Golf Course
Designer: Jack Nicklaus
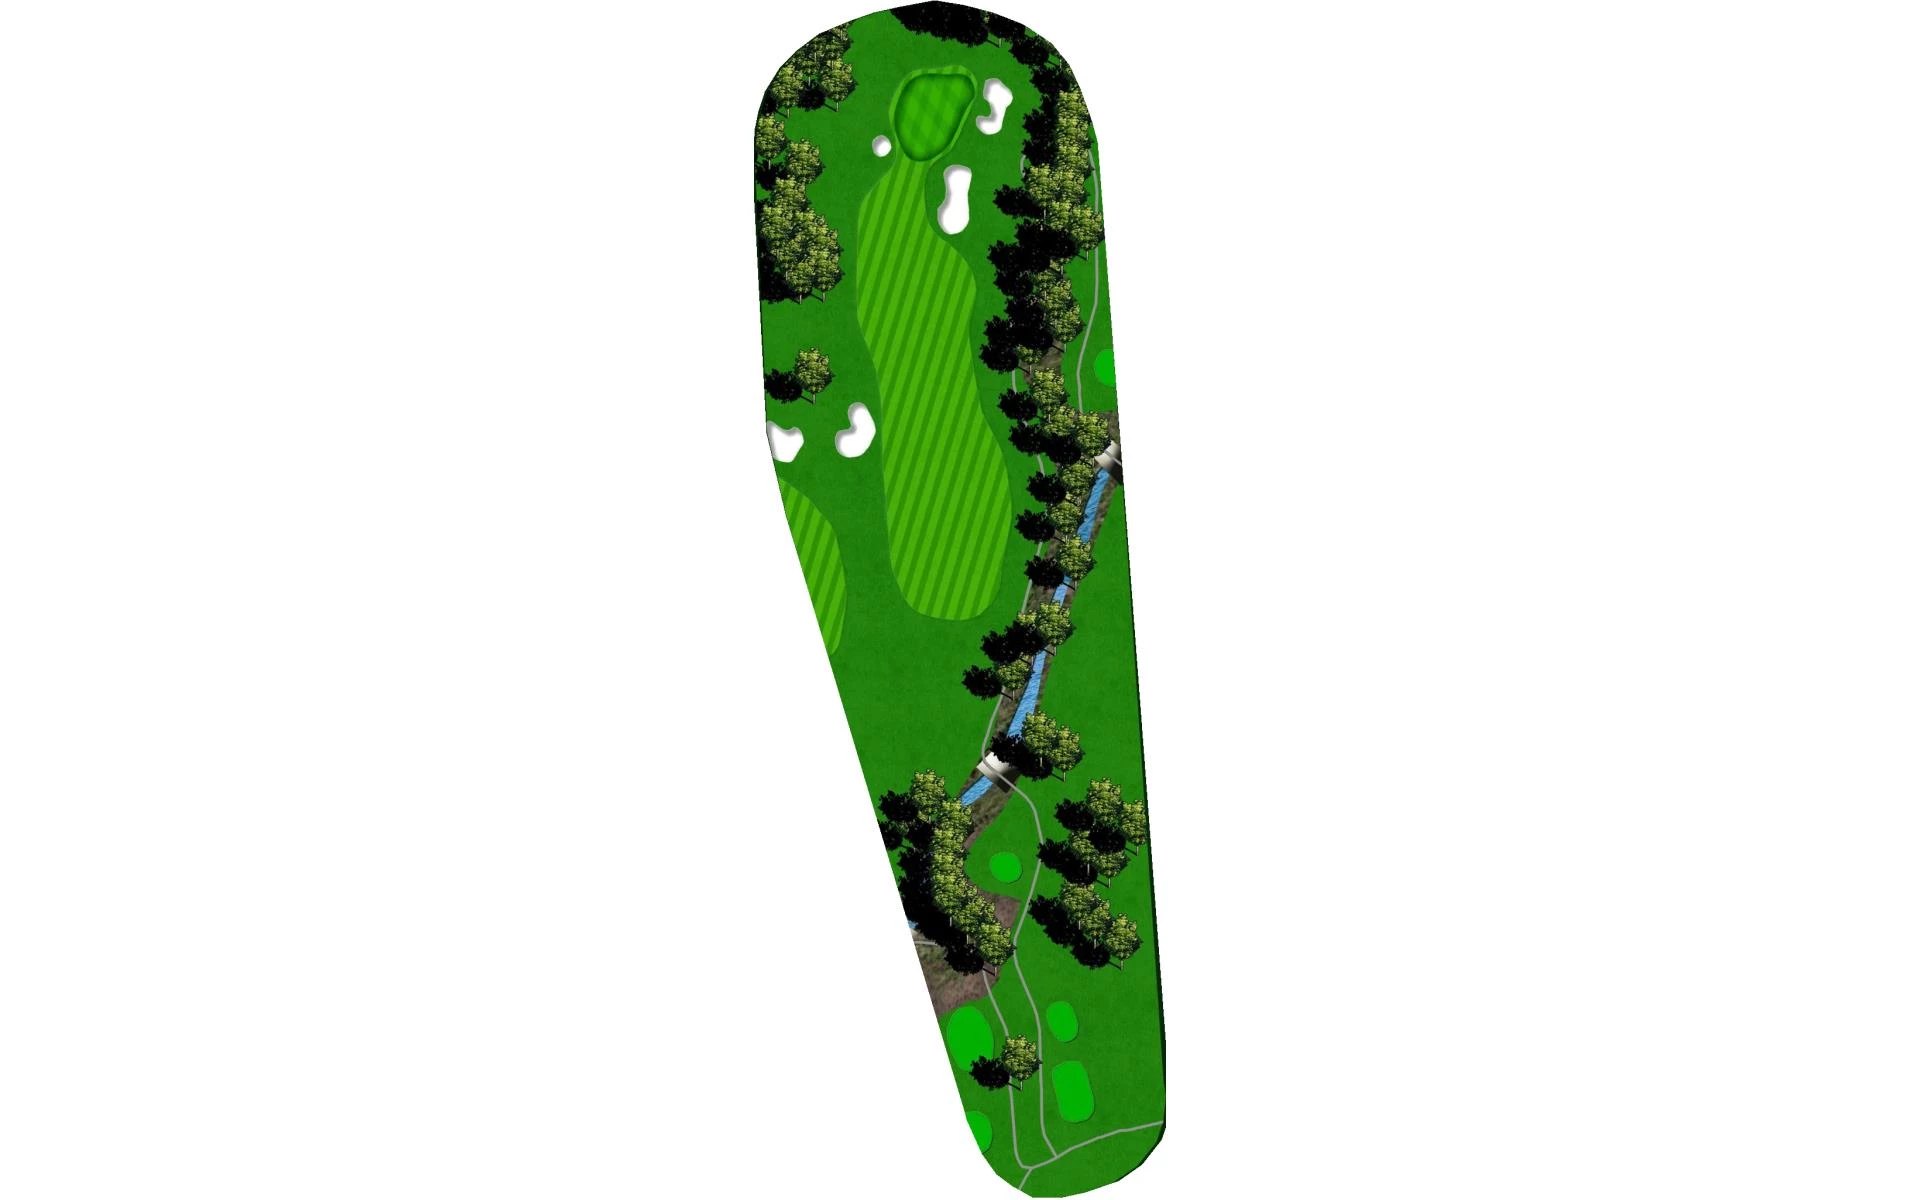
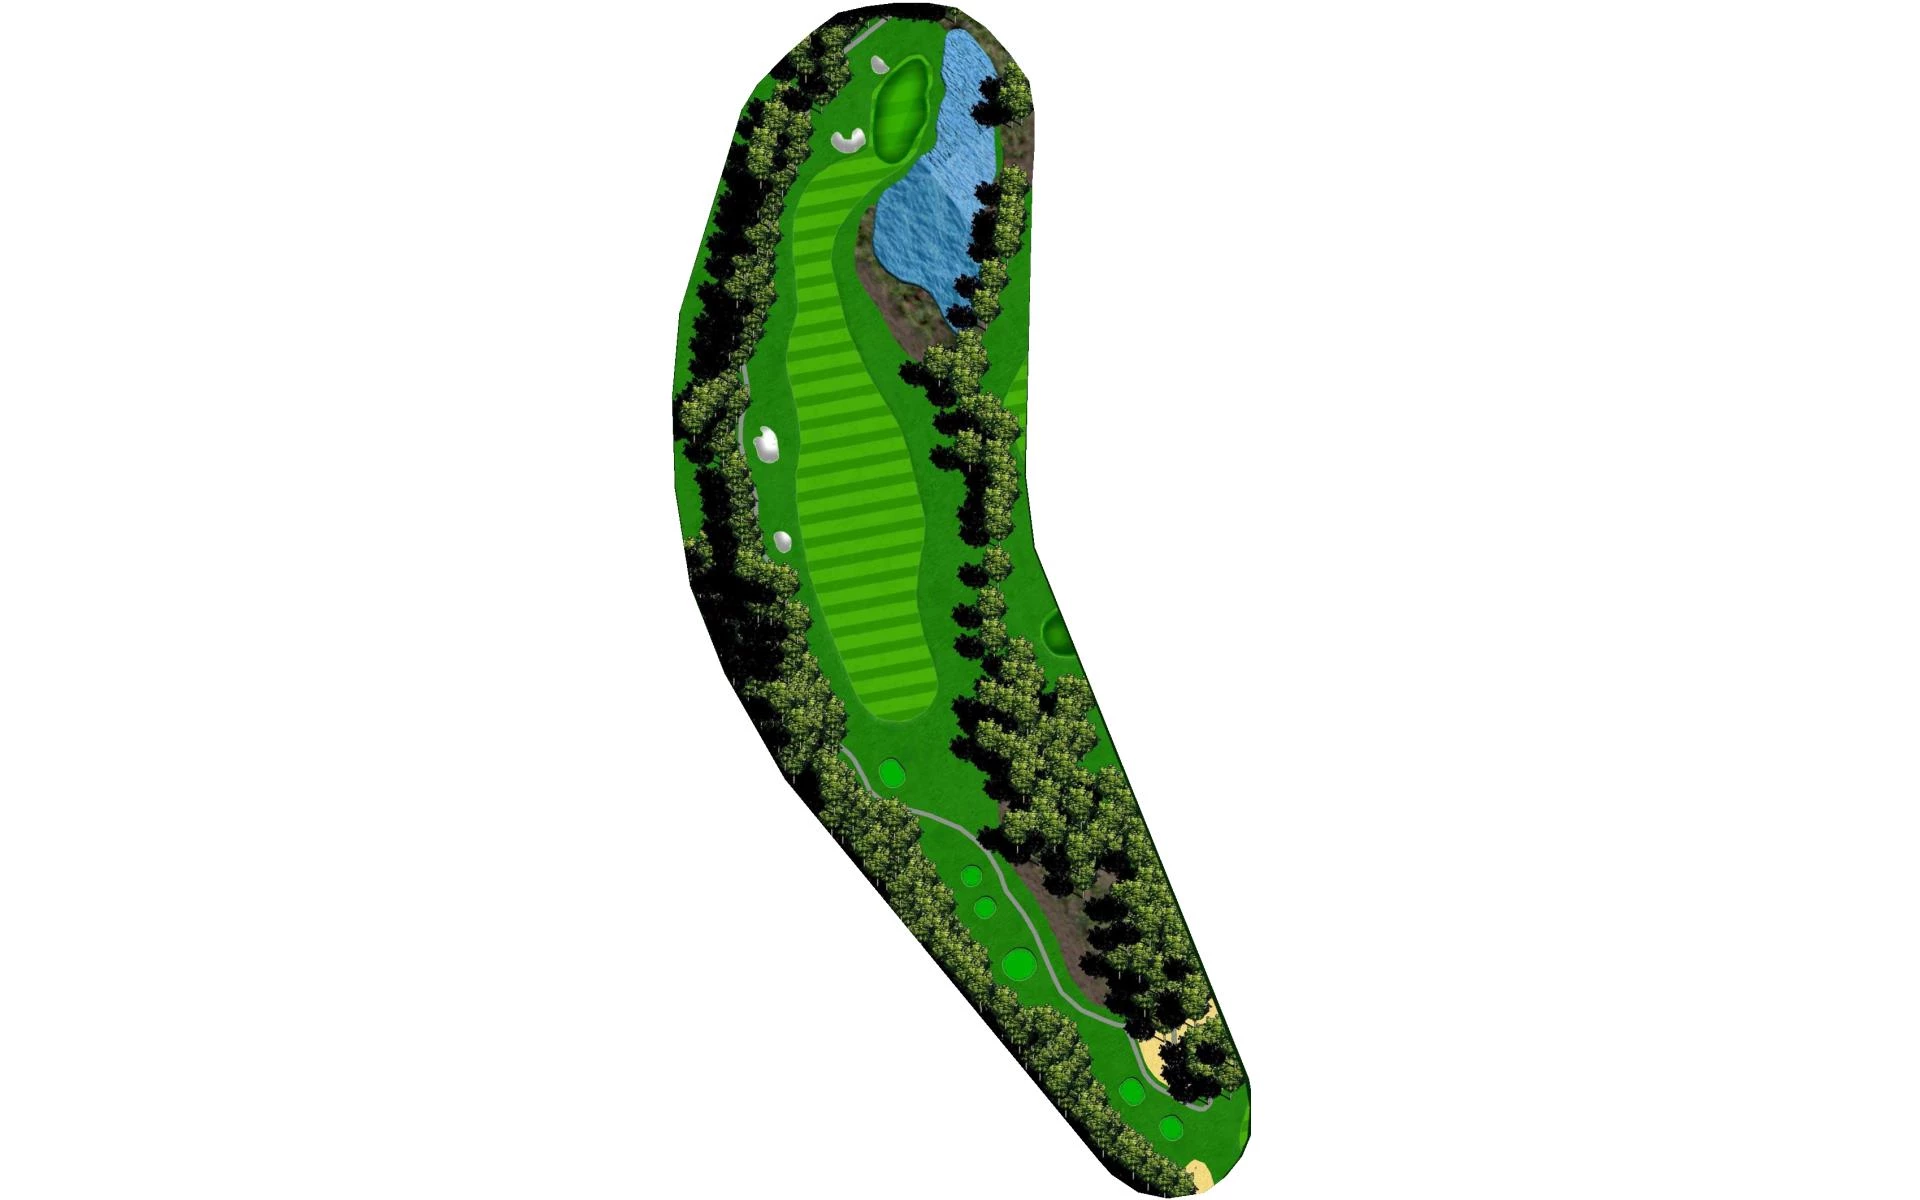
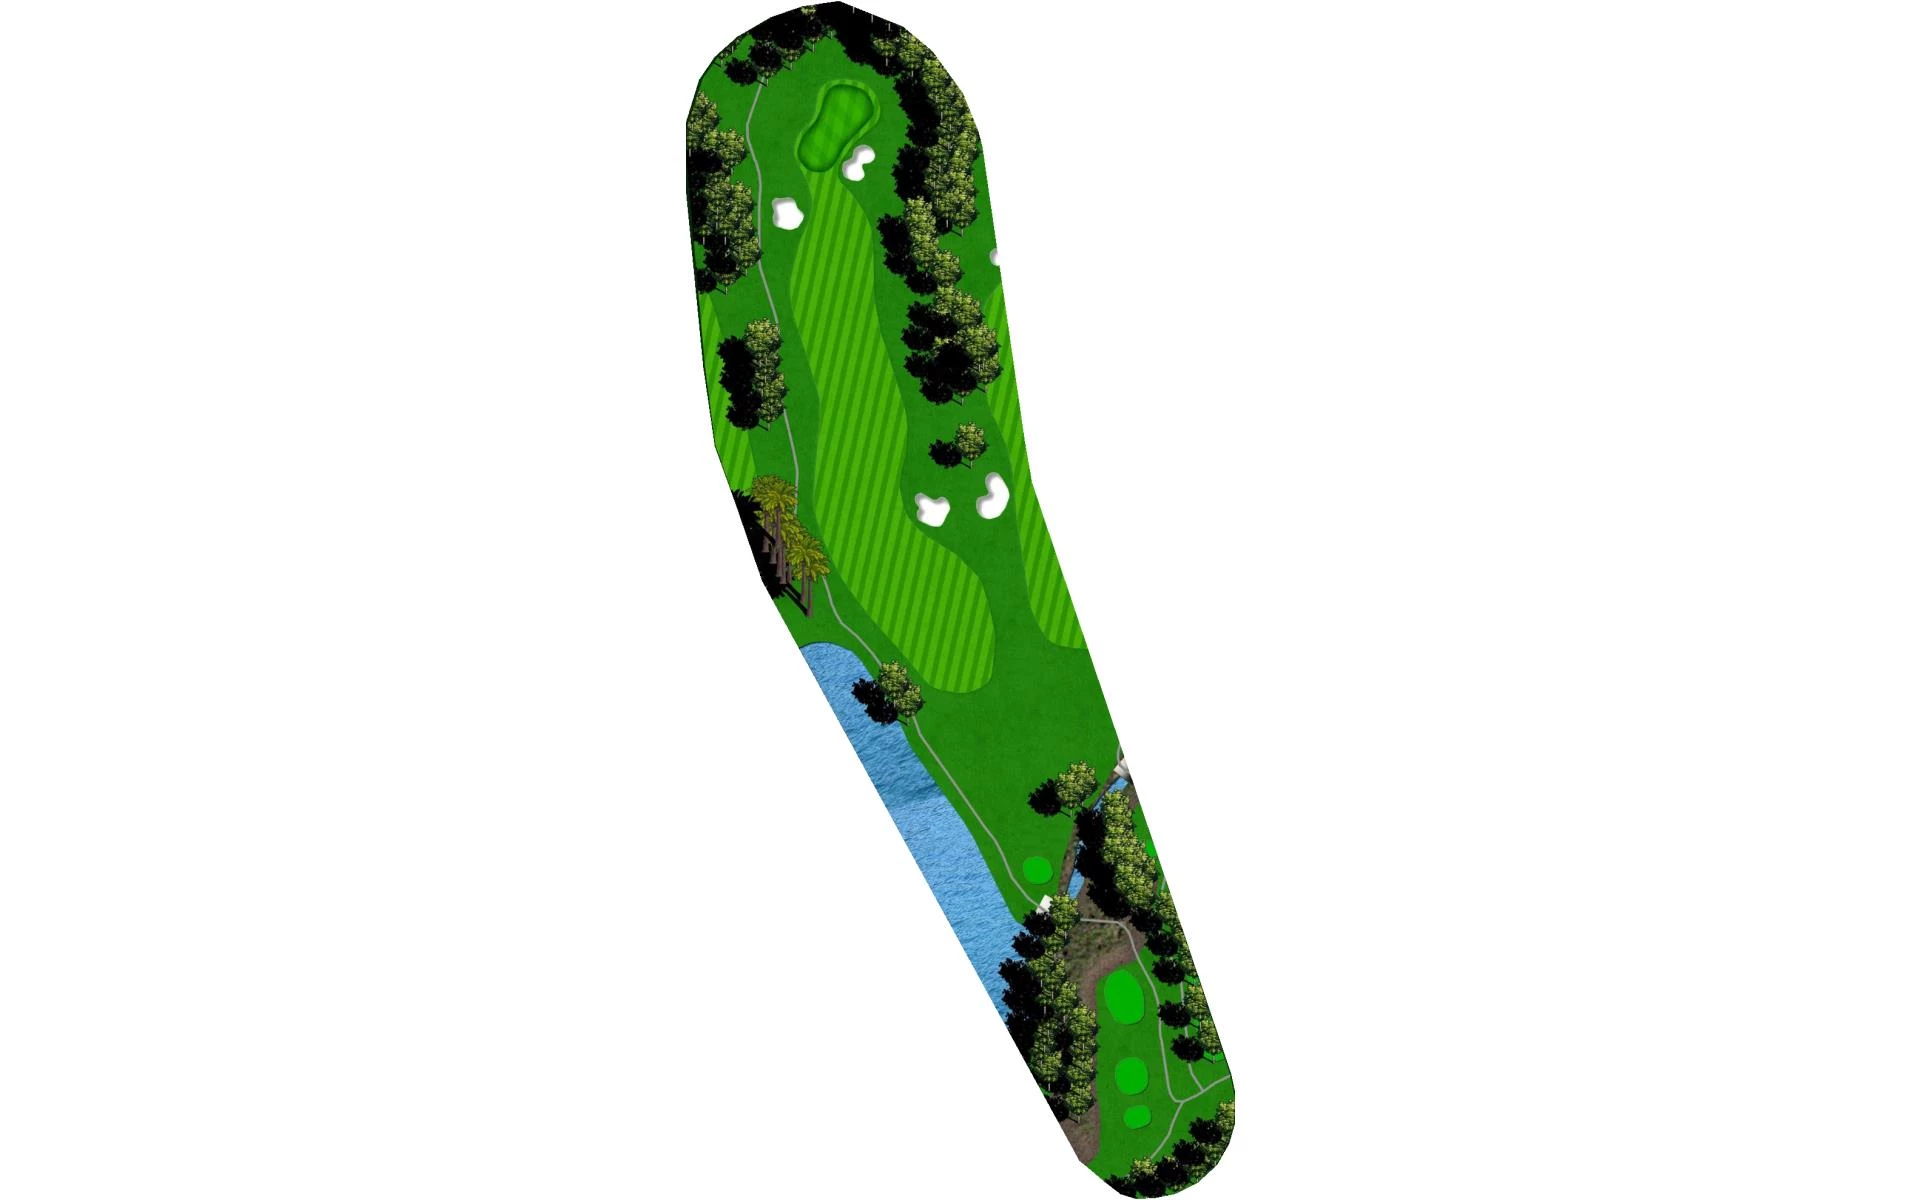
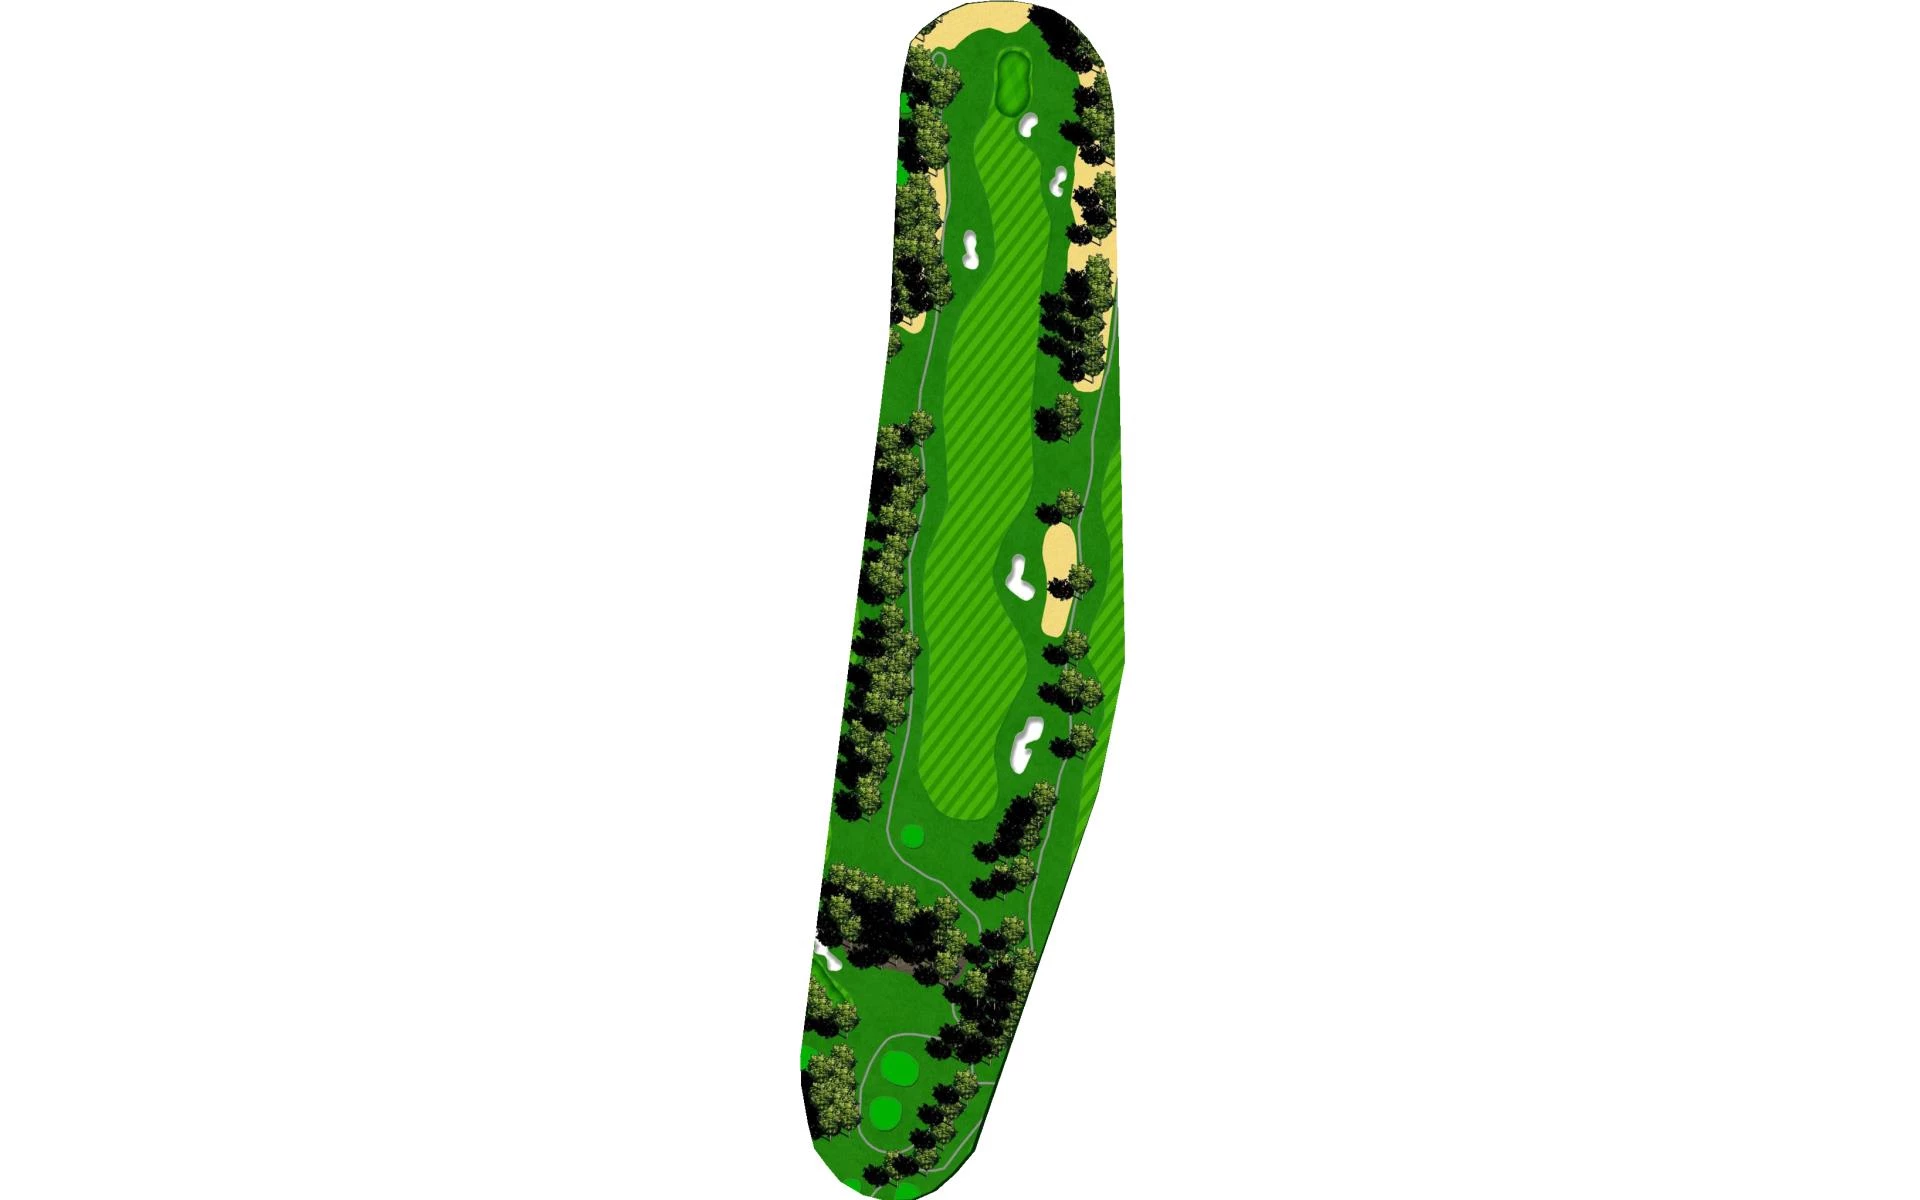
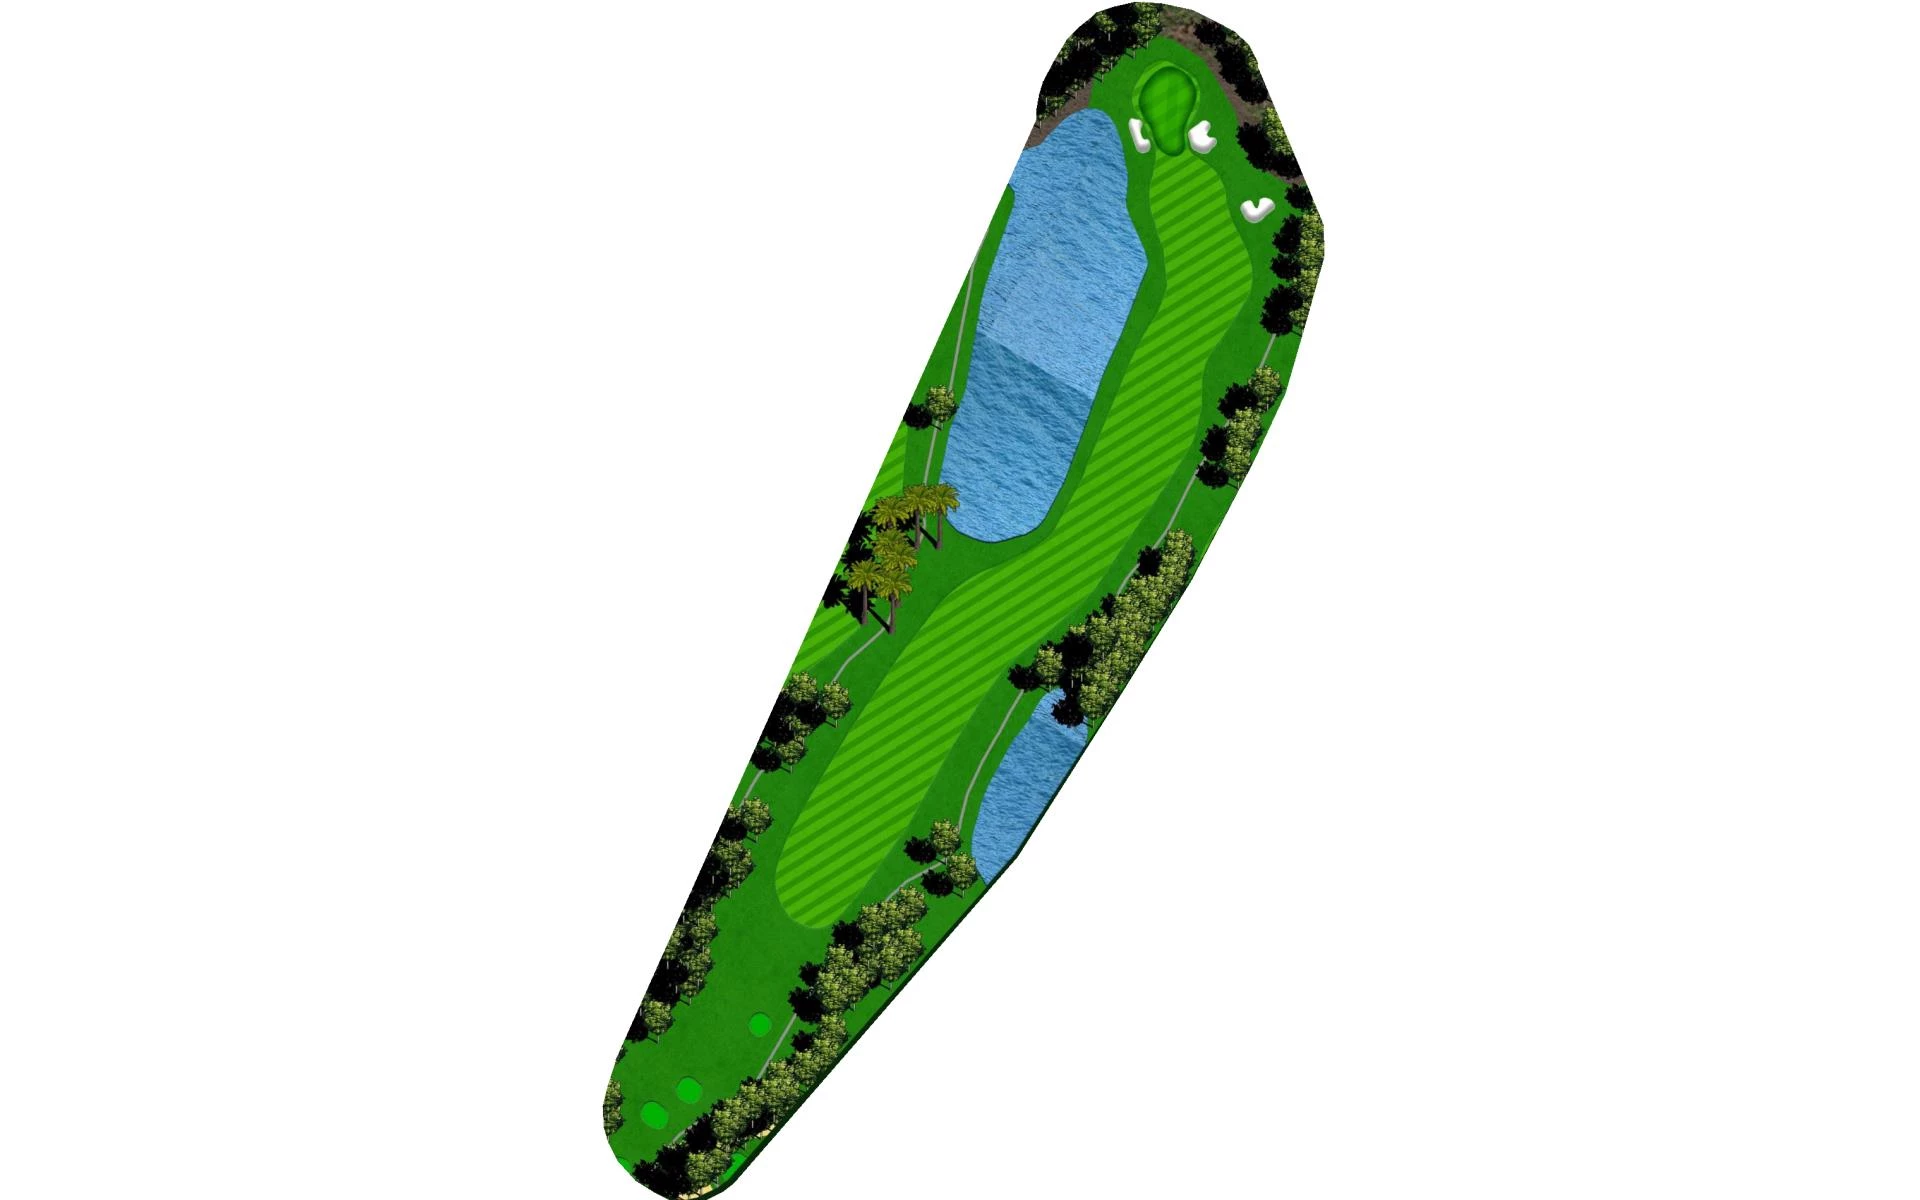
# 1 / Hole #1
Par: 4
Yardage by Tee:
BLACK 340
BLUE 330
GOLD 306
GREEN 252
WHITE 323
Slope:
Black- 132 | Blue-127 | White- 122 | Gold- 132 | Green-125
Pro Tips
| The first hole features a fairway that slopes from left-to-right with a prevailing cross wind that blows west-to-east. Drives down the left will set up the best angle to approach this well-guarded green. |
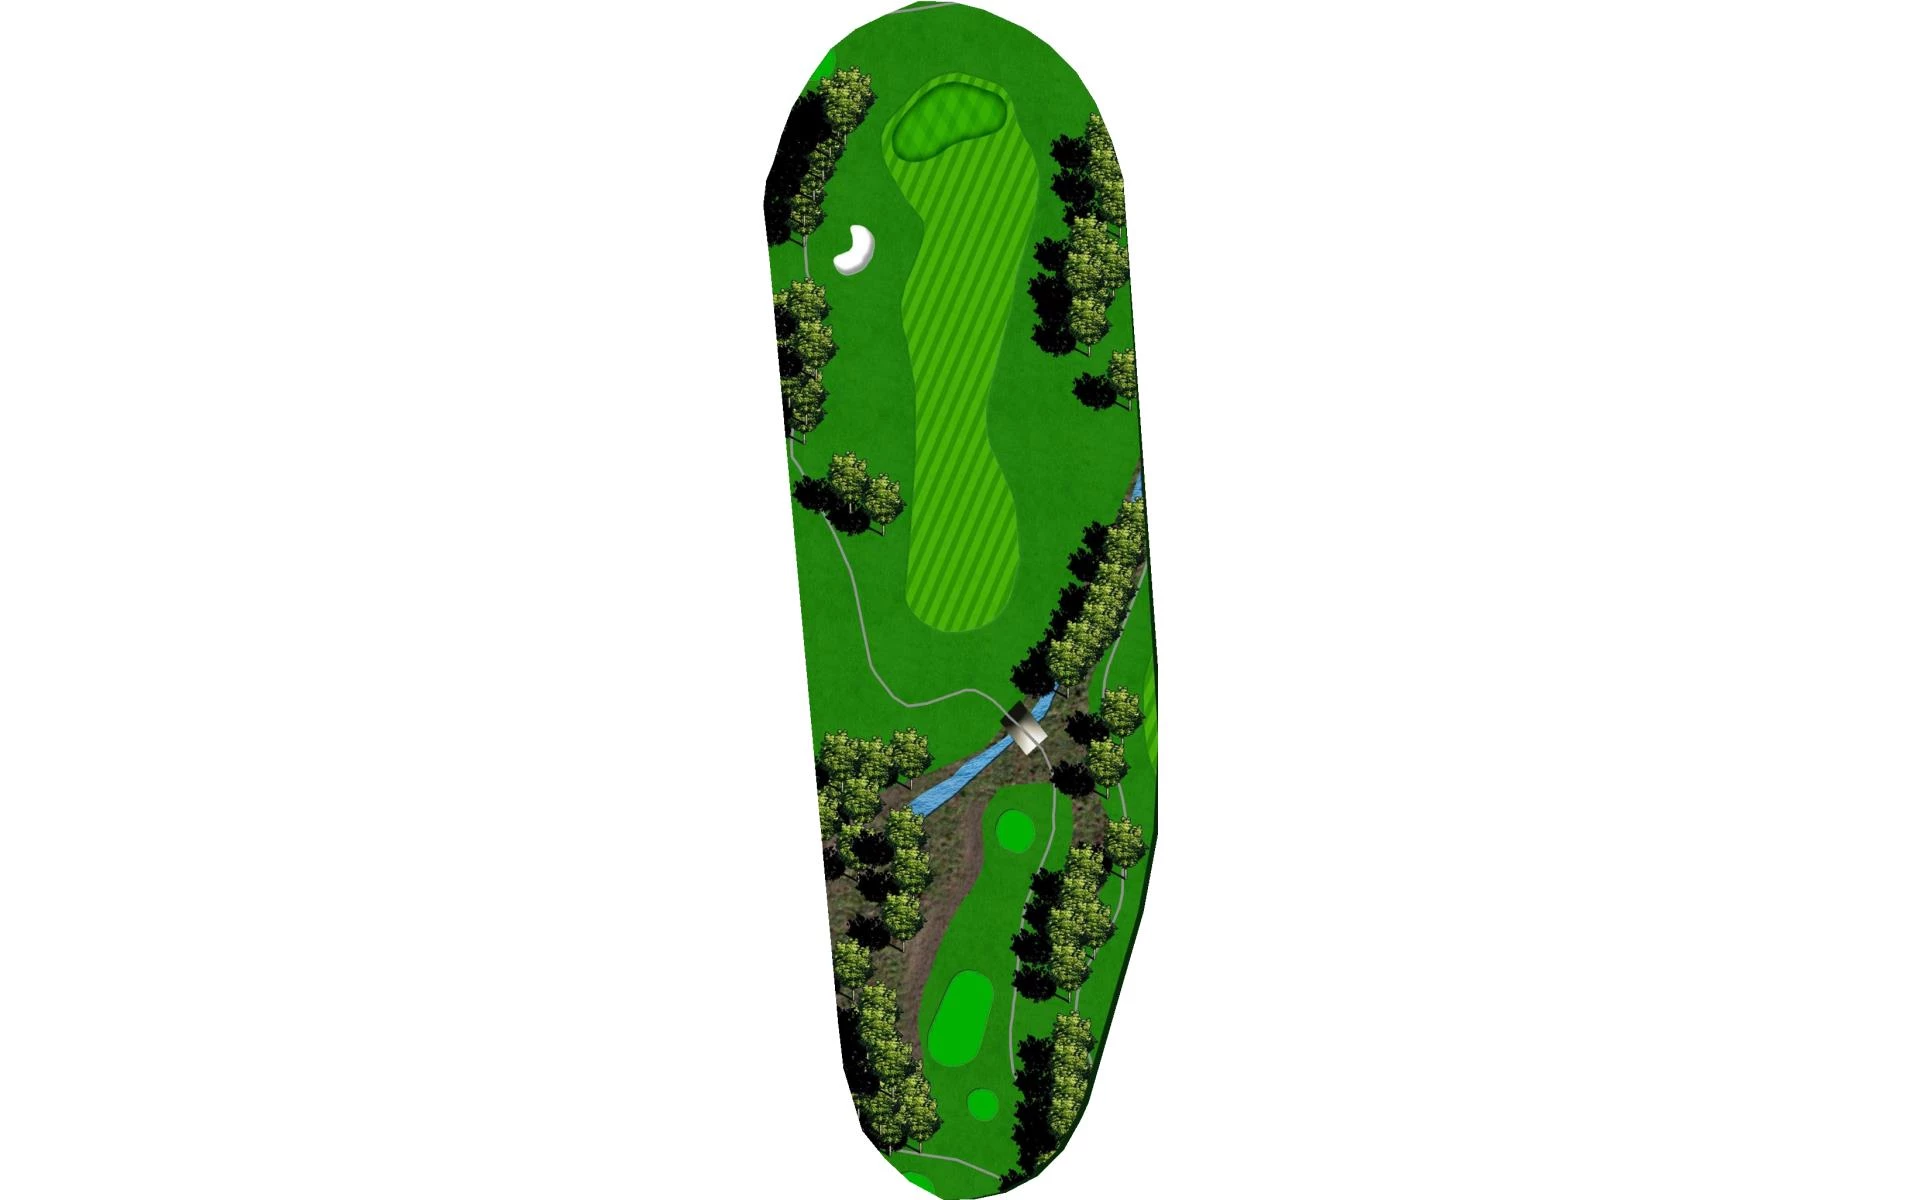
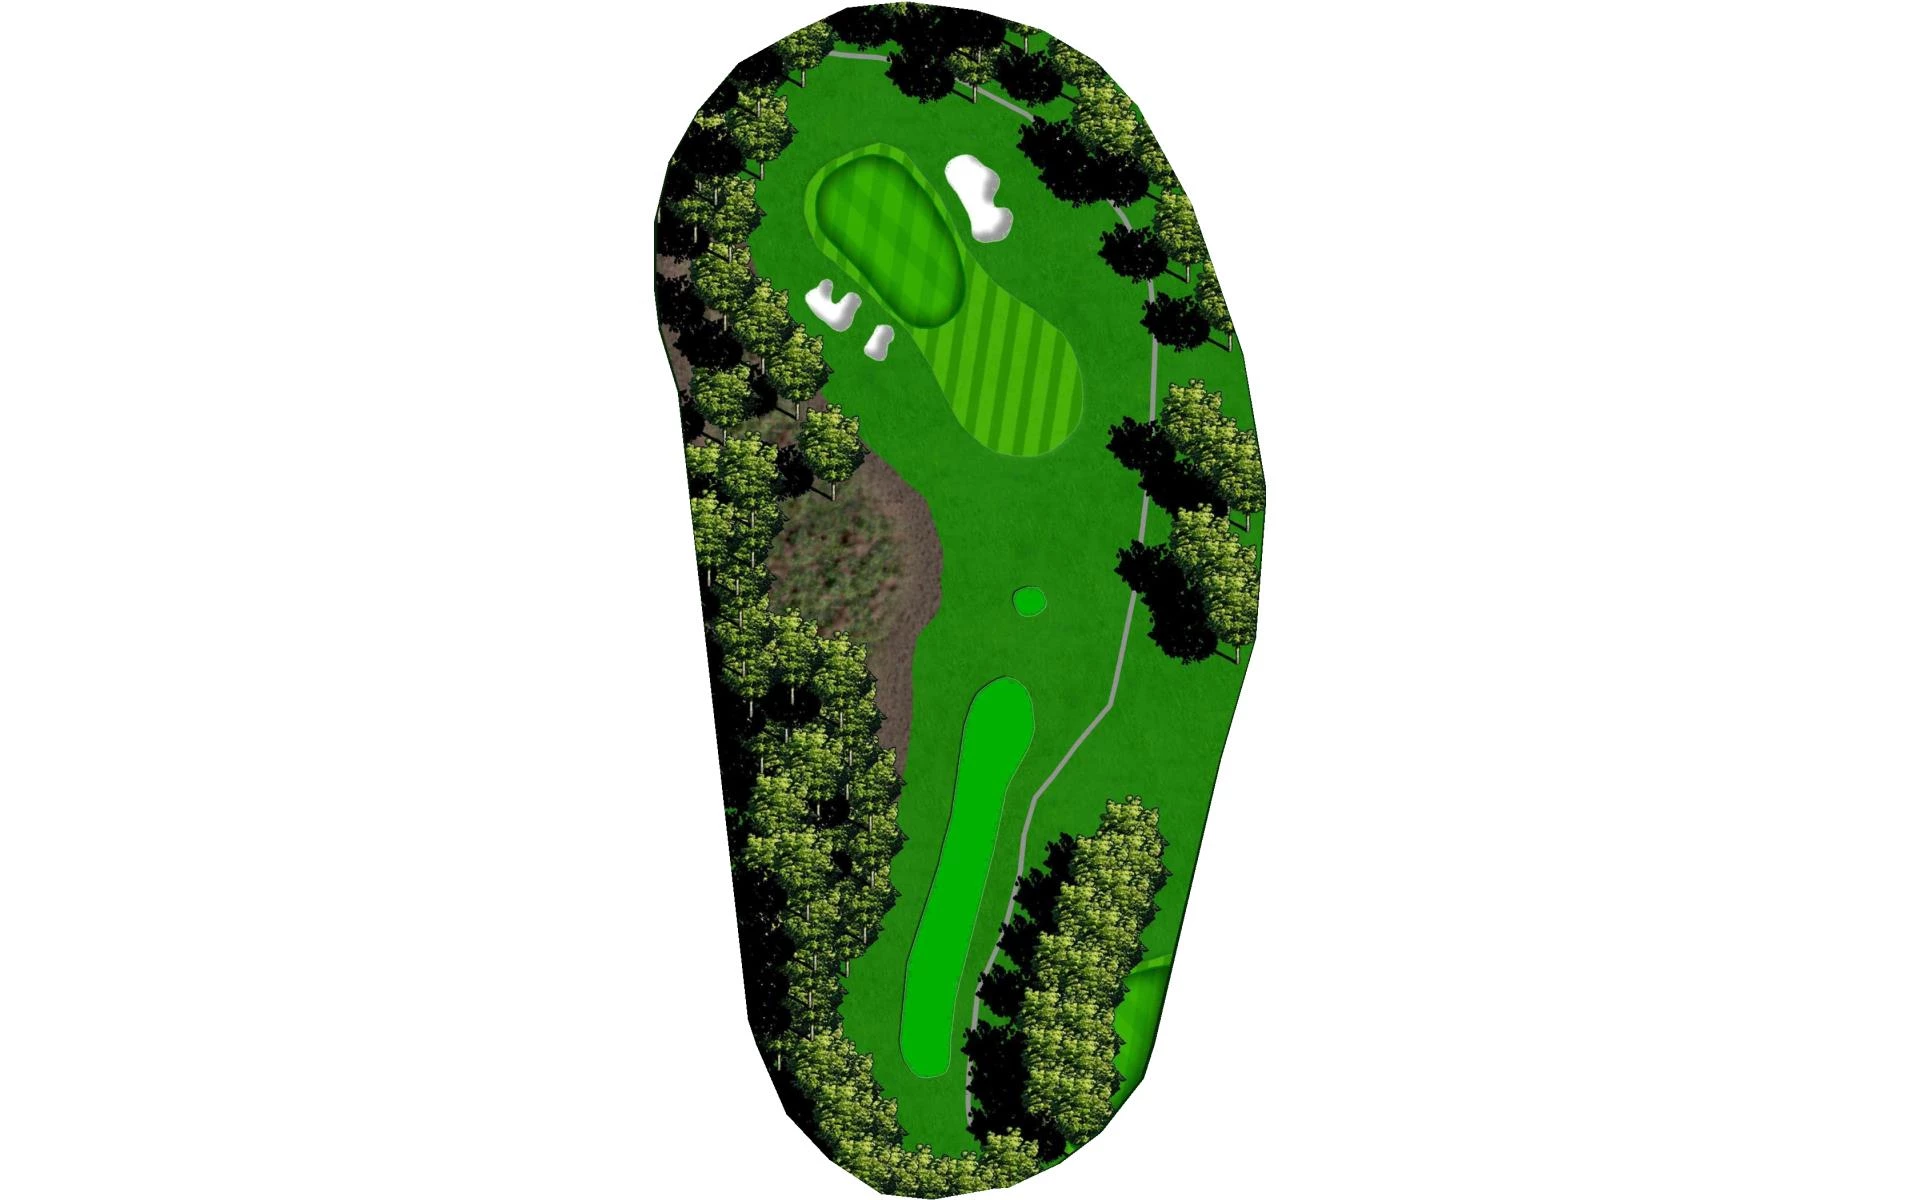
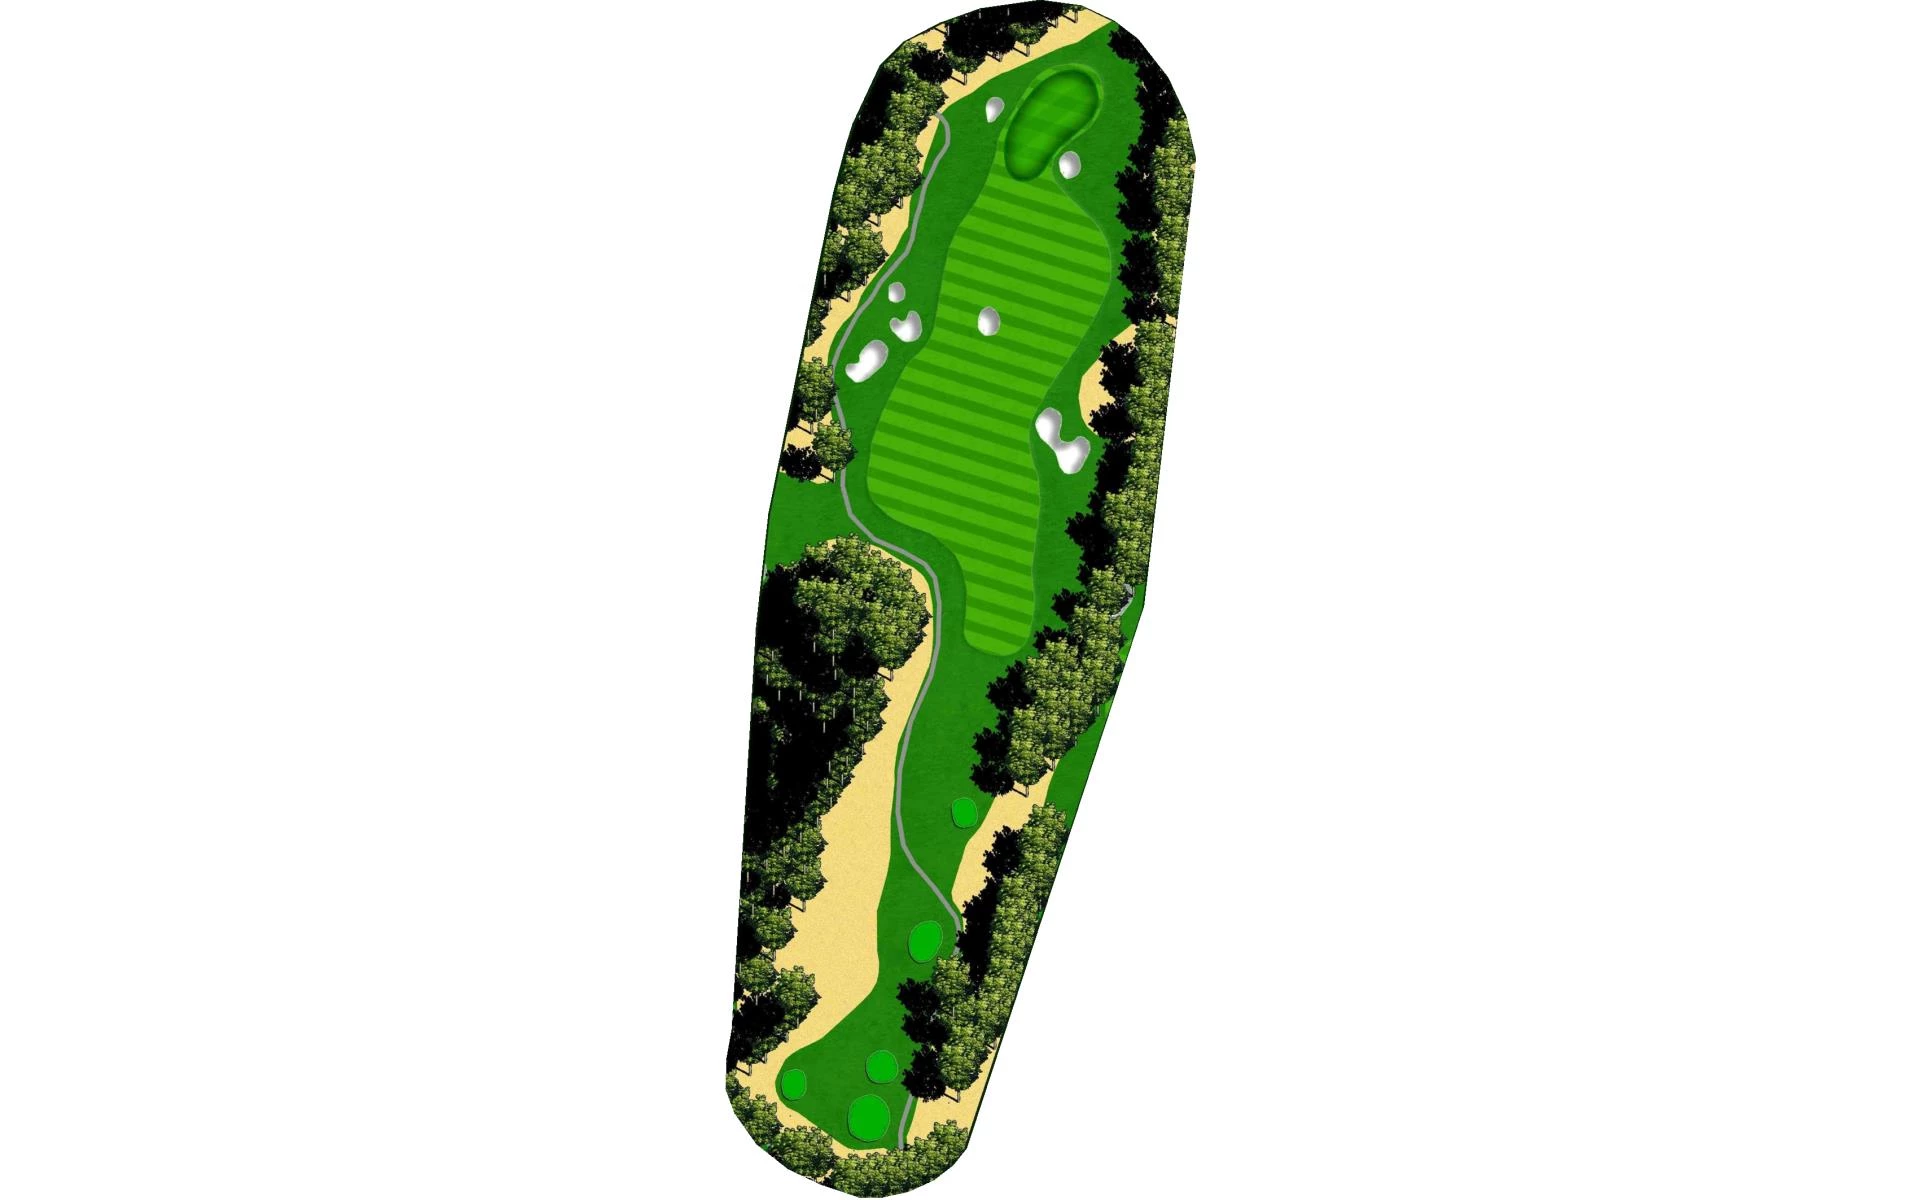
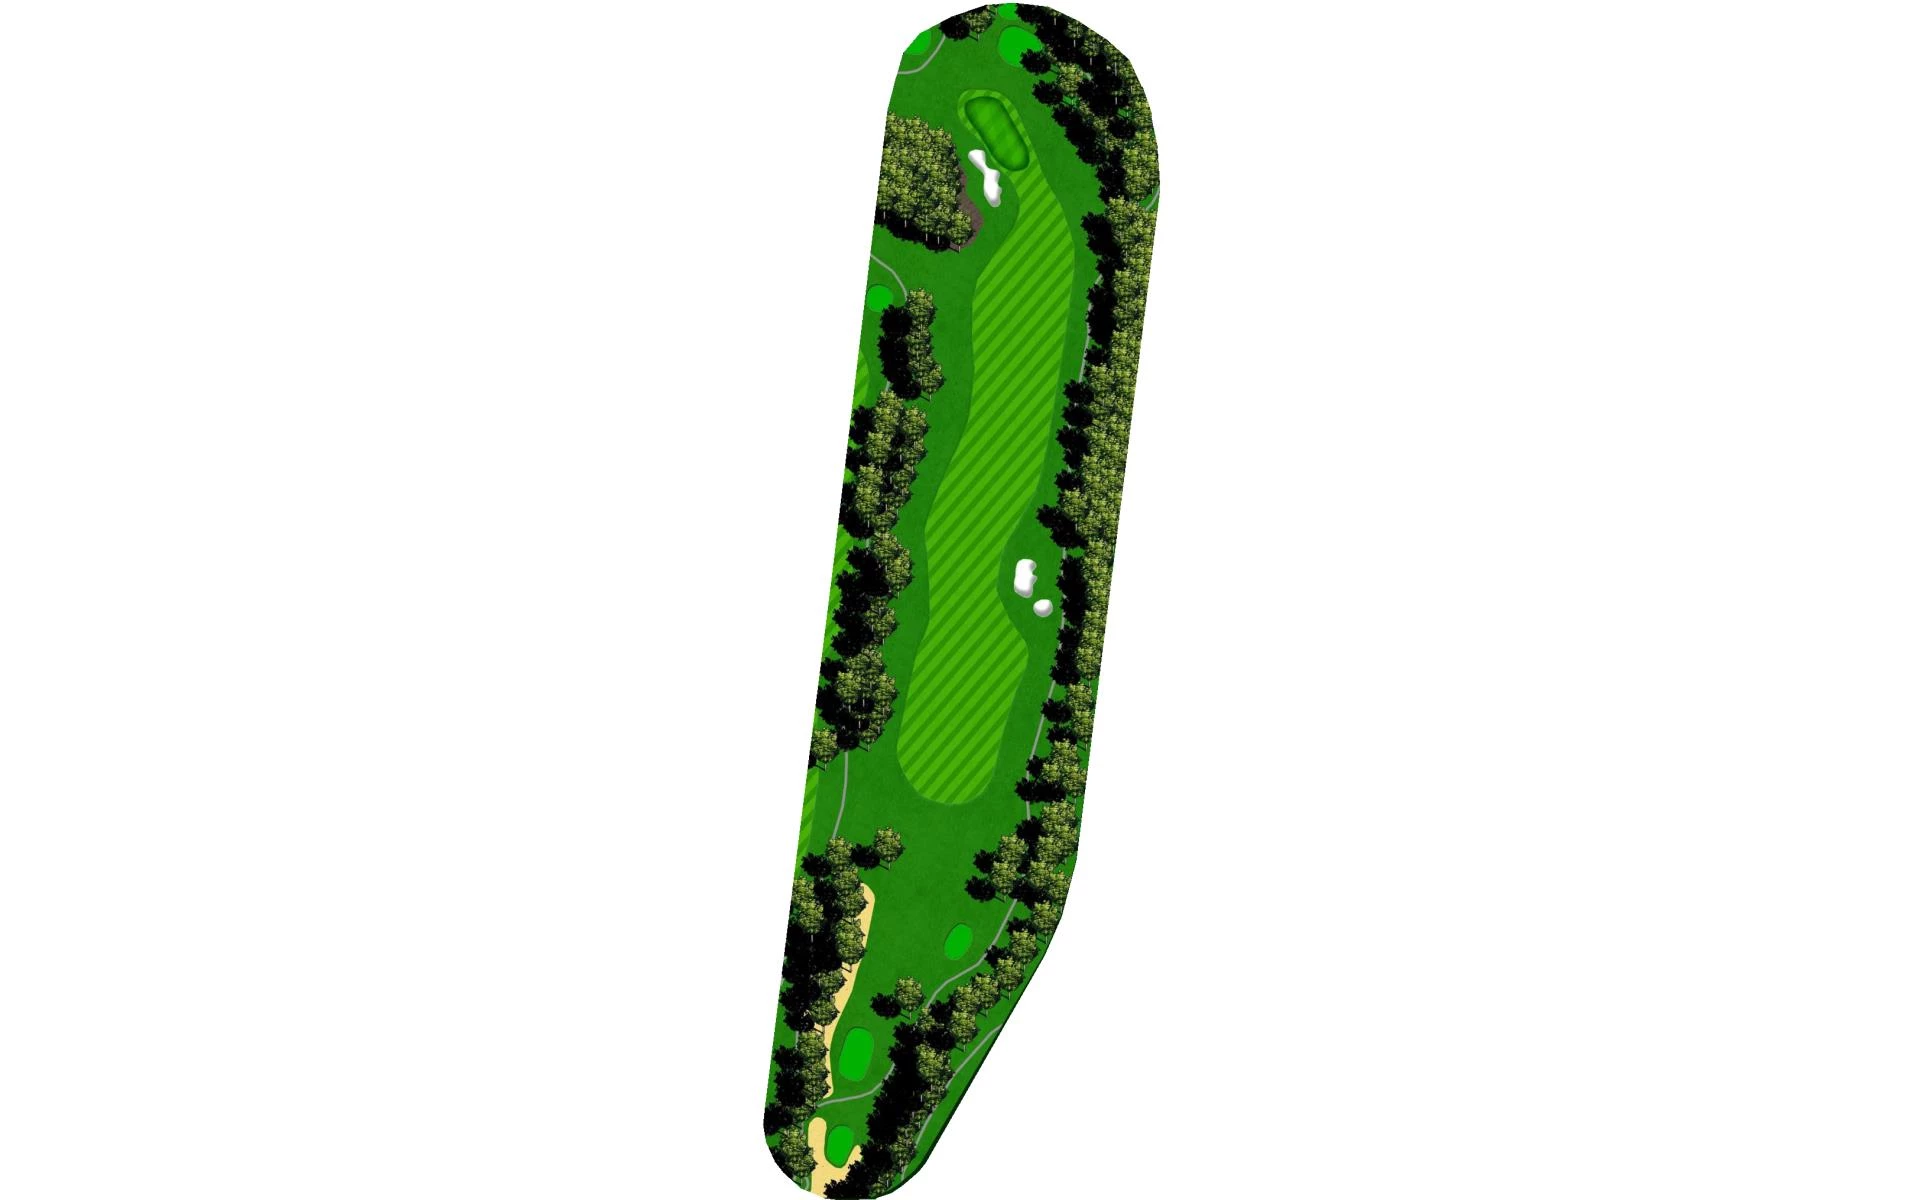
# 2 / Hole #2
Par: 4
Yardage by Tee:
BLACK 297
BLUE 291
GOLD 262
GREEN 225
WHITE 276
Slope:
Black- 132 | Blue-127 | White- 122 | Gold- 132 | Green-125
Pro Tips
Rated as the easiest hole on the golf course for men, the second can still be a tricky test. Sloping undulation surrounds the green and challenging rough makes an up-and-down difficult. The best angle to approach this green is from the right side of the fairway, regardless of the pin location because of the putting surface that slopes left-to-right.
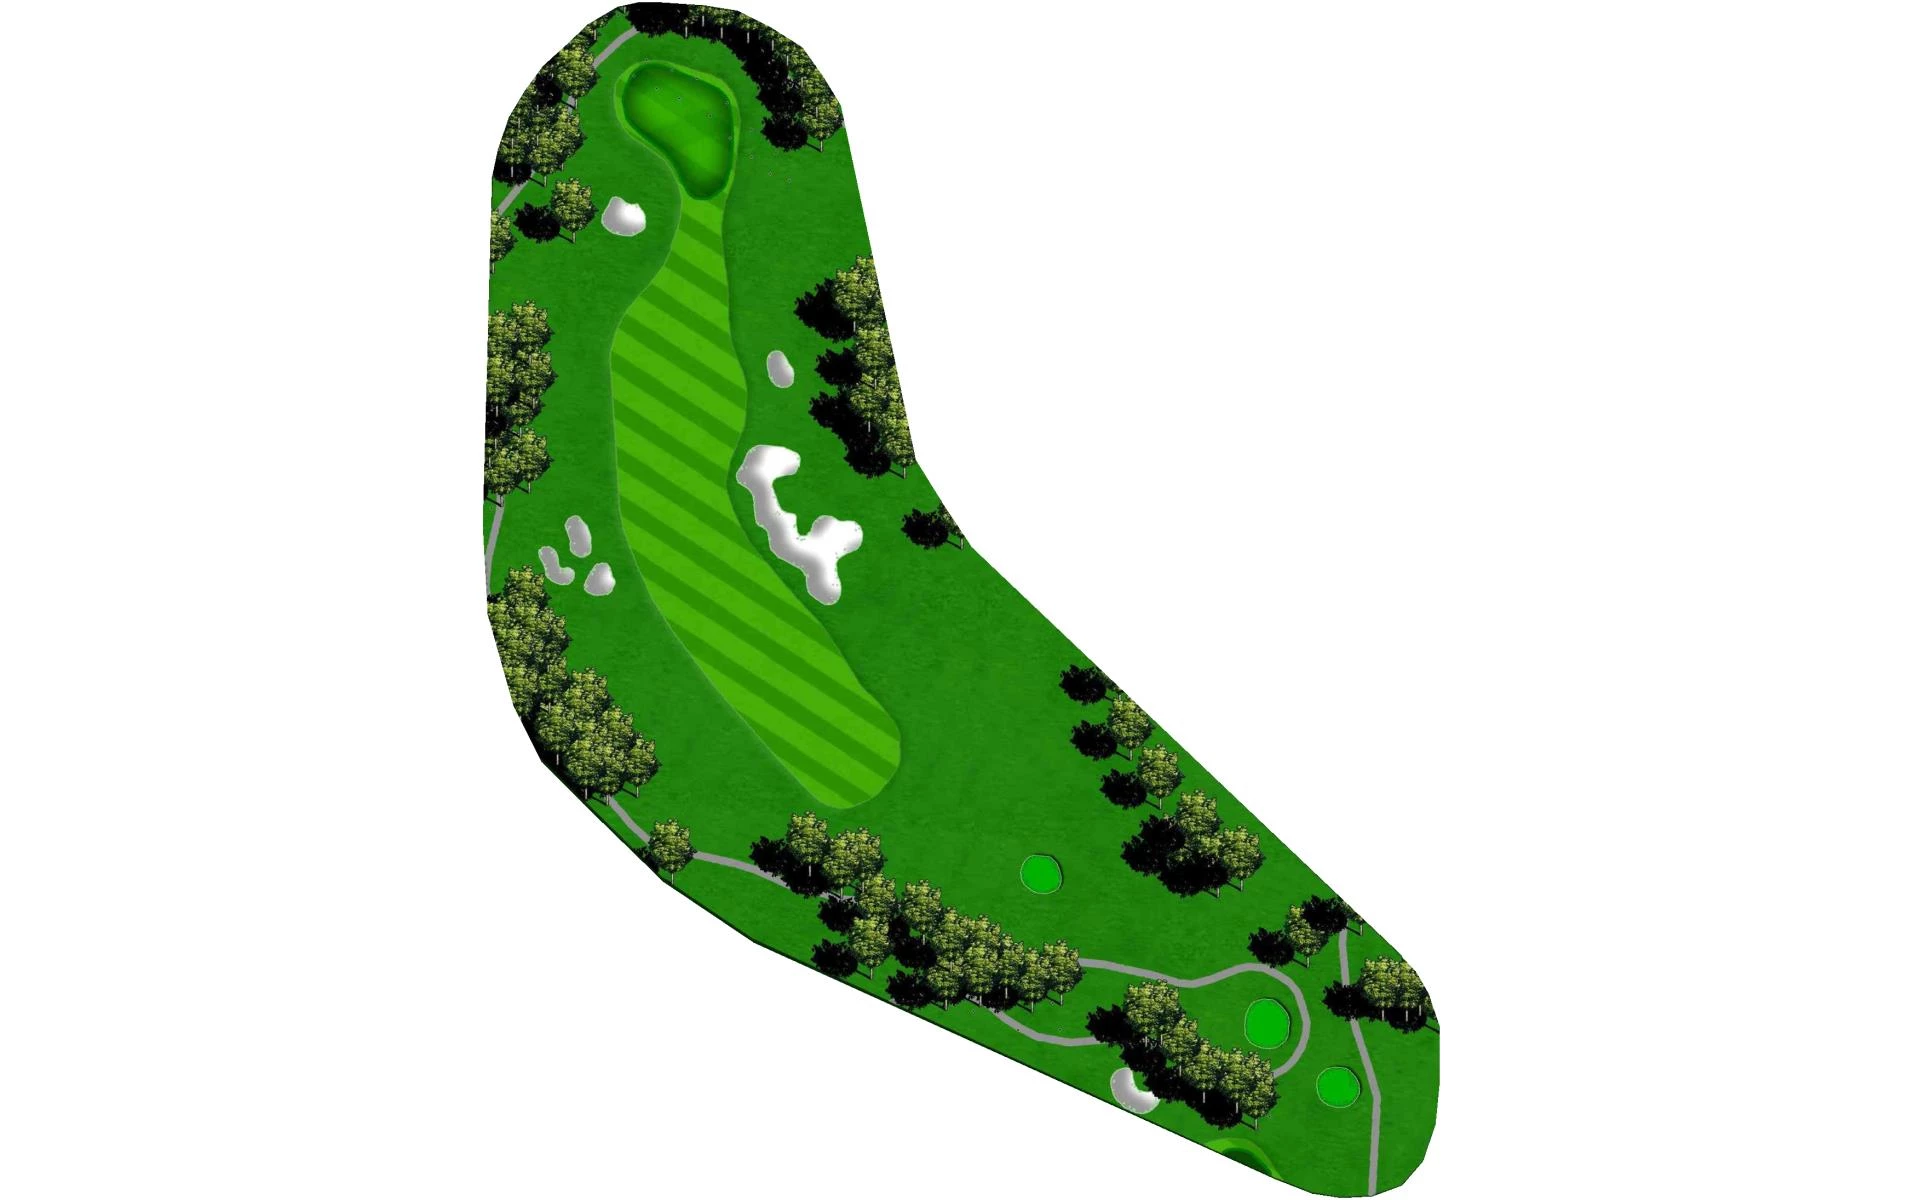
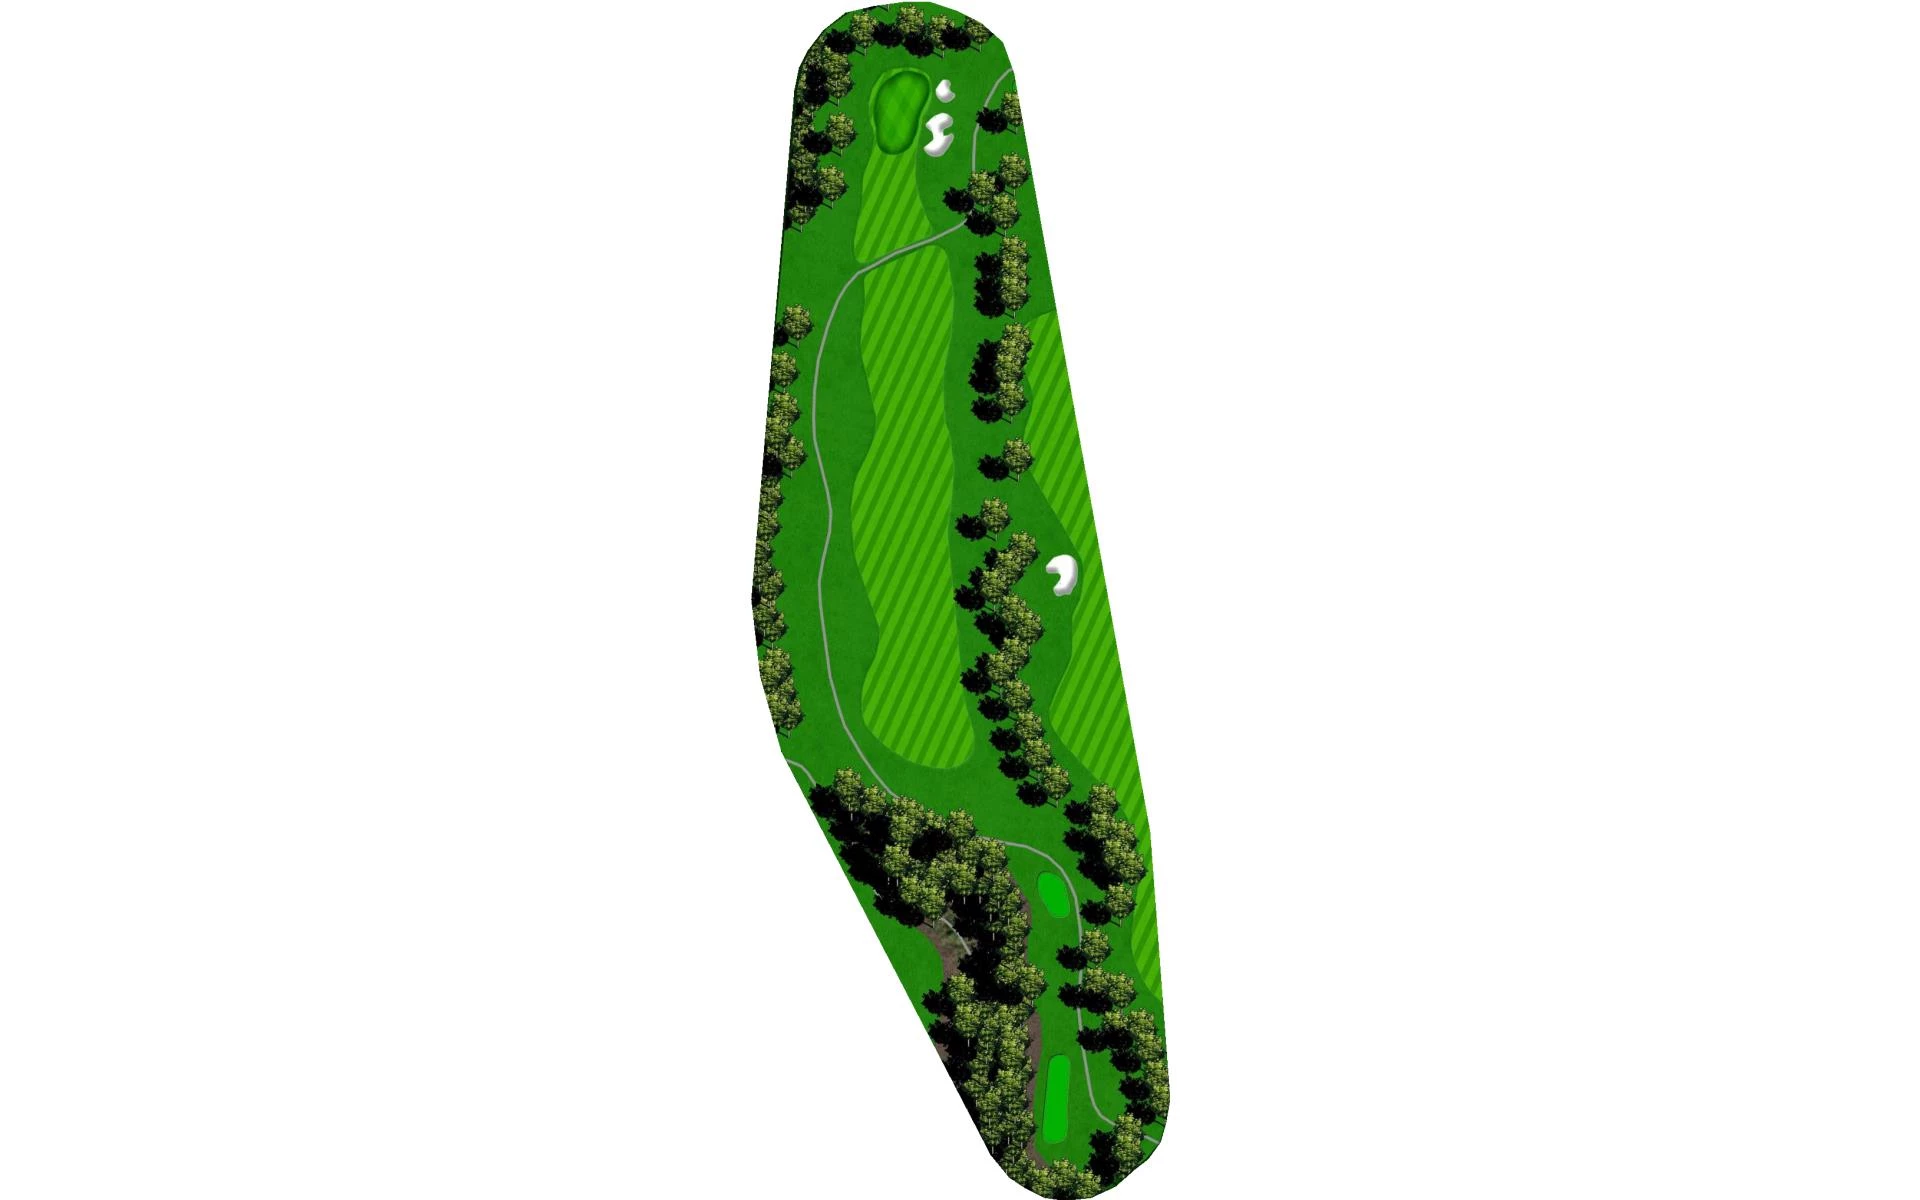
# 3 / Hole #3
Par: 4
Yardage by Tee:
BLACK 358
BLUE 335
GOLD 255
GREEN 255
WHITE 331
Slope:
Black- 132 | Blue-127 | White- 122 | Gold- 132 | Green-125
Pro Tips
The third is a risk-reward dogleg right par 4. Some of the longer hitters may take a chance at driving the green. Bunkers guard the corner and players will want to avoid the 100+ yard bunker shot.
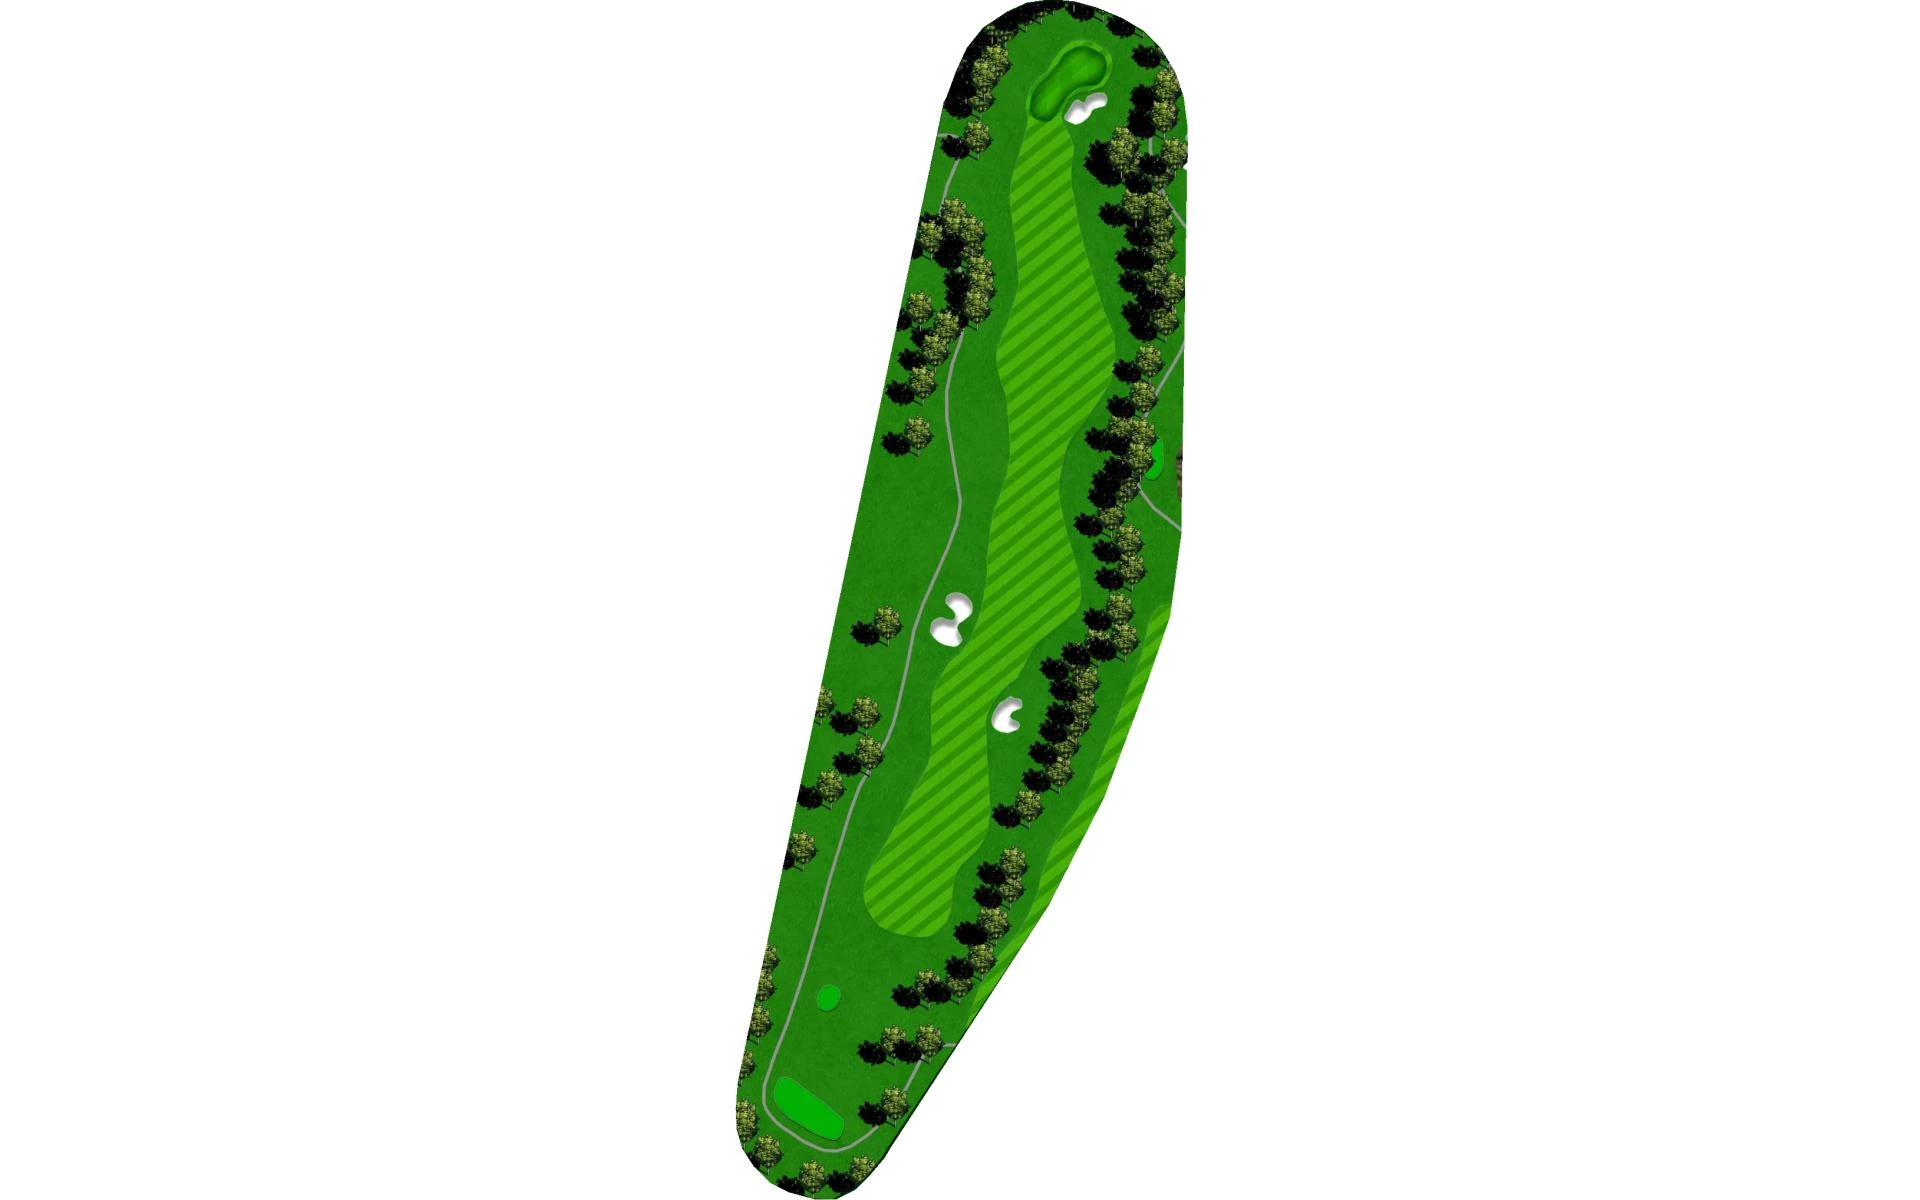
# 4 / Hole #4
Par: 4
Yardage by Tee:
BLACK 365
BLUE 350
GOLD 284
GREEN 246
WHITE 333
Slope:
Black- 132 | Blue-127 | White- 122 | Gold- 132 | Green-125
Pro Tips
An intimidating tee shot awaits on the fourth tee box. Players will want to do whatever they can to hit the fairway and set up the best approach shot. Club selection can be difficult as the elevation change and false front fool most players.

# 5 / Hole #5
Par: 3
Yardage by Tee:
BLACK 183
BLUE 155
GOLD 145
GREEN 115
WHITE 145
Slope:
Black- 132 | Blue-127 | White- 122 | Gold- 132 | Green-125
Pro Tips
The fifth hole requires a well-placed shot to the pin side of this two-tiered green. Players will want to watch out and avoid both the greenside bunker on the left and the closely-mown collection area on the right.
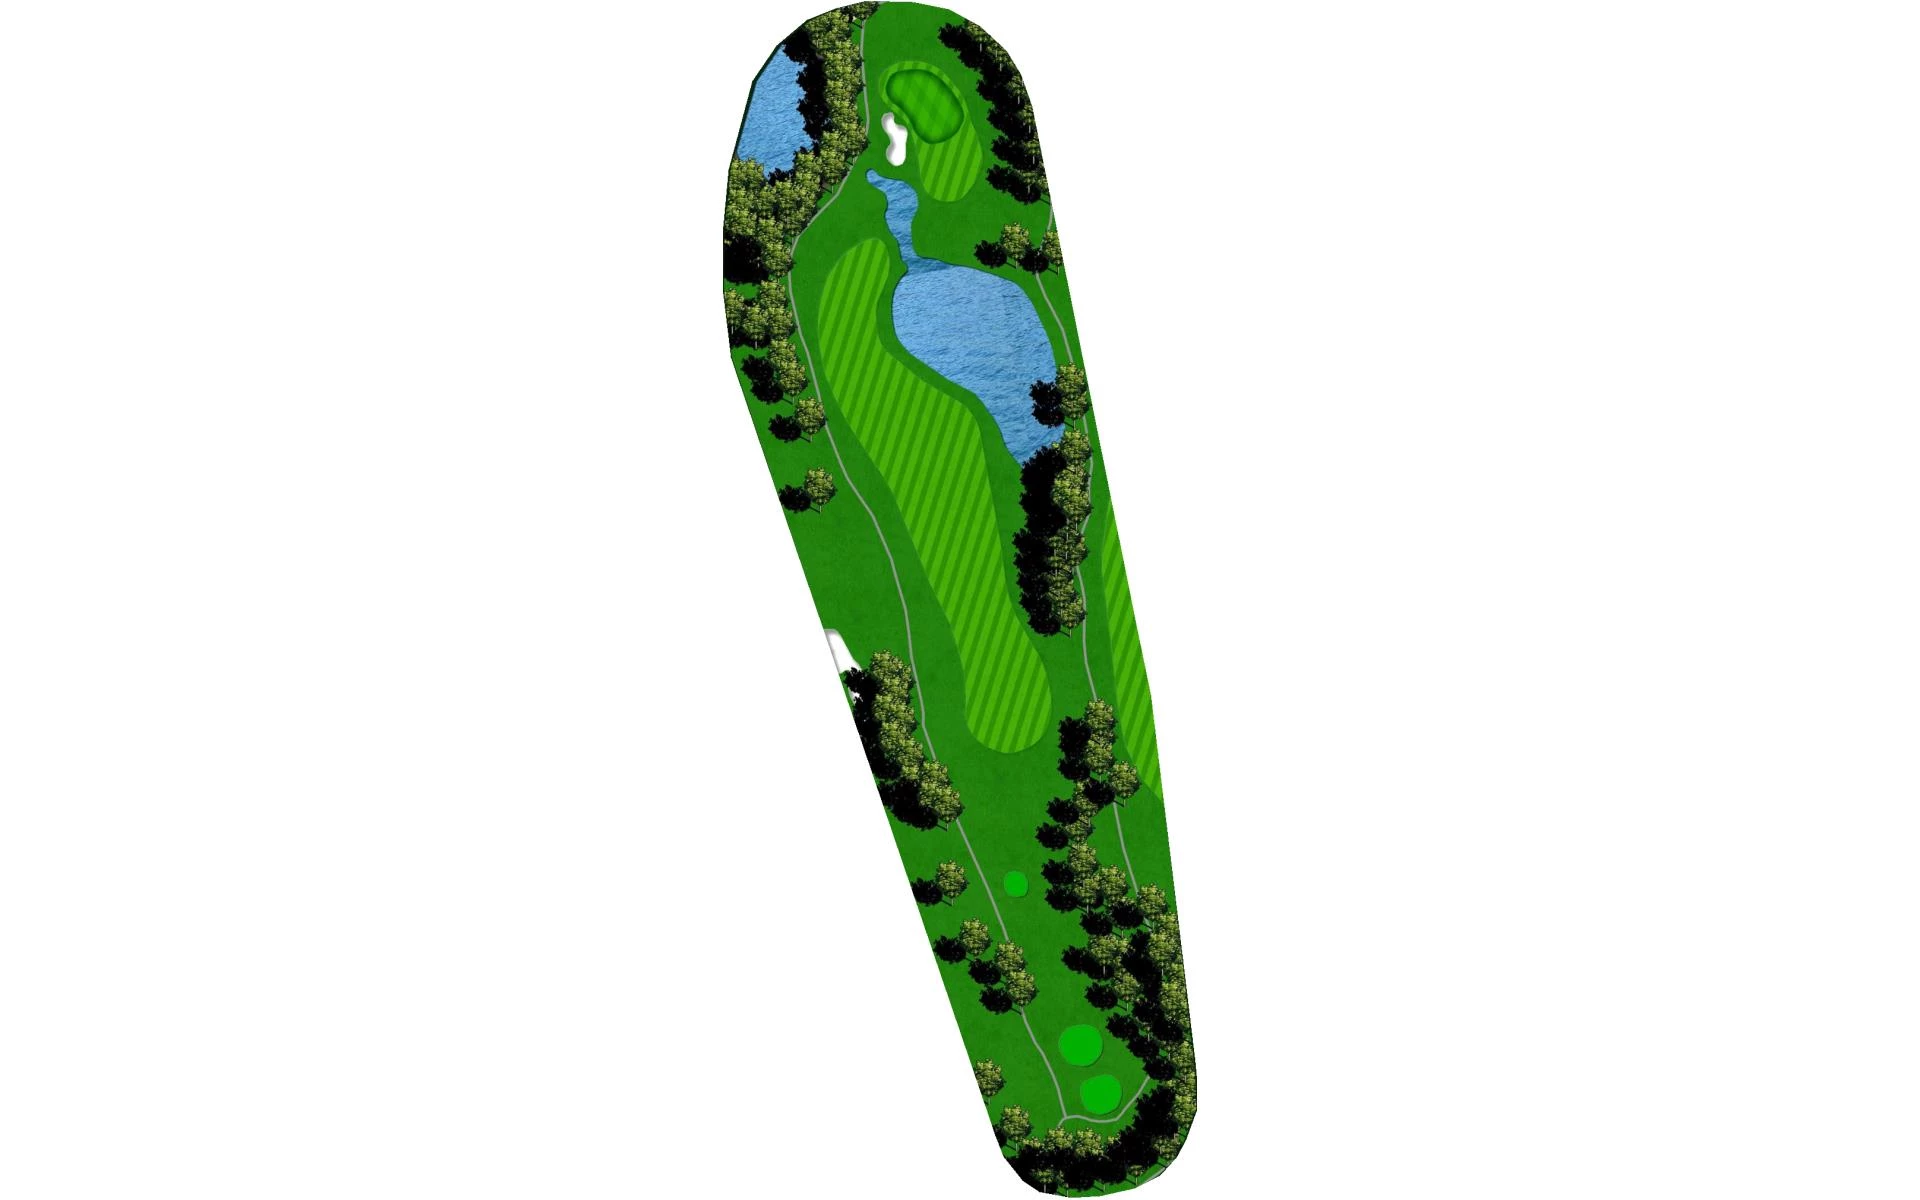
# 6 / Hole #6
Par: 4
Yardage by Tee:
BLACK 459
BLUE 436
GOLD 342
GREEN 320
WHITE 370
Slope:
Black- 132 | Blue-127 | White- 122 | Gold- 132 | Green-125
Pro Tips
Next is the hardest hole on the golf course, which is also the longest par 4. An ideal tee shot will be down the right side of the fairway, setting up the best chance of hitting the green in regulation. The green is well-protected by bunkers and a pond that catches a lot of balls.
# 7 / Hole #7
Par: 3
Yardage by Tee:
BLACK 158
BLUE 150
GOLD 120
GREEN 103
WHITE 138
Slope:
Black- 132 | Blue-127 | White- 122 | Gold- 132 | Green-125
Pro Tips
The seventh is a par 3 that features a bunker and out-of-bounds on the left. Players ought to favor the right side of the green, as it slopes from right-to-left, but need to be aware of the prevailing wind that blows east.
# 8 / Hole #8
Par: 4
Yardage by Tee:
BLACK 435
BLUE 417
GOLD 344
GREEN 344
WHITE 406
Slope:
Black- 132 | Blue-127 | White- 122 | Gold- 132 | Green-125
Pro Tips
This par 4, eighth, slopes from left-to-right the entire way to the green. Longer hitters might be able to carry over to the right fairway, but precision will be required. A drive to the left fairway will leave players a longer shot into the green. The green is surrounded by slopes and bunkers, so the best miss is short.
# 9 / Hole #9
Par: 5
Yardage by Tee:
BLACK 493
BLUE 489
GOLD 479
GREEN 438
WHITE 479
Slope:
Black- 132 | Blue-127 | White- 122 | Gold- 132 | Green-125
Pro Tips
The front nine closes with the first par 5 on the golf course. Fairway bunkers focus a player’s attention to the middle of the fairway. A lay-up to about 100 yards will leave the best angle of attack to this green.
# 10 / Hole #10
Par: 4
Yardage by Tee:
BLACK 424
BLUE 397
GOLD 311
GREEN 311
WHITE 370
Slope:
Black- 132 | Blue-127 | White- 122 | Gold- 132 | Green-125
Pro Tips
The back nine starts with a challenging uphill par 4. The tee is elevated and a prevailing west wind means it’s best to aim for the left side of the fairway. On the approach, the best place to miss is long because of two bunkers that protect the front.
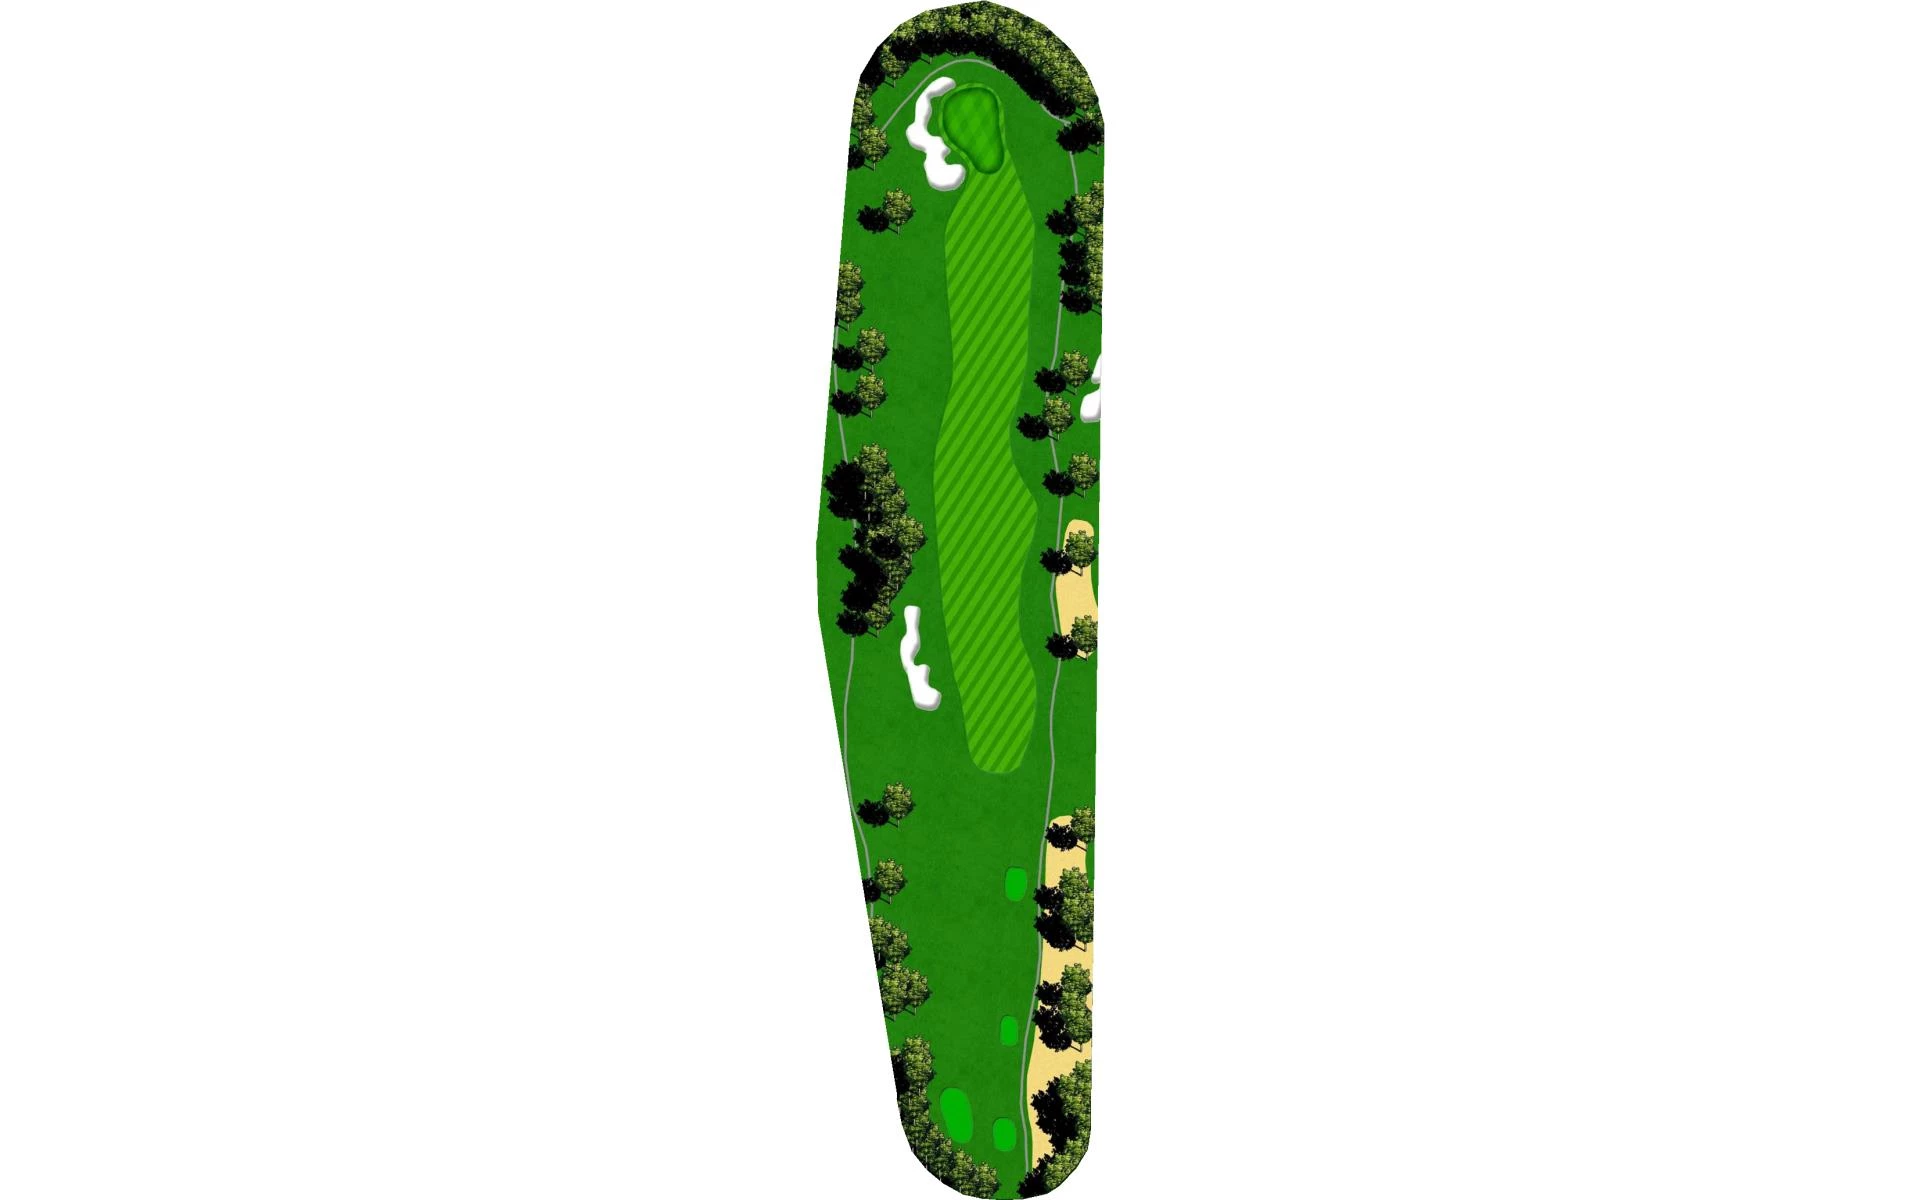
# 11 / Hole #11
Par: 4
Yardage by Tee:
BLACK 306
BLUE 300
GOLD 289
GREEN 250
WHITE 289
Slope:
Black- 132 | Blue-127 | White- 122 | Gold- 132 | Green-125
Pro Tips
The eleventh hole is a par 4 that requires two precise shots to hit the green and make par. A pot bunker in the fairway should be avoided by leaving the driver in the bag. Players will want to leave about 120 yards into this green that features a false front.
# 12 / Hole #12
Par: 3
Yardage by Tee:
BLACK 154
BLUE 141
GOLD 138
GREEN 122
WHITE 138
Slope:
Black- 132 | Blue-127 | White- 122 | Gold- 132 | Green-125
Pro Tips
The twelfth provides players with an elevated view of the green and all of the surrounding valley. Swirling winds are fairly common, so players will want to check the trees before picking a club. This green is well-guarded by bunkers and penalty areas.
# 13 / Hole #13
Par: 4
Yardage by Tee:
BLACK 414
BLUE 404
GOLD 311
GREEN 311
WHITE 370
Slope:
Black- 132 | Blue-127 | White- 122 | Gold- 132 | Green-125
Pro Tips
A pine tree just right of the fairway provides players with a good target line from the tee box on the thirteenth hole. On the approach, players will want to shoot for the middle of the green to set up the best chance for par.
# 14 / Hole #14
Par: 5
Yardage by Tee:
BLACK 549
BLUE 511
GOLD 374
GREEN 374
WHITE 491
Slope:
Black- 132 | Blue-127 | White- 122 | Gold- 132 | Green-125
Pro Tips
This par 5 slopes slightly uphill. The second shot slopes left-to-right, so players will want to keep their ball left to play from the center. The green is well-protected where the best miss is long and left.
# 15 / Hole #15
Par: 5
Yardage by Tee:
BLACK 502
BLUE 446
GOLD 402
GREEN 402
WHITE 443
Slope:
Black- 132 | Blue-127 | White- 122 | Gold- 132 | Green-125
Pro Tips
The second consecutive par 5 provides the best opportunity for a birdie. A well-struck tee shot will set up a chance to reach the green in two. The green is two-tiered, so players will want to make sure they’re on the right level. Greenside rough on the right is a better miss than the penalty area on the left.
# 16 / Hole #16
Par: 3
Yardage by Tee:
BLACK 220
BLUE 196
GOLD 176
GREEN 152
WHITE 176
Slope:
Black- 132 | Blue-127 | White- 122 | Gold- 132 | Green-125
Pro Tips
The final par 3, sixteenth, presents a challenge from all teeing locations. A well-placed bunker protects the green and a penalty area left that attracts a lot of golf balls.
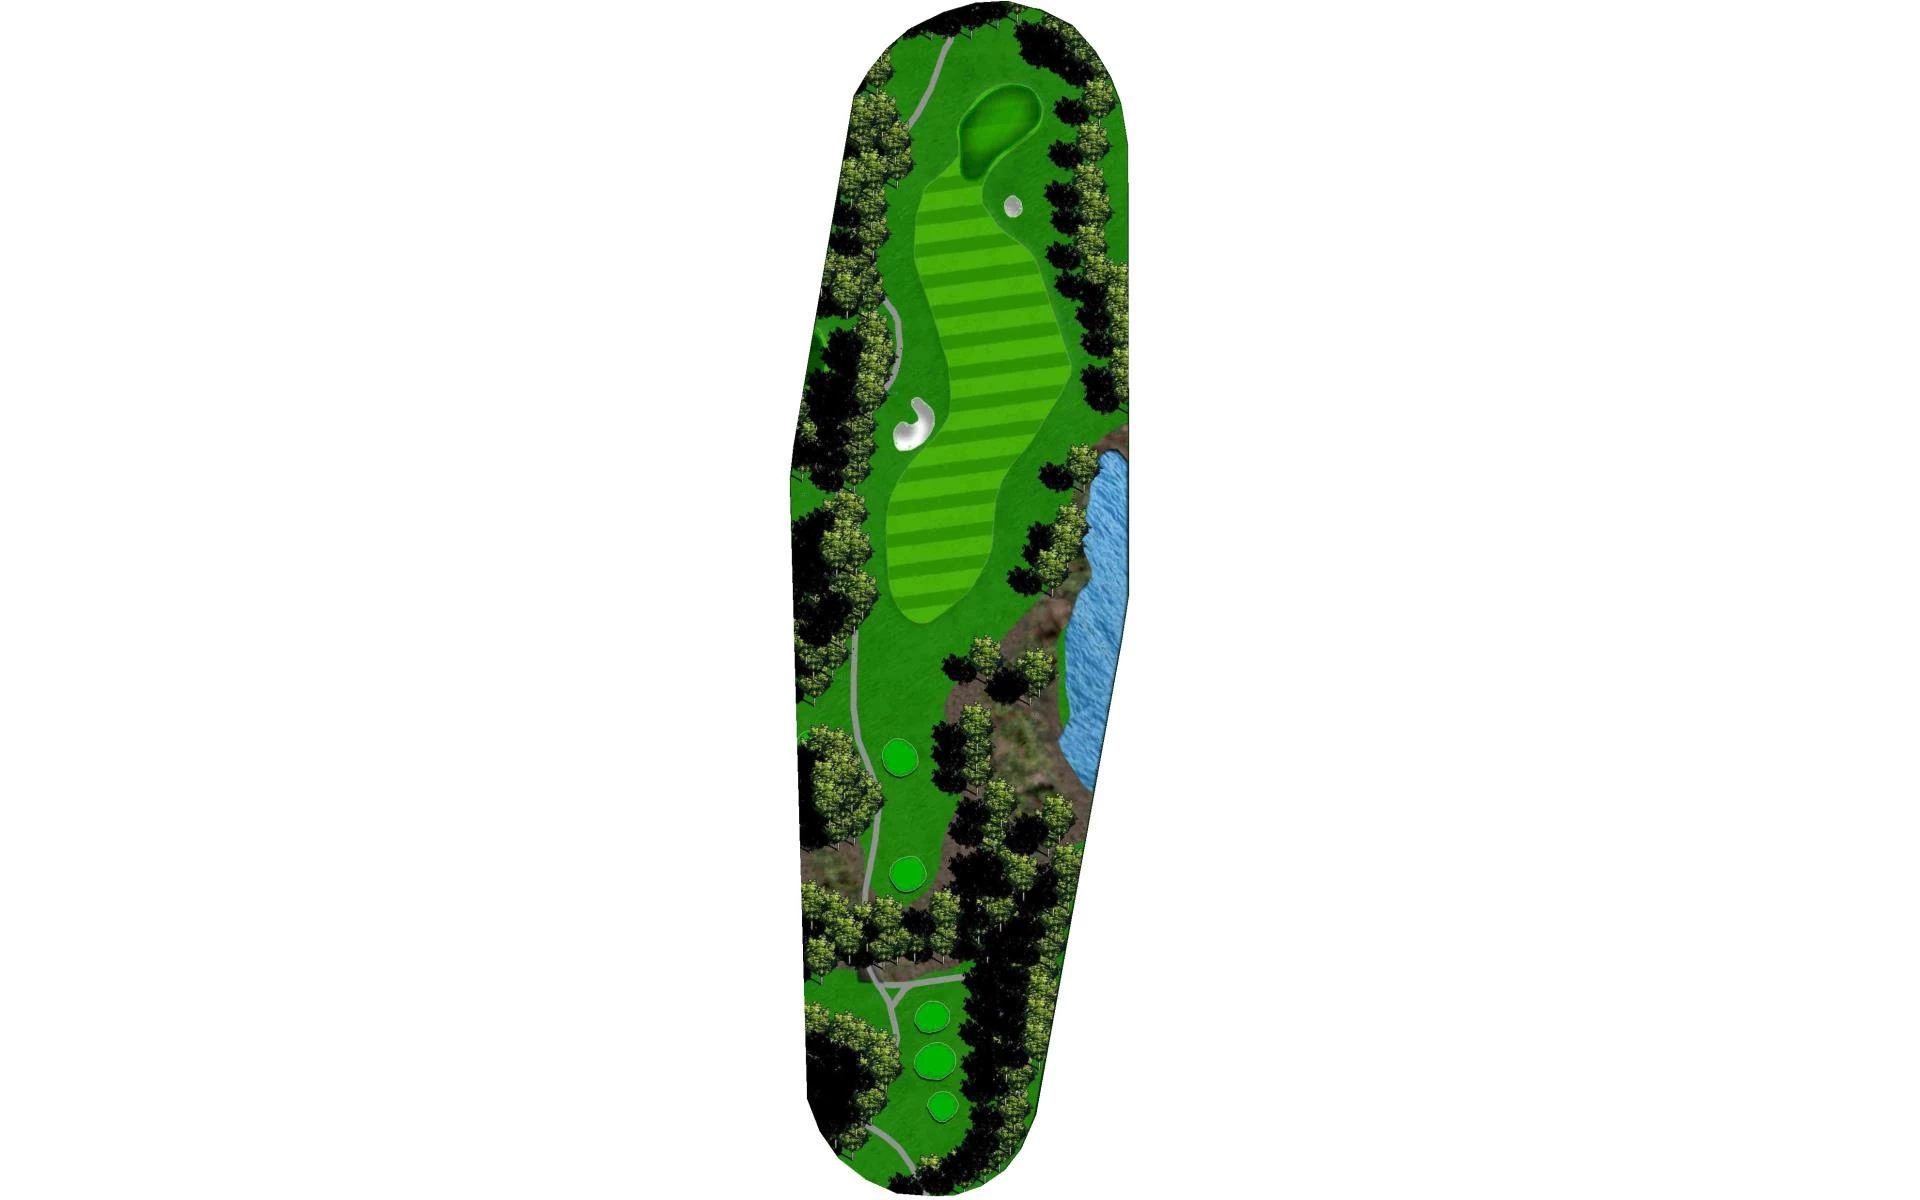
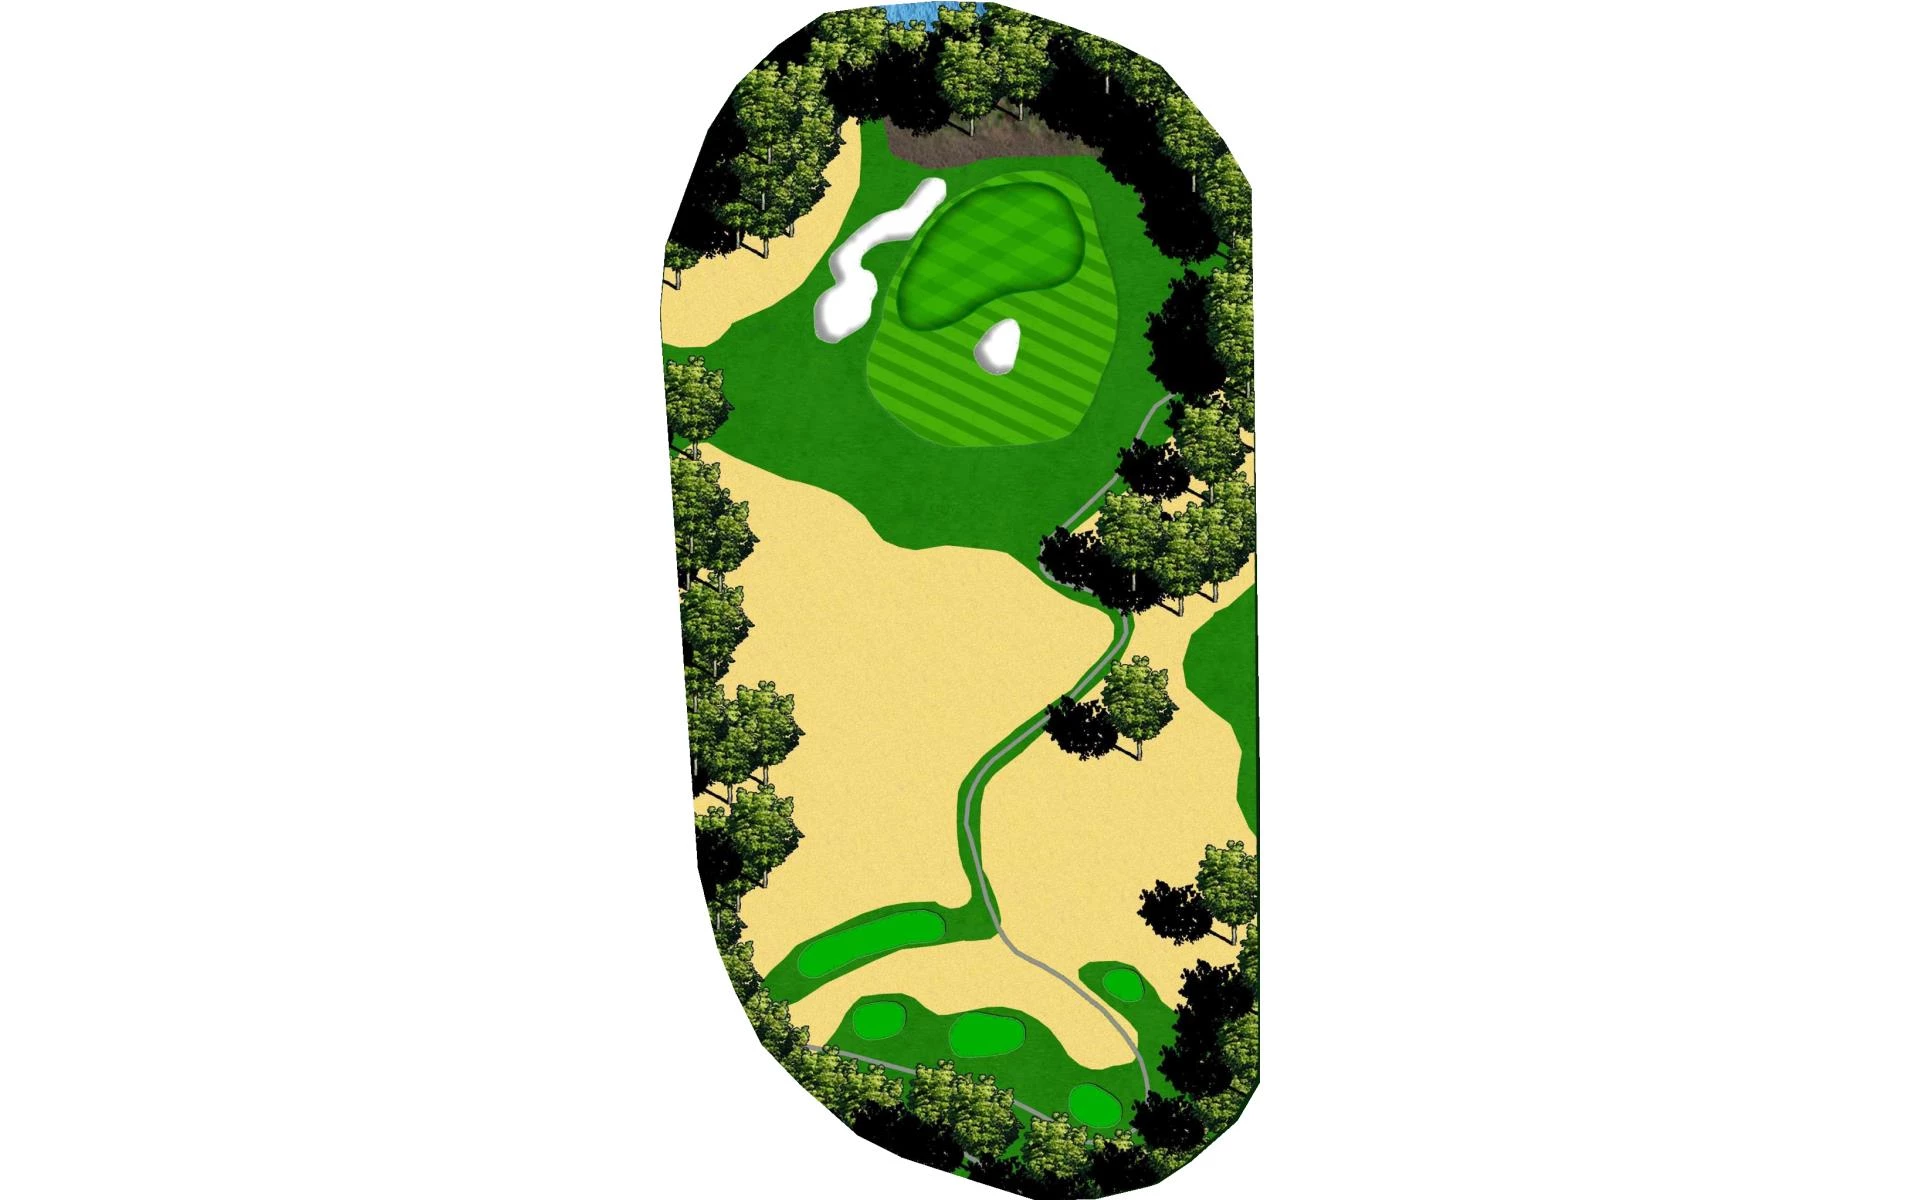
# 17 / Hole #17
Par: 4
Yardage by Tee:
BLACK 410
BLUE 403
GOLD 318
GREEN 318
WHITE 387
Slope:
Black- 132 | Blue-127 | White- 122 | Gold- 132 | Green-125
Pro Tips
The seventeenth is Aliso Viejo’s signature hole. A narrow fairway and an elevated green come together to create a challenging par 4. The ideal tee shot is placed down the right side of the fairway, which will set players up for the best chance at an even lie. A waterfall and fountain pond frame the raised putting surface that is protected by bunkers and a penalty area on the left.
# 18 / Hole #18
Par: 5
Yardage by Tee:
BLACK 504
BLUE 496
GOLD 457
GREEN 410
WHITE 469
Slope:
Black- 132 | Blue-127 | White- 122 | Gold- 132 | Green-125
Pro Tips
The closing hole is a par 5 that requires a tee shot in play for a chance at par or better. Avoid the water on the right and the pond that protects the second half of the hole on the left. The green is guarded by both water and sand, so players must be careful to avoid those.