The Club at Falcon Point Golf Course
Designer: Bruce Devlin and Robert von Hagge
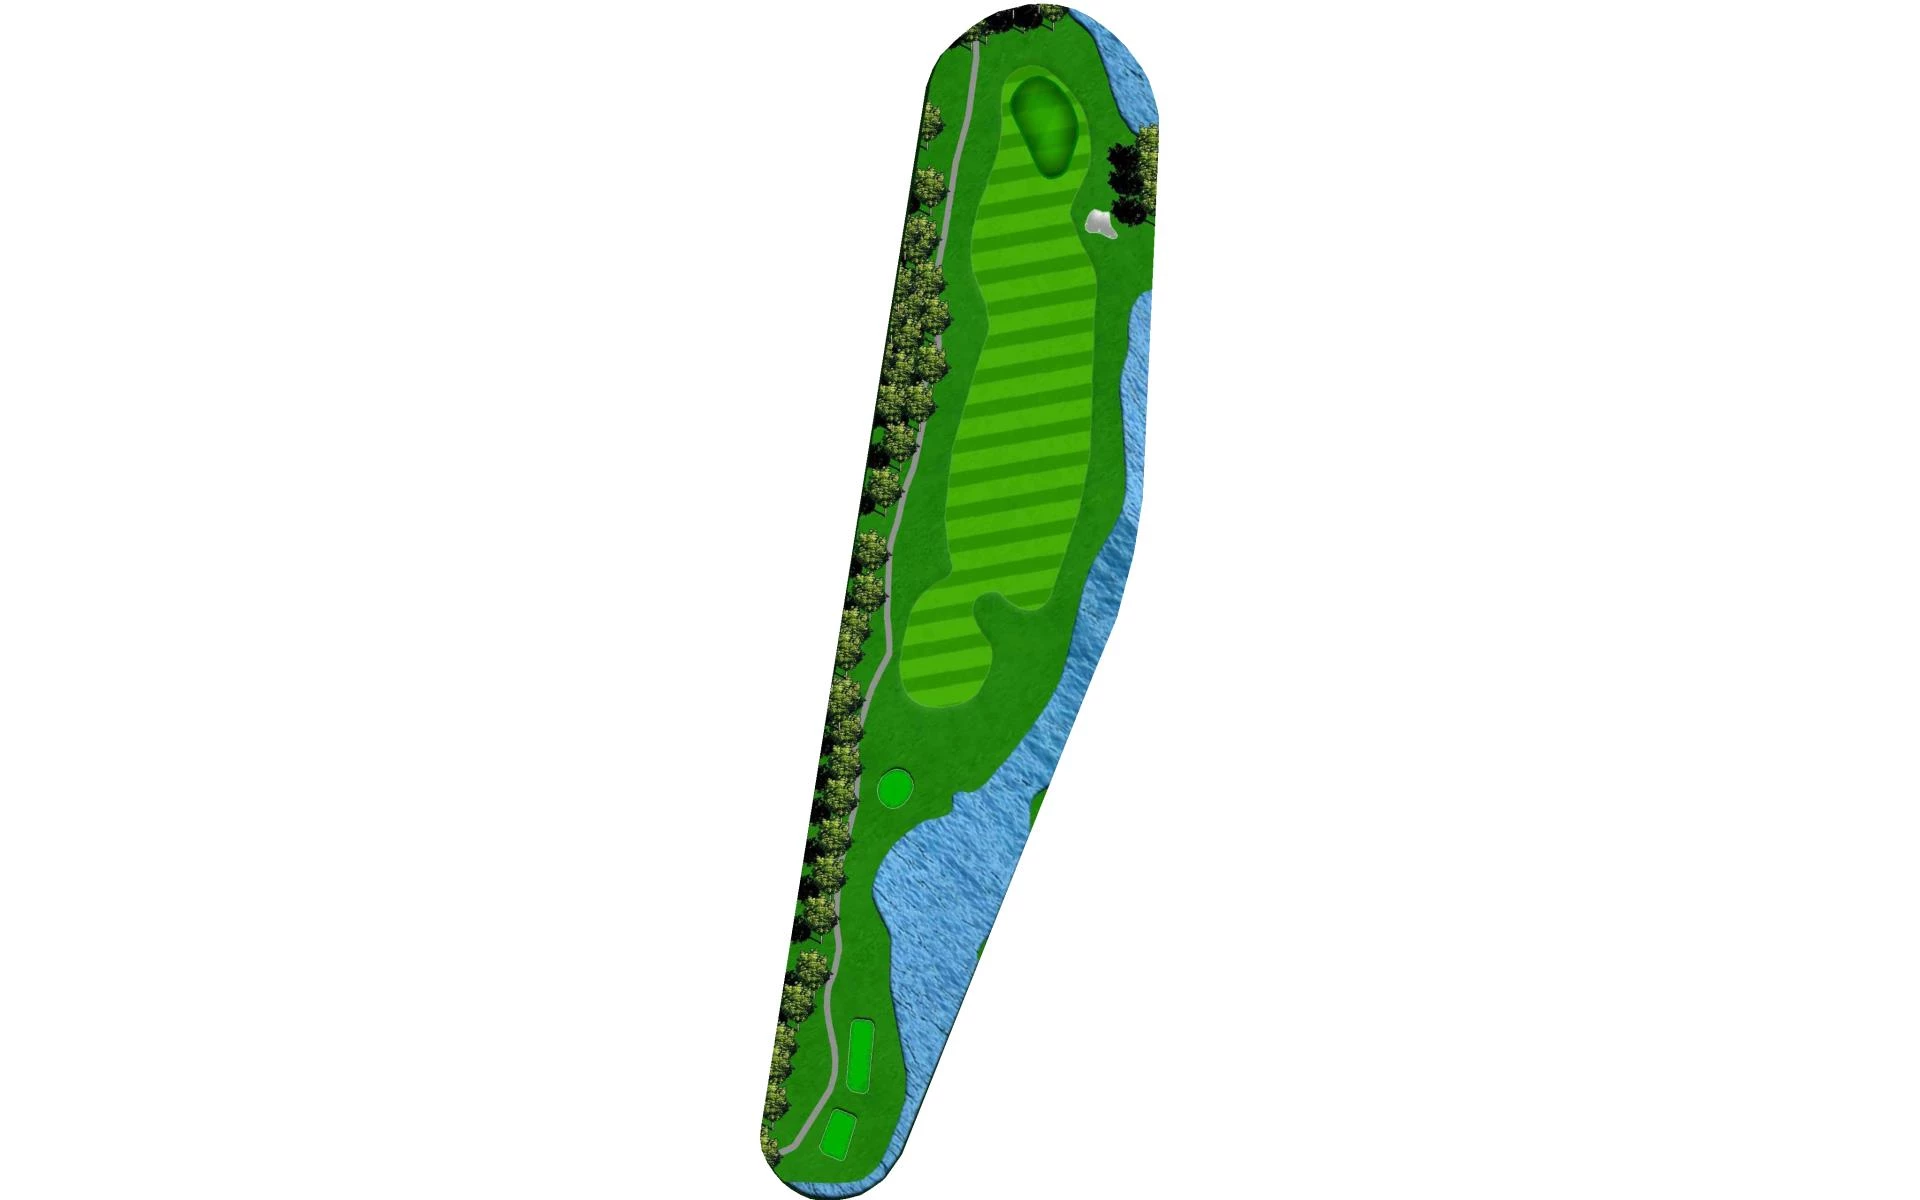
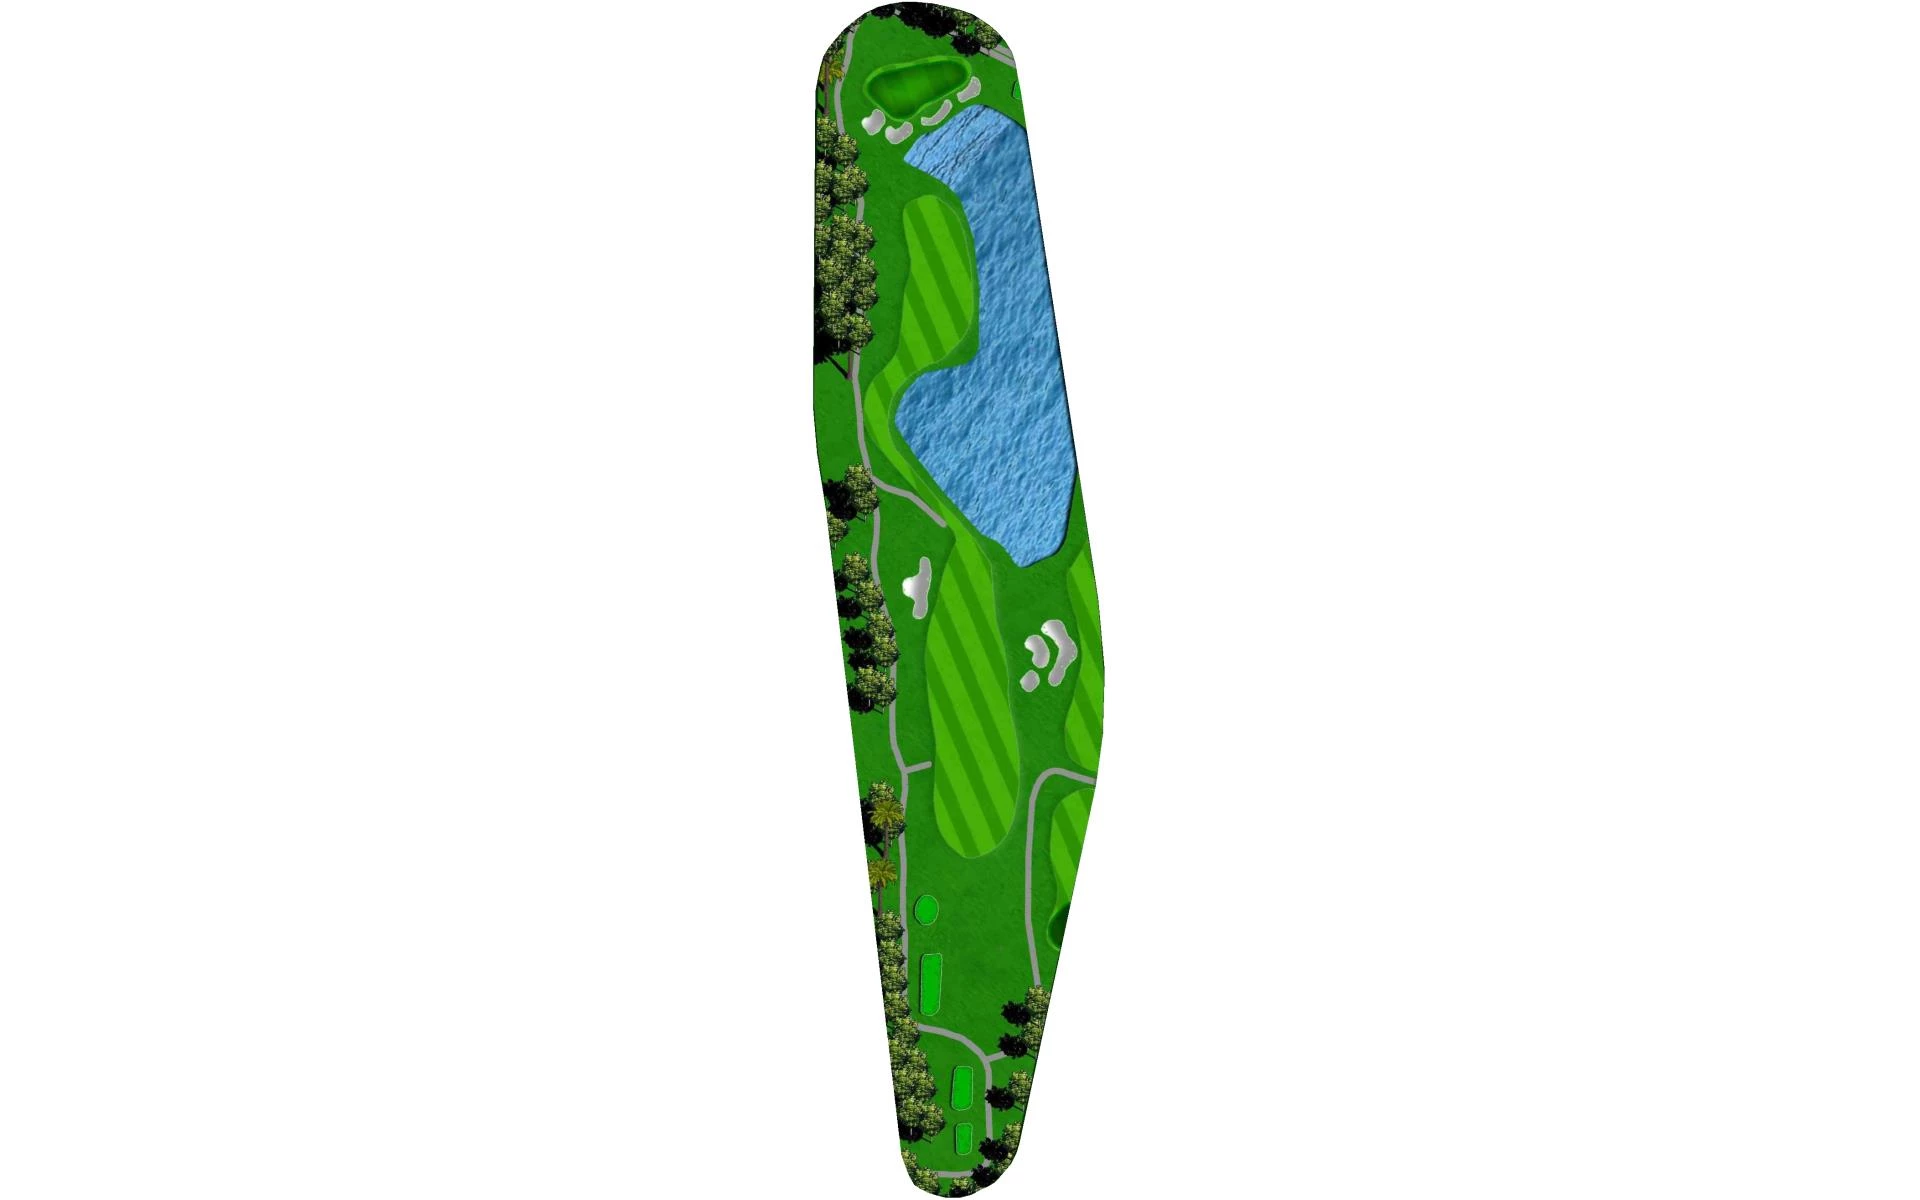
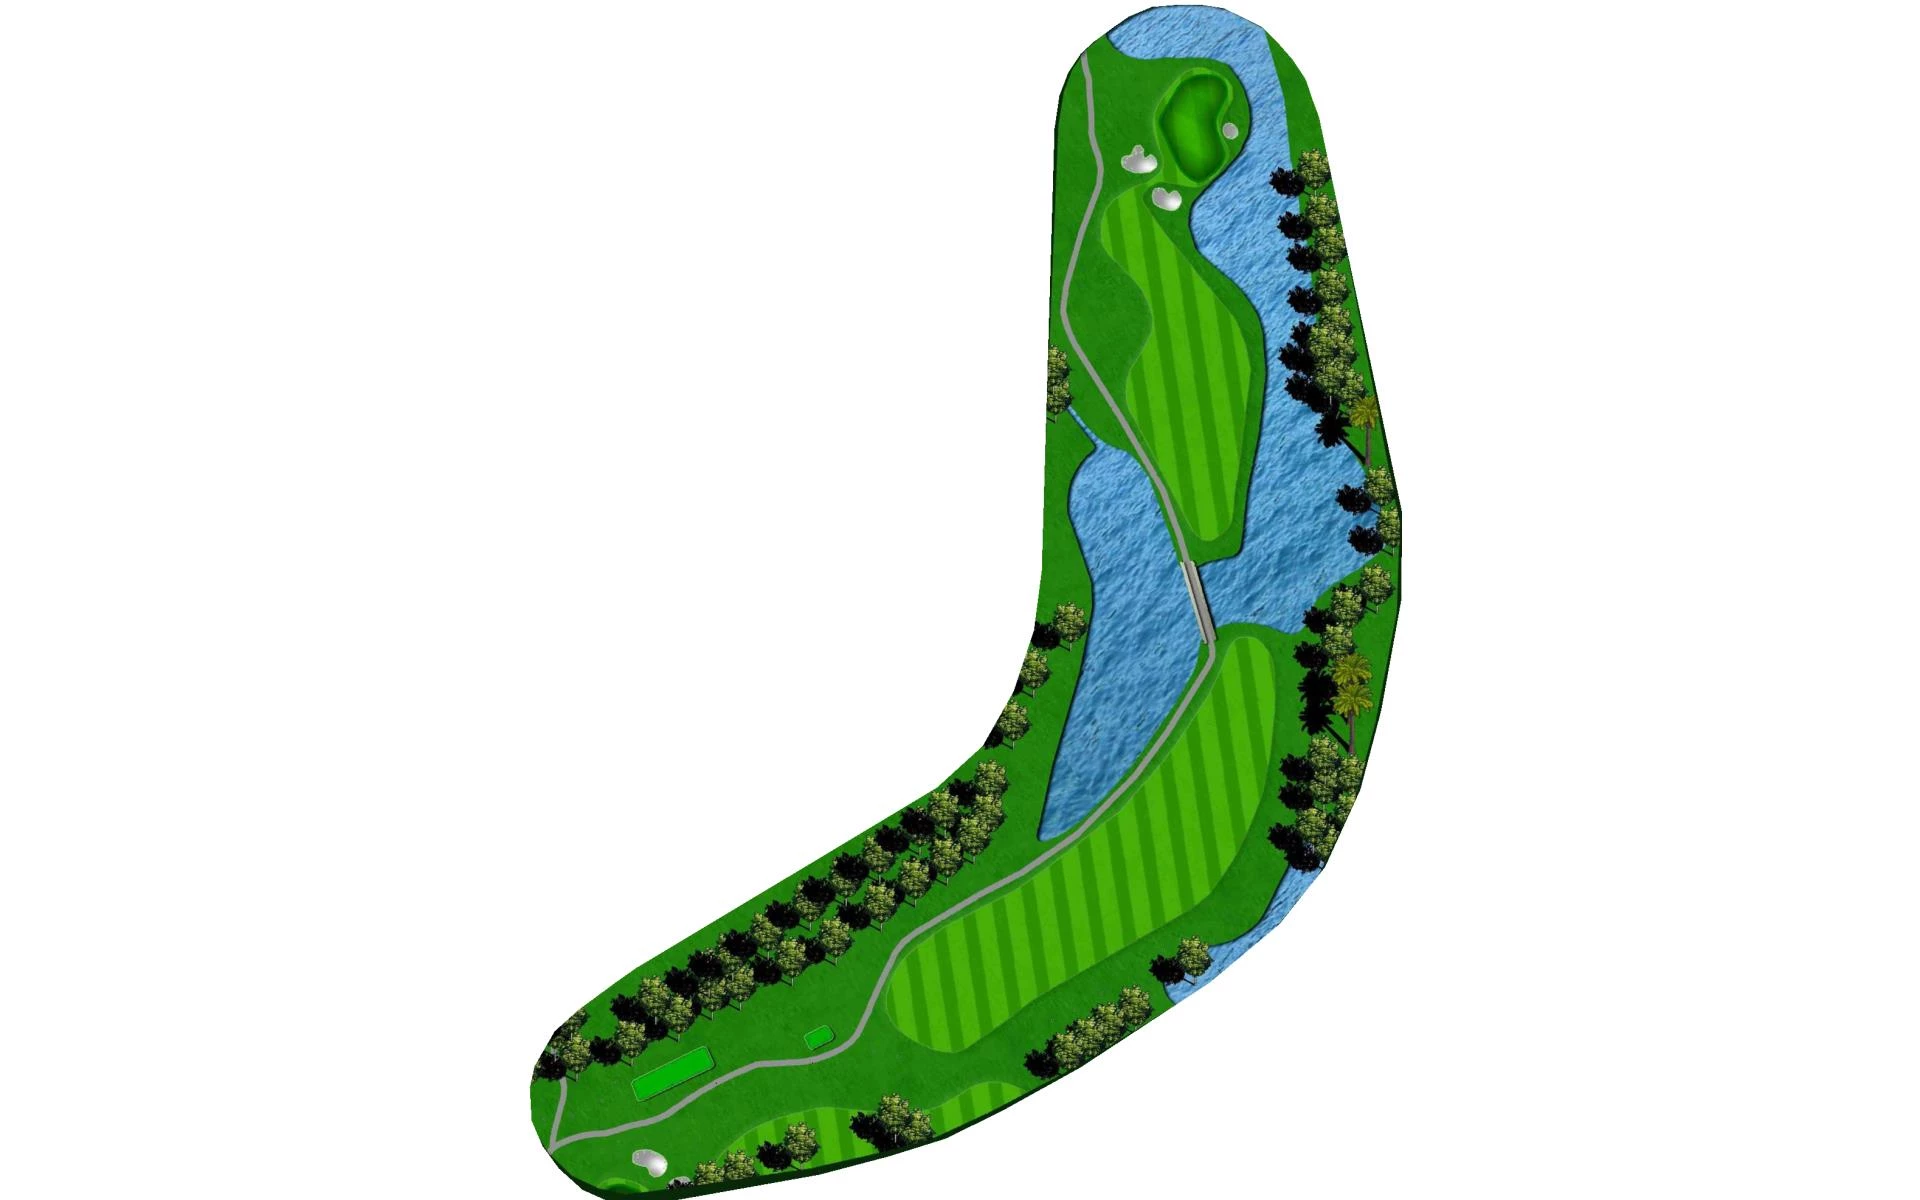
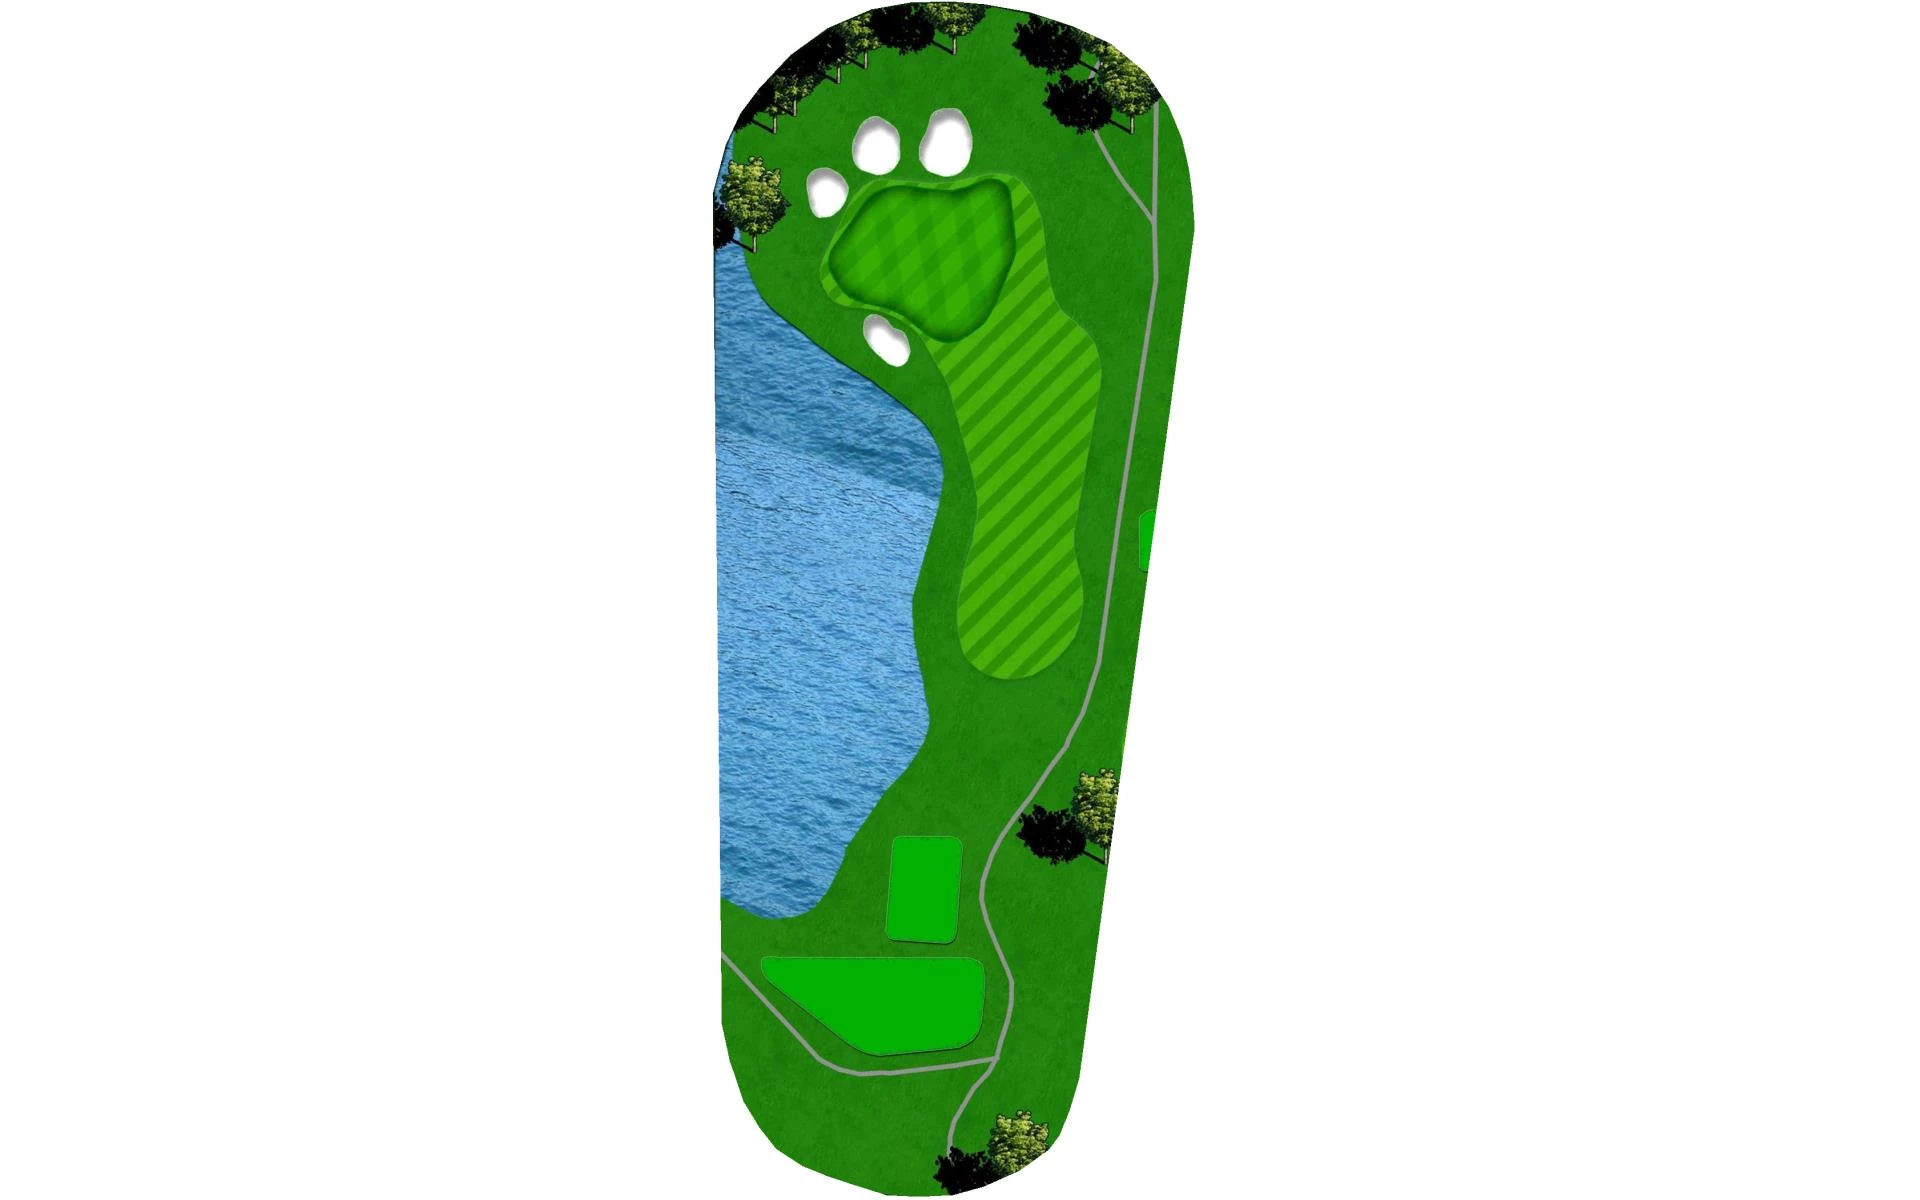
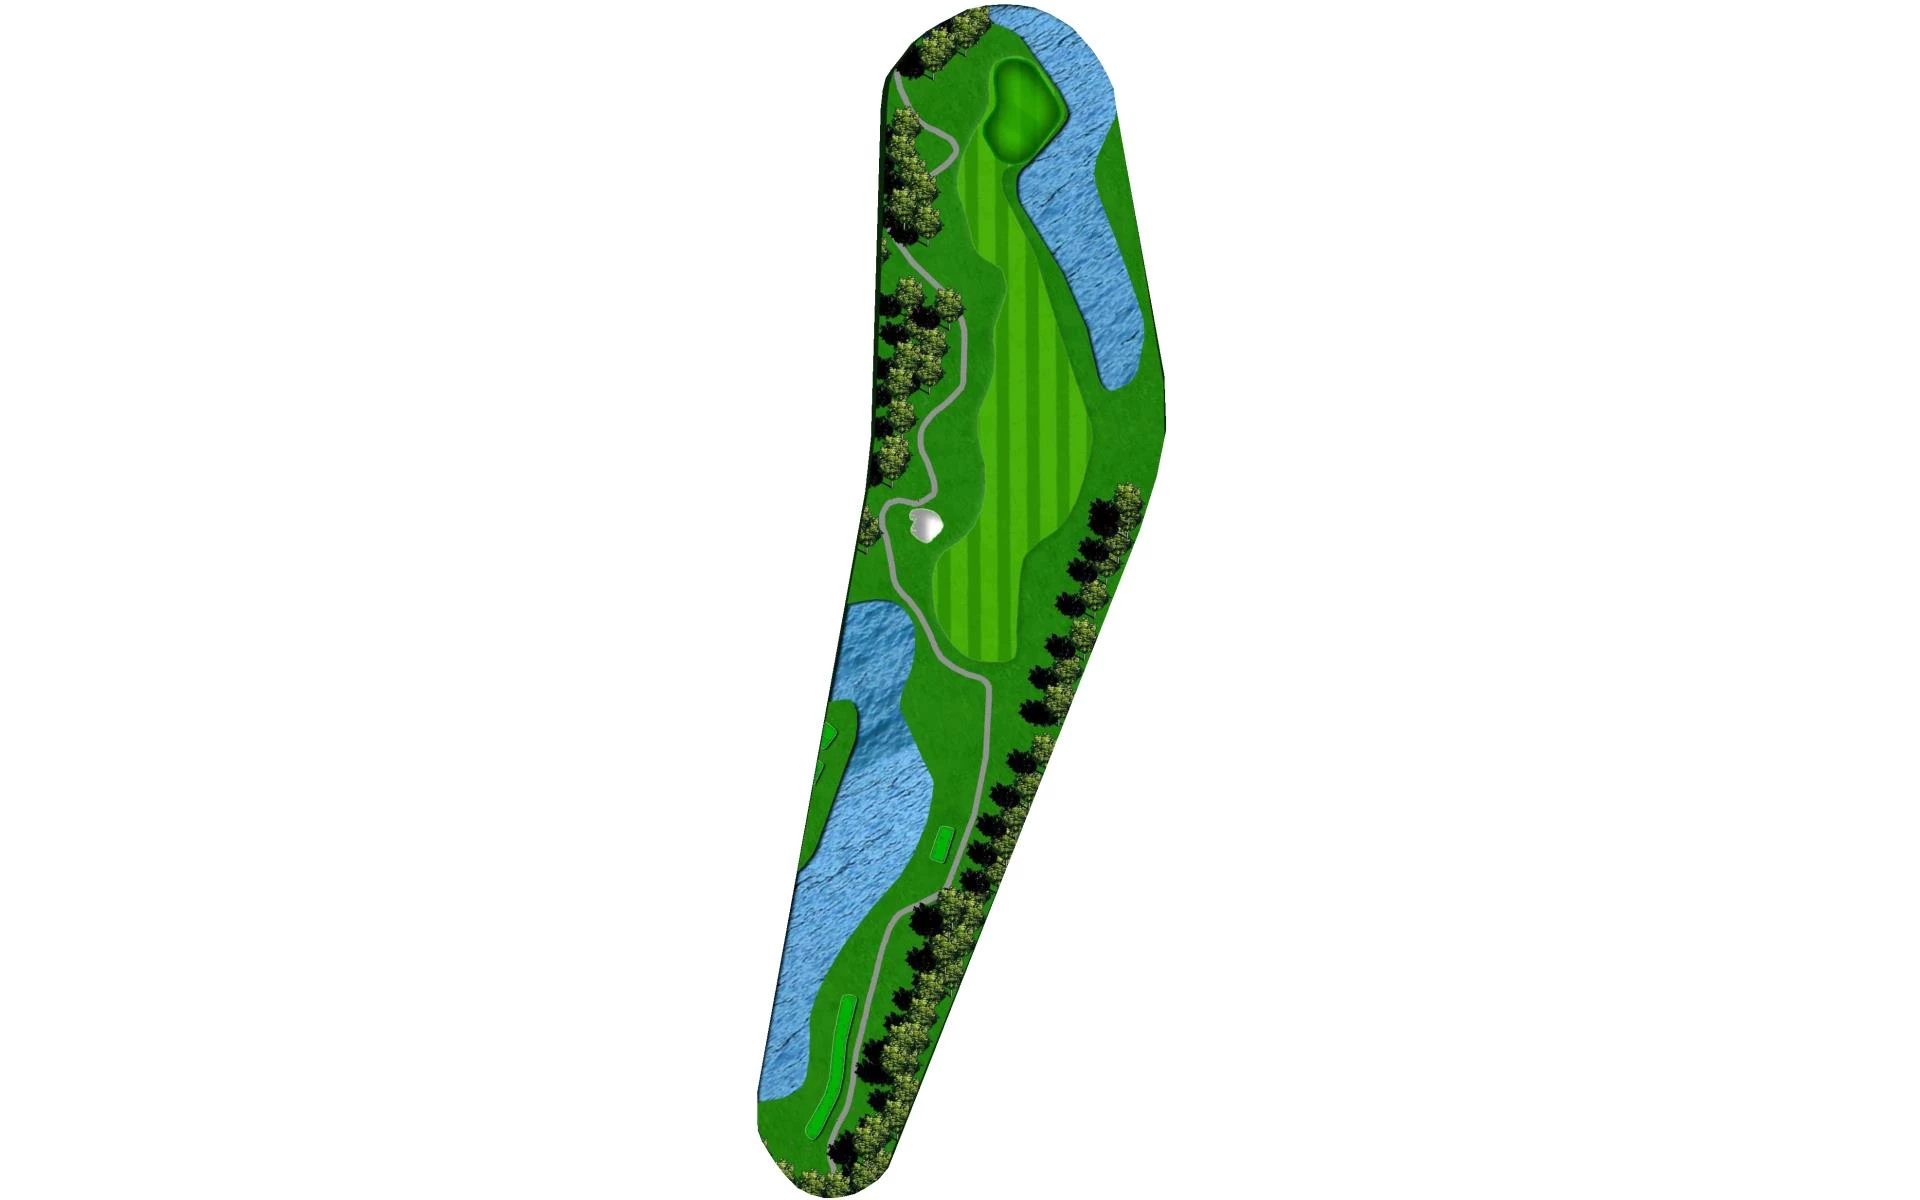
# 1 / Hole #
Par: 4
Handicaps:
Men's 9
Women's 11
Yardage by Tee:
BLACK 389
GOLD 374
BLUE 358
WHITE 338
RED 251
Slope:
Black - 137 | Gold - 135 | White - 130 | White - Ladies 140 | Red - 124 | Red - Ladies 128 |
Pro Tips
| With water down the right and out-of-bounds down the left, the first hole provides players with a formidable open tee shot. A raised green makes slightly off target approach shots require a good pitch shot to get up and down. |
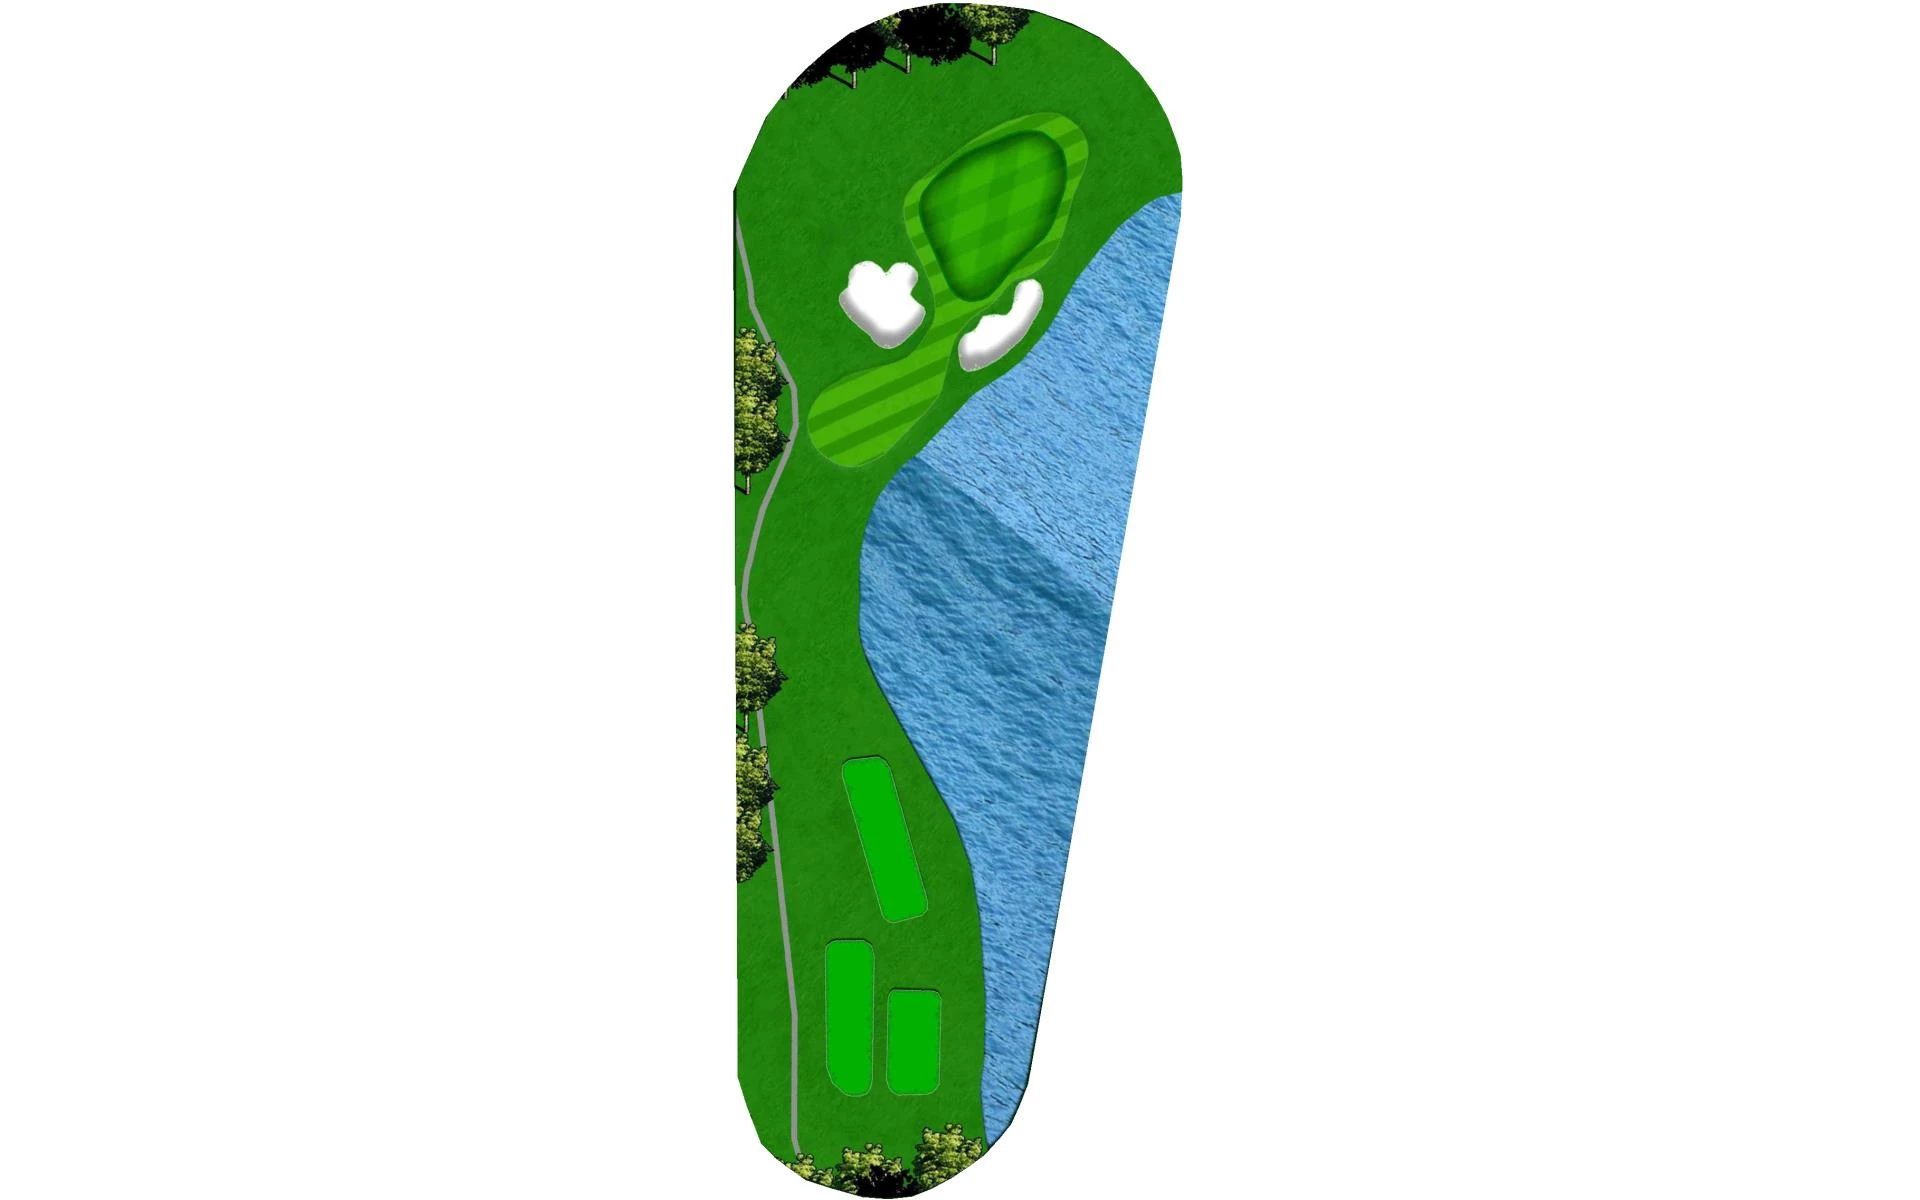
# 2 / Hole #2
Par: 3
Handicaps:
Men's 17
Women's 17
Yardage by Tee:
BLACK 148
GOLD 137
BLUE 120
WHITE 120
RED 100
Slope:
Black - 137 | Gold - 135 | White - 130 | White - Ladies 140 | Red - 124 | Red - Ladies 128 |
Pro Tips
| The second hole features a double green shared with the 4th hole and two bunkers guarding the front. Depending on the pin position and wind, this can be a difficult shot to get close. Being long of this severely back to front sloped green provides one of the tougher up and downs on the course. |
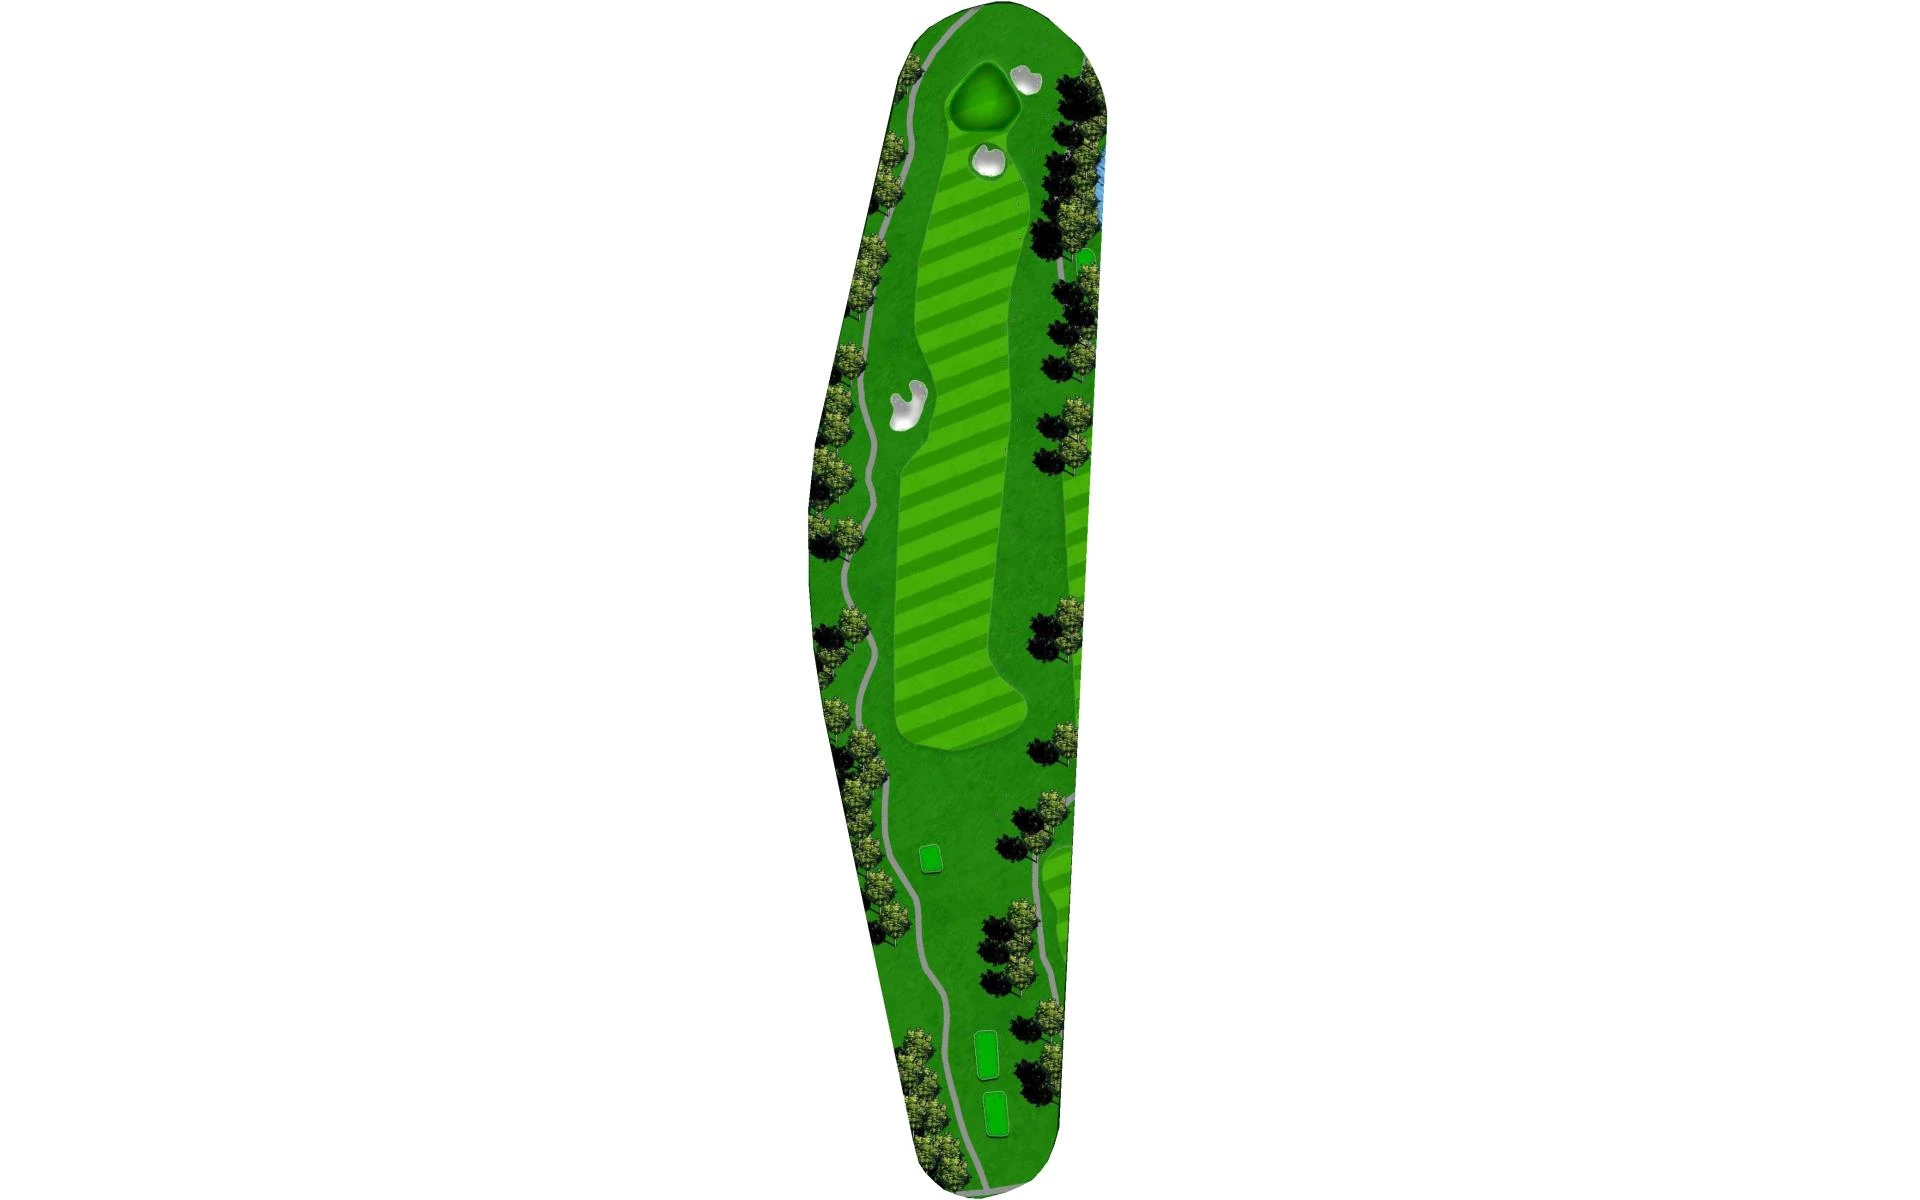
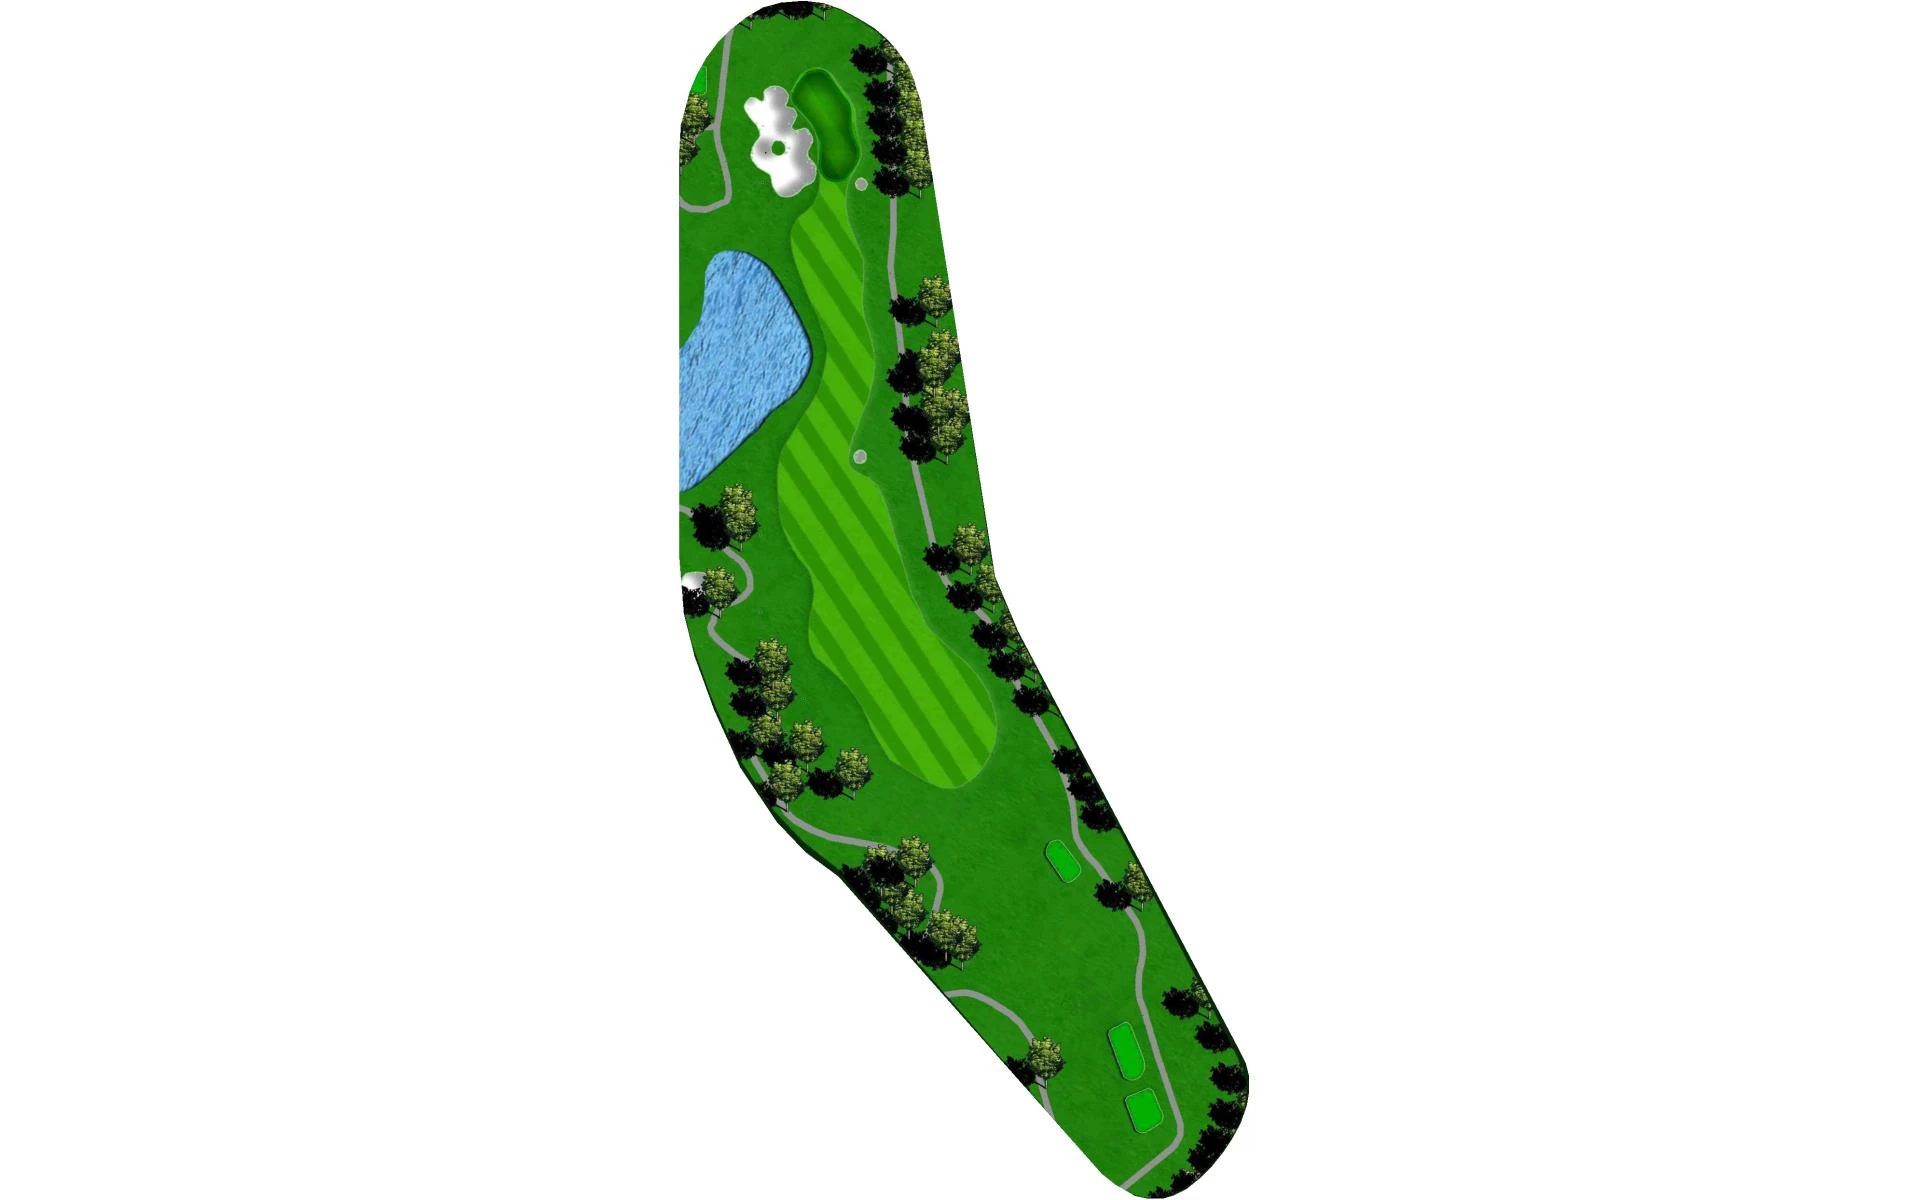
# 3 / Hole #3
Par: 4
Handicaps:
Men's 5
Women's 9
Yardage by Tee:
BLACK 422
GOLD 405
BLUE 393
WHITE 309
RED 309
Slope:
Black - 137 | Gold - 135 | White - 130 | White - Ladies 140 | Red - 124 | Red - Ladies 128 |
Pro Tips
| Appropriately named "Sahara", the third hole is the only hole on the golf course without a water hazard. Downwind, players can look to score on this hole, but into the wind it can play as one of the longest par 4's on the course. |
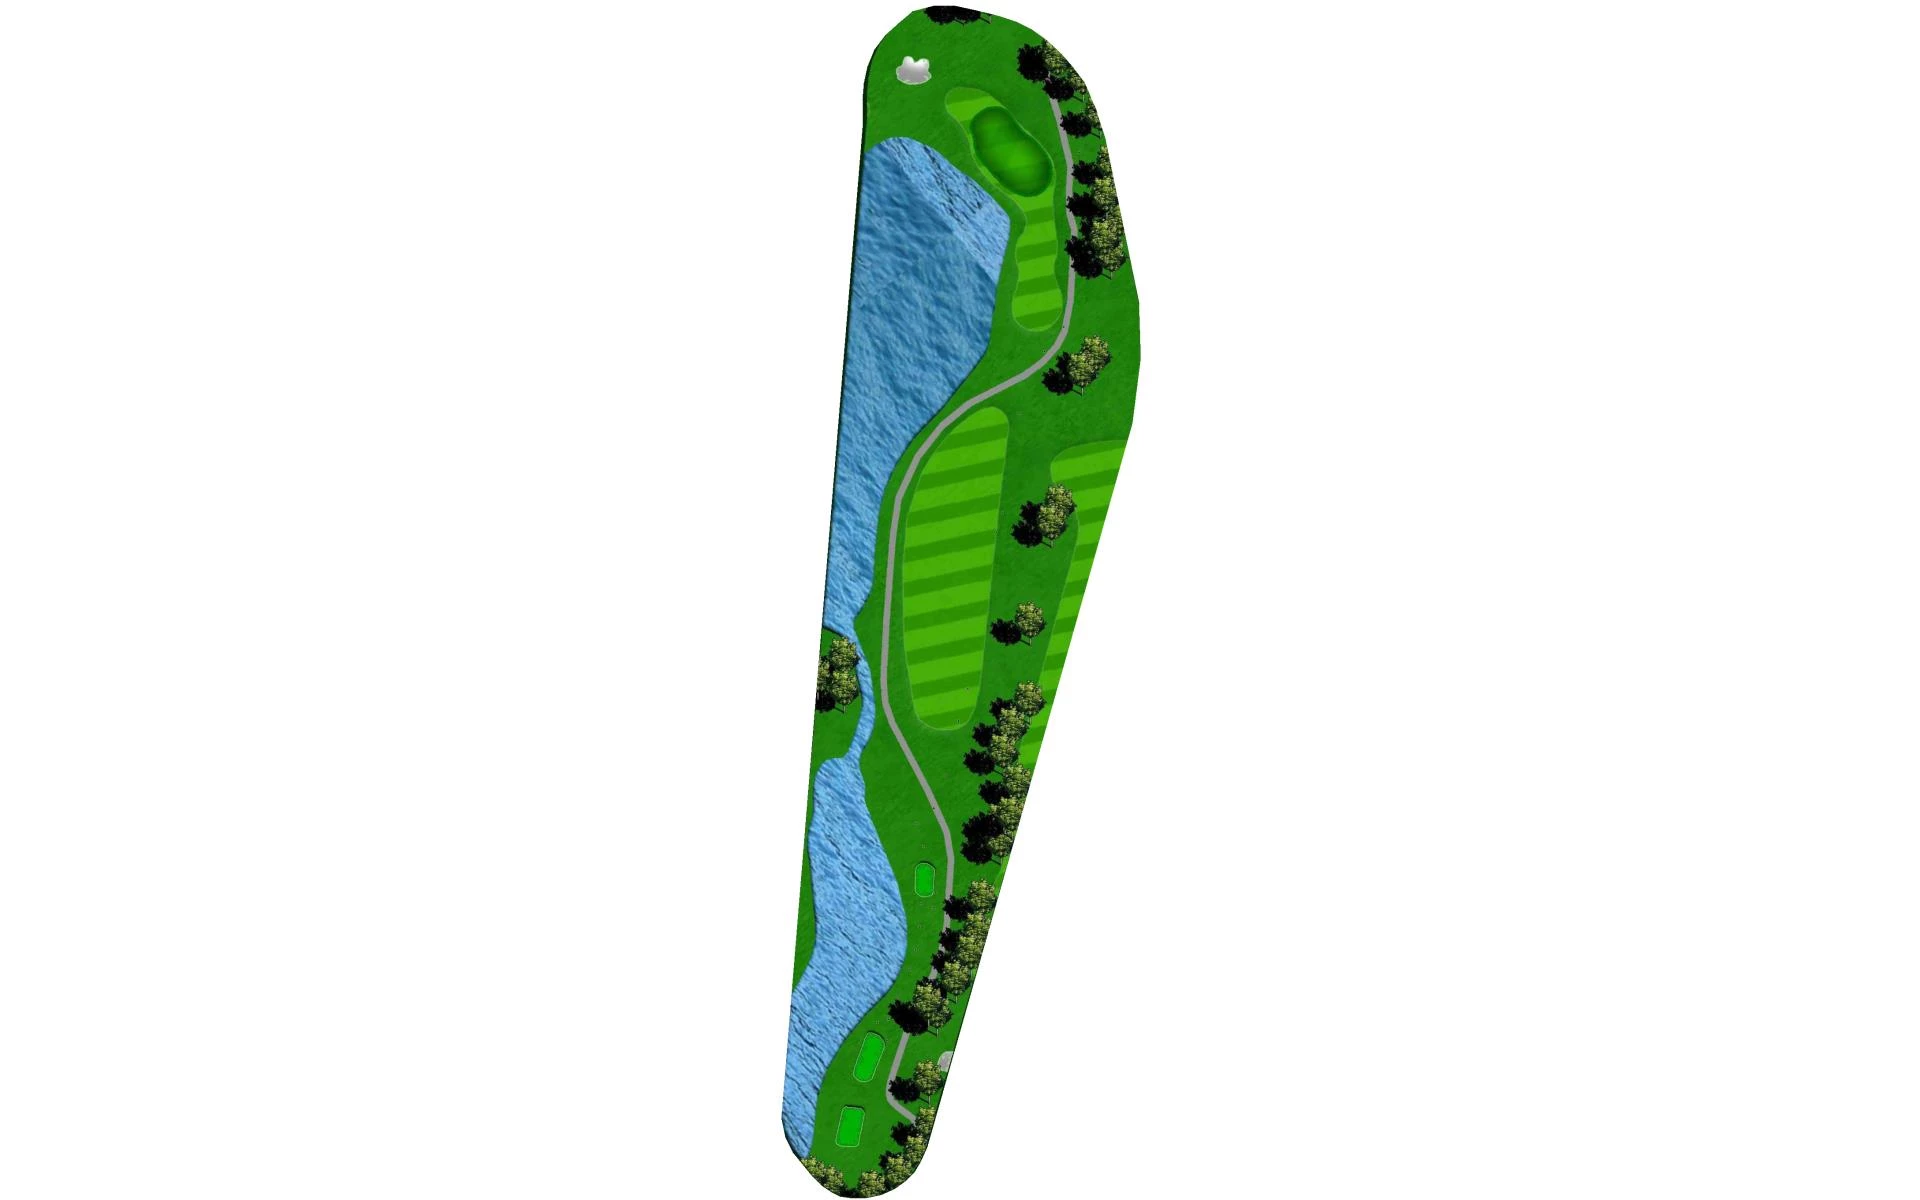
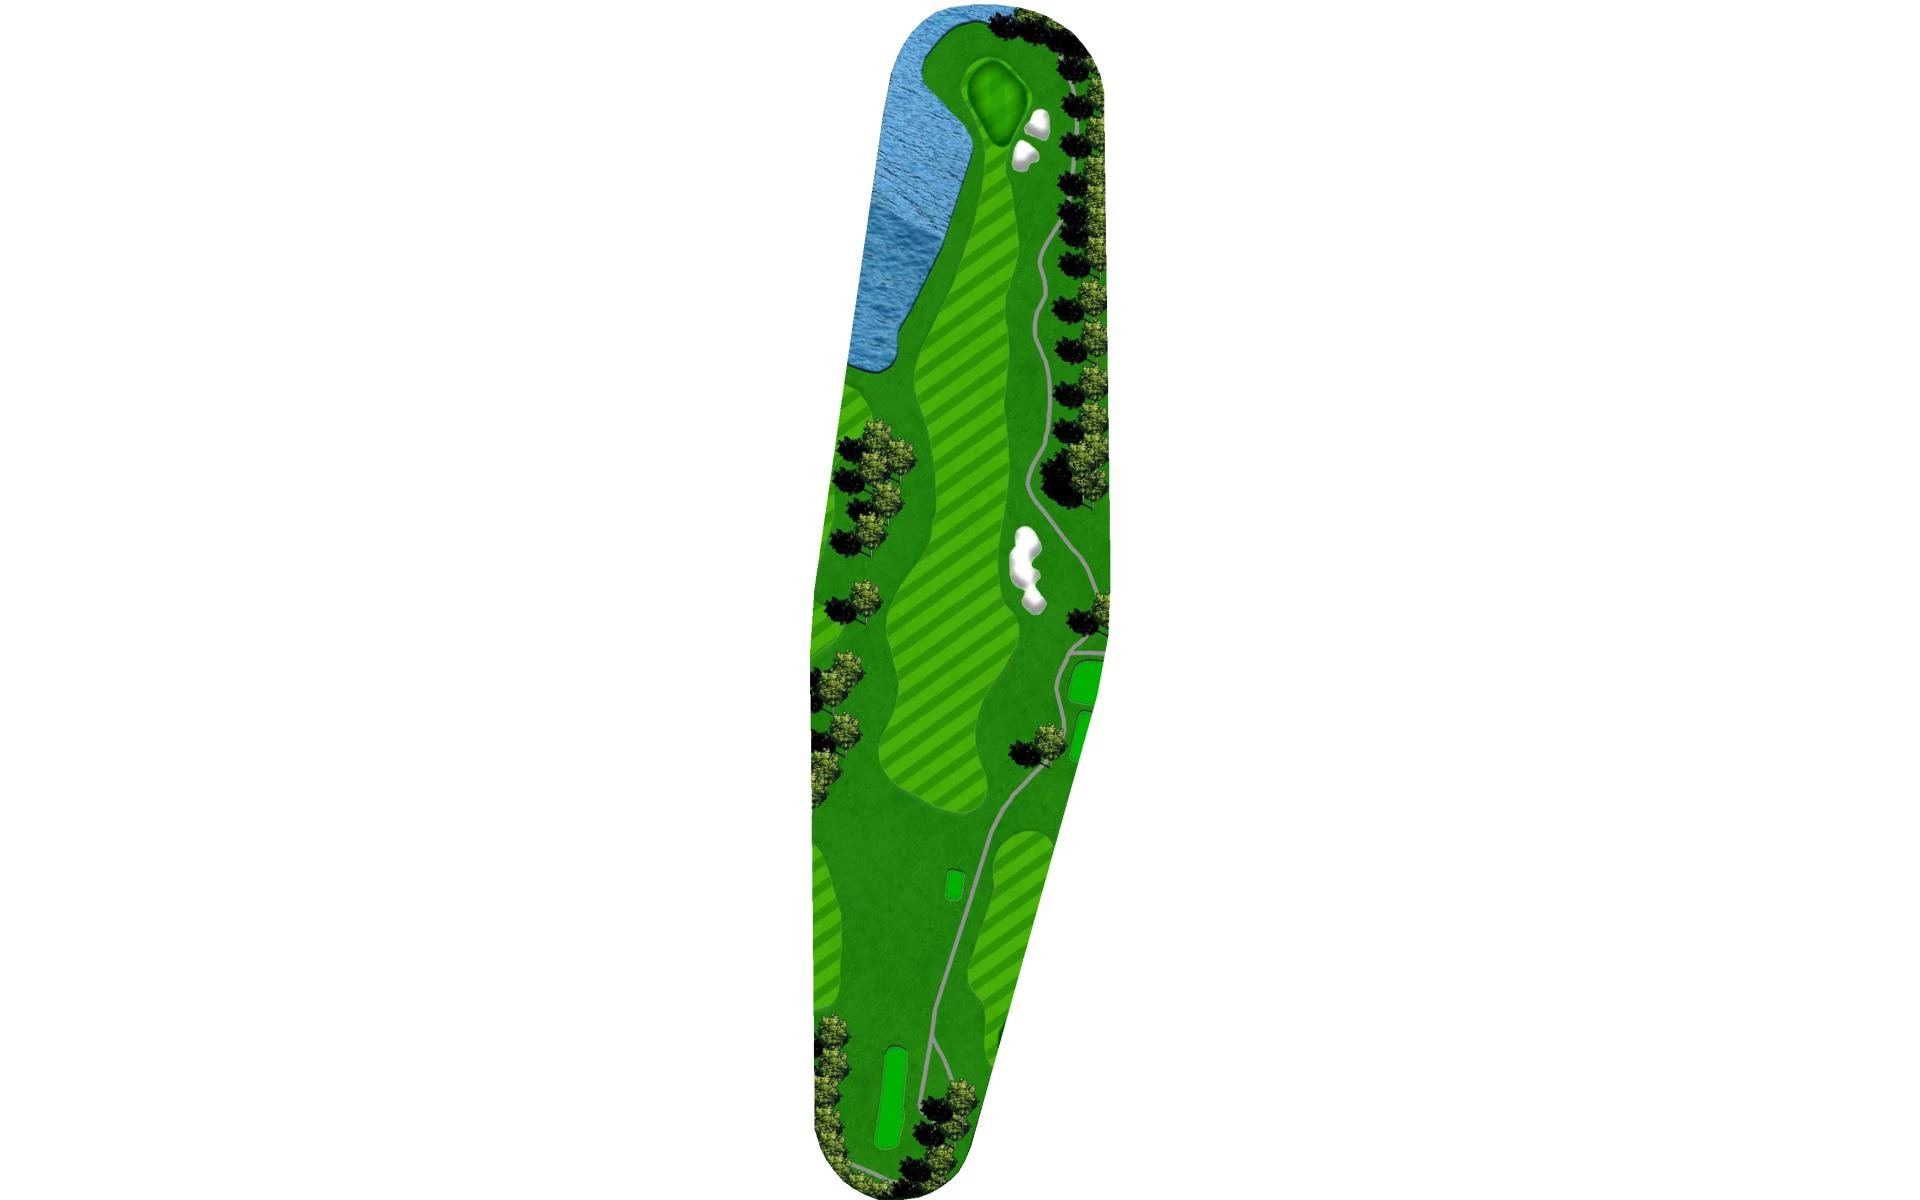
# 4 / Hole #4
Par: 4
Handicaps:
Men's 1
Women's 5
Yardage by Tee:
BLACK 429
GOLD 414
BLUE 398
WHITE 314
RED 314
Slope:
Black - 137 | Gold - 135 | White - 130 | White - Ladies 140 | Red - 124 | Red - Ladies 128 |
Pro Tips
| The fourth hole truly is a "Stiff Test". Pampas bushes on the right and water on the left demands an accurate tee shot into a prevailing headwind. A well-placed tee shot still leaves a long, difficult approach over water into the second portion of this double green. |
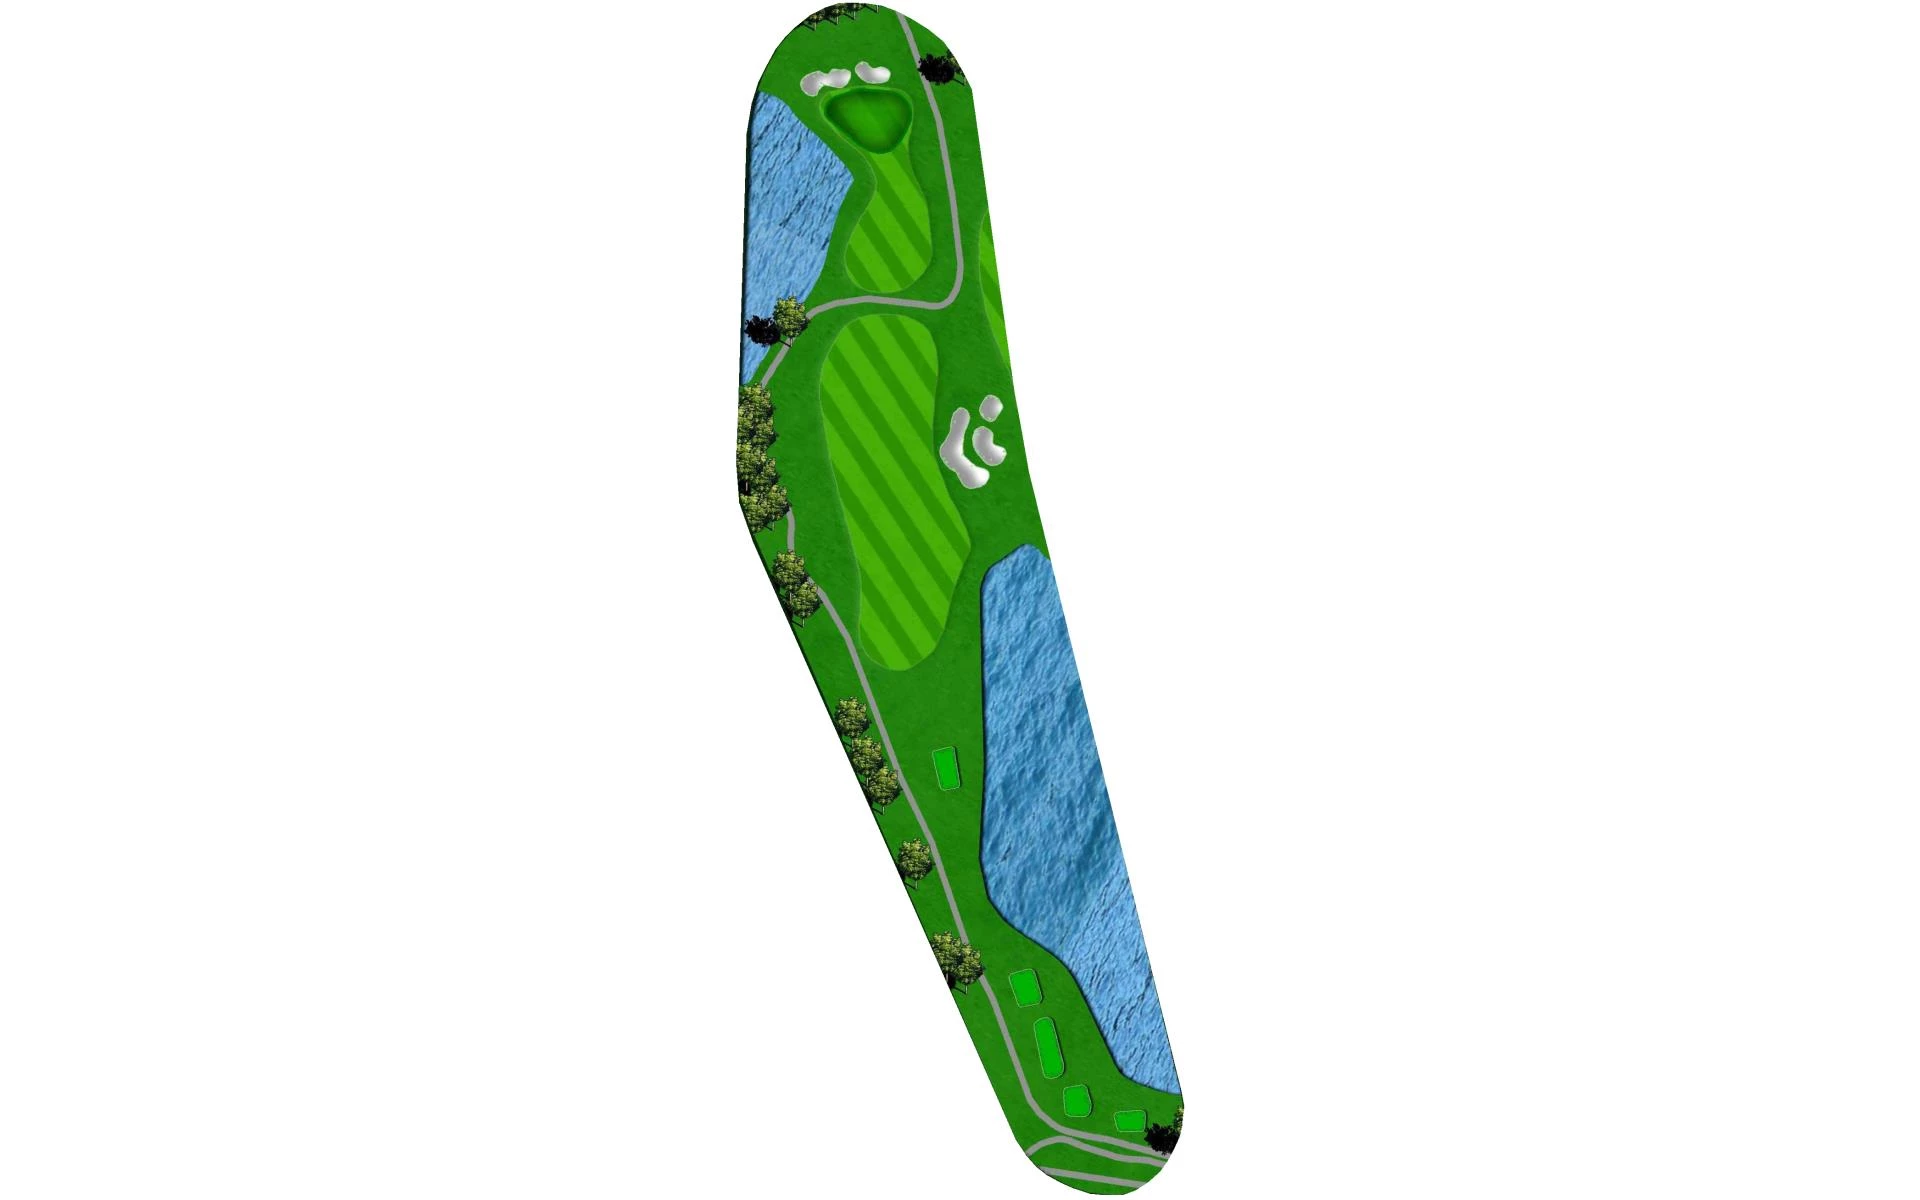
# 5 / Hole #5
Par: 5
Handicaps:
Men's 3
Women's 1
Yardage by Tee:
BLACK 475
GOLD 450
BLUE 419
WHITE 419
RED 371
Slope:
Black - 137 | Gold - 135 | White - 130 | White - Ladies 140 | Red - 124 | Red - Ladies 128 |
Pro Tips
| "Patience", requires a layup off the tee for even the longest hitters. Players are then faced with a choice, go for the heavily guarded green or layup again and leave themselves with a wedge. 4 bunkers protect the front of the green while over the back and to the left is out-of-bounds. |
# 6 / Hole #6
Par: 4
Handicaps:
Men's 13
Women's 13
Yardage by Tee:
BLACK 385
GOLD 365
BLUE 352
WHITE 317
RED 239
Slope:
Black - 137 | Gold - 135 | White - 130 | White - Ladies 140 | Red - 124 | Red - Ladies 128 |
Pro Tips
| The par 4 sixth hole has a wide fairway with bunkers on the right. A good drive leaves a wedge or short iron into the tricky green at the end of "Black Diamond". The two-tiered green slopes from back to front and is protected by water on the left and bunkers off the back. |
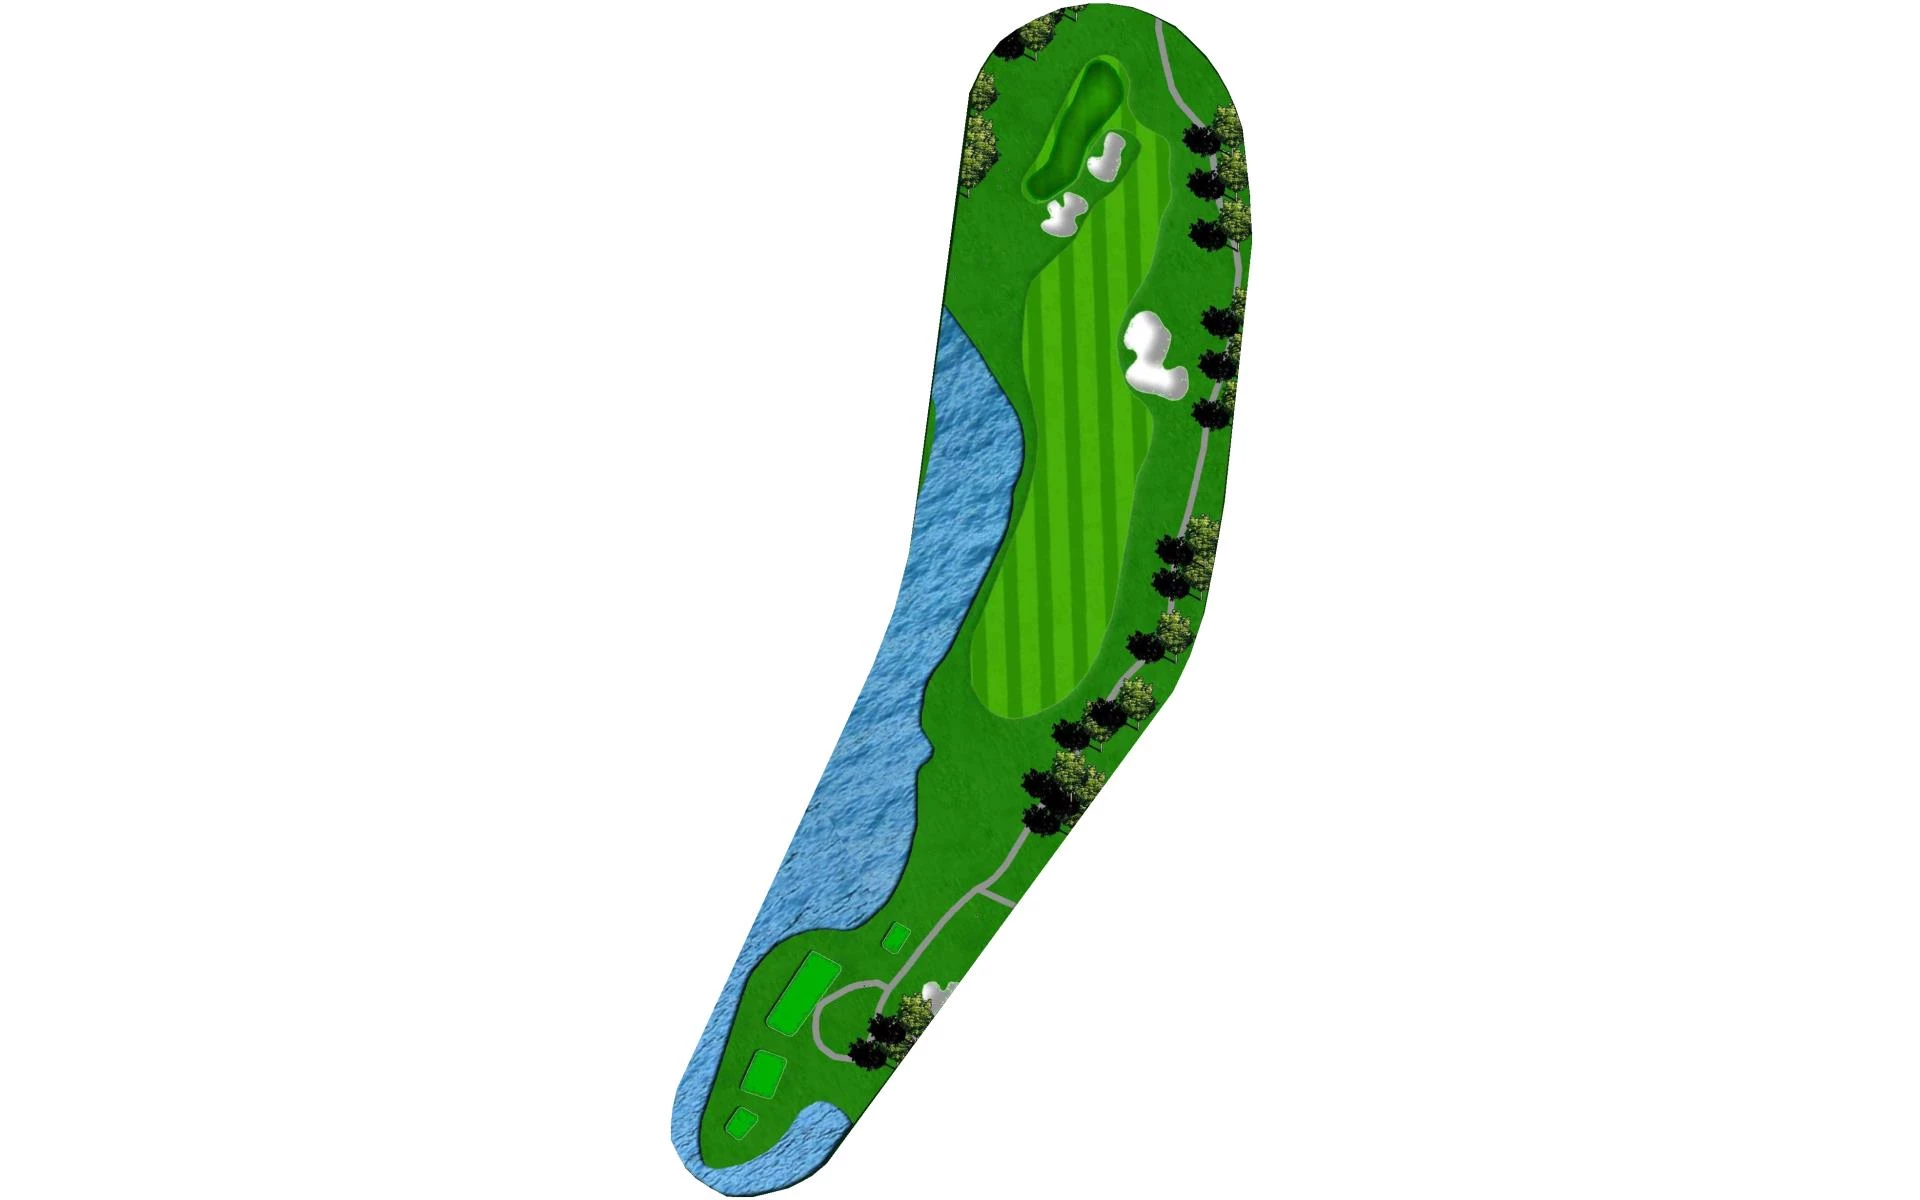
# 7 / Hole #7
Par: 3
Handicaps:
Men's 15
Women's 15
Yardage by Tee:
BLACK 222
GOLD 194
BLUE 165
WHITE 155
RED 136
Slope:
Black - 137 | Gold - 135 | White - 130 | White - Ladies 140 | Red - 124 | Red - Ladies 128 |
Pro Tips
| The seventh hole is largely regarded as the most difficult par 3 on the golf course. Requiring a longer club off the tee, it is tough to get close on this very large green. A bunker off the back, water short, and out-of-bounds on either side make any miss costly. |
# 8 / Hole #8
Par: 4
Handicaps:
Men's 11
Women's 7
Yardage by Tee:
BLACK 404
GOLD 384
BLUE 370
WHITW 325
RED 285
Slope:
Black - 137 | Gold - 135 | White - 130 | White - Ladies 140 | Red - 124 | Red - Ladies 128 |
Pro Tips
| Besides the large group of pampas bushes on the right side of the fairway, "Ambush" is a fairly open hole off the tee. An elevated green guarded by bunkers on the front presents a tough approach shot that may require one more club. |
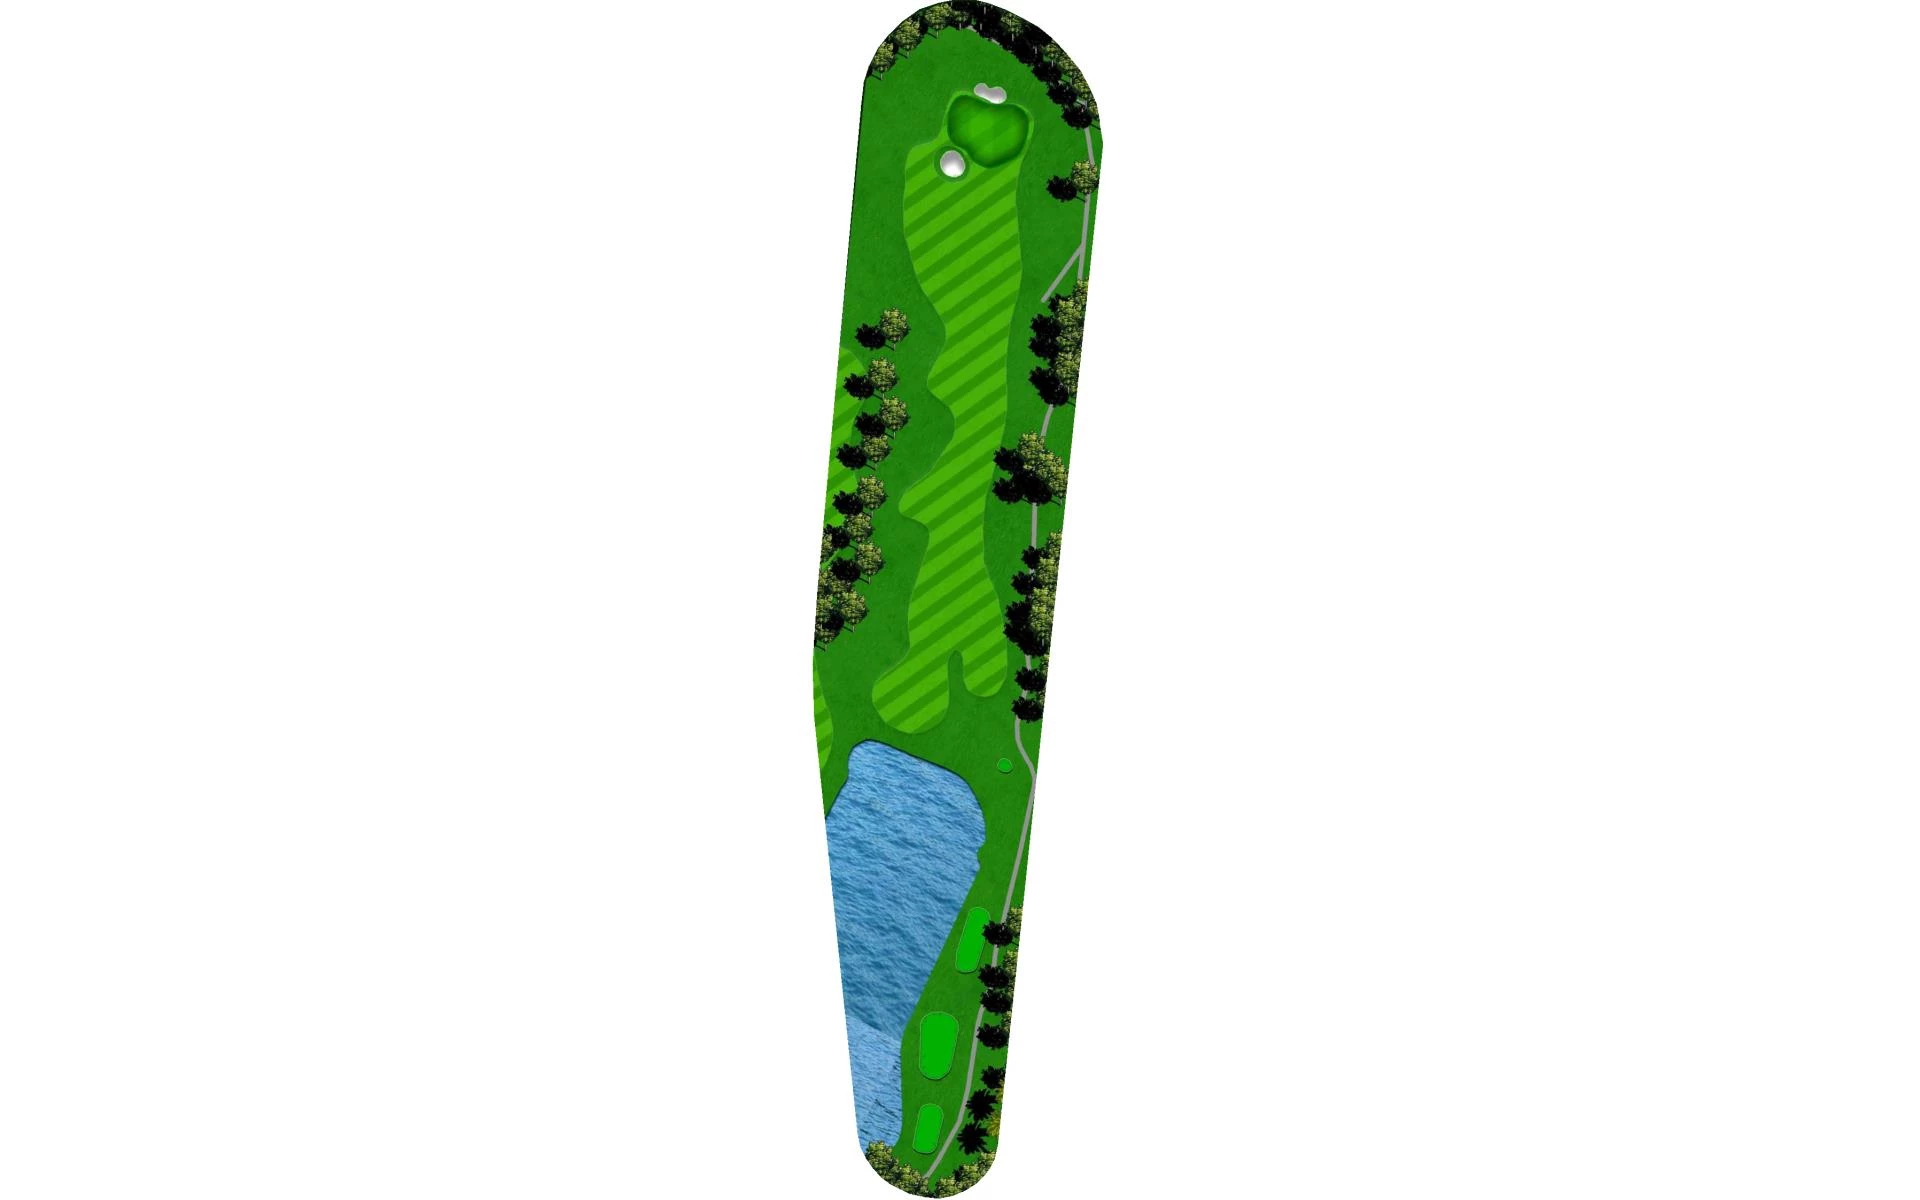
# 9 / Hole #9
Par: 5
Handicaps:
Men's 7
Women's 3
Yardage by Tee:
BLACK 501
GOLD 486
BLUE 478
WHITE 478
RED 433
Slope:
Black - 137 | Gold - 135 | White - 130 | White - Ladies 140 | Red - 124 | Red - Ladies 128 |
Pro Tips
| The final hole on the front nine is a dogleg left par 5 with water left and right off the tee. Similar to the 5th hole, players must choose whether to attack the green after a layup off the tee, or layup again leaving a wedge into a peninsula green surrounded by bunkers and water. |
# 10 / Hole #10
Par: 4
Handicaps:
Men's 12
Women's 10
Yardage by Tee:
BLACK 382
GOLD 374
BLUE 362
WHITE 347
RED 288
Slope:
Black - 137 | Gold - 135 | White - 130 | White - Ladies 140 | Red - 124 | Red - Ladies 128 |
Pro Tips
| Prevailing wind off the left makes this tight hole even tighter as out-of-bounds looms just yards off the fairway to the right. "Pipeline" demands accuracy off the tee, but also on the second shot to avoid the massive greenside bunker on the left and more out-of-bounds on the right. |
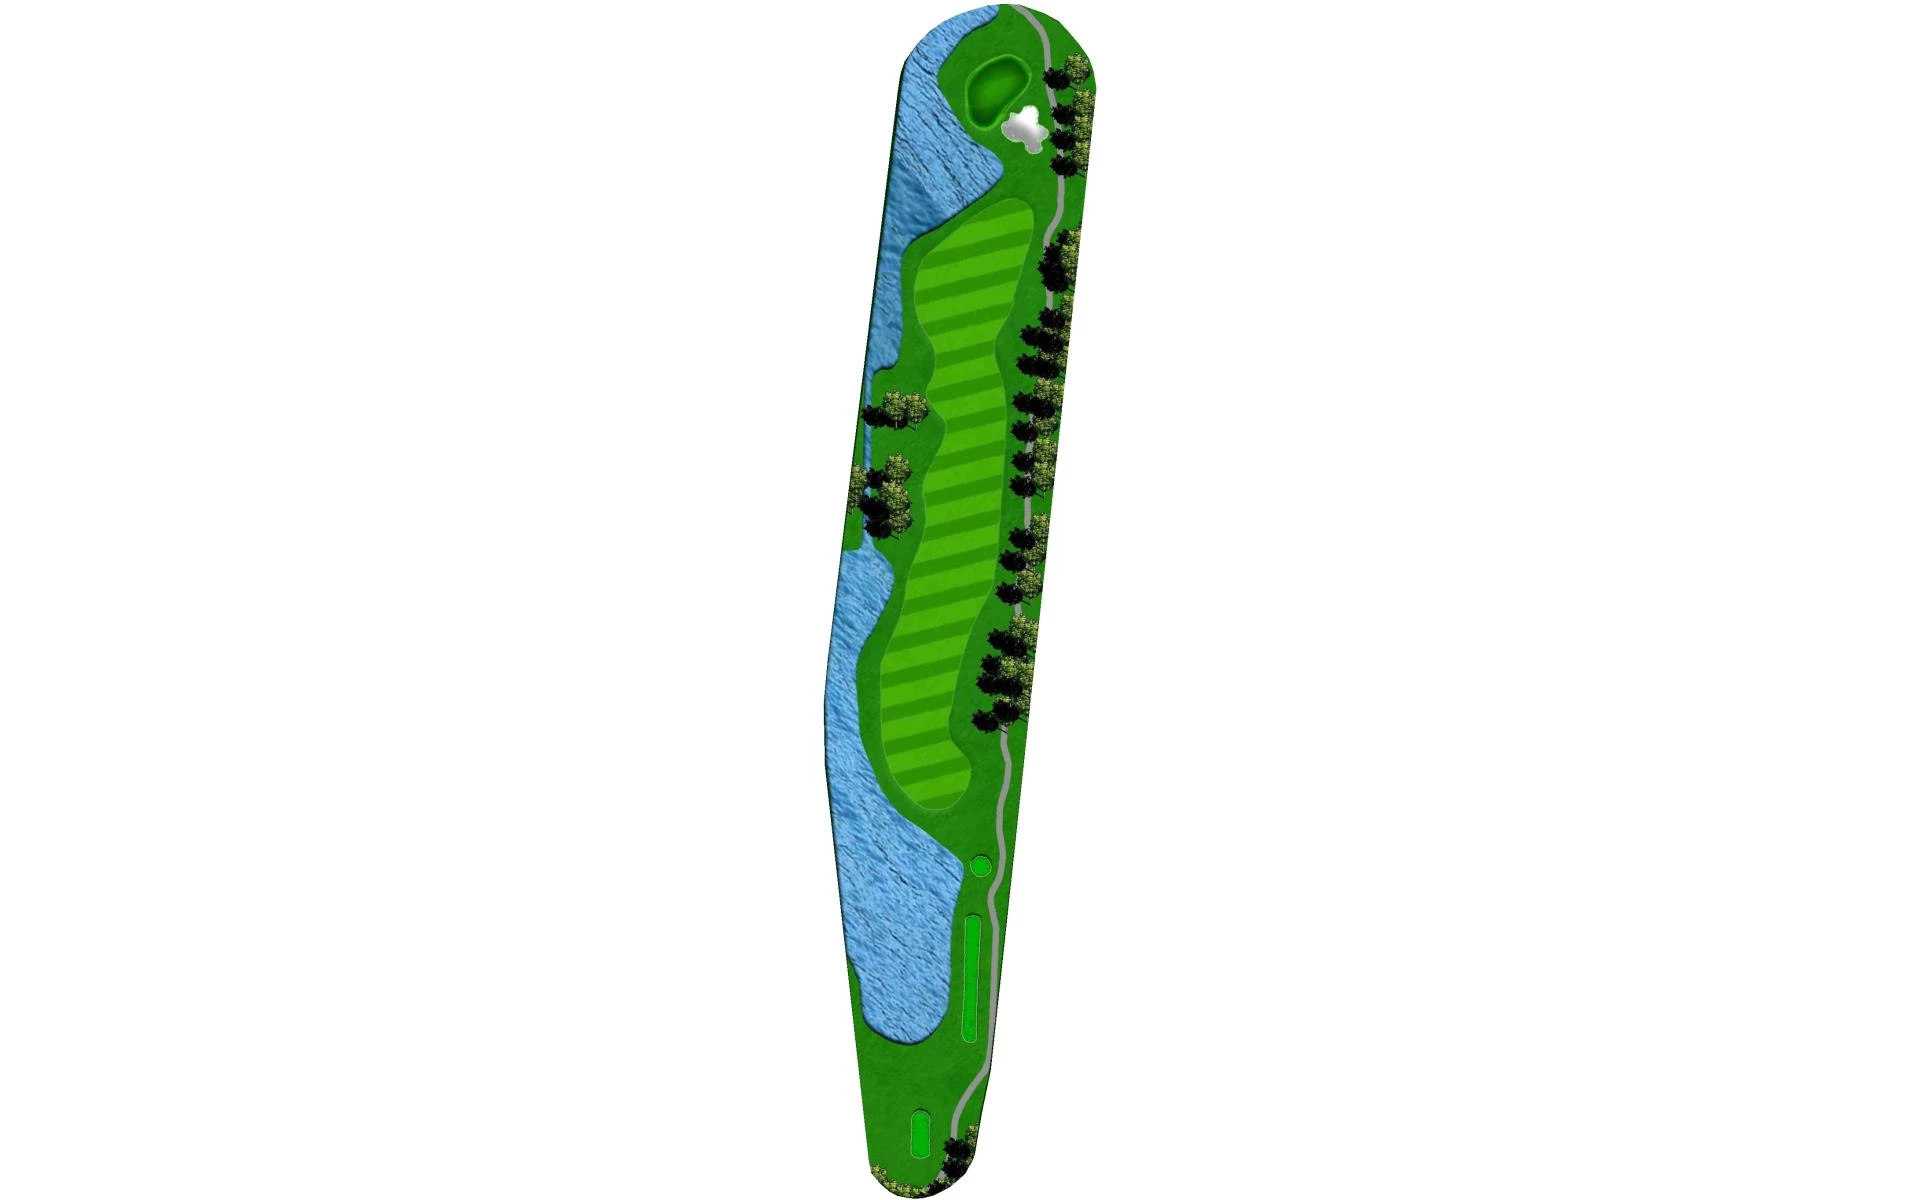
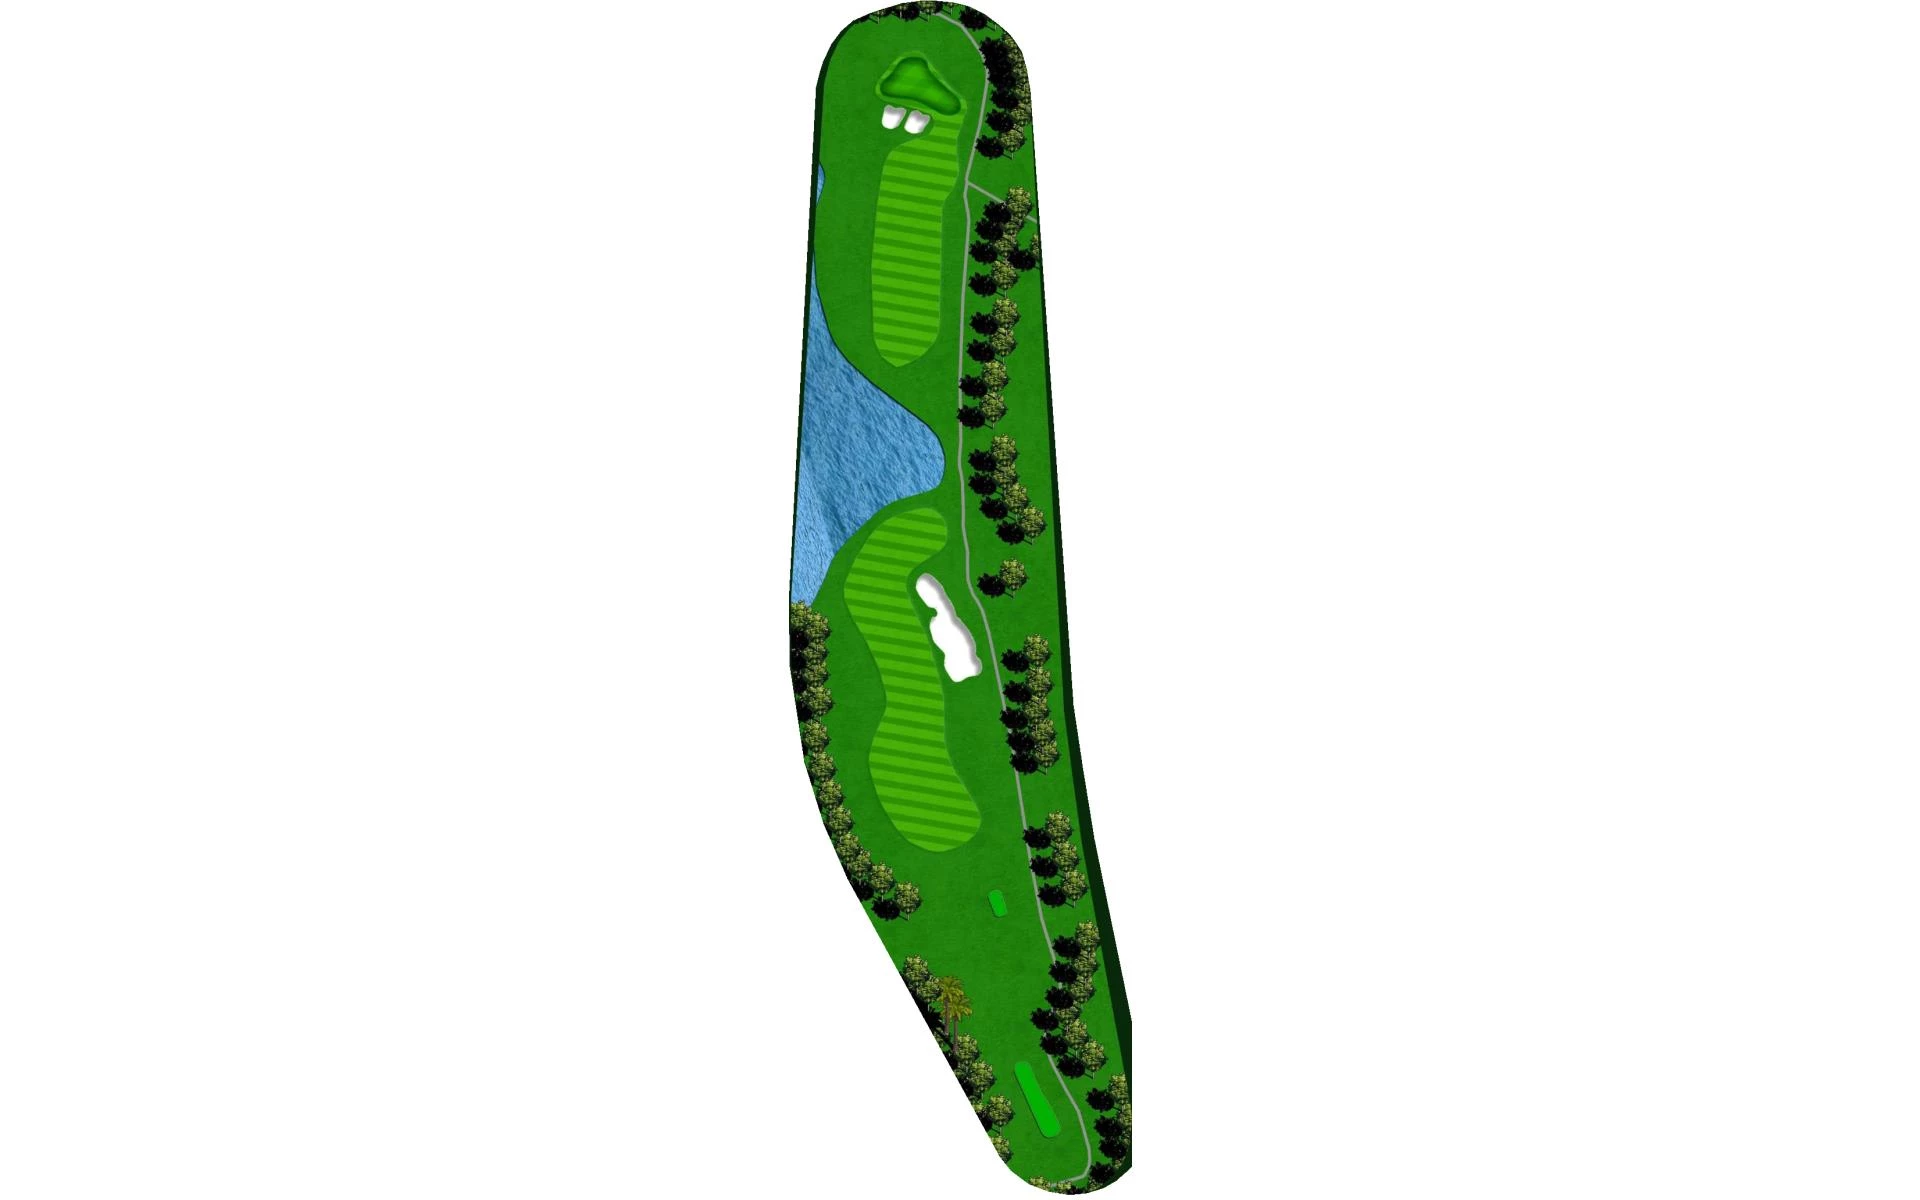
# 11 / Hole #11
Par: 4
Handicaps:
Men's 14
Women's 14
Yardage by Tee:
BLACK 373
GOLD 350
BLUE 337
WHITE 320
RED 411
Slope:
Black - 137 | Gold - 135 | White - 130 | White - Ladies 140 | Red - 124 | Red - Ladies 128 |
Pro Tips
| Finding the fairway is paramount on the short par 4 eleventh hole. Big hitters can take on the carry over the water but placing the ball into the fairway short of the large fairway bunker still leaves a short iron or wedge into this long skinny green protected by 2 greenside bunkers. |
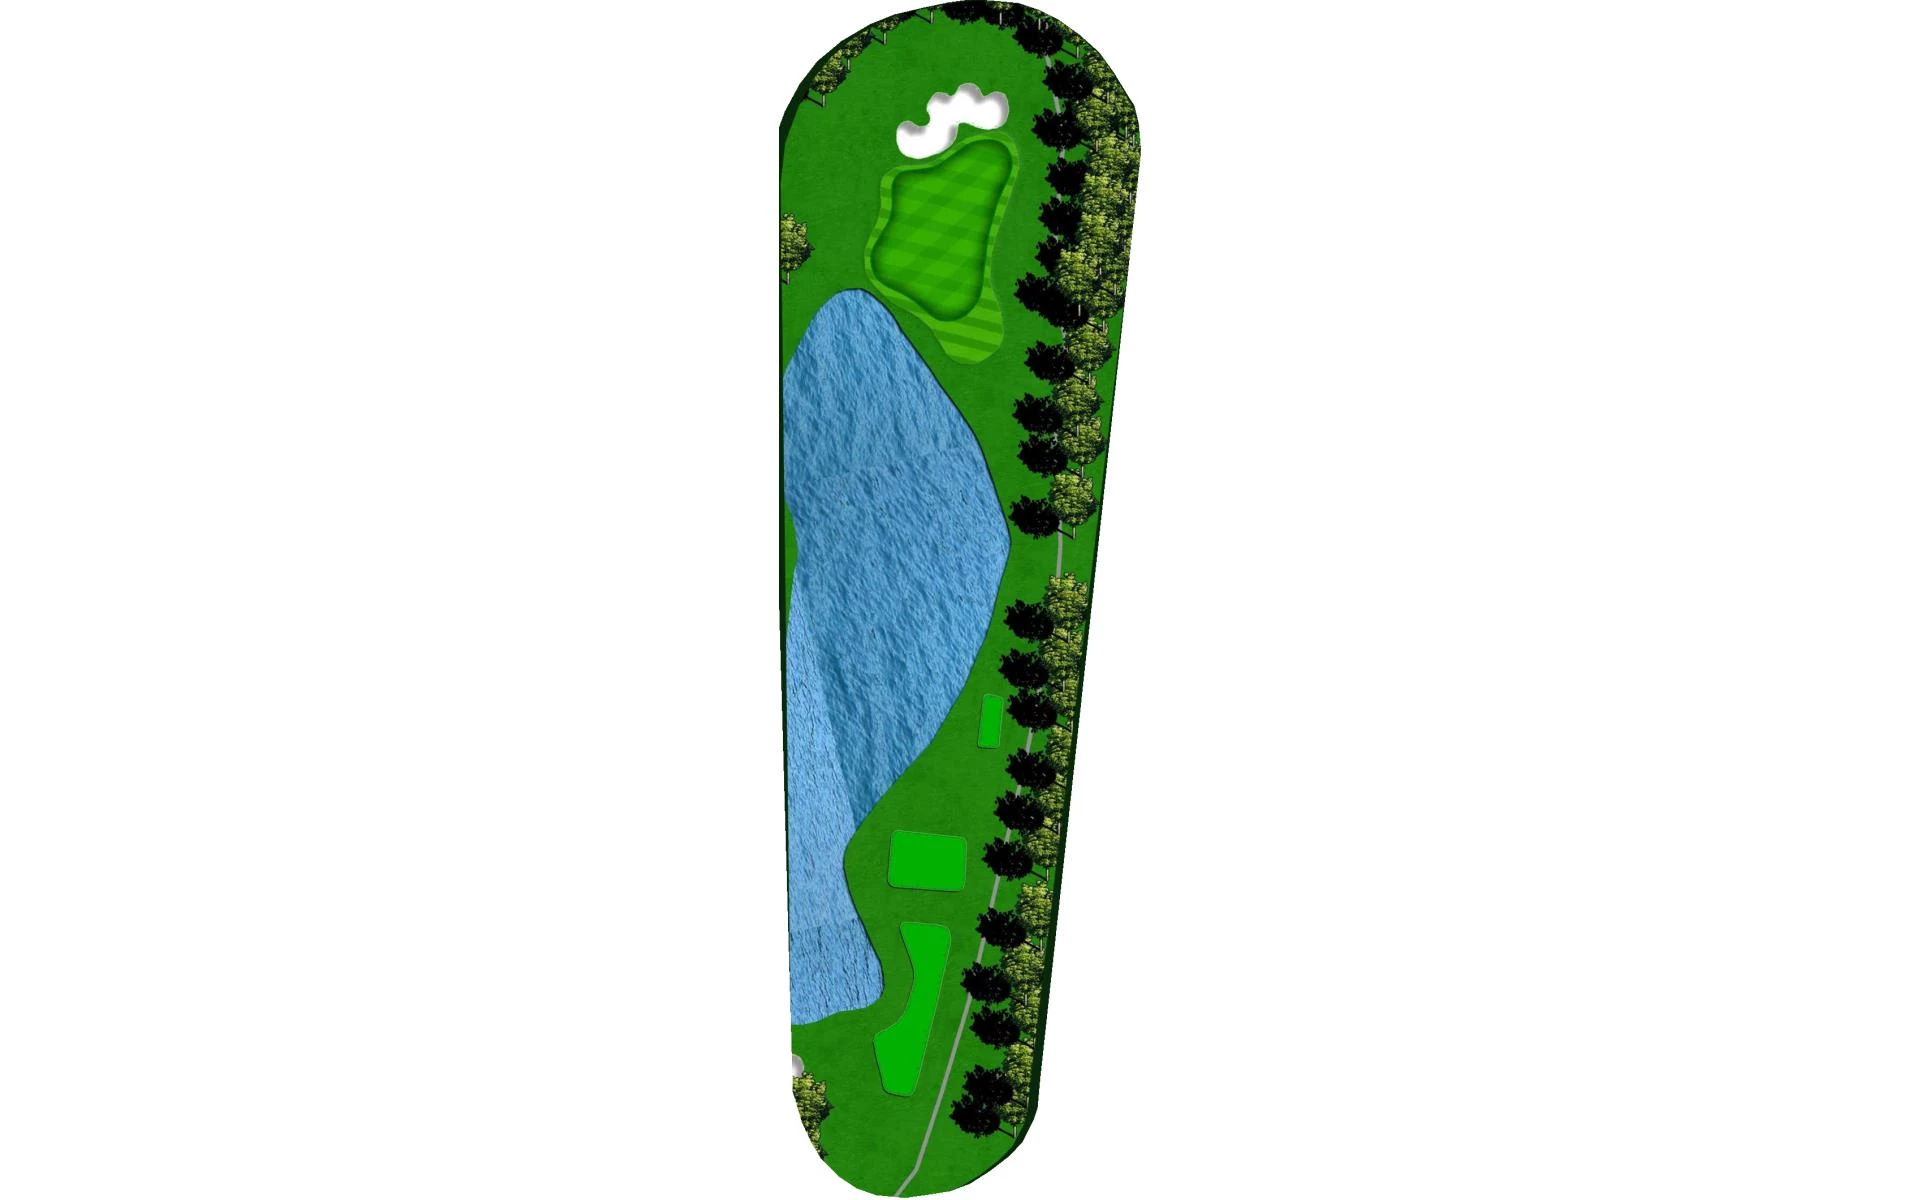
# 12 / Hole #12
Par: 5
Handicaps:
Men's 6
Women's 2
Yardage by Tee:
BLACK 518
GOLD 500
BLUE 461
WHITE 451
RED 110
Slope:
Black - 137 | Gold - 135 | White - 130 | White - Ladies 140 | Red - 124 | Red - Ladies 128 |
Pro Tips
| "Eagle's Dare" is the only par 5 that does not force players to layup off the tee and is the longest hole on the golf course. Water surrounds this elevated two-tiered green on 3 sides, out-of-bounds runs down the other, and a large greenside bunker sits just short and to the right. Players should think carefully before taking it on. |
# 13 / Hole #13
Par: 3
Handicaps:
Men's 18
Women's 18
Yardage by Tee:
BLACK 151
GOLD 140
BLUE 129
WHITE 125
RED 110
Slope:
Black - 137 | Gold - 135 | White - 130 | White - Ladies 140 | Red - 124 | Red - Ladies 128 |
Pro Tips
| The thirteenth hole is a short par 3 with a large green surrounded by bunkers. If you judge the wind correctly off the tee, birdie should be in play. |
# 14 / Hole #14
Par: 4
Handicaps:
Men's 2
Women's 6
Yardage by Tee:
BLACK 424
GOLD 401
BLUE 401
WHITE 318
RED 318
Slope:
Black - 137 | Gold - 135 | White - 130 | White - Ladies 140 | Red - 124 | Red - Ladies 128 |
Pro Tips
| Number fourteen lives up to its name, "Nightmare". A long hole made even longer by a prevailing head wind, the approach shot on this par 4 is one of the most difficult on the course. Avoiding the water and bunkers surrounding this peninsula green is hard enough, but getting it close with the multiple tiers and undulation is even harder. |
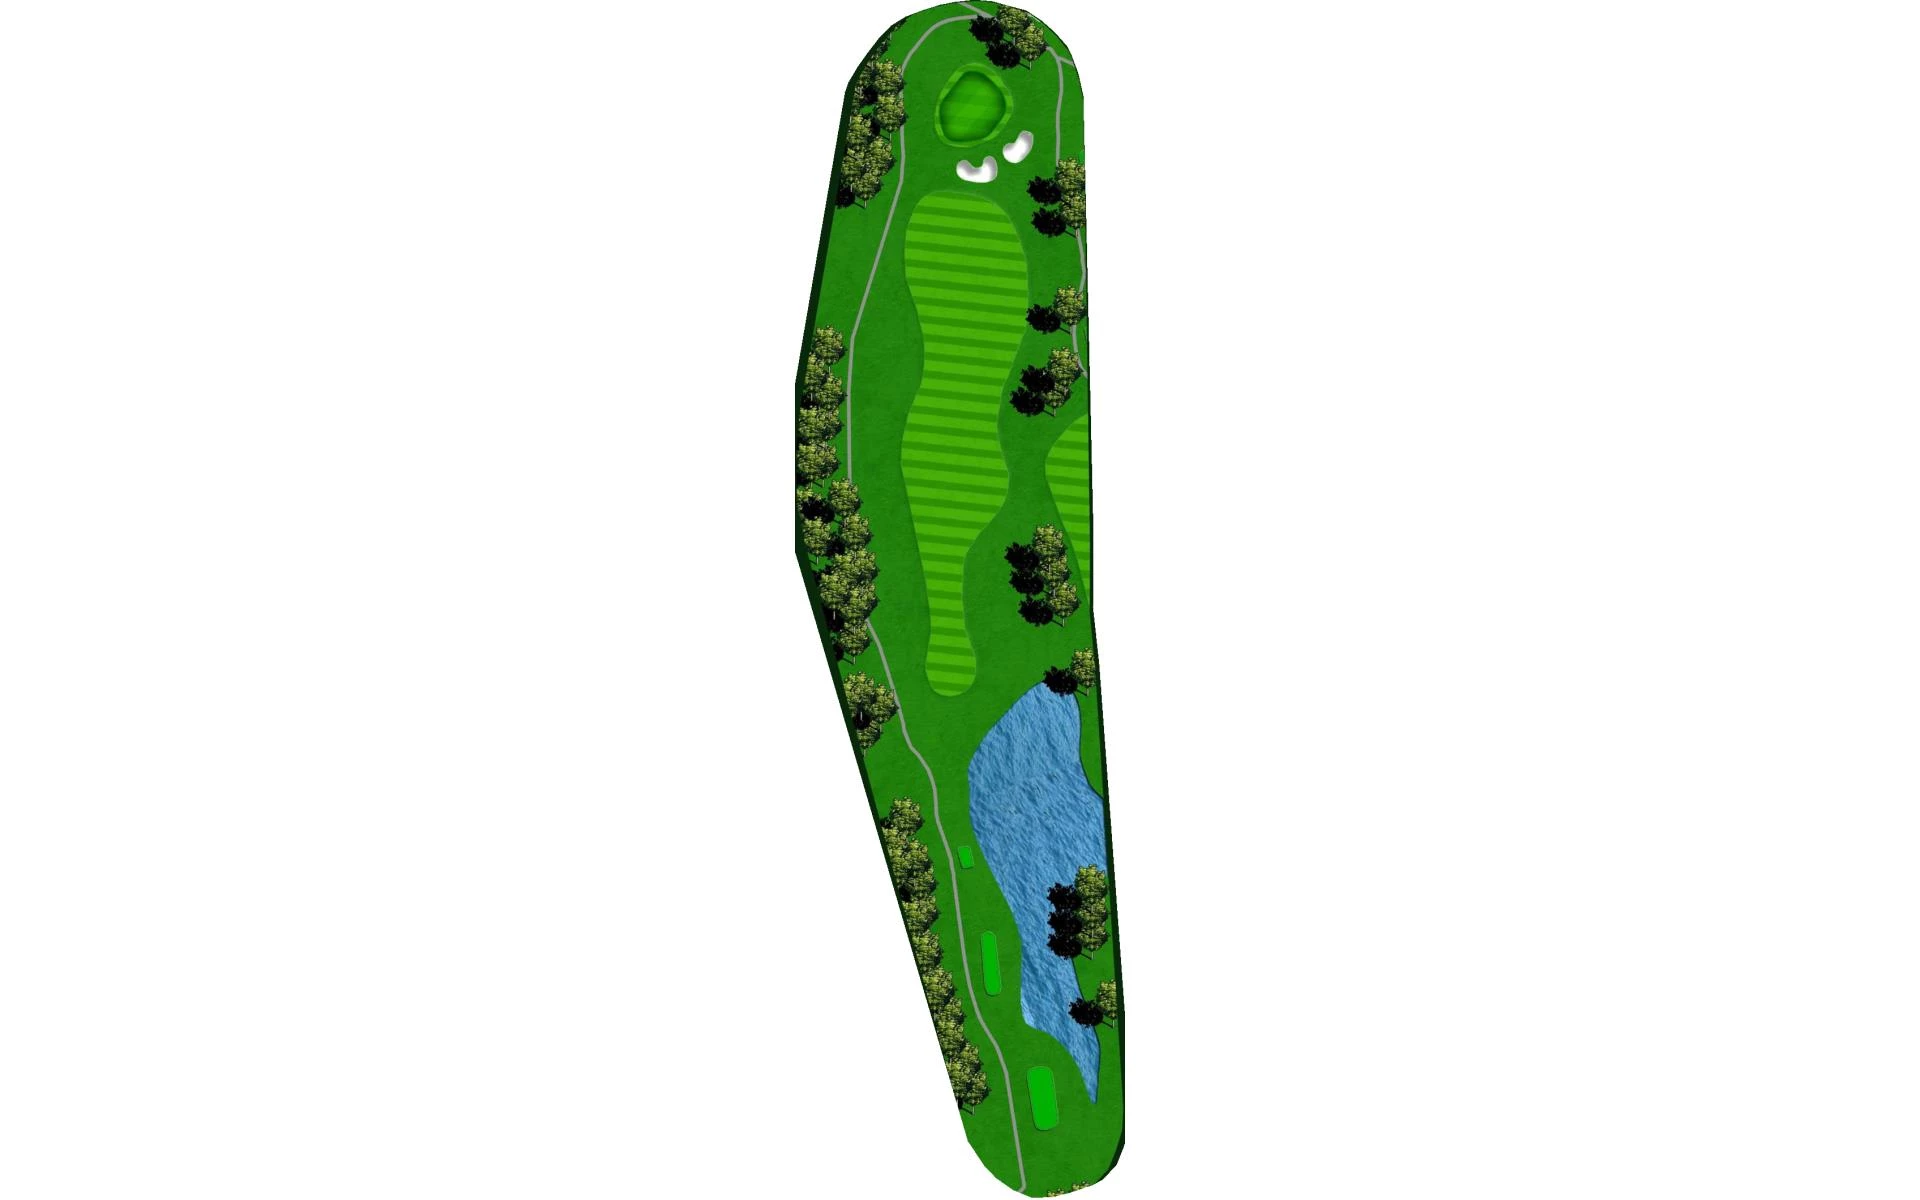
# 15 / Hole #15
Par: 4
Handicaps:
Men's 4
Women's 12
Yardage by Tee:
BLACK 441
GOLD 420
BLUE 390
WHITE 355
RED 335
Slope:
Black - 137 | Gold - 135 | White - 130 | White - Ladies 140 | Red - 124 | Red - Ladies 128 |
Pro Tips
| The fifteenth hole is a long straight par 4 that runs parallel to the 14th. A good tee shot that avoids the large pampas bush on the right, sets up a manageable approach into this large green. |
# 16 / Hole #16
Par: 5
Handicaps:
Men's 10
Women's 4
Yardage by Tee:
BLACK 495
GOLD 479
BLUE 472
WHITE 463
RED 391
Slope:
Black - 137 | Gold - 135 | White - 130 | White - Ladies 140 | Red - 124 | Red - Ladies 128 |
Pro Tips
| The final par 5 on the course, "Temptation", is the most reachable. Water divides the fairway in half and some players need less than driver off the tee. Out-of-bounds running down the right side is certainty in play and greenside bunkers short of the green stop balls from rolling up if going for it in 2. |

# 17 / Hole #17
Par: 3
Handicaps:
Men's 16
Women's 16
Yardage by Tee:
BLACK 163
GOLD 147
BLUE 129
WHITE 129
RED 110
Slope:
Black - 137 | Gold - 135 | White - 130 | White - Ladies 140 | Red - 124 | Red - Ladies 128 |
Pro Tips
| The green on "Falcon Peak" is extremely elevated and slight misses will run off and leave tough up and downs. Hit the green and you should have a good opportunity at birdie. |
# 18 / Hole #18
Par: 4
Handicaps:
Men's 8
Women's 8
Yardage by Tee:
BLACK 449
GOLD 437
BLUE 411
WHITE 386
RED 319
Slope:
Black - 137 | Gold - 135 | White - 130 | White - Ladies 140 | Red - 124 | Red - Ladies 128 |
Pro Tips
| "Bagpipes" is a long par 4 that sets up for a challenging finish. A good drive leaves a long approach into yet another peninsula green. Extreme undulation in the middle parts of the green make placement on the second shot paramount to success with the putter. |