White / Blue Course
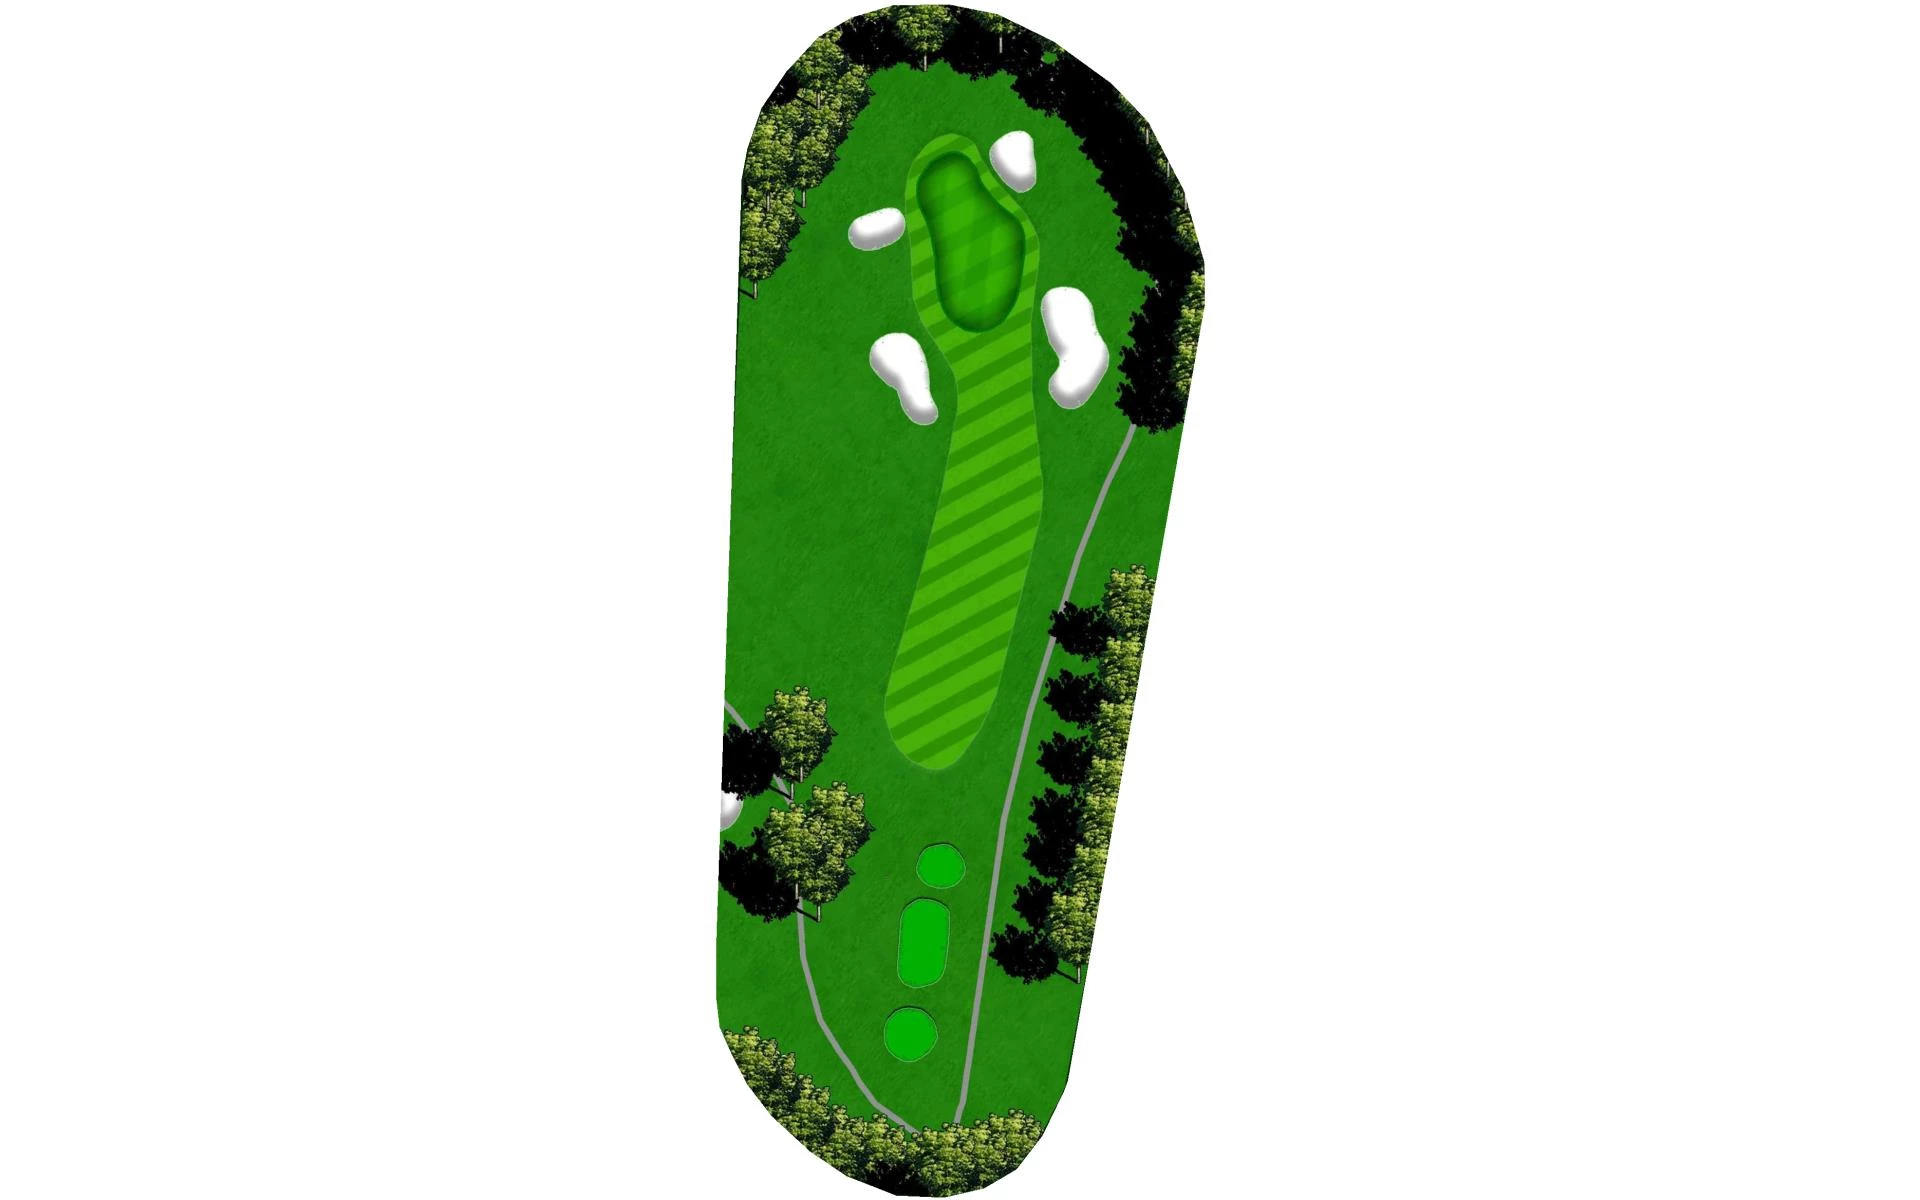
# 1 / Hole #1
Par: 3
Yardage by Tee:
Blue 145
Gold 116
Red 122
White 137
Pro Tips
Take an extra club along, as this hole plays deceptively more uphill than it looks.
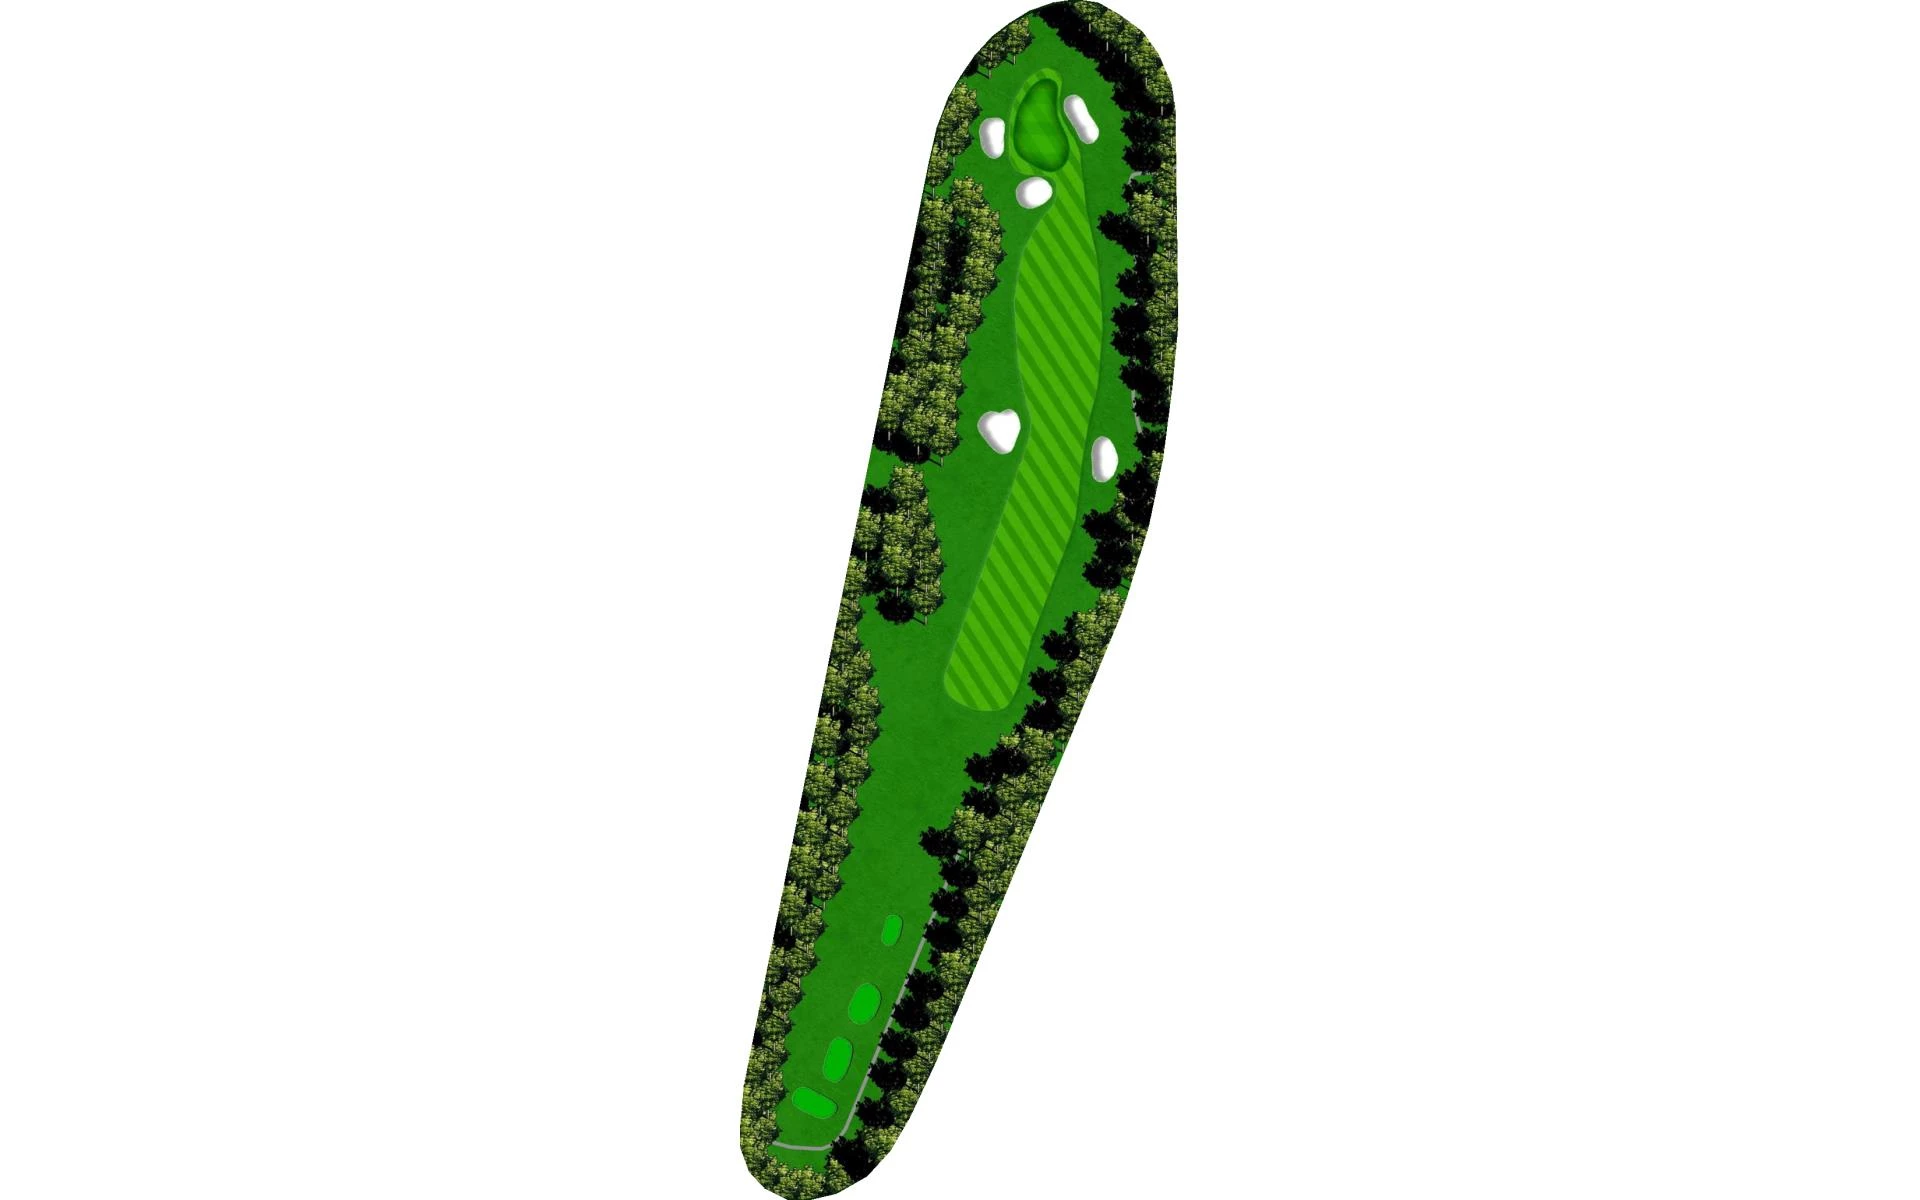
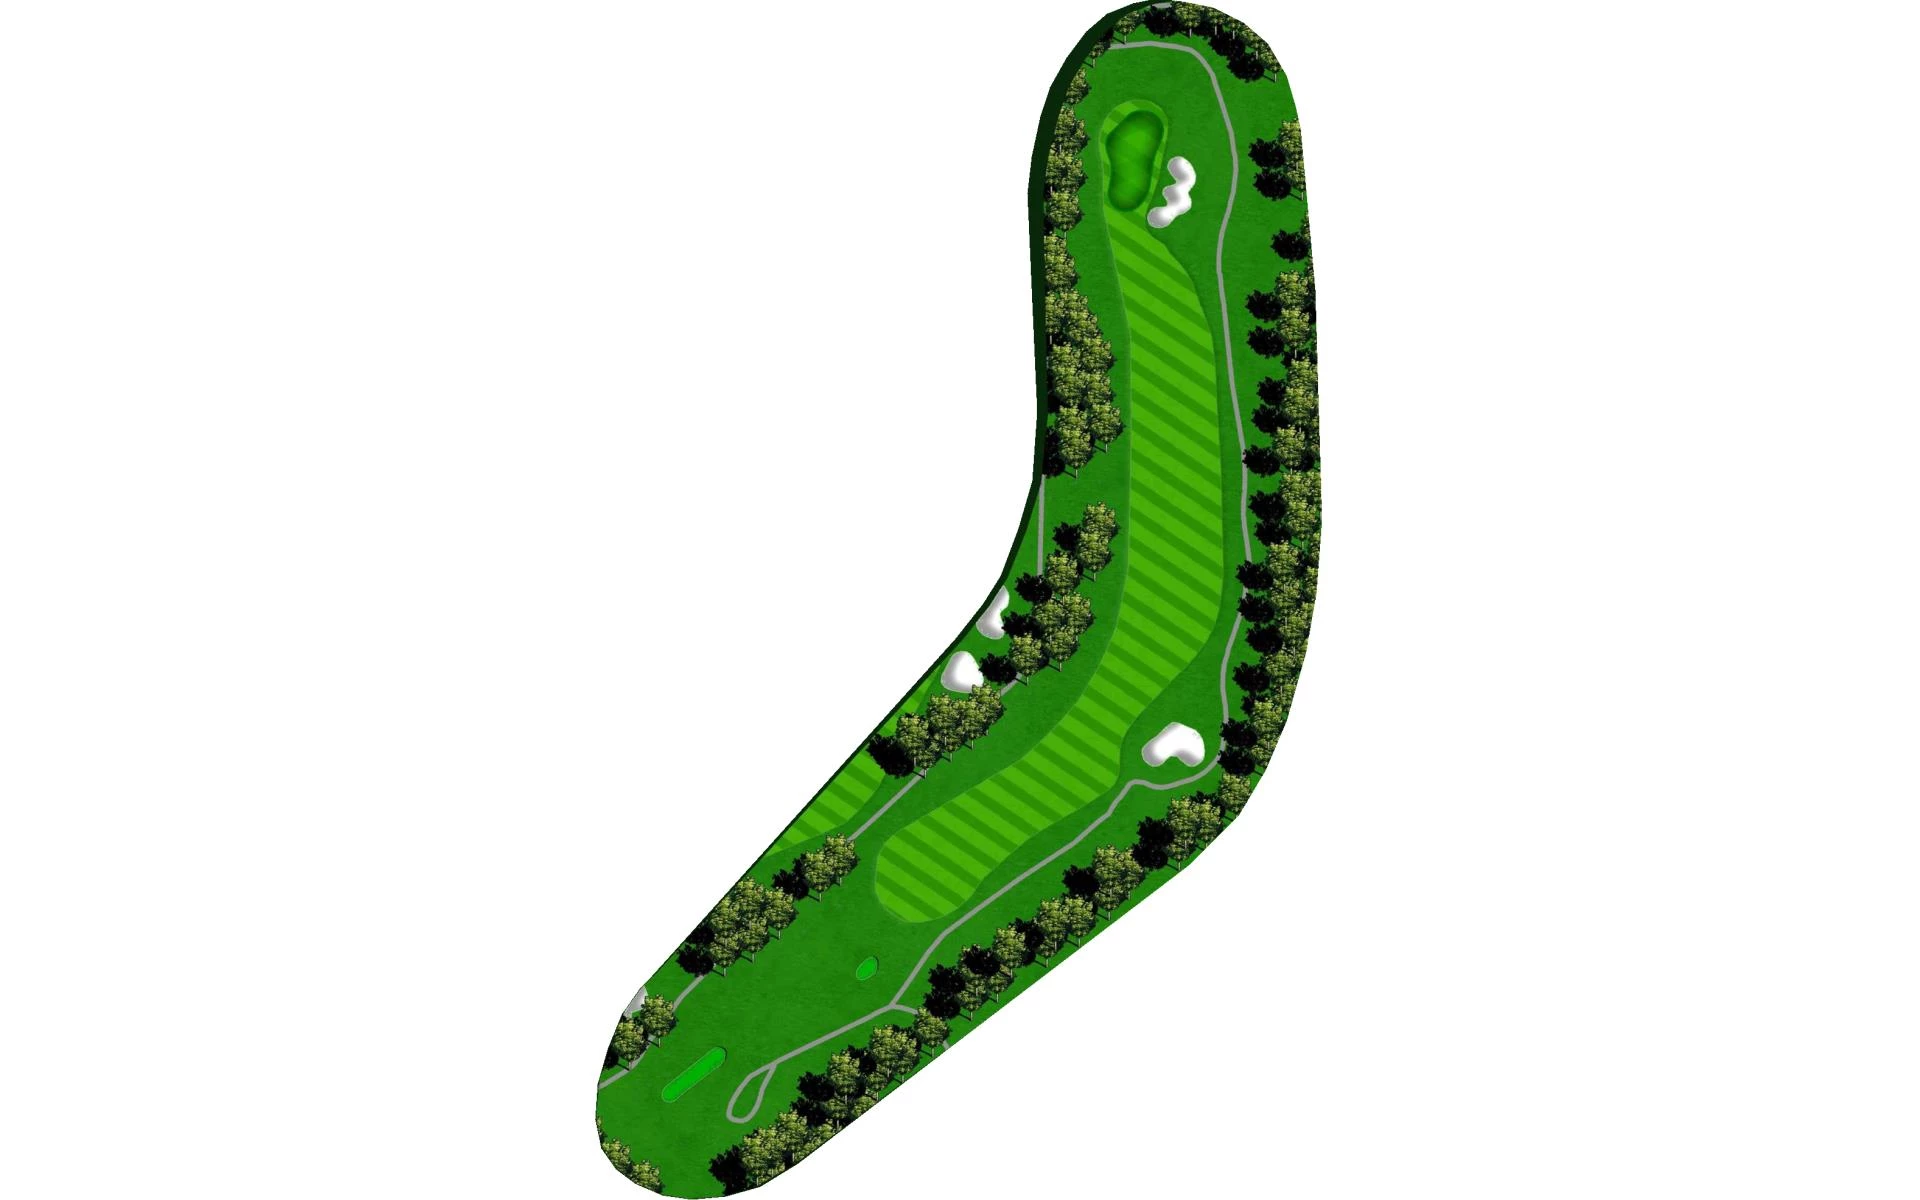
# 2 / Hole #2
Par: 4
Yardage by Tee:
Blue 340
Gold 275
Red 315
White 325
Pro Tips
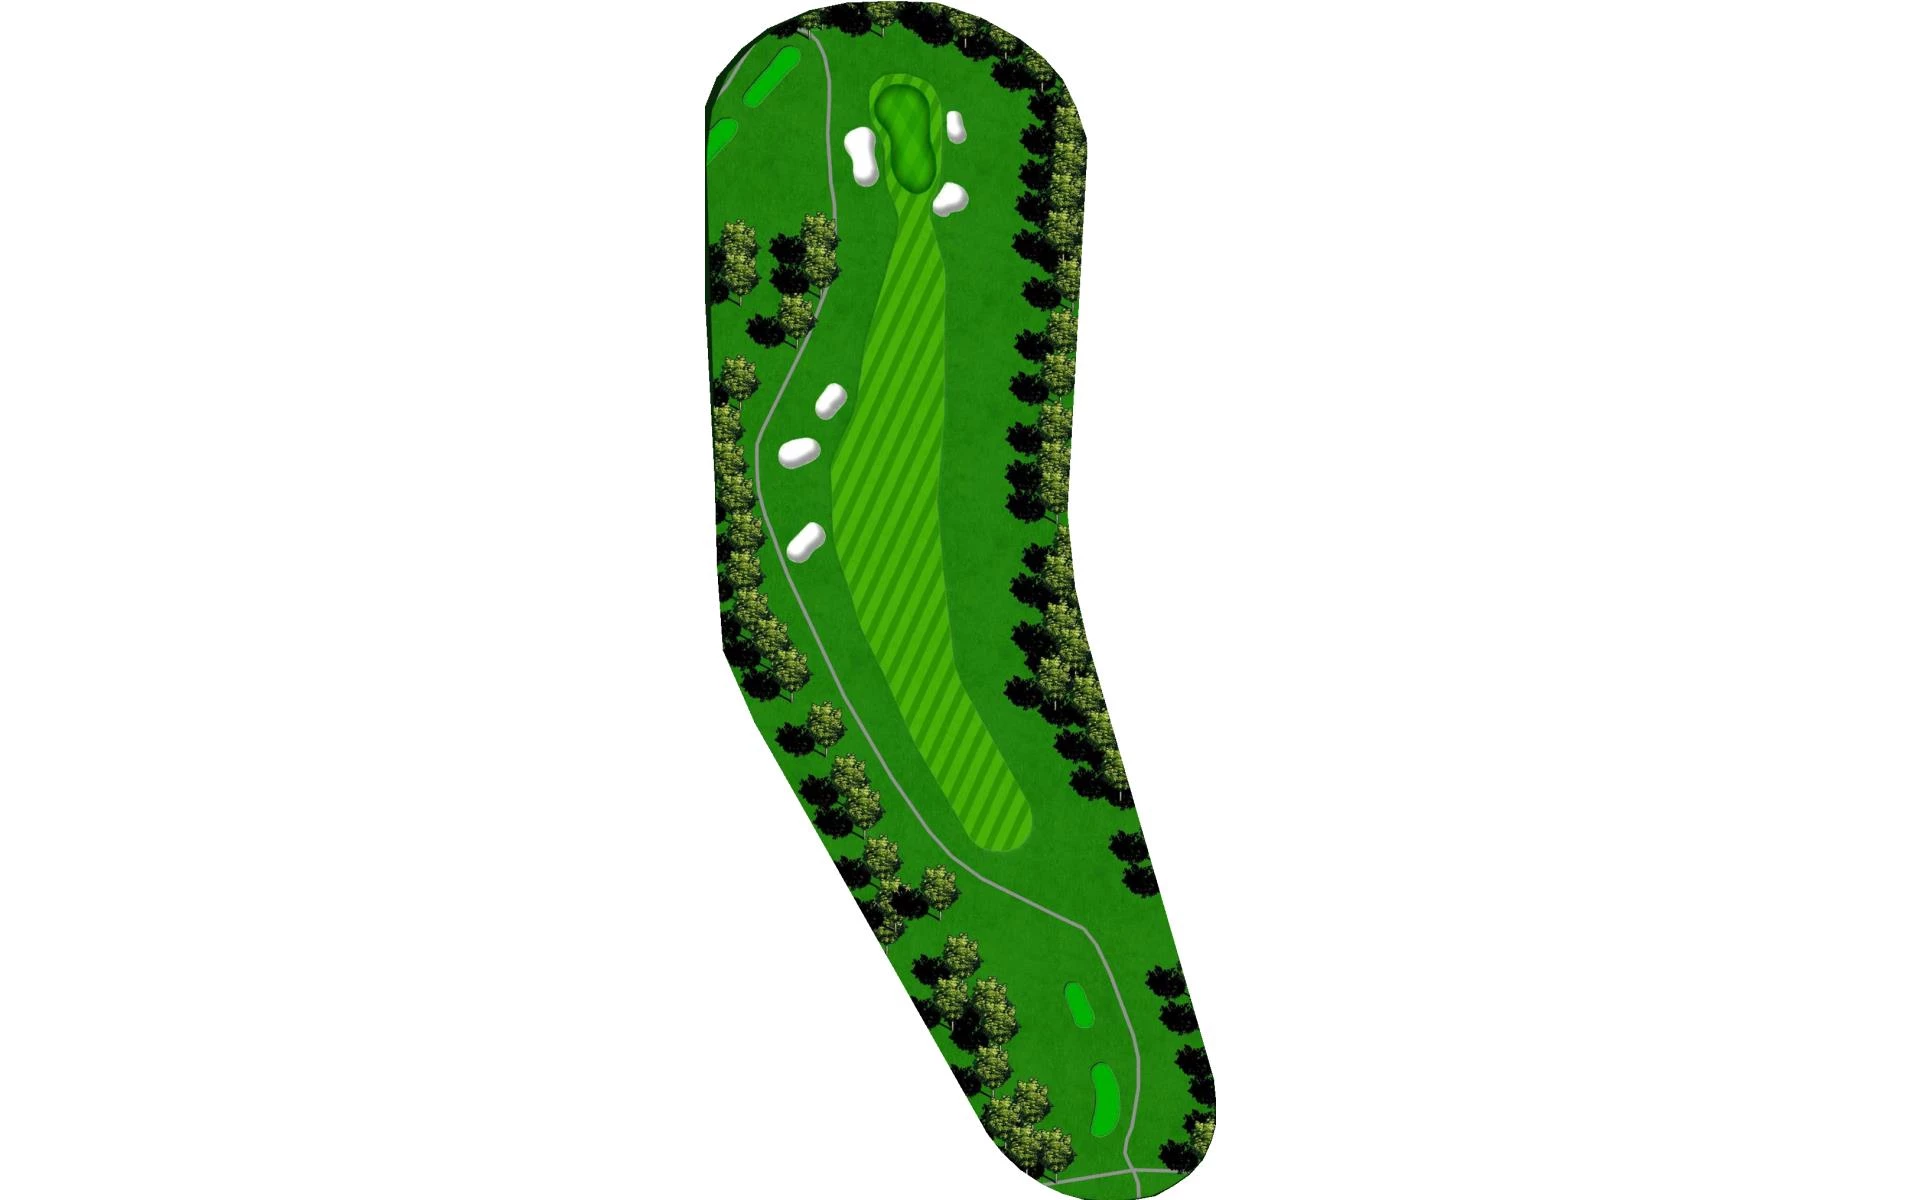
Accuracy off the tee is crucial to avoid the fairway bunkers. The approach shot plays uphill, so hit enough club so you don’t leave it short in front of the bunker.
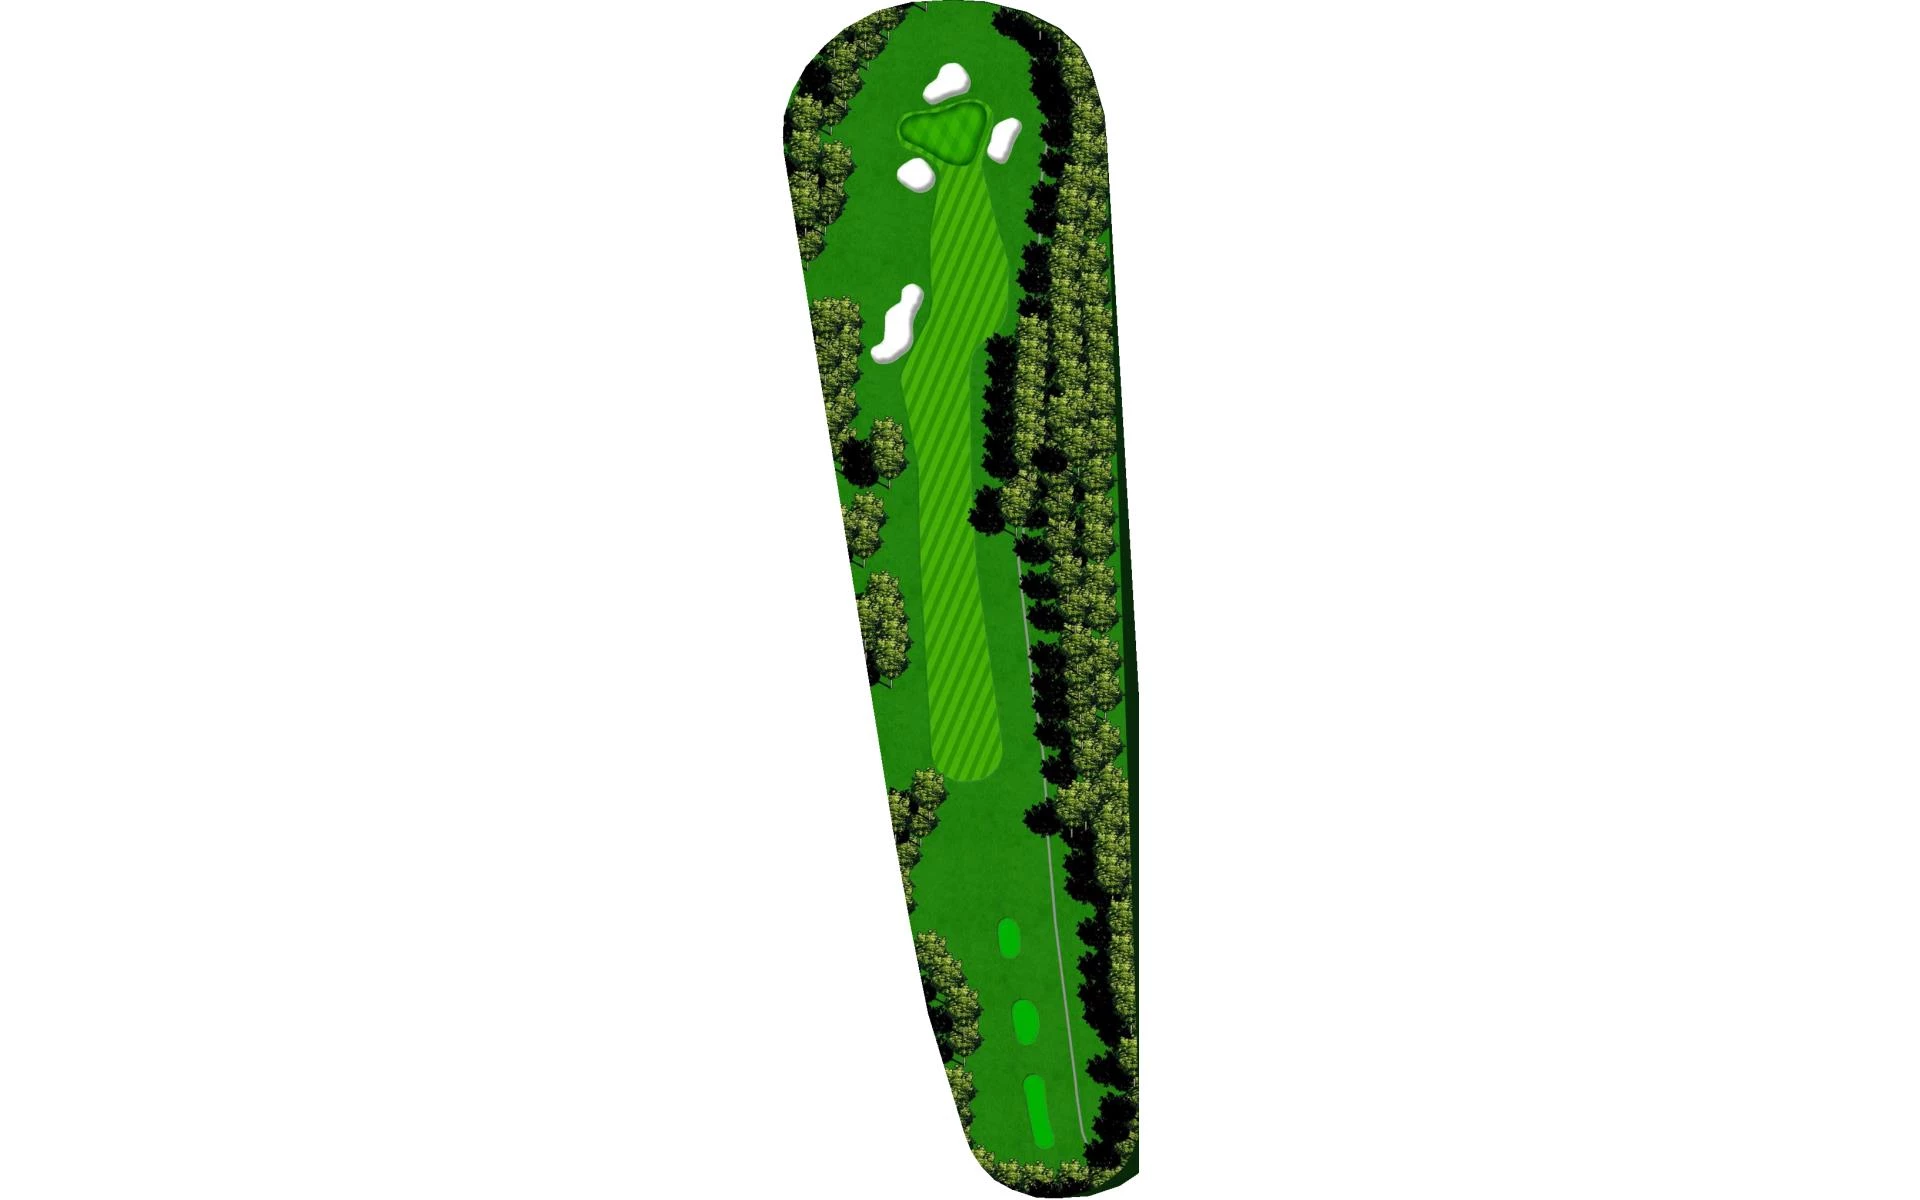
# 3 / Hole #3
Par: 4
Yardage by Tee:
Blue 361
Gold 284
Red 293
White 325
Pro Tips
Favor the left half of a very narrow fairway in order to have a good look at the green on your approach.
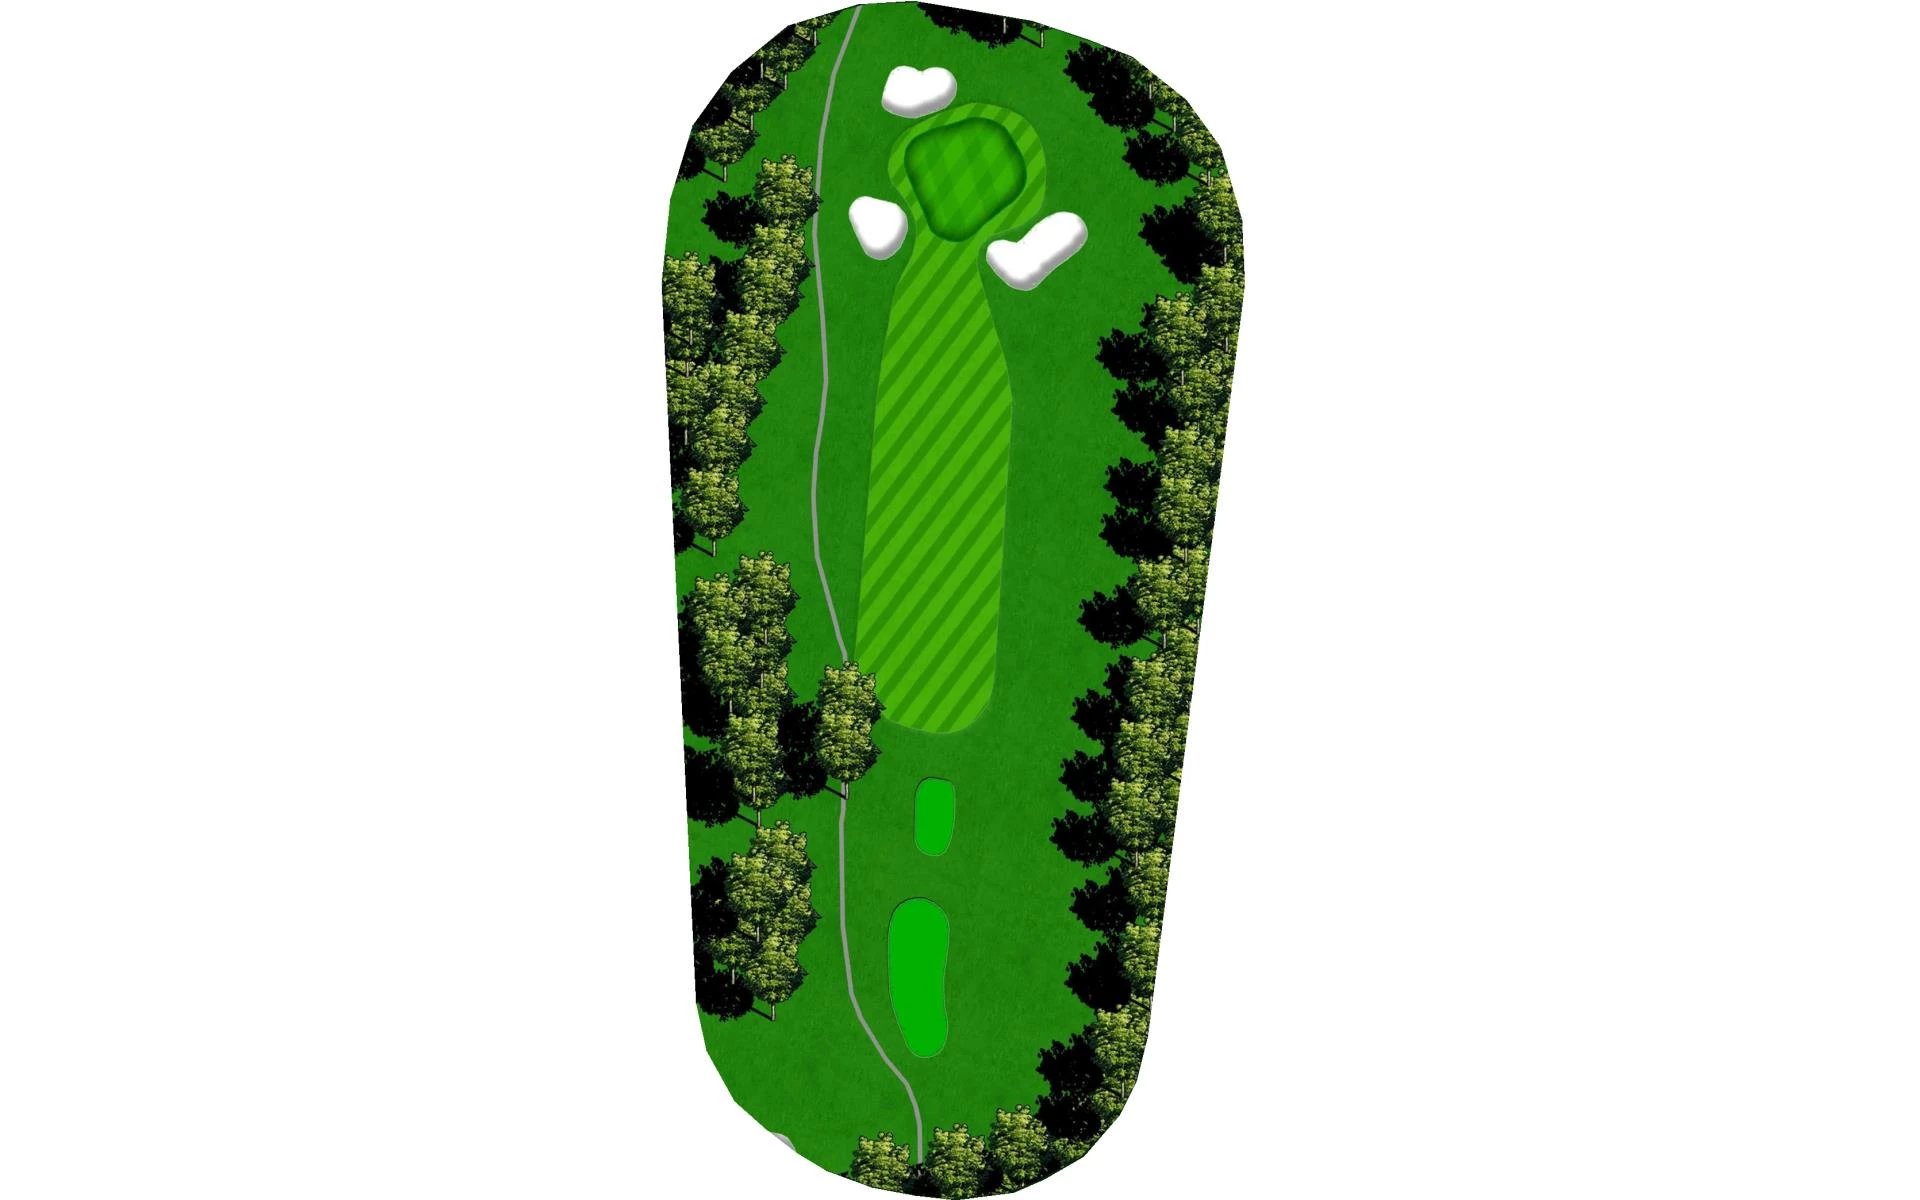
# 4 / Hole #4
Par: 3
Yardage by Tee:
Blue 170
Gold 120
Red 132
White 154
Pro Tips
This hole usually plays into the wind, but be careful as long or left can end up out of bounds.
# 5 / Hole #5
Par: 4
Yardage by Tee:
Blue 336
Gold 288
Red 298
White 324
Pro Tips
A risk/reward tee shot. If you can successfully carry the trees on your drive you’ll have a short approach. If not, play to the left of the fairway. Beware of the large pine tree guarding the green on the left side.
# 6 / Hole #6
Par: 4
Yardage by Tee:
Blue 403
Gold 288
Red 348
White 377
Pro Tips
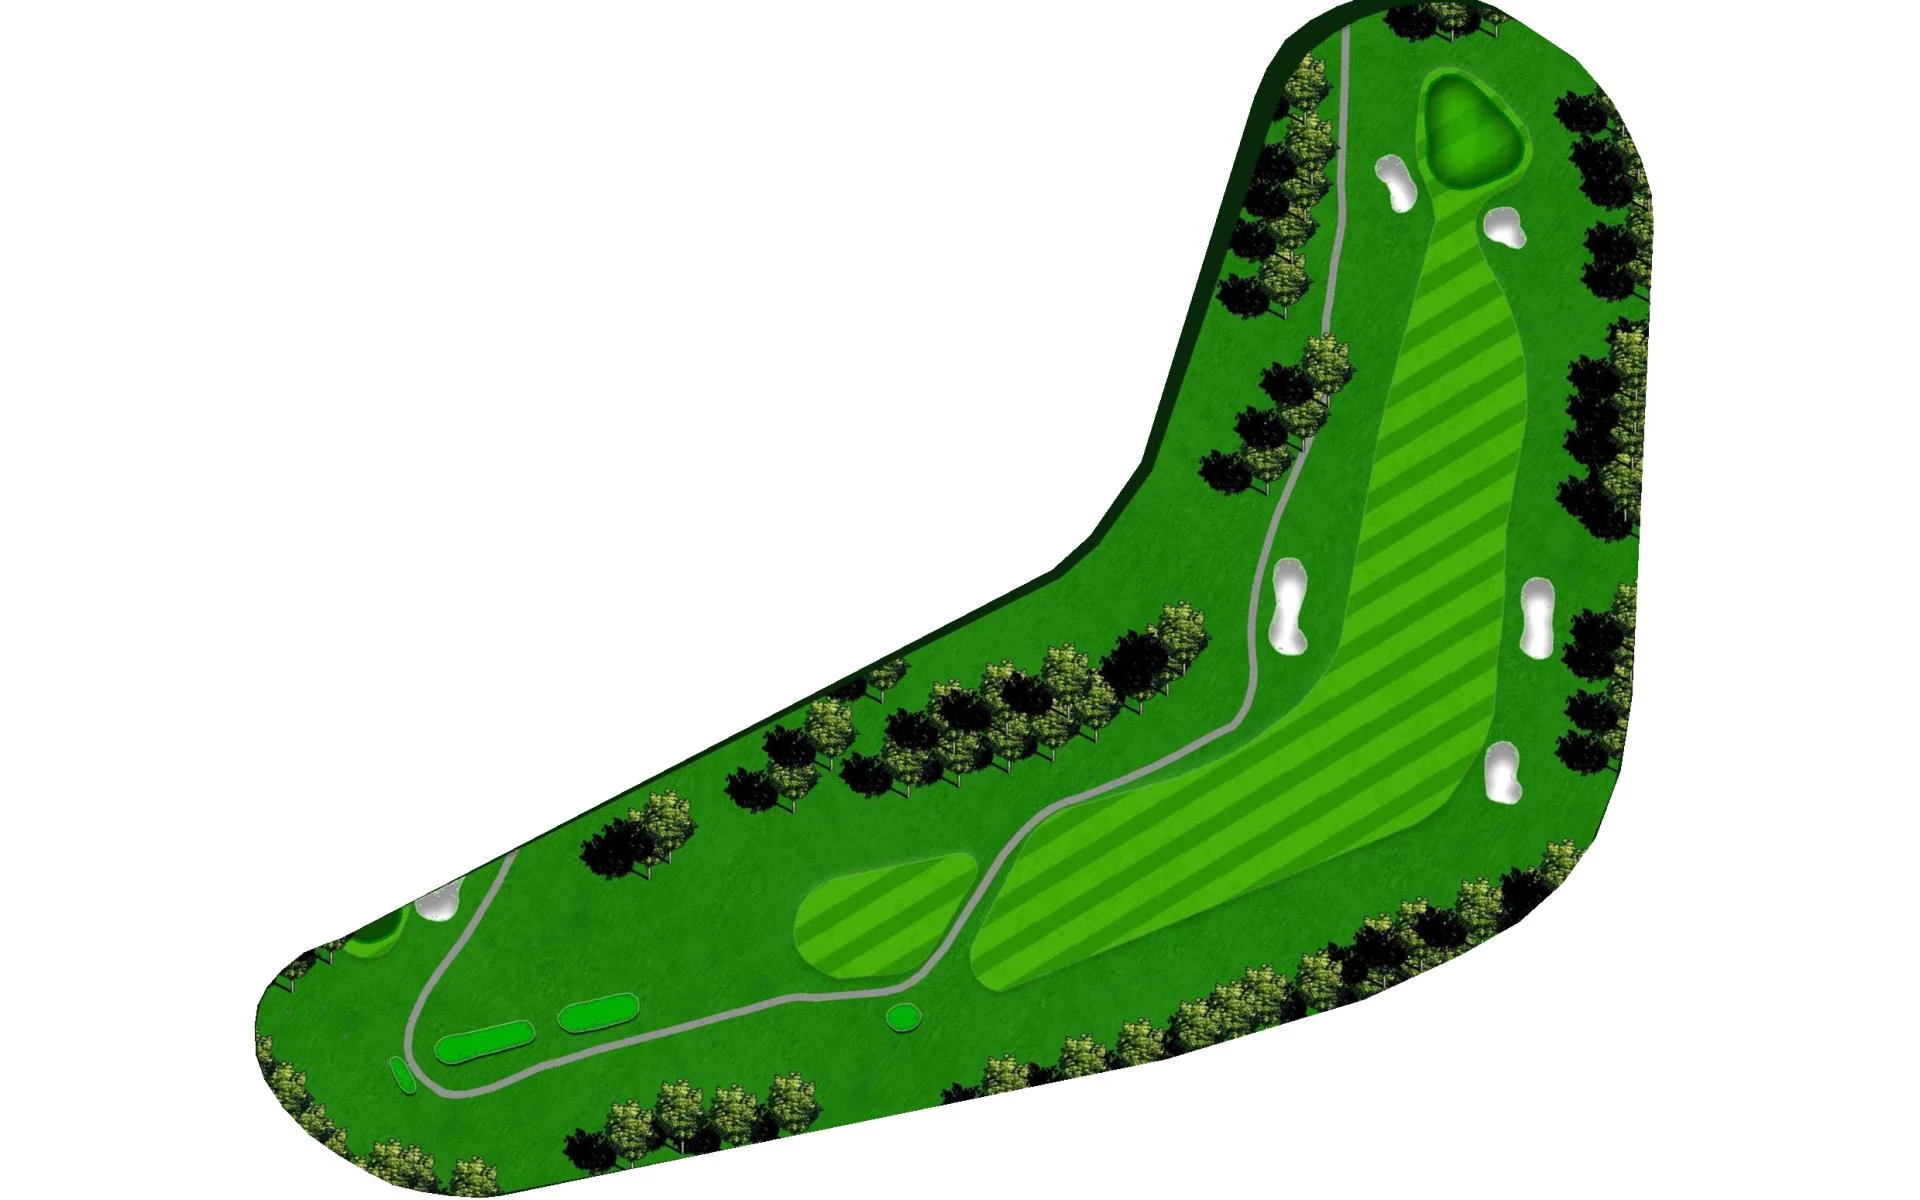
This hole also offers a risk/reward tee shot. If you dare to choose to cut the corner, the risk is the out of bounds along the left. A smart play on your tee shot is to hit right of the 150-yard marker.
# 7 / Hole #7
Par: 4
Yardage by Tee:
Blue 303
Gold 258
Red 268
White 289
Pro Tips
A short par 4 that requires an accurate tee shot of 180 to 200 yards. The approach shot is most critical, with a two-tier green and a pond short of the green.
# 8 / Hole #8
Par: 5
Yardage by Tee:
Blue 546
Gold 410
Red 448
White 519
Pro Tips
A par 5 that can be reached in two by long hitters. Favor the right side of the fairway to have a chance to go for in two. Second shots will roll out left so be careful.
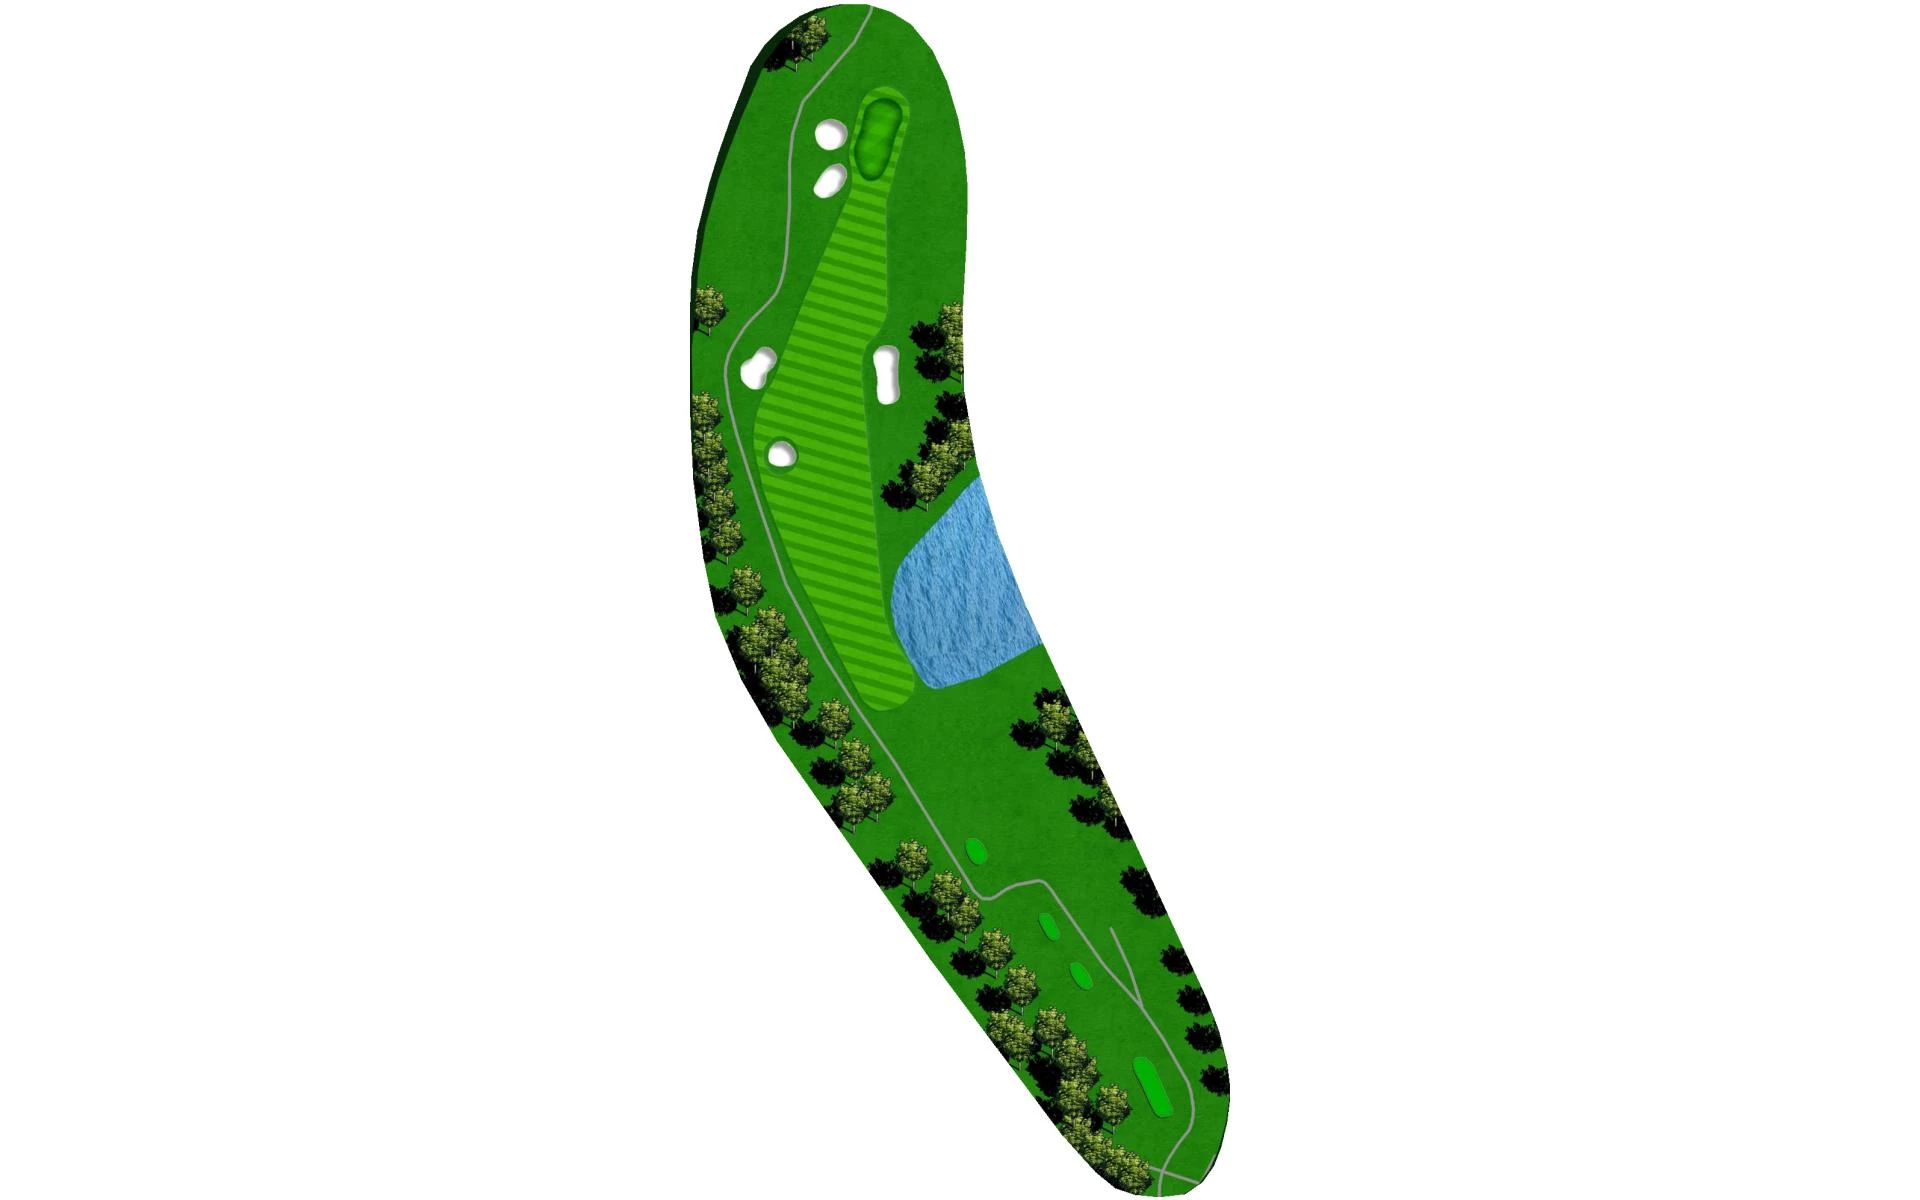
# 9 / Hole #9 / Signature Hole
Par: 4
Yardage by Tee:
Blue 381
Gold 272
Red 301
White 323
Pro Tips
The tee shot here introduces players to beautiful Lake Conroe. Just keep your eyes on the left half of the fairway on your tee ball. The approach plays uphill to a narrow green.

# 10 / Hole #10
Par: 4
Yardage by Tee:
Blue 389
Gold 276
Red 357
White 377
Pro Tips
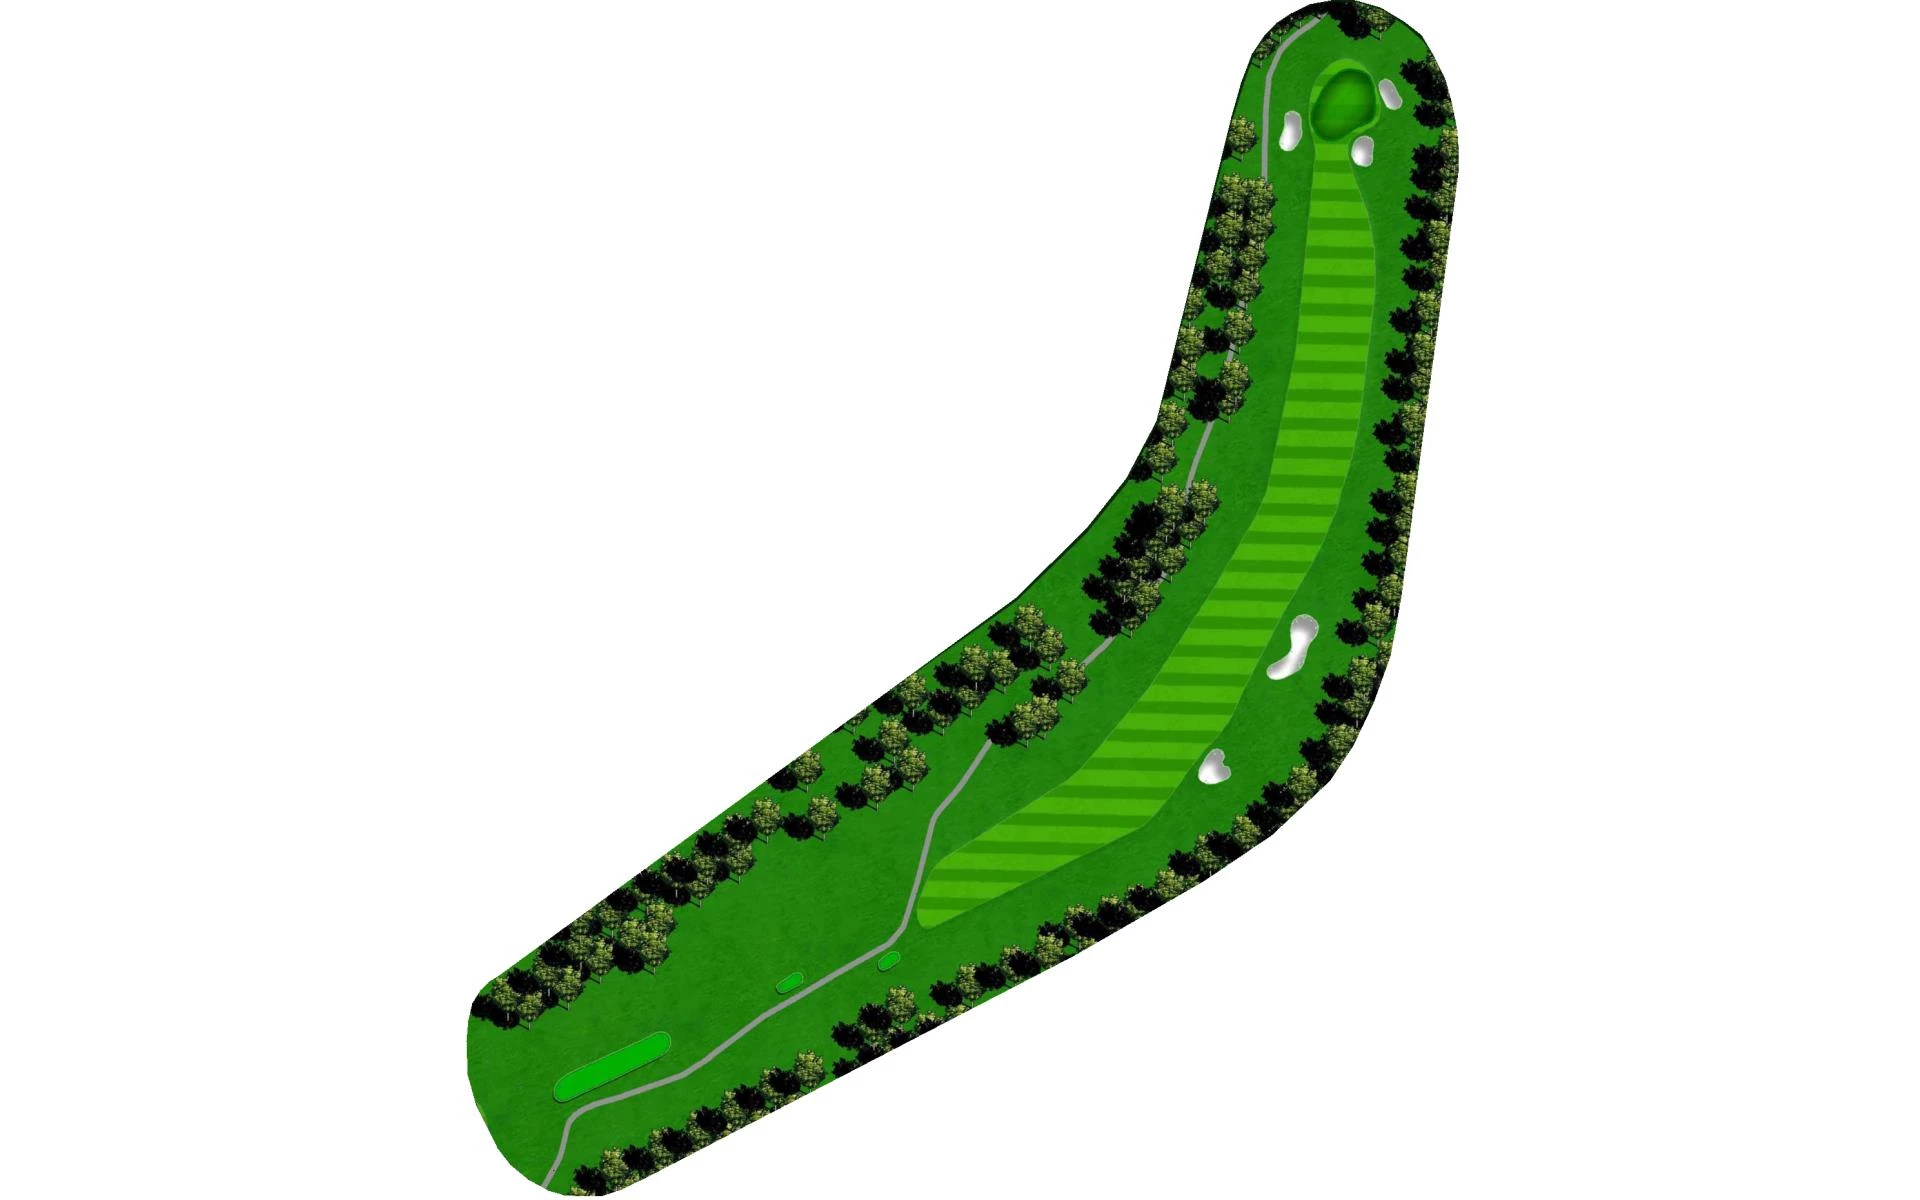
A par 4 dogleg right, this hole features an extreme uphill tee shot and an approach shot back downhill. The entire hole is guarded by trees both left and right.
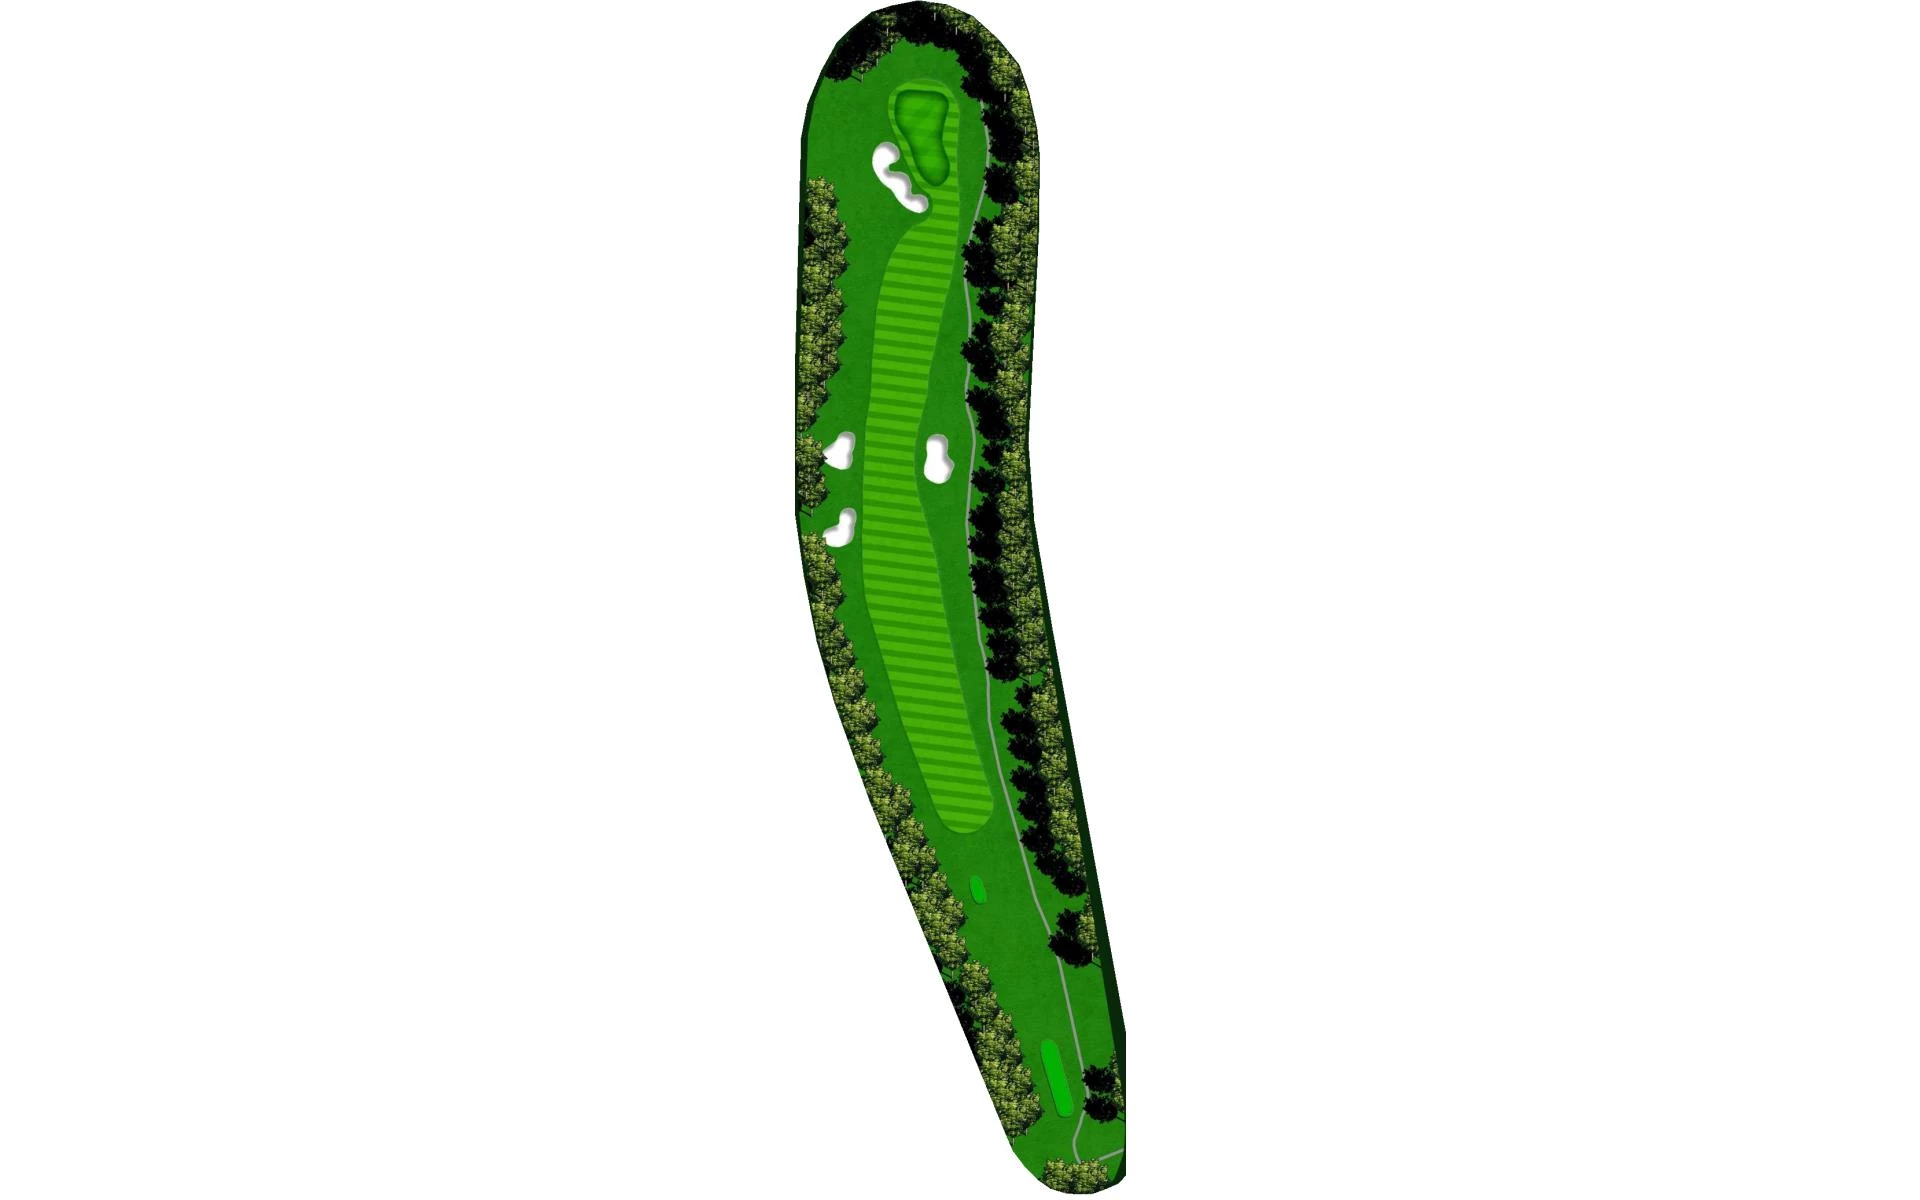
# 11 / Hole #11
Par: 4
Yardage by Tee:
Blue 383
Gold 292
Red 360
White 373
Pro Tips
A par 4 with a slight dogleg right. The trees left of the fairway make hitting the green in regulation improbable. A green-side left bunker is one to avoid.
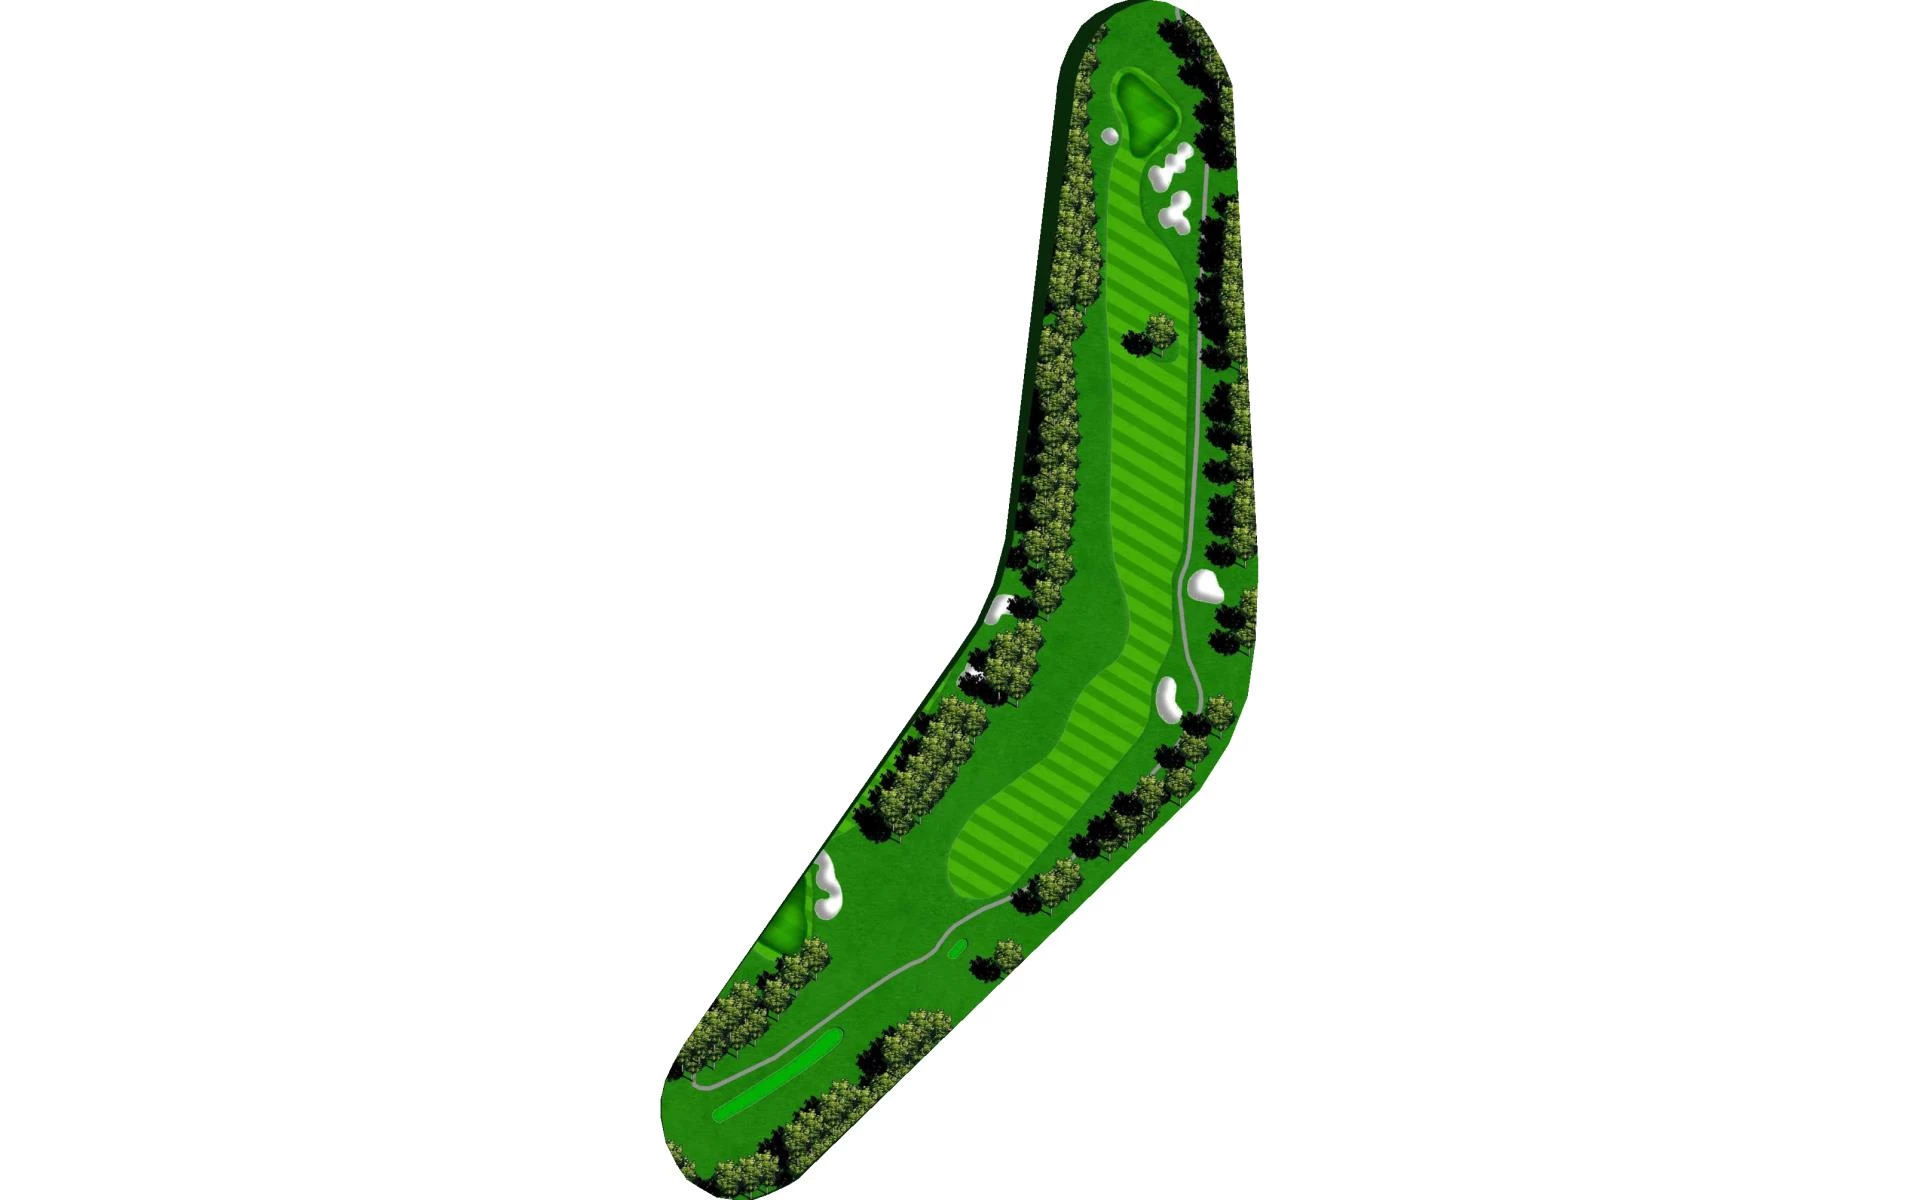
# 12 / Hole #12
Par: 5
Yardage by Tee:
Blue 493
Gold 379
Red 448
White 473
Pro Tips
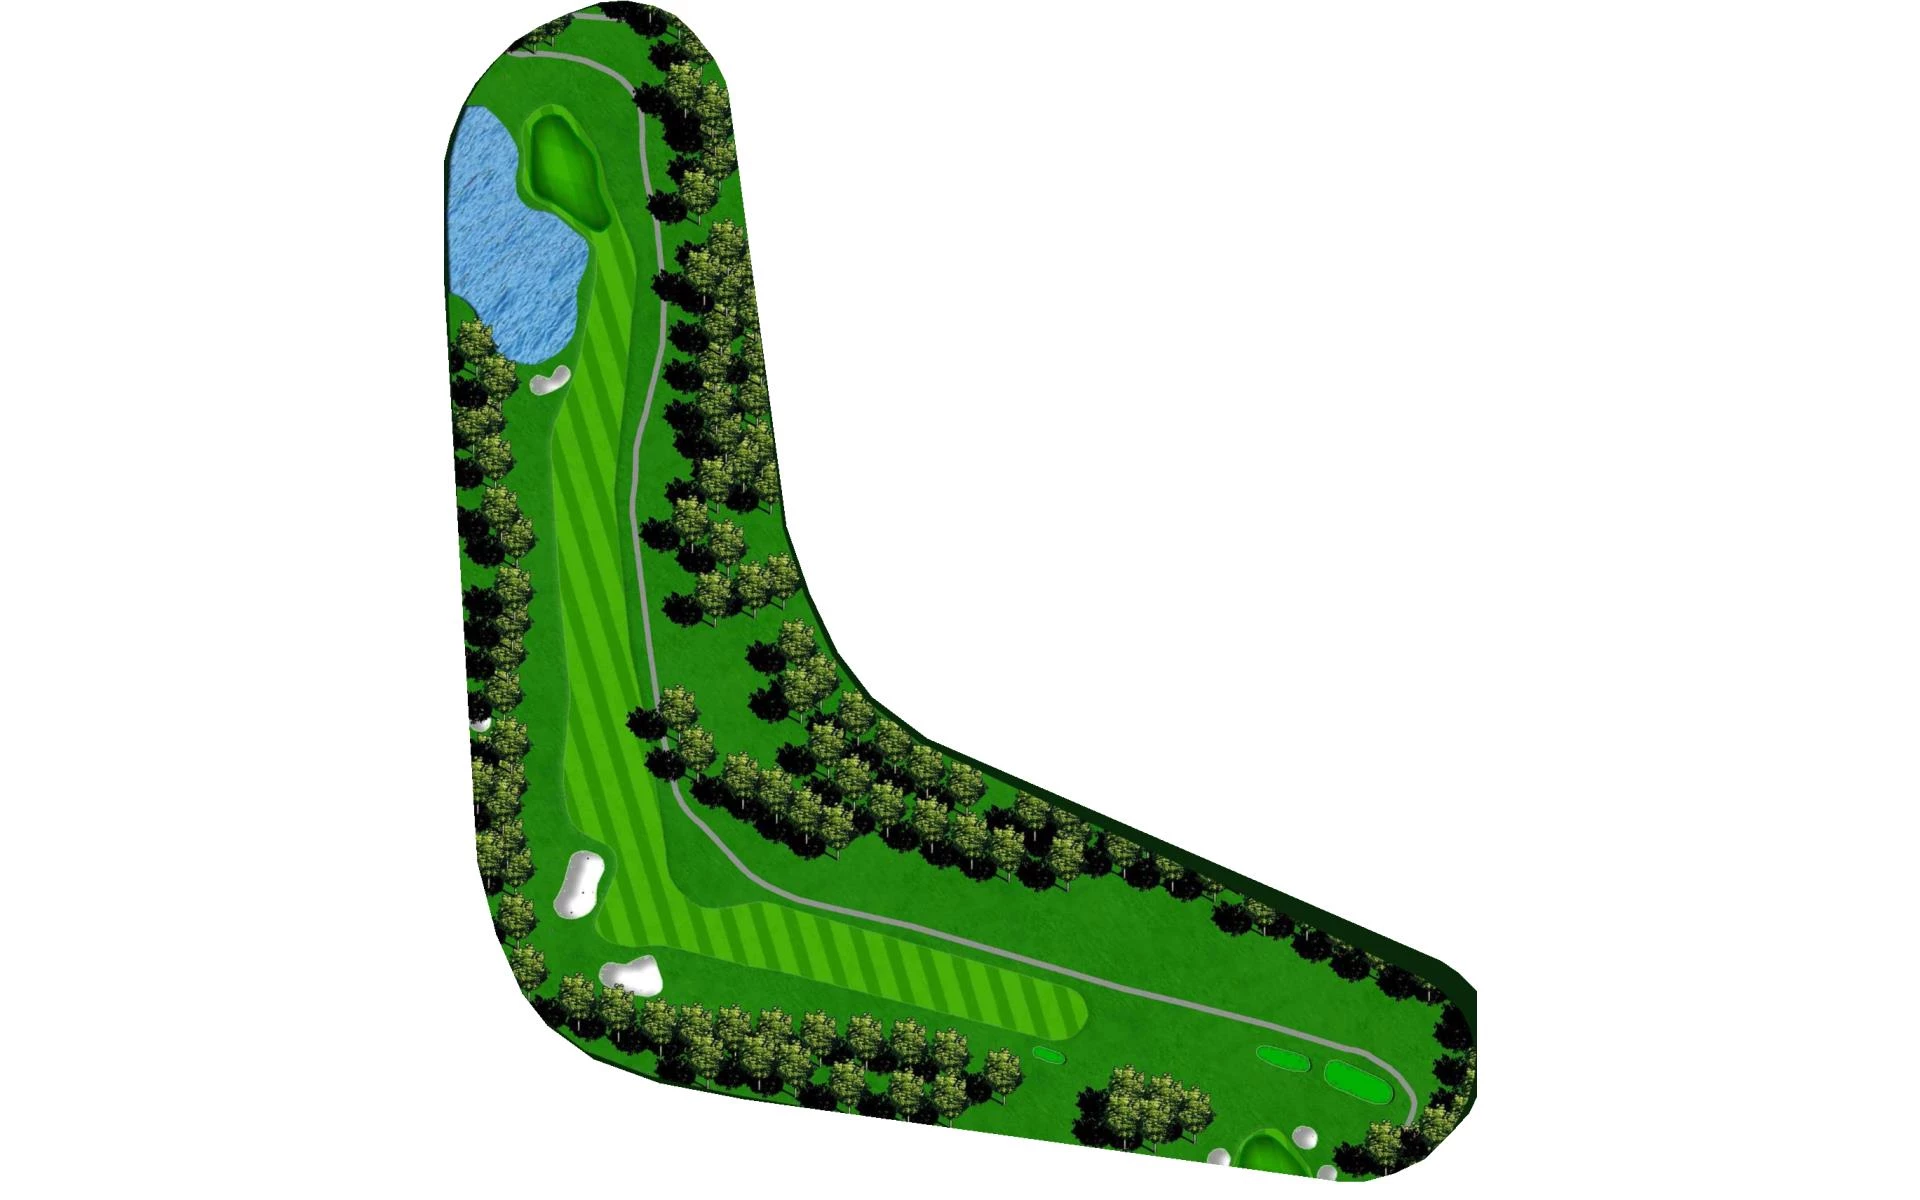
A dogleg left par 5 where a draw is the preferred ball flight on the tee shot. You will not want to miss your approach left of the green as a hill makes it a challenging up and down.
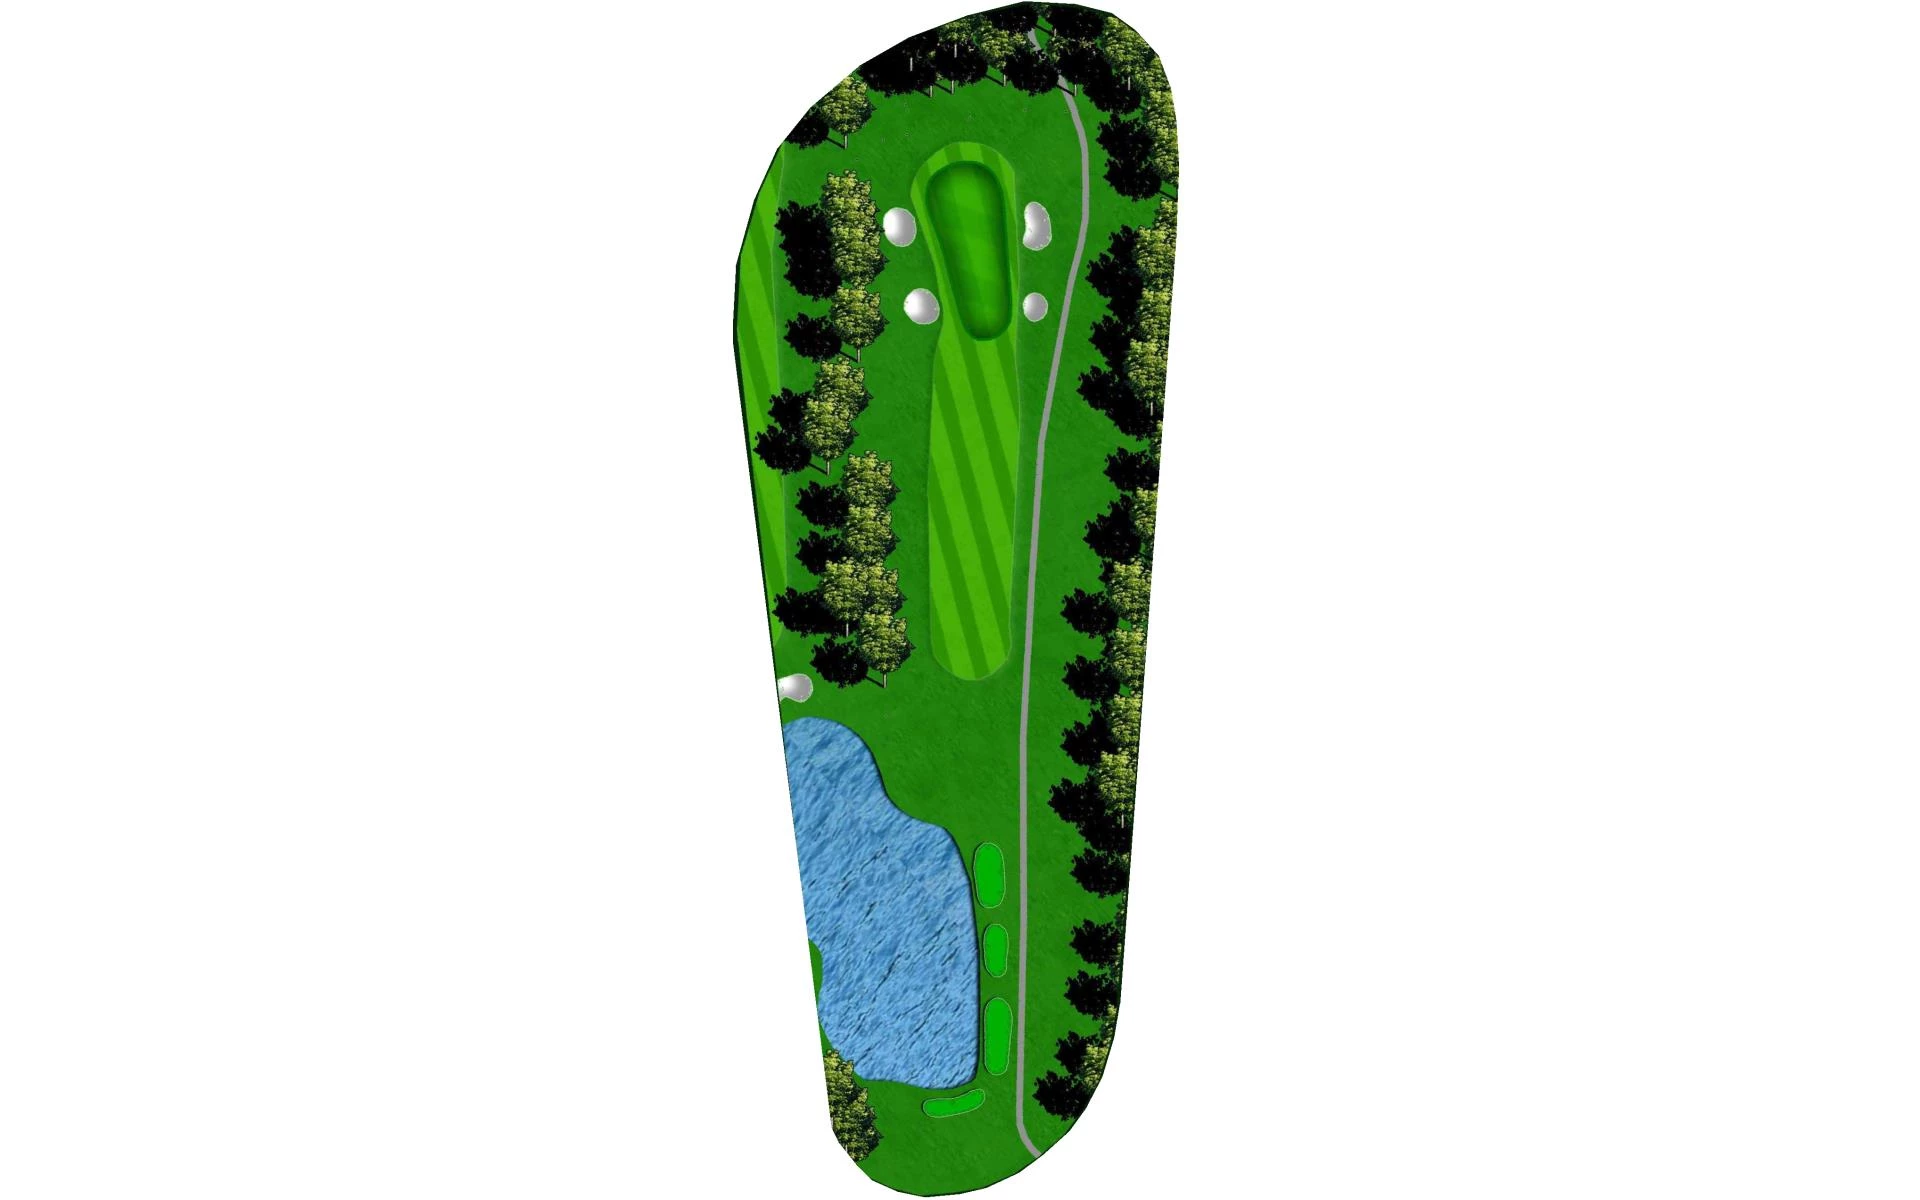
# 13 / Hole #13 / Signature Hole
Par: 3
Yardage by Tee:
Blue 188
Gold 132
Red 142
White 174
Pro Tips
Take an extra club along, as this hole plays deceptively more uphill than it looks.
# 14 / Hole #14
Par: 4
Yardage by Tee:
Blue 363
Gold 307
Red 318
White 337
Pro Tips
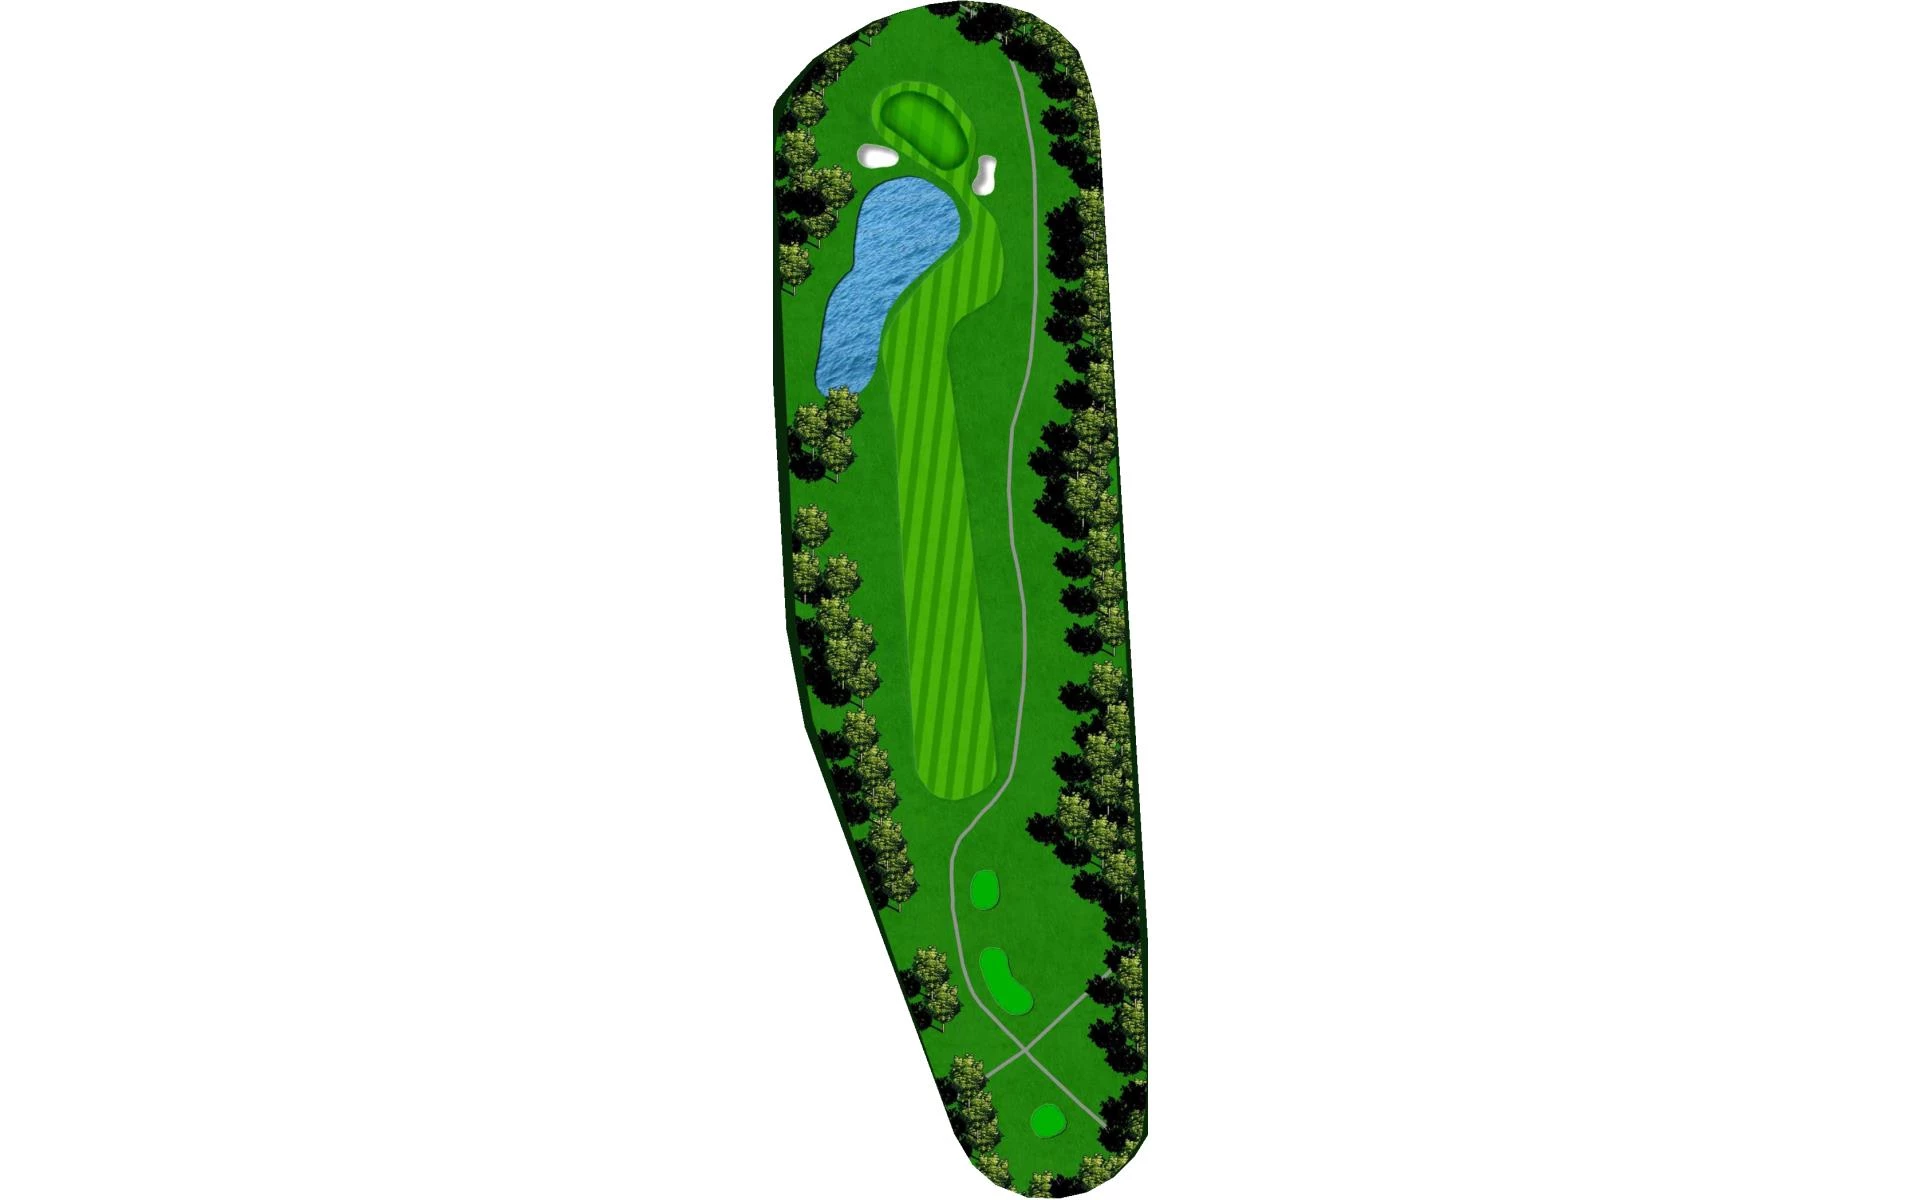
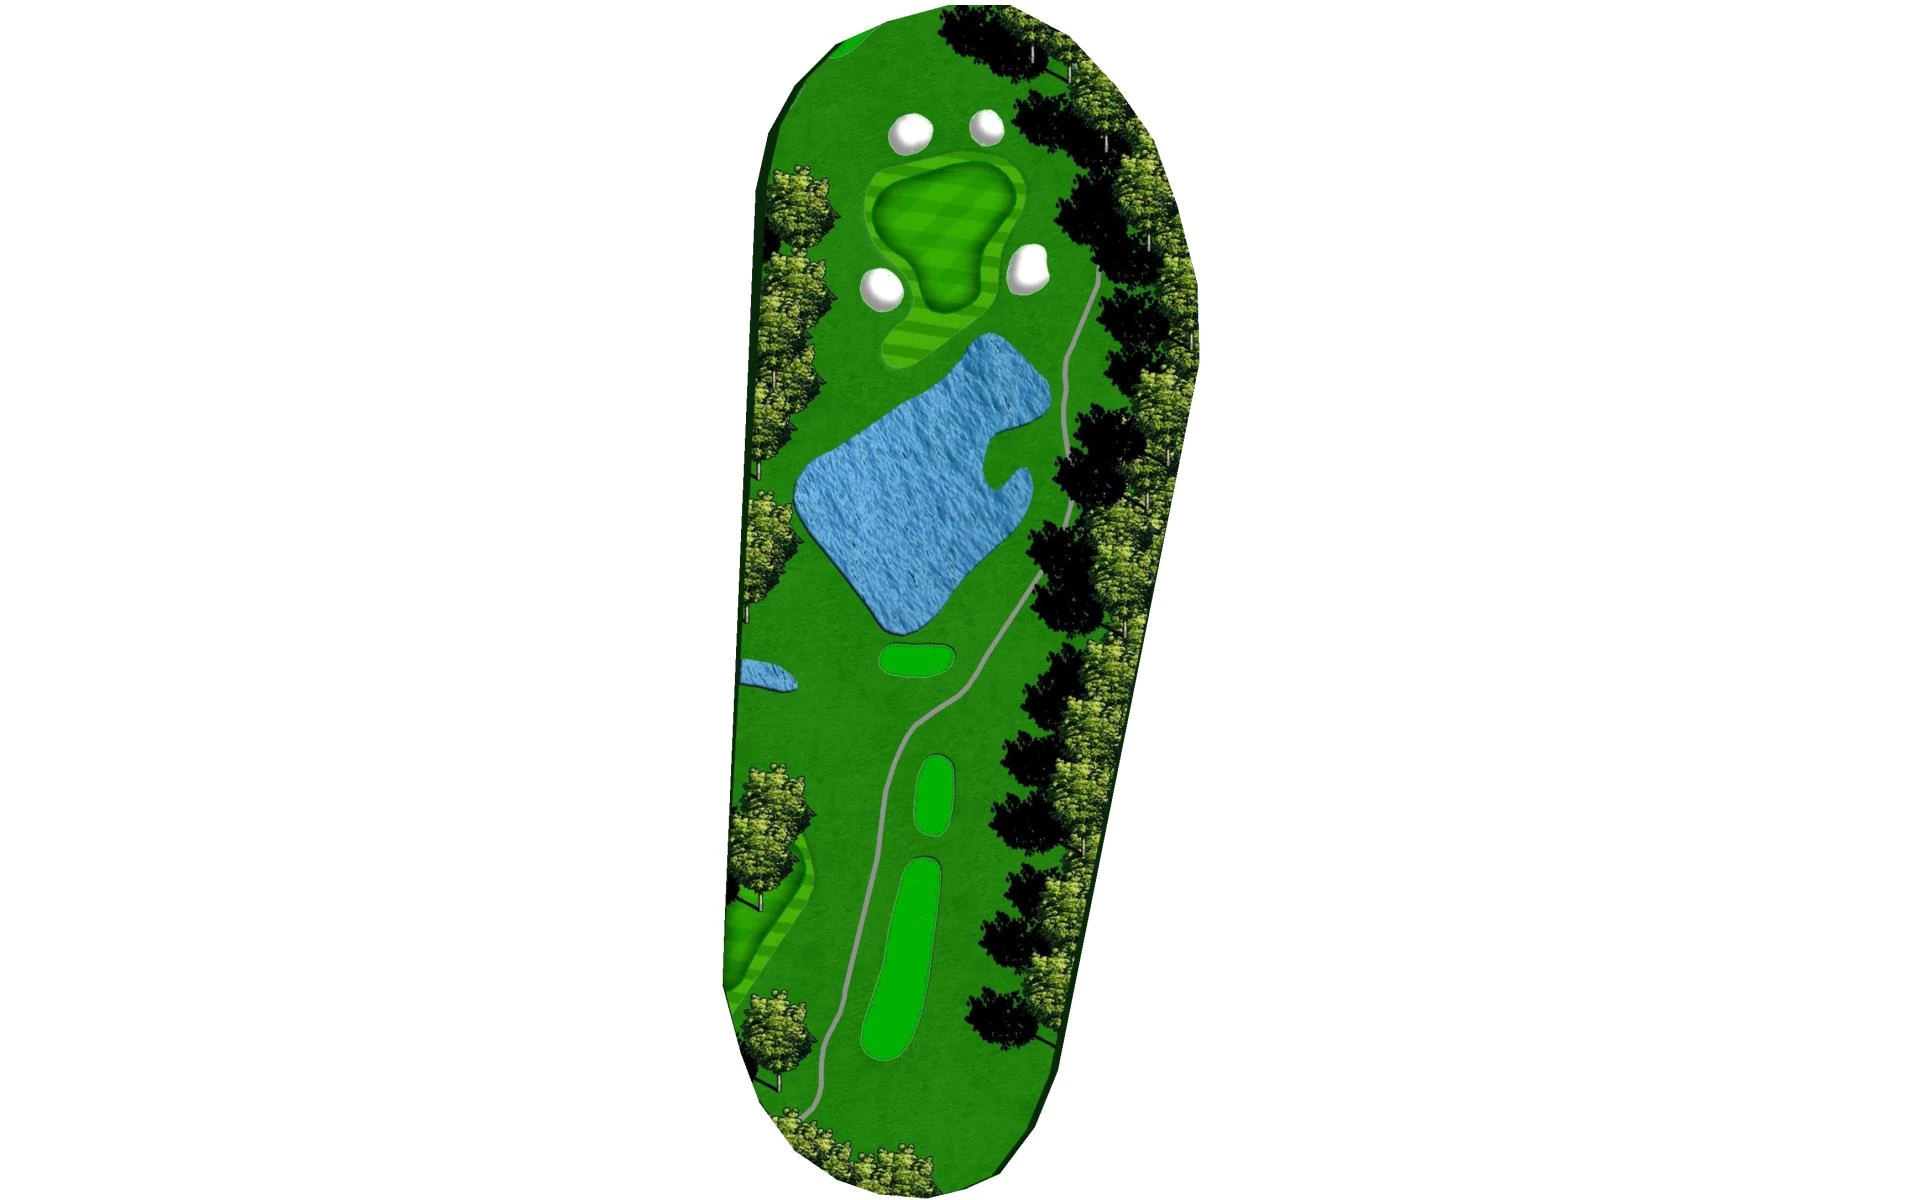
A dogleg left par 4 with water in play left on your tee shot. The right side of the fairway gives you the best angle to an uphill approach shot to a green that is not very deep. Beware of the bunkers short.
# 15 / Hole #15
Par: 4
Yardage by Tee:
Blue 435
Gold 323
Red 329
White 415
Pro Tips
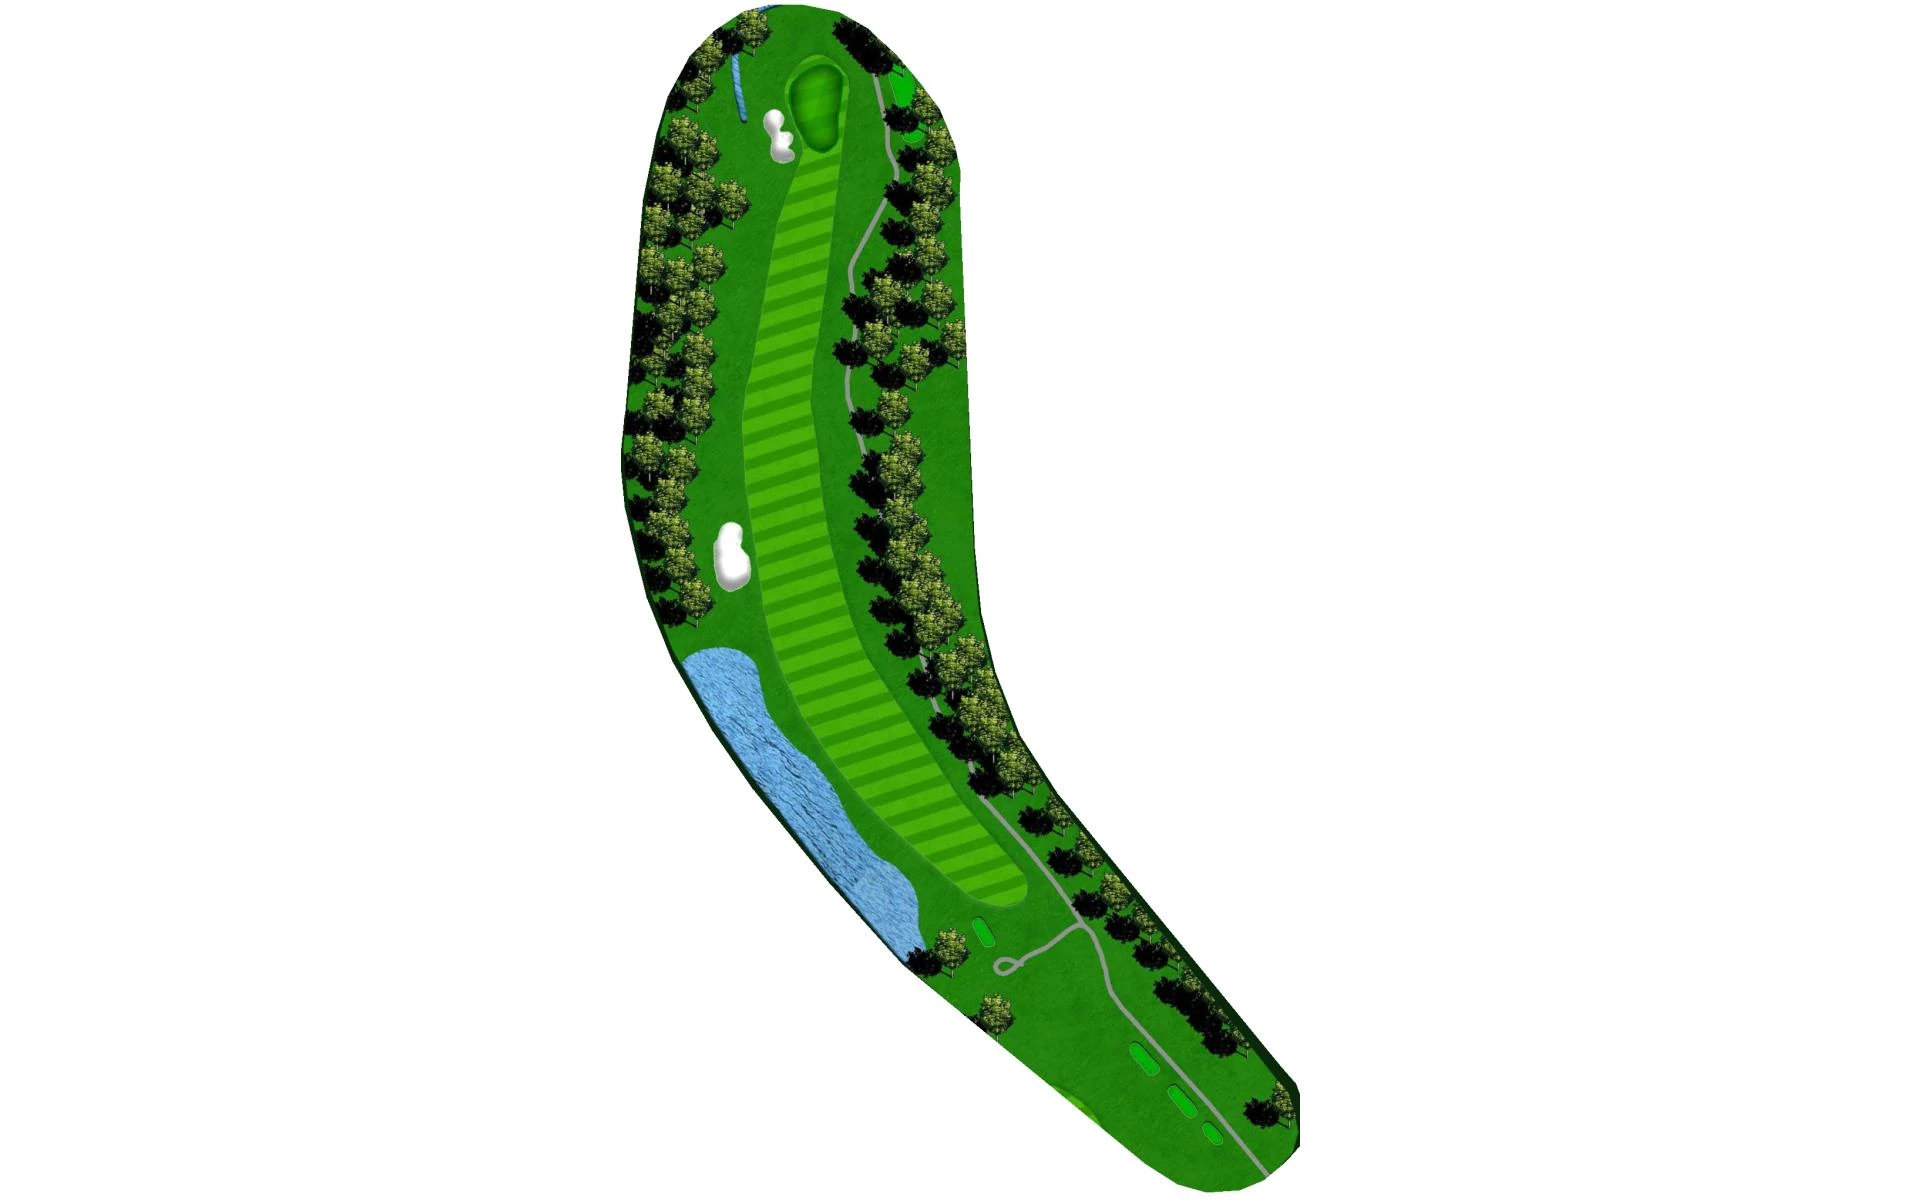
A dogleg right, long par 4. Avoid the creek that runs along the left side of this hole.
# 16 / Hole #16
Par: 3
Yardage by Tee:
Blue 148
Gold 79
Red 101
White 132
Pro Tips
A short par 3 with a very tricky green and water short. You will want an uphill putt; beware of 3-putts and fast downhill putts.
# 17 / Hole #17
Par: 5
Yardage by Tee:
Blue 487
Gold 381
Red 450
White 475
Pro Tips
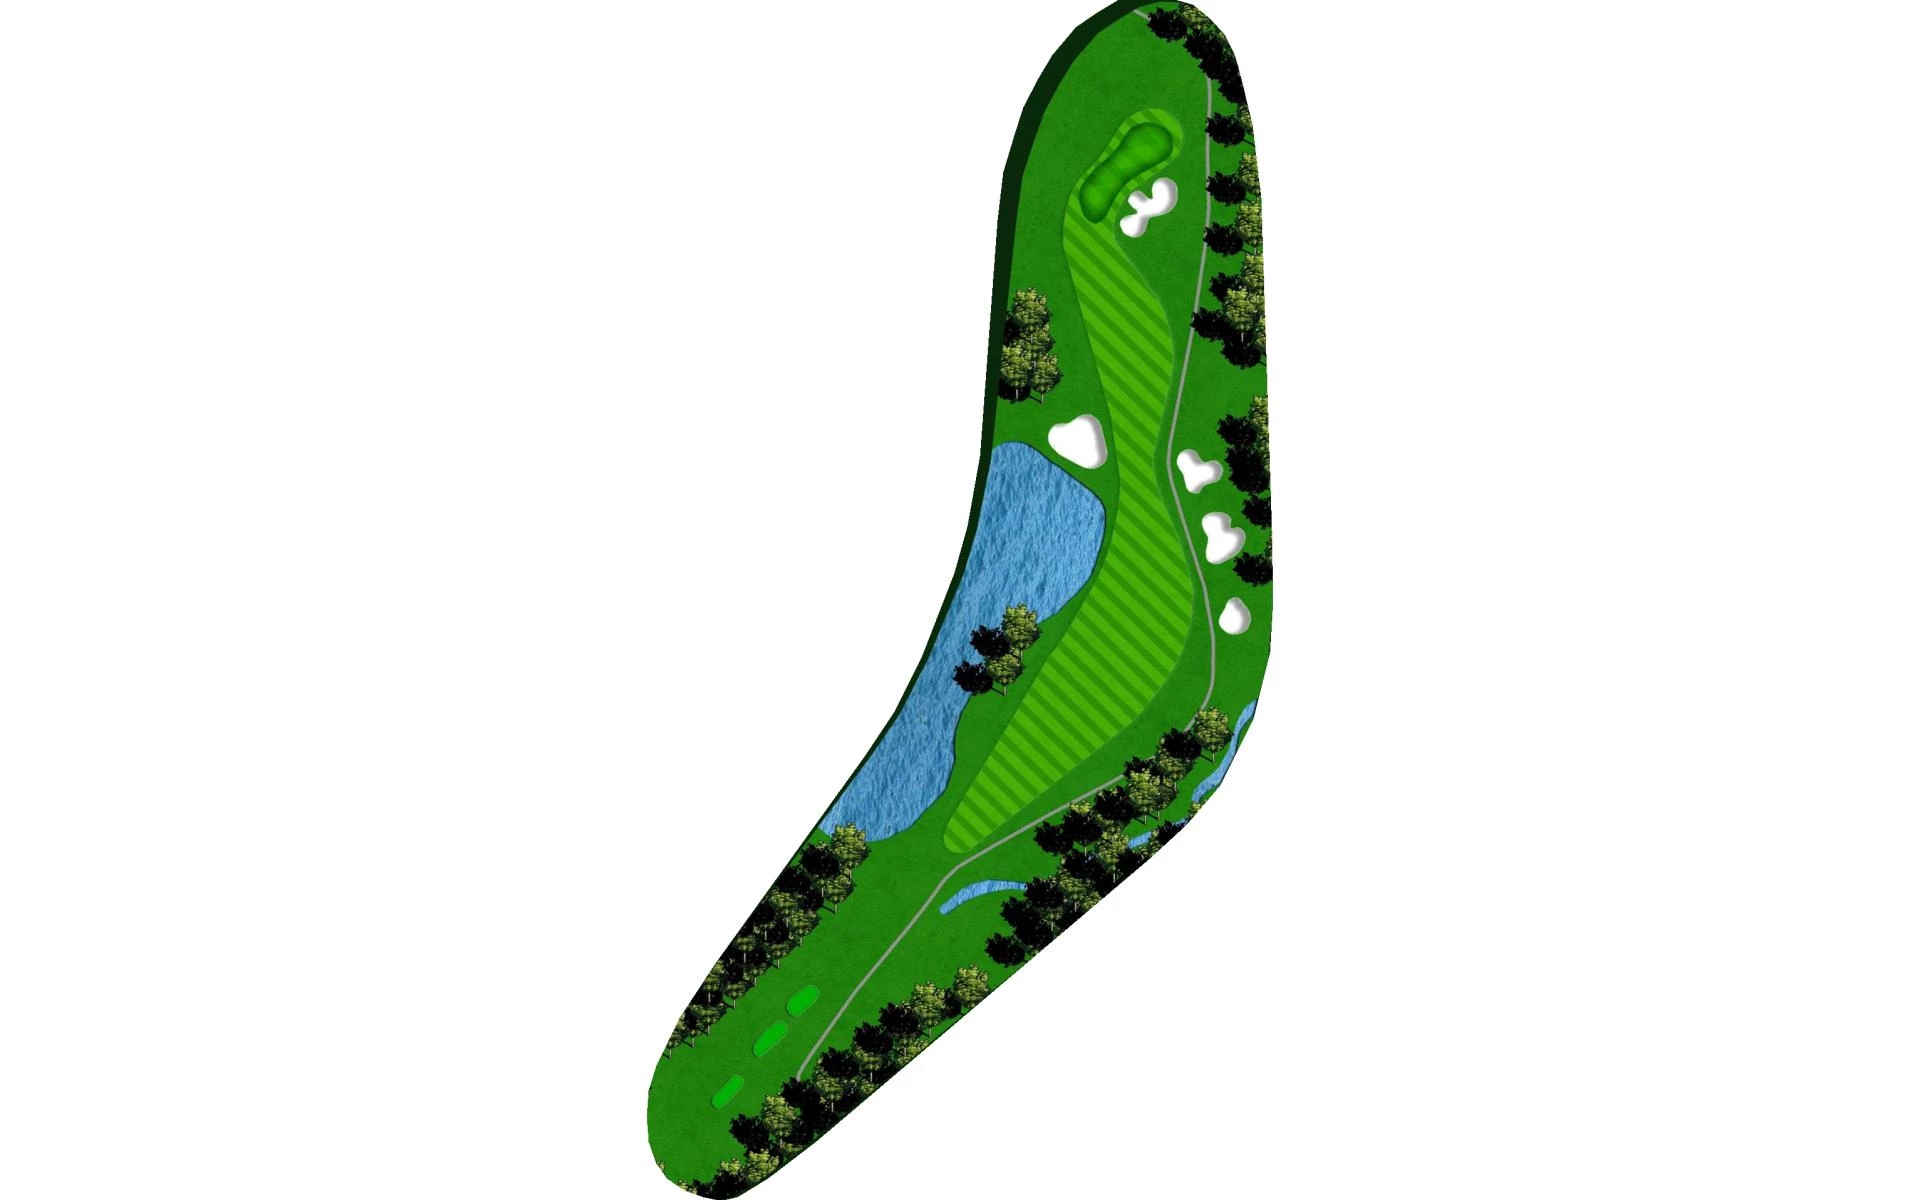
A sharp dogleg to the right par 5. With water guarding the entire green, you’ll be faced with a blind approach uphill shot. Long hitters can cut the corner and try to get home in two.
# 18 / Hole #18
Par: 4
Yardage by Tee:
Blue 411
Gold 323
Red 332
White 401
Pro Tips
The finishing hole is a dogleg left par 4 that demands a good tee shot. The approach shot is downhill to a green that you don’t want to miss to the left. Be aware of your stance on your approach shot—it’s on a steep hill.