Course
The golf course at Canterwood Golf & Country Club opened in 1988 and was designed by Robert Muir Graves, one of the most prominent architect…
The golf course at Canterwood Golf & Country Club opened in 1988 and was designed by Robert Muir Graves, one of the most prominent architects in the Pacific Northwest. Renowned for its beauty and challenge that it poses to golfers, the course always hovers around 10th in the state according to Golf Digest, sometimes as high as 5th. The course never plays the same way twice and makes golfers play a variety of shots.
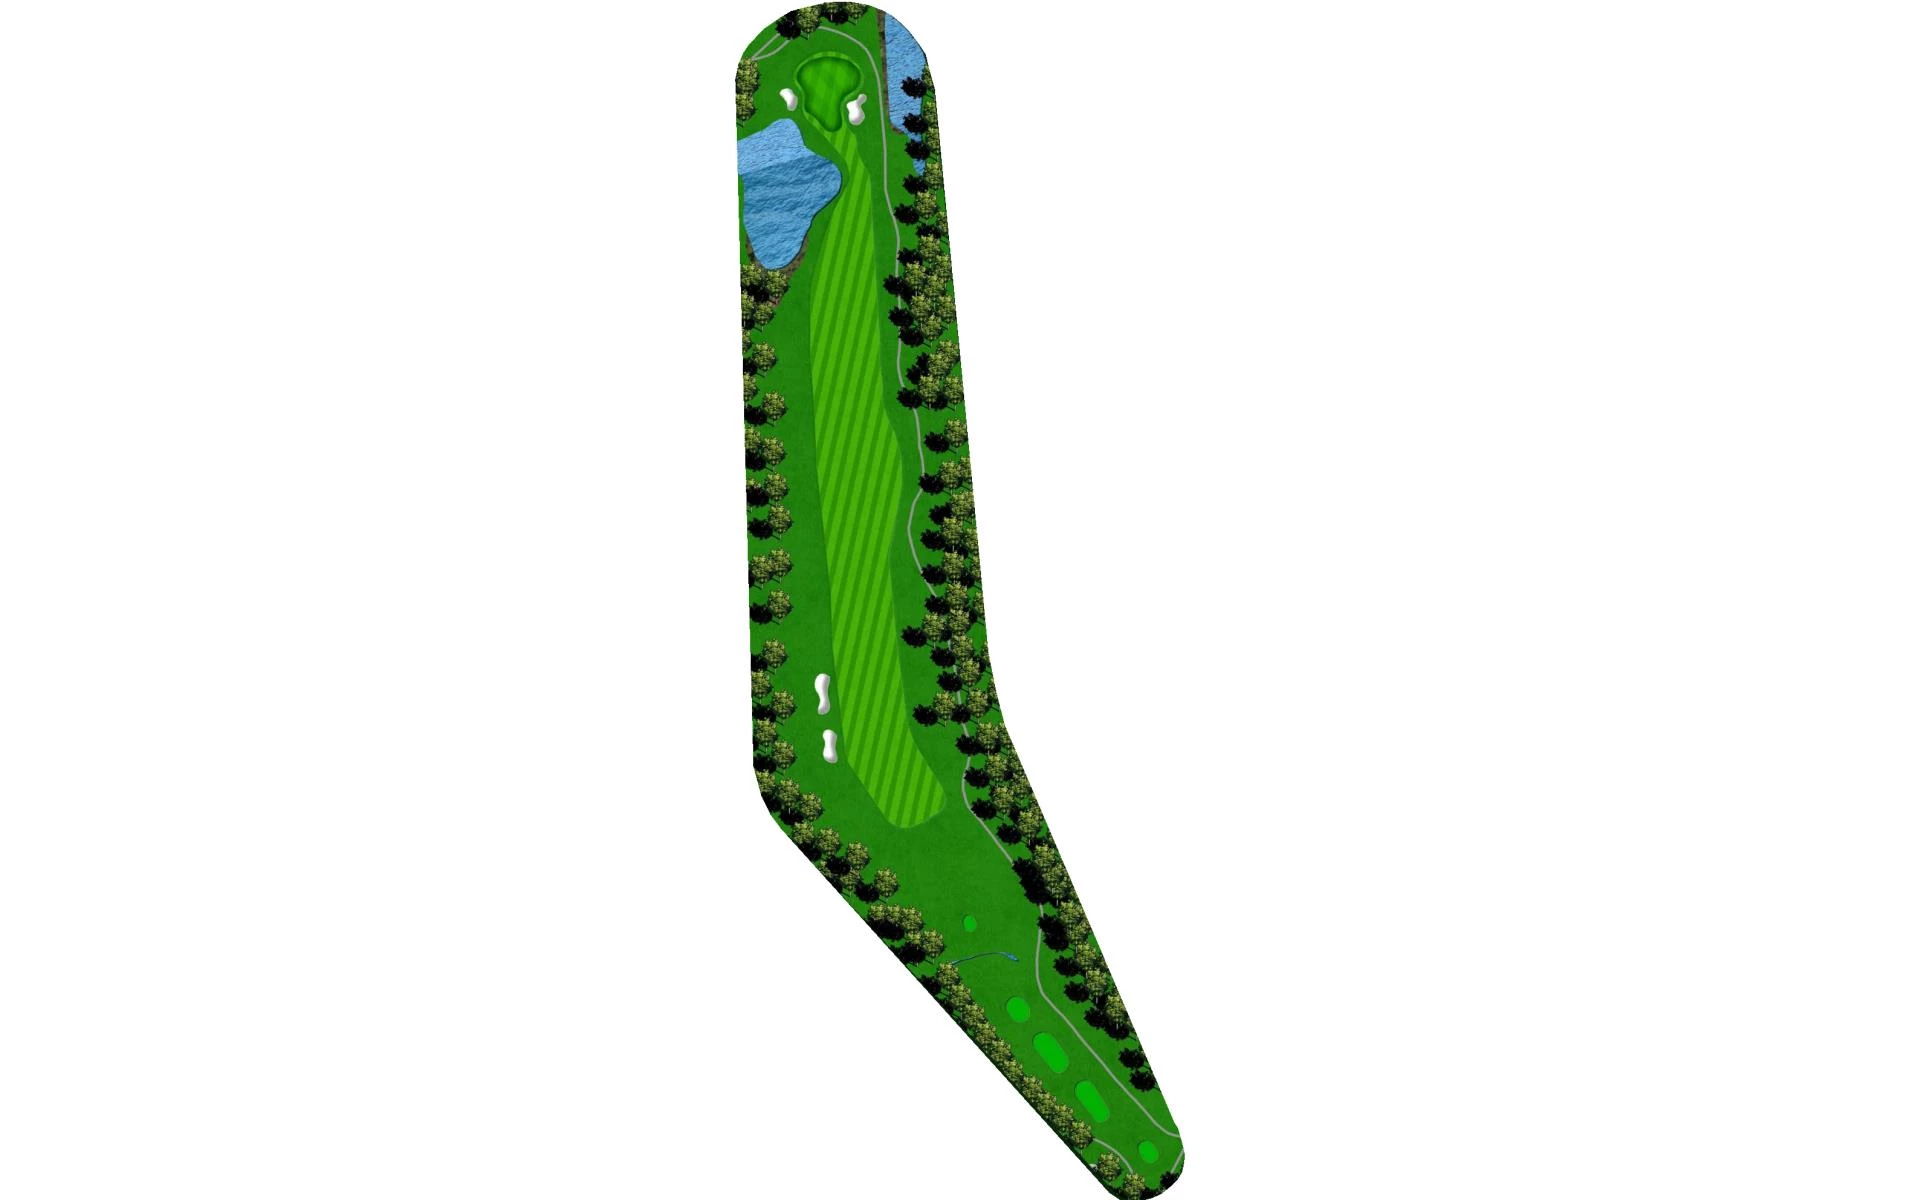
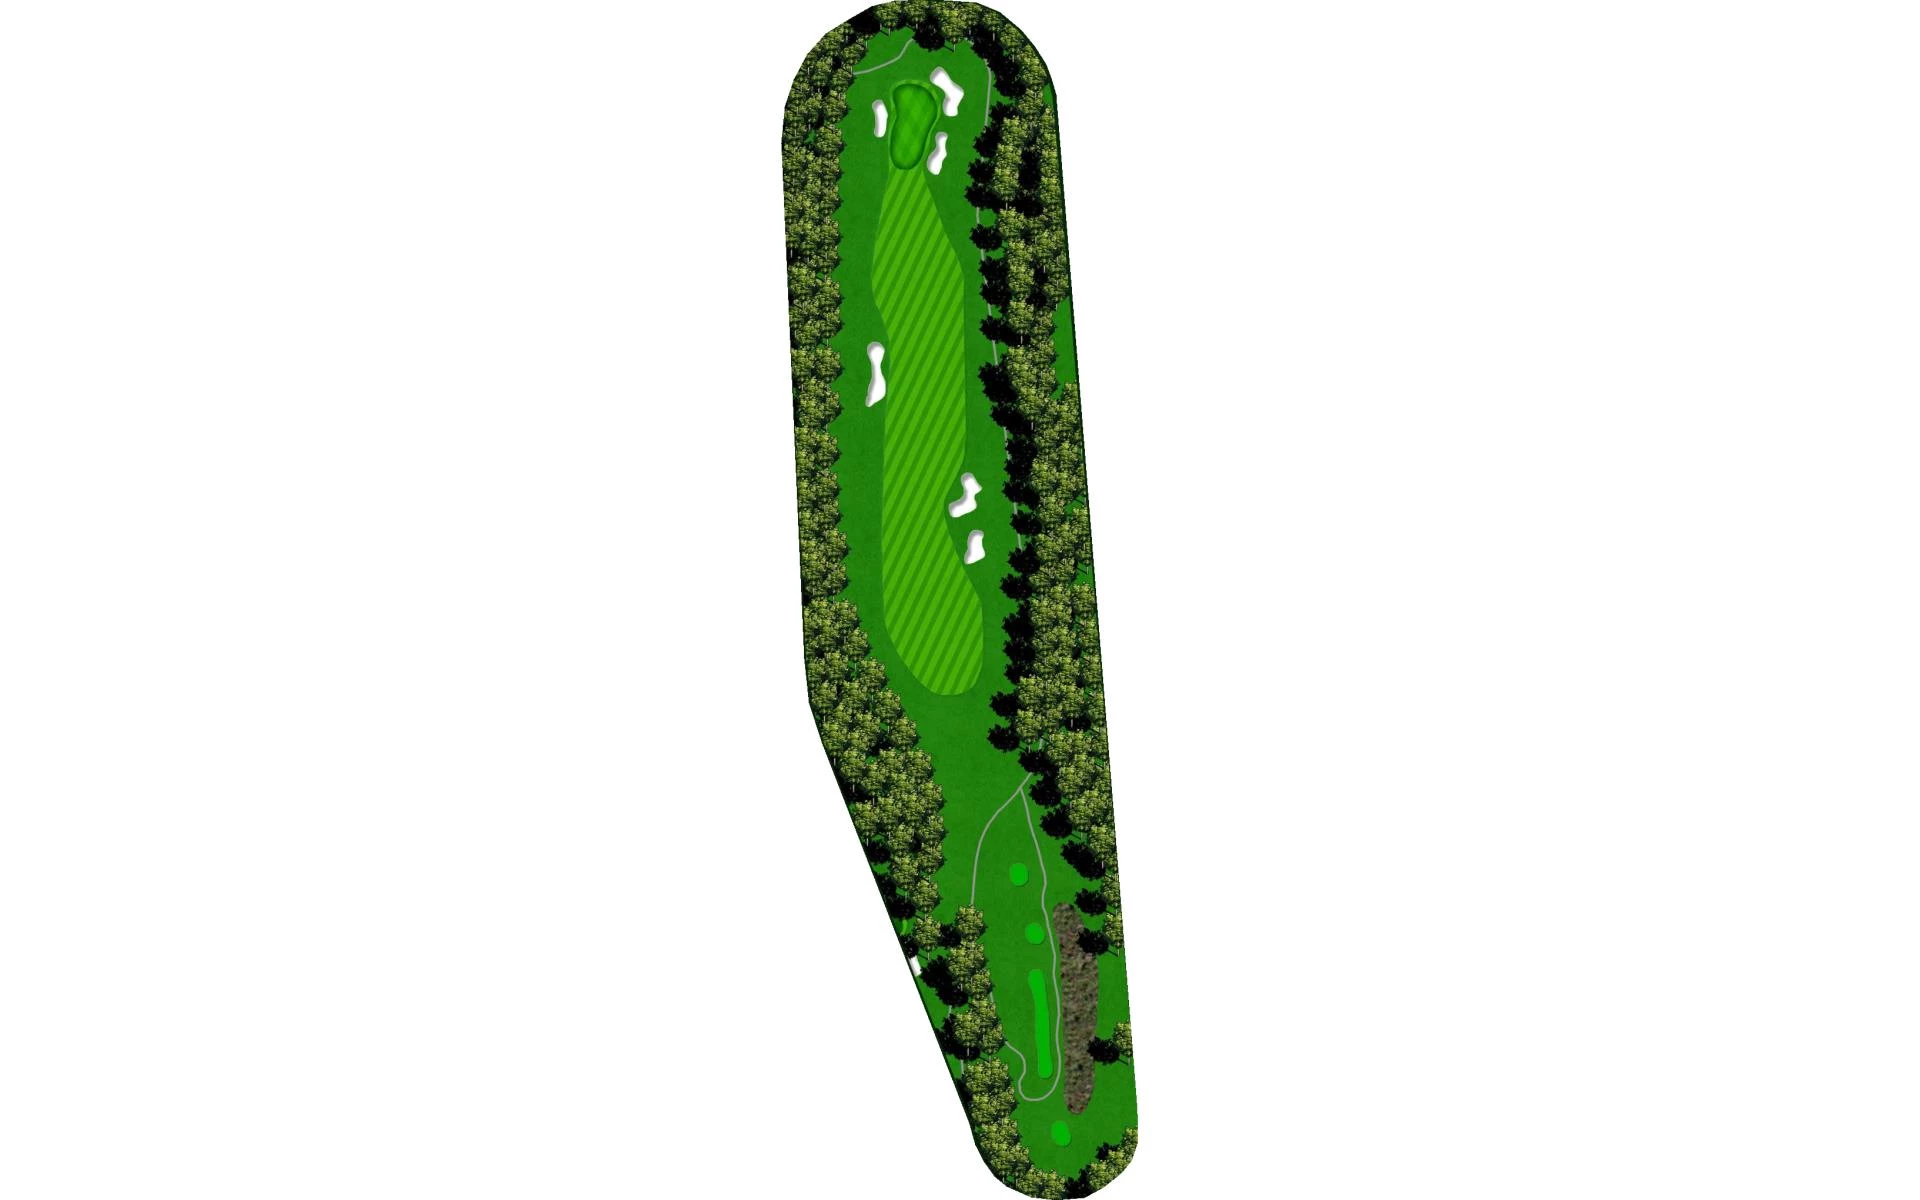
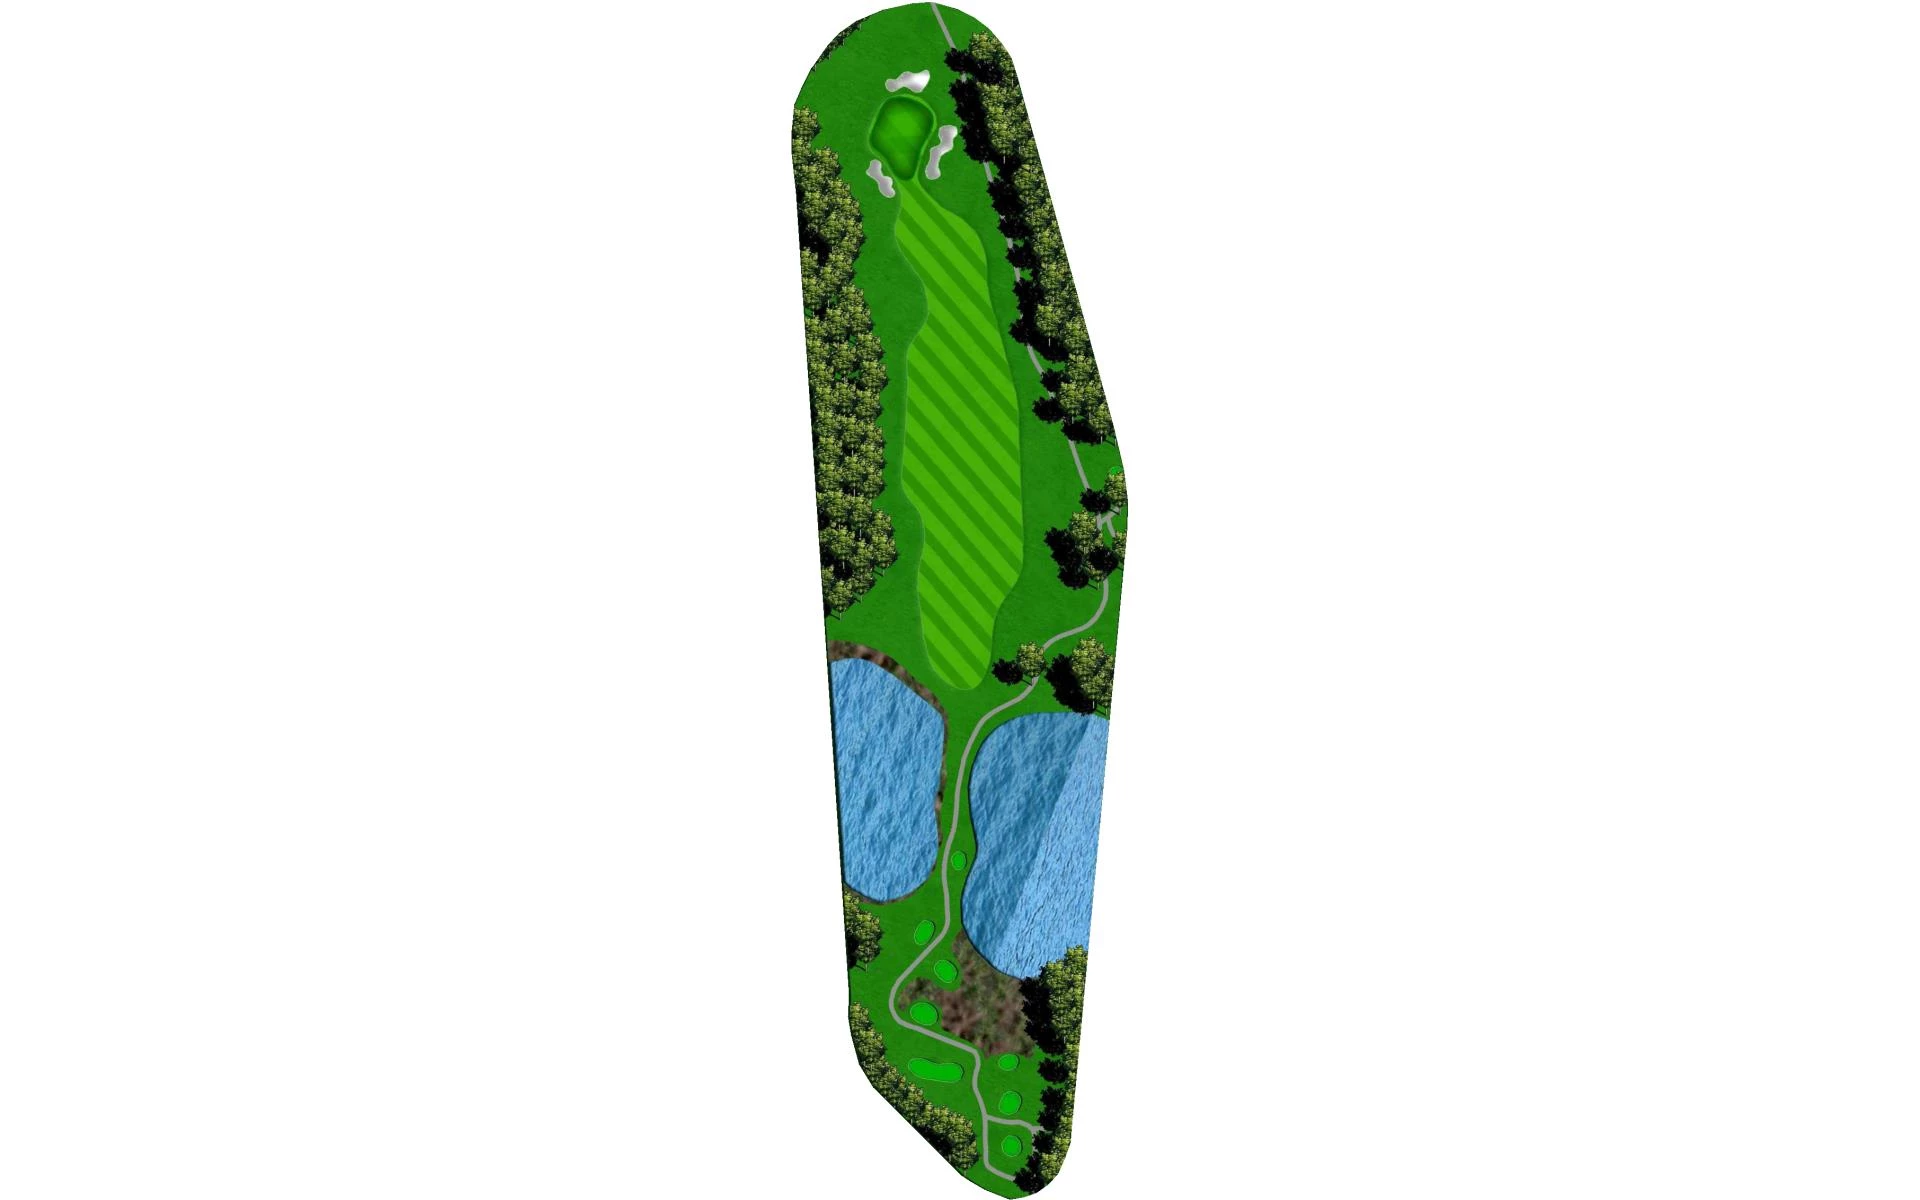
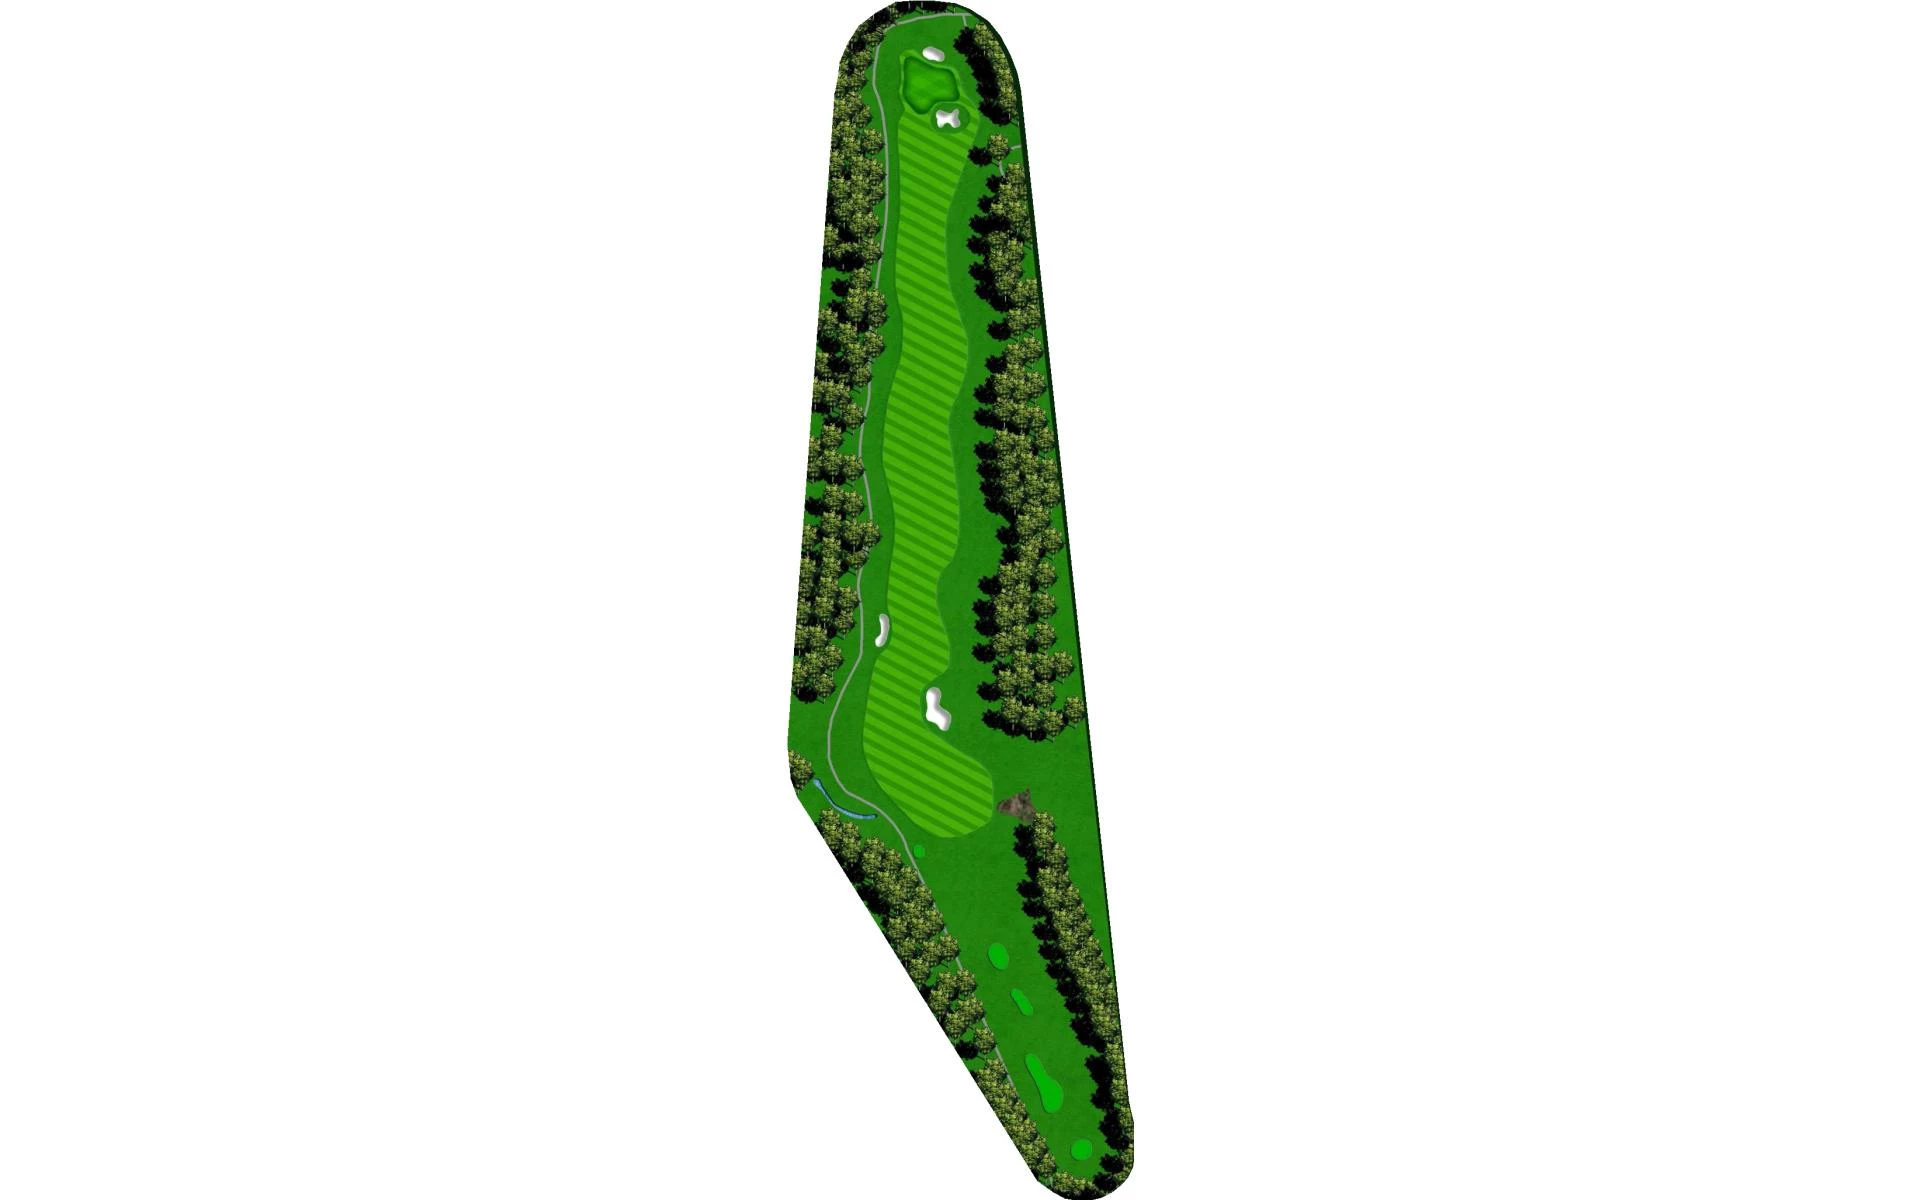
# 1 /
Par: 5
Yardage by Tee:
BLACK 591
GOLD 555
BLUE 545
WHITE 510
GREEN 490
Silver 440
Pro Tips
The opening hole of this stunning golf course is a dogleg right par 5. A well-placed drive should avoid the bunkers on the left side of the landing area. Players will then need to lay up to a comfortable distance in order to avoid the water that guards both sides of the green.
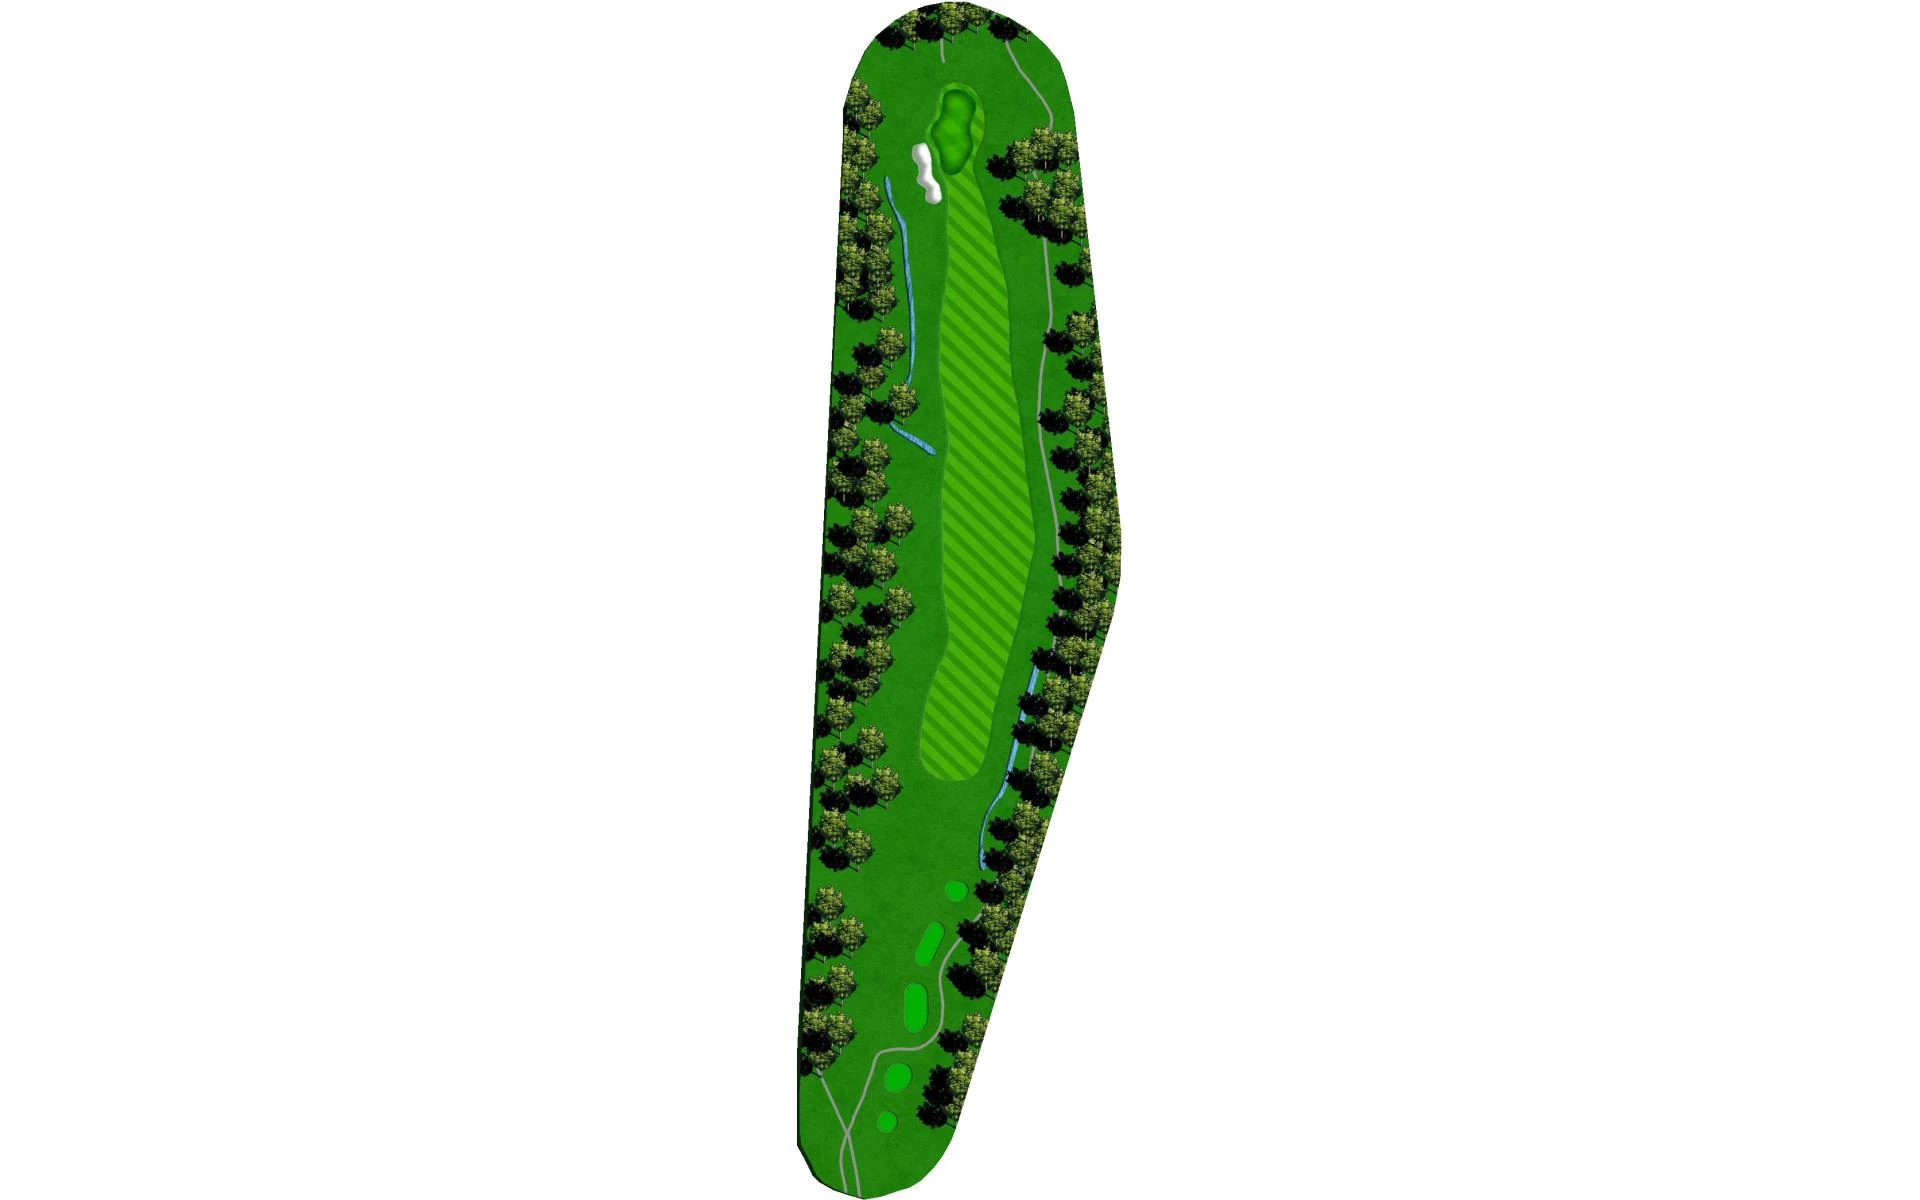
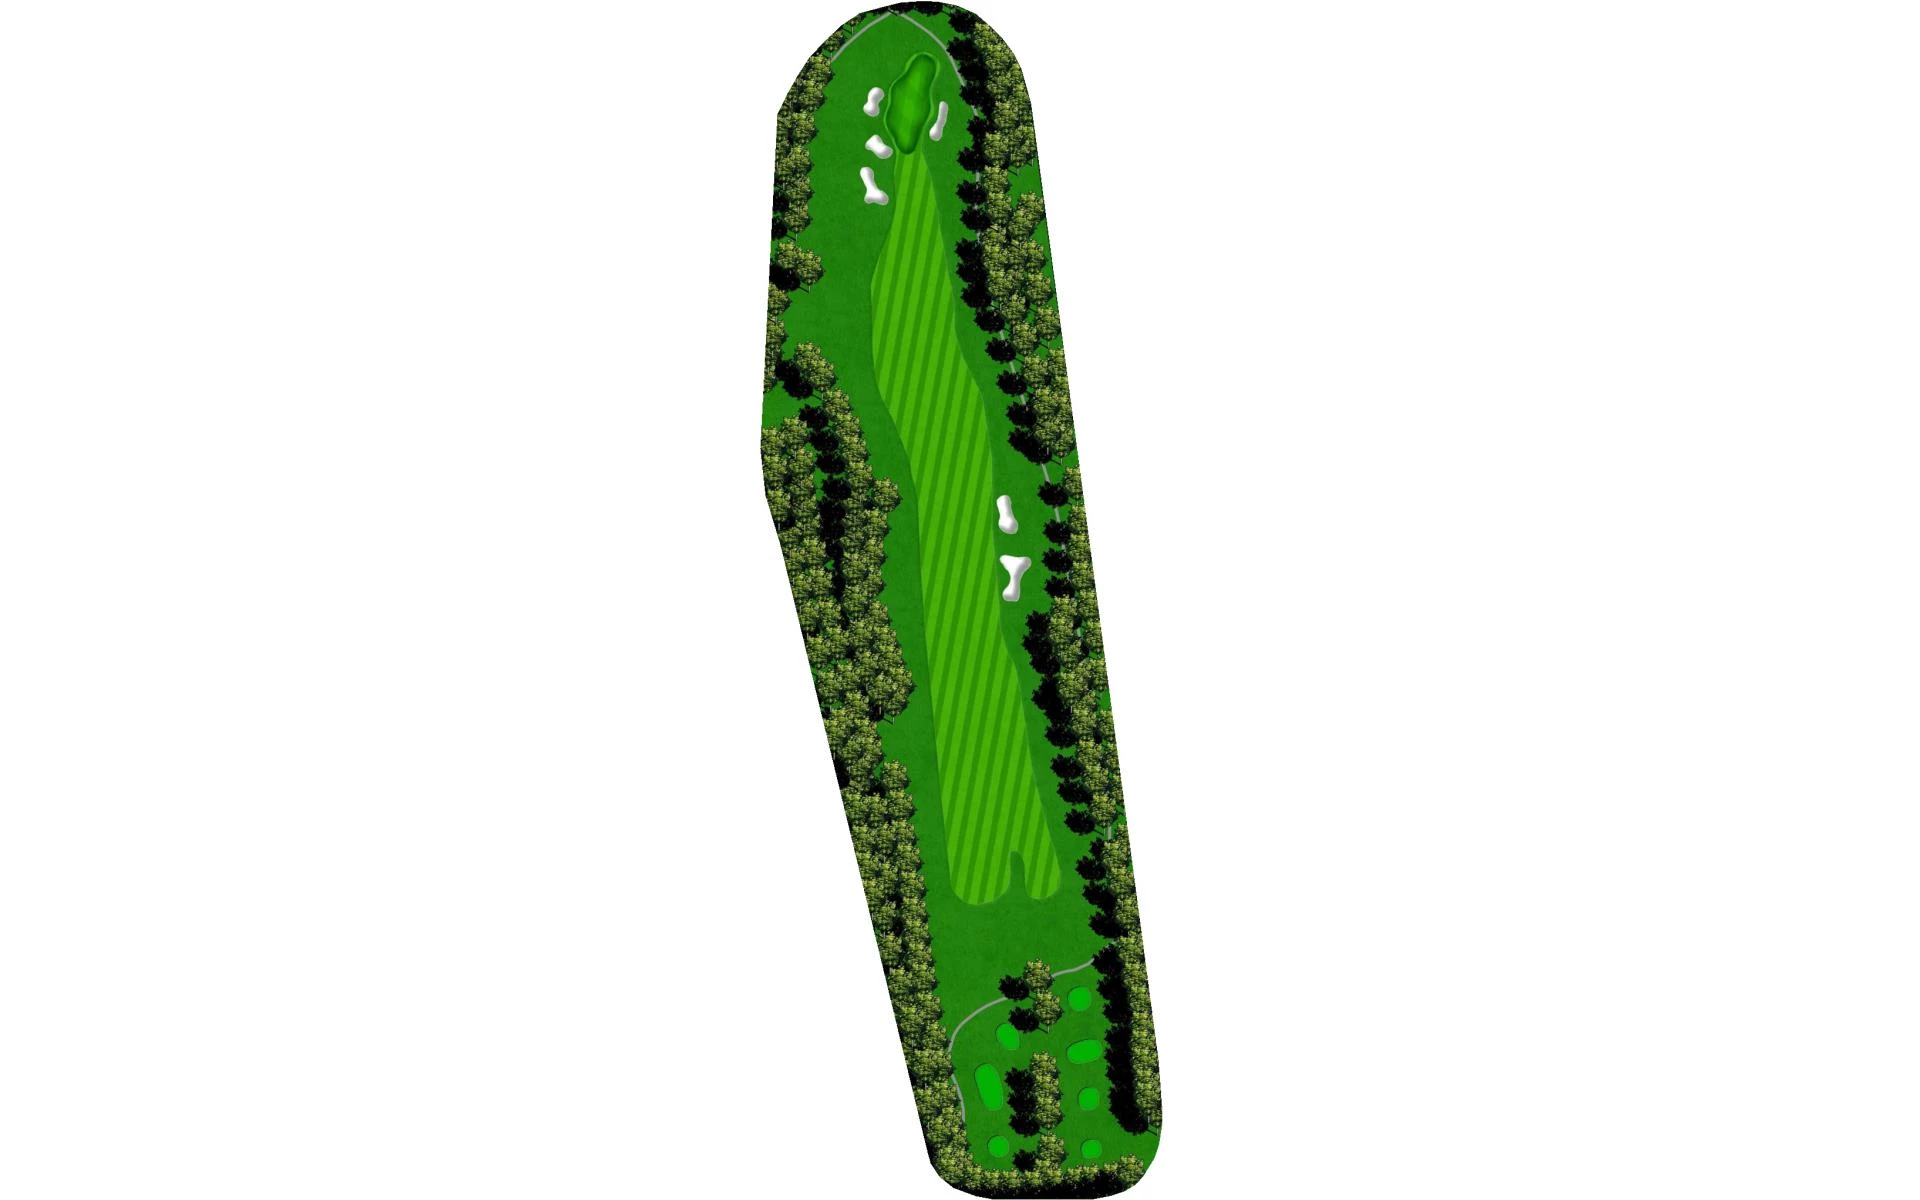
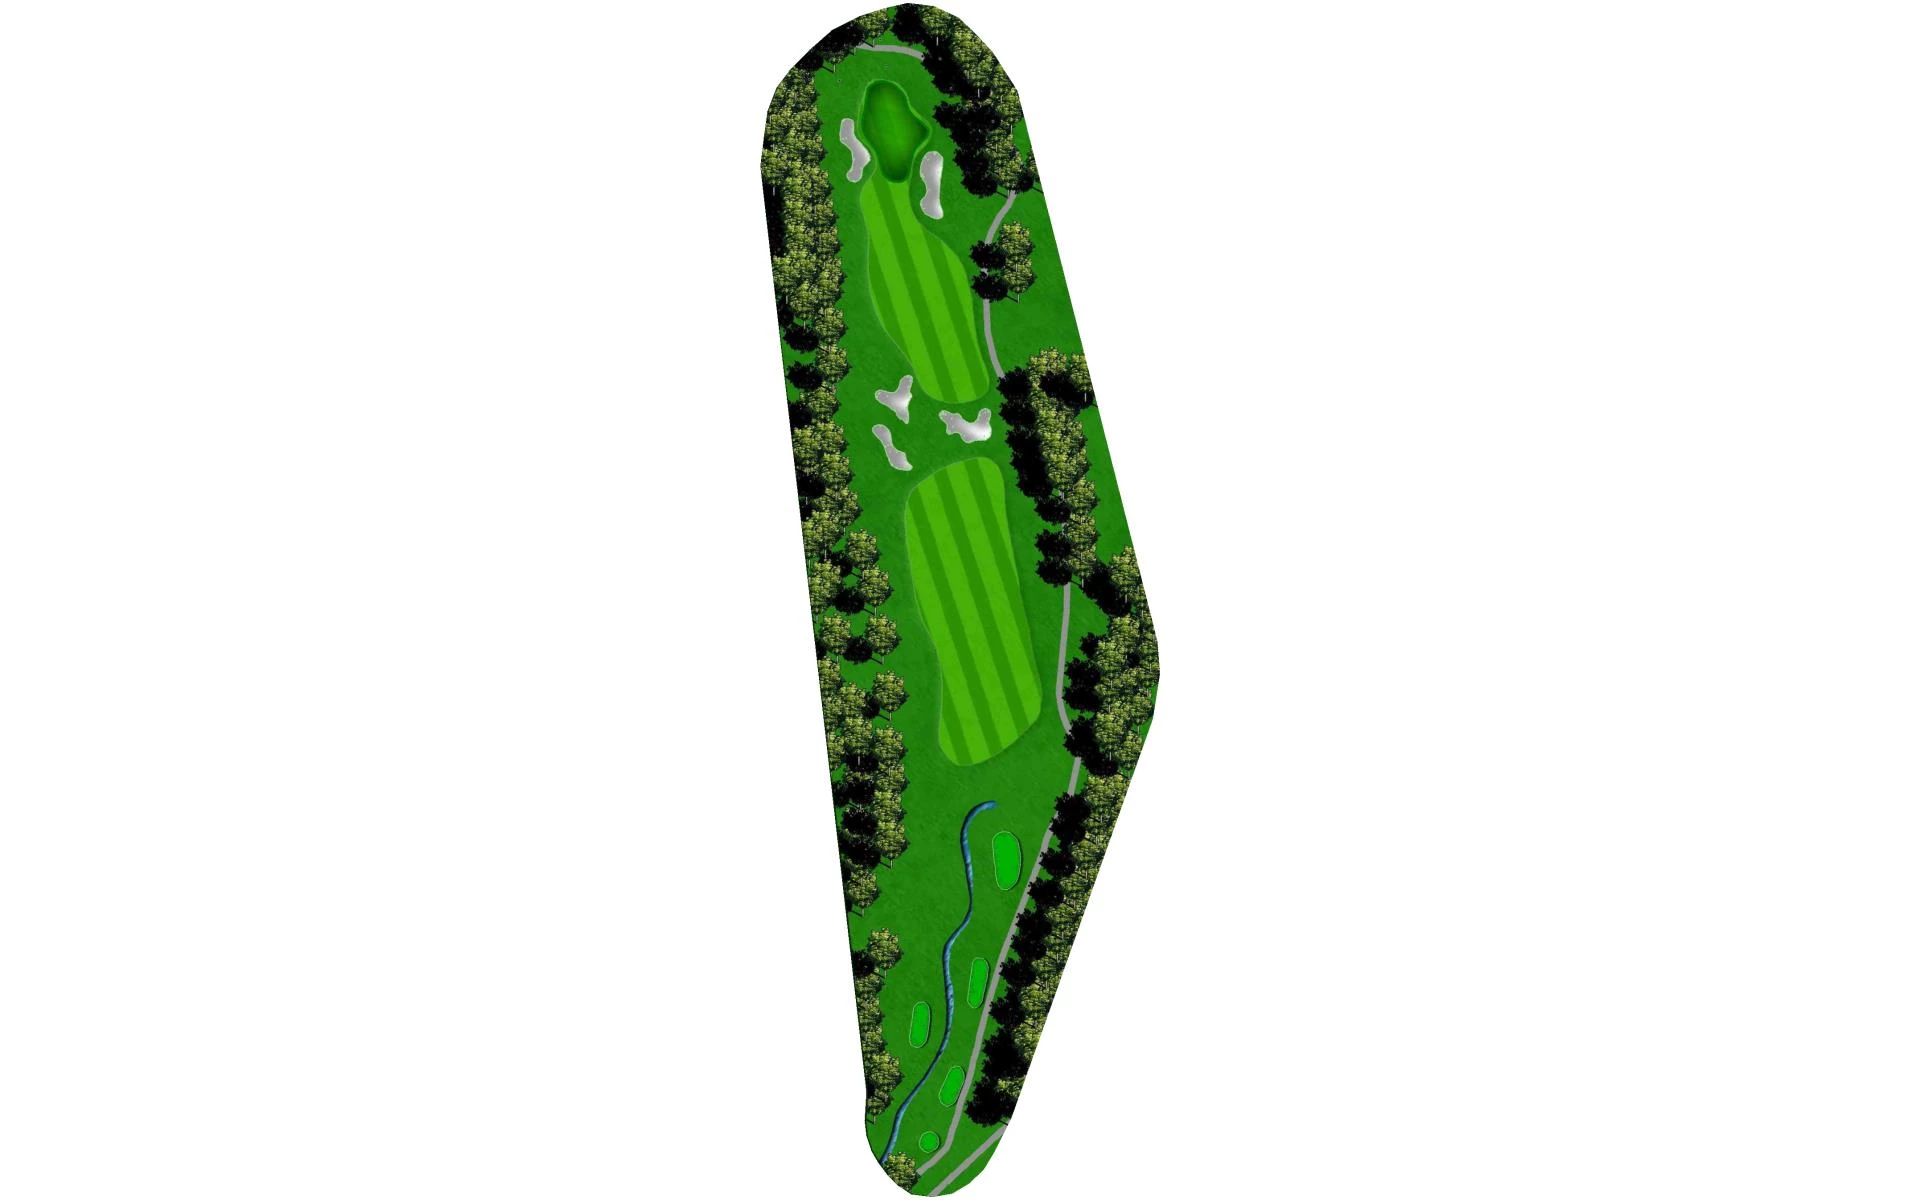
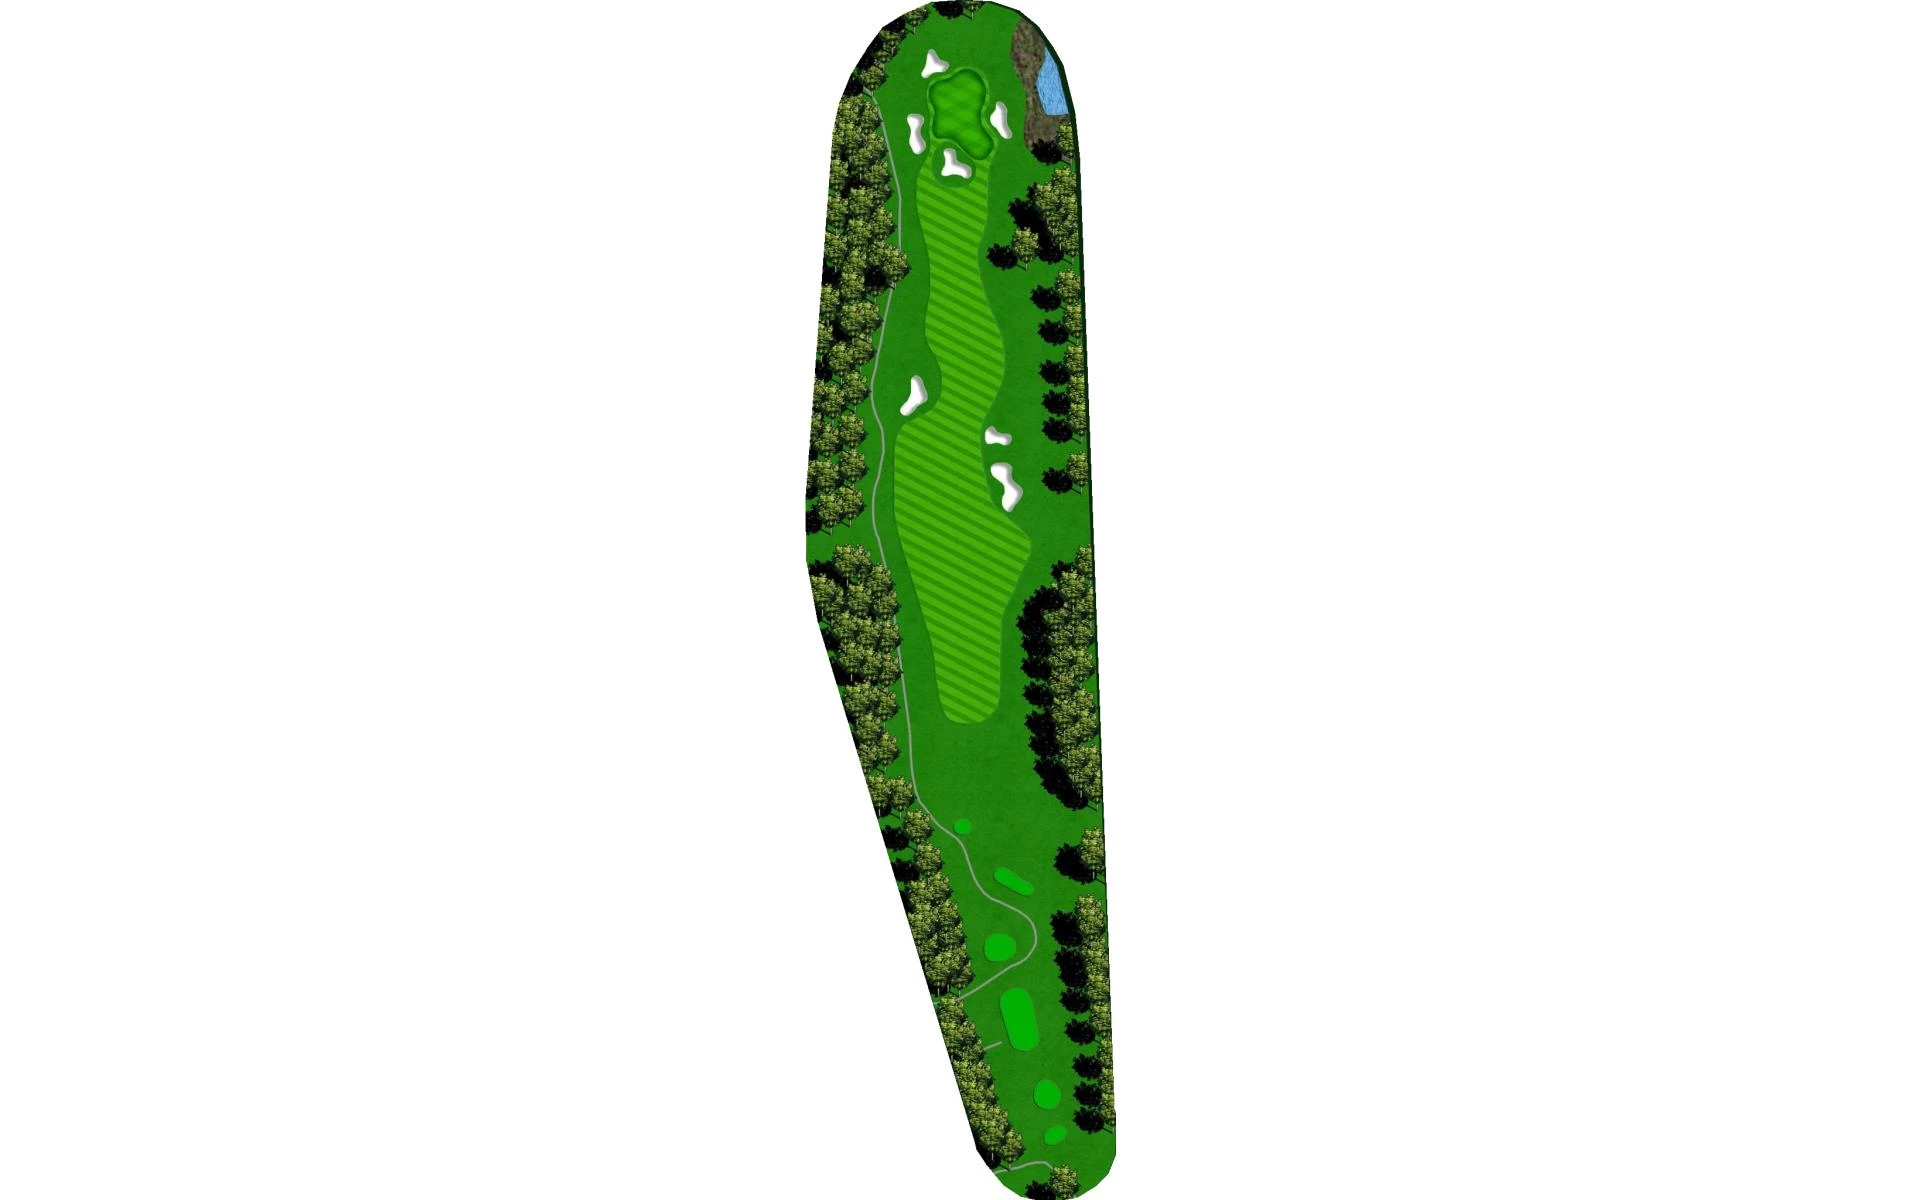
# 2 /
Par: 4
Yardage by Tee:
BLACK 432
BLUE 390
GOLD 427
WHITE 352
GREEN 352
Silver 326
Pro Tips
The second hole is a fairly straightforward par 4. Players will want to keep their ball in the middle of left side of the hole as they approach the putting surface in order to give them the best angle. The green features a false front and slopes right-to-left and back-to-front.
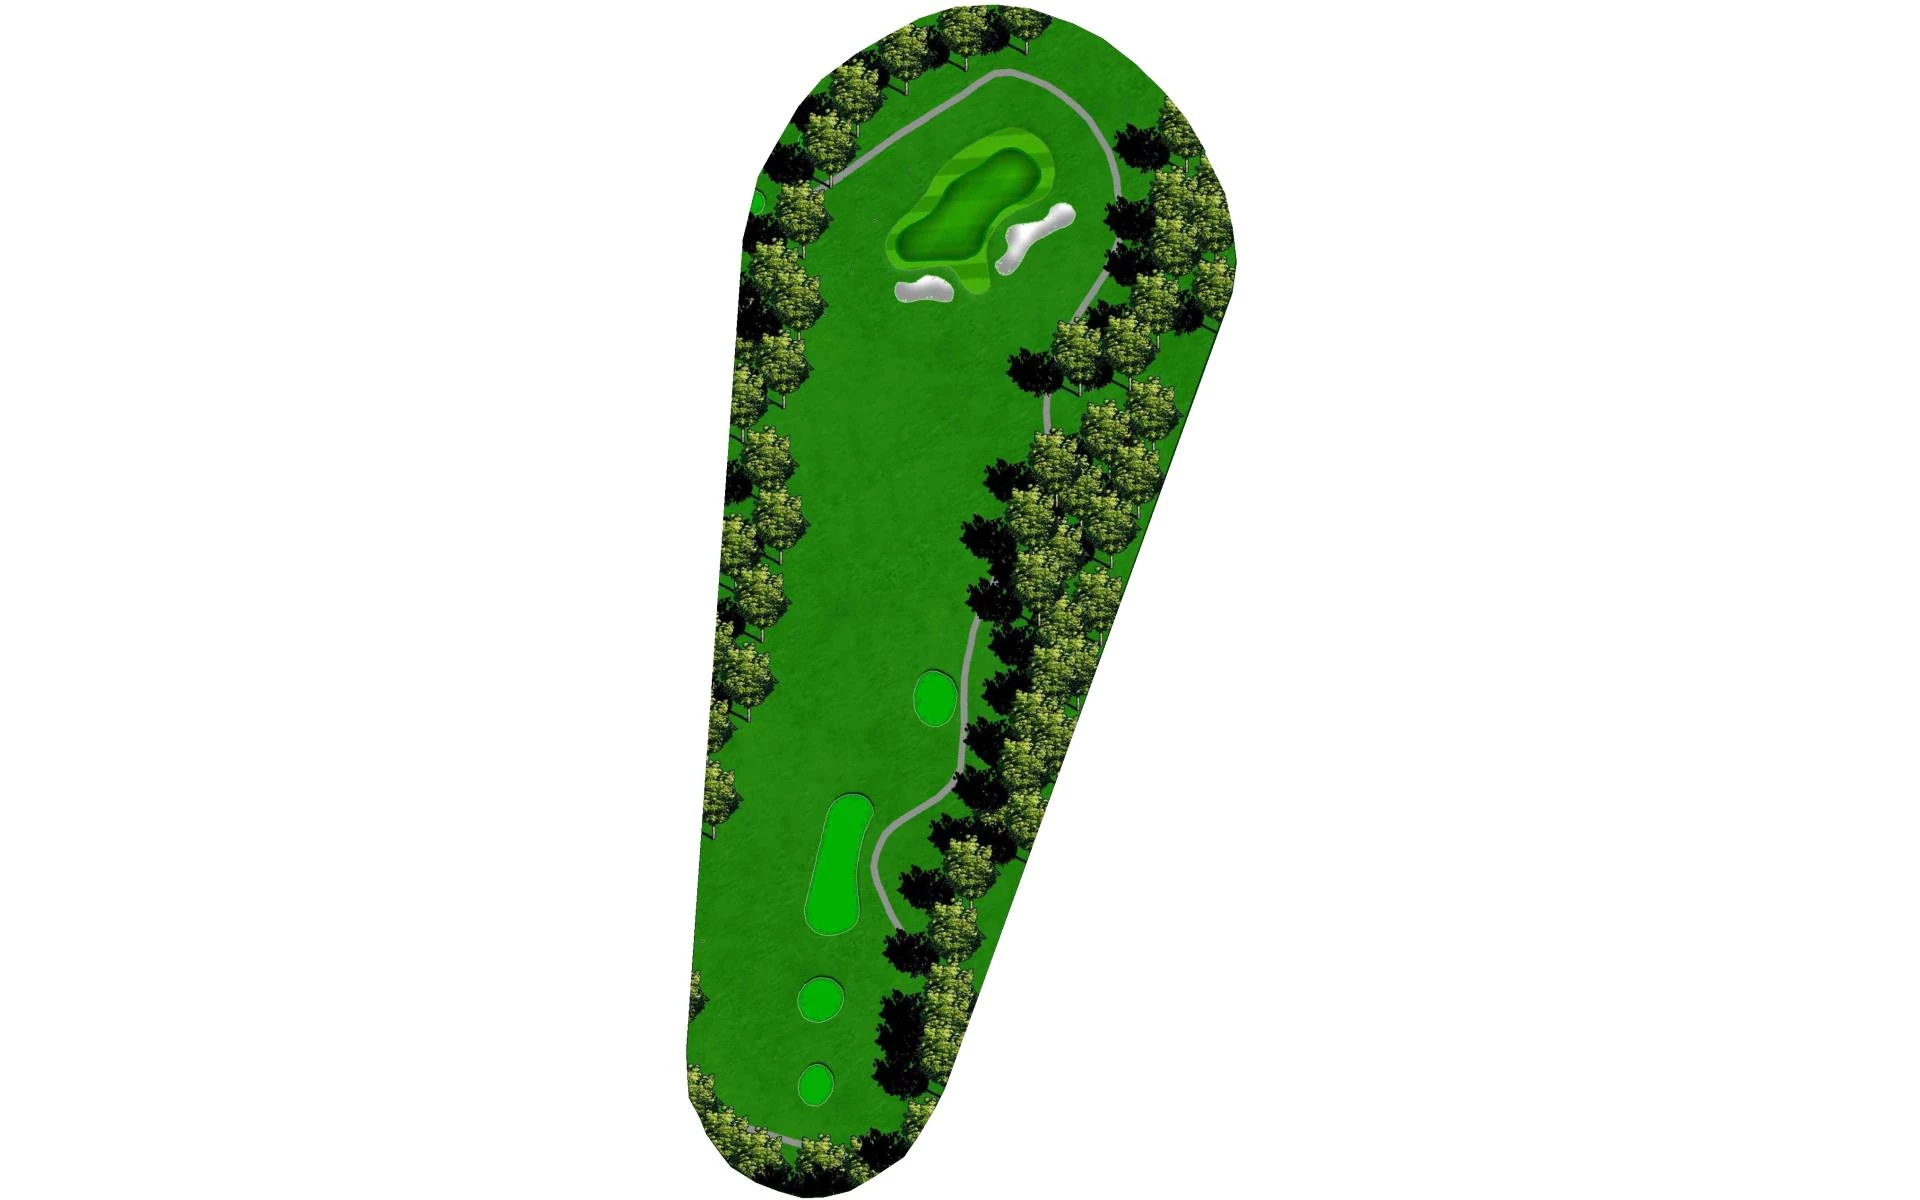
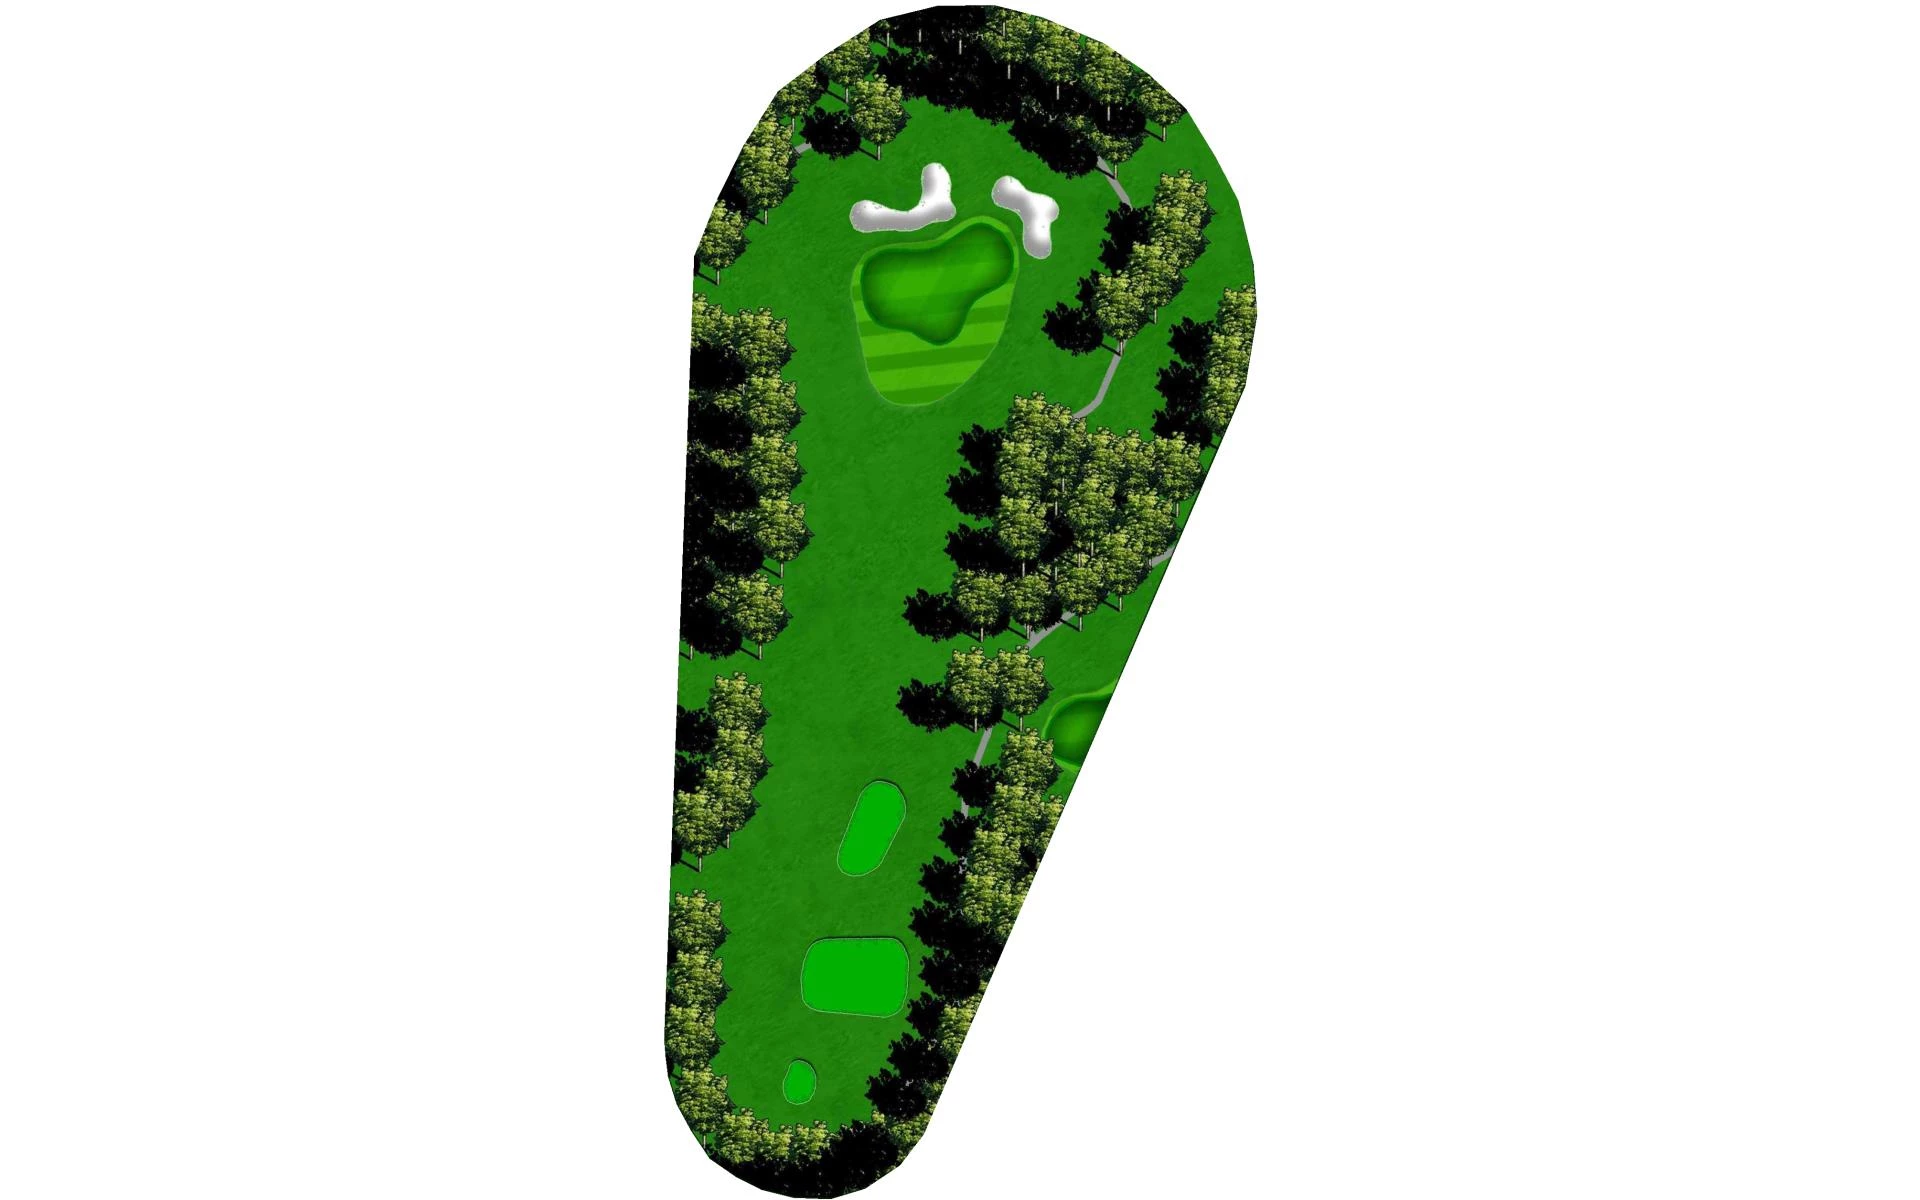
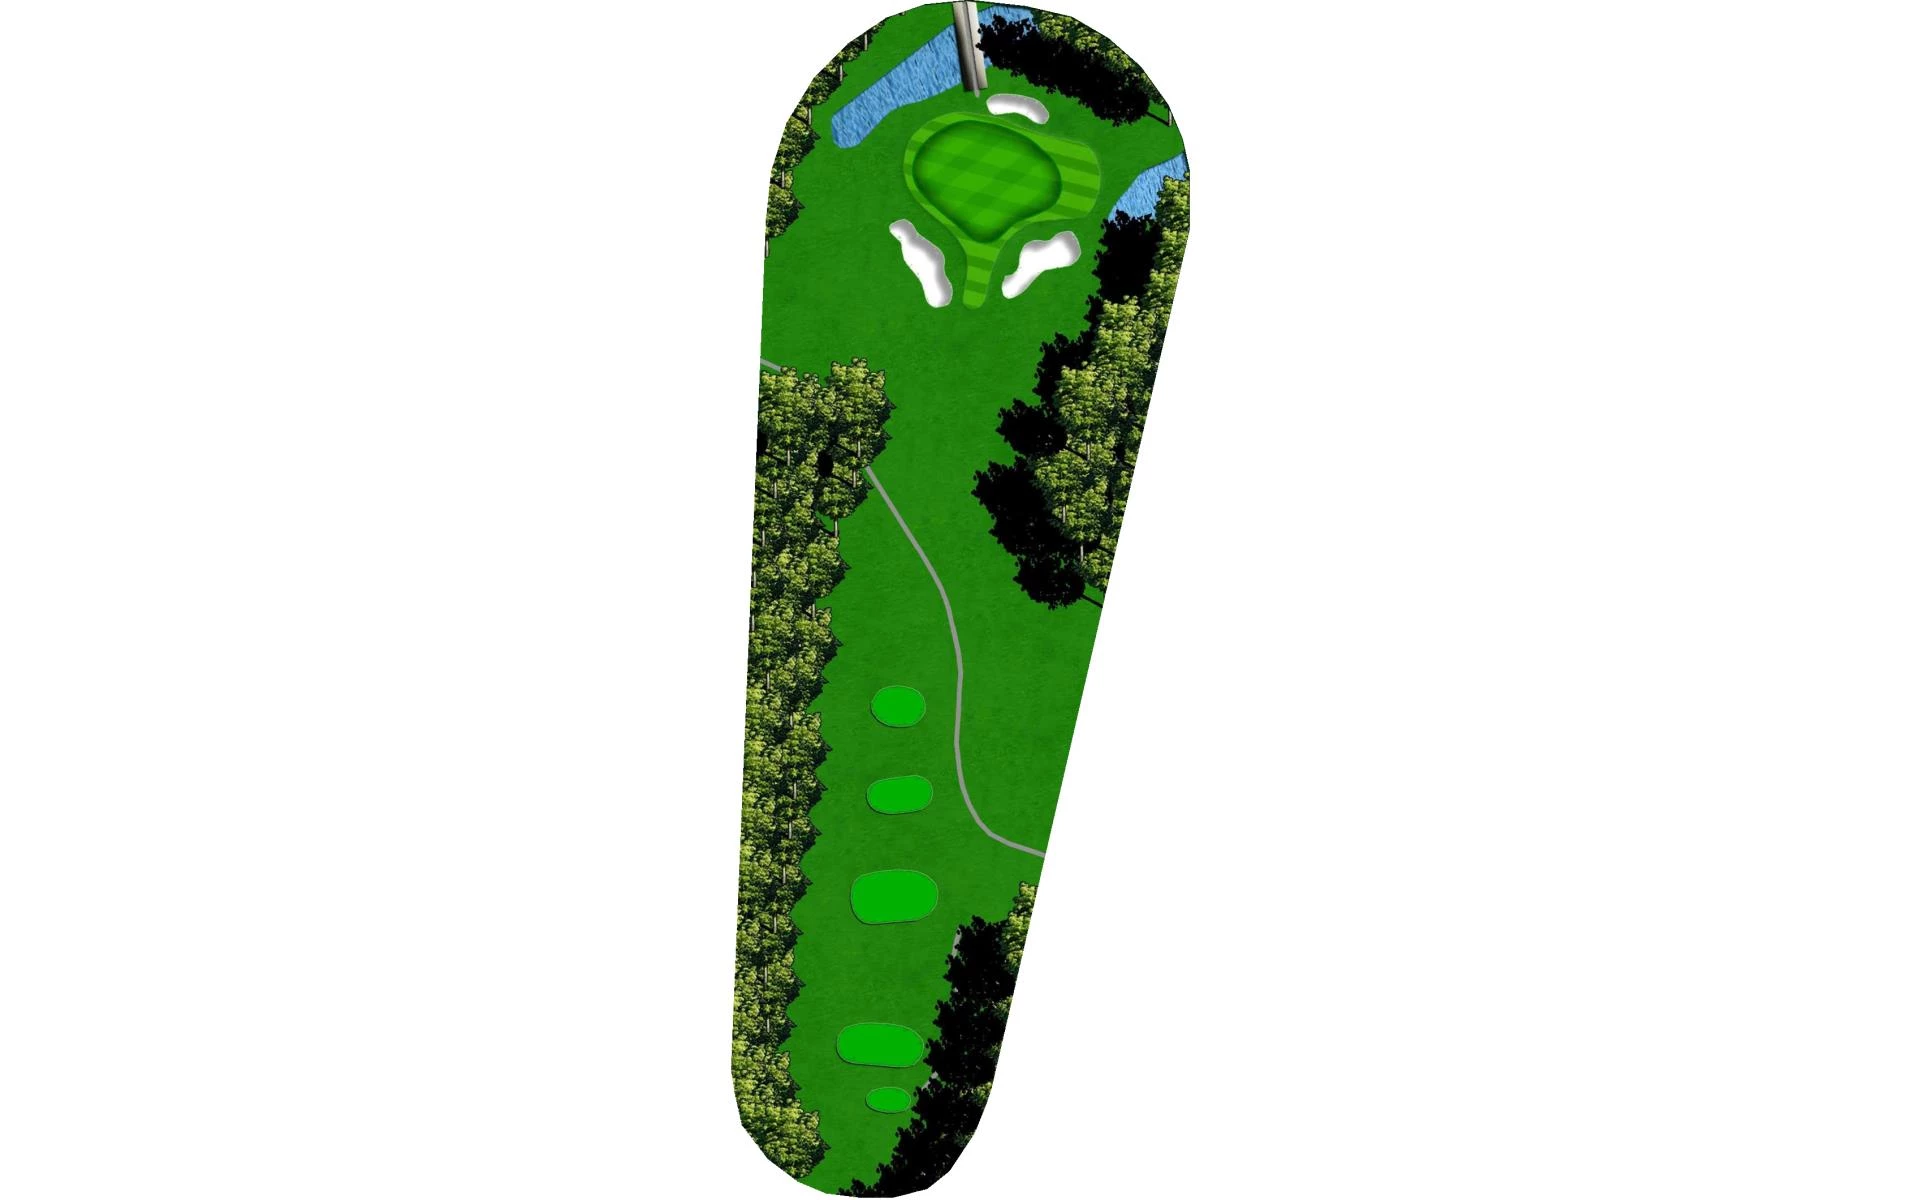
# 3 /
Par: 3
Yardage by Tee:
BLACK 200
BLUE 164
GOLD 176
WHITE 149
GREEN 140
Silver 117
Pro Tips
This uphill par 3 plays at least one club longer than the yardage indicates. The green is shallow and protected in front by two bunkers, so a premium is placed on distance control.
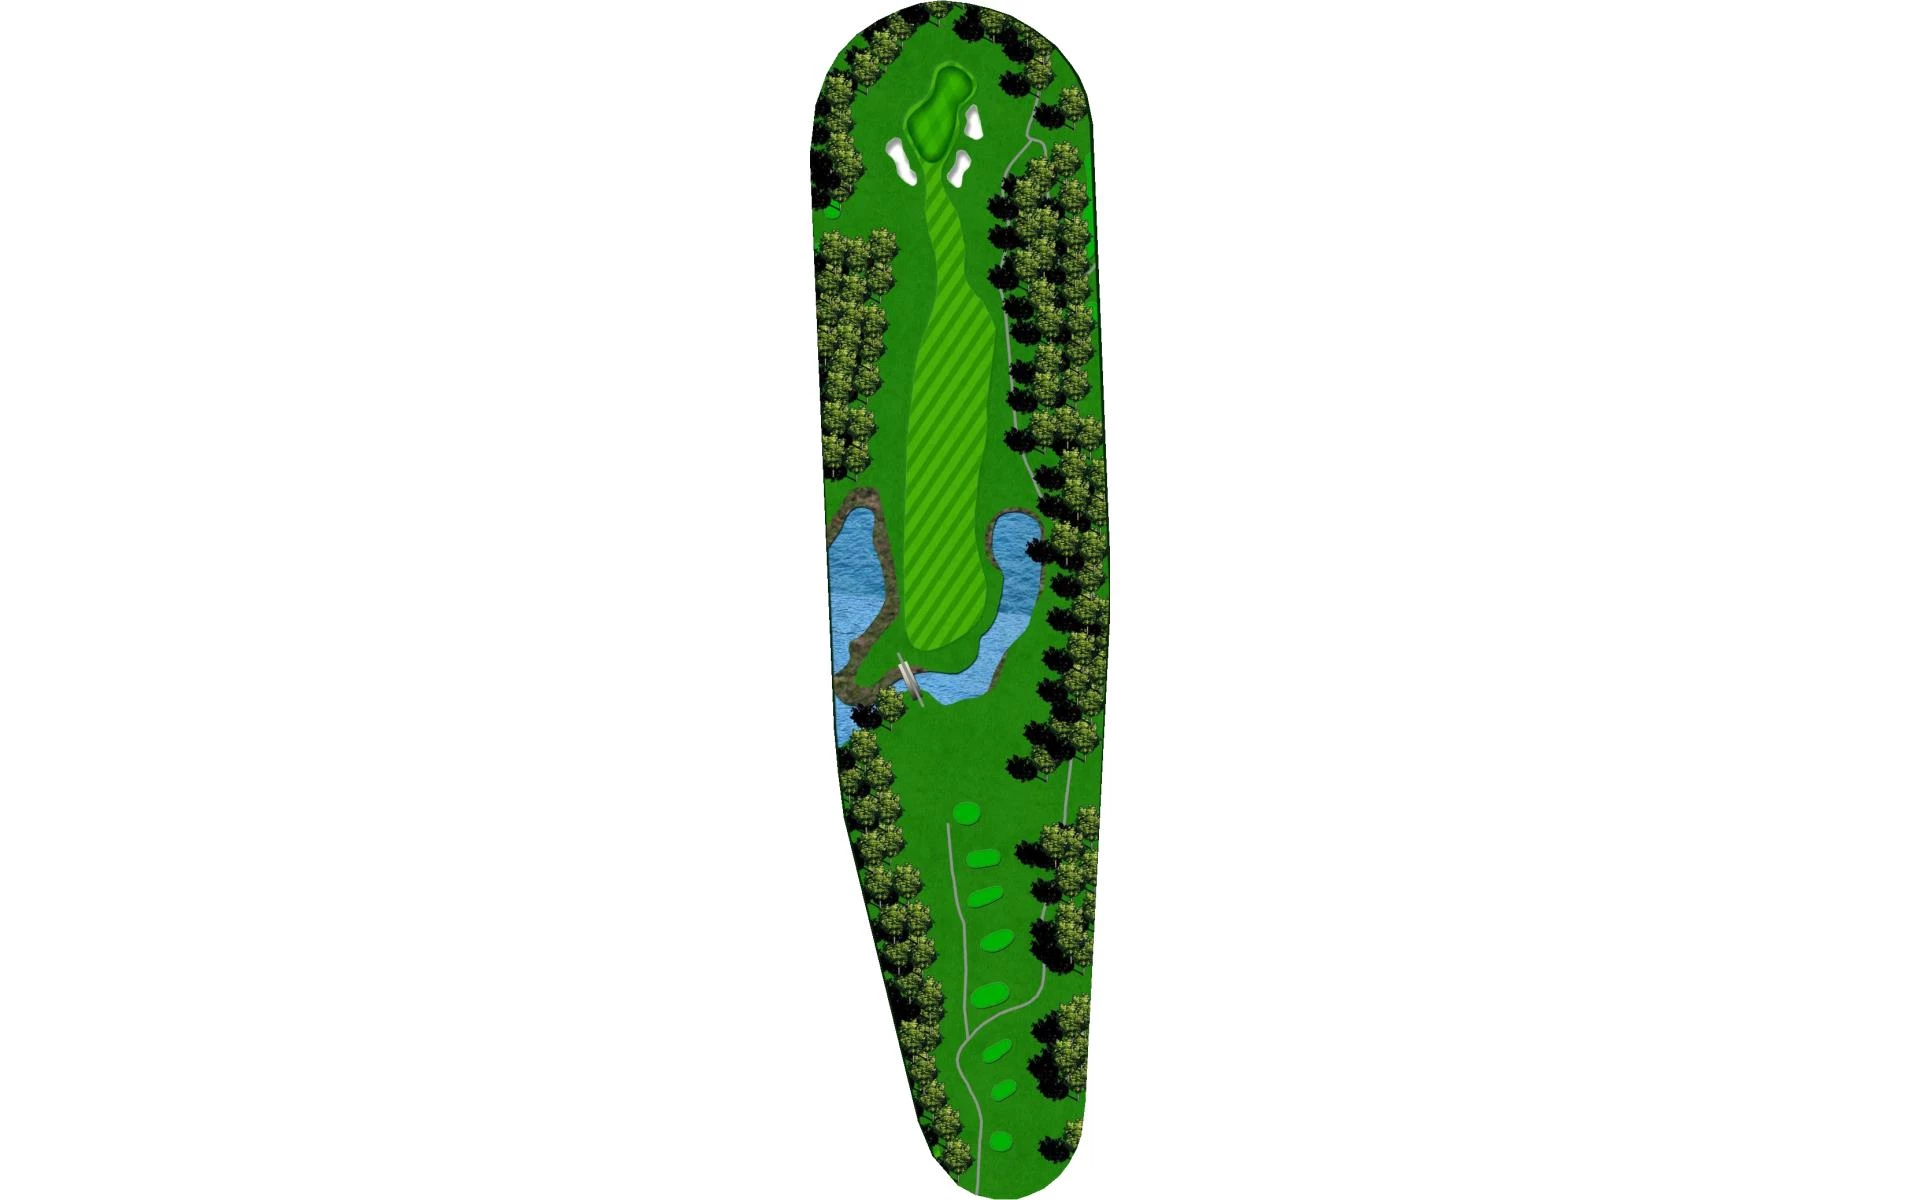
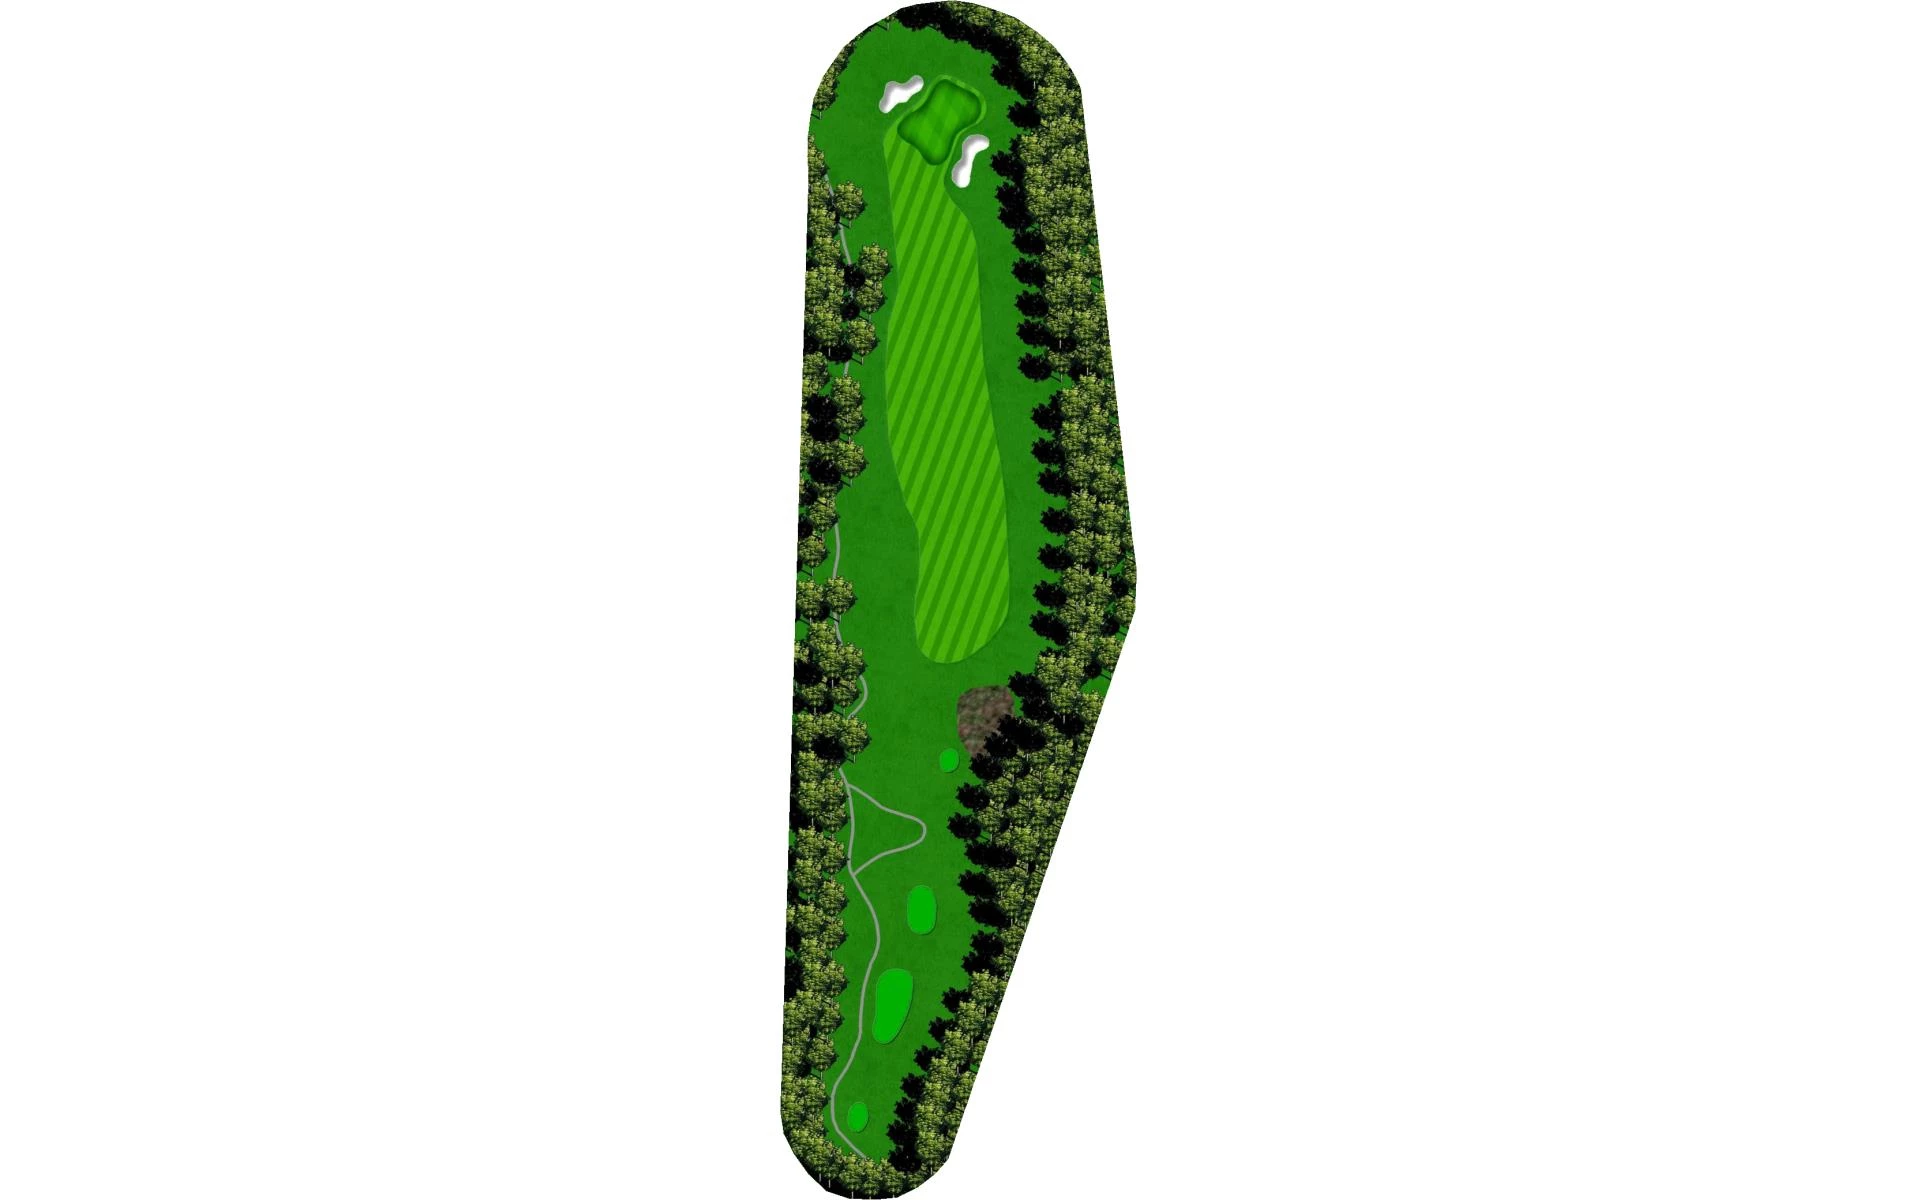
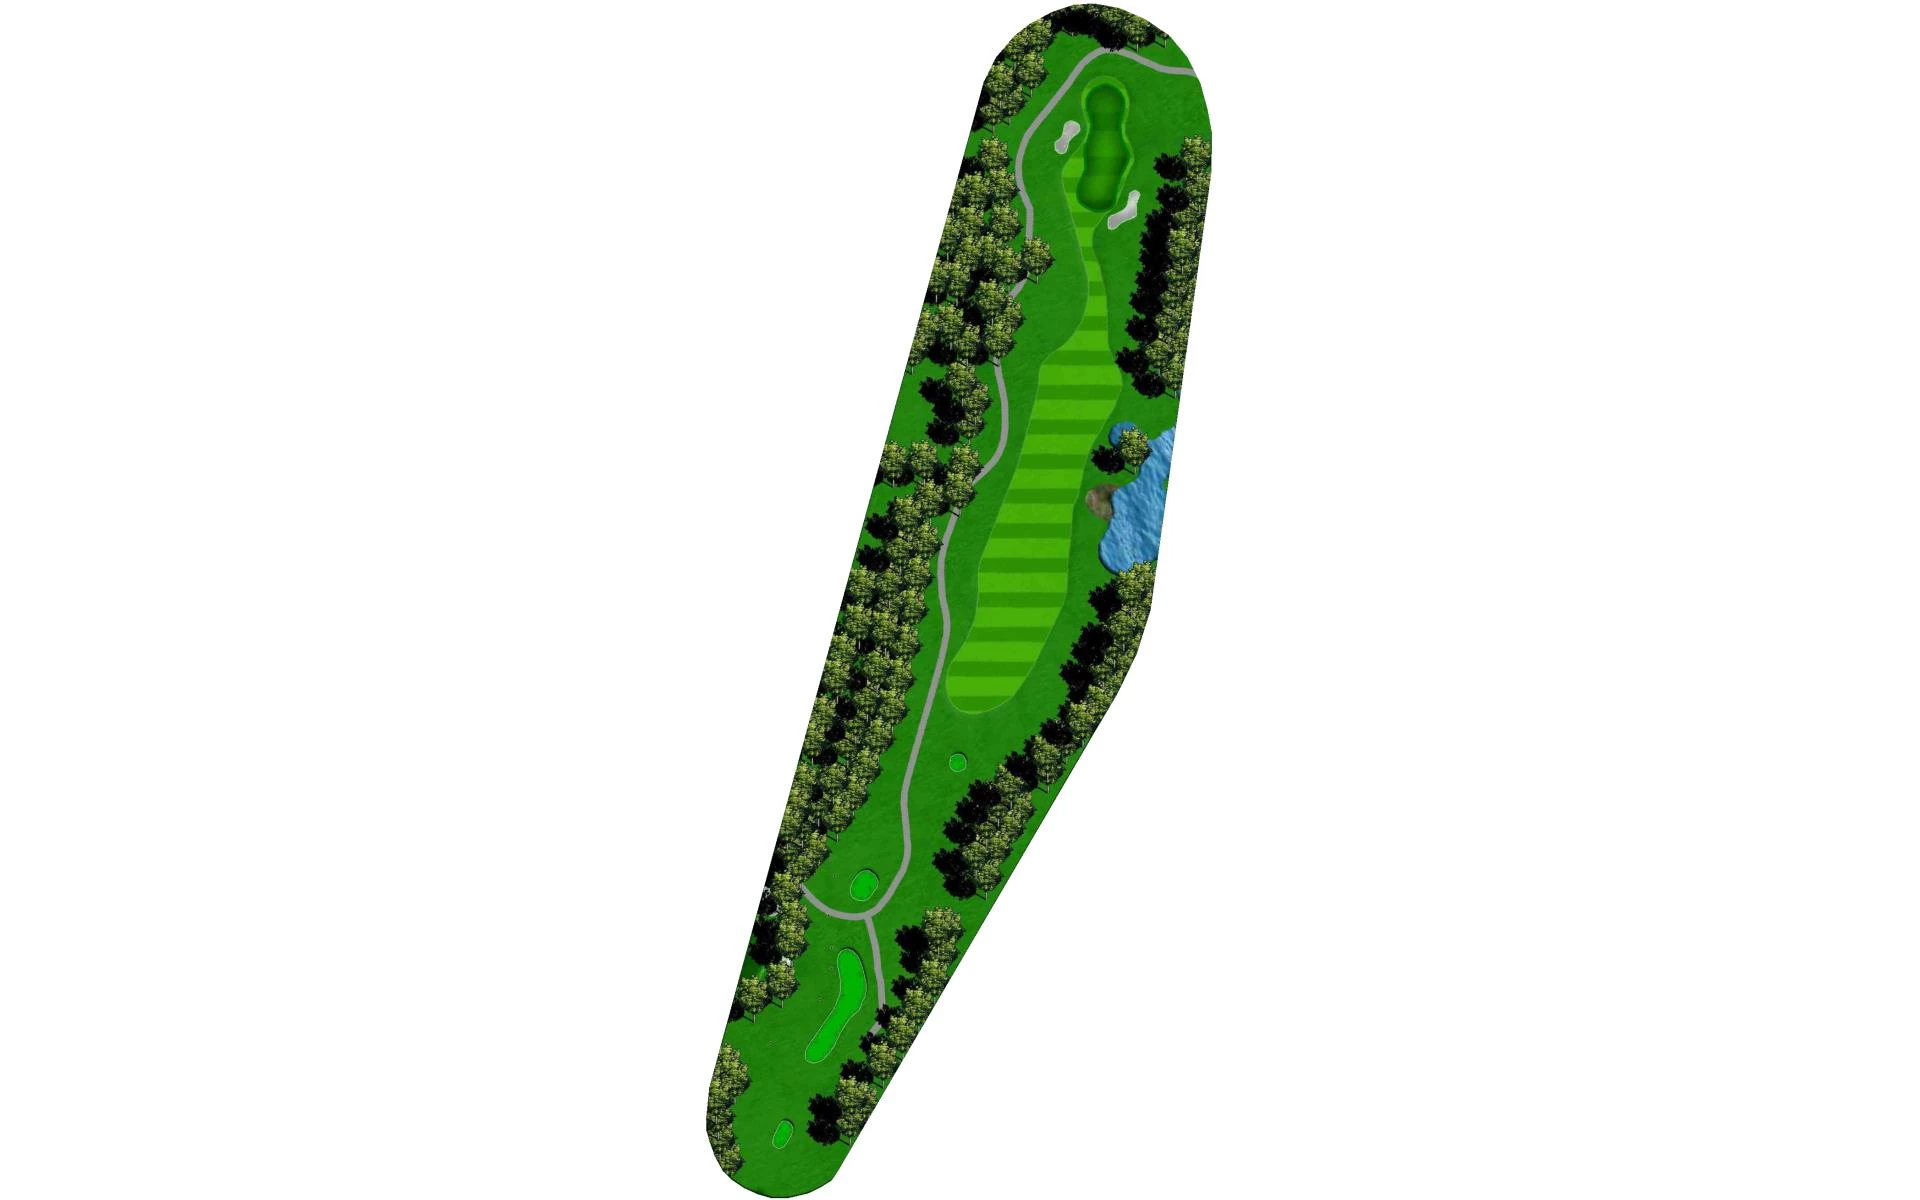
# 4 /
Par: 4
Yardage by Tee:
BLACK 427
BLUE 367
GOLD 390
WHITE 343
GREEN 310
Silver 291
Pro Tips
The tee box on this beautiful par 4 looks down on the rest of the hole. The first thing a player will have to do is carry the water short of the narrowing fairway. Around 100 yards out the approach becomes more difficult, so staying back has its benefits. The two-tiered green is elevated with another false front.
# 5 /
Par: 4
Yardage by Tee:
BLACK 419
BLUE 362
GOLD 385
WHITE 332
GREEN 311
Silver 311
Pro Tips
This relatively short par 4 provides a chance to attack. Laying short of the left fairway bunker off the tee also has its advantages, as it takes danger out of play. The wide, flat landing area provides those who hit the fairway a good opportunity to reach the large two-tiered green.
# 6 /
Par: 5
Yardage by Tee:
BLACK 455
BLUE 420
GOLD 436
WHITE 410
GREEN 400
Silver 388
Pro Tips
The sixth is the most difficult hole on the golf course. Off the tee, players will have to hit this narrow fairway with enough length to give them a chance to hit the green in regulation. The green is heavily bunkered, so hitting it with a long-iron will prove difficult.

# 7 /
Par: 3
Yardage by Tee:
BLACK 227
BLUE 155
GOLD 177
WHITE 149
GREEN 126
Silver 100
Pro Tips
This picturesque par 3 plays slightly downhill. The front and left side of this green is protected by a pond, while on the right and back left there’s sand. Players will also notice that the putting surface slopes left, towards the water.
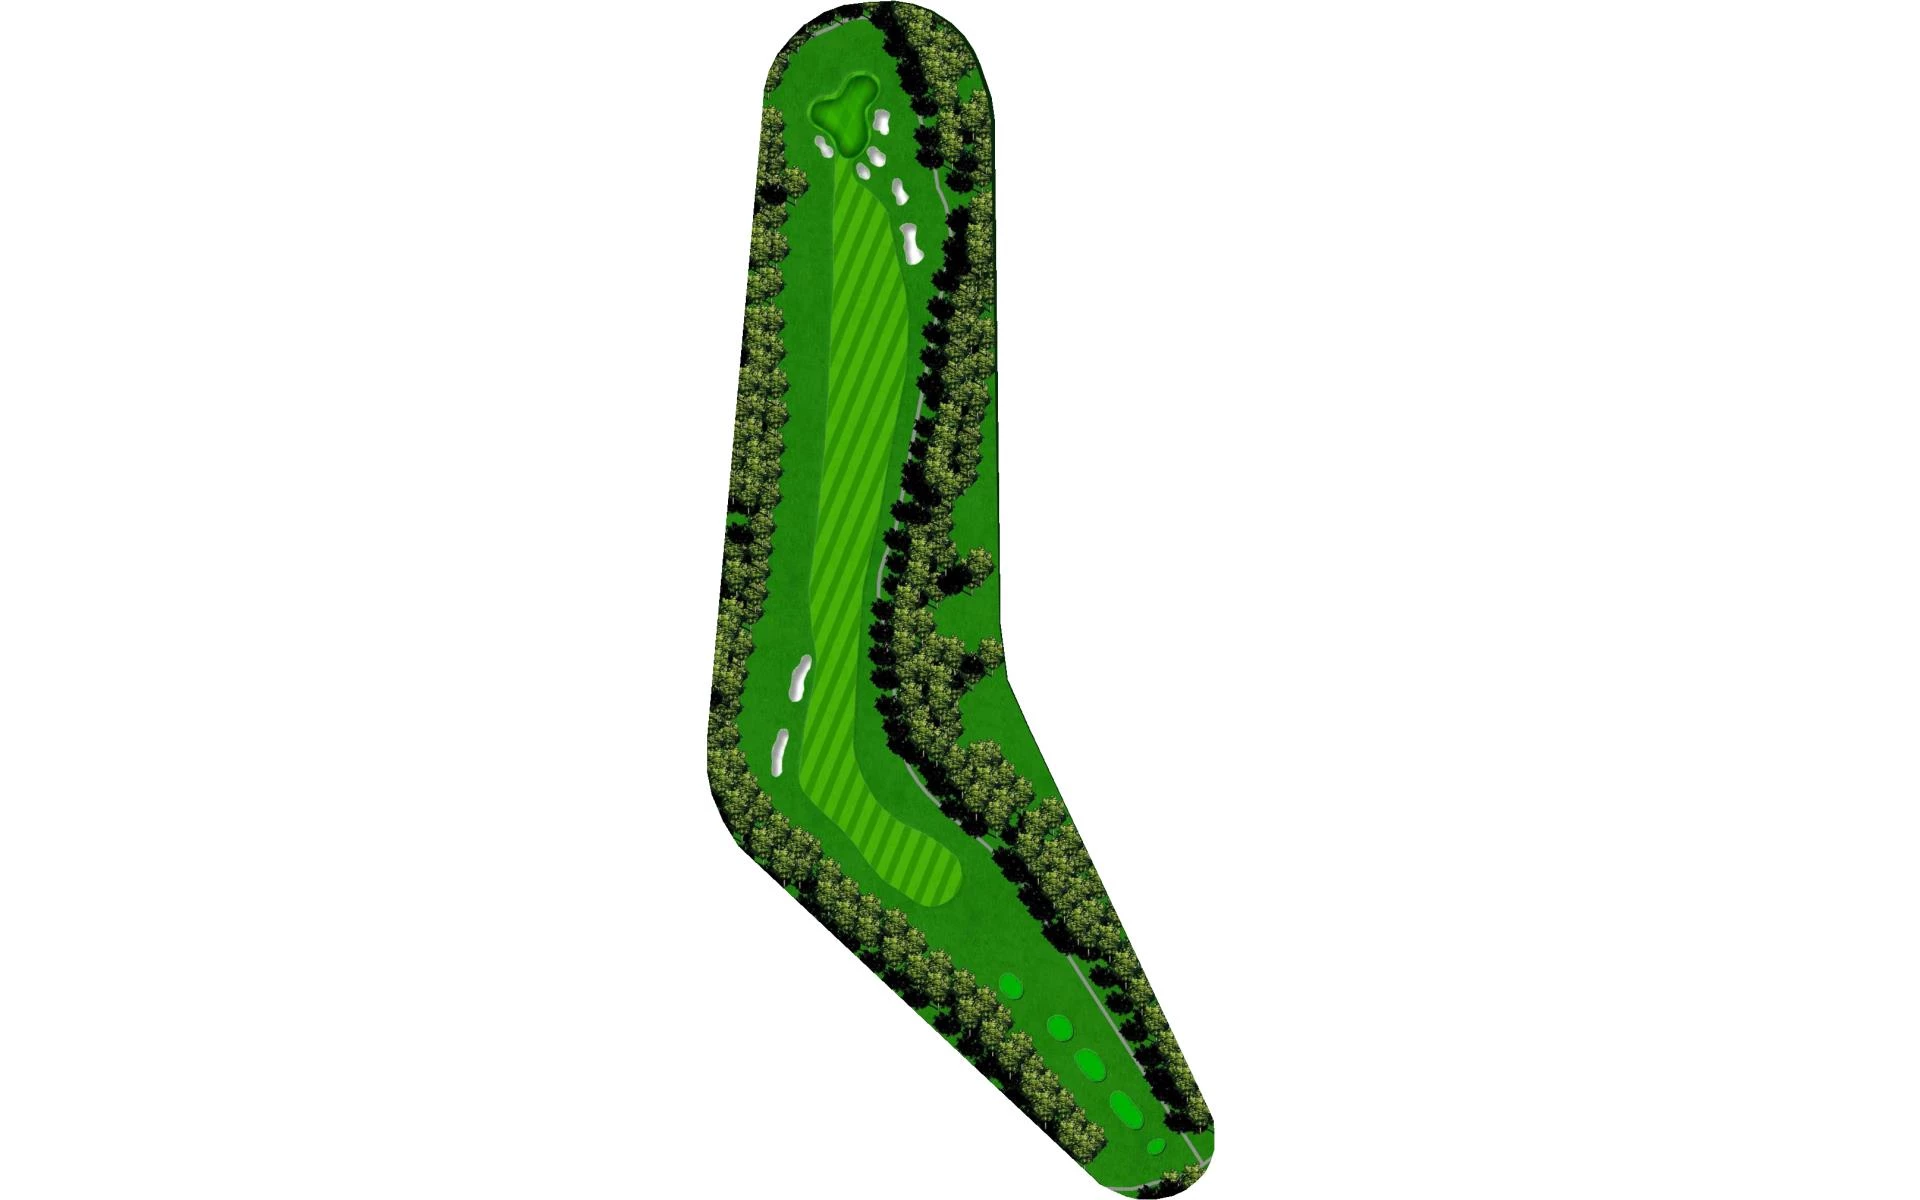
# 8 /
Par: 5
Yardage by Tee:
BLACK 534
BLUE 490
GOLD 514
WHITE 475
GREEN 441
Silver 433
Pro Tips
The eighth is a long dogleg right par 5, that requires a shorter shot off the tee to the corner. Some may be tempted to cut the corner with a driver, but that risk could leave an awkward downhill lie. Playing down the left side of this hole will pay off.
# 9 /
Par: 4
Yardage by Tee:
BLACK 388
BLUE 340
GOLD 360
WHITE 330
GREEN 305
Silver 298
Pro Tips
The final hole on the front nine offers players options off the tee. Longer hitters who can carry the ball 250 yards can go straight at the hole. The other option is to play straight down the fairway to set up a short uphill second shot. This 3-tiered green rewards an approach shot that lands on the correct tier.
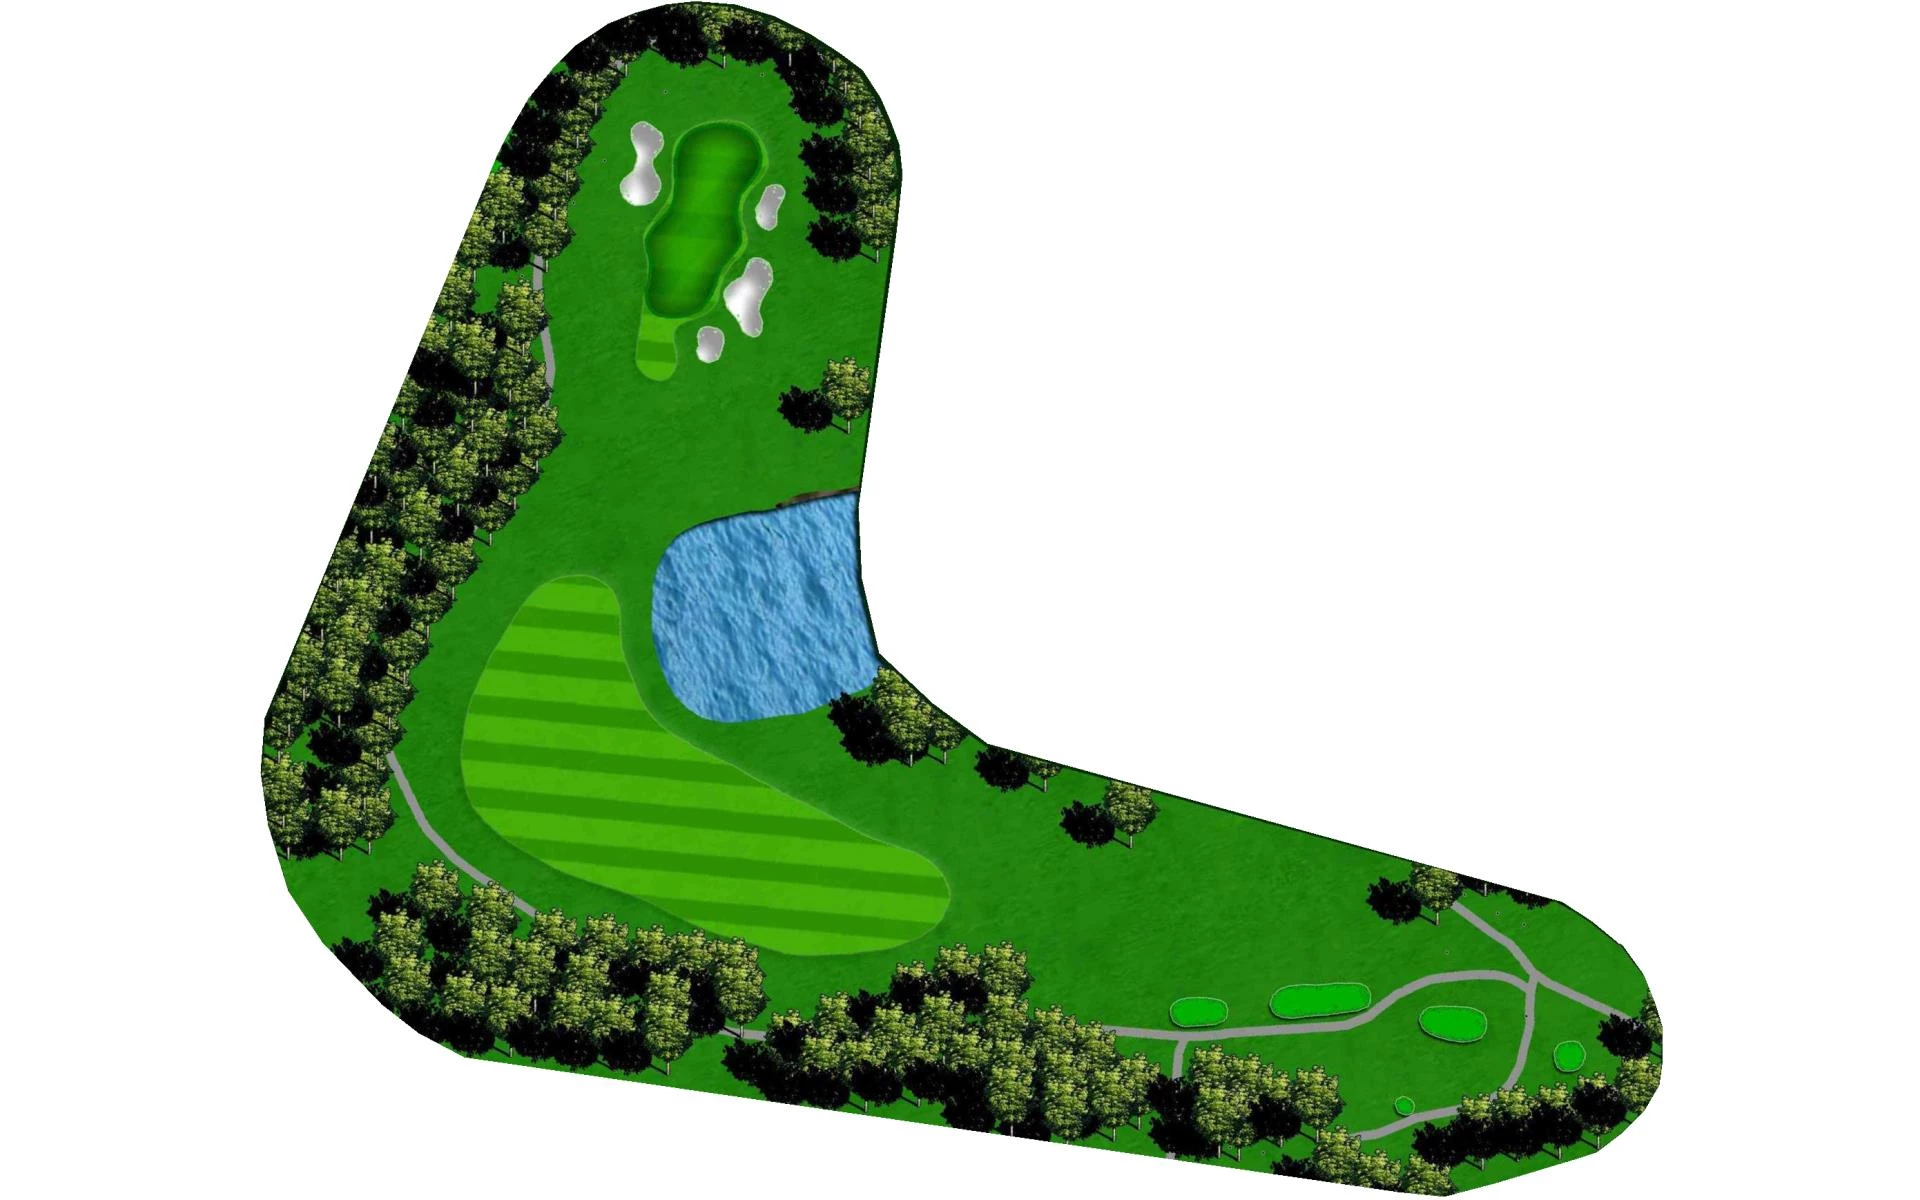
# 10 /
Par: 4
Yardage by Tee:
BLACK 427
BLUE 370
GOLD 409
WHITE 350
GREEN 332
Silver 307
Pro Tips
The back nine begins with a picturesque par 4 that features a lake on both sides of the tee. The landing area is wide, but players will notice a prominent tree in the middle. The approach is flat into this large green complex.
# 11 /
Par: 4
Yardage by Tee:
BLACK 372
BLUE 345
GOLD 357
WHITE 312
GREEN 269
Silver 307
Pro Tips
This short par 4 features cross bunkers that split the middle of the fairway. Players will need to lay-up off the tee in order to keep their ball in the short grass. The green on this hole is fairly flat, but does slope slightly back-to-front.
# 12 /
Par: 3
Yardage by Tee:
BLACK 175
BLUE 154
GOLD 158
WHITE 148
GREEN 124
Silver 109
Pro Tips
This slightly downhill par 3 features a green with a false front on the right side. Players will want to keep their tee shot in the middle or left side of the putting surface.
# 13 /
Par: 4
Yardage by Tee:
BLACK 398
BLUE 343
GOLD 365
WHITE 315
GREEN 307
Silver 250
Pro Tips
The thirteenth is a short par 4 with a landing area that slopes left-to-right. Players will want to favor the left side with their tee shot. The approach into the green will have to avoid trouble that surrounds this undulated green.
# 14 /
Par: 5
Yardage by Tee:
BLACK 602
BLUE 541
GOLD 564
WHITE 516
GREEN 481
Silver 418
Pro Tips
The fairway bunkers on the right side of the fairway are in play for long hitters on this par 5. The fairway bends slightly right on its way to the green that slopes down from back-to-front. A bunker in the front-center of the green must be avoided.
# 15 /
Par: 4
Yardage by Tee:
BLACK 442
BLUE 383
GOLD 424
WHITE 353
GREEN 328
Silver 307
Pro Tips
The landing area on this downhill par 4 is guarded on both sides by fairway bunkers. Avoid those and players will have a downhill shot into the green, which is also protected by bunkers. The approach shot typically requires one less club than normal.
# 16 /
Par: 4
Yardage by Tee:
BLACK 408
BLUE 350
GOLD 369
WHITE 333
GREEN 299
Silver 249
Pro Tips
The sixteenth is a narrow par 4 with a slight bend to the left. The tee shot is tight, but also has to avoid the water hidden on the right side. A tee shot too far left will block out a player’s second shot into the elevated, three-tiered green with a false front.
# 17 /
Par: 3
Yardage by Tee:
BLACK 174
BLUE 133
GOLD 166
WHITE 128
GREEN 116
Silver 100
Pro Tips
Accuracy is key on this short par 3. The green is large and protected by bunkers in front and water behind.

# 18 /
Par: 5
Yardage by Tee:
BLACK 517
BLUE 482
GOLD 486
WHITE 462
GREEN 456
Silver 407
Pro Tips
The finishing hole is a par 5 that bends its way uphill towards the clubhouse. An ideal tee shot will play down the right side as the fairway funnels left. A layup to the right fairway will give players the best angle in on their approach. Then, the green features a lot of breaks, mostly to the left, and is heavily protected by bunkers.