The Golf Course at Hilton Head
Designer: Rees Jones
Designed by Rees Jones, the golf course at Country Club of Hilton Head truly captures the essence of Lowcountry golf in South Carolina. A ro…
Designed by Rees Jones, the golf course at Country Club of Hilton Head truly captures the essence of Lowcountry golf in South Carolina. A round of golf will take players through pine forests and marshlands with views of the Intracoastal Waterway. Featuring six sets of tees, CCHH features a challenging test of golf to players of all skill levels.
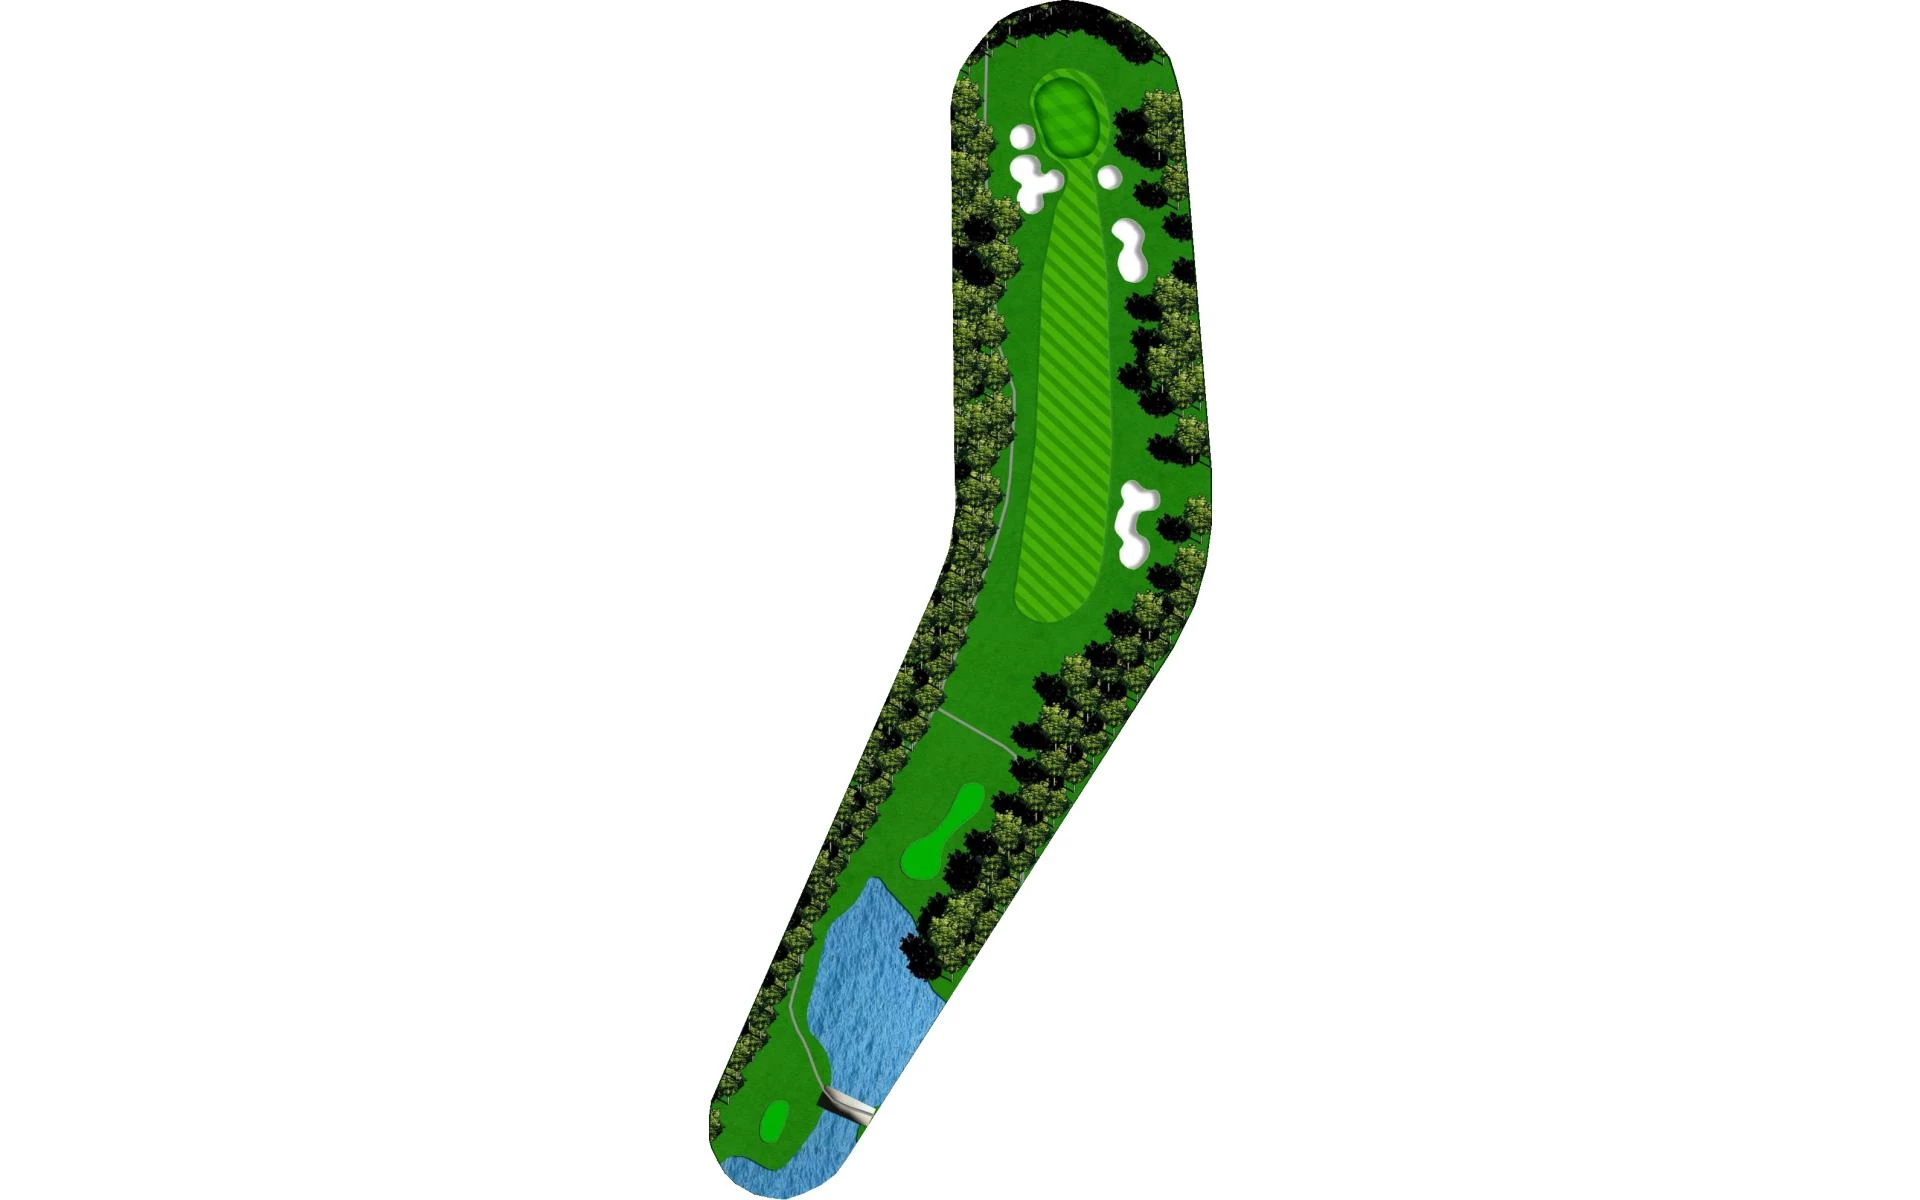
# 1 / Hole 1
Par: 4
Handicaps:
Men's 13
Women's 3
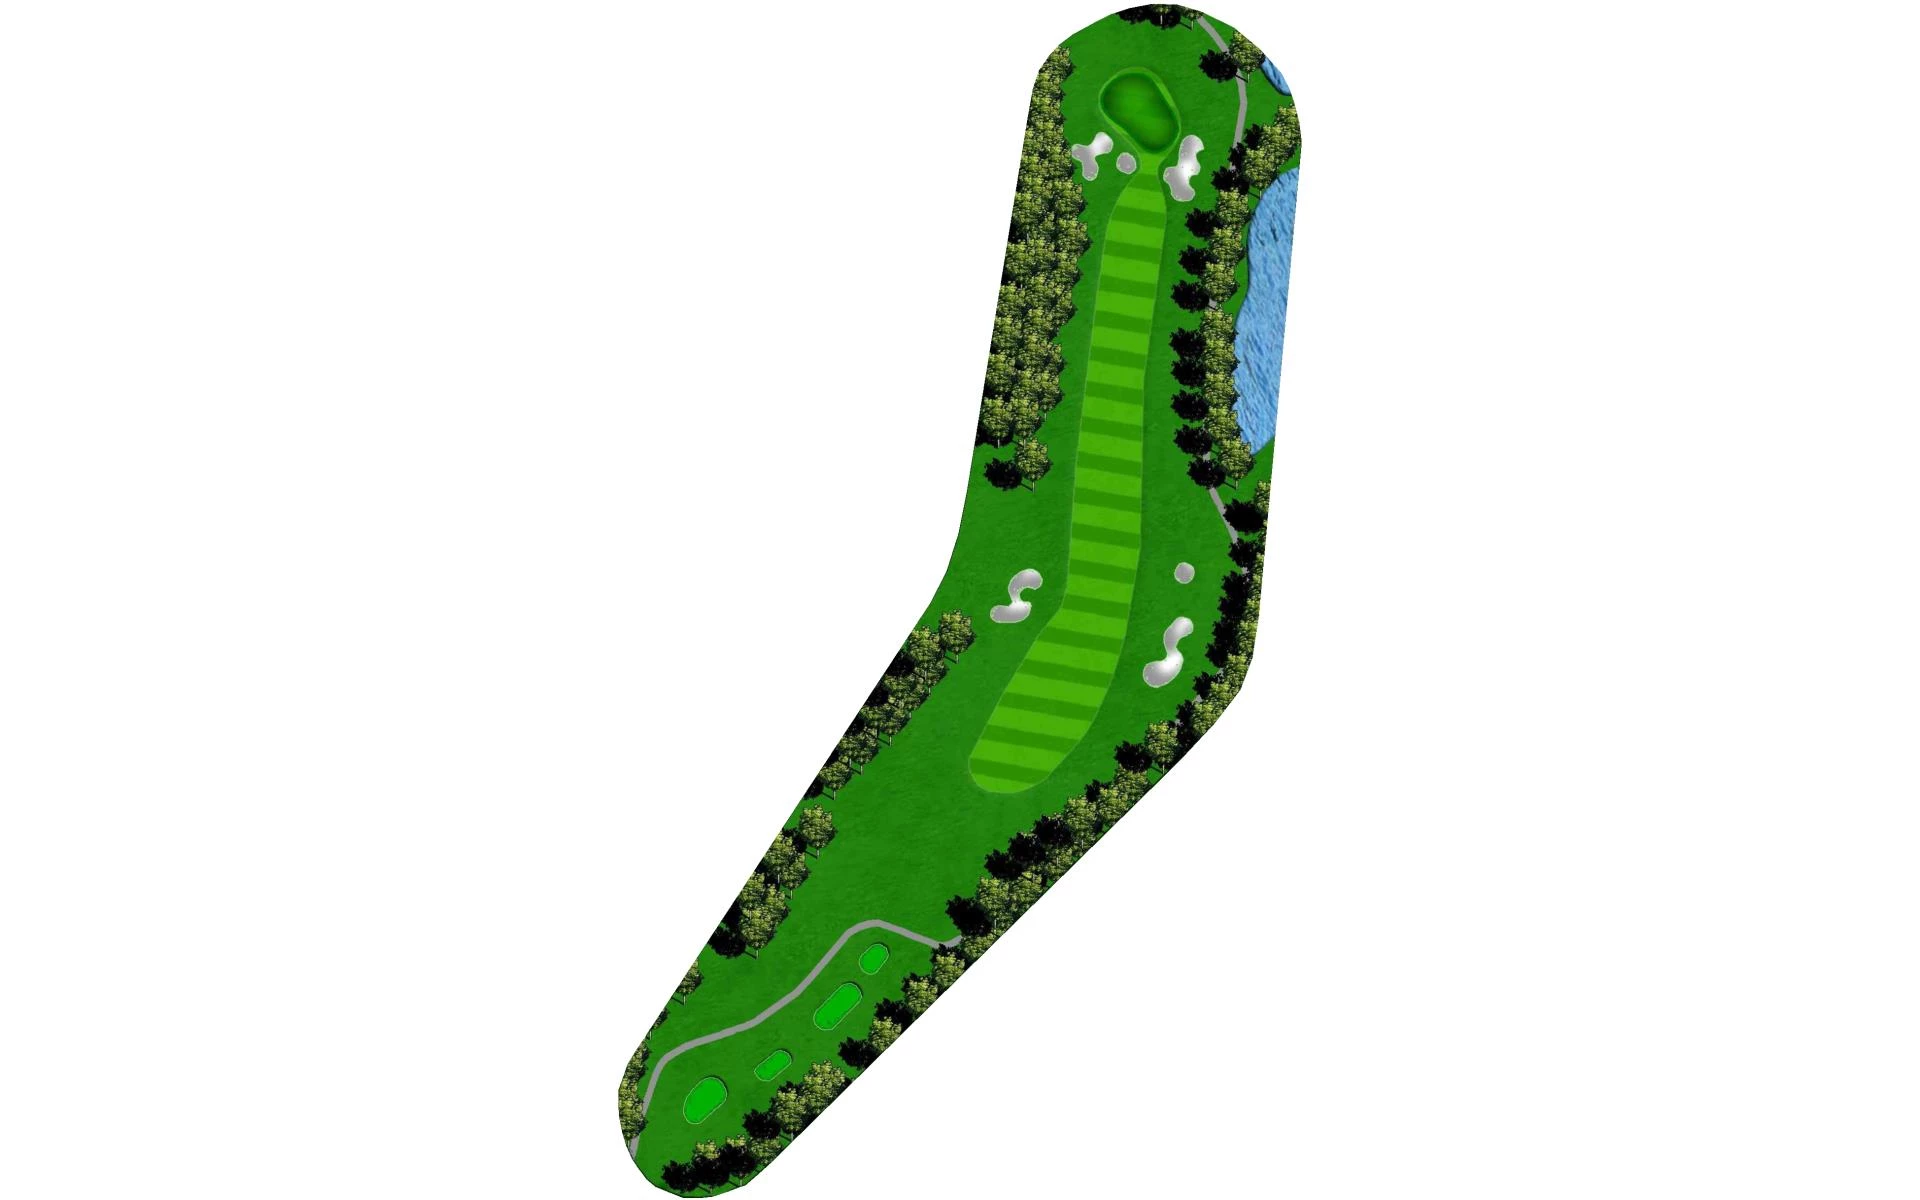
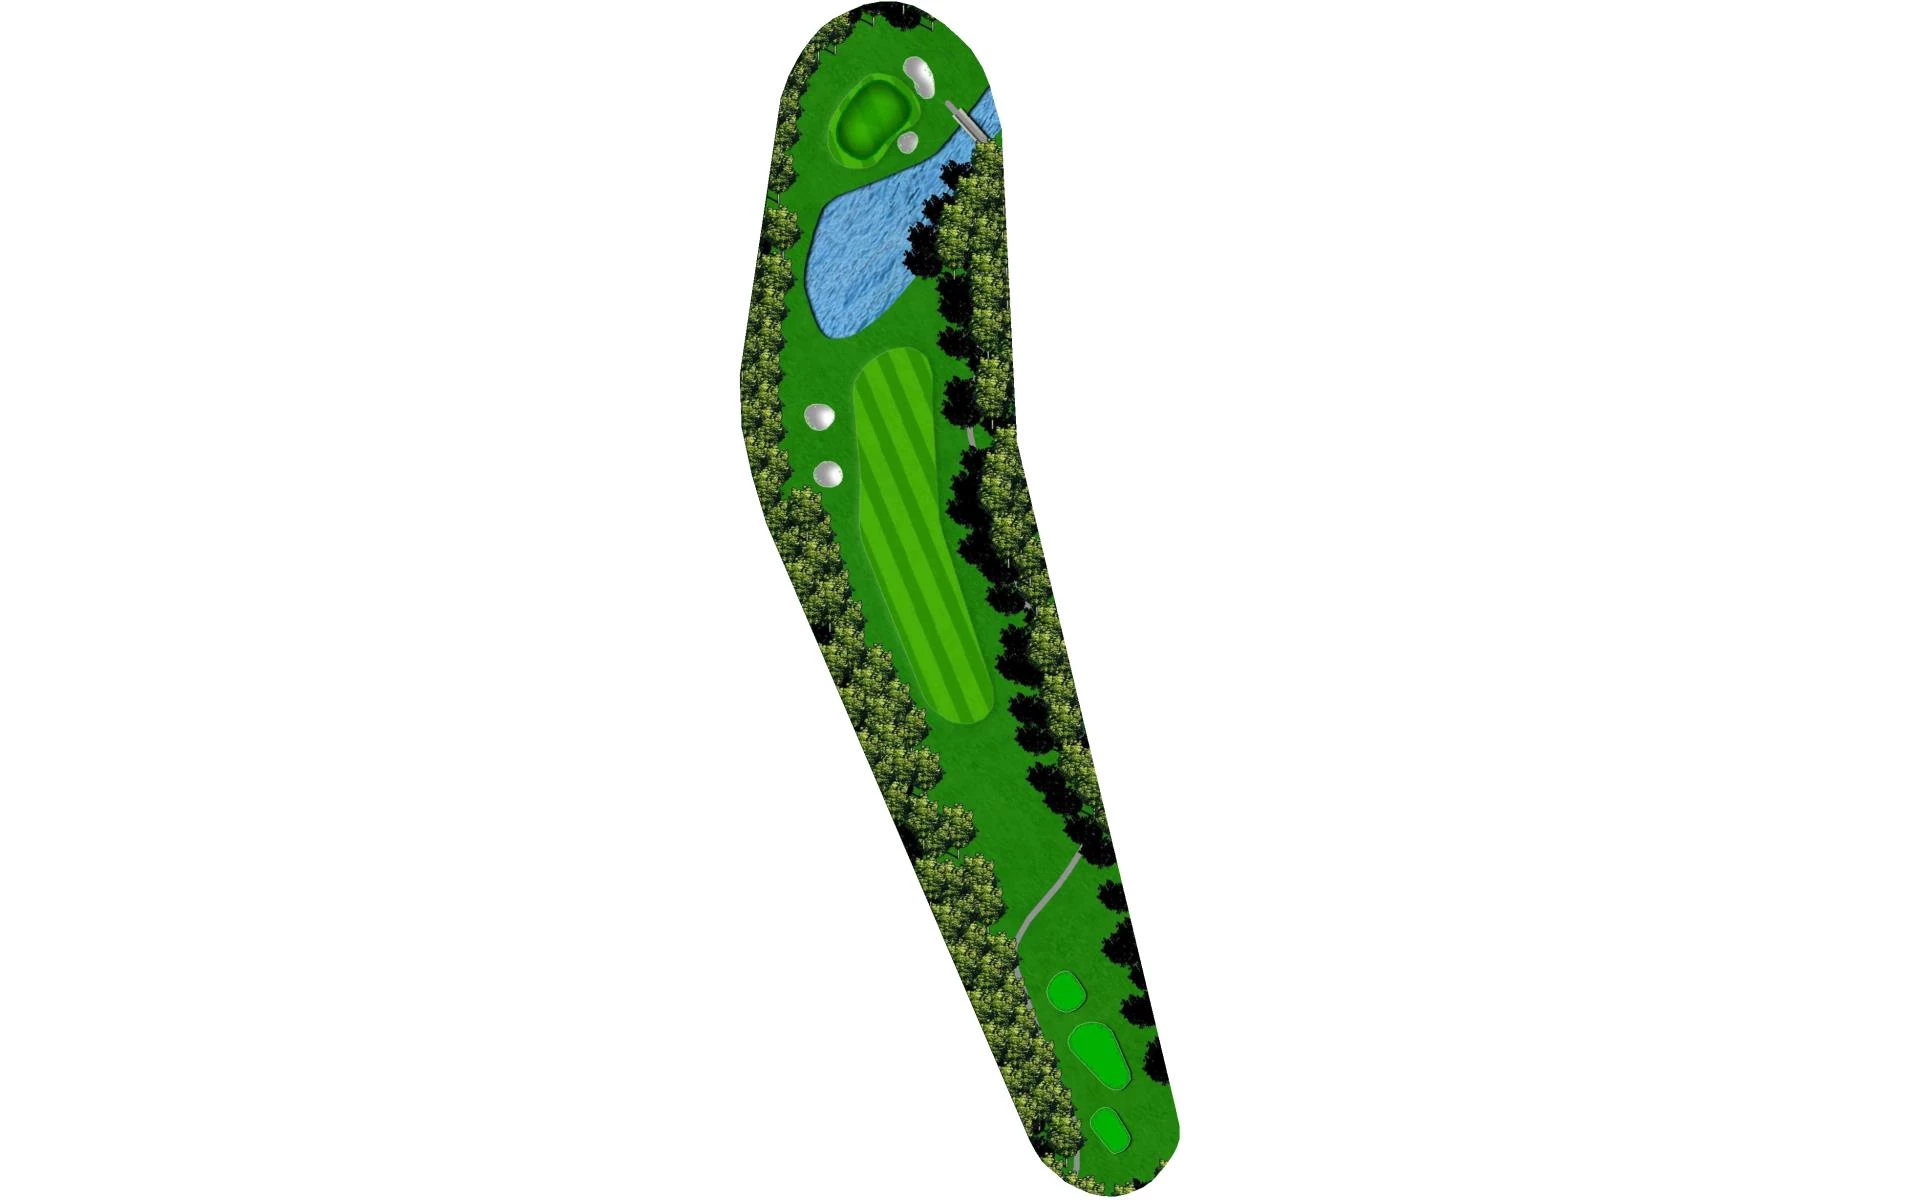
With bunkers guarding both sides of the fairway, the opening hole immediately tests a players accuracy. On the approach, the green is also p…
With bunkers guarding both sides of the fairway, the opening hole immediately tests a players accuracy. On the approach, the green is also protected on both sides by sand.
Yardage by Tee:
Gold Tee 398
Blue Tee 365
White Tee 335
Green Tee 315
Red Tee 310
Black Tee 310
Pro Tips
With bunkers guarding both sides of the fairway, the opening hole immediately tests a players accuracy. On the approach, the green is also protected on both sides by sand.
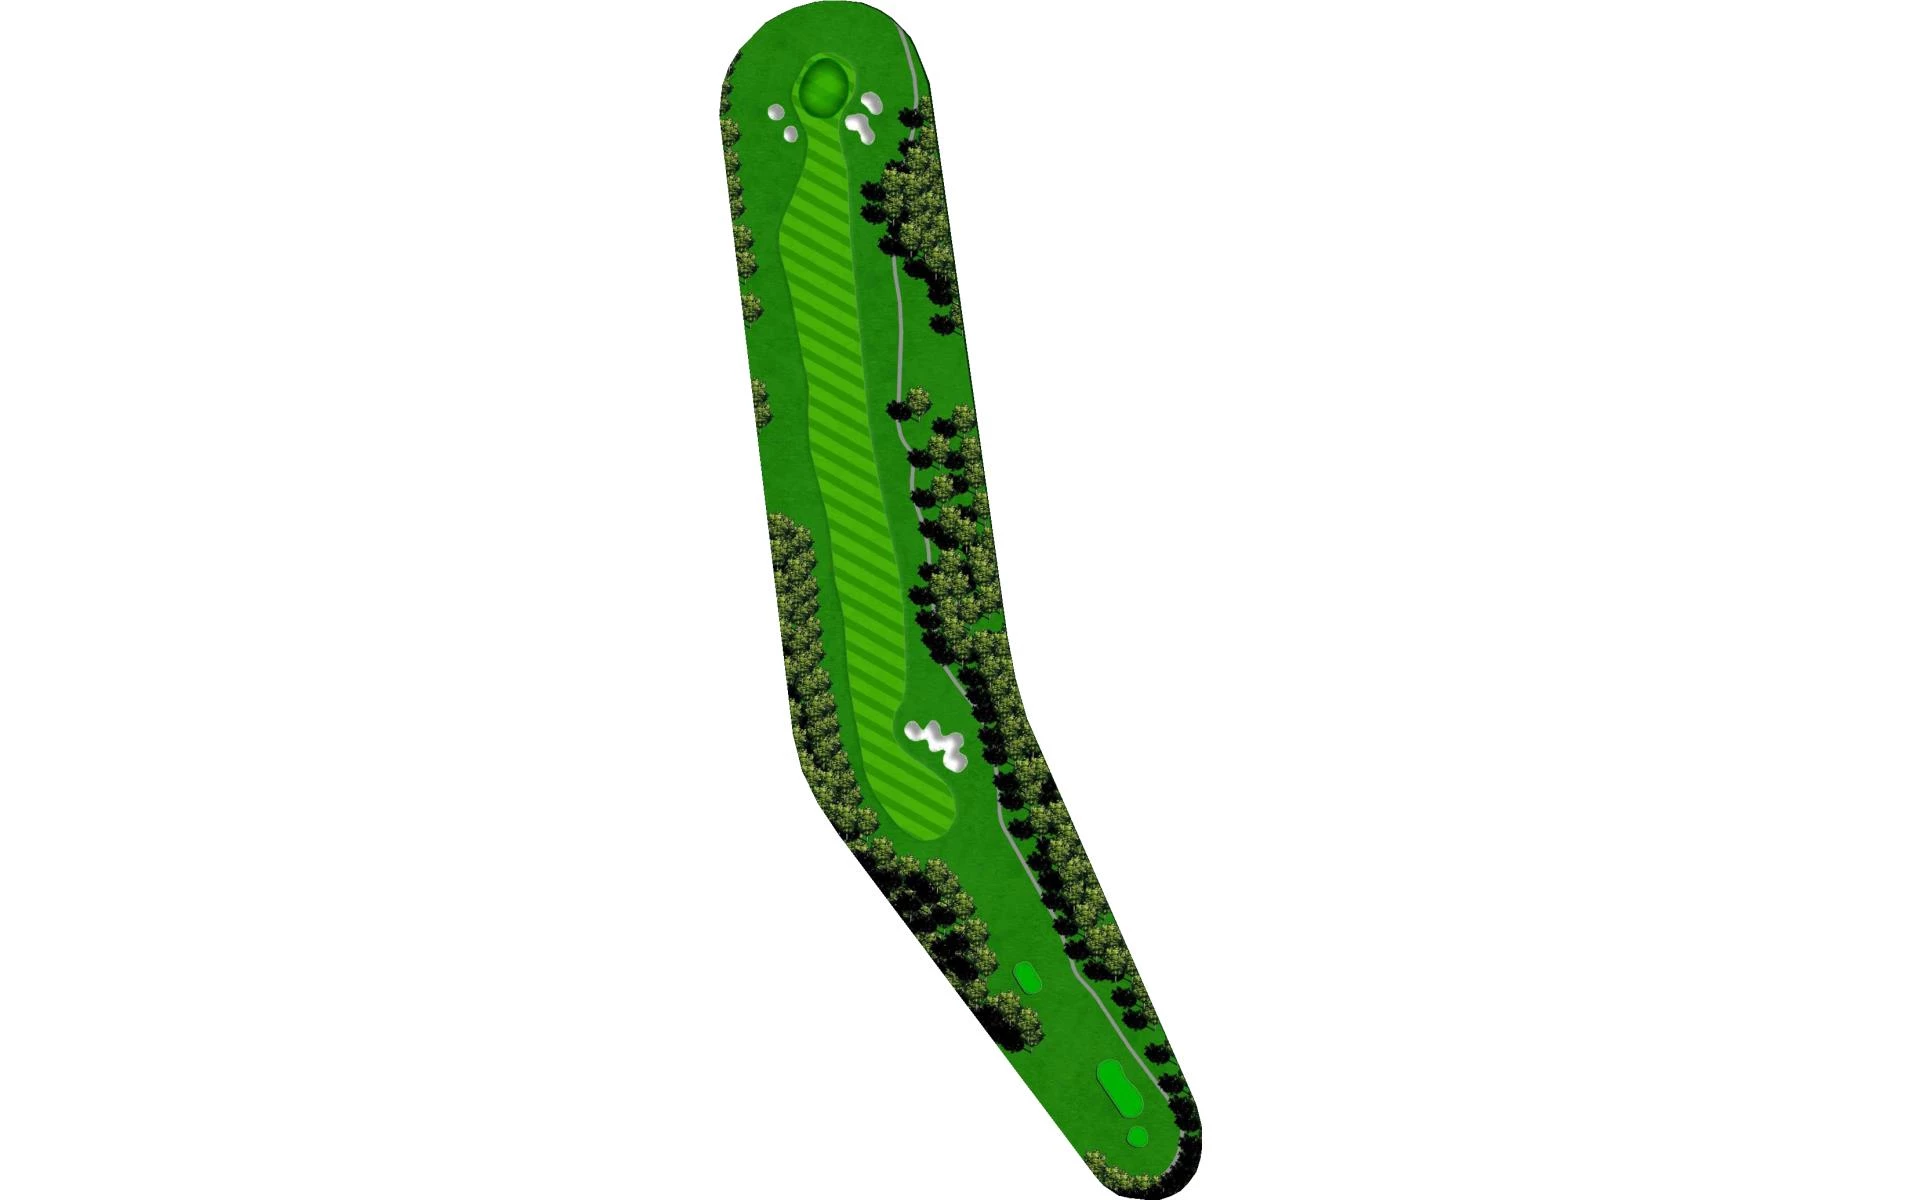
# 2 / Hole 2
Par: 4
Handicaps:
Men's 7
Women's 5
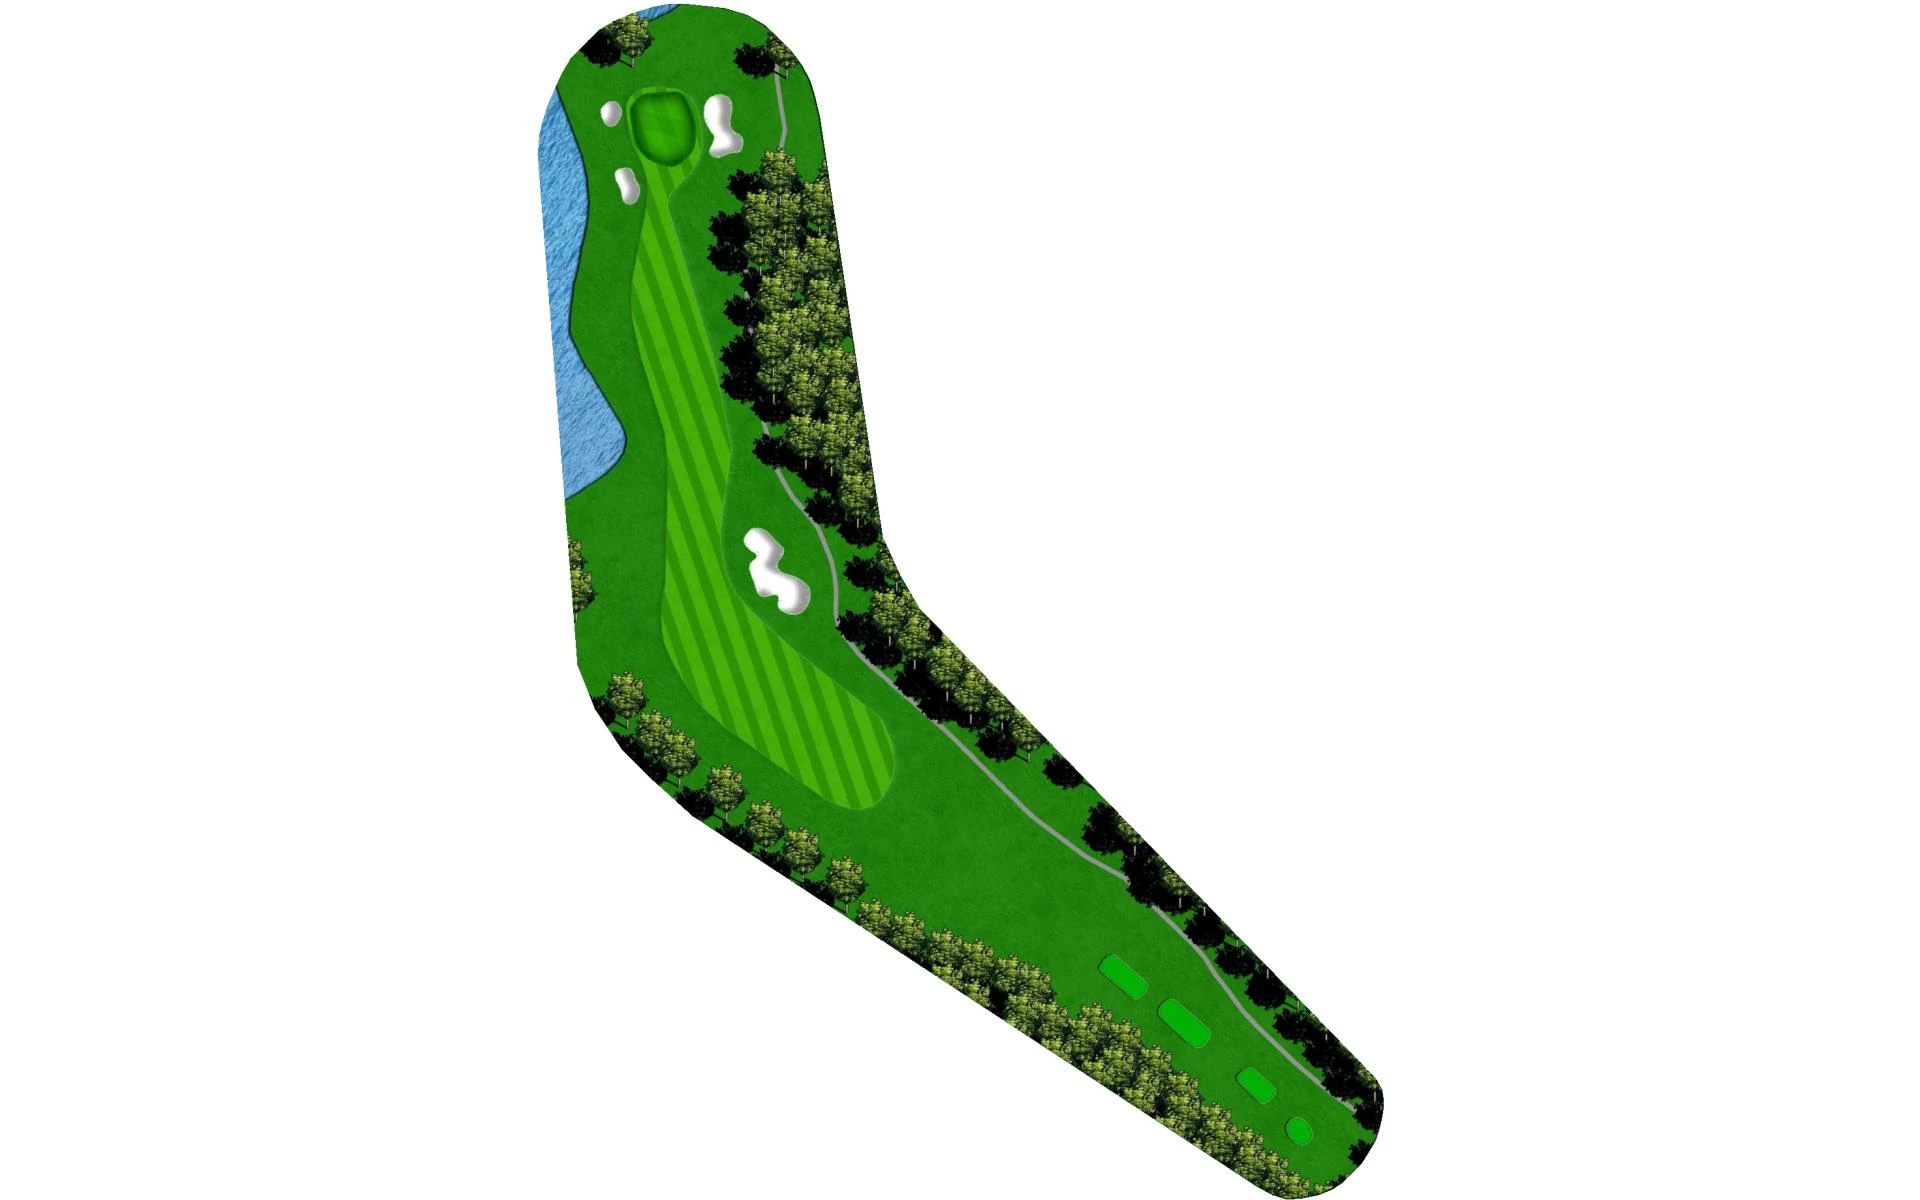
Players will want to take their drive down the left side to avoid the fairway bunker and out-of-bounds on the right. The approach shot typic…
Players will want to take their drive down the left side to avoid the fairway bunker and out-of-bounds on the right. The approach shot typically requires an extra club to the elevated green.
Yardage by Tee:
Gold Tee 413
Blue Tee 393
White Tee 364
Green Tee 340
Red Tee 336
Black Tee 286
Pro Tips
Players will want to take their drive down the left side to avoid the fairway bunker and out-of-bounds on the right. The approach shot typically requires an extra club to the elevated green.
# 3 / Hole 3
Par: 3
Handicaps:
Men's 17
Women's 17
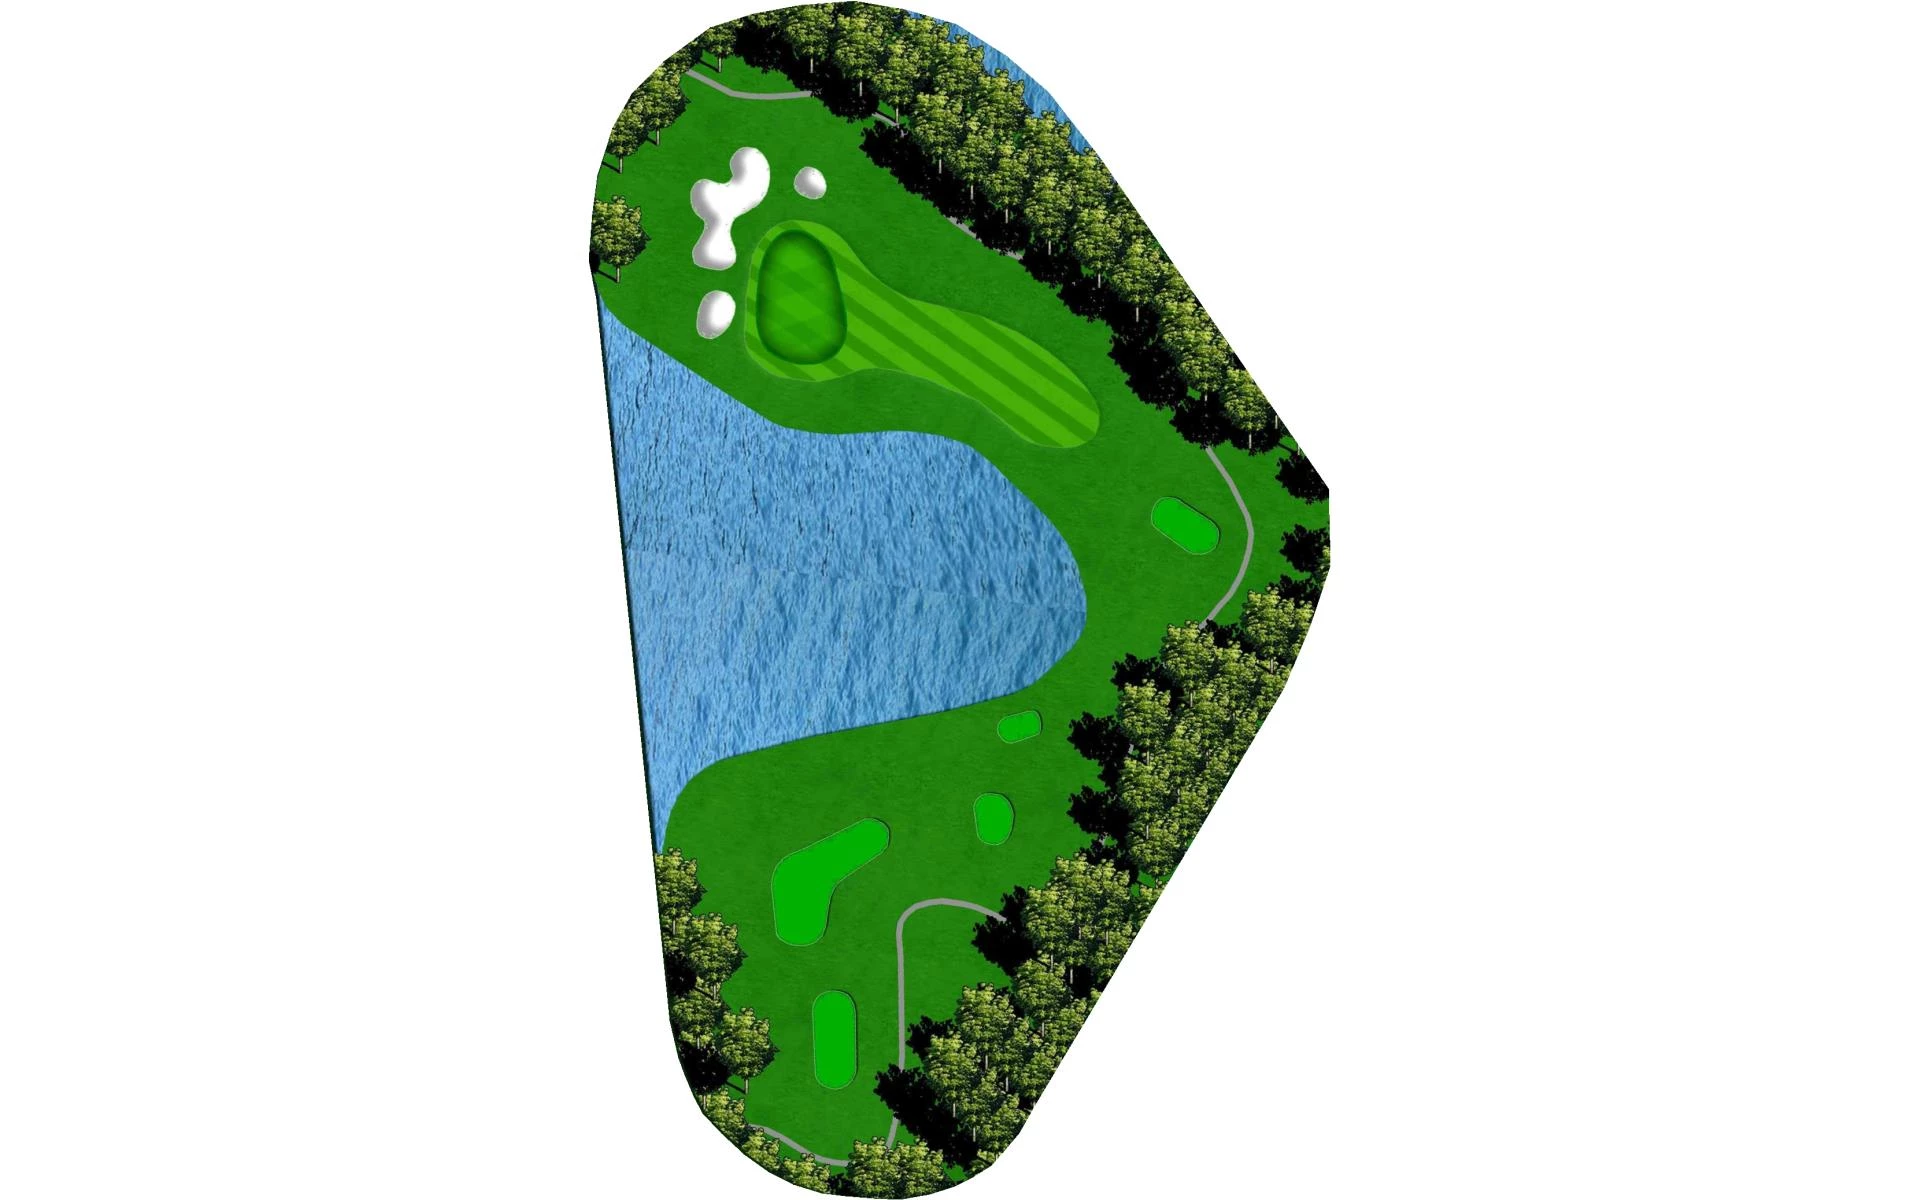
The par 3, third hole forces players to carry the water on all but the front tees. The smart play is to aim for the center of the green.
Yardage by Tee:
Gold Tee 166
Blue Tee 156
White Tee 130
Green Tee 120
Red Tee 104
Black Tee 94
Pro Tips
The first par 3 on the front nine, a shot to carry the water with a bail out area on the right side. Be careful of the bunkers long and the tricky slope on the green.
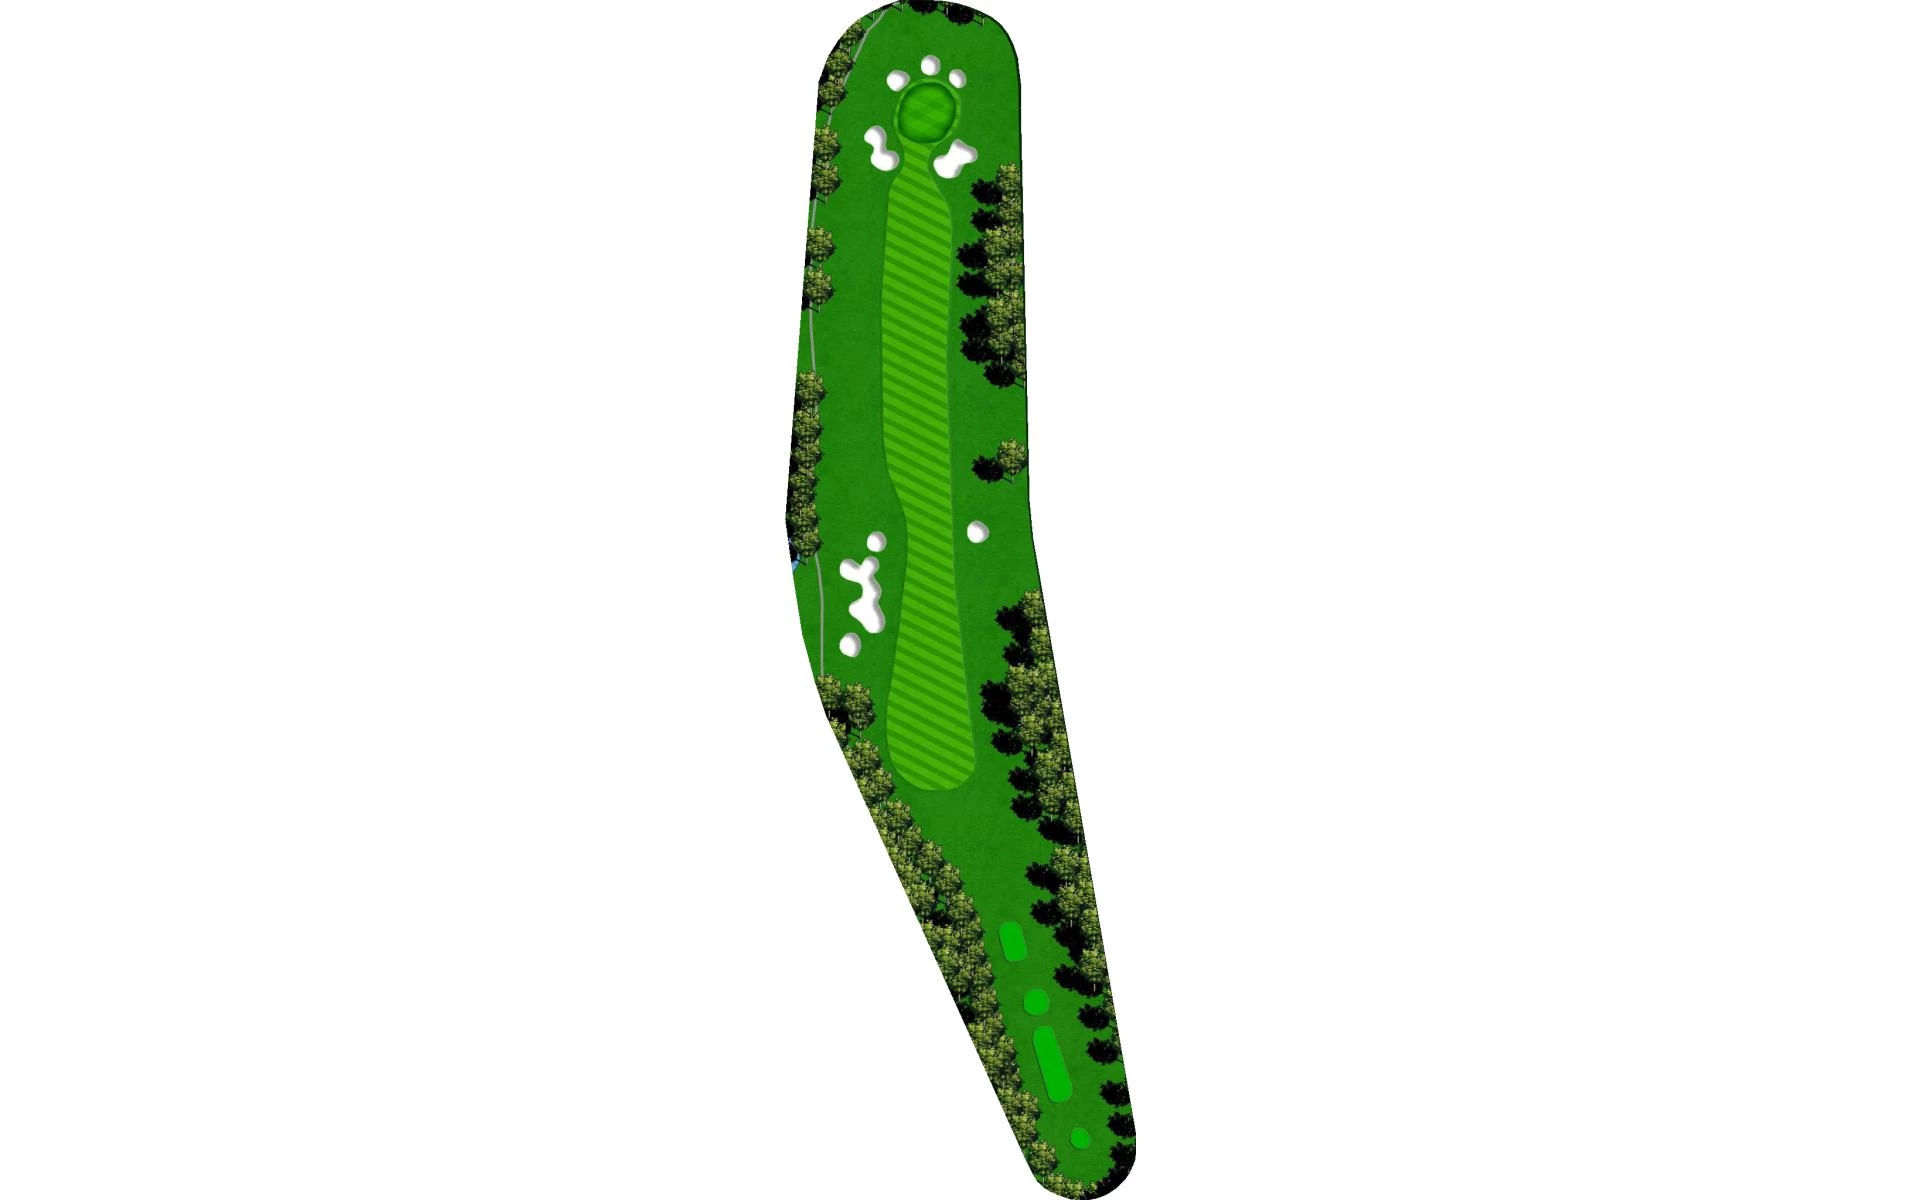
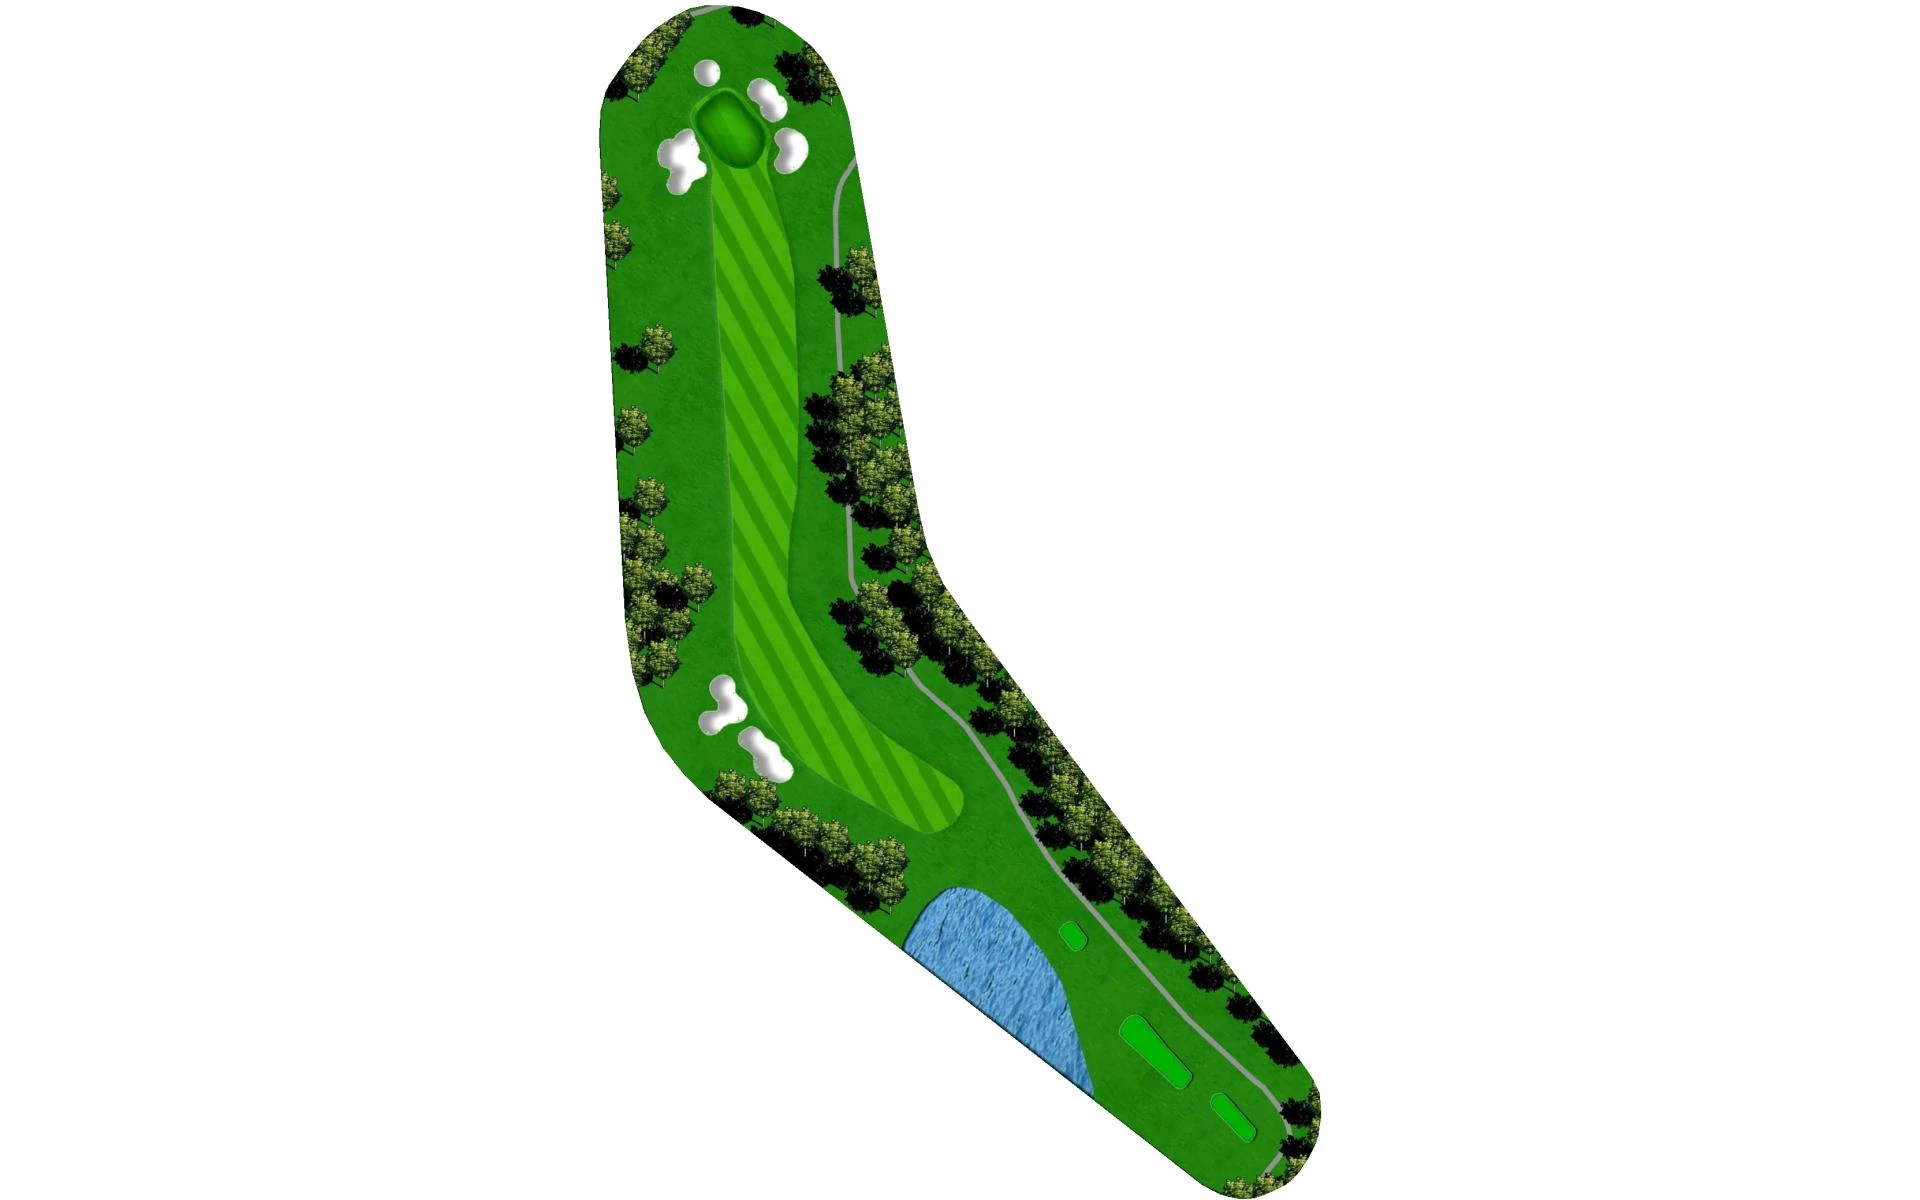
# 4 / Hole 4
Par: 4
Handicaps:
Men's 5
Women's 9
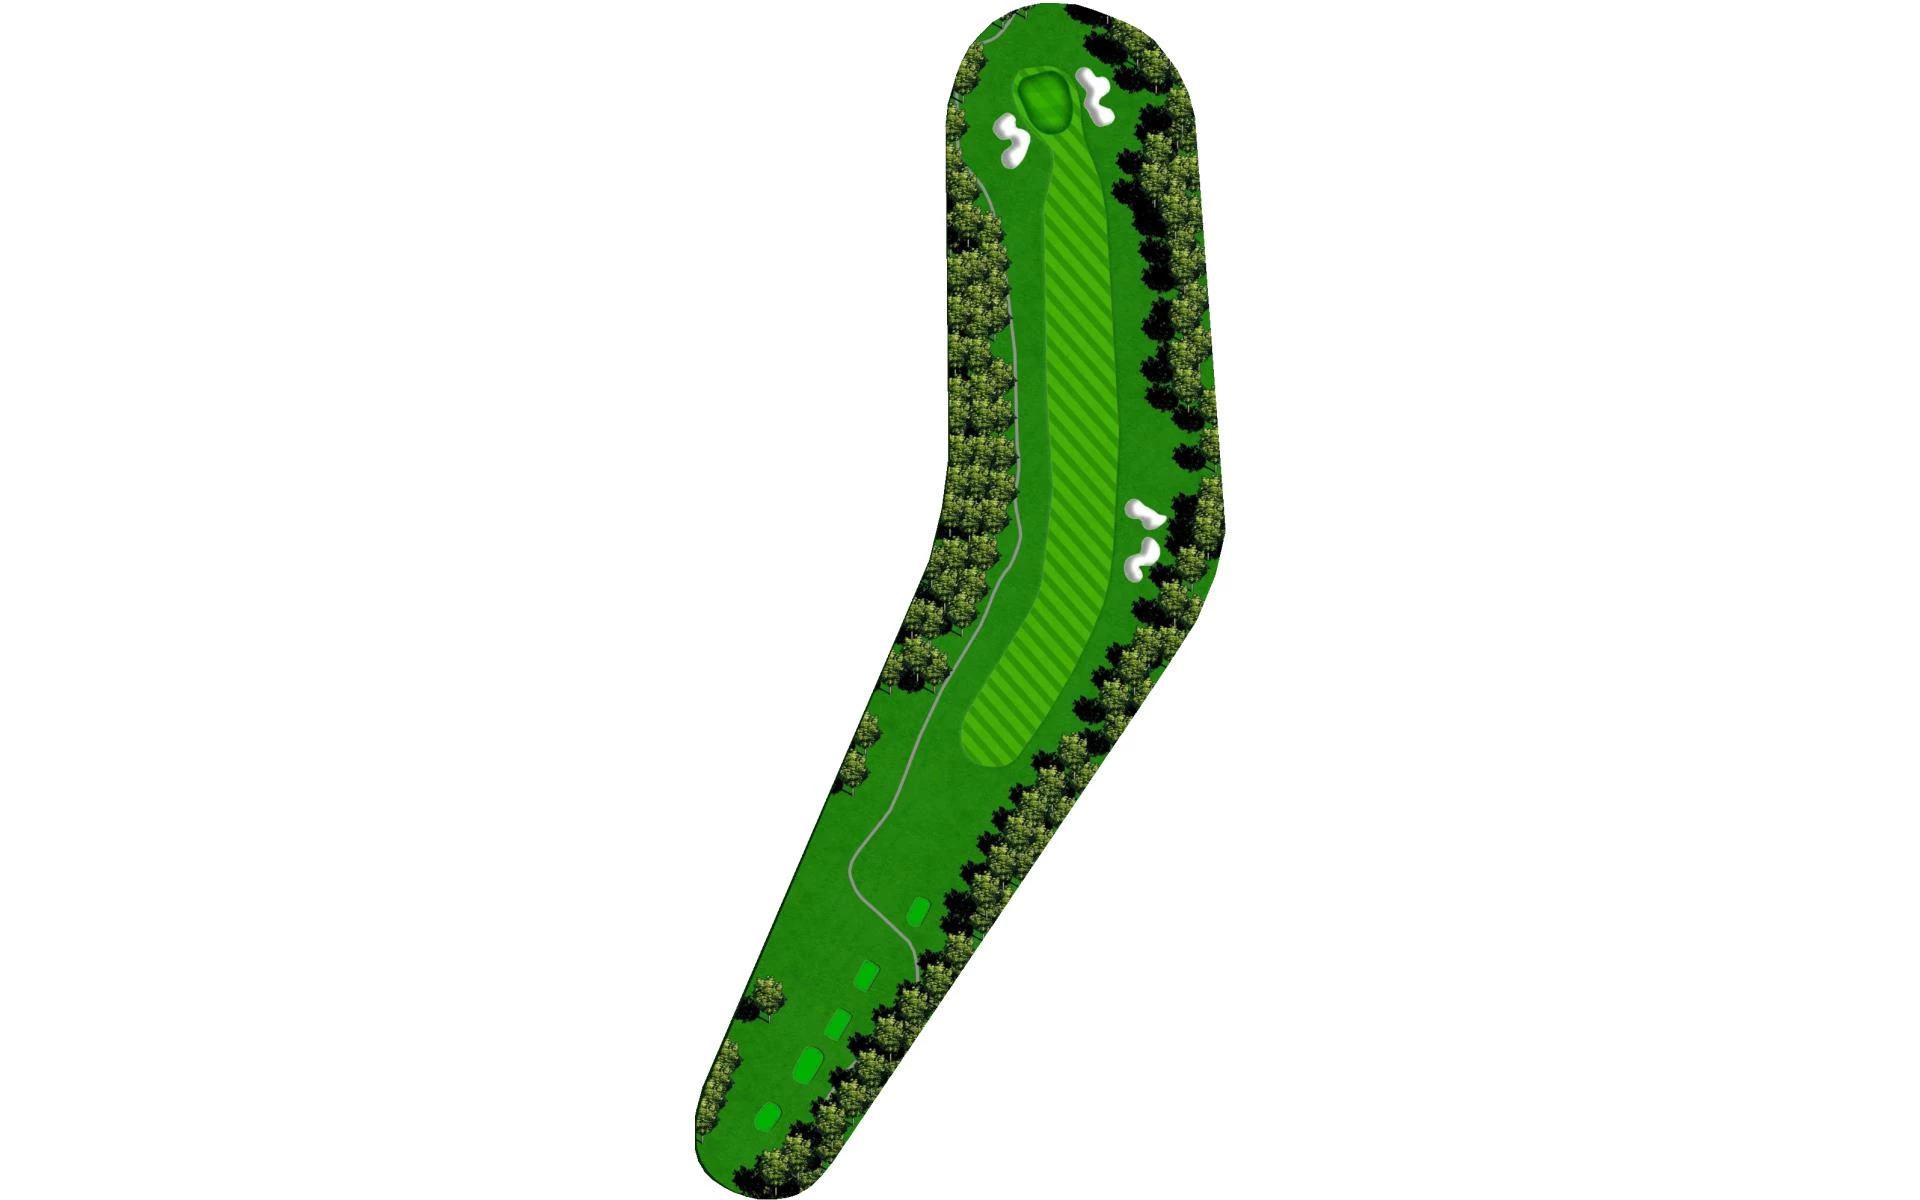
This long dogleg left par 4 demands both length and accuracy from players. Favoring the right side off the tee, while avoiding the two fairw…
This long dogleg left par 4 demands both length and accuracy from players. Favoring the right side off the tee, while avoiding the two fairway bunkers, will set up the best approach angle.
Yardage by Tee:
Gold Tee 431
Blue Tee 407
White Tee 384
Green Tee 339
Red Tee 334
Black Tee 334
Pro Tips
This long dogleg left par 4 demands both length and accuracy from players. Favoring the right side off the tee, while avoiding the two fairway bunkers, will set up the best approach angle.
# 5 / Hole 5
Par: 4
Handicaps:
Men's 3
Women's 1
The fifth is the shortest par 4 on the front side, but is rated the hardest for women and third hardest for men. Water protects the front of…
The fifth is the shortest par 4 on the front side, but is rated the hardest for women and third hardest for men. Water protects the front of the green and will punish anything short.
Yardage by Tee:
Gold Tee 358
Blue Tee 338
White Tee 326
Green Tee 306
Red Tee 301
Black Tee 250
Pro Tips
The fifth is the shortest par 4 on the front side, but is rated the hardest for women and third hardest for men. Water protects the front of the green and will punish anything short.
# 6 / Hole 6
Par: 5
Handicaps:
Men's 11
Women's 11
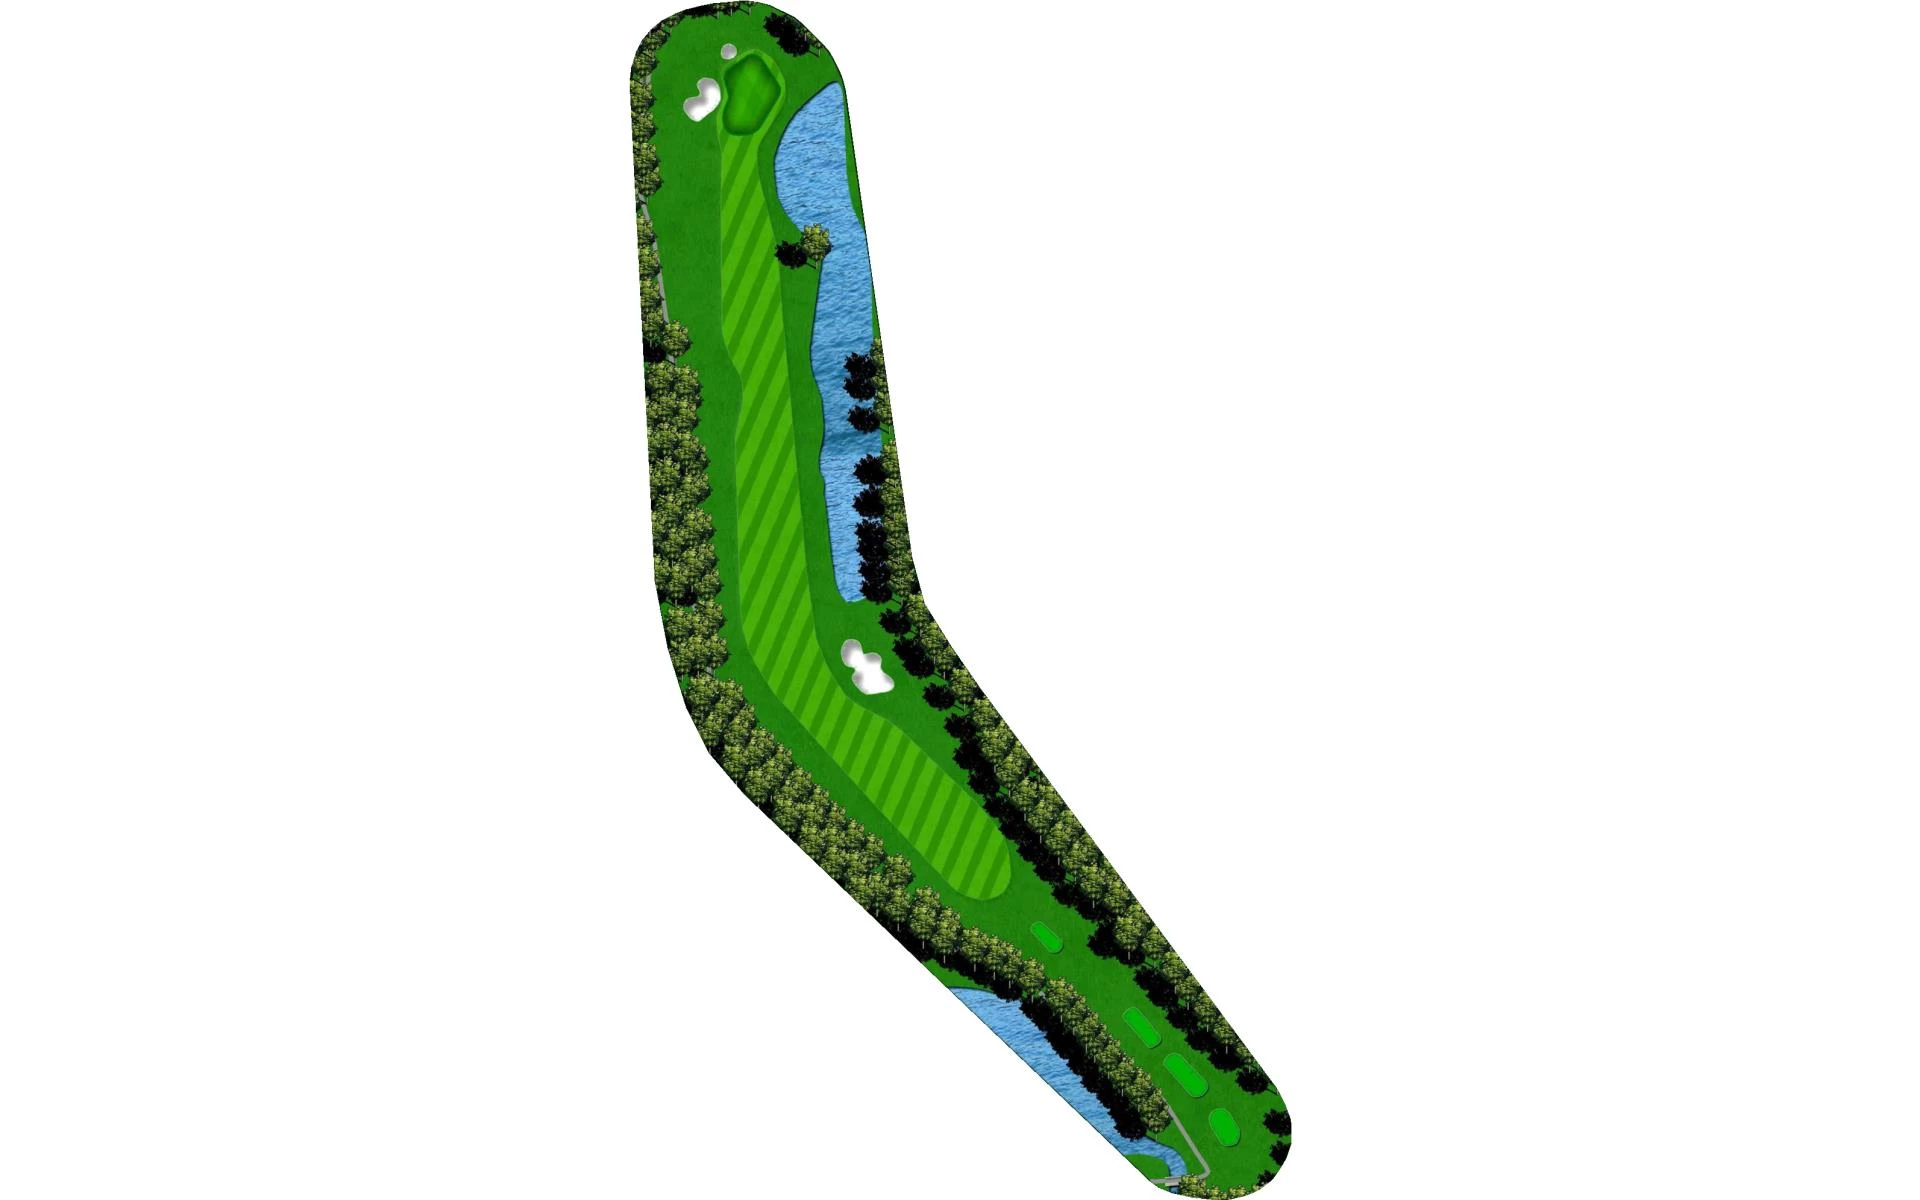
The first par 5 on the golf course features water down most of the right side. Longer players have a chance to reach the green in two. Those…
The first par 5 on the golf course features water down most of the right side. Longer players have a chance to reach the green in two. Those who lay-up will want to do so to the 100 yard marker to take the oak tree on the left out of play.
Yardage by Tee:
Gold Tee 491
Blue Tee 467
White Tee 461
Green Tee 455
Red Tee 450
Black Tee 396
Pro Tips
The first par 5 on the golf course features water down most of the right side. Longer players have a chance to reach the green in two. Those who lay-up will want to do so to the 100 yard marker to take the oak tree on the left out of play.
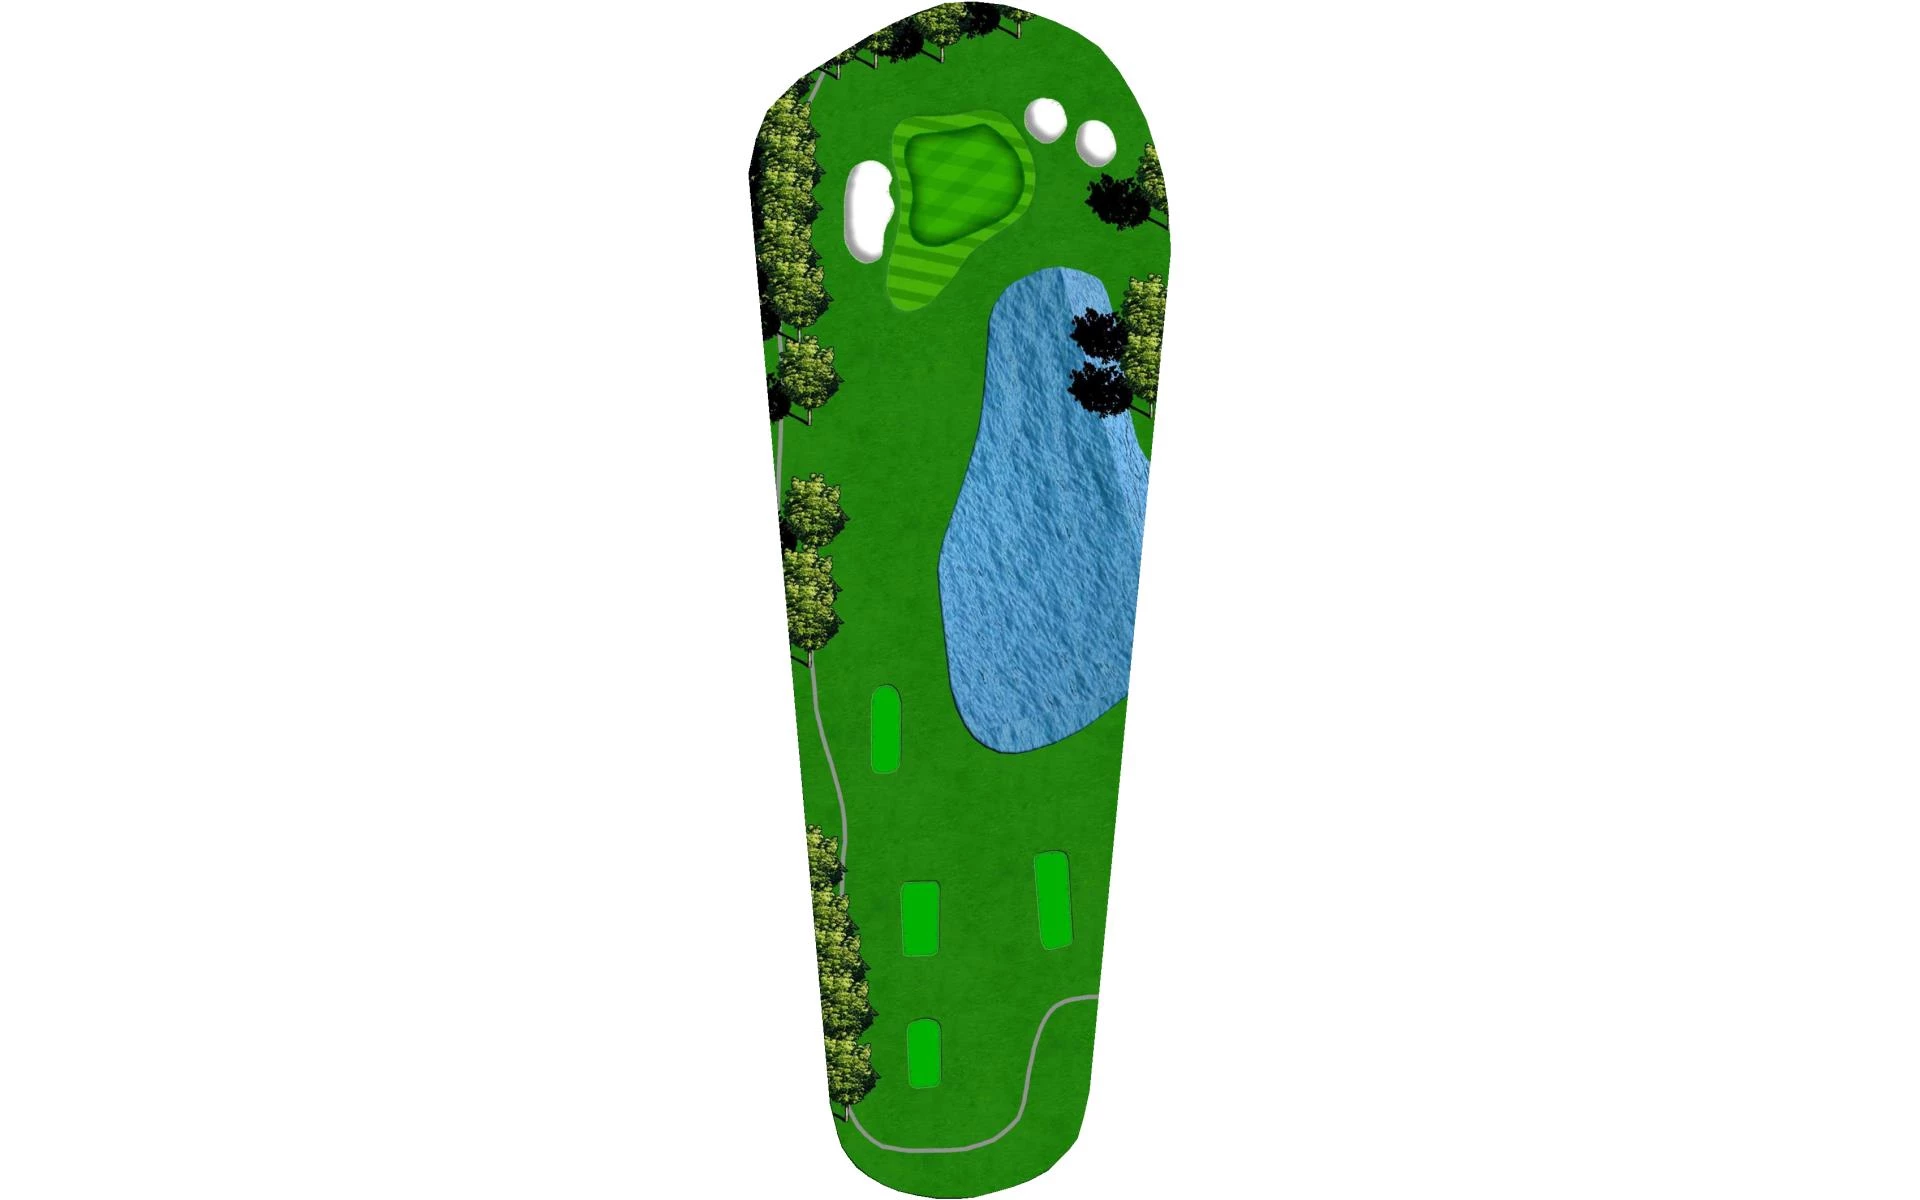
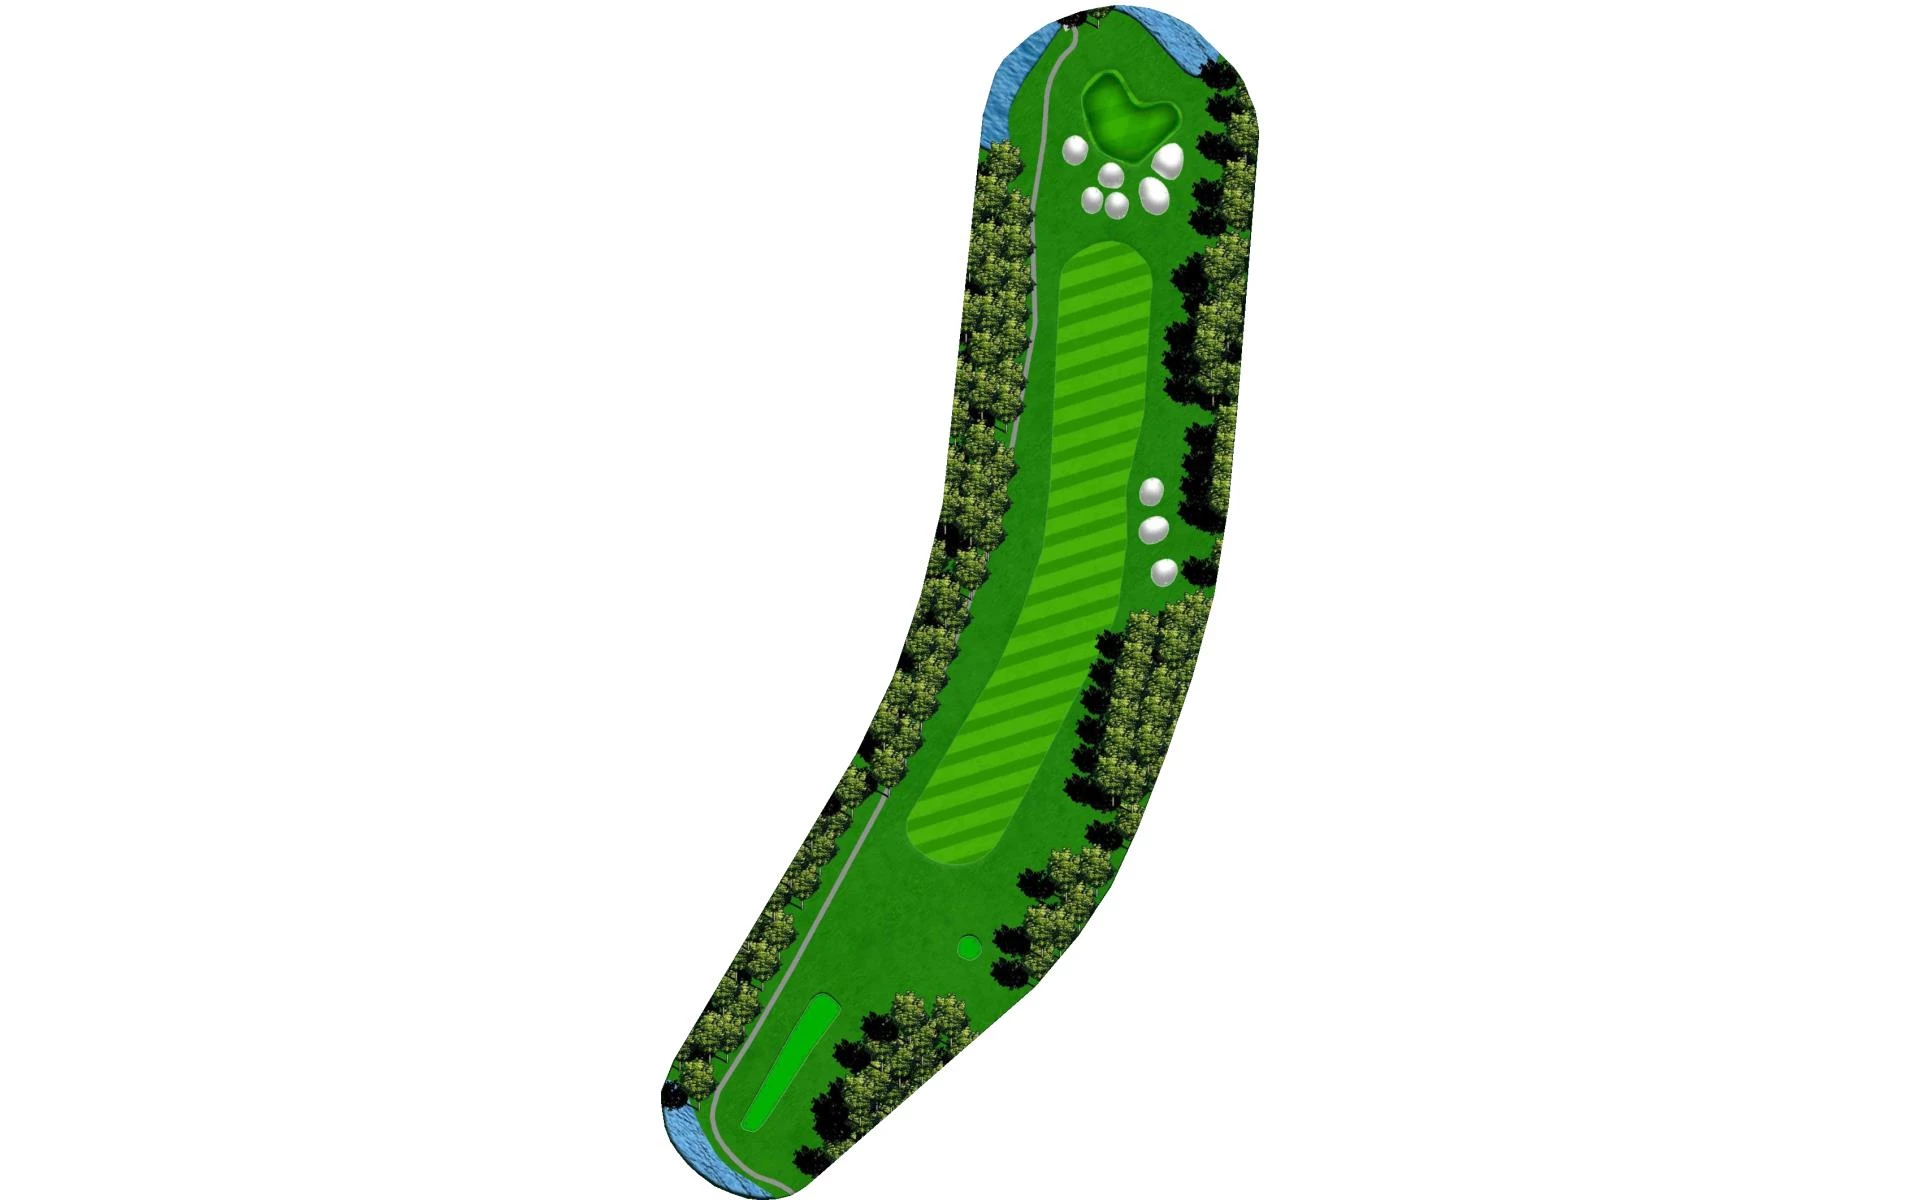
# 7 / Hole 7
Par: 3
Handicaps:
Men's 15
Women's 15
This par 3 is another one that places a premium on accuracy over length. The smart play here is to aim at the center of the green and miss l…
This par 3 is another one that places a premium on accuracy over length. The smart play here is to aim at the center of the green and miss left to avoid the water.
Yardage by Tee:
Gold Tee 171
Blue Tee 143
White Tee 133
Green Tee 108
Red Tee 103
Black Tee 103
Pro Tips
This par 3 is another one that places a premium on accuracy over length. The smart play here is to aim at the center of the green and miss left to avoid the water.
# 8 / Hole 8
Par: 5
Handicaps:
Men's 9
Women's 13
This well-bunkered par 5 offers players a great opportunity to make birdie. The key is to avoid the large bunkers guarding the putting surfa…
This well-bunkered par 5 offers players a great opportunity to make birdie. The key is to avoid the large bunkers guarding the putting surface.
Yardage by Tee:
Gold Tee 518
Blue Tee 496
White Tee 487
Green Tee 430
Red Tee 425
Black Tee 360
Pro Tips
This well-bunkered par 5 offers players a great opportunity to make birdie. The key is to avoid the large bunkers guarding the putting surface.
# 9 / Hole 9
Par: 4
Handicaps:
Men's 1
Women's 7
The final hole on the front nine is a long and narrow par 4. Players who make par here should be happy.
Yardage by Tee:
Gold Tee 433
Blue Tee 410
White Tee 398
Green Tee 353
Red Tee 347
Black Tee 299
Pro Tips
The final hole on the front nine is a long and narrow par 4. Players who make par here should be happy.
# 10 / Hole 10
Par: 4
Handicaps:
Men's 2
Women's 6
The back nine opens with one of the most demanding tee shots on the golf course. The landing area features a punishing bunker on the left an…
The back nine opens with one of the most demanding tee shots on the golf course. The landing area features a punishing bunker on the left and water on the right. A two-tiered green awaits and will challenge even the best of putters.
Yardage by Tee:
Gold Tee 423
Blue Tee 396
White Tee 388
Green Tee 325
Red Tee 320
Black Tee 284
Pro Tips
The back nine opens with one of the most demanding tee shots on the golf course. The landing area features a punishing bunker on the left and water on the right. A two-tiered green awaits and will challenge even the best of putters.
# 11 / Hole 11
Par: 3
Handicaps:
Men's 16
Women's 16
Players ought to take an extra club to hit the green on this par 3.
Yardage by Tee:
Gold Tee 184
Blue Tee 178
White Tee 151
Green Tee 117
Red Tee 115
Black Tee 115
Pro Tips
Players ought to take an extra club to hit the green on this par 3.
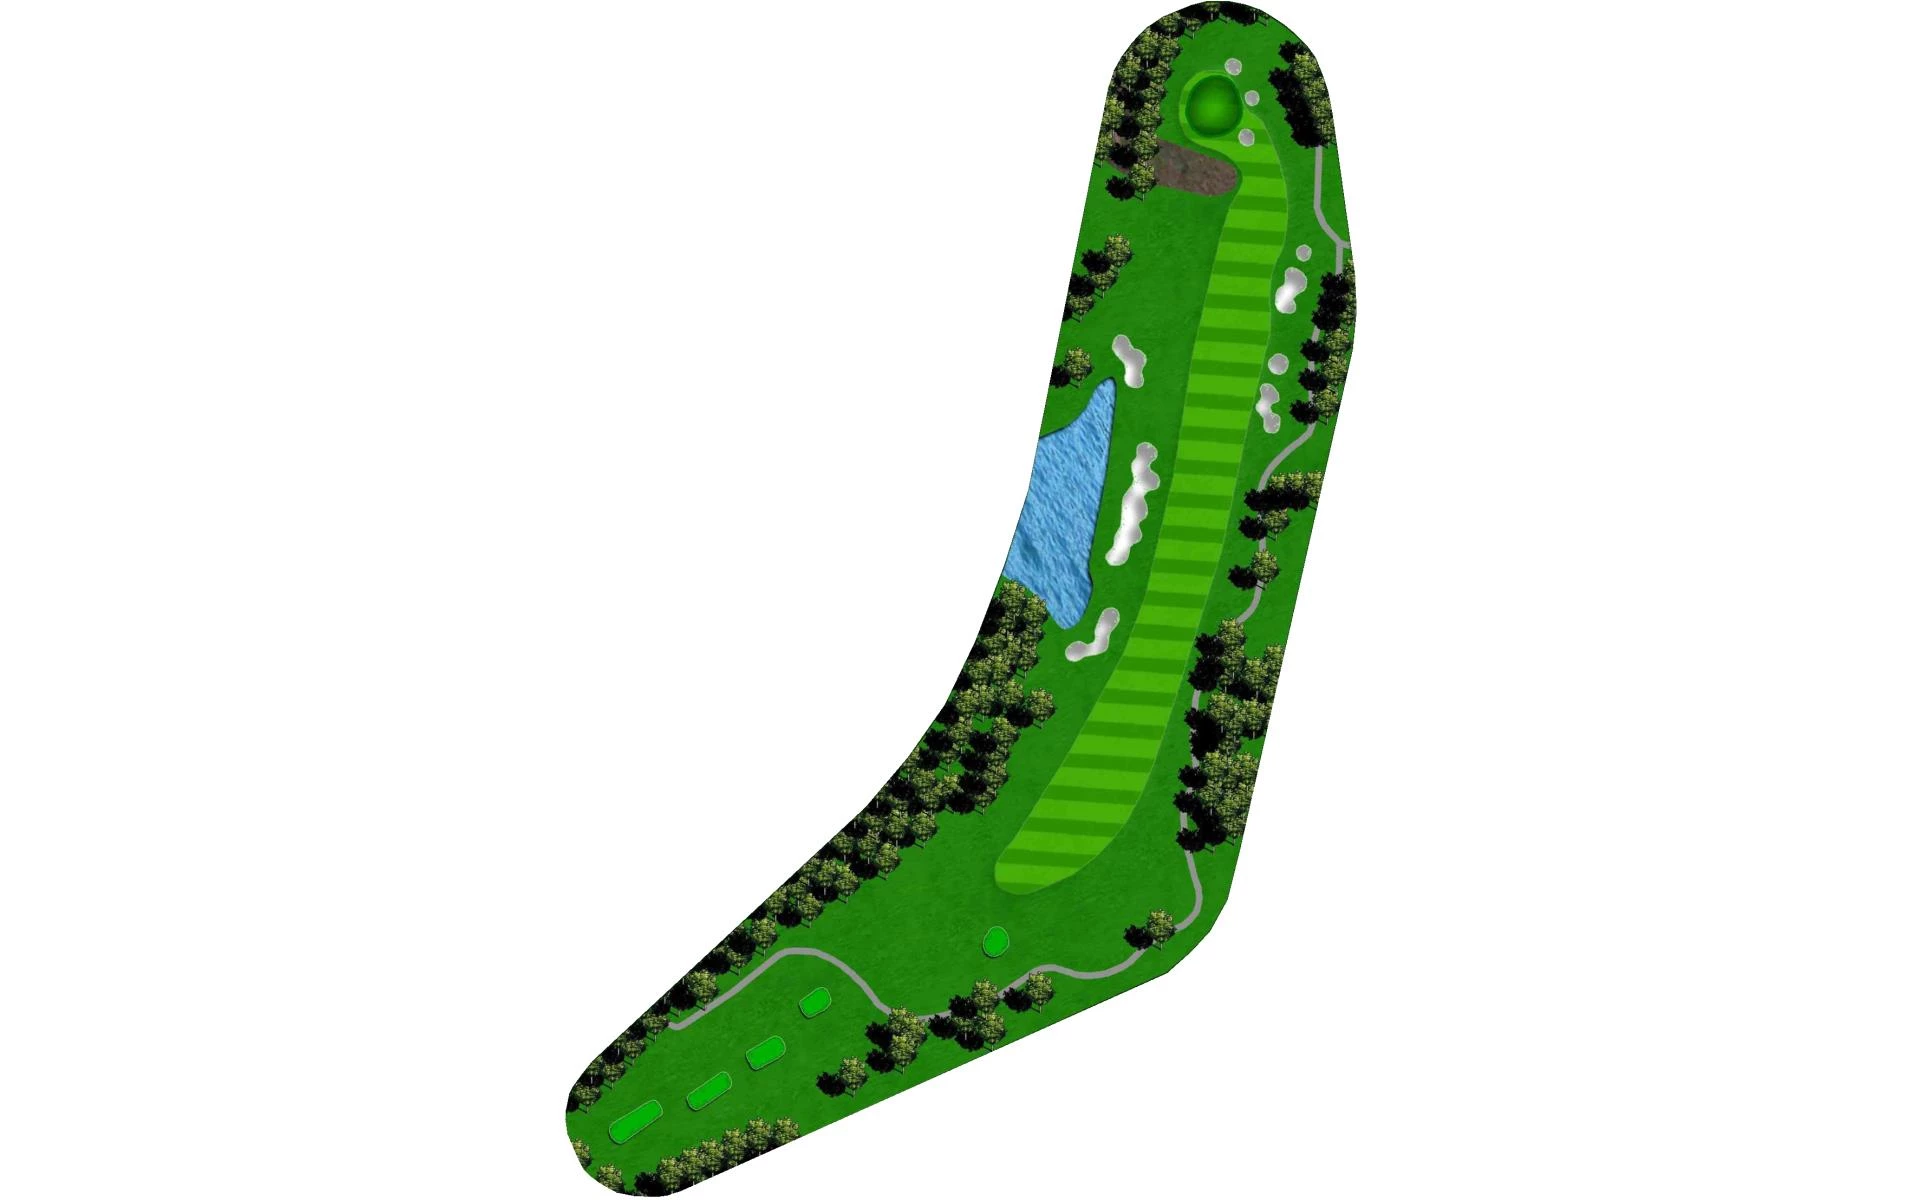
# 12 / Hole 12
Par: 5
Handicaps:
Men's 10
Women's 12
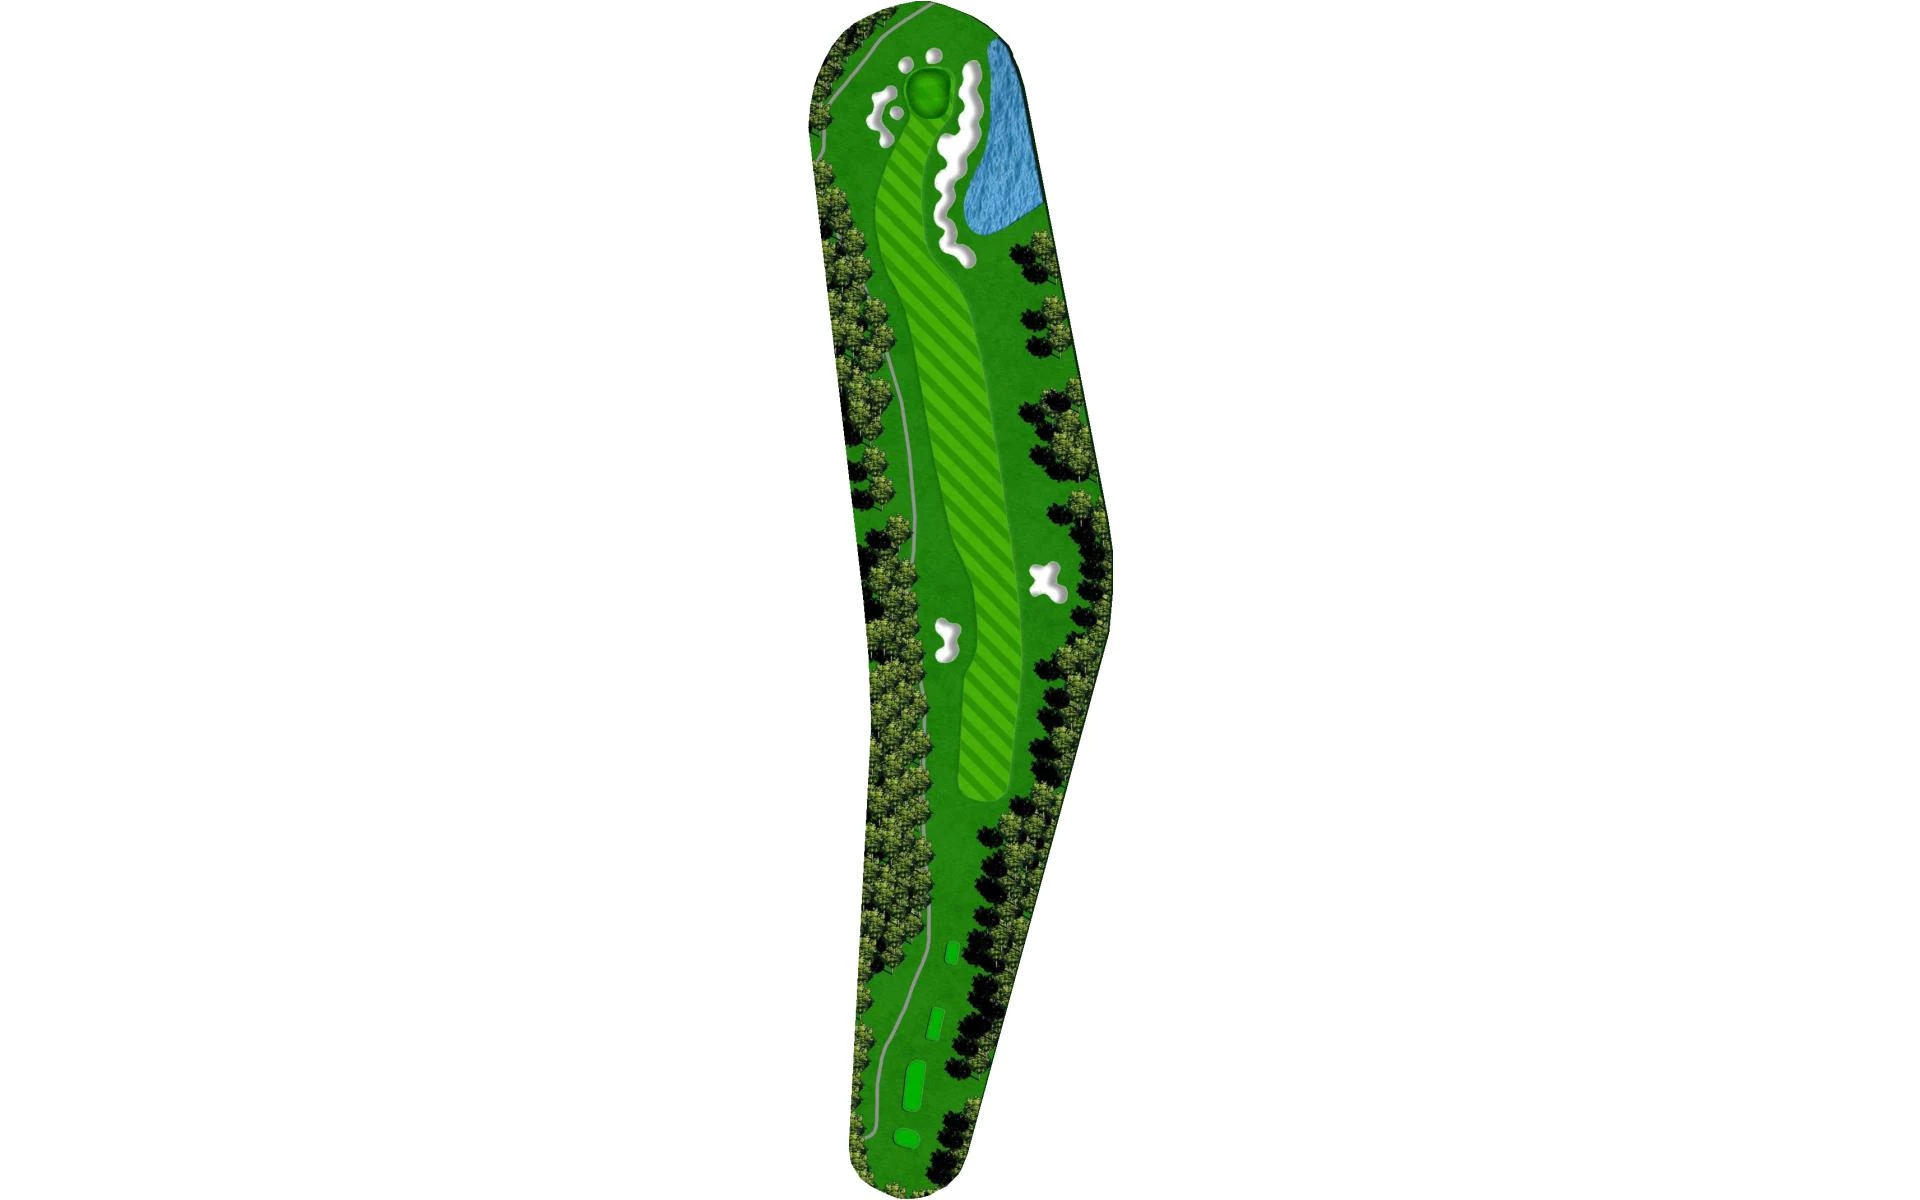
The par 5, twelfth hole is the Country Club of Hilton Head’s signature. It features spectacular views of the Intracoastal Waterway and is th…
The par 5, twelfth hole is the Country Club of Hilton Head’s signature. It features spectacular views of the Intracoastal Waterway and is the highest point on Hilton Head Island, measuring 28.24 feet above sea level.
Yardage by Tee:
Gold Tee 575
Blue Tee 540
White Tee 511
Green Tee 415
Red Tee 410
Black Tee 410
Pro Tips
The par 5, twelfth hole is the Country Club of Hilton Head’s signature. It features spectacular views of the Intracoastal Waterway and is the highest point on Hilton Head Island, measuring 28.24 feet above sea level.
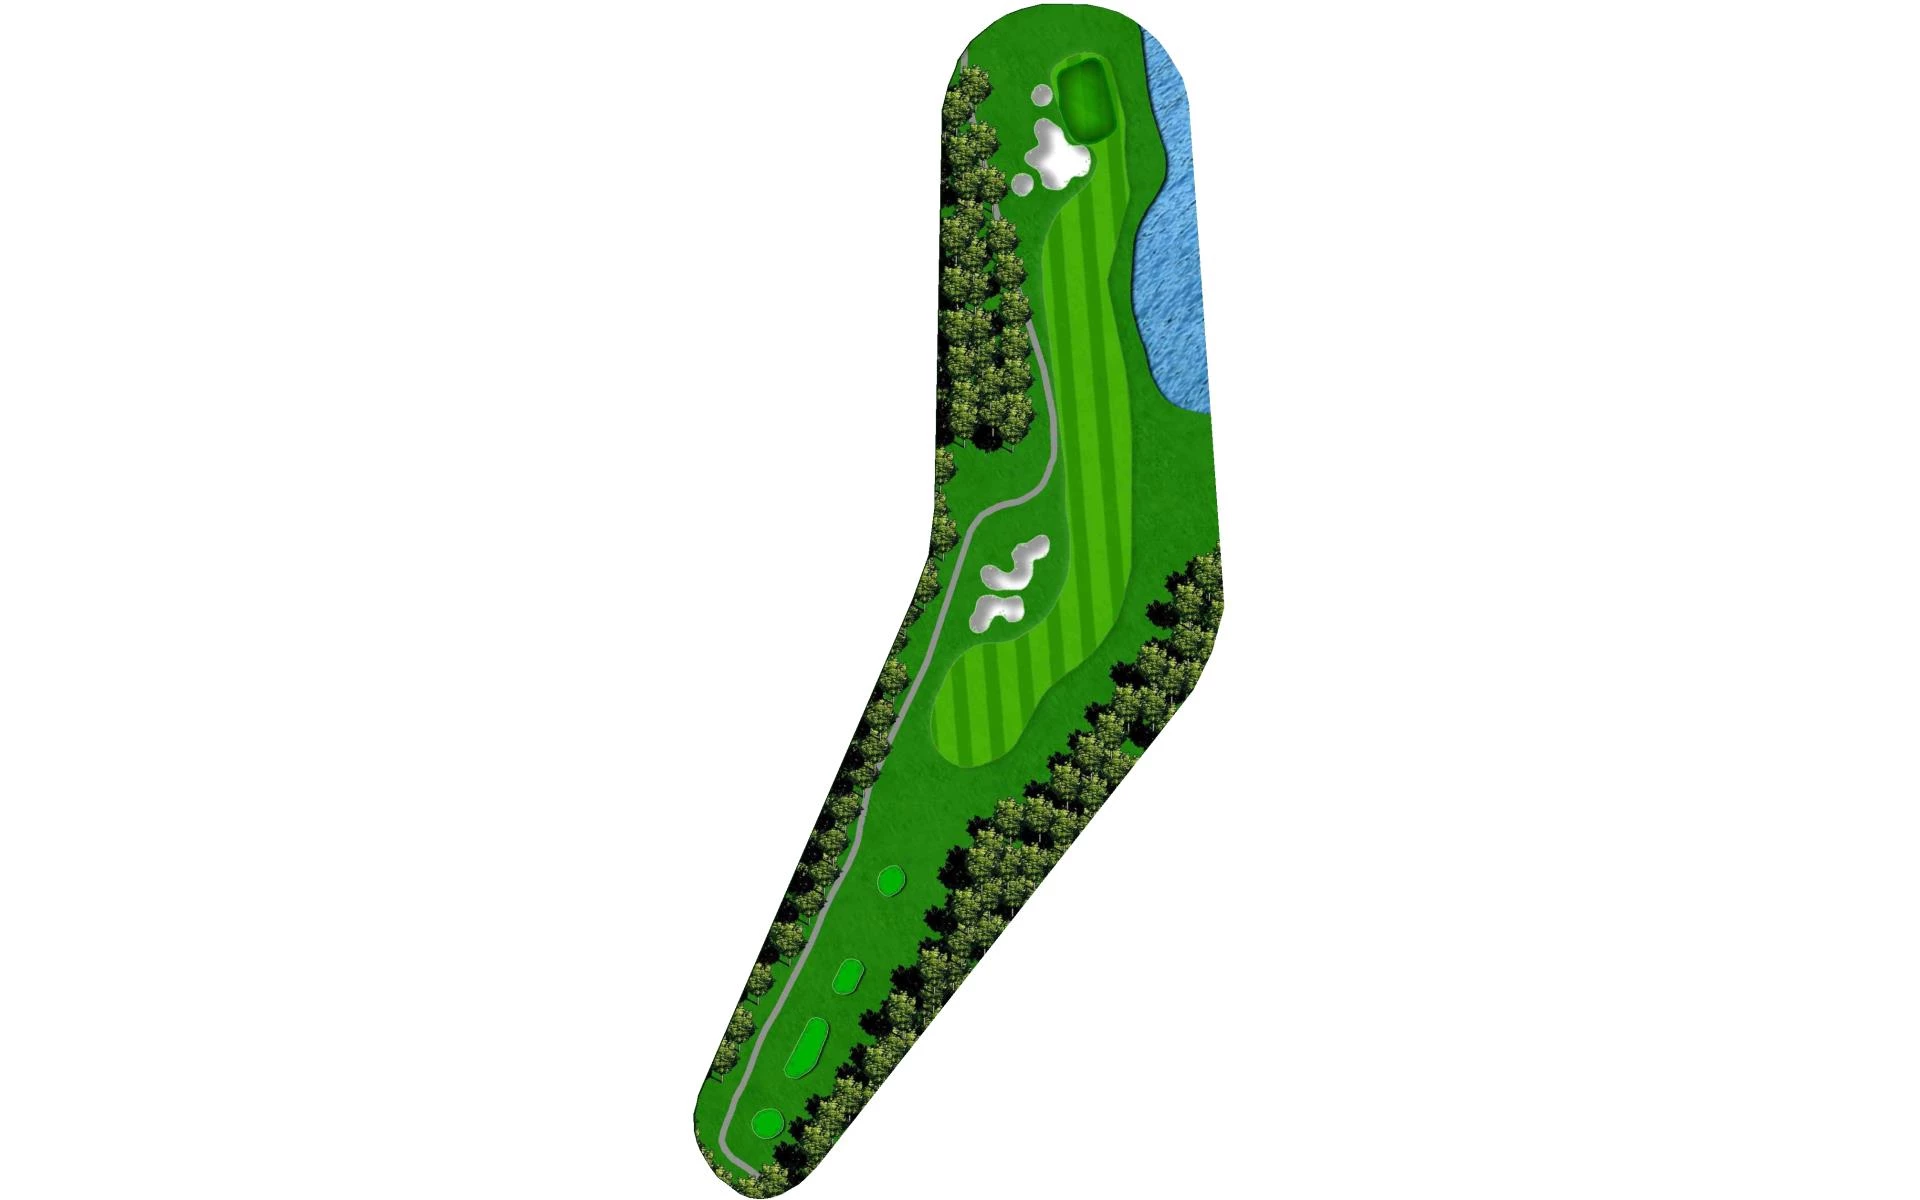
# 13 / Hole 13
Par: 4
Handicaps:
Men's 8
Women's 10
Fairway bunkers on the left and out-of-bounds on the right frames the tee shot on this par 4. Cutting the corner on the right is an option, …
Fairway bunkers on the left and out-of-bounds on the right frames the tee shot on this par 4. Cutting the corner on the right is an option, which will make the hole play much shorter. The green on this hole is slightly elevated, so players will need to take a little more club than normal.
Yardage by Tee:
Gold Tee 438
Blue Tee 415
White Tee 401
Green Tee 358
Red Tee 353
Black Tee 275
Pro Tips
Fairway bunkers on the left and out-of-bounds on the right frames the tee shot on this par 4. Cutting the corner on the right is an option, which will make the hole play much shorter. The green on this hole is slightly elevated, so players will need to take a little more club than normal.
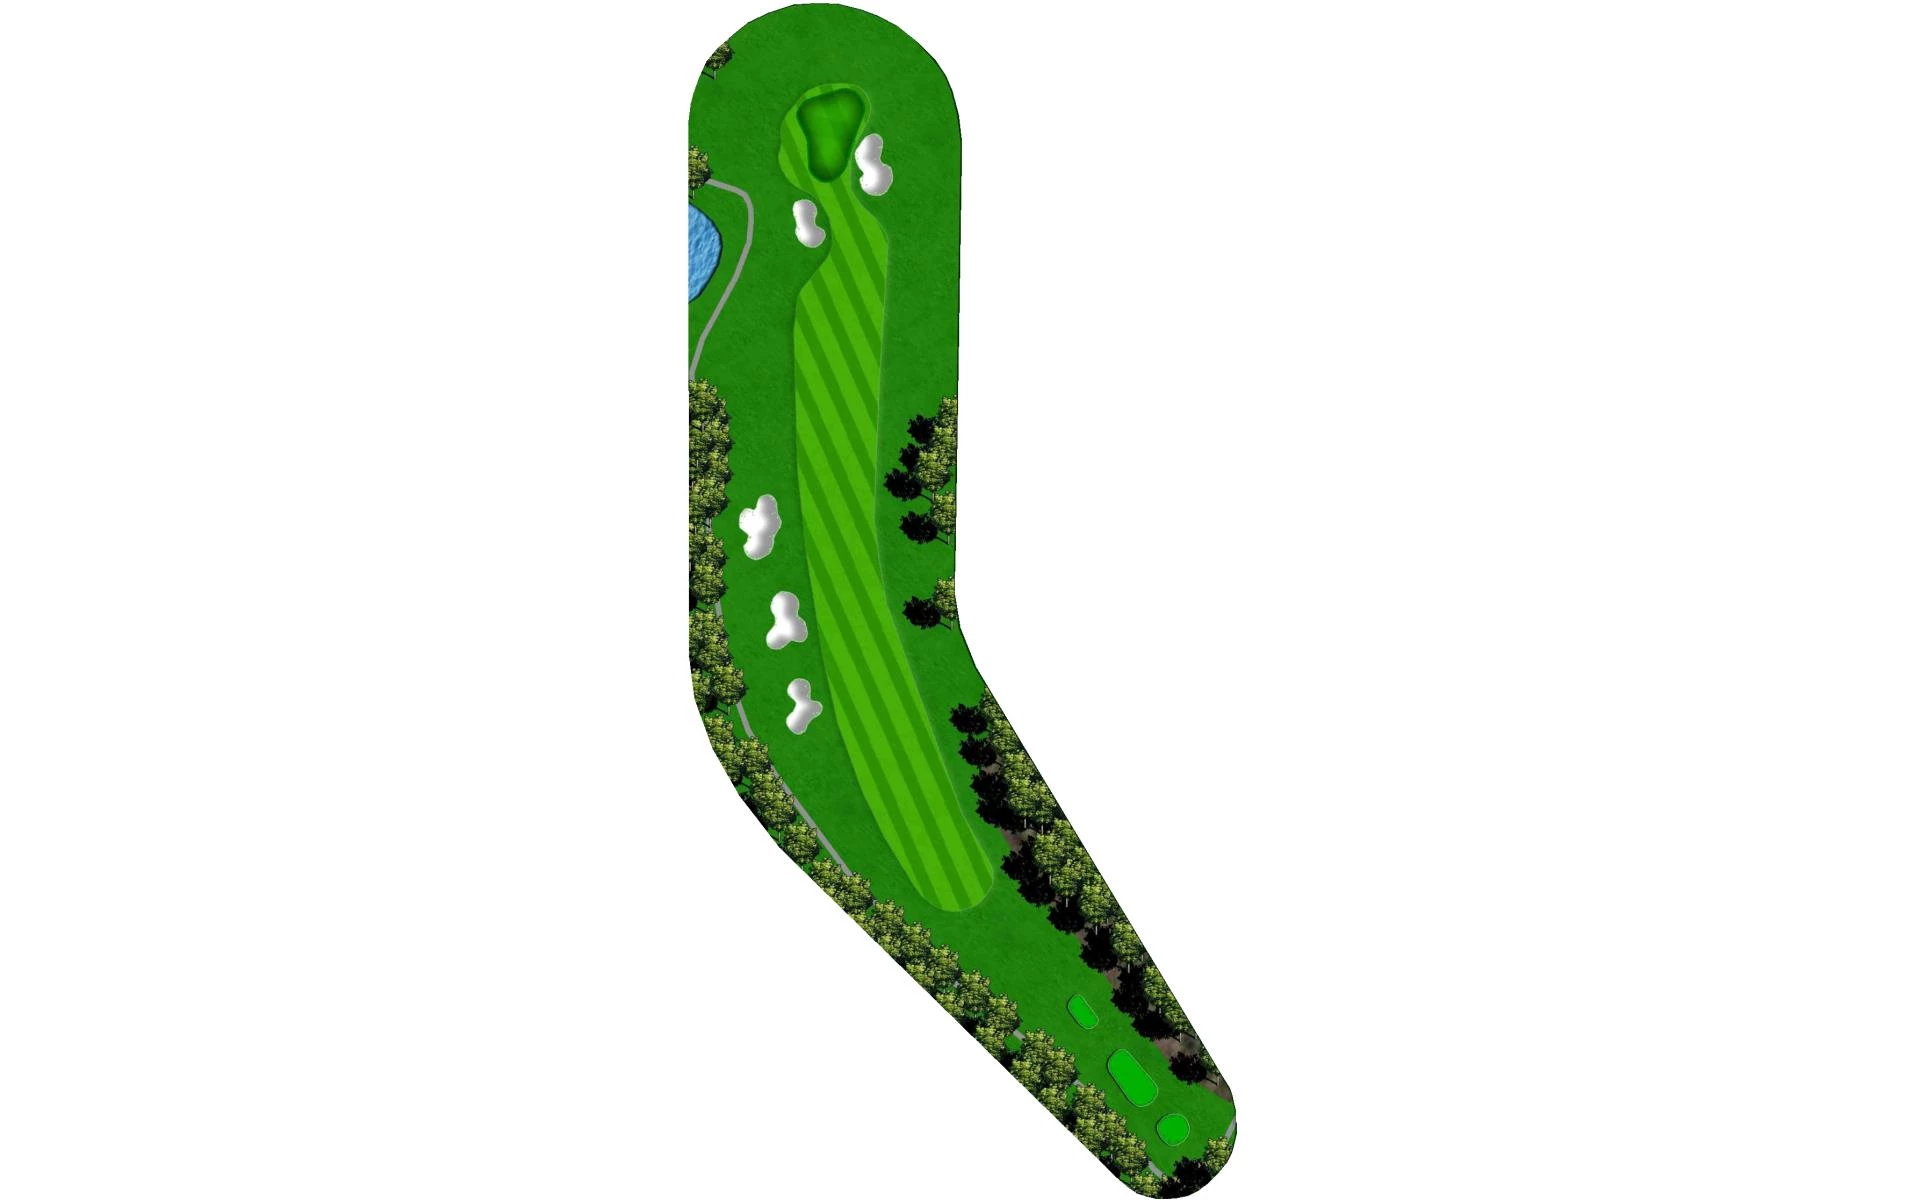
# 14 / Hole 14
Par: 3
Handicaps:
Men's 14
Women's 18
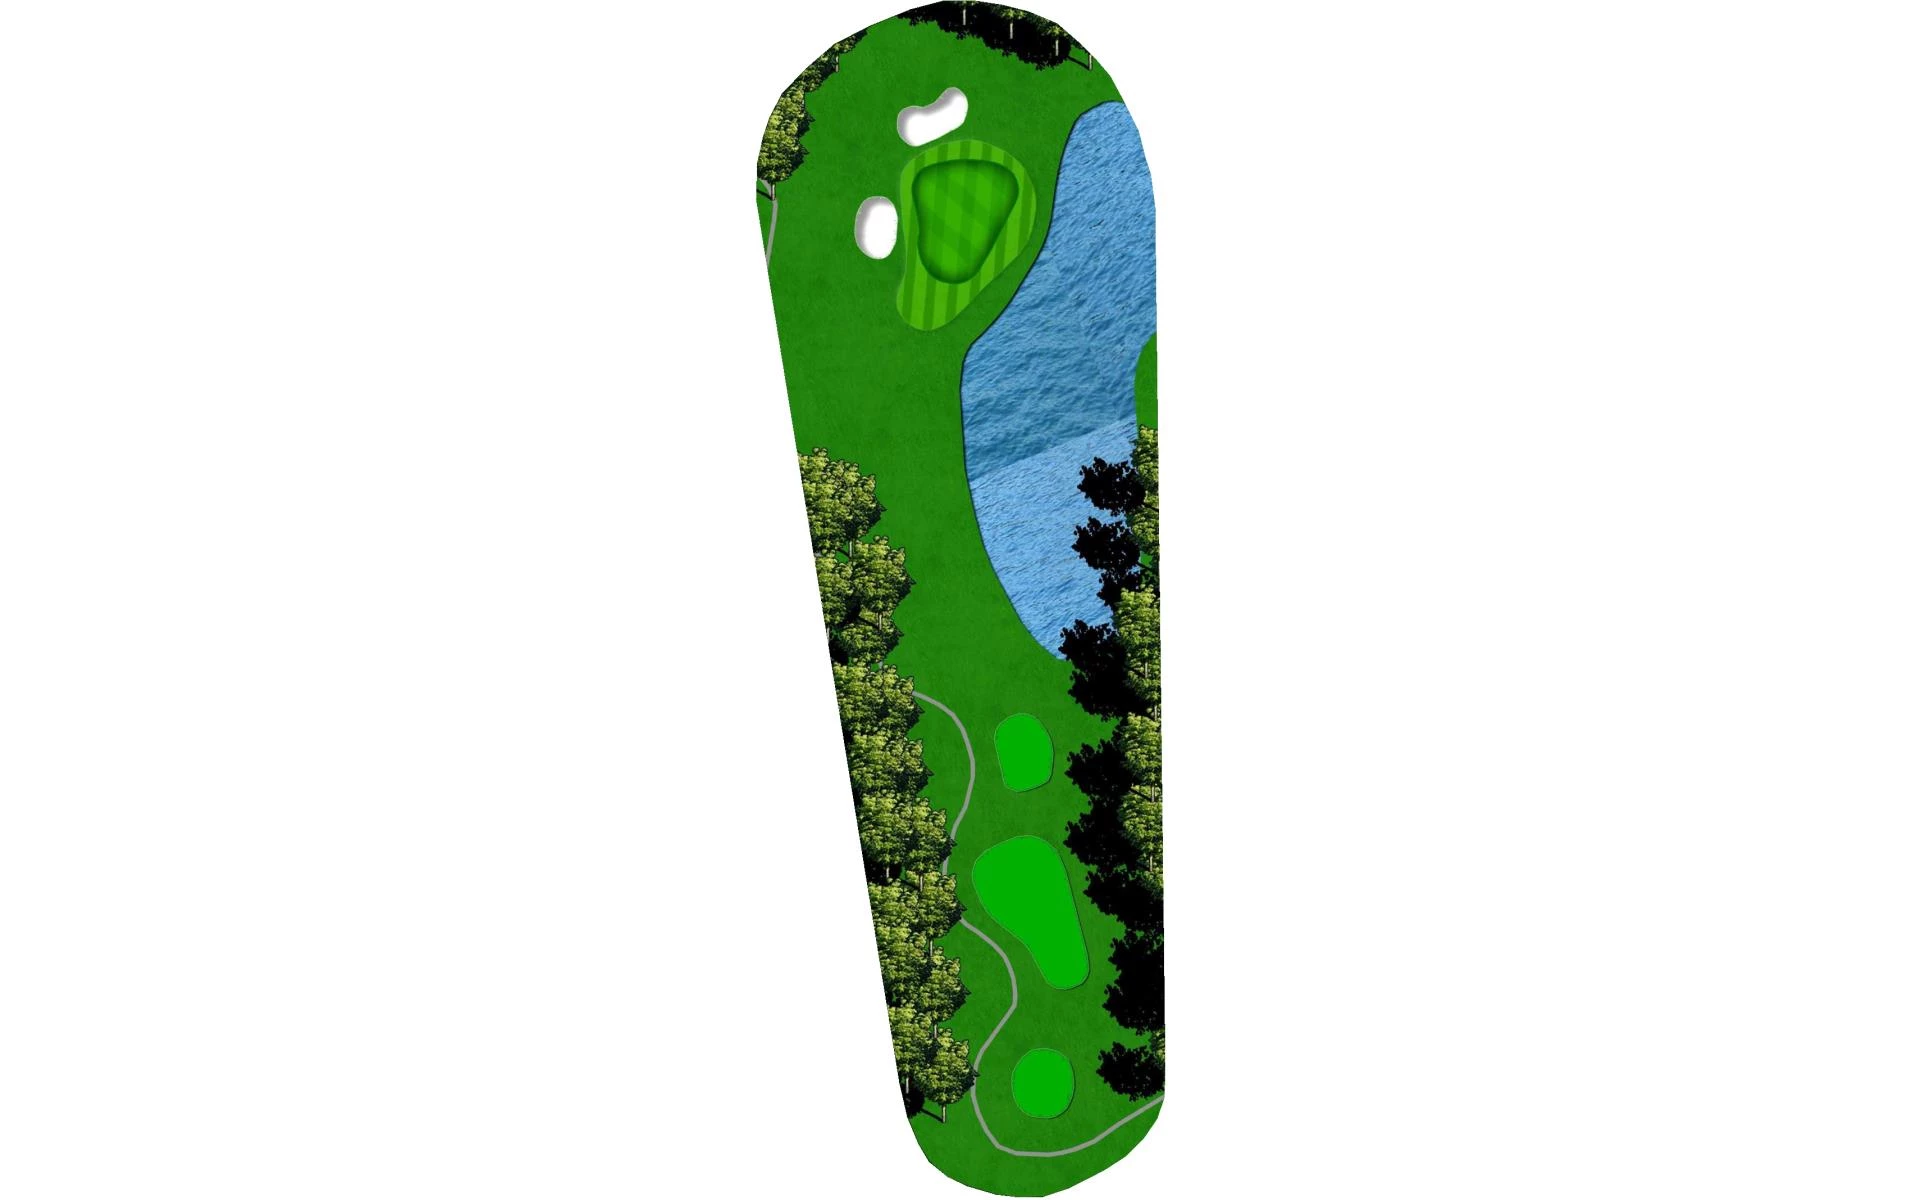
The fourteenth is the final par 3 and, some who say, the best on the course. It requires a forced carry over a marsh to an elevated and narr…
The fourteenth is the final par 3 and, some who say, the best on the course. It requires a forced carry over a marsh to an elevated and narrow green that’s guarded by deep bunkers. Aiming for the center of the green is a smart play.
Yardage by Tee:
Gold Tee 185
Blue Tee 160
White Tee 152
Green Tee 135
Red Tee 70
Black Tee 70
Pro Tips
The fourteenth is the final par 3 and, some who say, the best on the course. It requires a forced carry over a marsh to an elevated and narrow green that’s guarded by deep bunkers. Aiming for the center of the green is a smart play.
# 15 / Hole 15
Par: 4
Handicaps:
Men's 12
Women's 8
This hole is a slightly uphill dogleg right par 4. The approach shot tends to require an extra club to an elevated green.
Yardage by Tee:
Gold Tee 378
Blue Tee 358
White Tee 351
Green Tee 330
Red Tee 328
Black Tee 328
Pro Tips
This hole is a slightly uphill dogleg right par 4. The approach shot tends to require an extra club to an elevated green.
# 16 / Hole 16
Par: 4
Handicaps:
Men's 4
Women's 2
The dogleg left par 4, sixteenth is next. Players will need to take an extra club into the elevated green. There’s often a left-to-right win…
The dogleg left par 4, sixteenth is next. Players will need to take an extra club into the elevated green. There’s often a left-to-right wind up by the green coming off of Spring Lake.
Yardage by Tee:
Gold Tee 376
Blue Tee 373
White Tee 358
Green Tee 344
Red Tee 342
Black Tee 296
Pro Tips
The dogleg left par 4, sixteenth is next. Players will need to take an extra club into the elevated green. There’s often a left-to-right wind up by the green coming off of Spring Lake.
# 17 / Hole 17
Par: 4
Handicaps:
Men's 18
Women's 14
This par 4 features an incredibly demanding tee shot from the blue and gold tees. When the tees are set forward, it’s definitely a chance fo…
This par 4 features an incredibly demanding tee shot from the blue and gold tees. When the tees are set forward, it’s definitely a chance for late birdie.
Yardage by Tee:
Gold Tee 402
Blue Tee 392
White Tee 286
Green Tee 275
Red Tee 273
Black Tee 273
Pro Tips
This par 4 features an incredibly demanding tee shot from the blue and gold tees. When the tees are set forward, it’s definitely a chance for late birdie.
# 18 / Hole 18
Par: 5
Handicaps:
Men's 6
Women's 4
The closing hole is a long dogleg right par 5. Players will want to avoid the fairway bunker on the right. A two-tiered green awaits and wil…
The closing hole is a long dogleg right par 5. Players will want to avoid the fairway bunker on the right. A two-tiered green awaits and will reward an approach shot that lands on the correct level.
Yardage by Tee:
Gold Tee 579
Blue Tee 556
White Tee 546
Green Tee 470
Red Tee 462
Black Tee 386
Pro Tips
The closing hole is a long dogleg right par 5. Players will want to avoid the fairway bunker on the right. A two-tiered green awaits and will reward an approach shot that lands on the correct level.