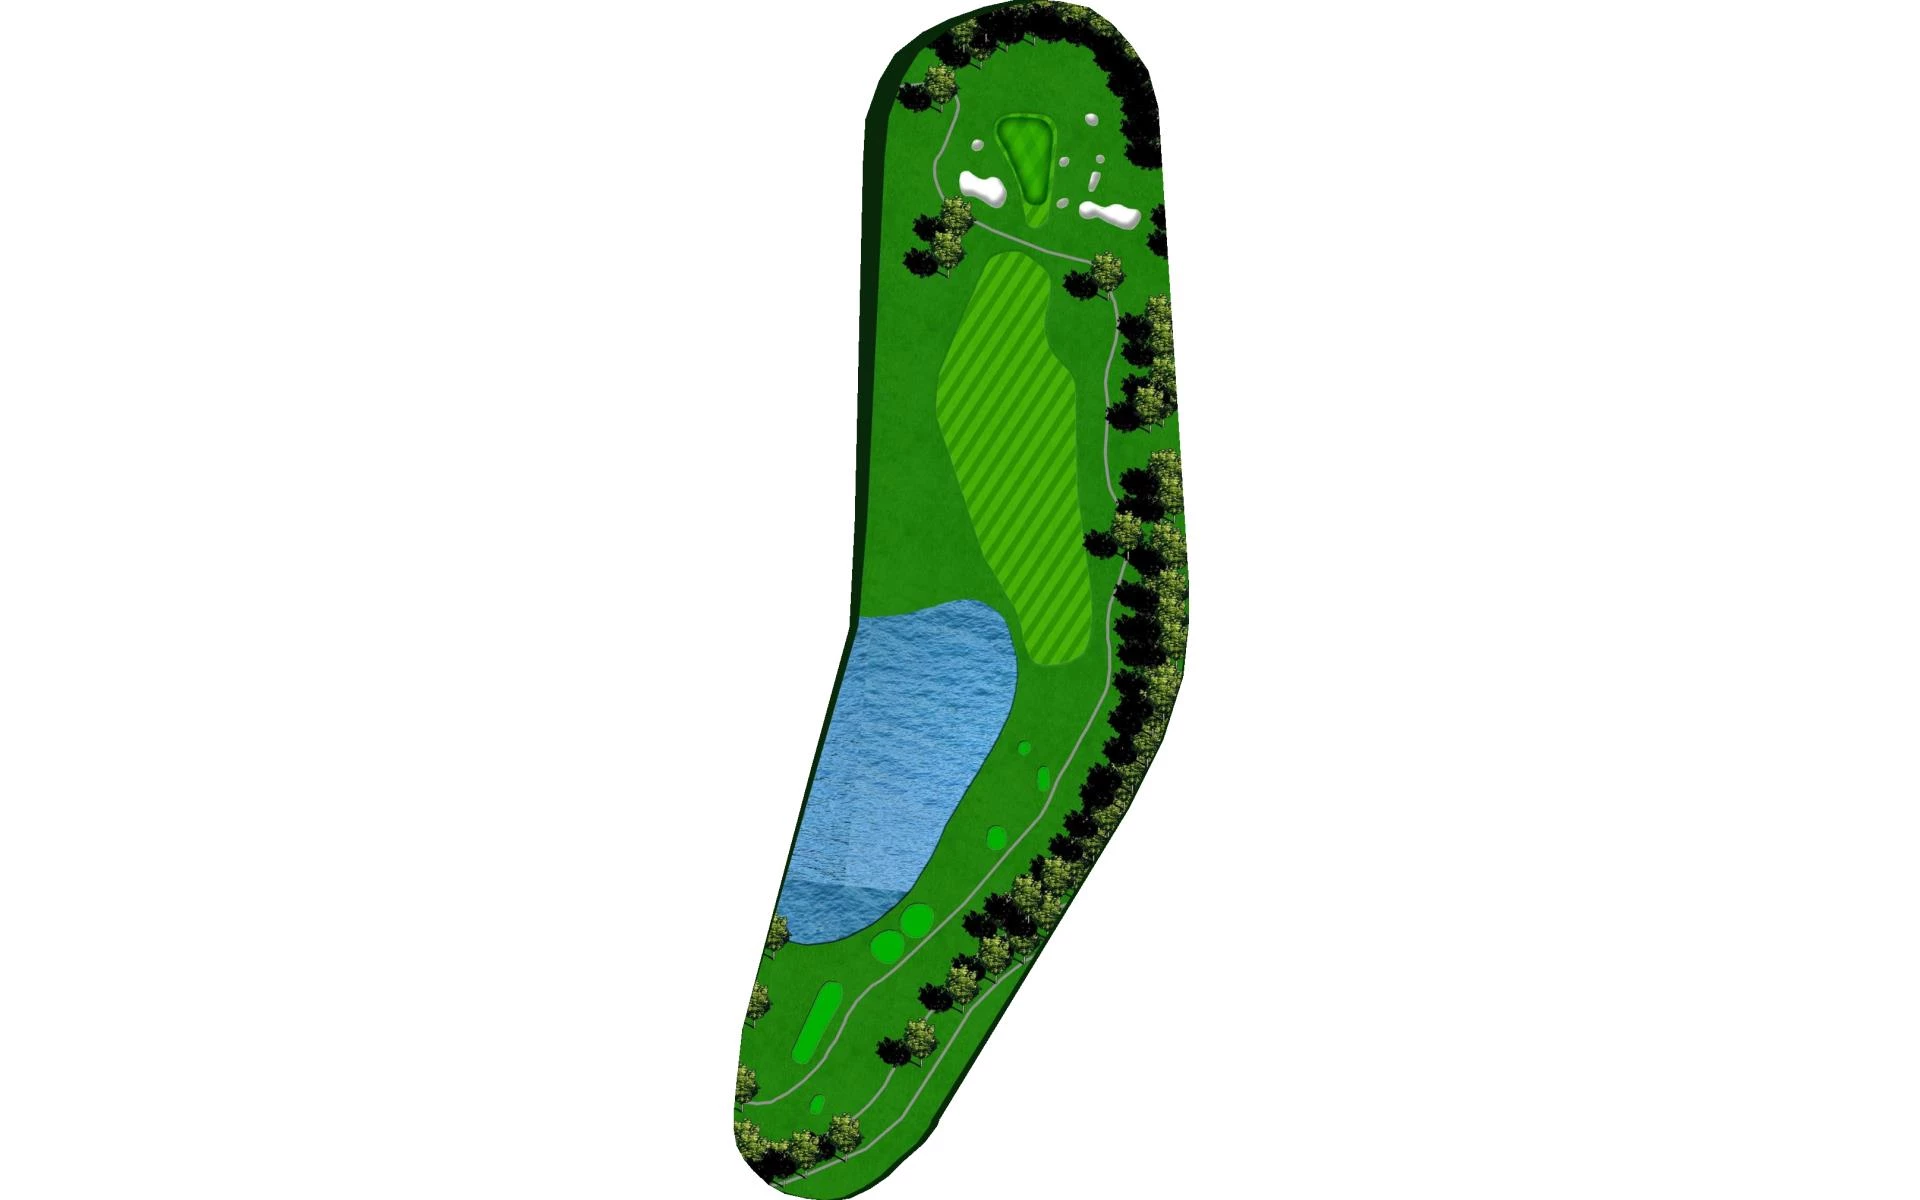
Heritage Golf Course
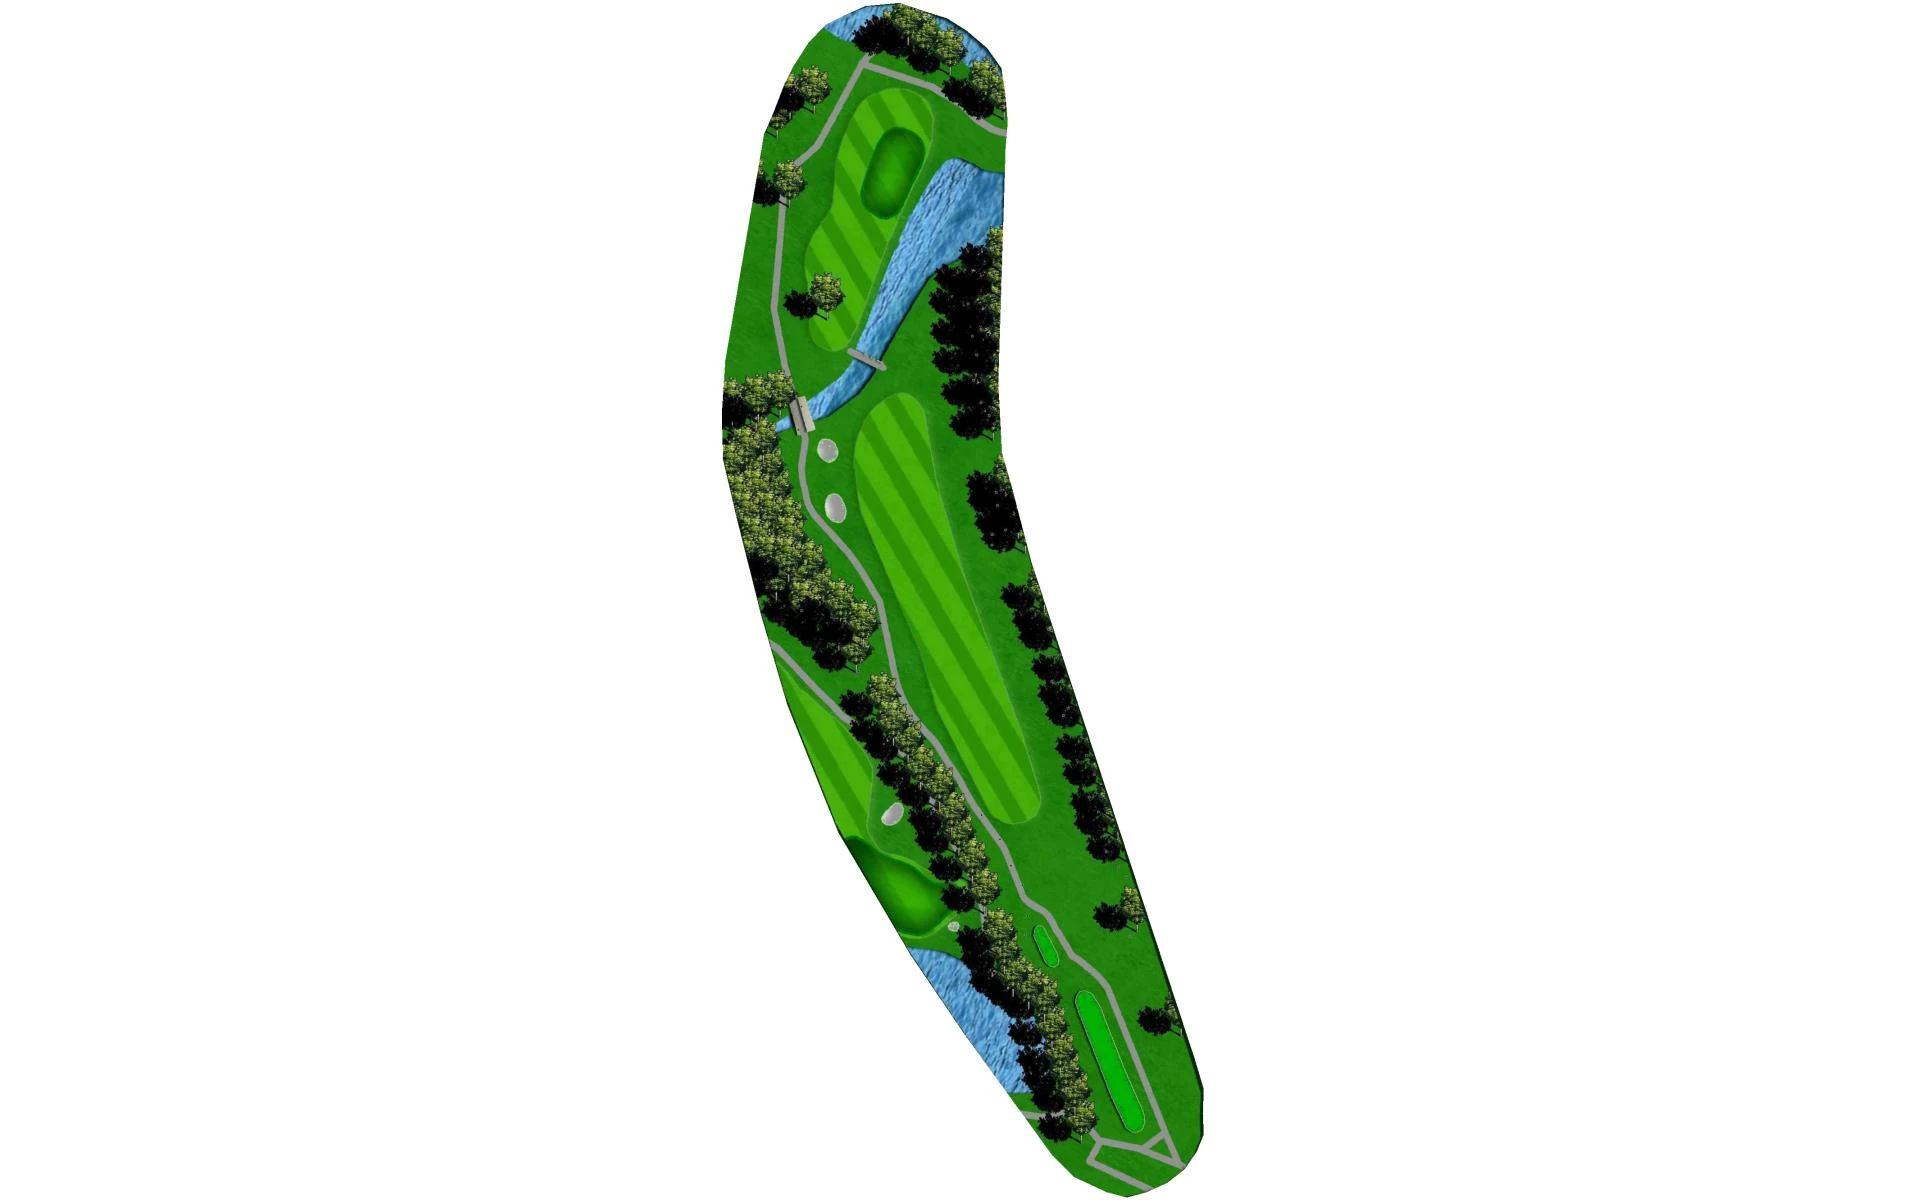
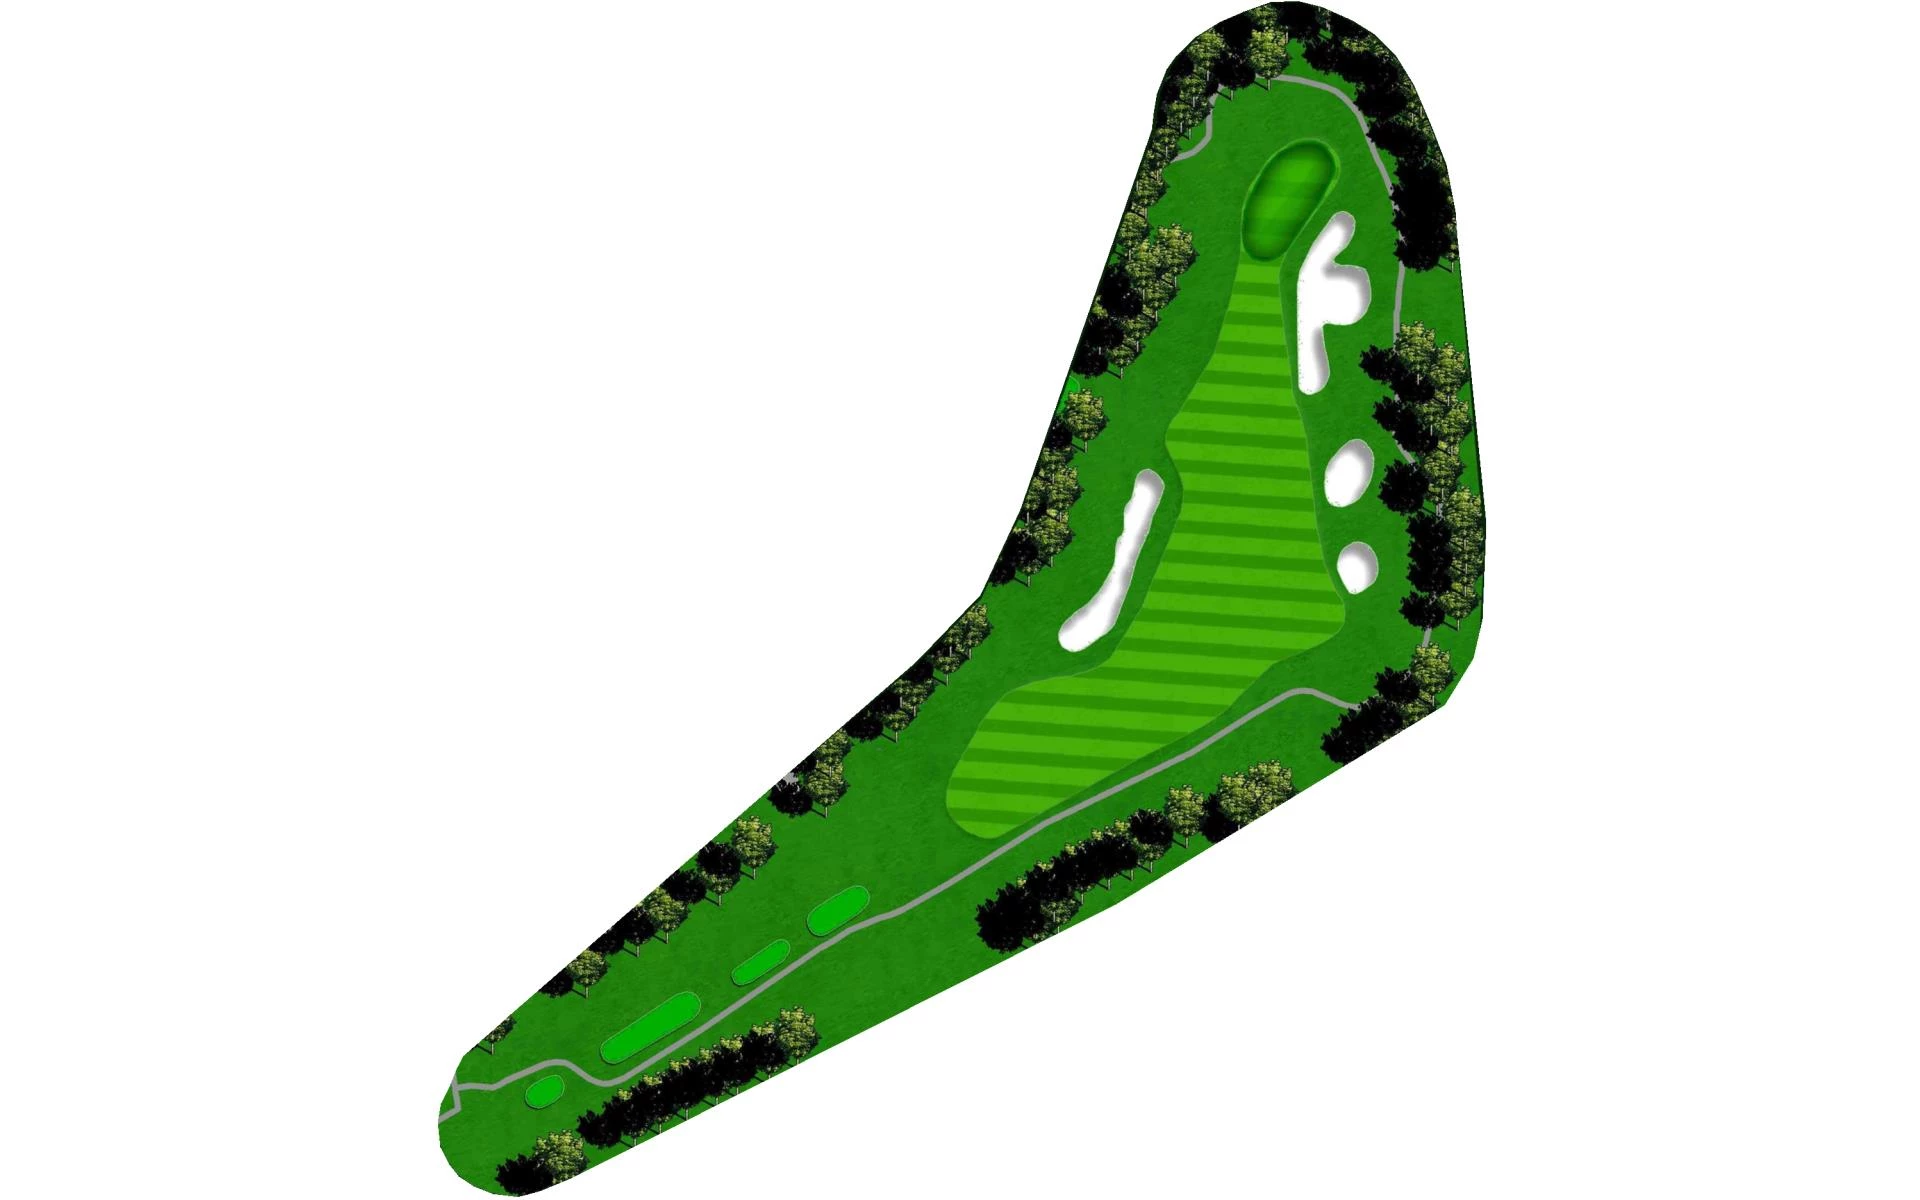
# 1 / Davey Jones Crossing
Par: 4
Yardage by Tee:
Dye 386
GOLD 375
BLUE 355
WHITE 340
SILVER 316
RED 305
Pro Tips
This opening hole is of modest length but it is the initial test of driving accuracy. When you drive finds the landing area, your approach will be a medium to short iron to a bunkerless green. The green has plenty of bail-out to the left, but part of Davey Jones' Locker lines the complete right side of the green. The green is large and subtle with an expansive collar. Plenty of room for chipping, picthing and putting.
# 2 / The Pinnacle
Par: 4
Yardage by Tee:
Dye 446
GOLD 440
BLUE 410
WHITE 372
SILVER 320
RED 290
Pro Tips
This medium to long par 4 has an open landing area. The play here is all in the approach shot: medium to long iron, uphill, setting right-to-left. The green has an inviting opening, but beware: It is well-protected by two deep bunkers left and one right. Reaching the green in two does not guarantee a par. Be careful of reading the breaks; don't let the altitude fool you.
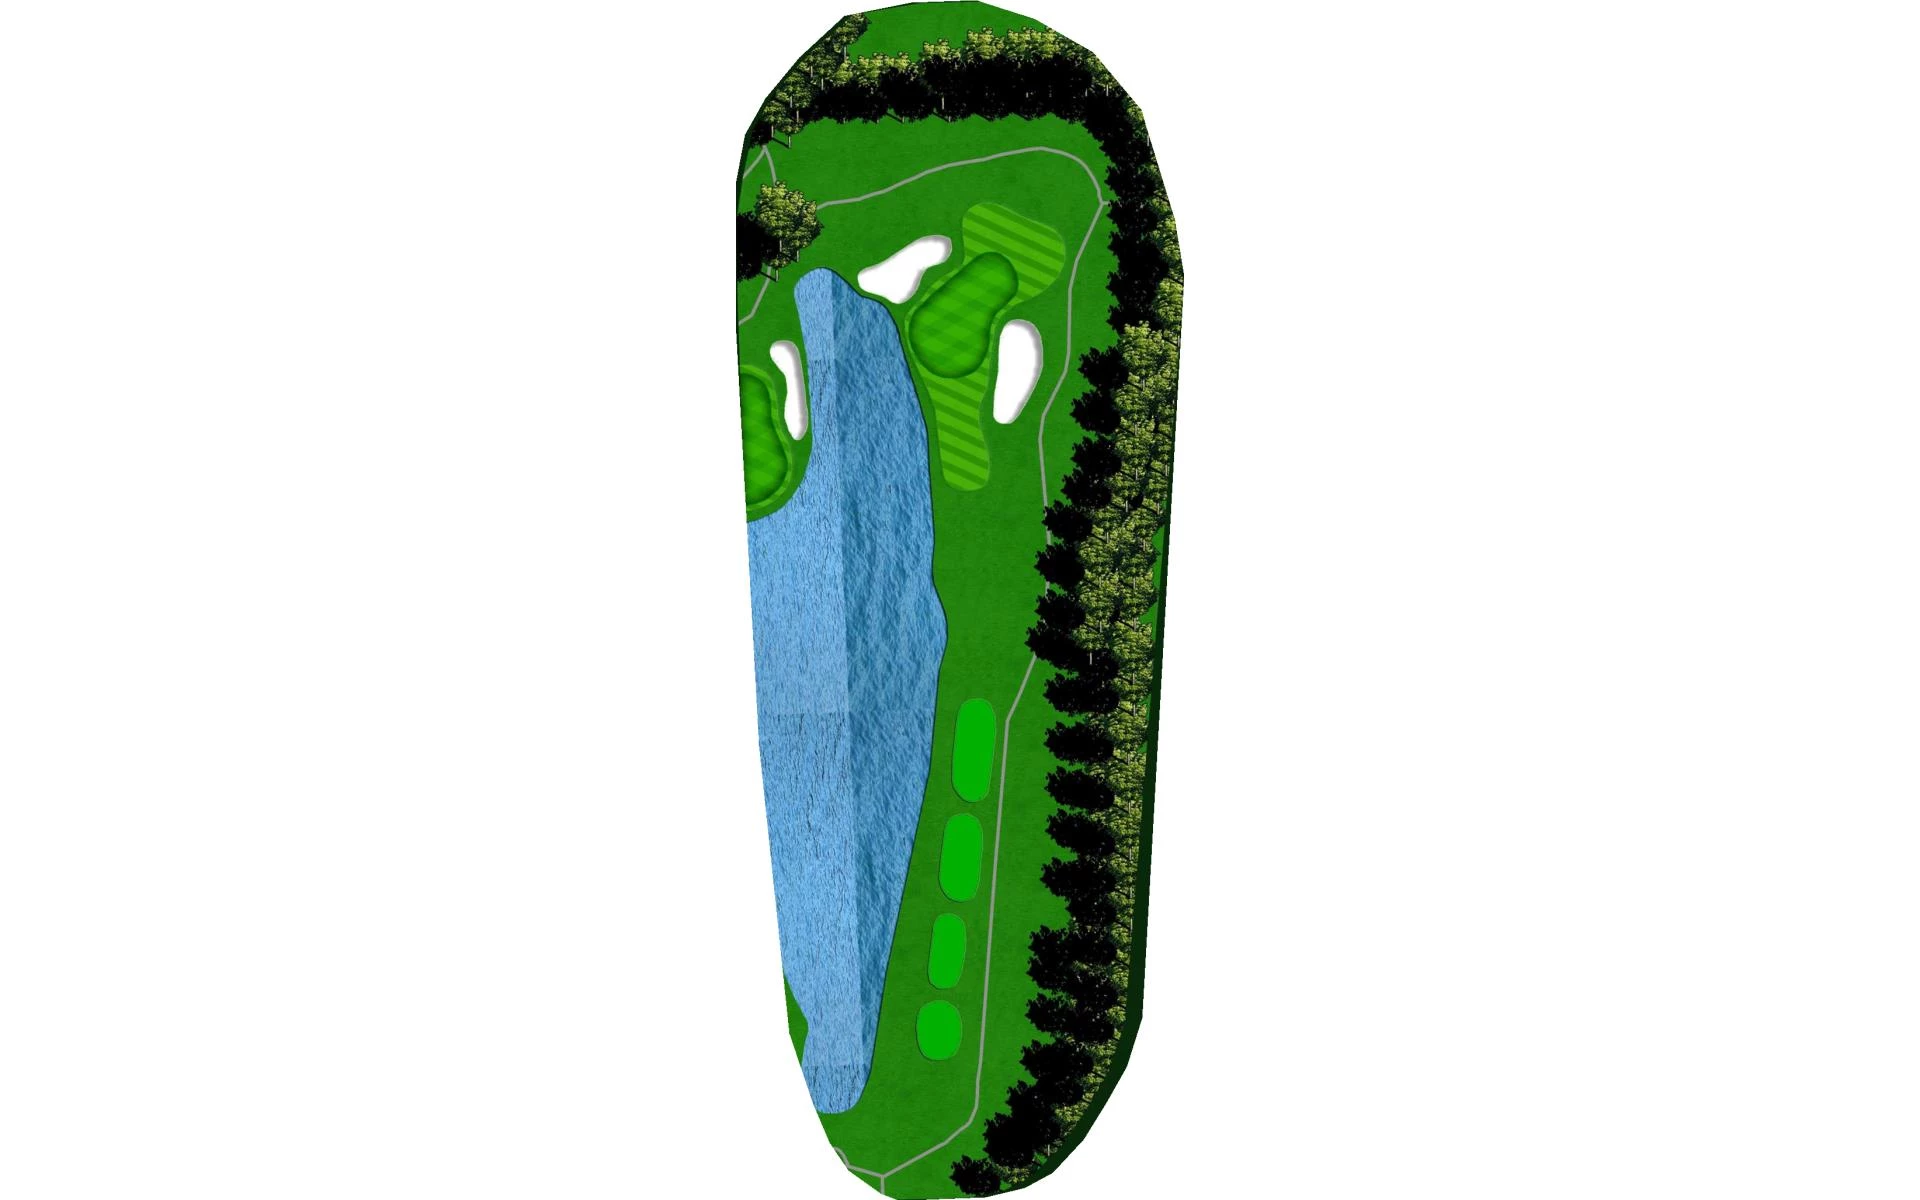
# 3 / Campbell's Point
Par: 3
Yardage by Tee:
Dye 208
GOLD 185
BLUE 175
WHITE 152
SILVER 135
RED 115
Pro Tips
This long all-carry par 3 has only two options: wet or dry. You have an opportunity to bail-out left but beware of the sandy beach. The green is large and undulating; just remember, relax and take the second option!
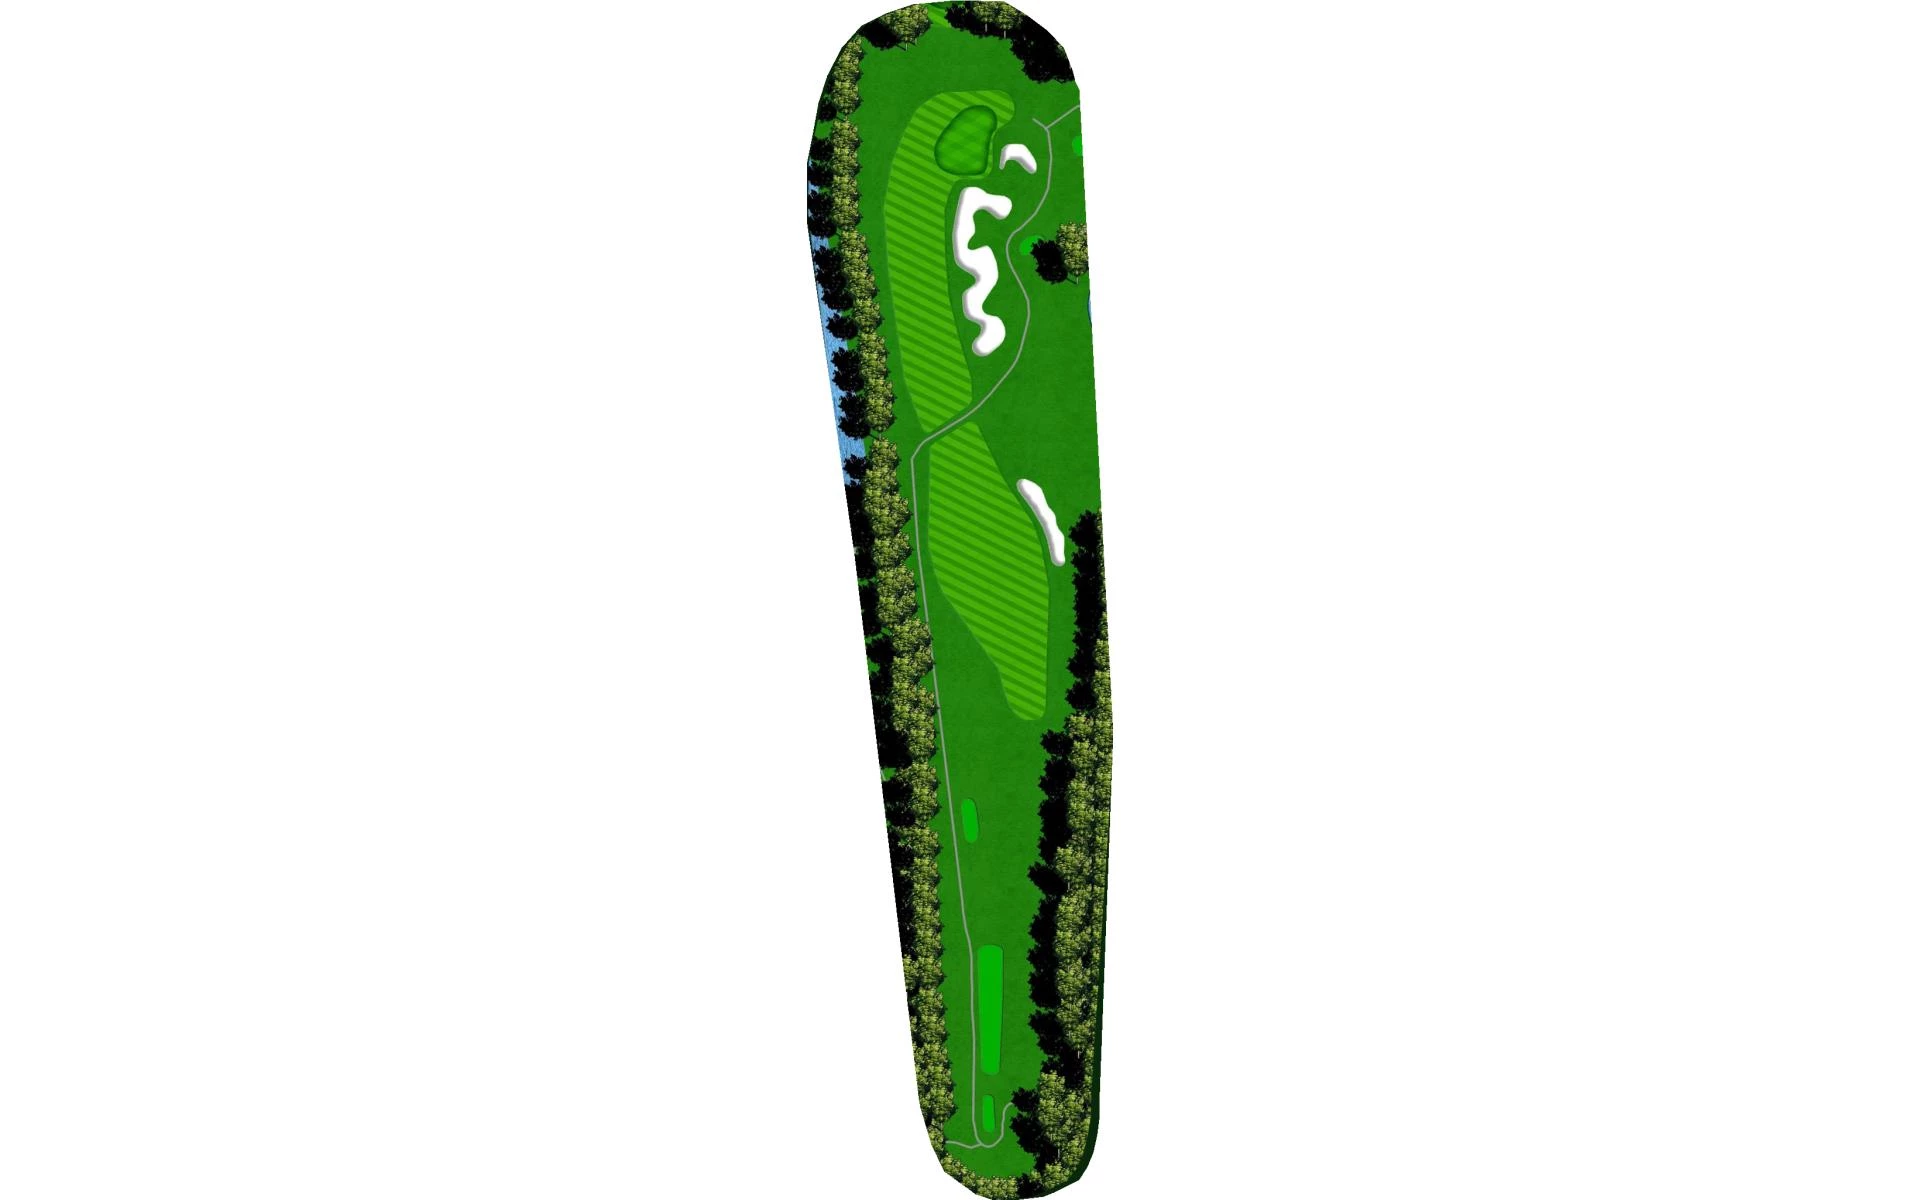
# 4 / Cascades
Par: 5
Yardage by Tee:
Dye 523
GOLD 500
BLUE 485
WHITE 455
SILVER 422
RED 395
Pro Tips
This modest par 5 is the first real chance at birdie. Hug the hazard along the right side and the approach to the green opens up. Bail-out safe to the left on the drive and the door to the green closes. The three-tiered green is narrow, severe and heavily guarded by a variety of bunkers and grass depressions.
# 5 / Marker Look Out
Par: 4
Yardage by Tee:
Dye 370
GOLD 360
BLUE 340
WHITE 310
SILVER 260
RED 235
Pro Tips
This short par 4 requires an accurate drive to the middle of a wide fairway enabling you to see the green from the approach shot, otherwise, take your chances and let it rip. The fun comes when you play your next shot. W
# 6 / Long and Lean
Par: 4
Yardage by Tee:
Dye 473
GOLD 458
BLUE 431
WHITE 390
SILVER 350
RED 340
Pro Tips
Pray for the wind at your back here, the longest of the par 4s. This hole sets up either left-to-right or right-to-left off the tee. Straight is a good option but distance is a must. The green is totally open to a roll-up shot but one little pot bunker on the left can snag an errant ball.
# 7 / Double Cross / Signature Hole
Par: 4
Yardage by Tee:
Dye 432
GOLD 418
BLUE 390
WHITE 360
SILVER 325
RED 312
Pro Tips
This may be the frontside sleeper. If you think this hole looks hard, you're right. Water all along the left on both the drive and approach shot is a constant challenge. Water is the only true hazard left in golf. Your first glimpse of the famous railroad ties.

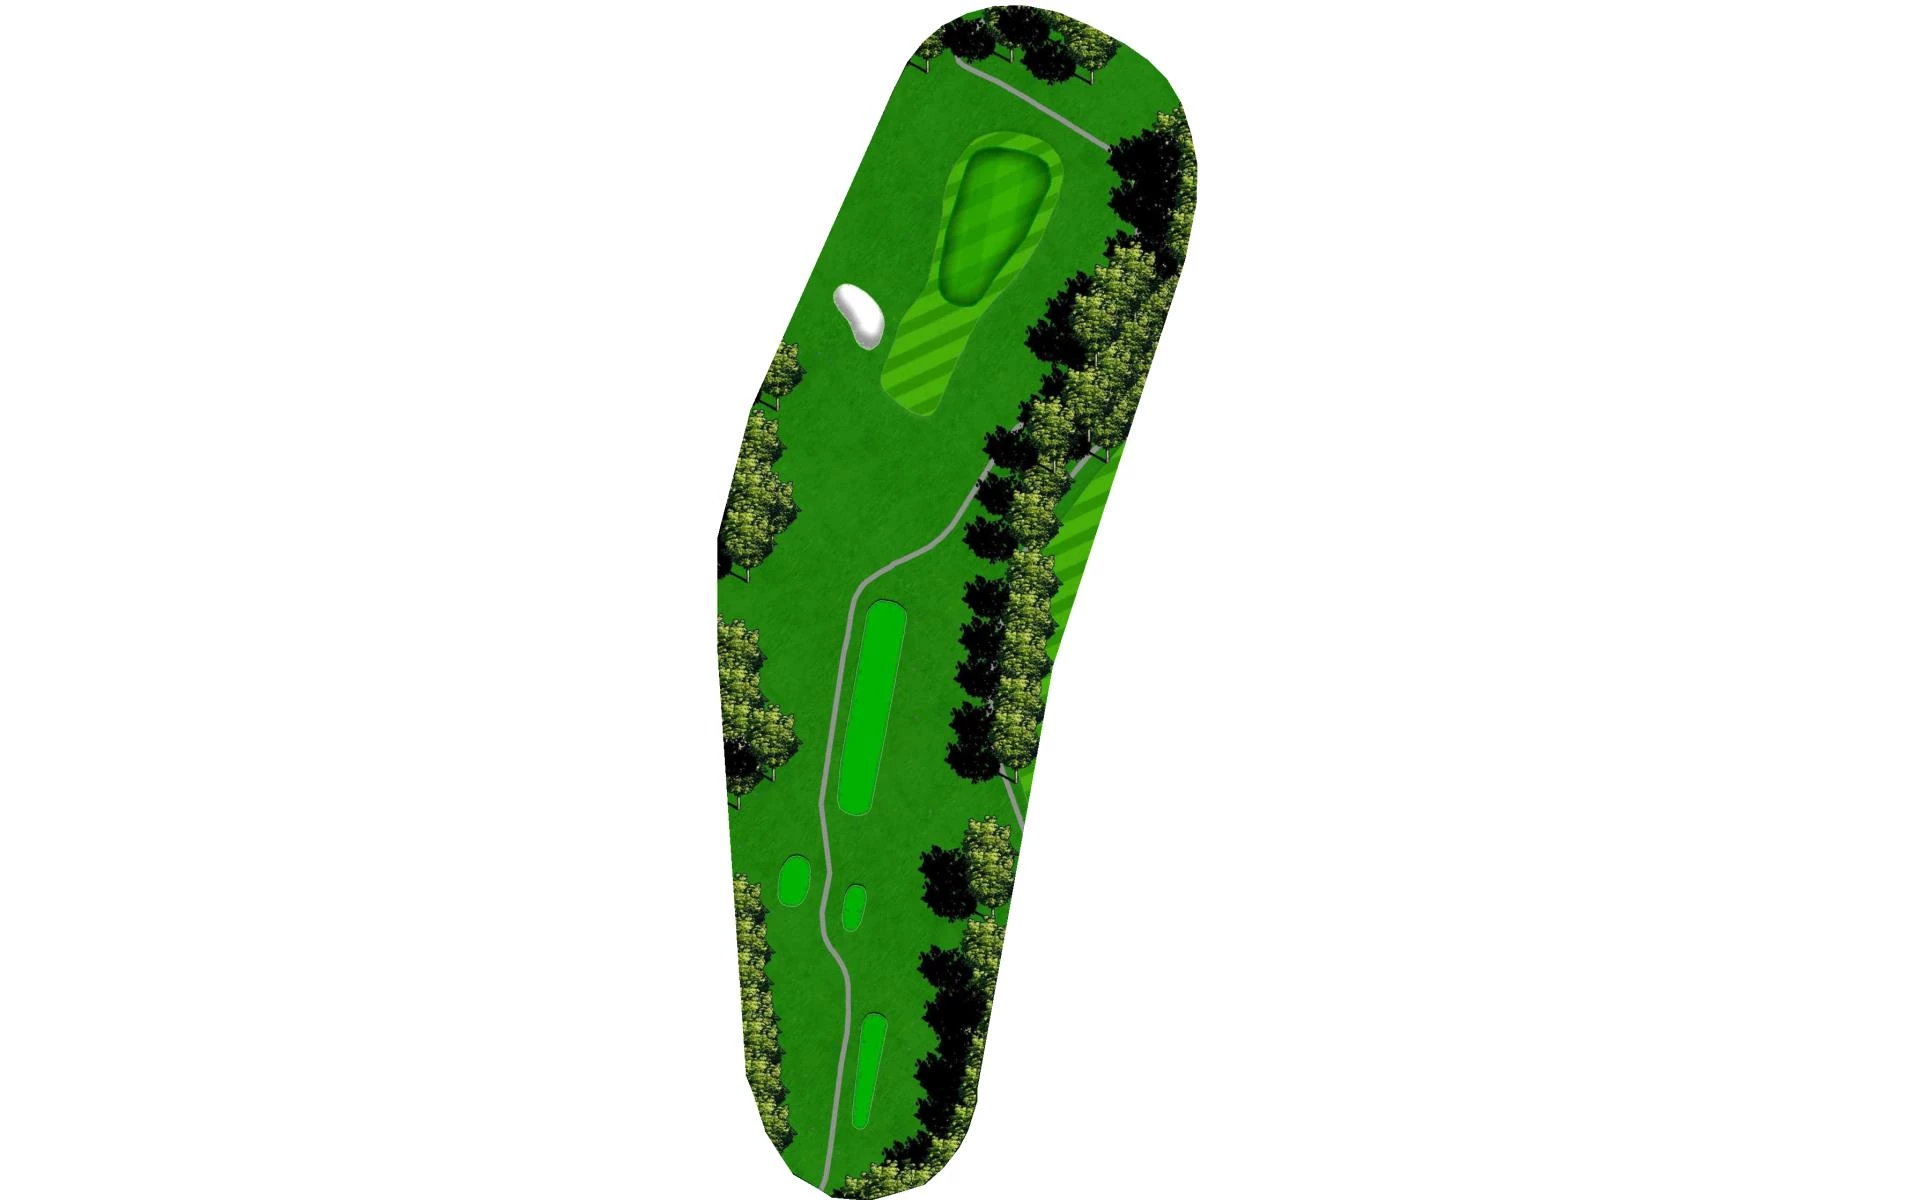
# 8 / Tunnel Vision
Par: 3
Yardage by Tee:
Dye 158
GOLD 150
BLUE 140
WHITE 120
SILVER 118
RED 90
Pro Tips
This short par 3 is back in the woods. A knockdown shot may be better here than a tee-it-high short iron. The large oaks on both sides funnel one's vision towards the green. Find the green here and all is well; miss the green and expect to be in the sand.
# 9 / The Water Tower
Par: 4
Yardage by Tee:
Dye 438
GOLD 430
BLUE 380
WHITE 344
SILVER 305
RED 275
Pro Tips
The tee shot needs to be on the left to avoid the water, aiming for the Hilliard Water Tower. All kinds of trouble in all kinds of places present many different strategies. All in all, the green is large and severe. Any two putt is good here.
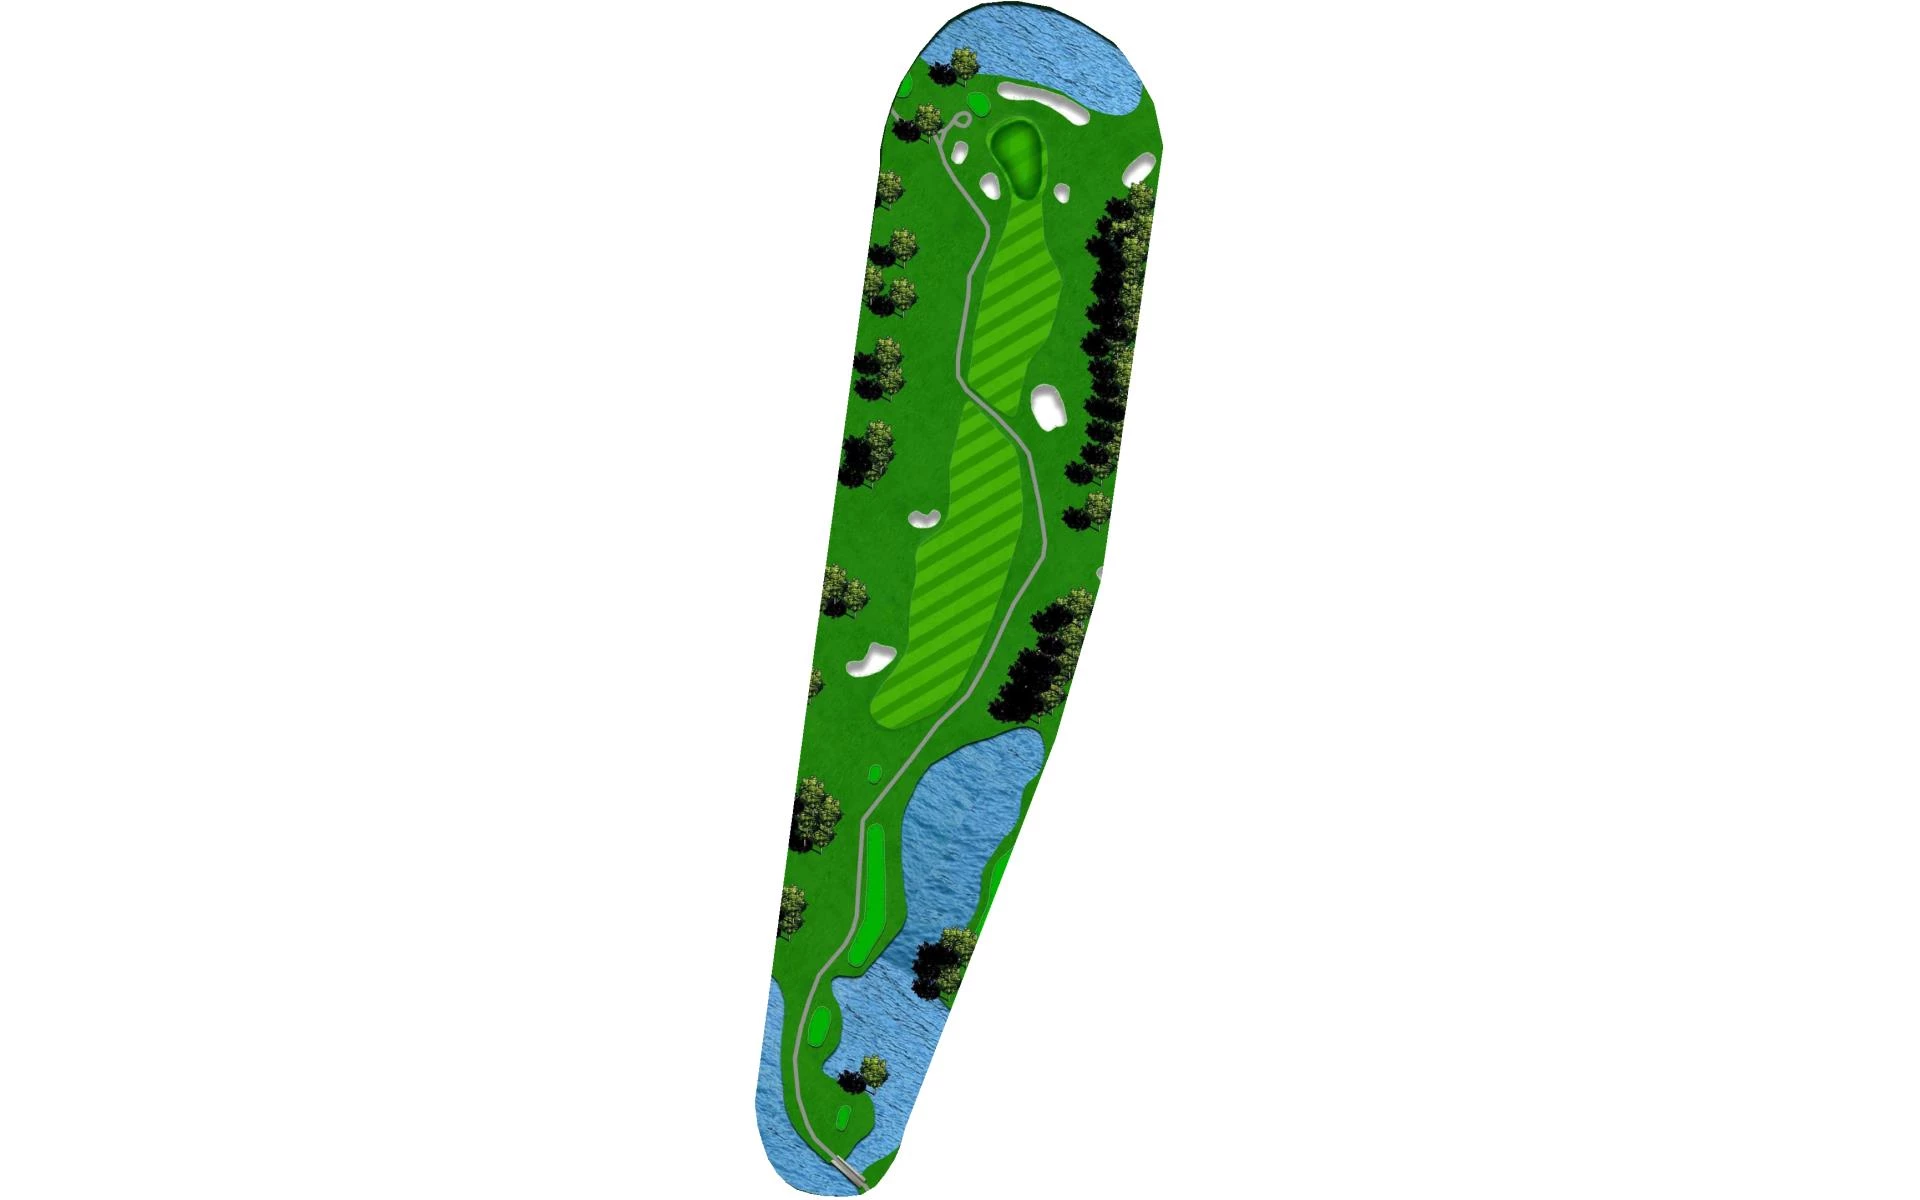
# 10 / Forget Me Not
Par: 4
Yardage by Tee:
Dye 367
GOLD 340
BLUE 330
WHITE 315
SILVER 290
RED 256
Pro Tips
This medium length par 4 is easier than it looks. The landing opens up to the right. A well-played shot along the fairway on the left allows for a more open approach to the green. A relaxing hole that invites you away from the clubhouse and prepares you for Pike's Peak.
# 11 / Pike's Peak
Par: 3
Yardage by Tee:
Dye 218
GOLD 209
BLUE 165
WHITE 140
SILVER 130
RED 125
Pro Tips
Take our advice on this par 3: Write down a 3 and go on to the 12th tee. Still want to tee it up? Well then, hit it long, hit it straight, make a chip and a putt. Stop by the club for one more drink and know that you have played the longest par 3, uphill, into the wind, that Heritage has to offer.
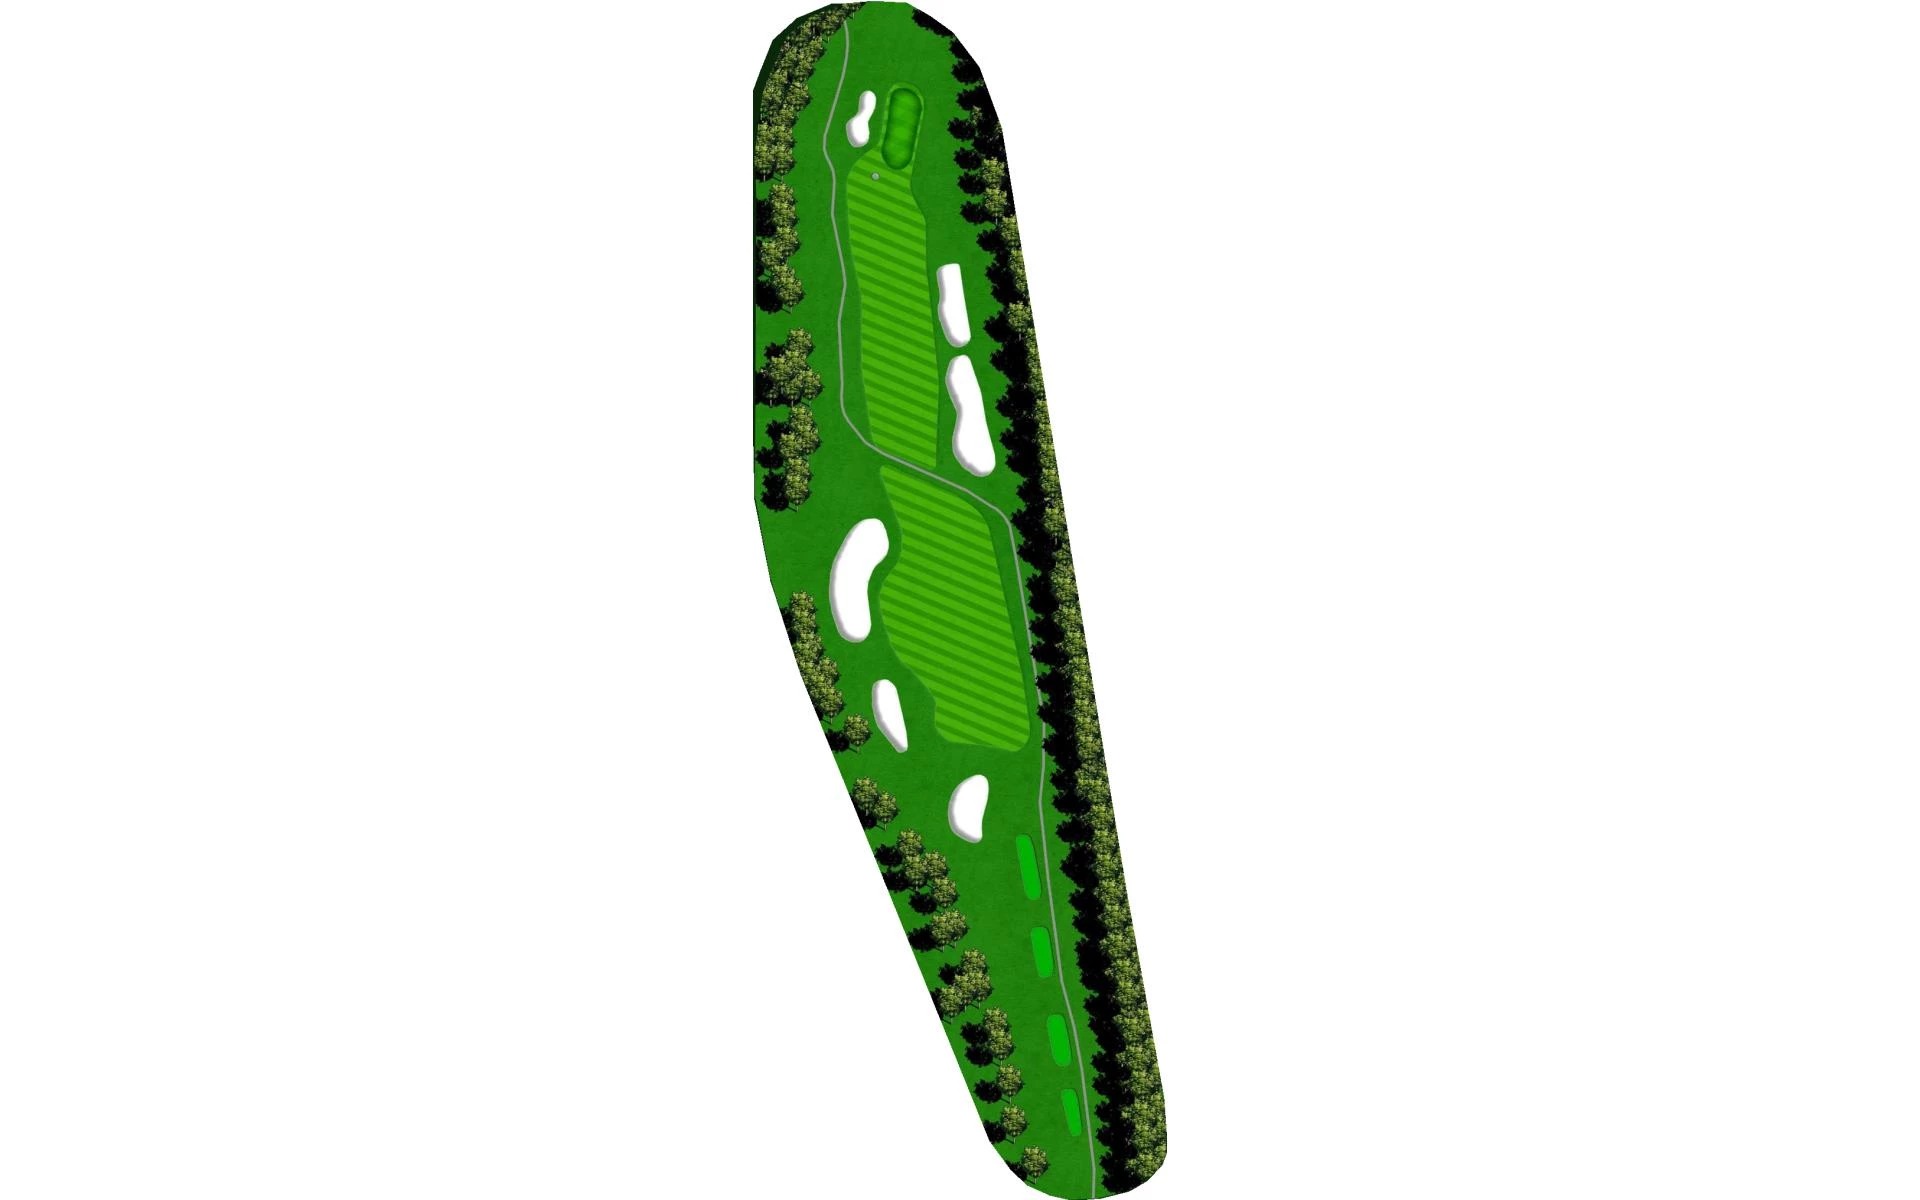
# 12 / Short and Mean
Par: 4
Yardage by Tee:
Dye 339
GOLD 330
BLUE 315
WHITE 283
SILVER 280
RED 233
Pro Tips
After descending the 11th green, 12 is our shortest par 4; but beware, it is not the easiest. Twelve is nicely framed by the trees, a stream and a small pond all at the same time. Both the tee shot and the approach shot need to find the correct landing area or the next shot could be extremely difficult to this small and severe green.
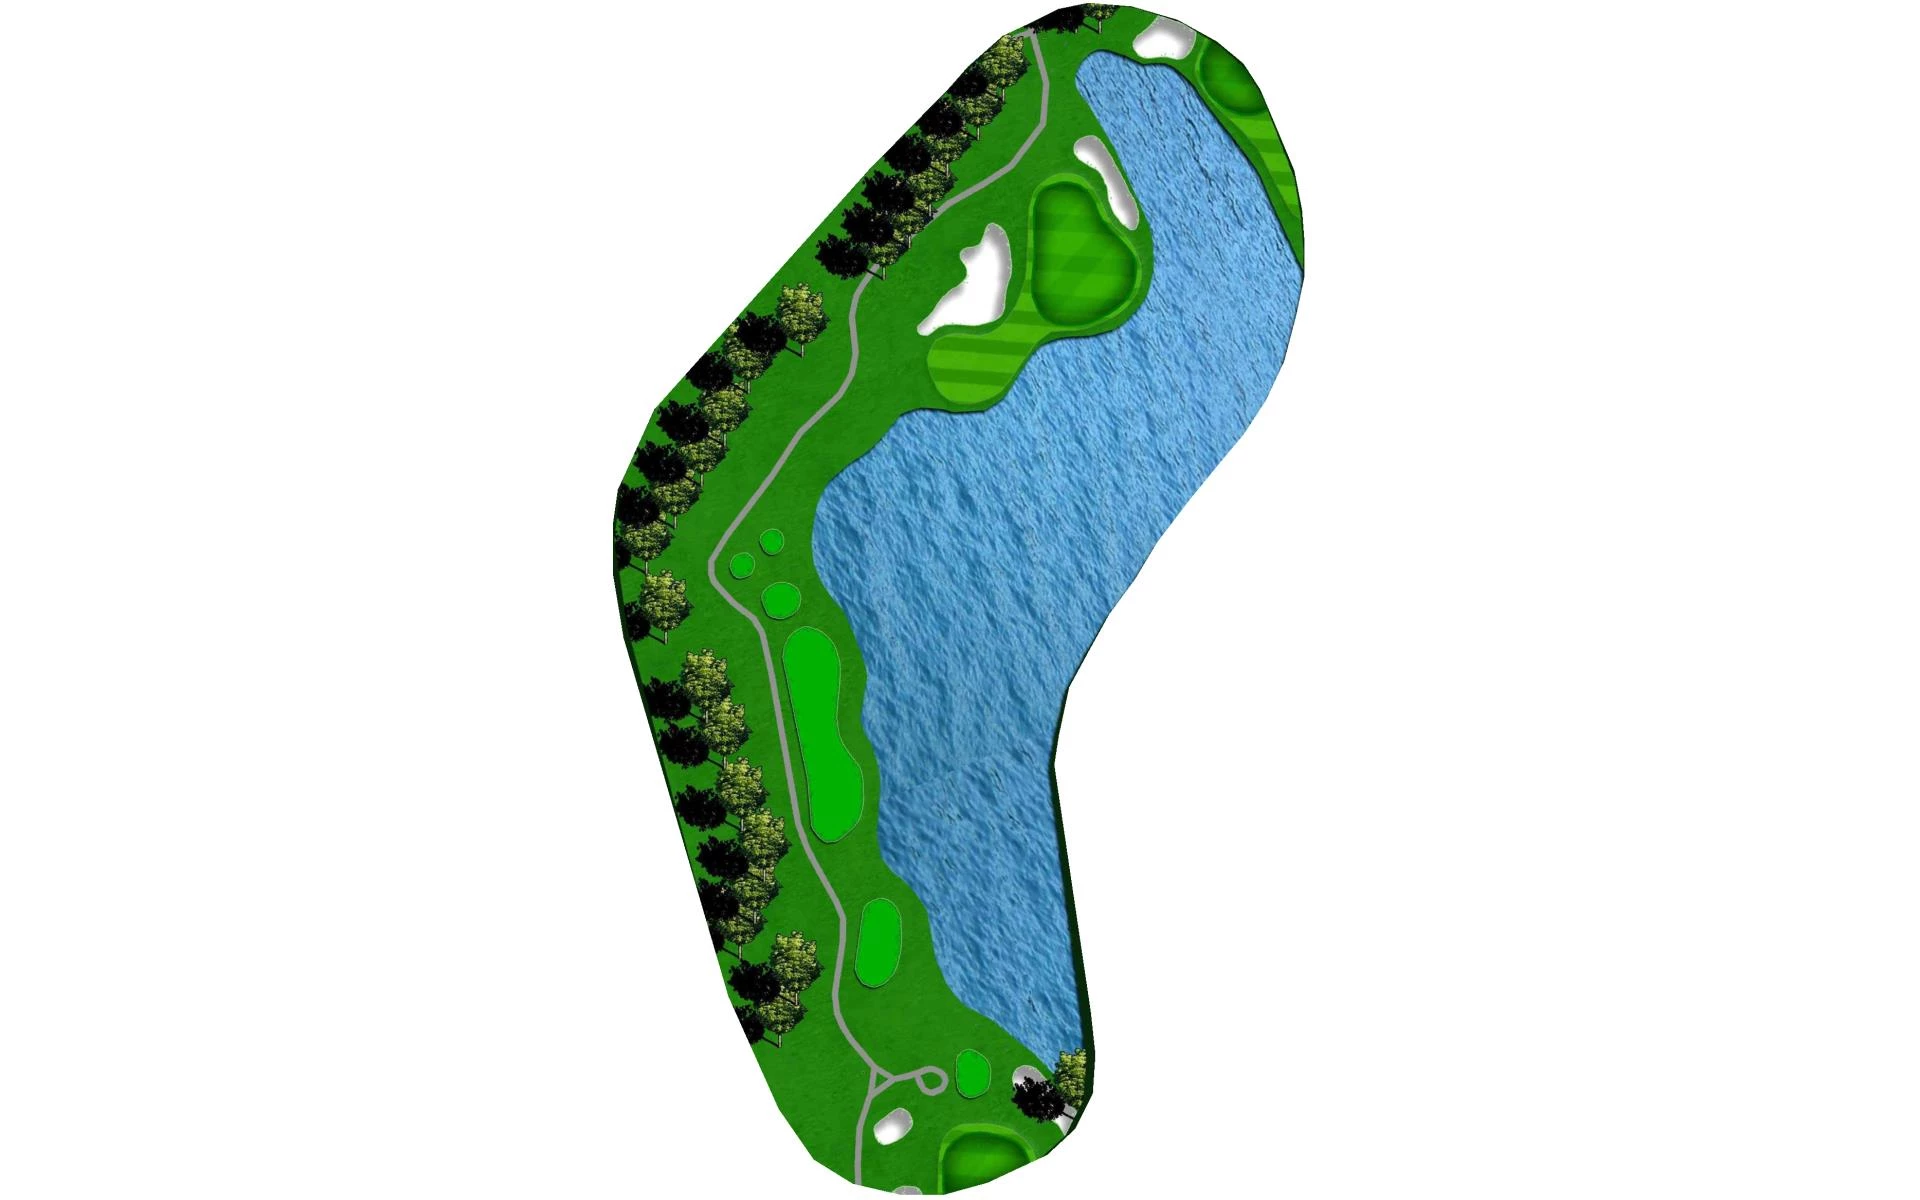
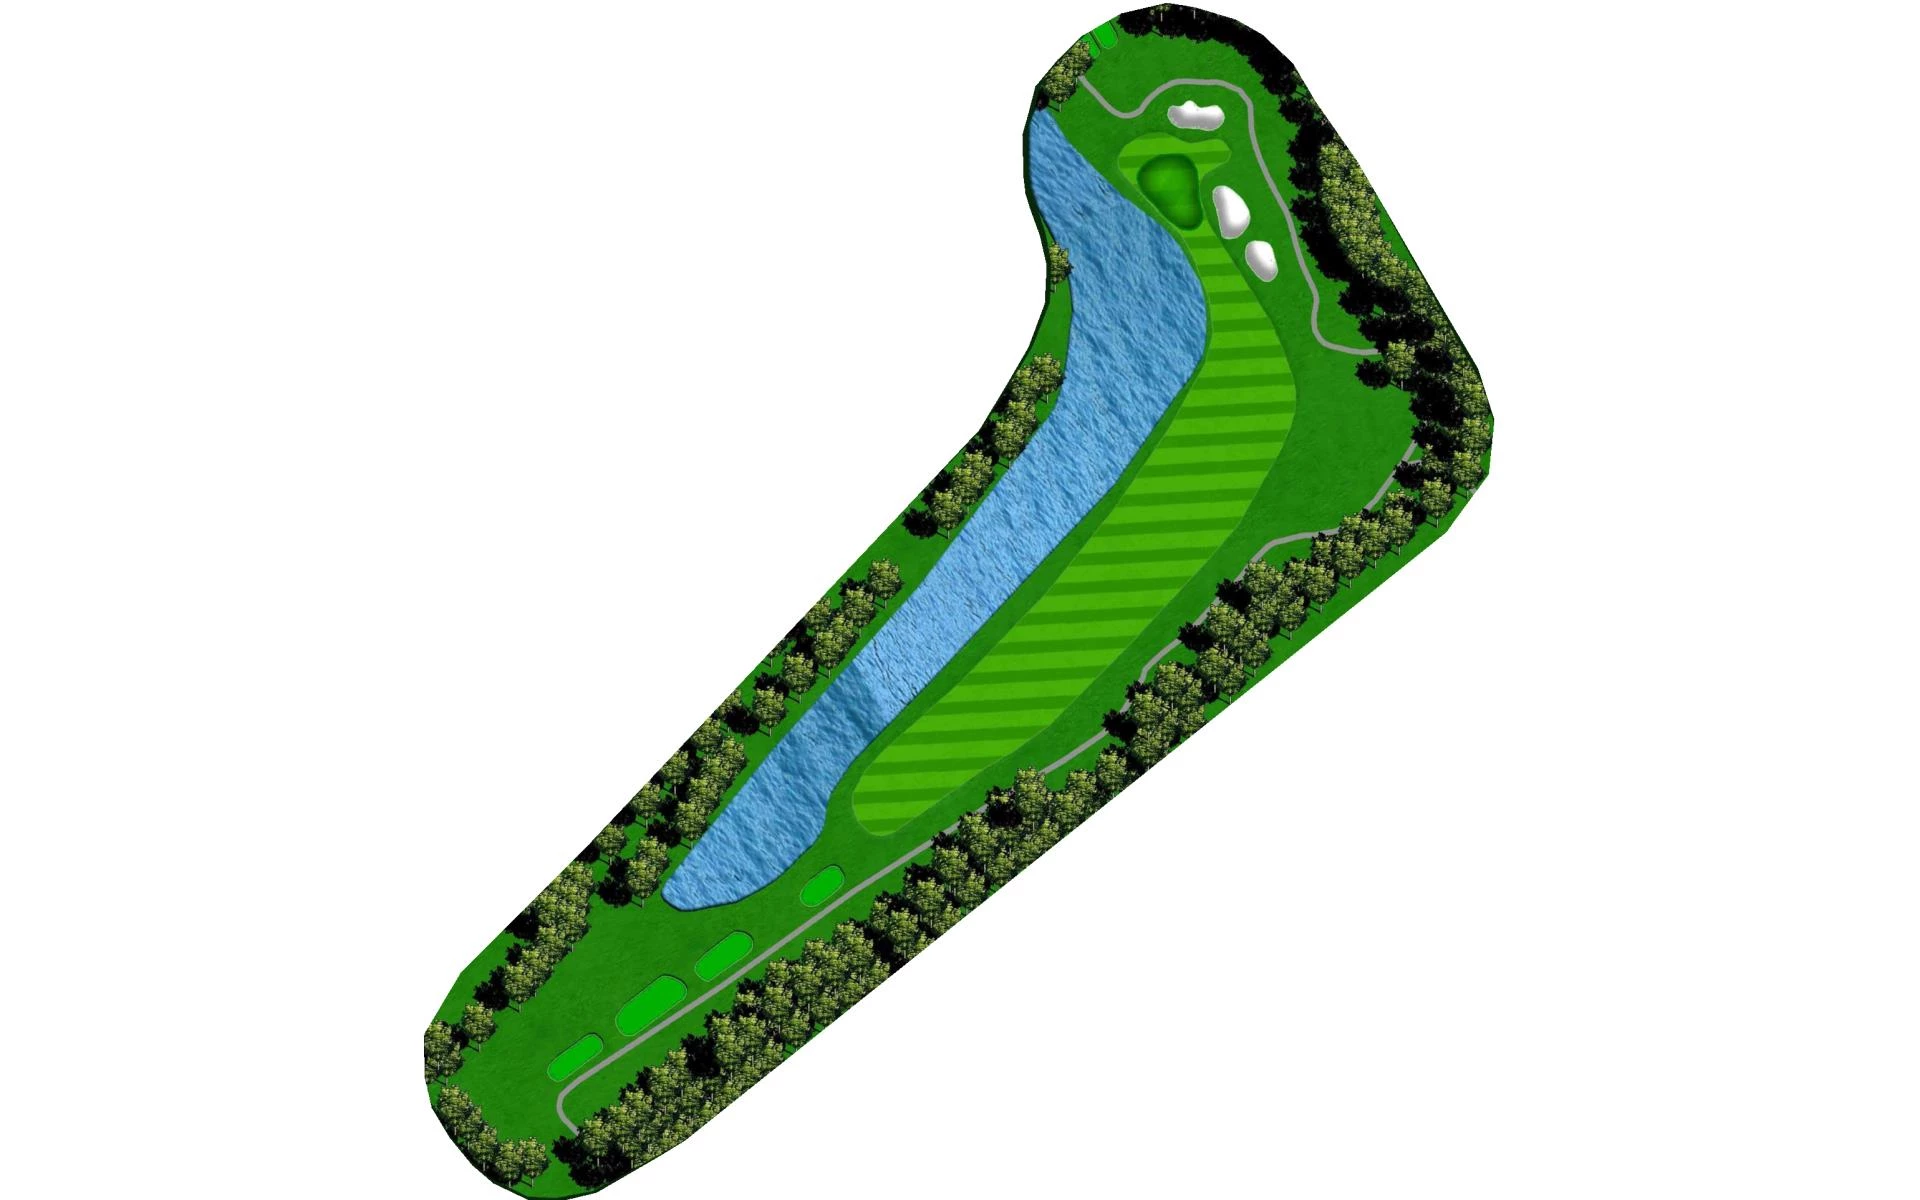
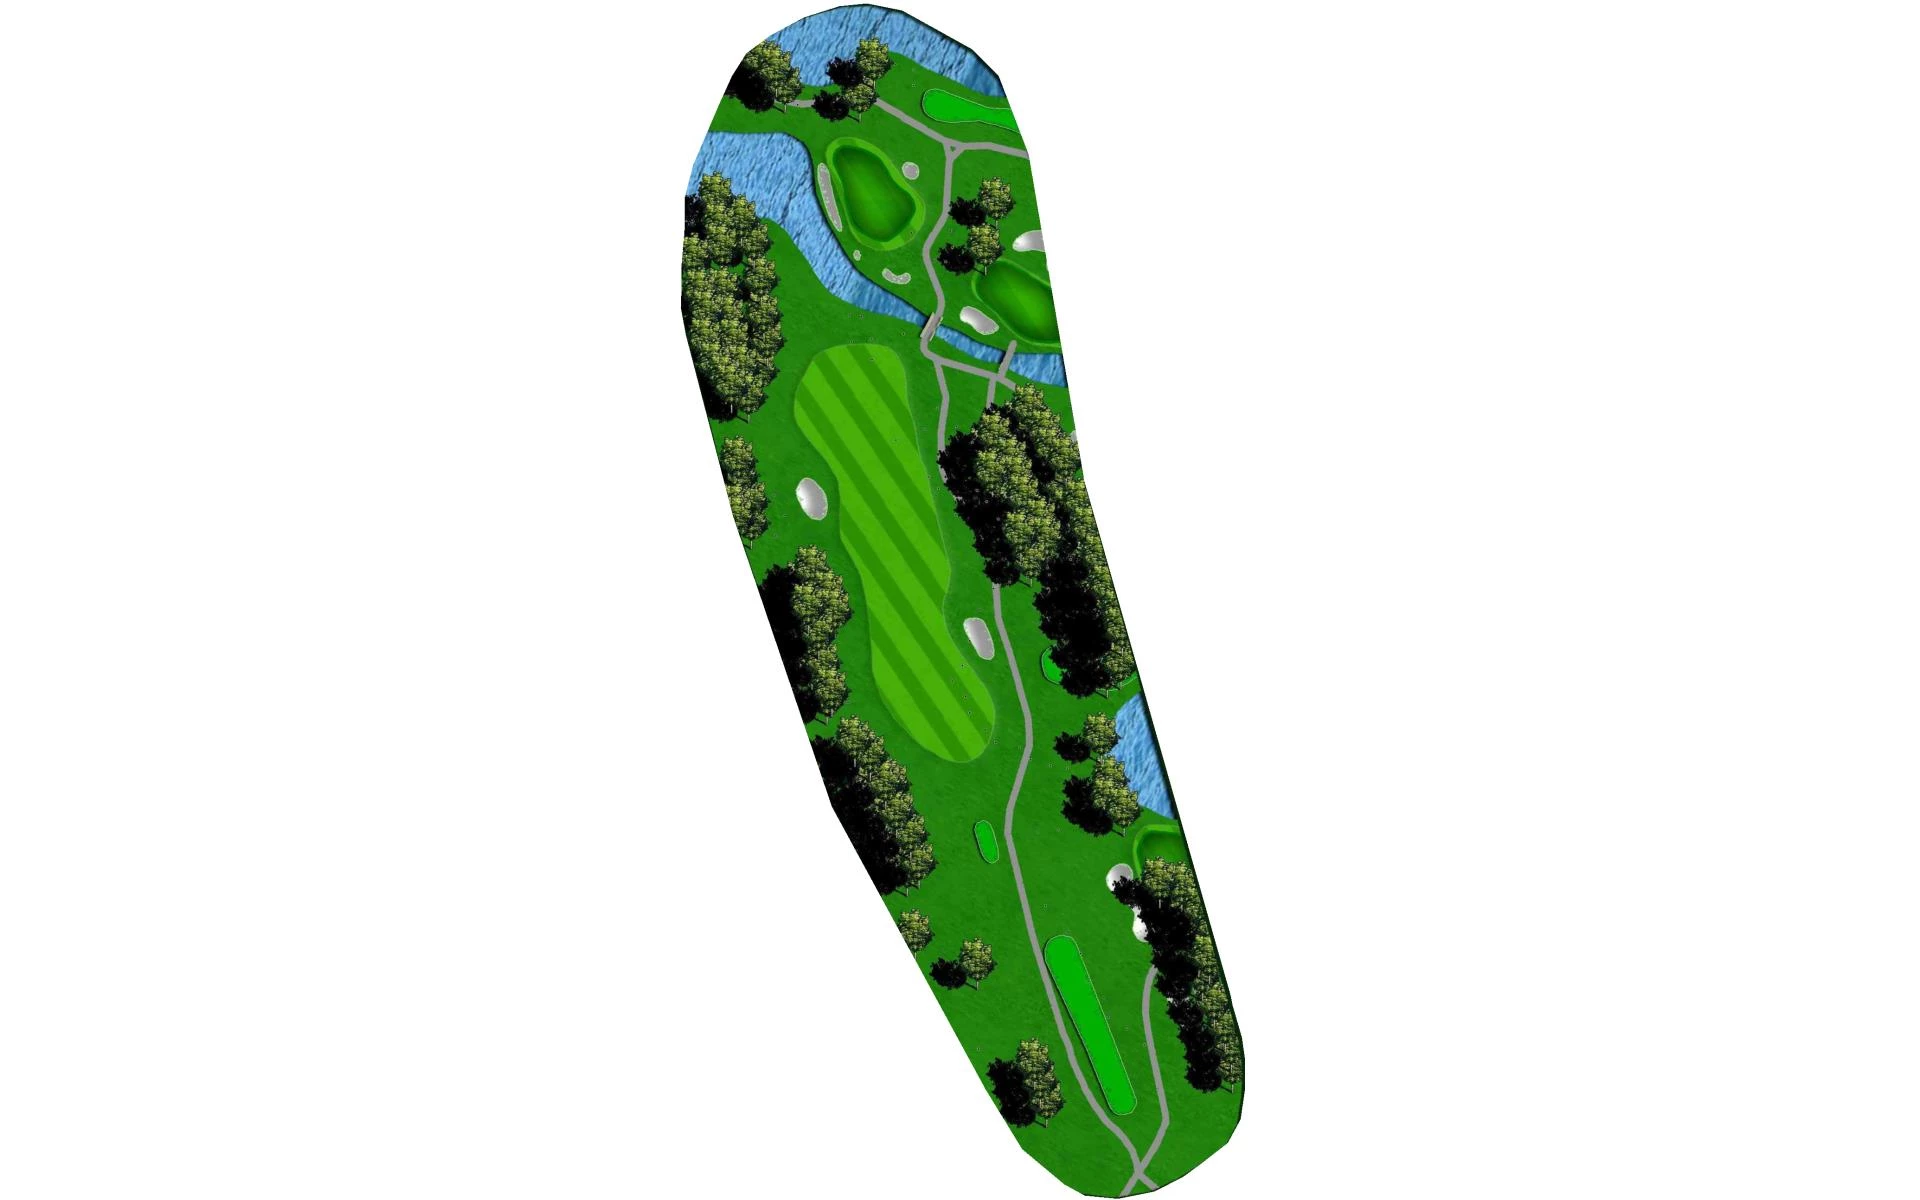
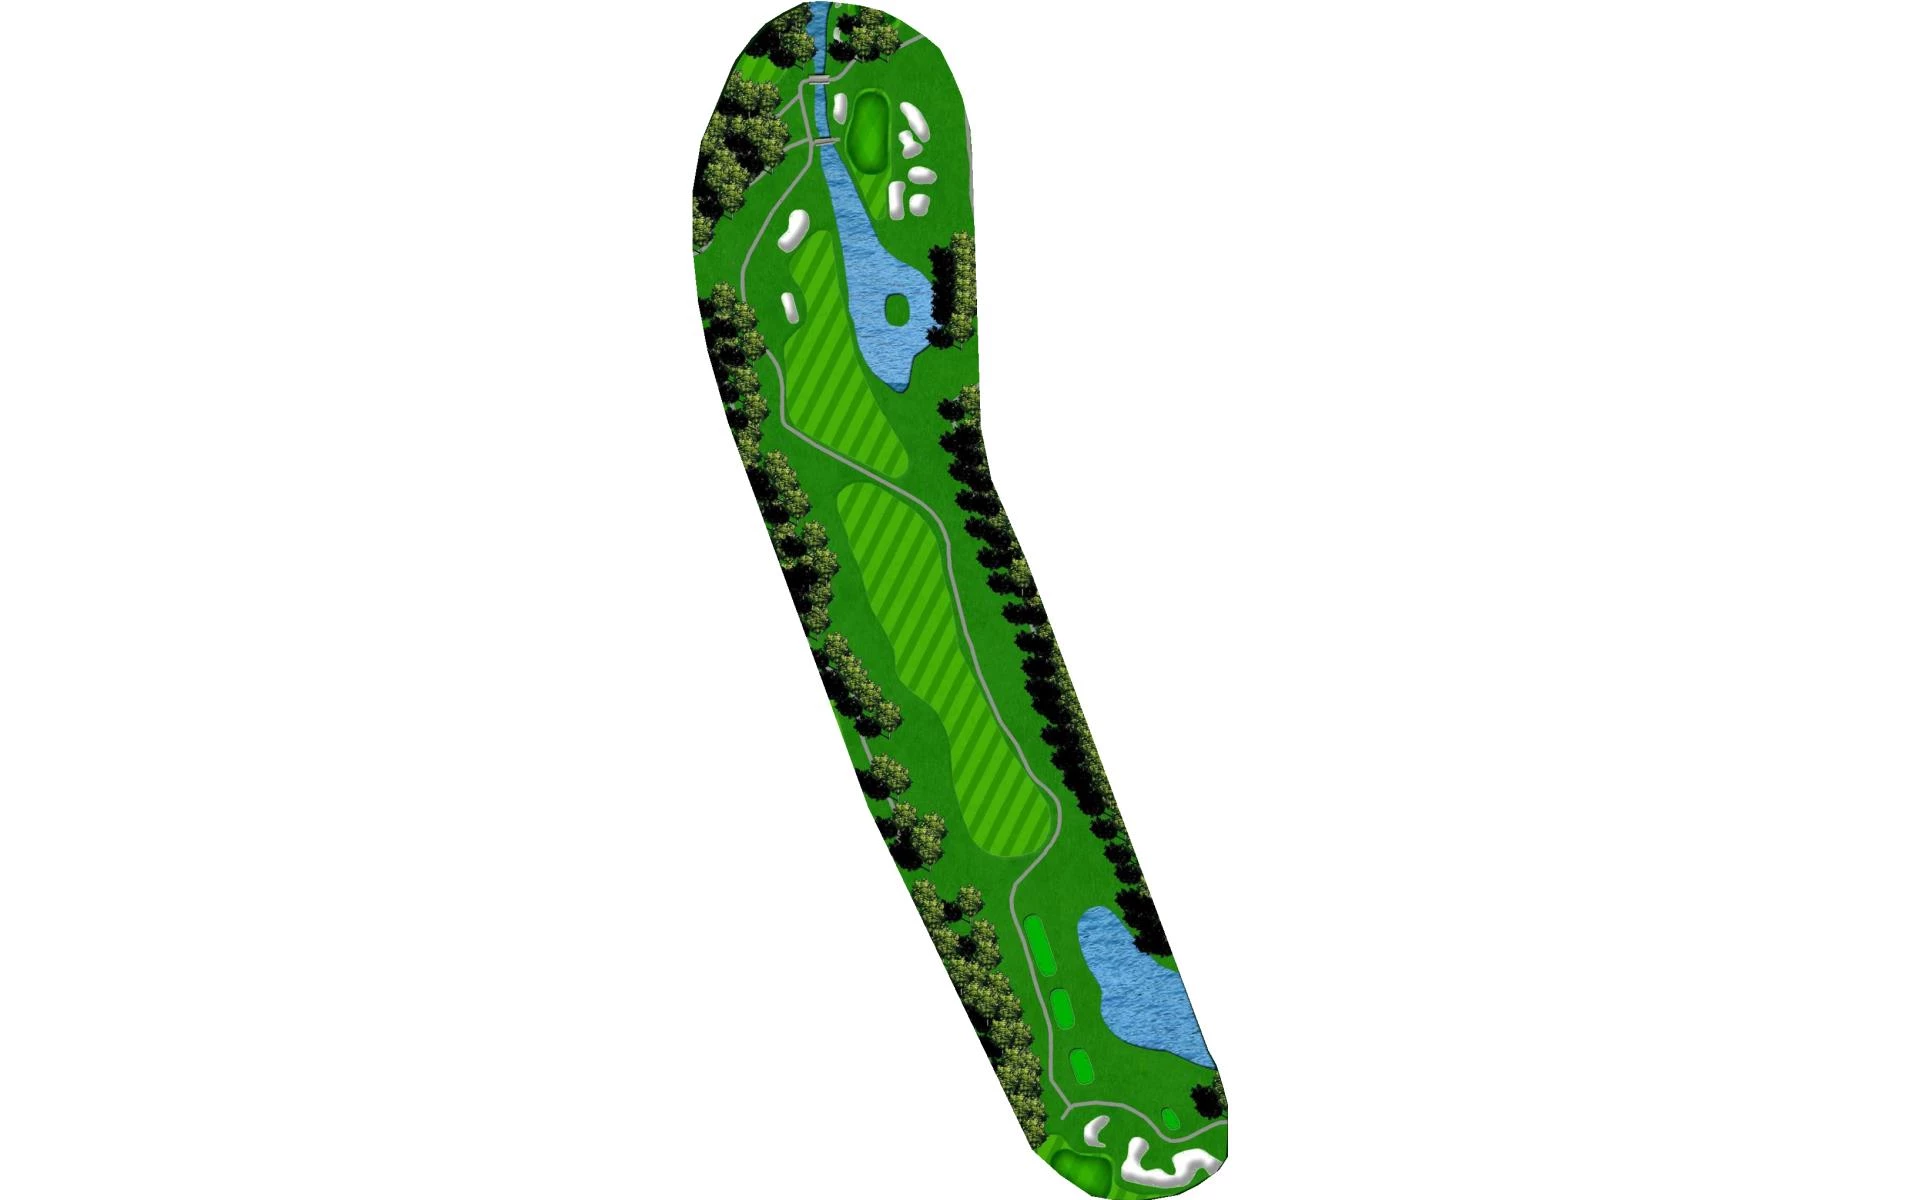
# 13 / Jettie
Par: 5
Yardage by Tee:
Dye 515
GOLD 508
BLUE 480
WHITE 453
SILVER 450
RED 416
Pro Tips
Two fine long shots can reach the green. The challenge of this hole is whether or not one should go for a green that is a peninsula. Although the green is ample, it is surrounded on three sides by water and sand and has a little keyhole pot bunker that protects the only opening to the green. Blind faith and great courage will be needed to navigate this treacherous par 5 green.
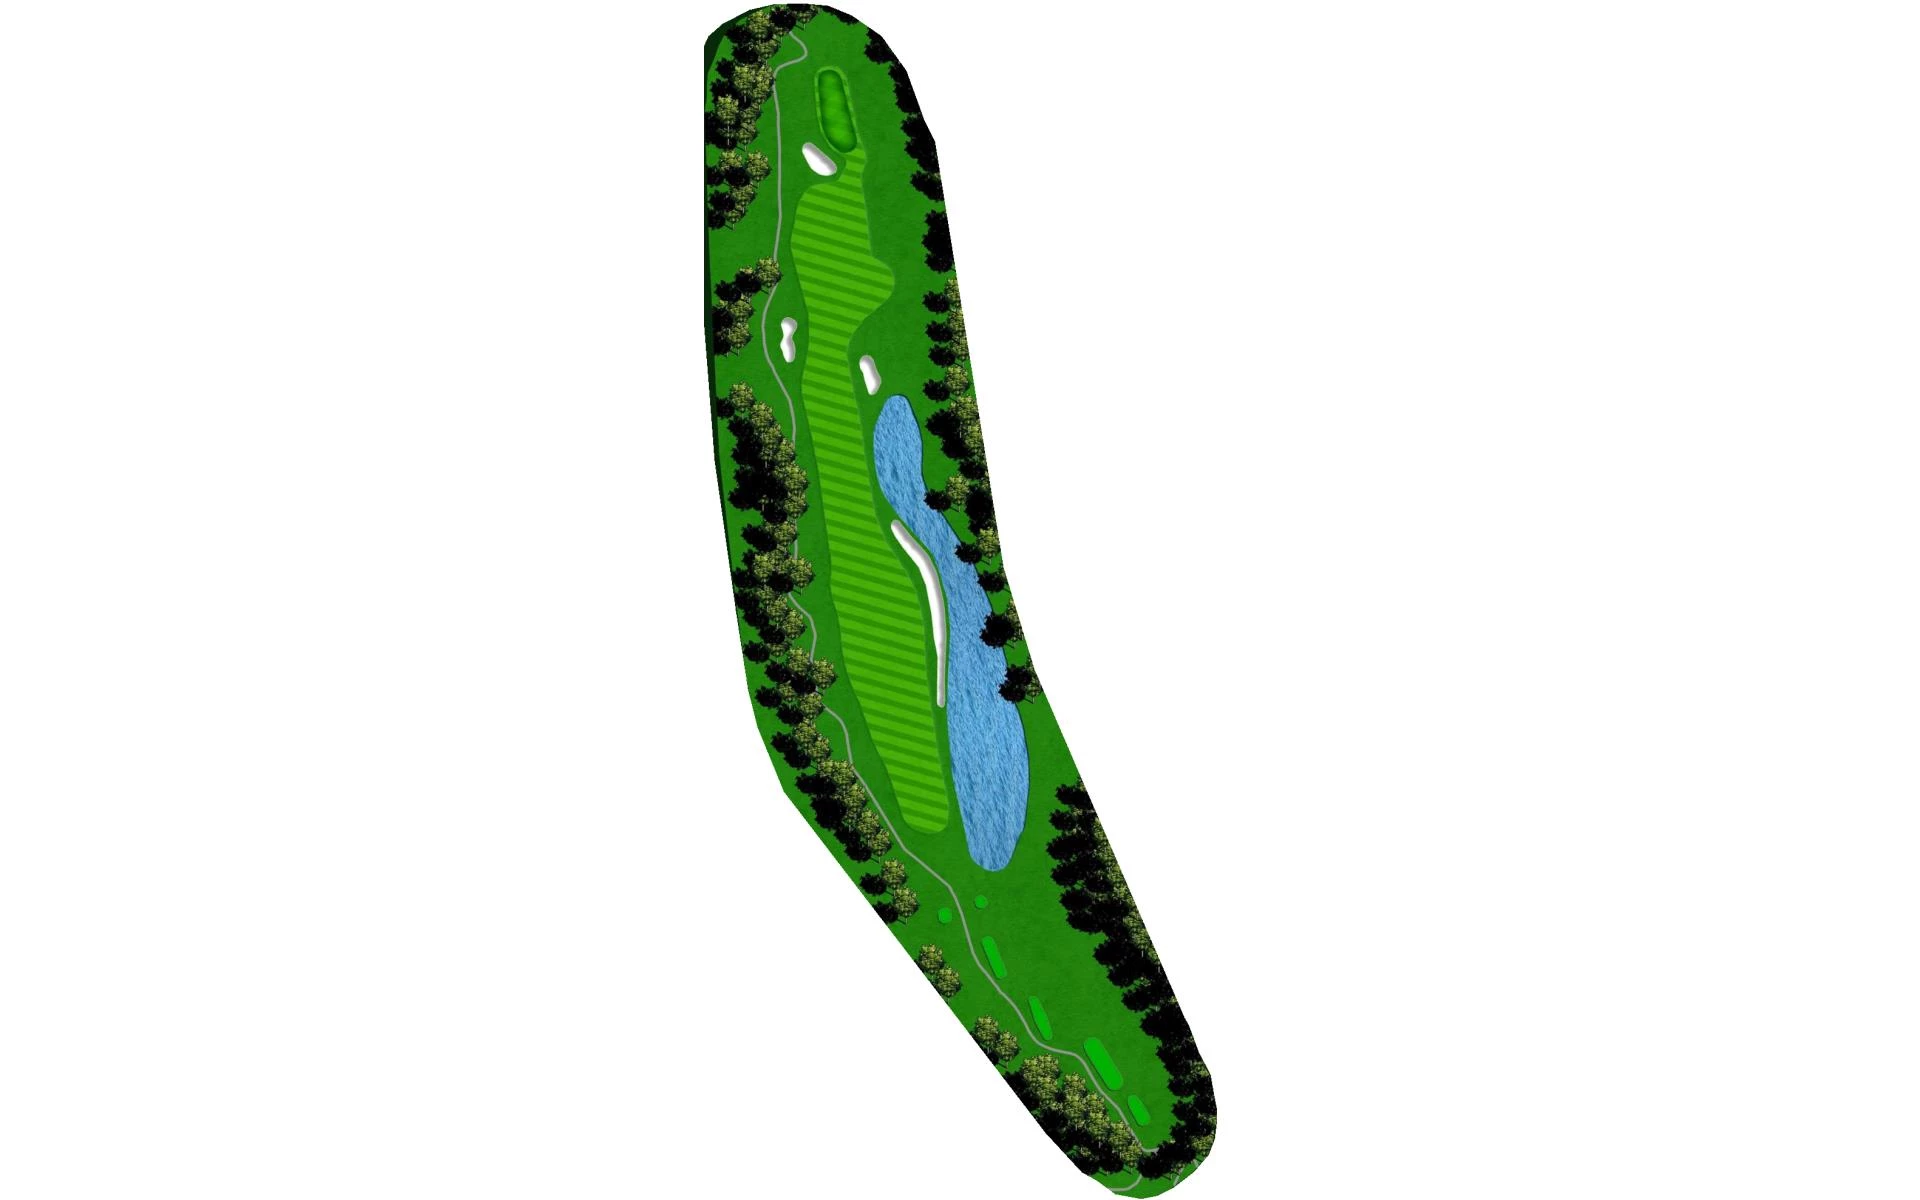
# 14 / The Dilemma
Par: 3
Yardage by Tee:
Dye 188
GOLD 180
BLUE 167
WHITE 140
SILVER 138
RED 109
Pro Tips
This right-to-left par 3 sets up left-to-right OR does this left-to-right par 3 set up right-to-left? Water left, trees and stream to the right; only a straight shot will work here.
# 15 / The Back Side Sleeper
Par: 4
Yardage by Tee:
Dye 414
GOLD 403
BLUE 380
WHITE 342
SILVER 290
RED 285
Pro Tips
This medium to long par 4 requires all of the shots: a draw off the tee and a fade into the green. As you stand on the tee, you wonder where the fairway is. When you're in the fairway, you wonder how to get to the green. This level to flat hole has lots of surprises including a wavy green. The first of the "Final Four."
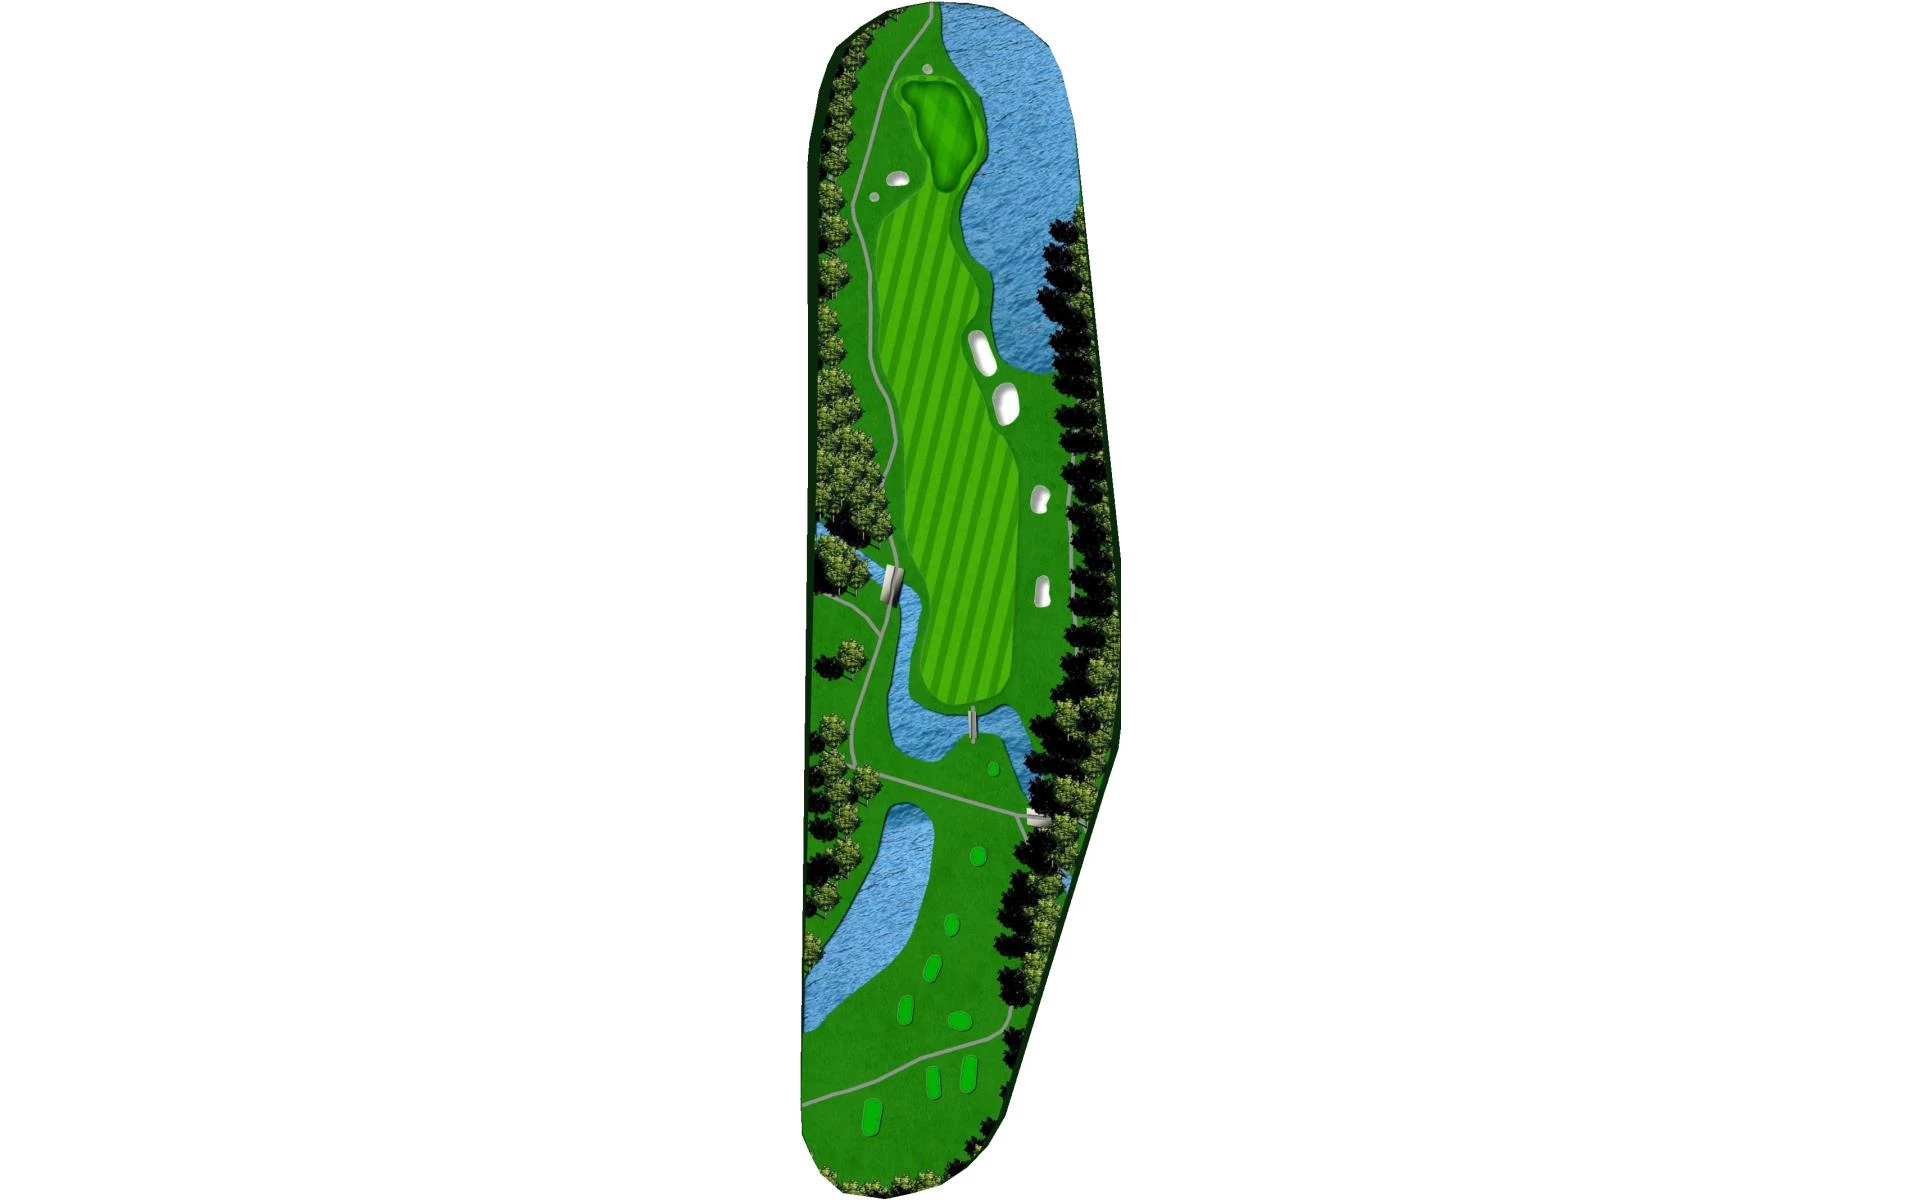
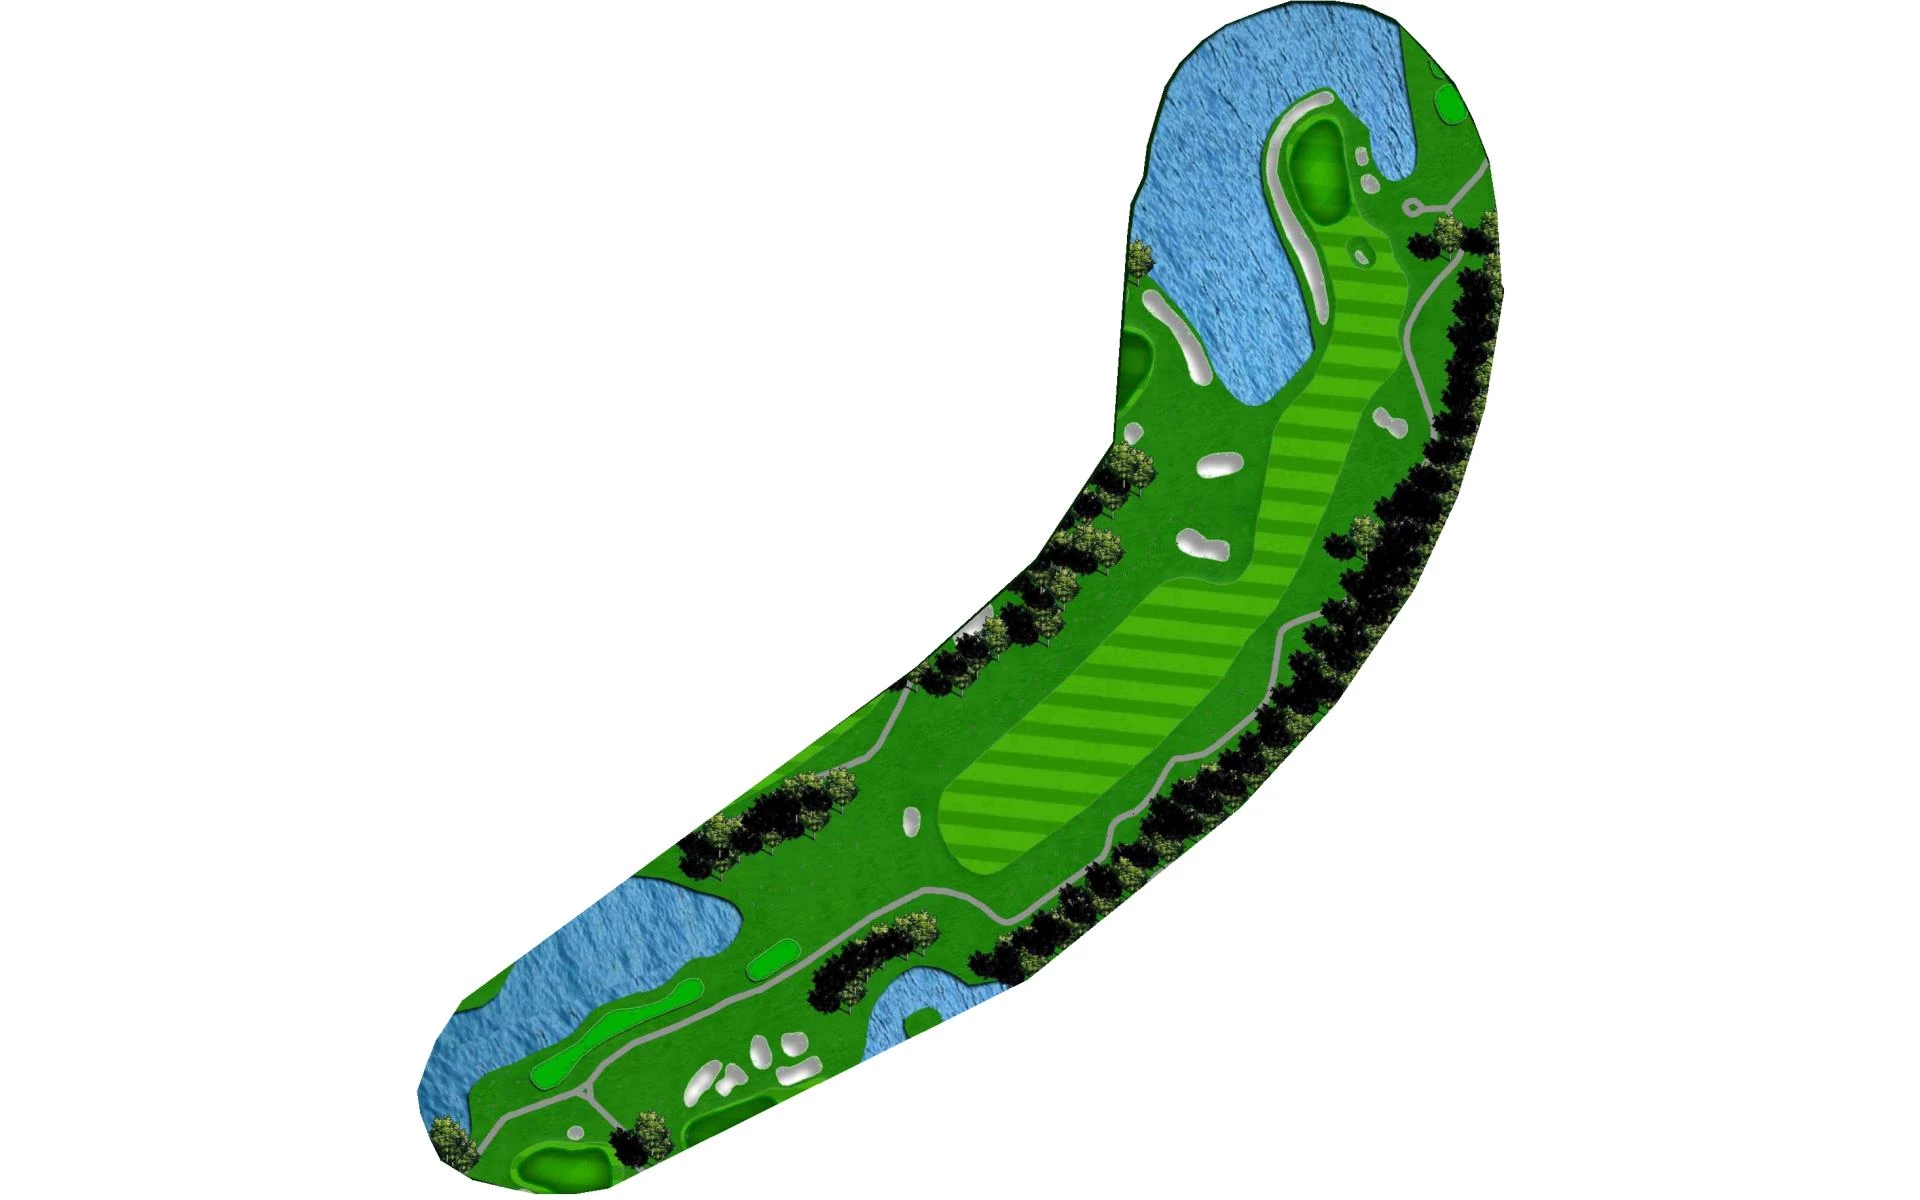
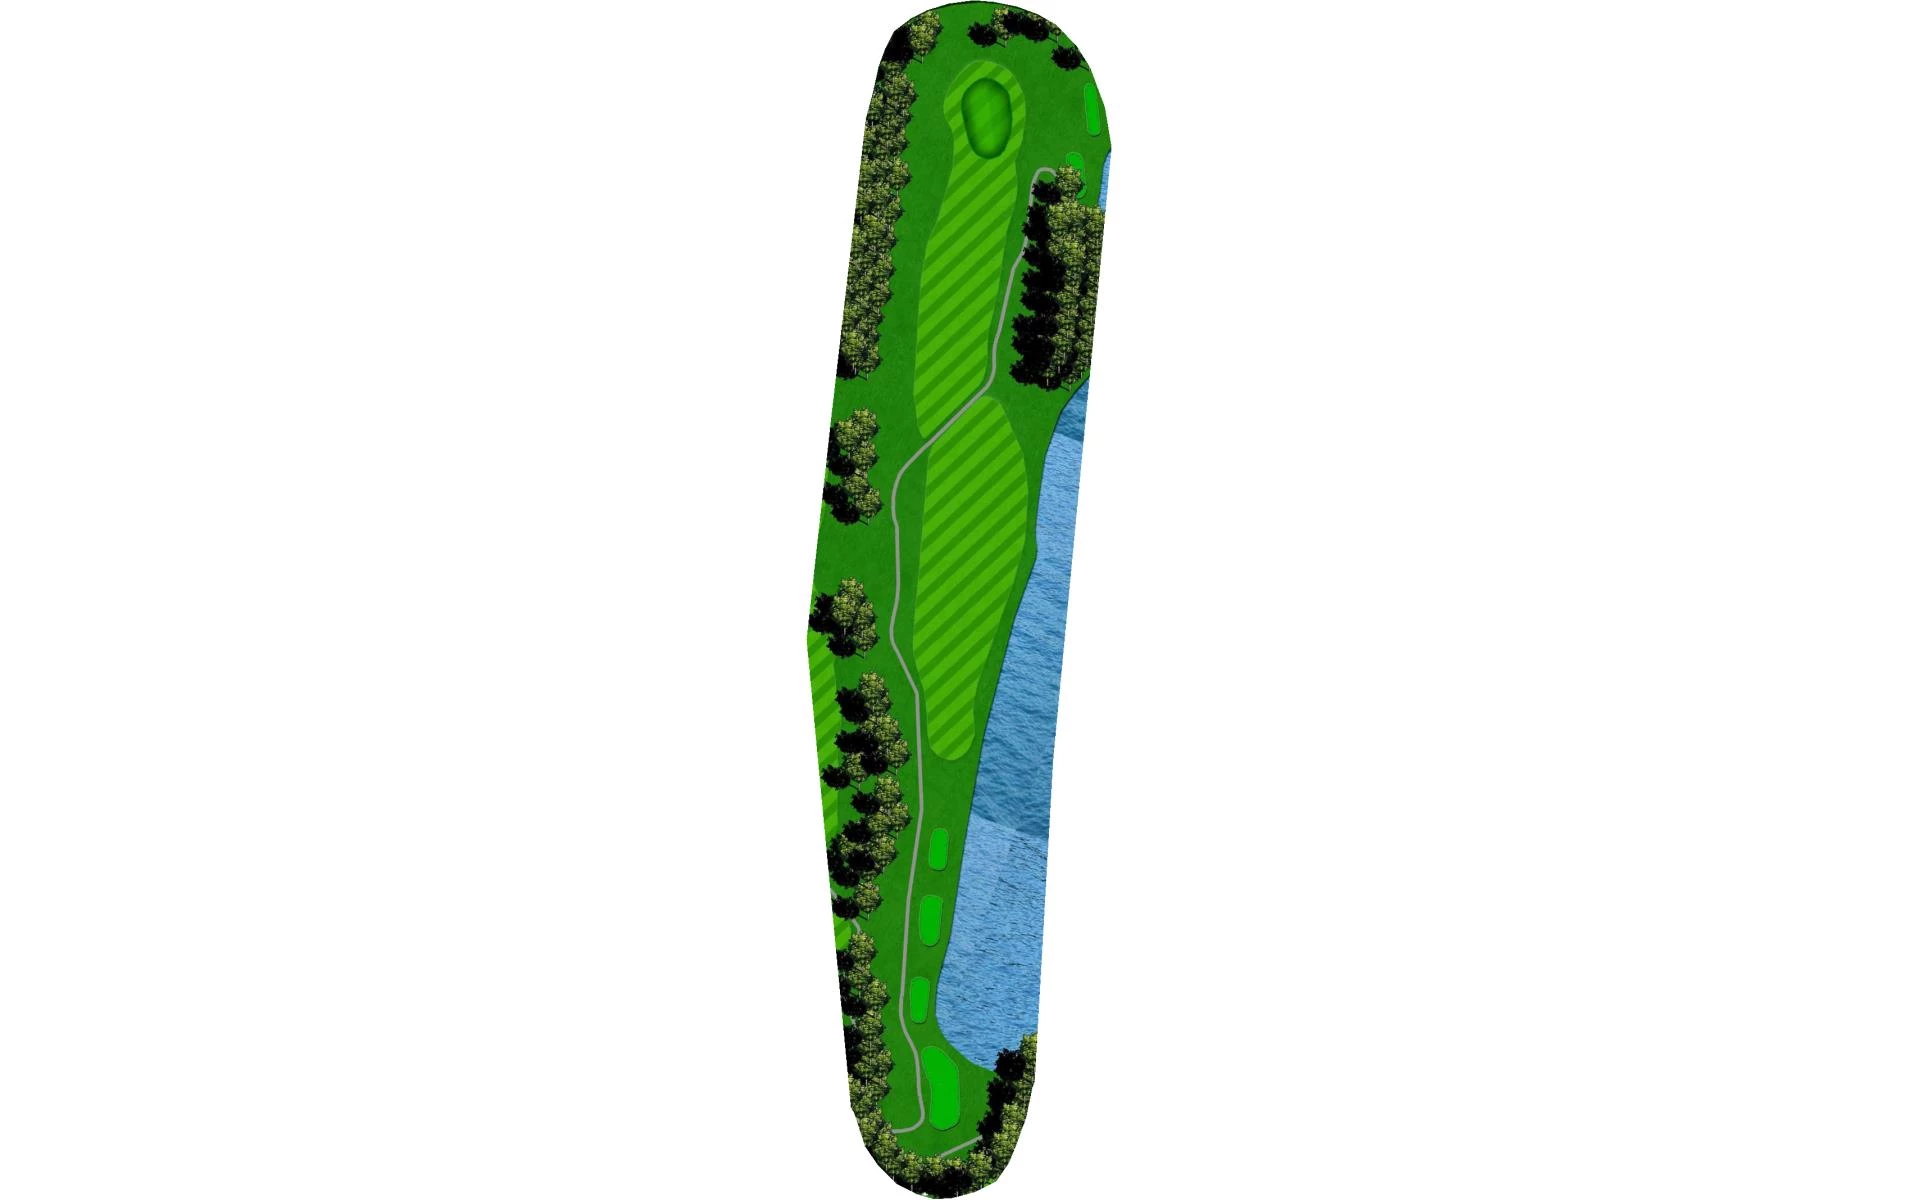
# 16 / Mirage
Par: 5
Yardage by Tee:
Dye 386
GOLD 375
BLUE 355
WHITE 340
SILVER 316
RED 305
Pro Tips
The shortest of the par 5s. This very reachable par 5 has many options but only one strategy: You have to go for the green. The tee shot is aimed at the lonesome tree on the left side of the fairway. From the left side, the green opens up to a long go-for-it approach. An errant shot by the green may be better than a lay-up approach shot from across the water, but why? Have fun with the three shot wherever it is.
# 17 / The Long and Mean
Par: 4
Yardage by Tee:
Dye 386
GOLD 375
BLUE 355
WHITE 340
SILVER 316
RED 305
Pro Tips
This extremely long par 4 has two hazards: length and water. Water is present on the right but it only amplifies the need for length on this bunkerless hole. With water and distance, this hole does not need anything else. Oh, but the woods around the green: nature's hazard.

# 18 / Fader's Finale
Par: 4
Yardage by Tee:
Dye 386
GOLD 375
BLUE 355
WHITE 340
SILVER 316
RED 305
Pro Tips
This medium par 4 is a great finishing hole. Water frames the right side of the hole while the landing area is wide open on the left. Twin maginificent oaks make a perfefct target for the fade off the tee. Stay of the left side and beware of the water by the green; just don't be right!