Private Golf Course Near In Edmond, OK
The West Course
Similar to the East Course, the West Course at Oak Tree Country Club has a multitude of bunkers throughout and liberal use of periphery greenside mounding, so offline approaches will lead to awkward stances and angles toward the pin. The best illustration of such is the par-5 7th, where the final fifty yards is a sand-strewn loop-de-loop. Water is less of a presence than on the East Course, but there are several shots sure to intimidate those with aquaphobia, the tee shot on the par-3 14th being the most notable. Several of the greens have some serious contour, the par-4 12th and 17th being prime examples
West Course
Designer: Pete Dye
The West Course, has a multitude of bunkering throughout, and Dye has made liberal use of periphery greenside mounding, so offline approache…
The West Course, has a multitude of bunkering throughout, and Dye has made liberal use of periphery greenside mounding, so offline approaches will lead to awkward stances and angles toward the pin. The best illustration of such is the par-5 7th, where the final fifty yards is a sand-strewn loop-de-loop.

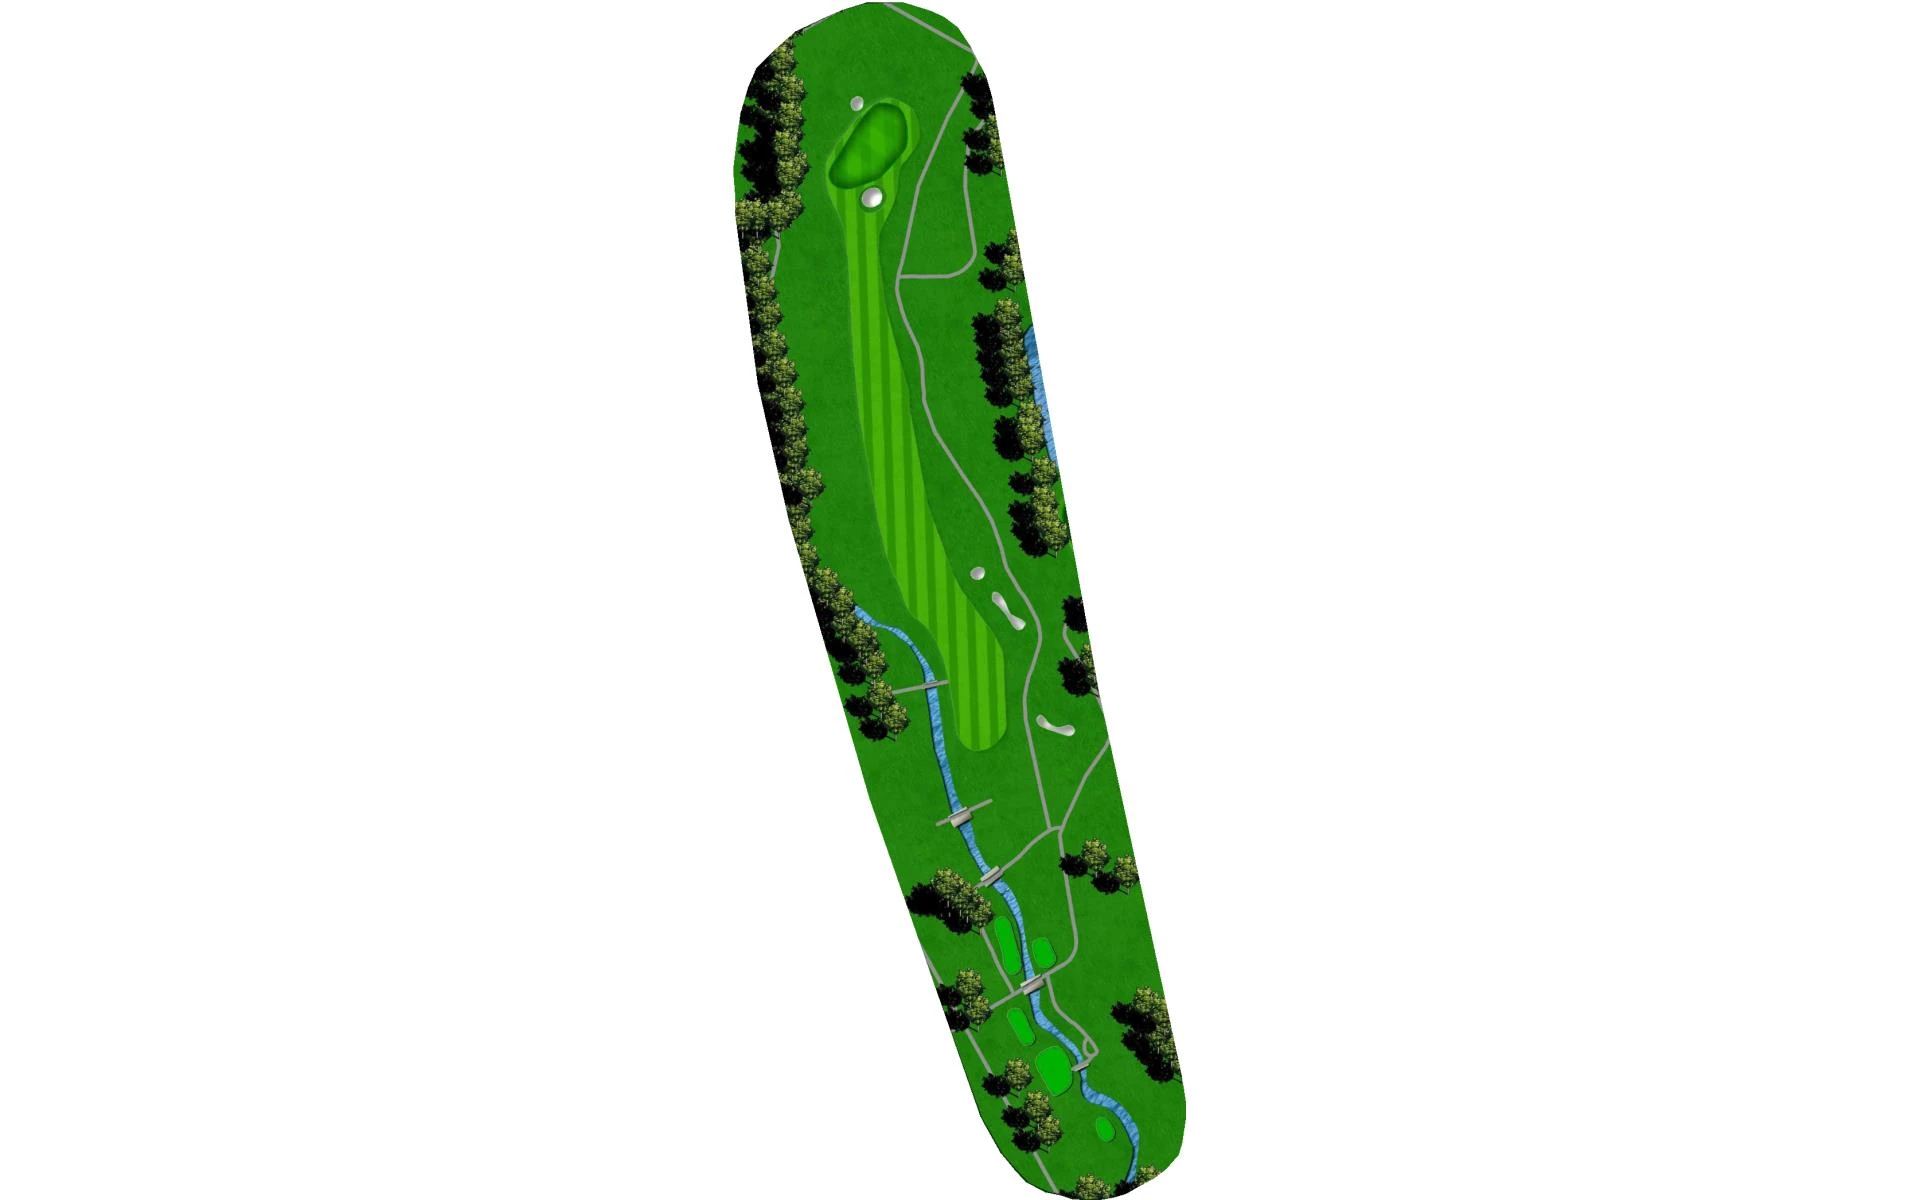
# 1 /
Par: 4
Yardage by Tee:
GOLD 380
BLUE 343
WHITE 333
GREEN 300
Pro Tips
Ease into your round with straightaway par 4. Avoid the trees and large bunker directly off the tee and leave wedge second shot. Multi-sectioned green makes accuracy premium for good birdie look. Avoid front left bunker.
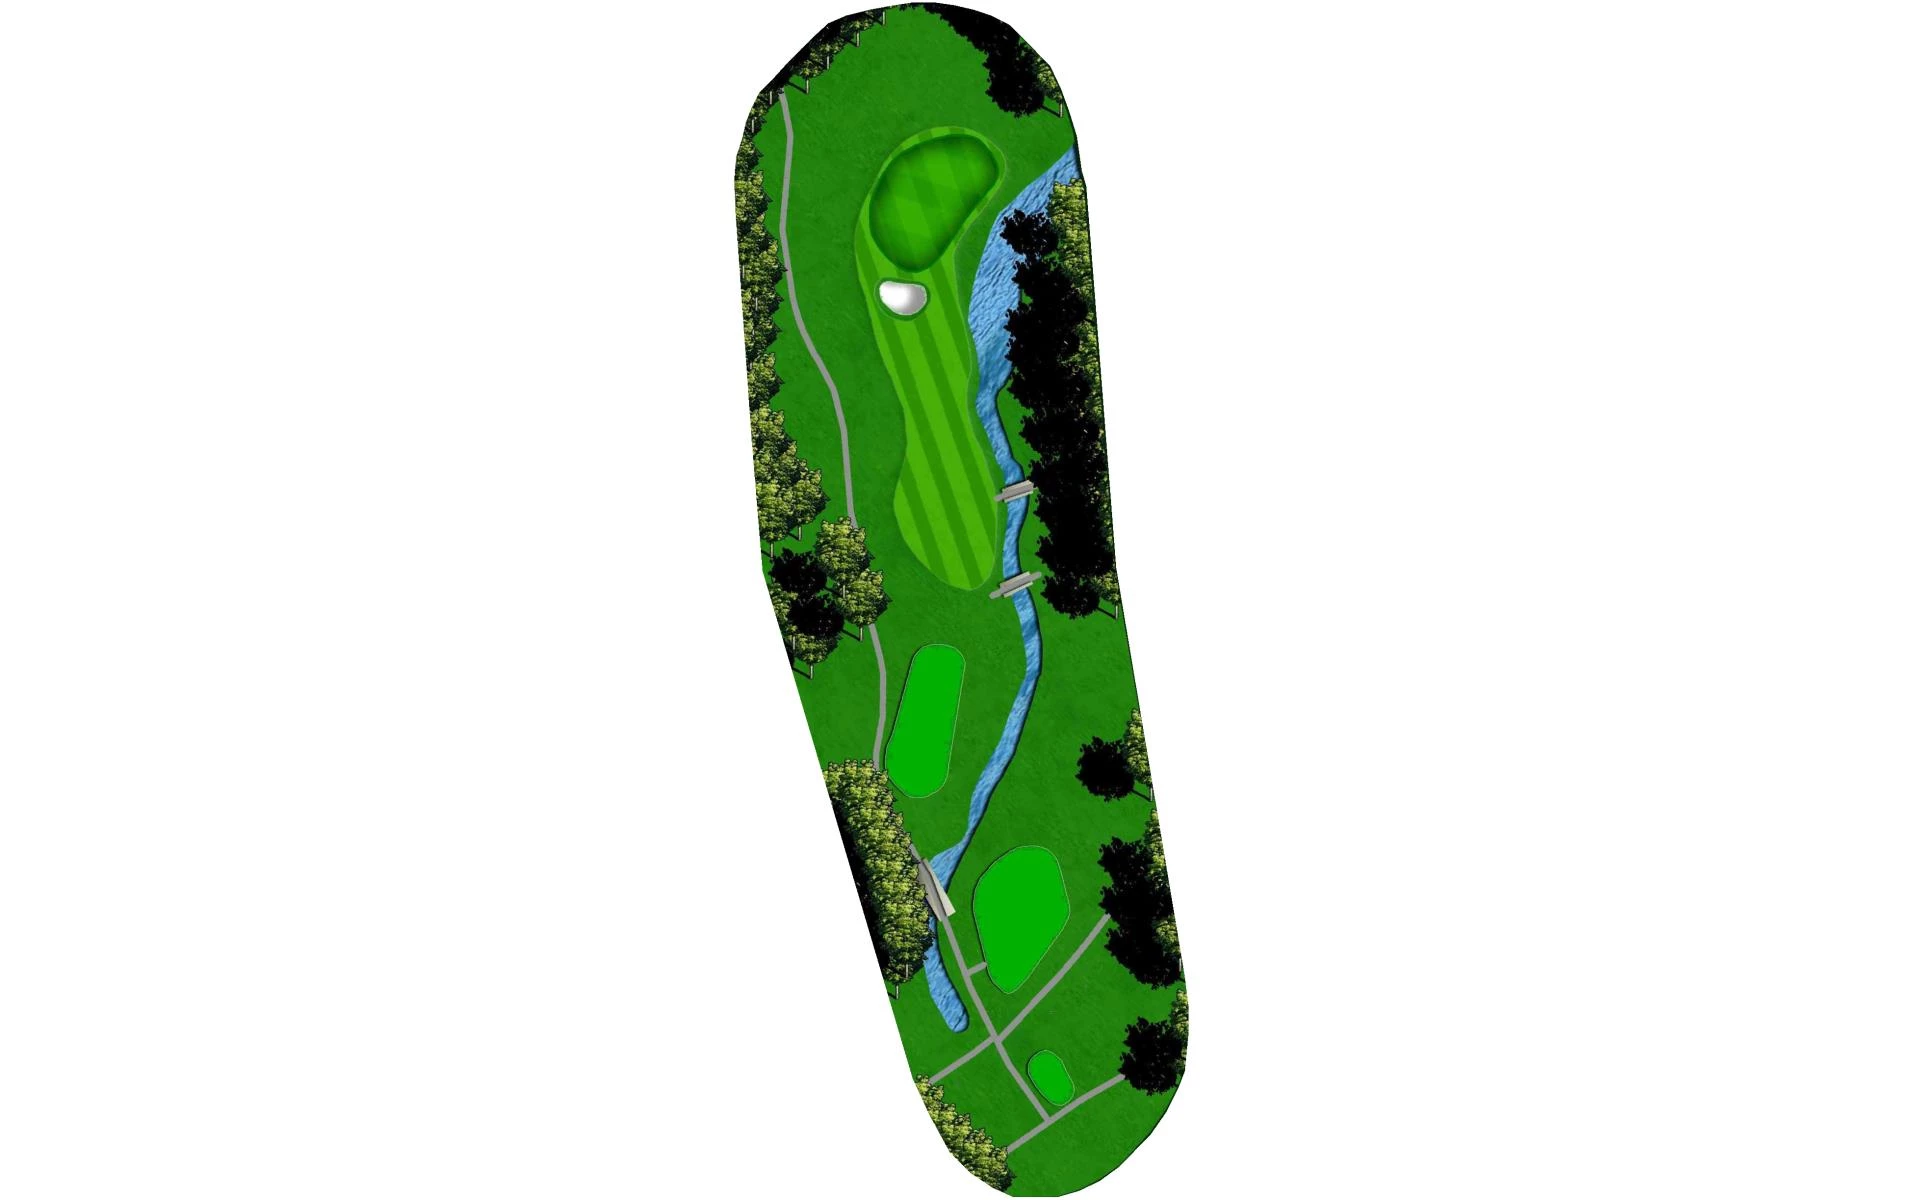
# 2 /
Par: 3
Yardage by Tee:
GOLD 204
BLUE 166
WHITE 160
GREEN 103
Pro Tips
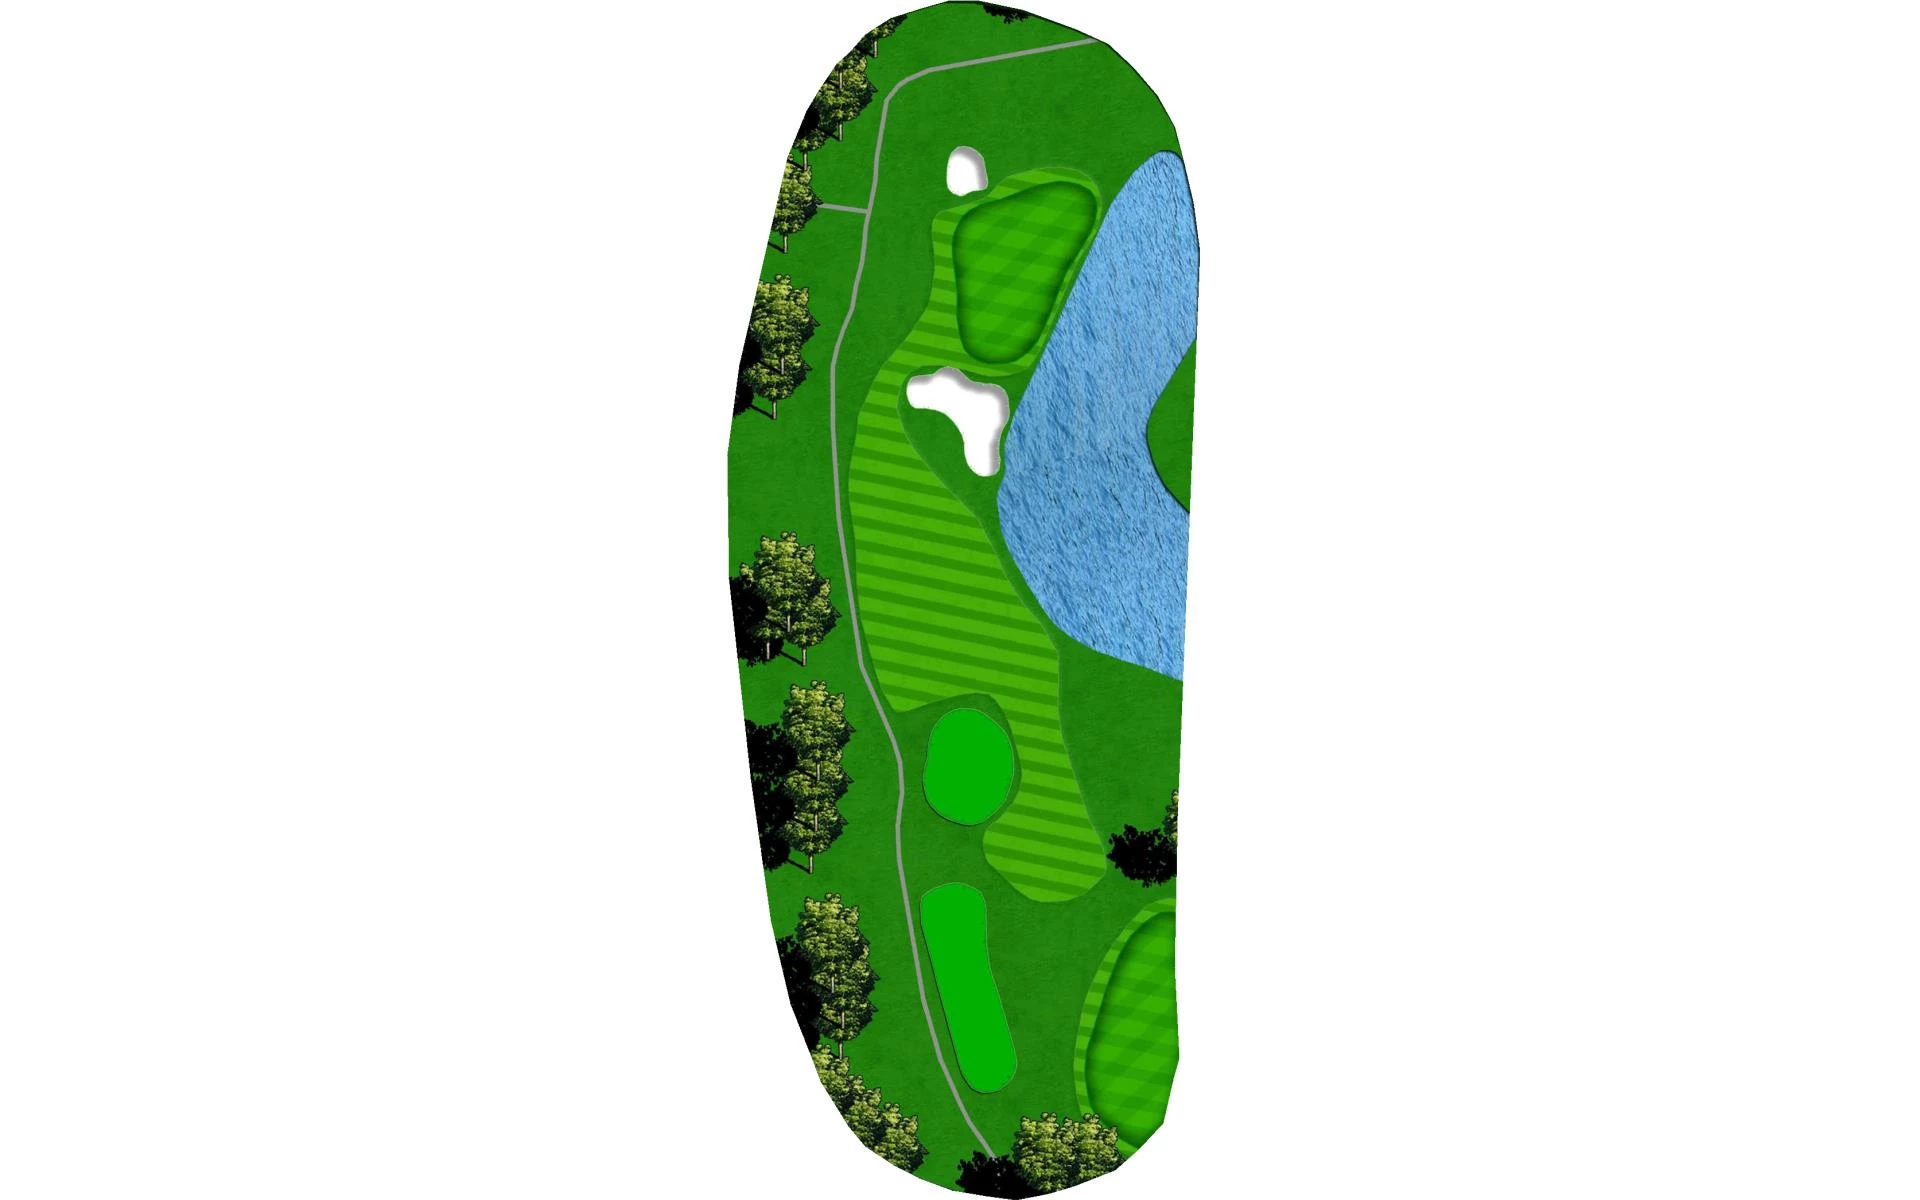
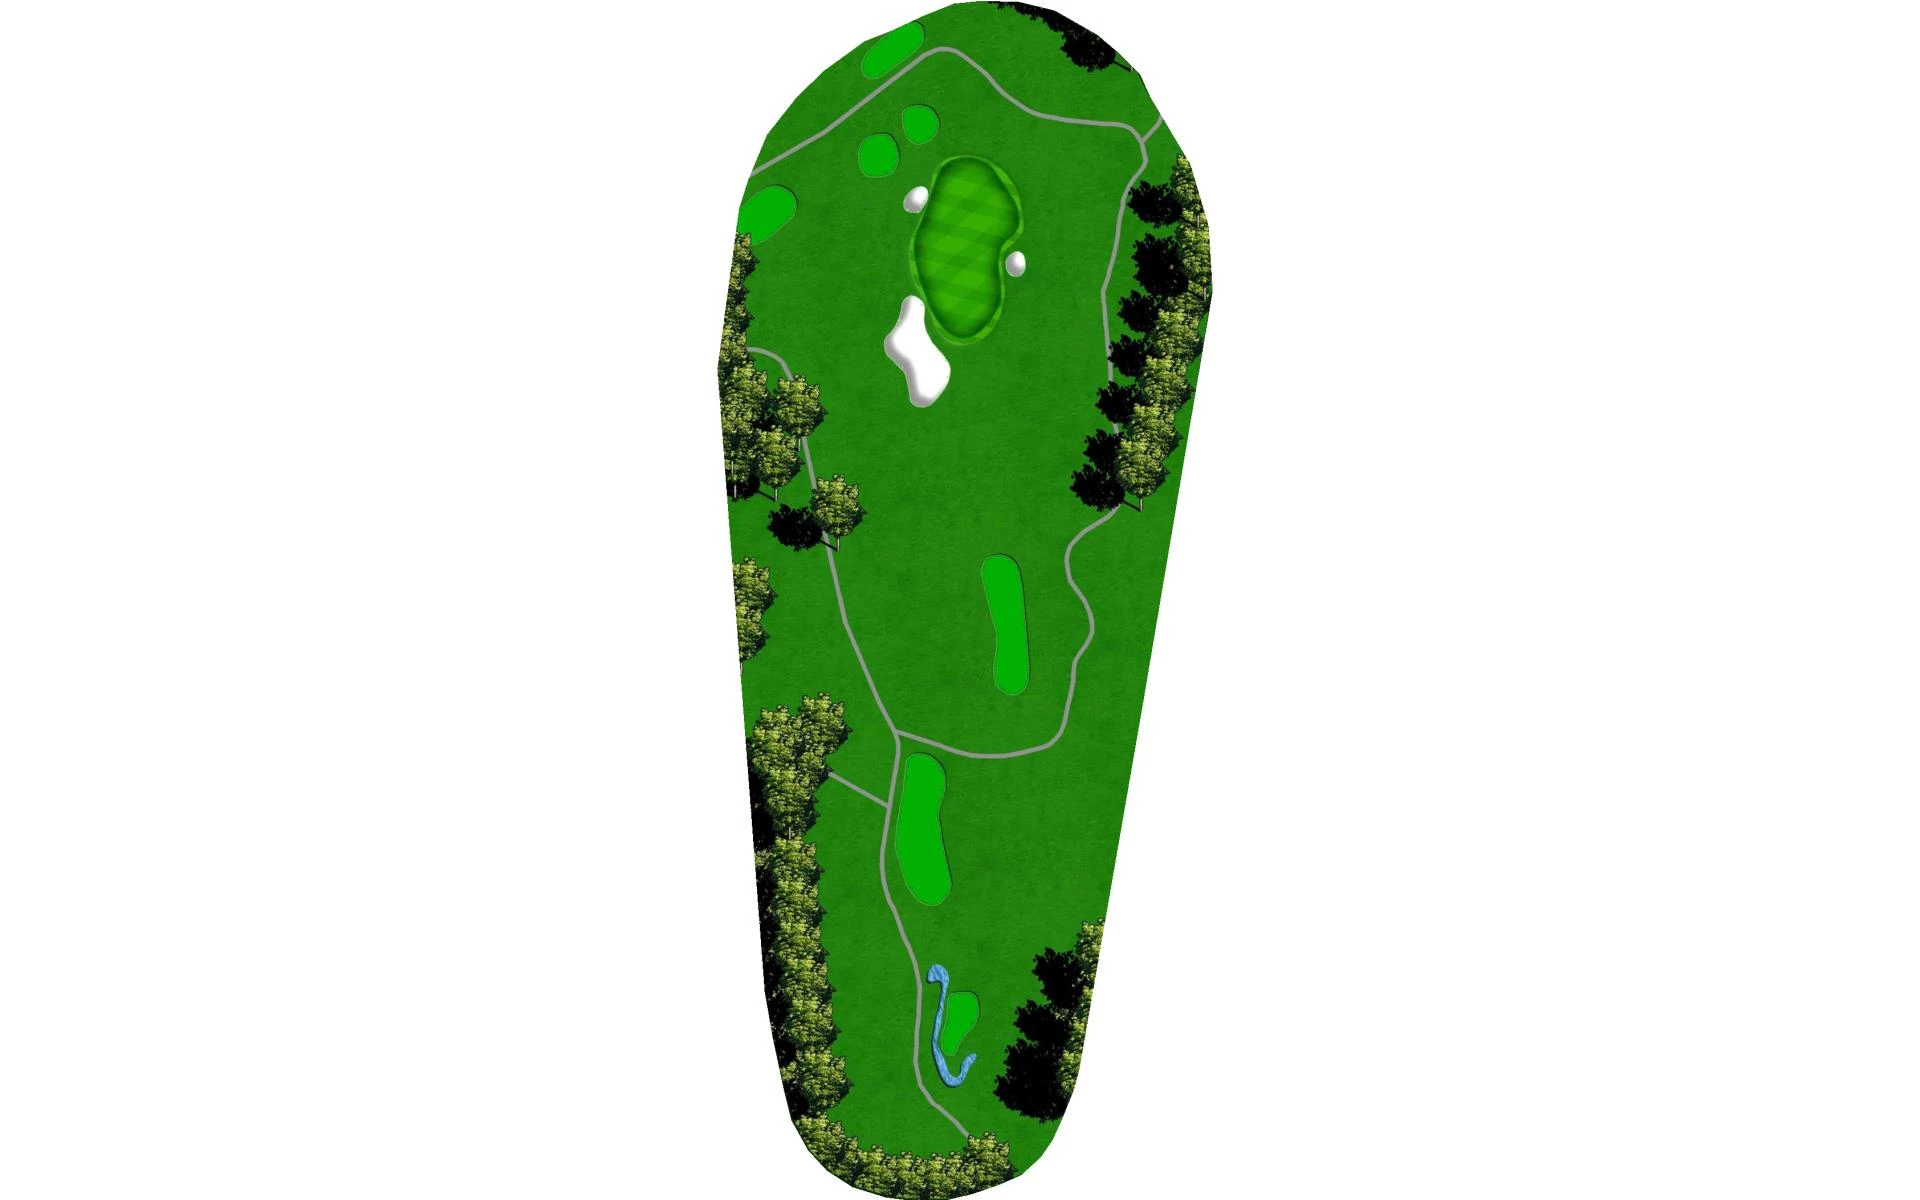
One of the hardest par 3s on the course. Traditionally playing into the wind. Mid-Long Iron to slender green. Creek and small pond collect many golf balls as short right of green slopes dramatically to the water. Par here gets round off to a good start.
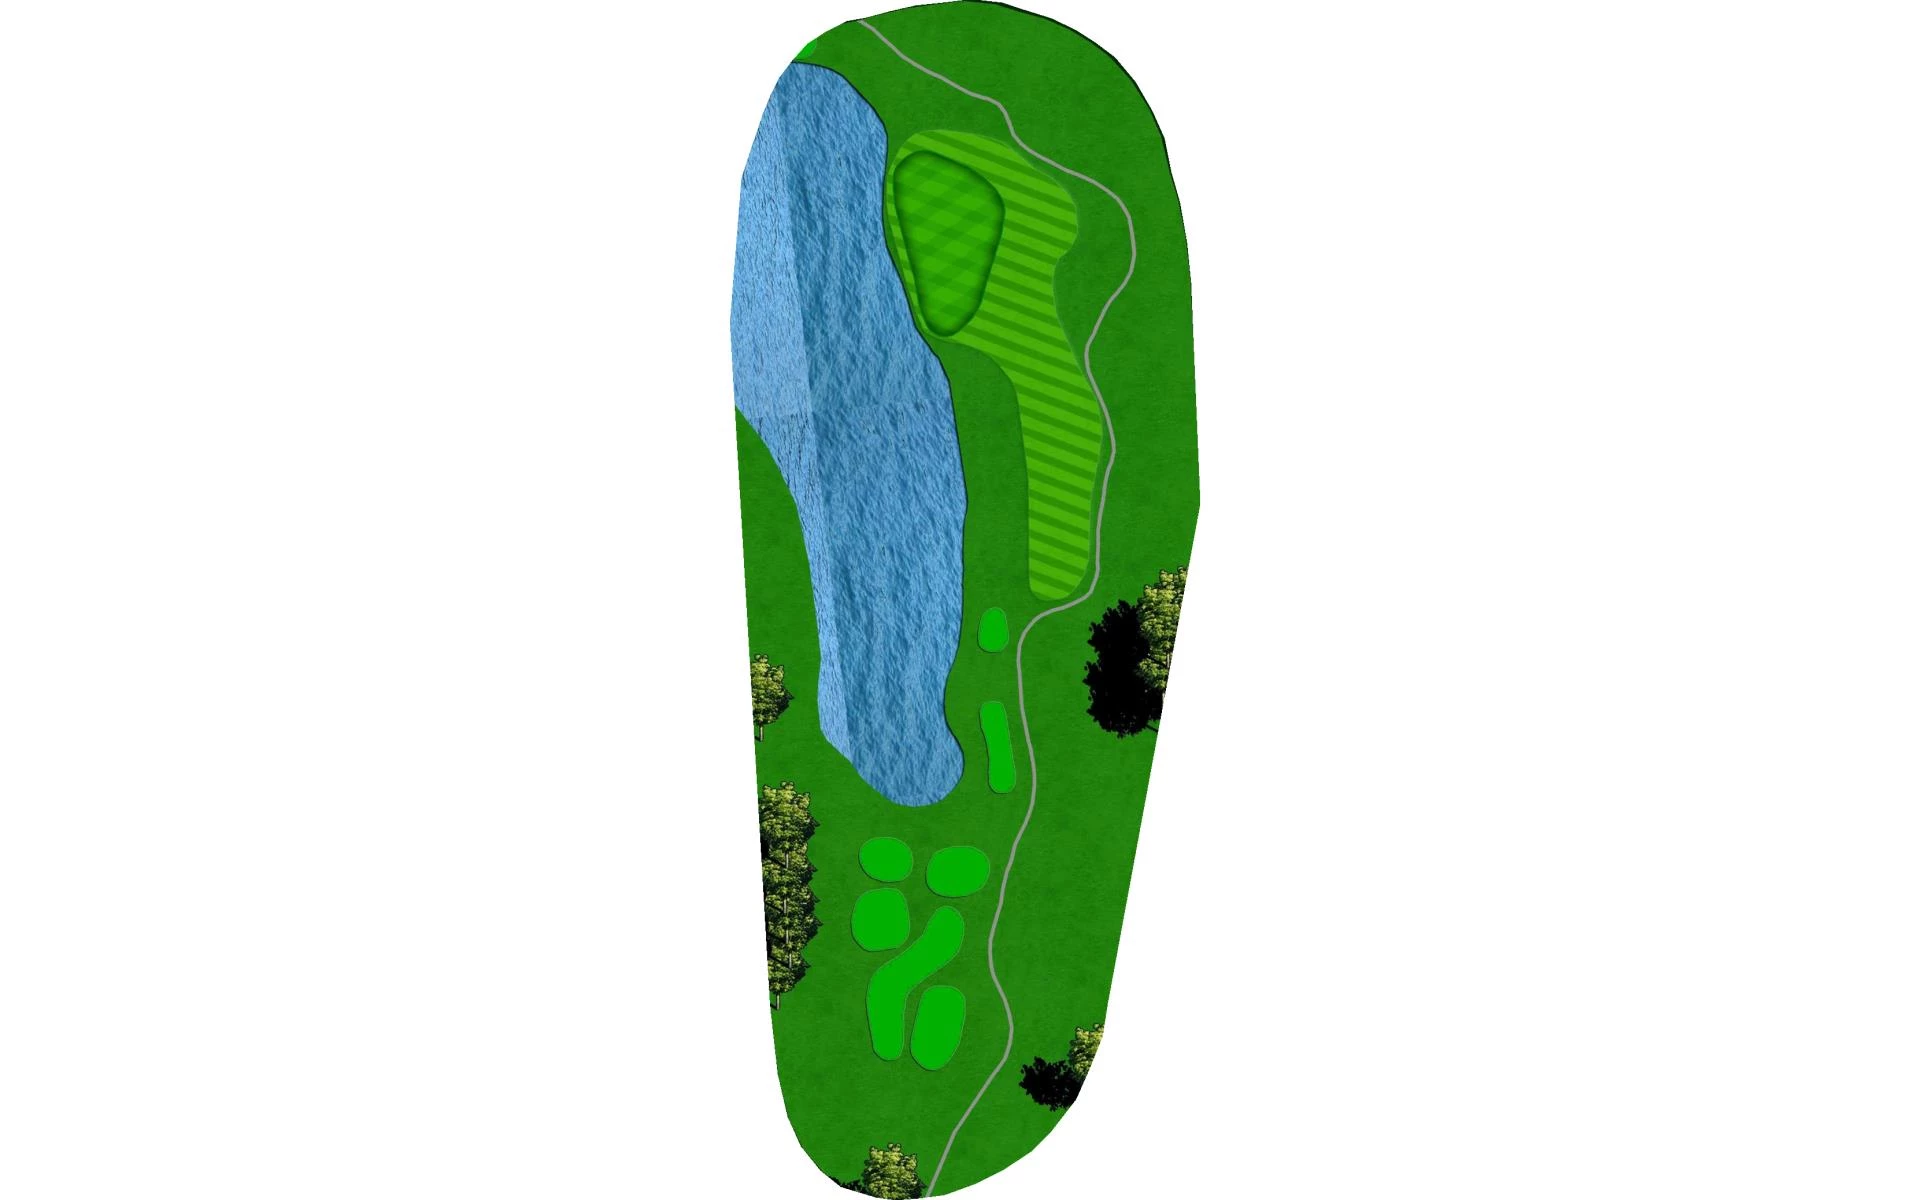
# 3 /
Par: 4
Yardage by Tee:
GOLD 470
BLUE 444
WHITE 341
GREEN 306
Pro Tips
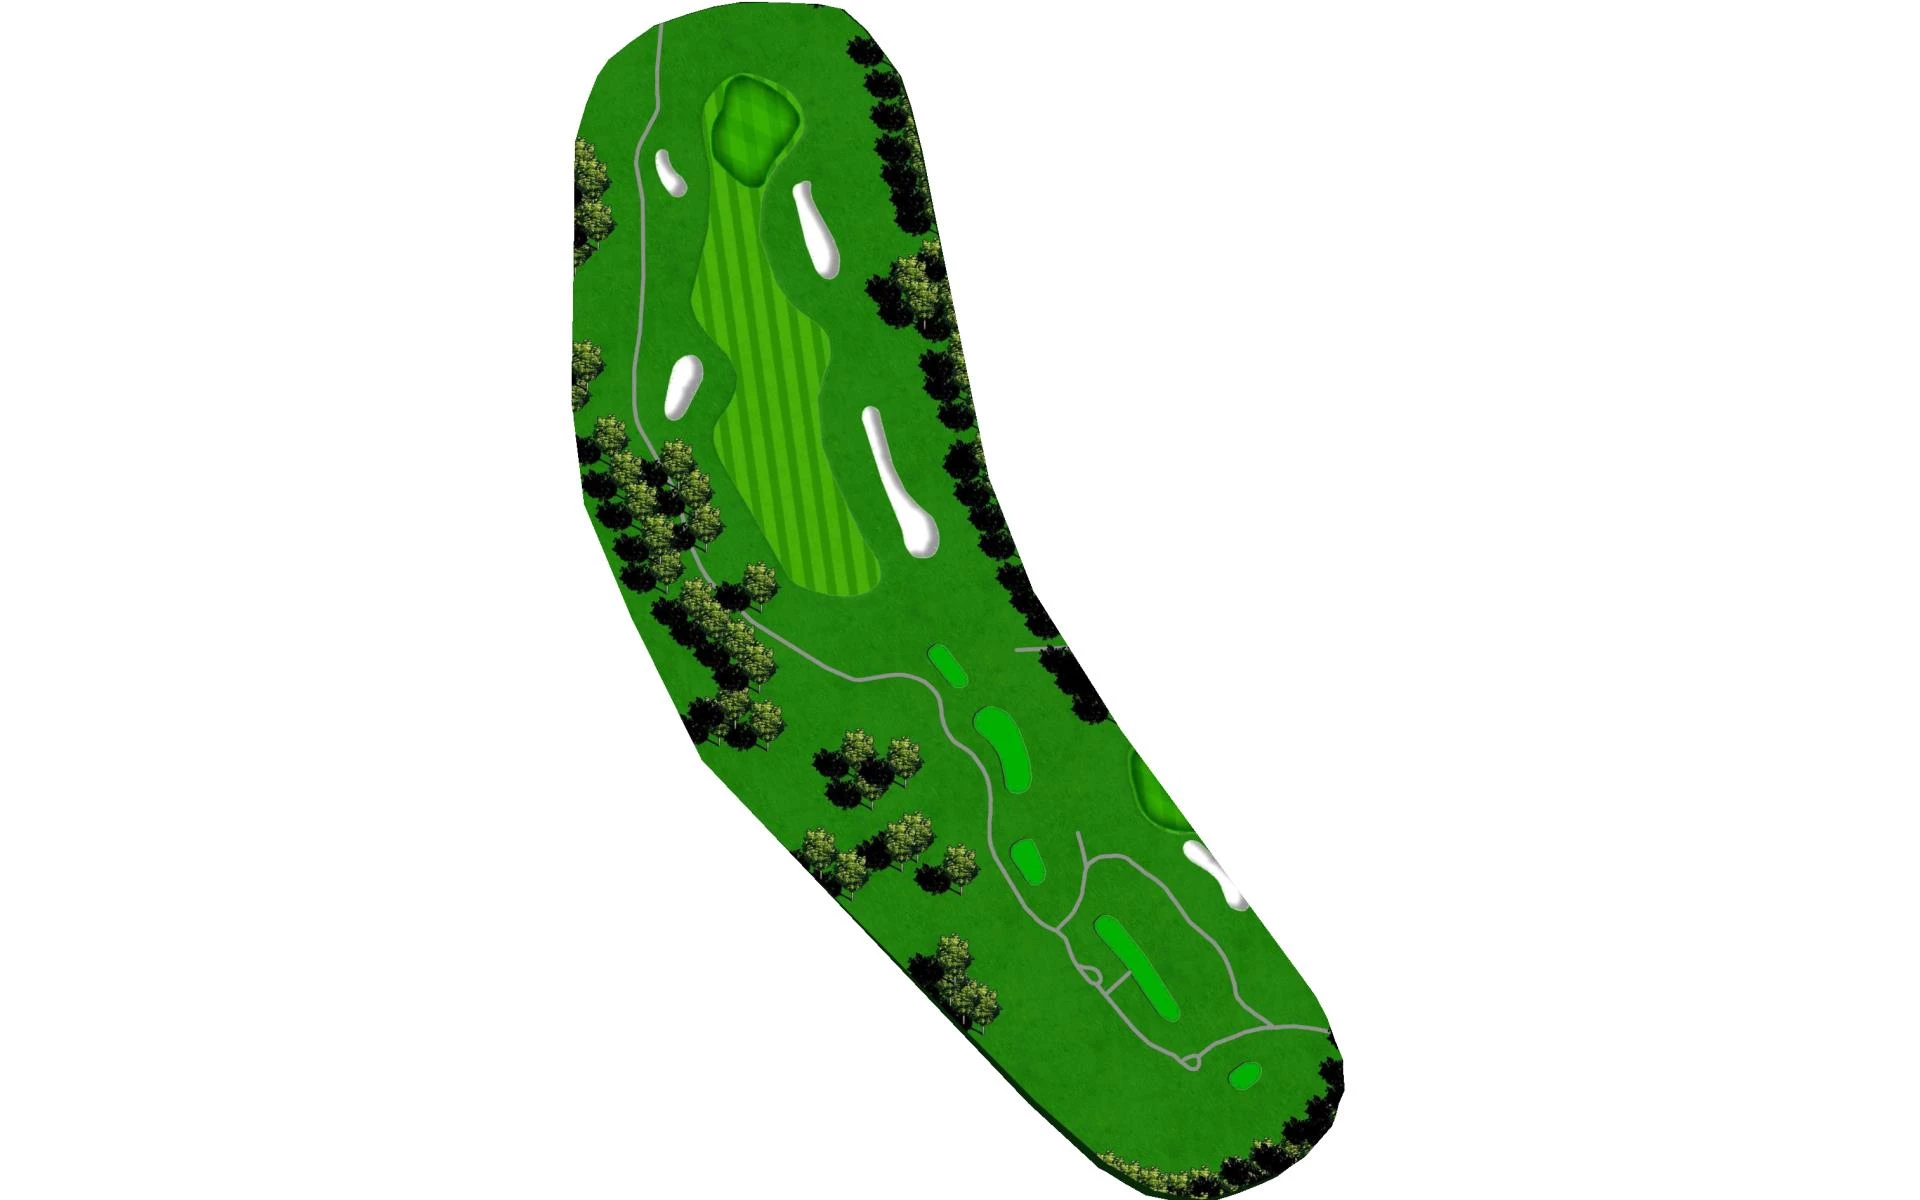
Easily the hardest tee shot on course as left to right wind blows directly to the lake which runs down the entire right side of the hole. Accurate drive avoids not only the water but trees lining the left side. Mid-iron approach to large green. Trust your yardage or end up in the large front bunker.
# 4 /
Par: 4
Yardage by Tee:
GOLD 333
BLUE 327
WHITE 304
GREEN 279
Pro Tips
Drive-able par 4 for the longer hitters. Church pew style bunkers, hidden off the tee, protect short and right of the green. Solid drive leaves a flip wedge to receptive green. Make birdie here.
# 5 /
Par: 4
Yardage by Tee:
GOLD 432
BLUE 372
WHITE 355
GREEN 345
Pro Tips
Solid par 4 with slight dogleg right. Trees on both sides of the landing area make accuracy important. OB left sneaks into play quicker than you think. Slender angled green awaits second shots with large swells right and long making up and downs difficult.
# 6 /
Par: 3
Yardage by Tee:
GOLD 150
BLUE 138
WHITE 124
GREEN 88
Pro Tips
Short par 3 with pond to the right of the green. Don’t get cute with tee ball or you’ll find bunker short. Triangle shaped green allows for tight pin placements, but a tee ball to the middle gives good looks to any pin.
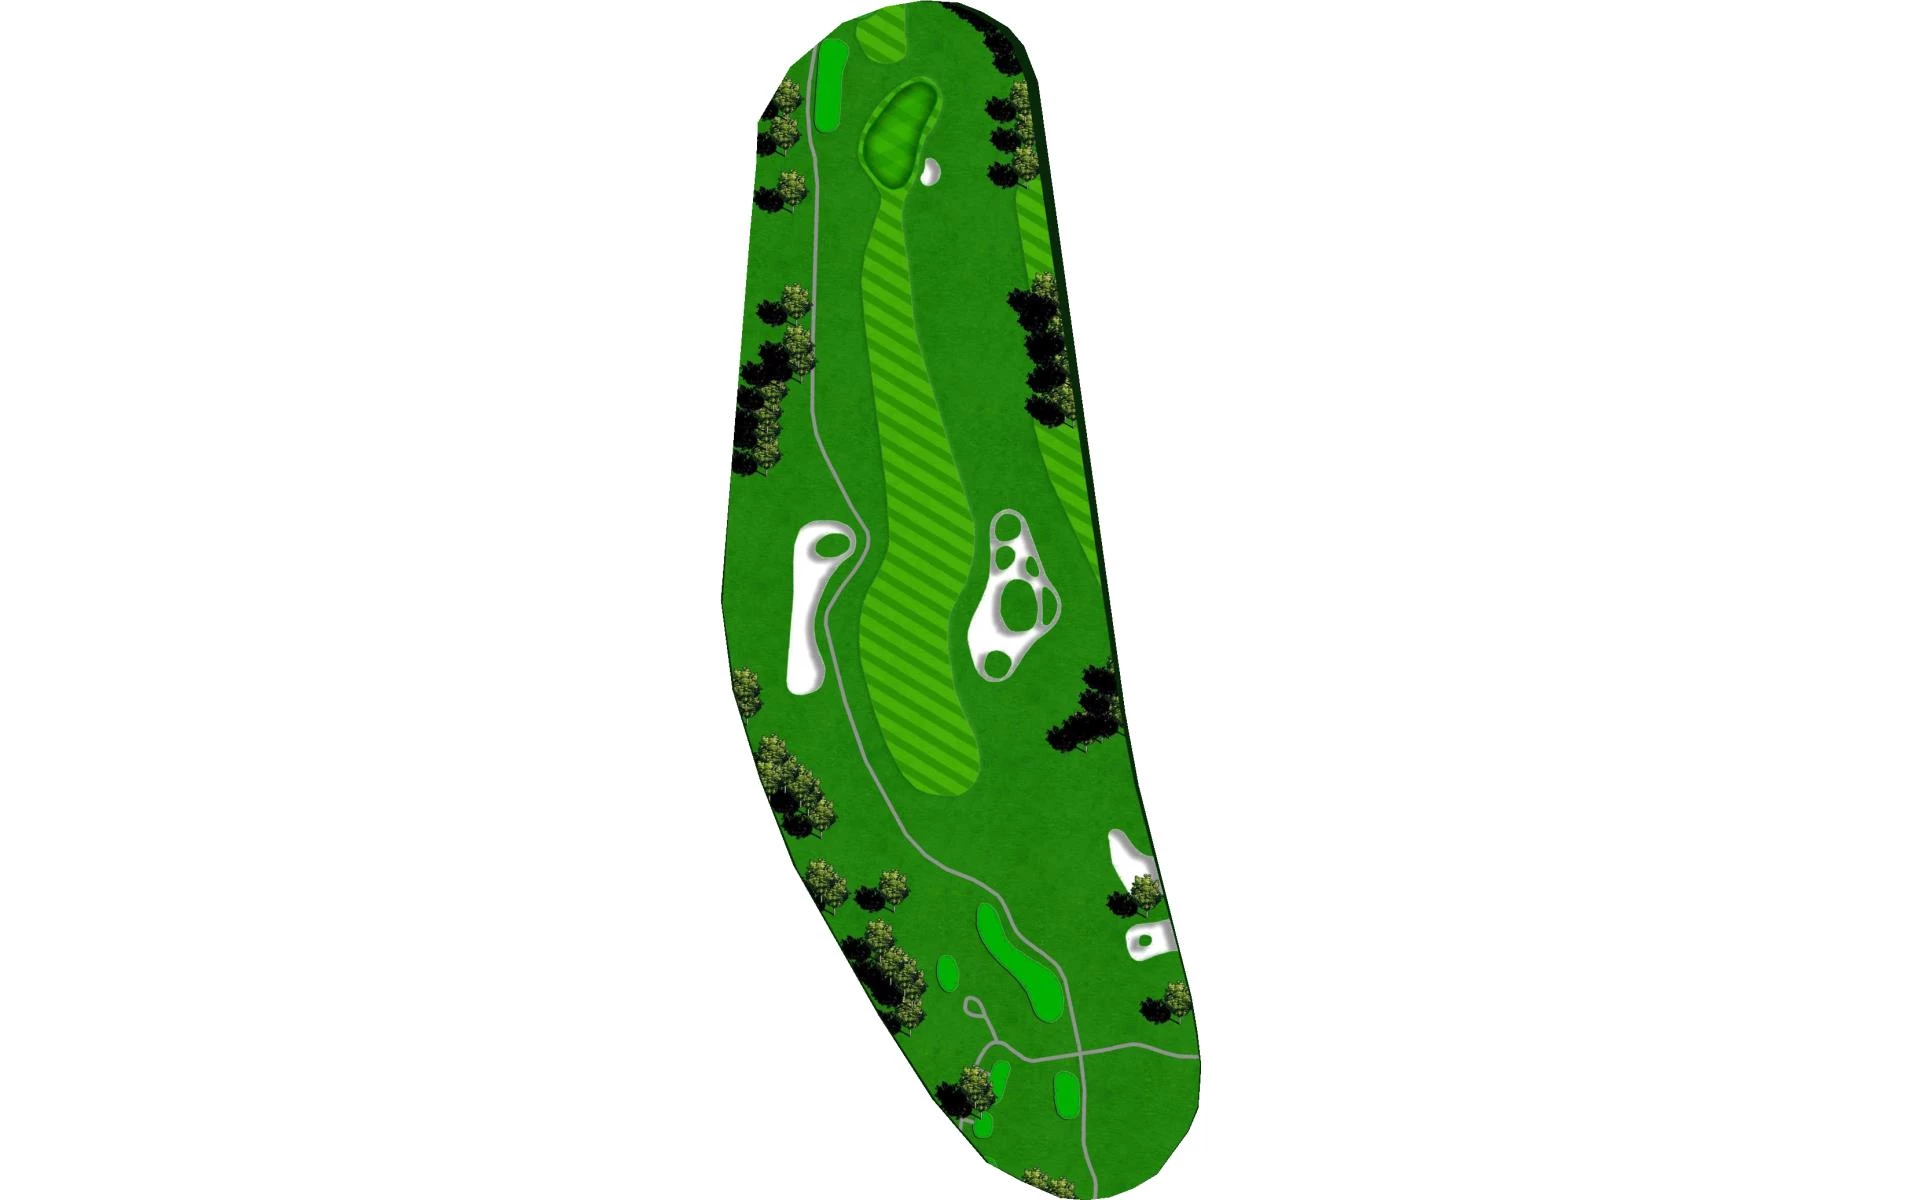
# 7 /
Par: 5
Yardage by Tee:
GOLD 576
BLUE 518
WHITE 515
GREEN 415
Pro Tips
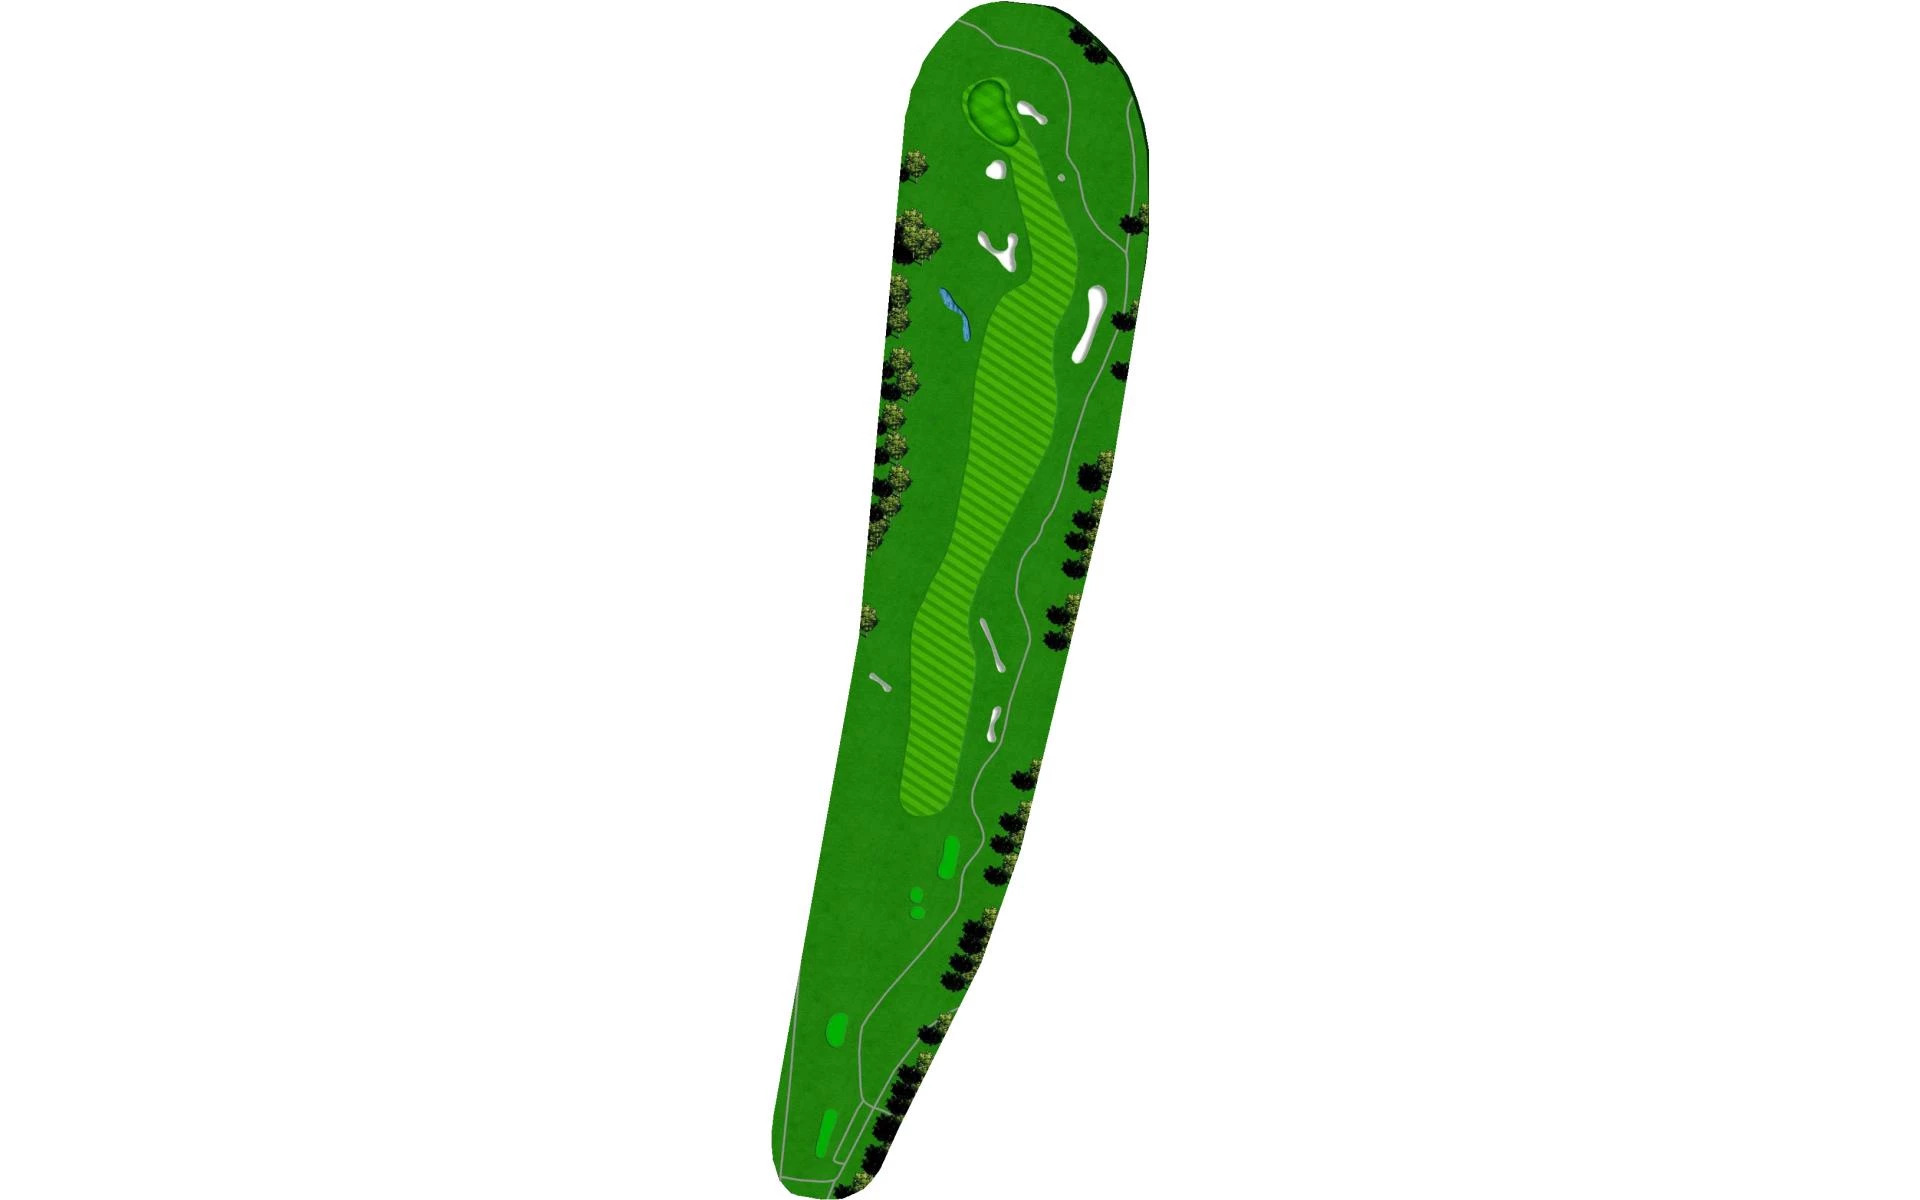
Long par 5 with blind landing area. Avoid OB left and bunkers on the right. Second shot placement is premium as layup is lined with large bunkers and a fairway that narrows significantly. Longer hitter will go for green in two and find it protected by a host of deep bunkers and grass swells making it difficult to save birdie.
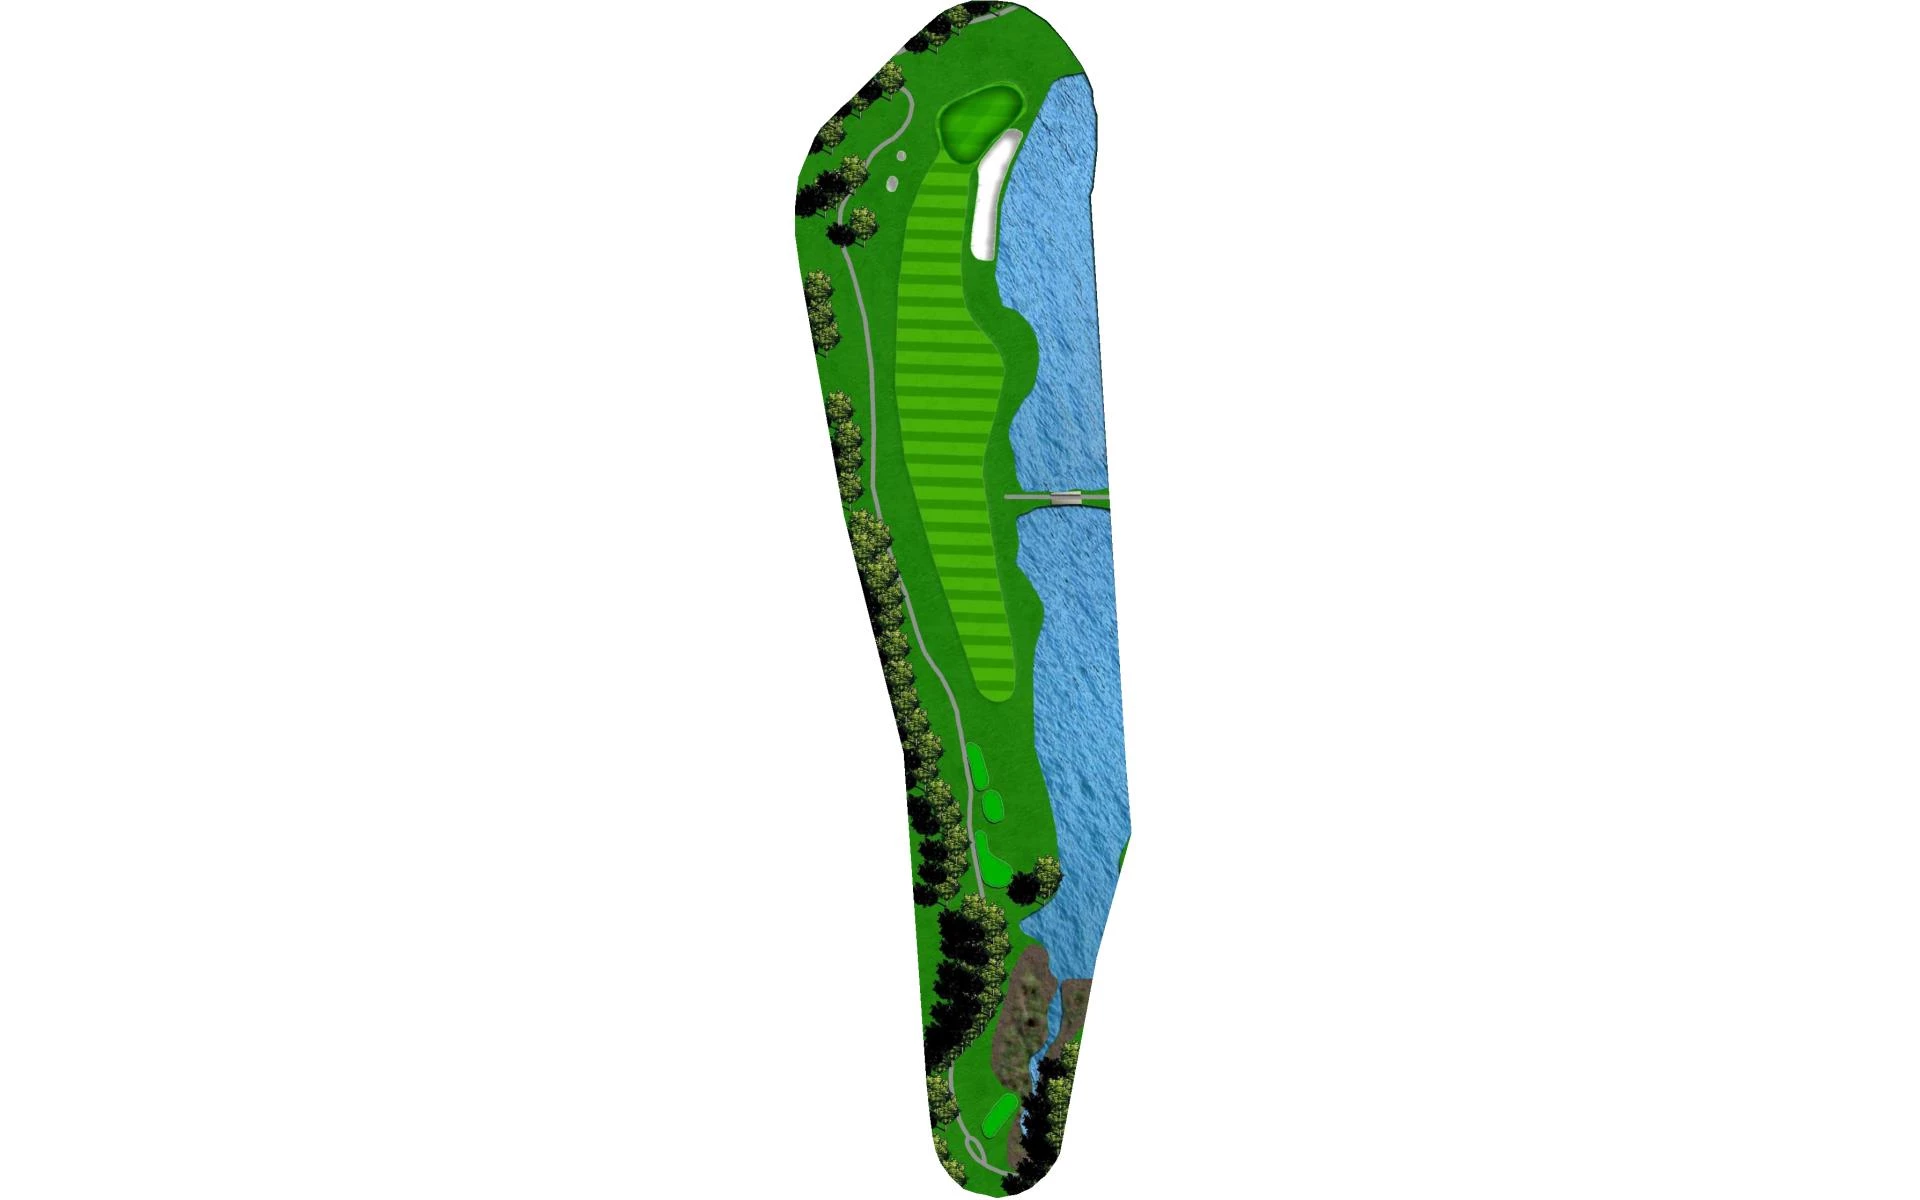
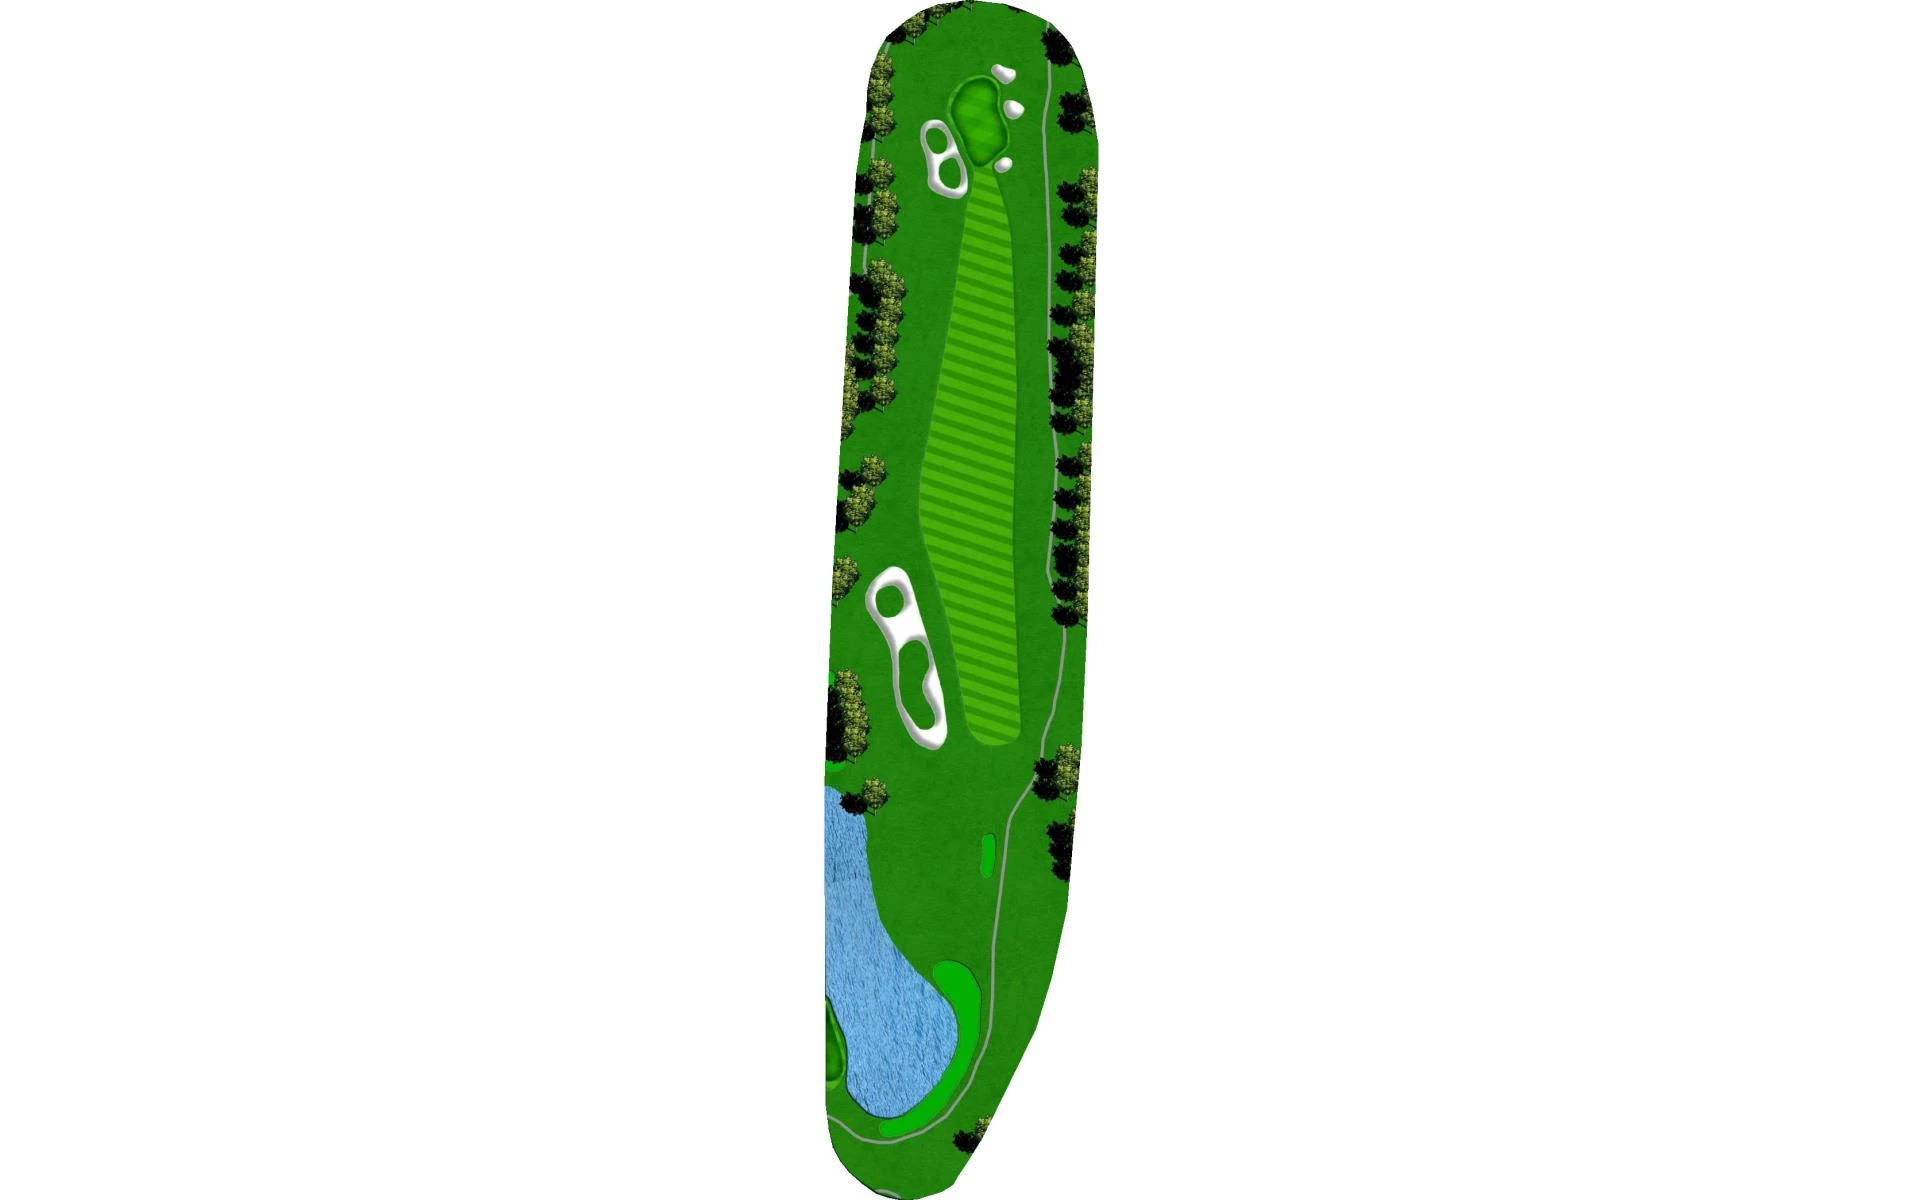
# 8 /
Par: 4
Yardage by Tee:
GOLD 462
BLUE 431
WHITE 356
GREEN 343
Pro Tips
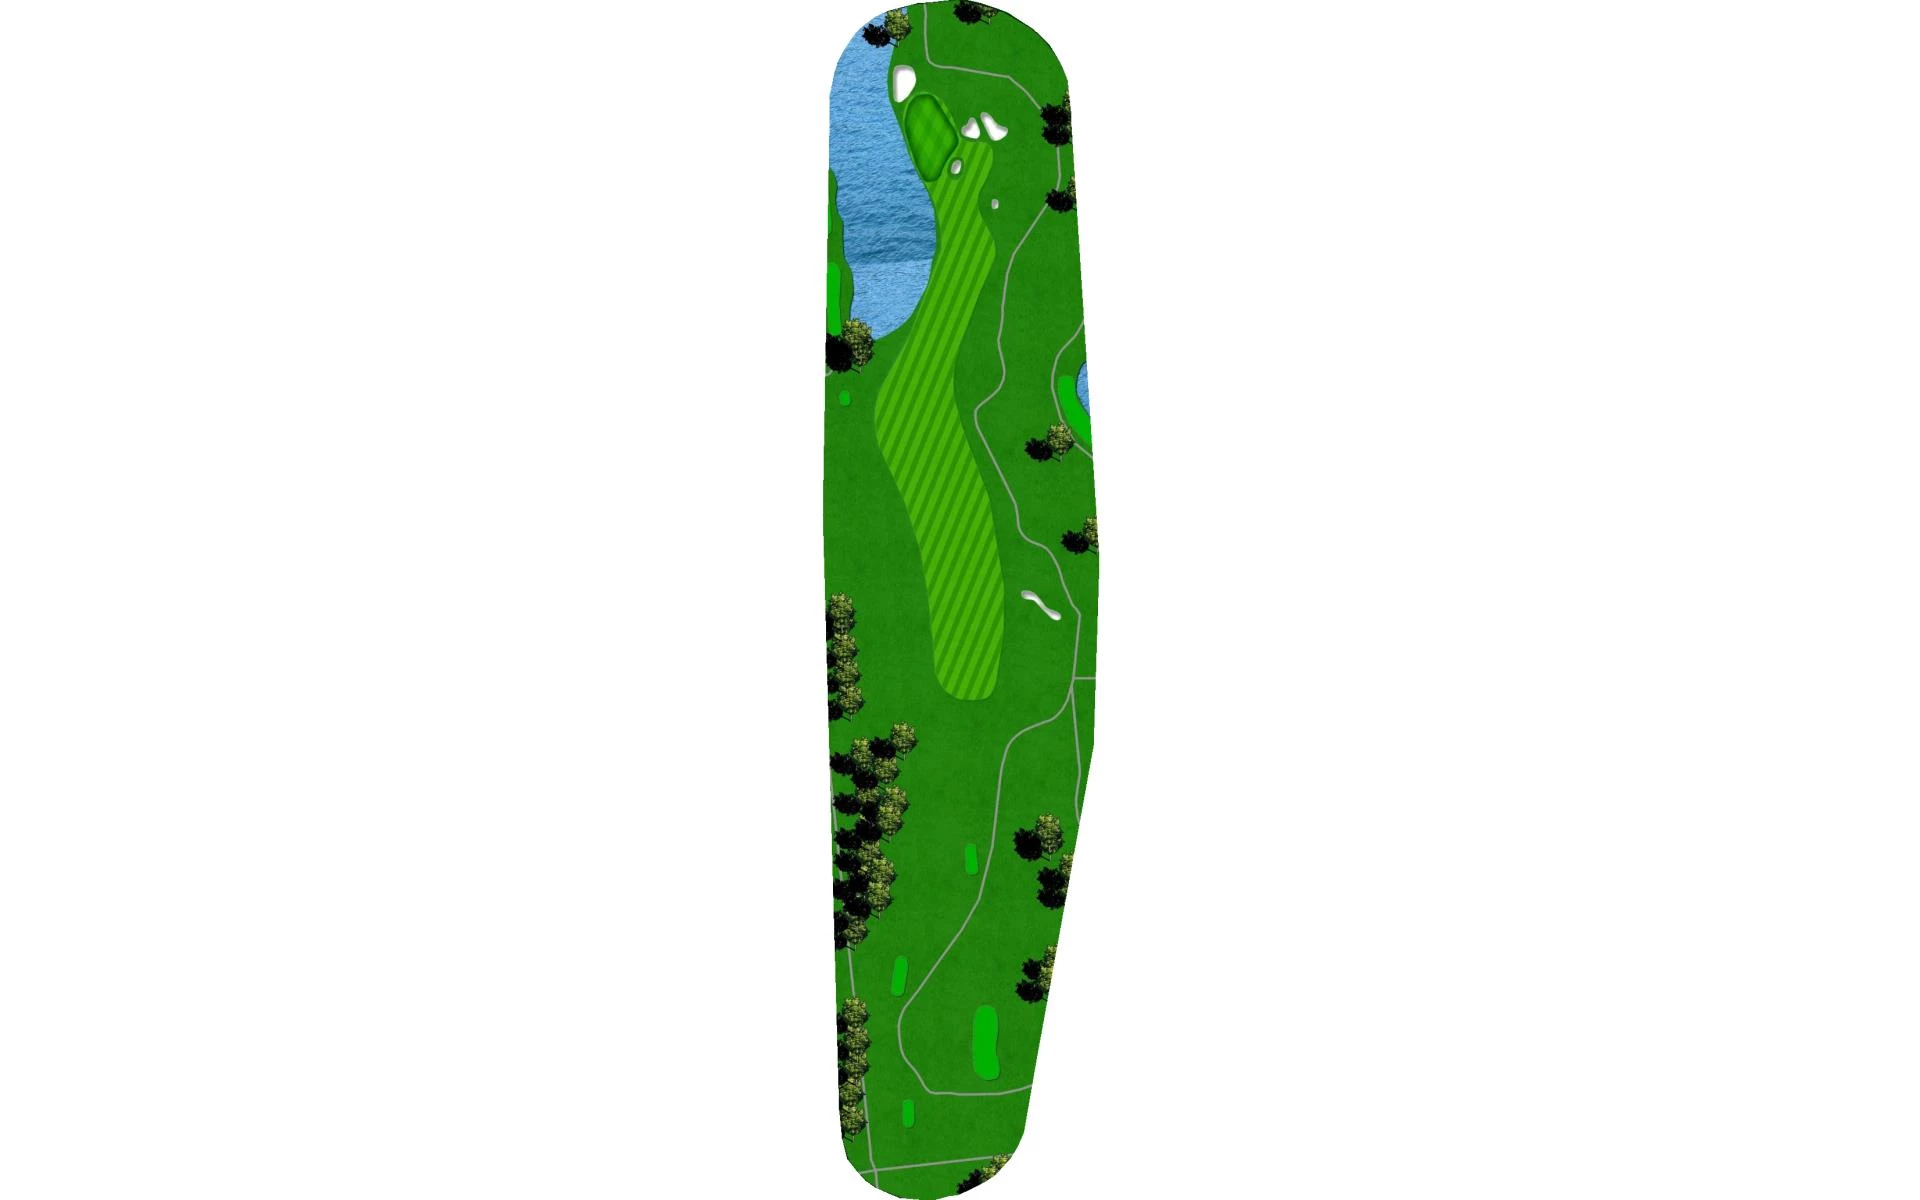
Downwind par 4 with pond at the end of fairway which lines the left side of green as well. Solid tee ball will leave short iron to relatively flat green. Avoid bunkers short right and long.
# 9 /
Par: 4
Yardage by Tee:
GOLD 393
BLUE 370
WHITE 325
GREEN 219
Pro Tips
Classic Pete Dye design with large mounds blocking view of the green. Short enough to go for off the tee but blind shot hides OB right and greenside bunkers. Good drive avoids OB left and will leave wedge to small tough green. Avoid going long.
# 10 /
Par: 3
Yardage by Tee:
GOLD 192
BLUE 155
WHITE 135
GREEN 93
Pro Tips
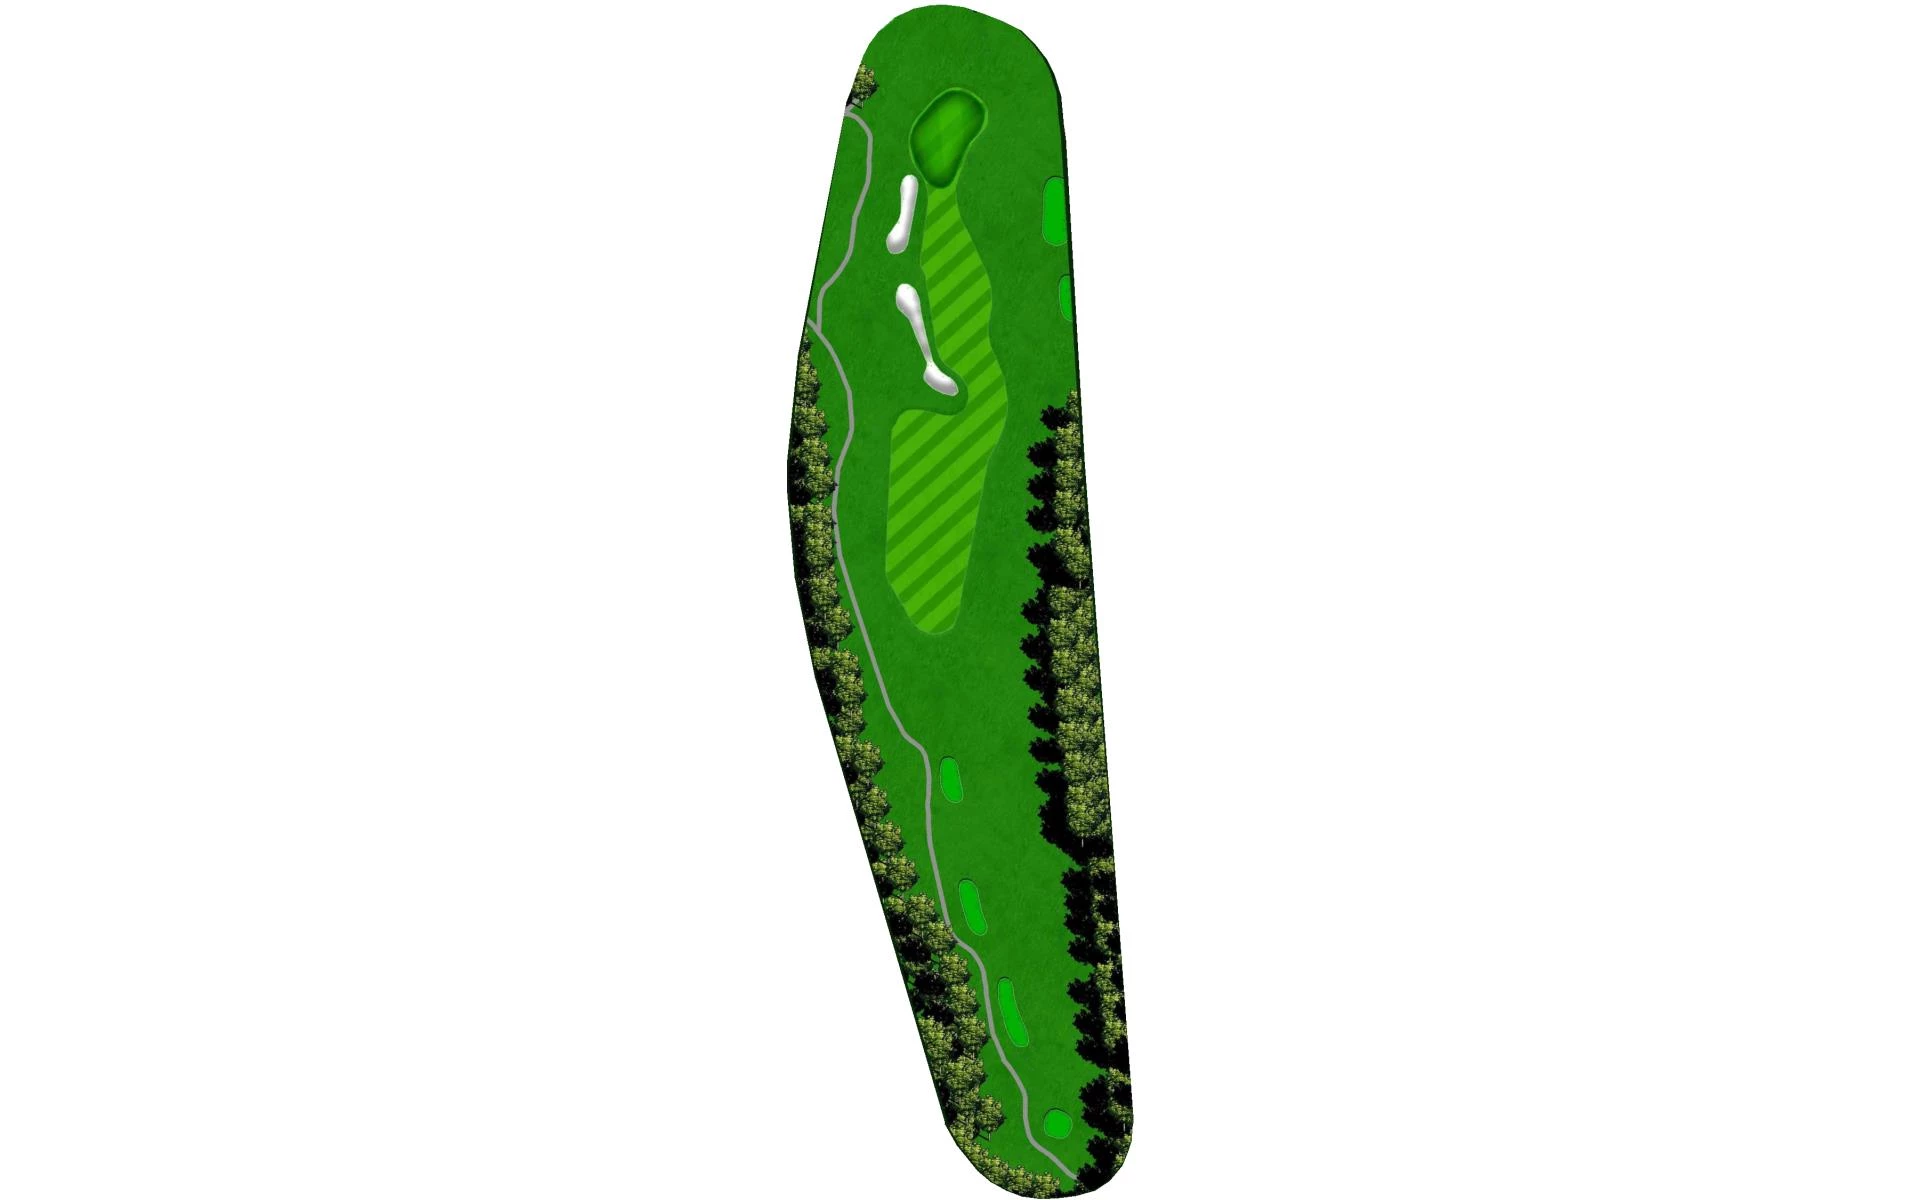
Par 3 to start back nine. Multi-tiered green protected by pot bunkers. Hit the right tier for a good look at birdie otherwise enjoy the rollercoaster ride.
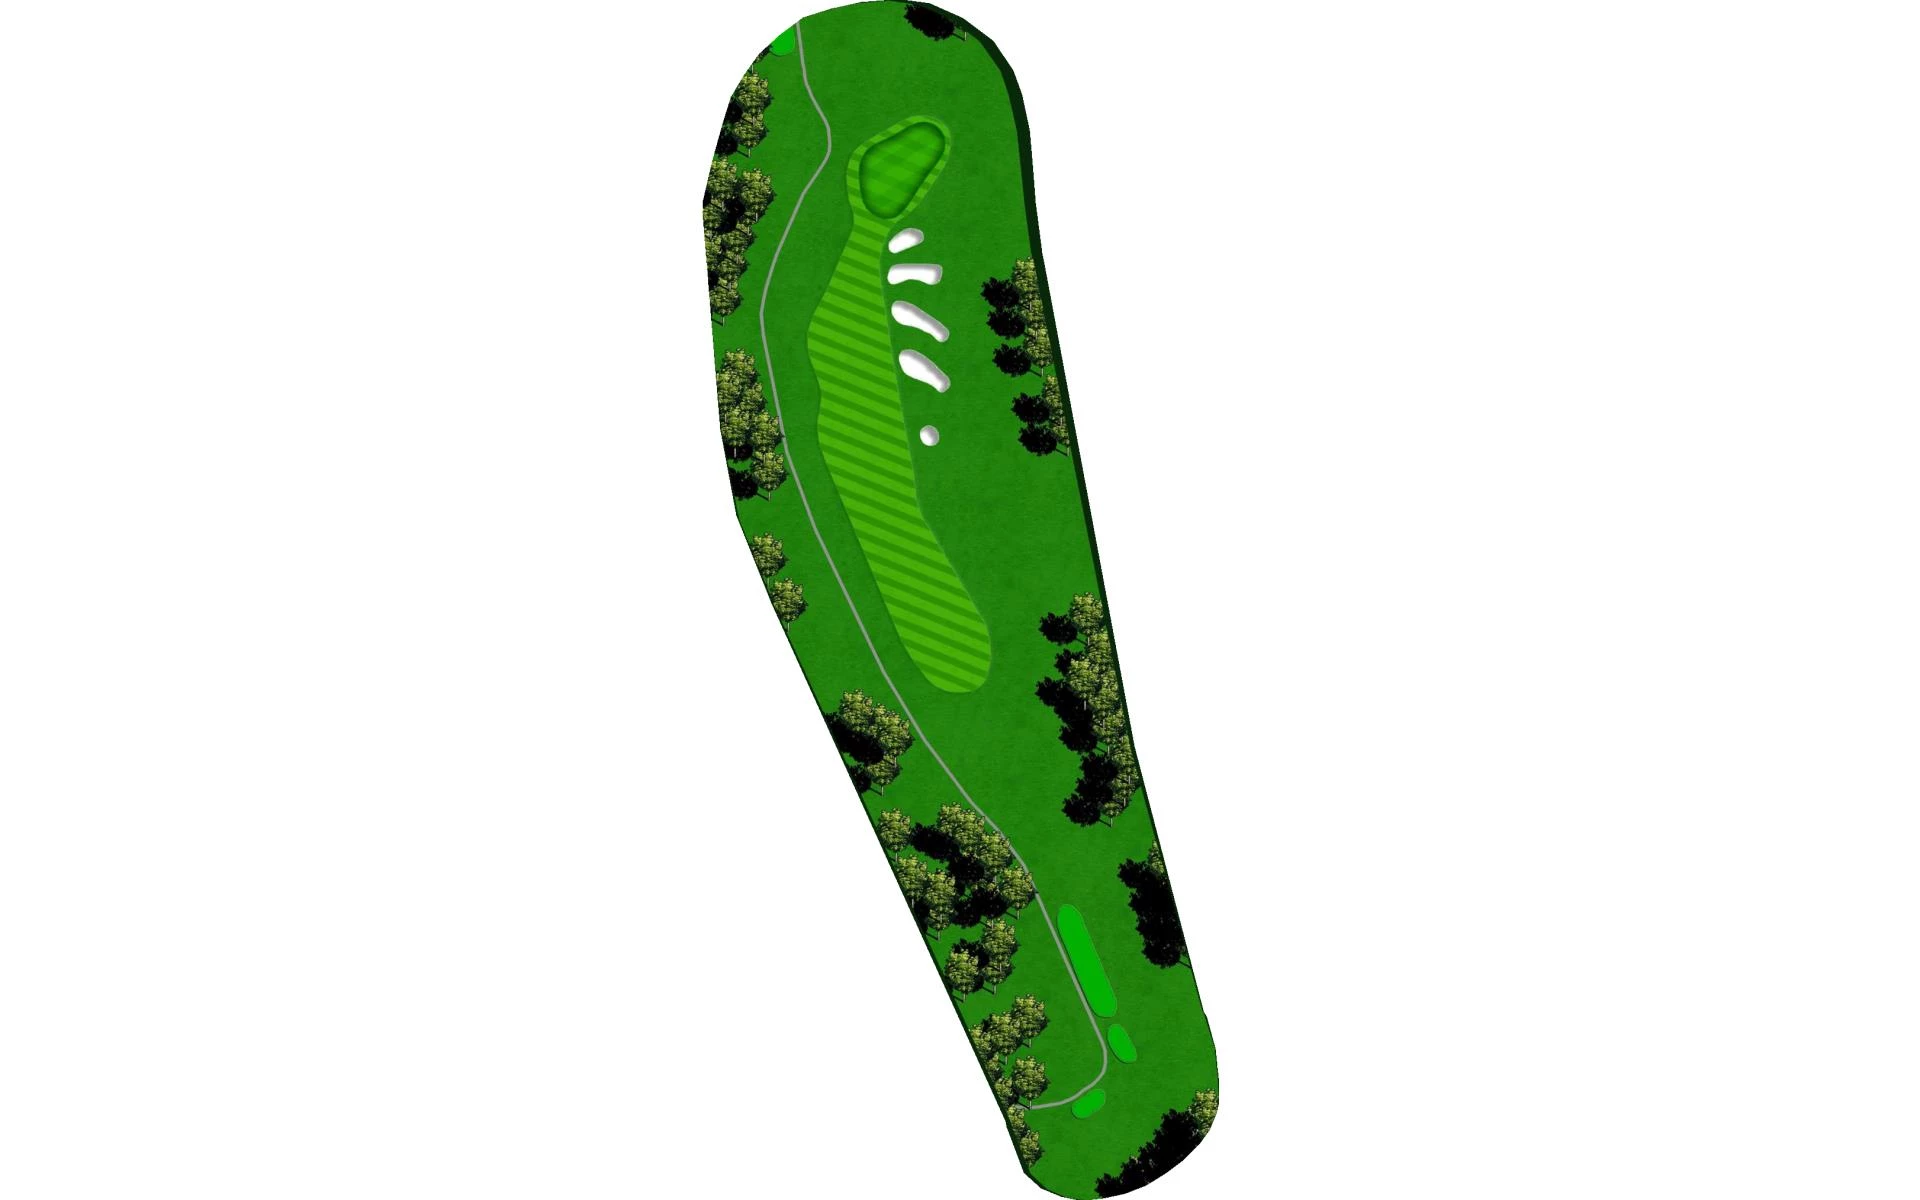
# 11 /
Par: 4
Yardage by Tee:
GOLD 371
BLUE 367
WHITE 332
GREEN 233
Pro Tips
Short par 4 with accuracy a premium off the tee. Long iron off the tee is enough to leave 130-150yd approach. Smallest green on the course requires accurate approach. Protected short by trees and large bunker, left of green drops 20 ft to large grass bowl
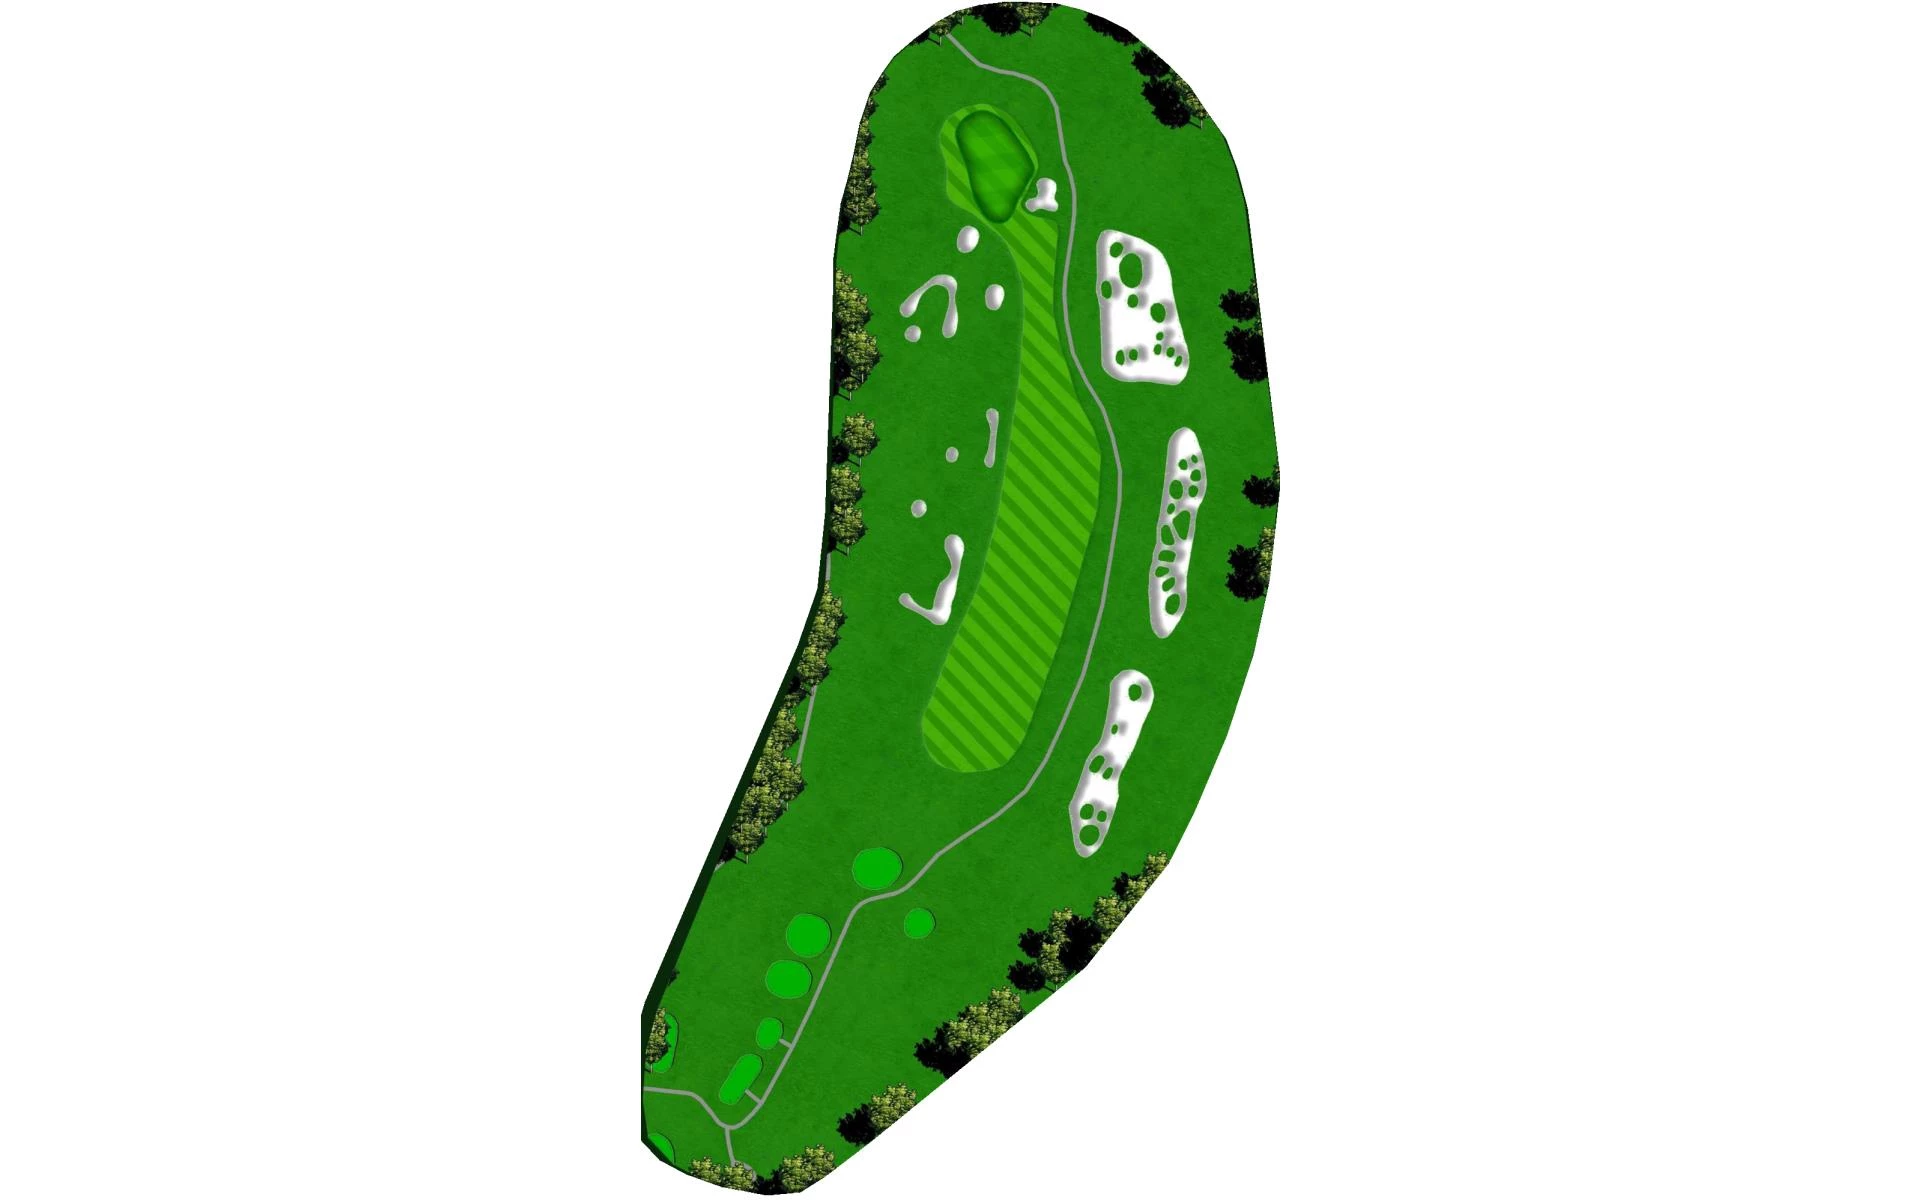
# 12 /
Par: 4
Yardage by Tee:
GOLD 405
BLUE 380
WHITE 320
GREEN 258
Pro Tips
Solid Par 4 requiring very accurate tee shot. Trees pinch both sides of the hole with a bunker extending across the fairway. Good drive leaves 140yds to tiered green. Avoid missing green right into small deep grass bunkers.
# 13 /
Par: 4
Yardage by Tee:
GOLD 350
BLUE 337
WHITE 292
GREEN 215
Pro Tips
Uphill par 4. Solid drive will avoid bunker left and the extremely deep bunker right. Wedge or short iron second shot to green. Avoid large deep bunker short right. Uphill shot hides green surface for hole locations in the back.
# 14 /
Par: 3
Yardage by Tee:
GOLD 174
BLUE 170
WHITE 135
GREEN 110
Pro Tips
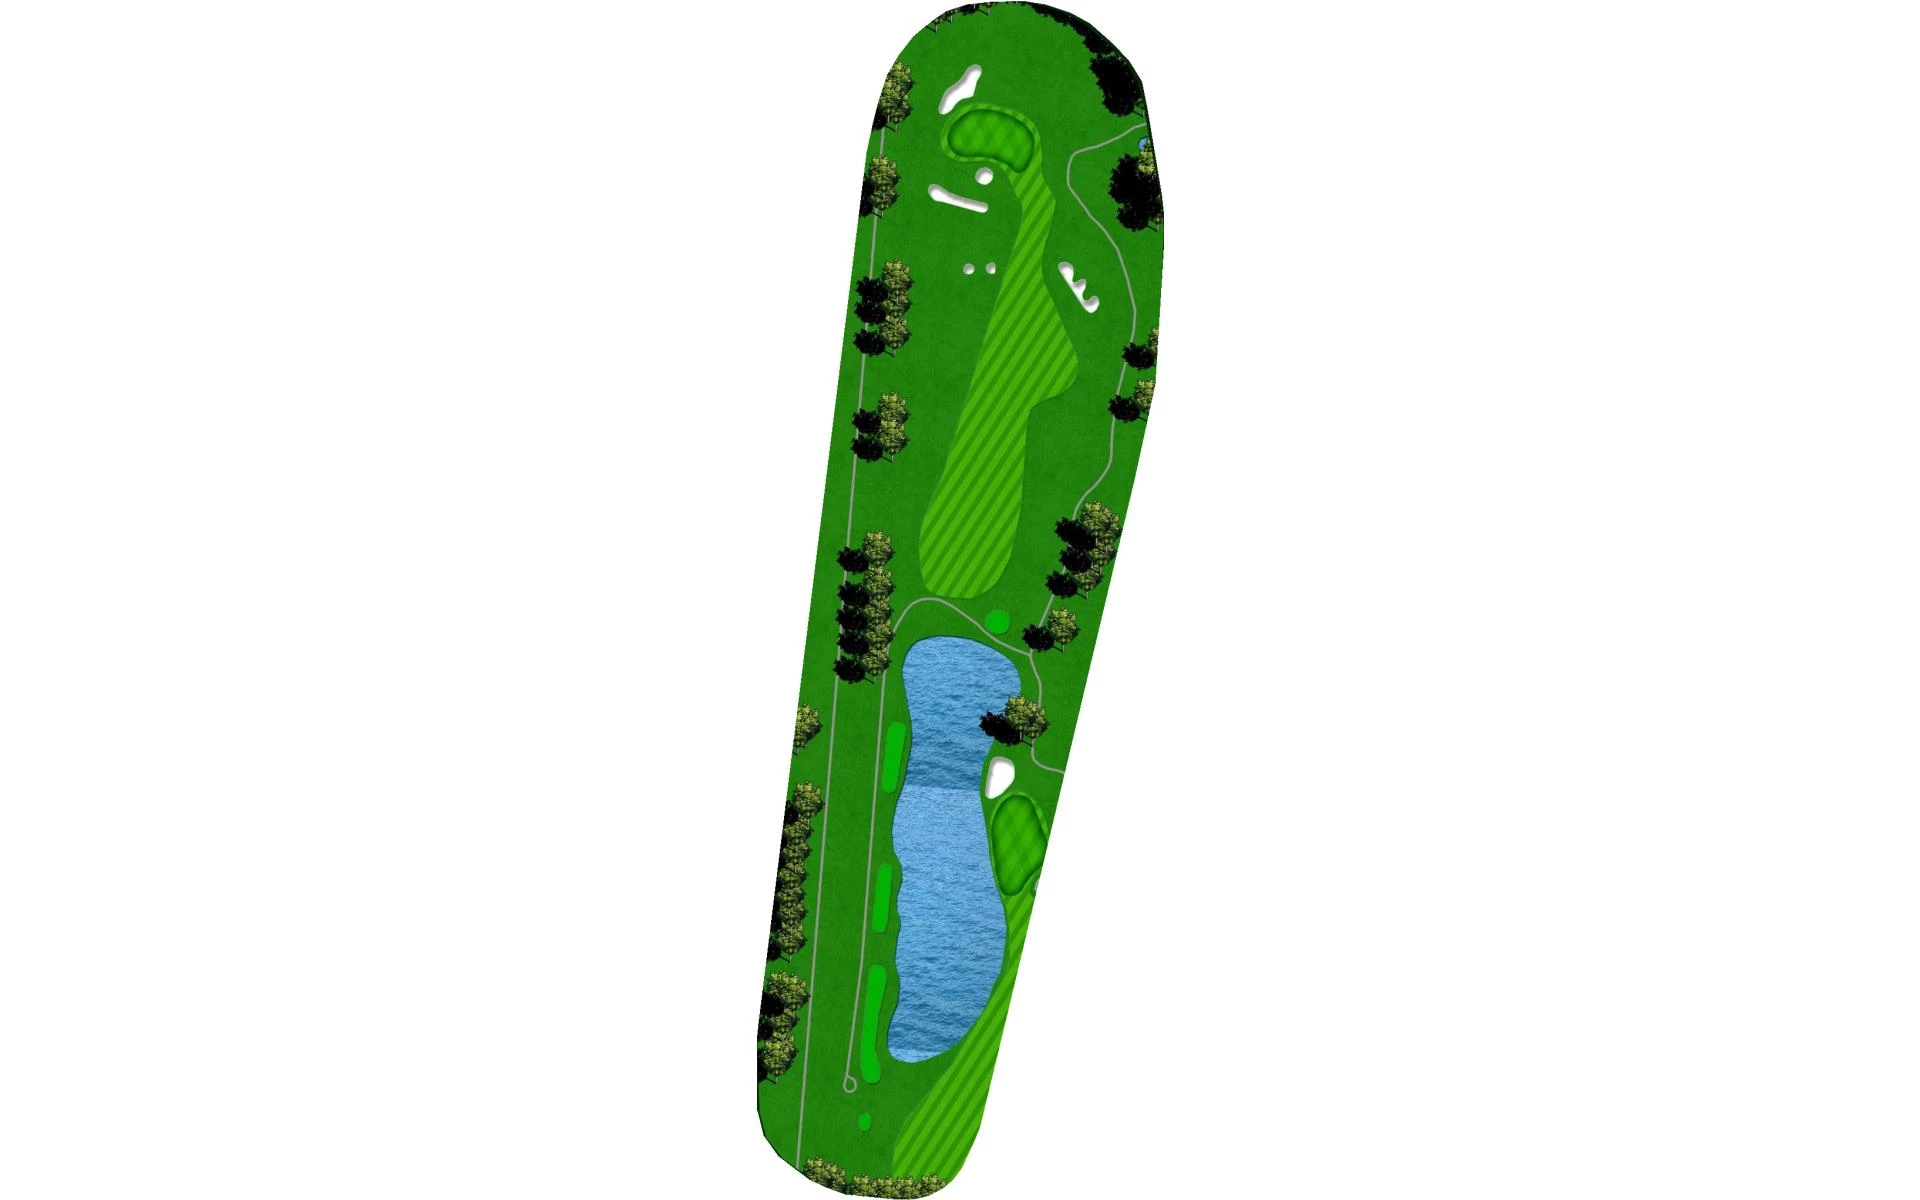
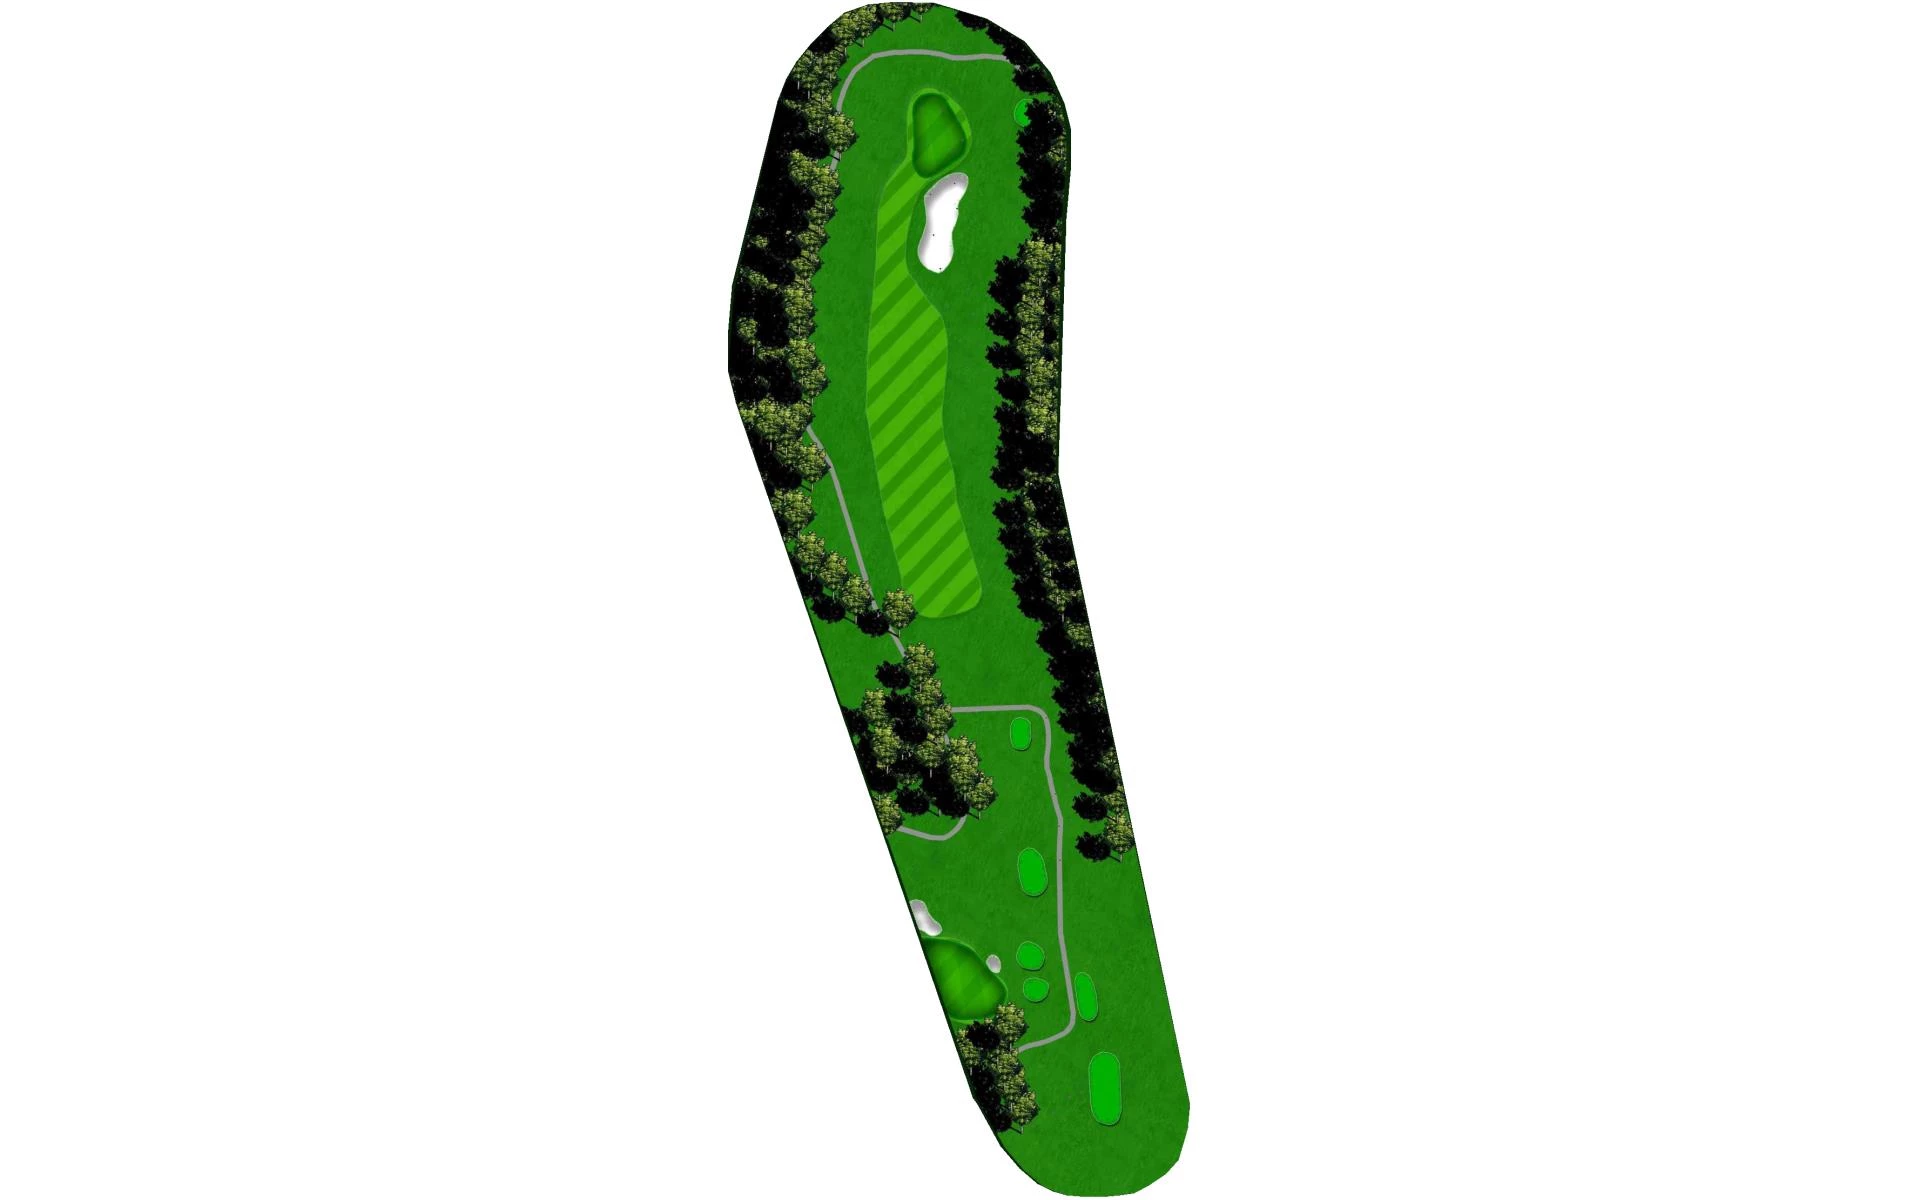
Final par 3 on the course. Green surrounded by water on the left and deep grass bunkers short and right of green. Accurate club selection is a must for a good look at birdie.
# 15 /
Par: 4
Yardage by Tee:
GOLD 469
BLUE 433
WHITE 356
GREEN 349
Pro Tips
Longest Par 4 on the course typically playing into the wind. Solid drive avoids trees and OB right off the tee and leaves downhill mid-long iron second shot. Tough deep bunkers left and right of green make proper club selection a must if trying to make birdie. Par is solid every time.
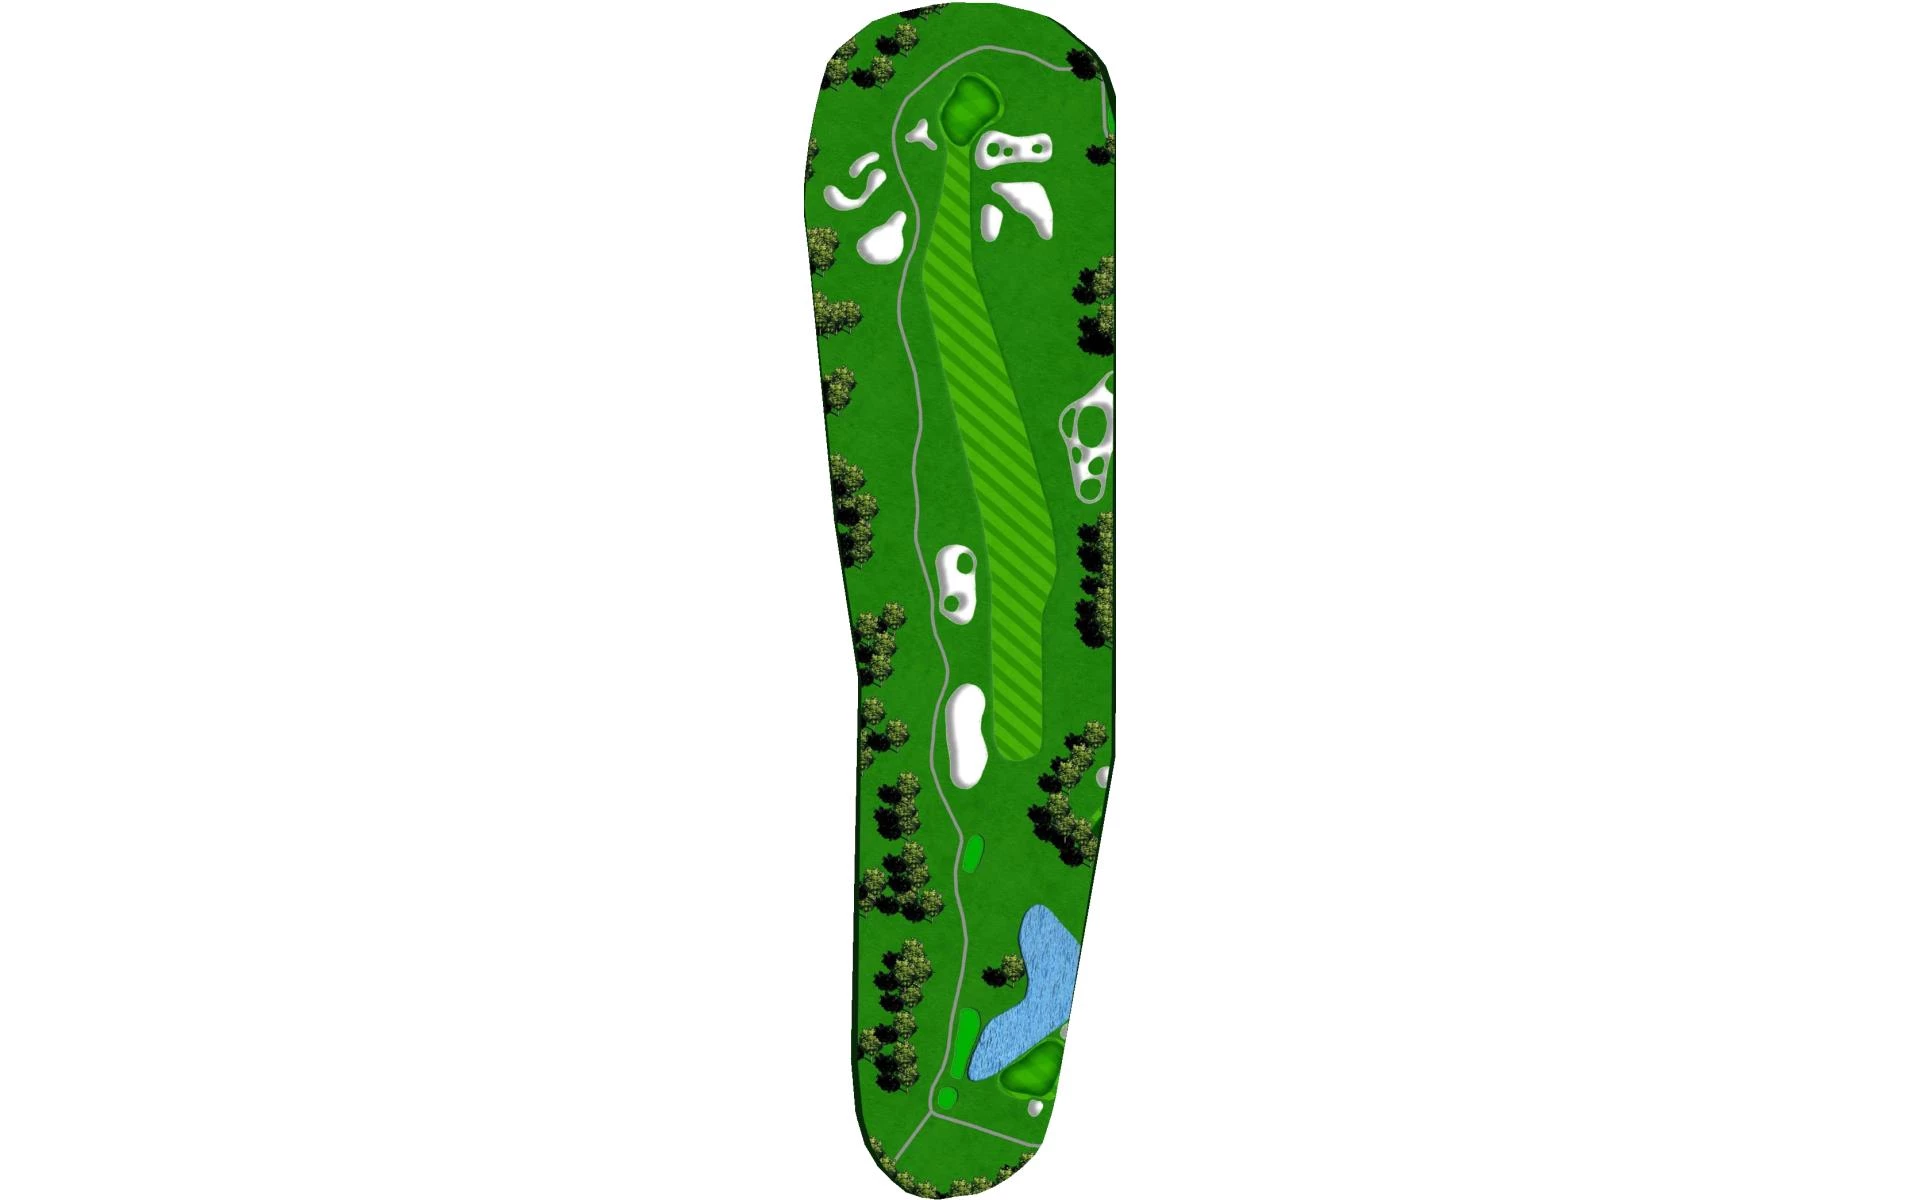
# 16 /
Par: 5
Yardage by Tee:
GOLD 536
BLUE 520
WHITE 494
GREEN 401
Pro Tips
Second and final par 5 on the course. Large landing area but it is a must you avoid long fairway bunkers on the left. Solid tee ball leaves the choice to layup or go for it. Green protected by 50yds of bunkers on the right with greenside bunker and native grass left. Front pin location is green light.
# 17 /
Par: 4
Yardage by Tee:
GOLD 399
BLUE 374
WHITE 319
GREEN 268
Pro Tips
Short par 4 with large collection of bunkers and swells protecting the left side of fairway and short of green. Fairway off tee tightens significantly at 75yds out so accurate tee ball is a must. Aggressive short iron or wedge approach set ups good look for birdie. Avoid pot bunker right of green.
# 18 /
Par: 4
Yardage by Tee:
GOLD 456
BLUE 389
WHITE 374
GREEN 251
Pro Tips
Solid par 4 finishing hole. Creek runs the length of the left side with fairway sloping towards hazard. Large mounds right help to catapult ball down the fairway. Avoid hitting it too far as second will be 50 ft below green surface. Well placed tee ball leaves 100yds and clear view of green. Precise second shot to proper tier required for good birdie chance.