Course
Designer: Don January/Roger Packard
Oakmont Country Club has provided Dallas-area golfers with some of the finest in spectacular, world-class Denton golf. From our towering, ma…
Oakmont Country Club has provided Dallas-area golfers with some of the finest in spectacular, world-class Denton golf. From our towering, mature oak trees to our meandering fairways, Oakmont Country Club has always brought its players a country club experience.
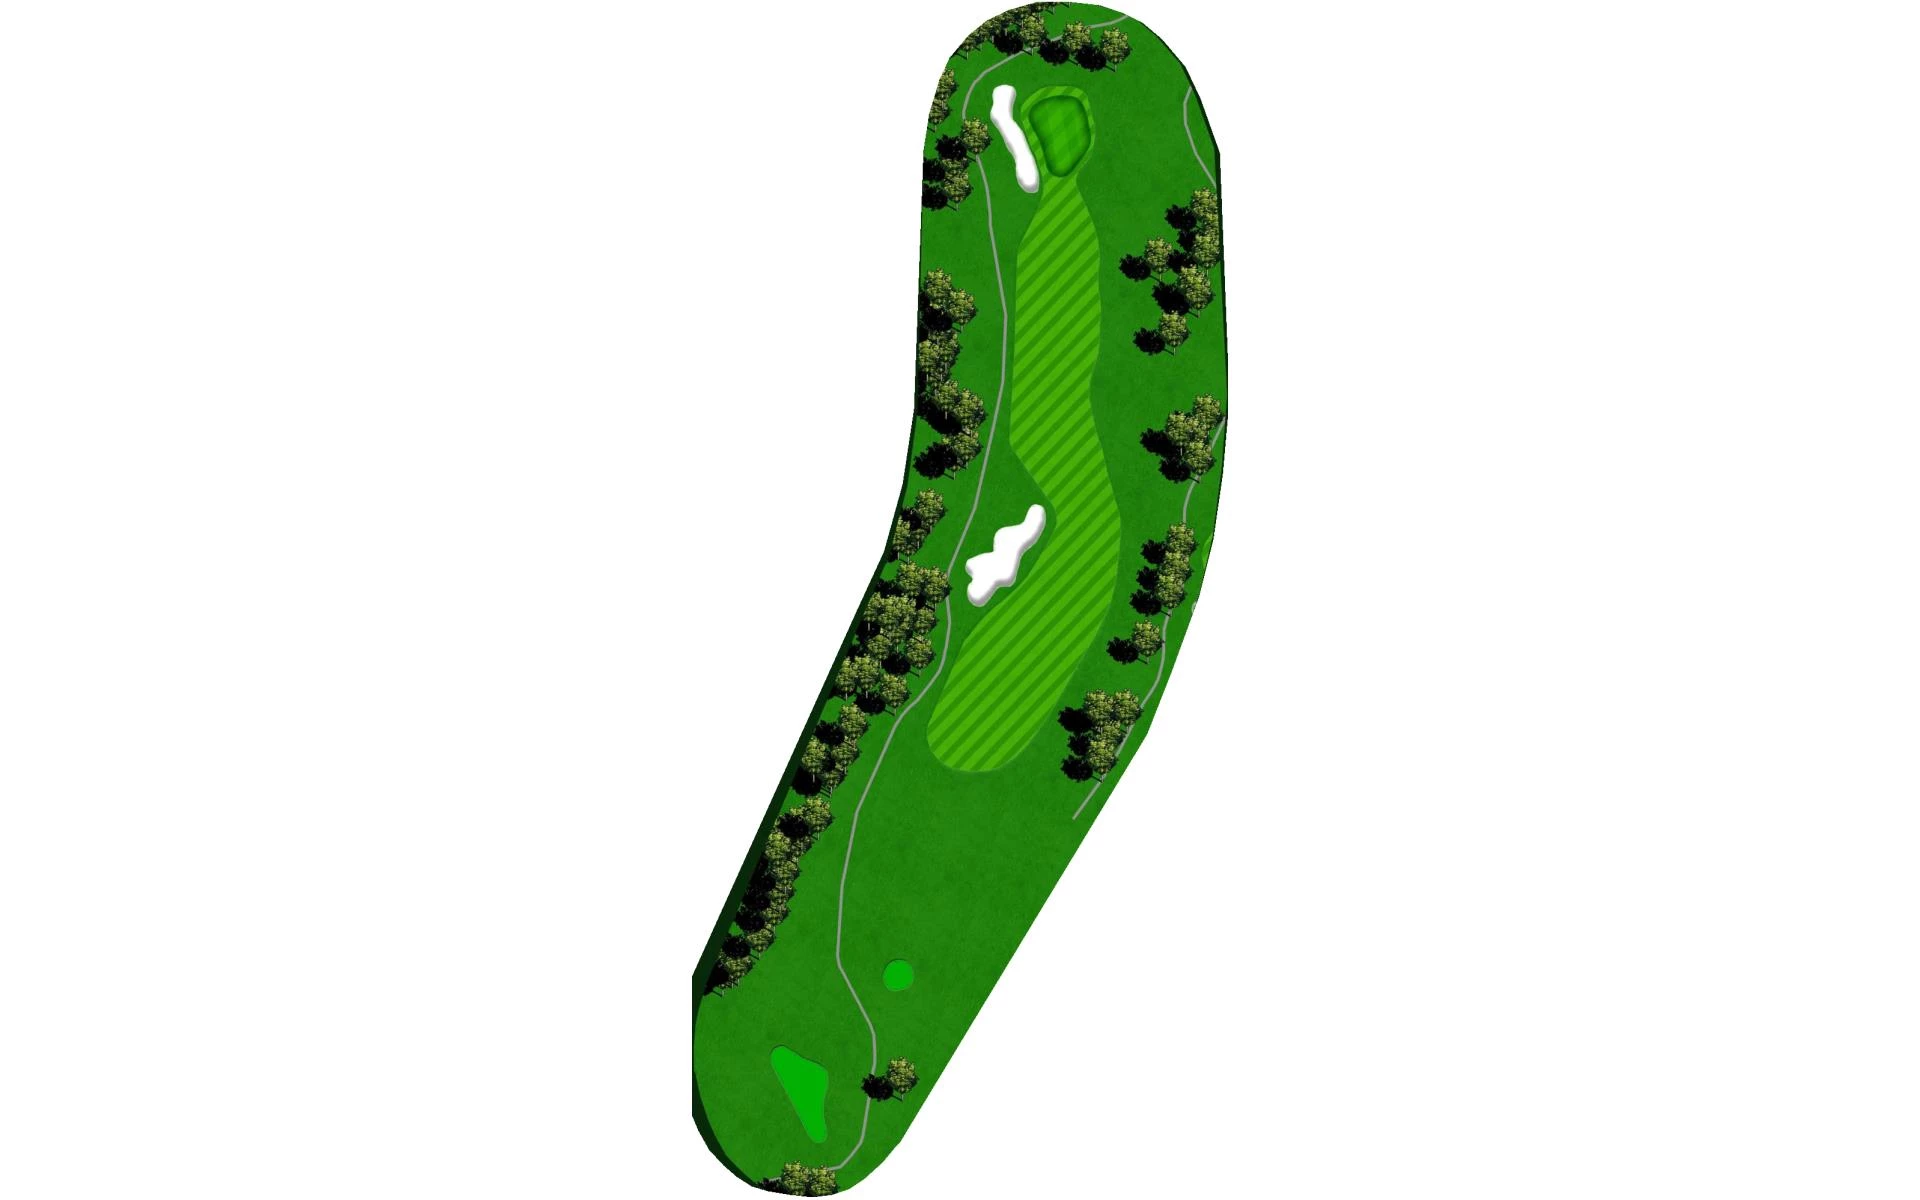
# 1 / Hole #1
Par: 4
Yardage by Tee:
Blue 340
Gold 362
Red 250
White 305
Pro Tips
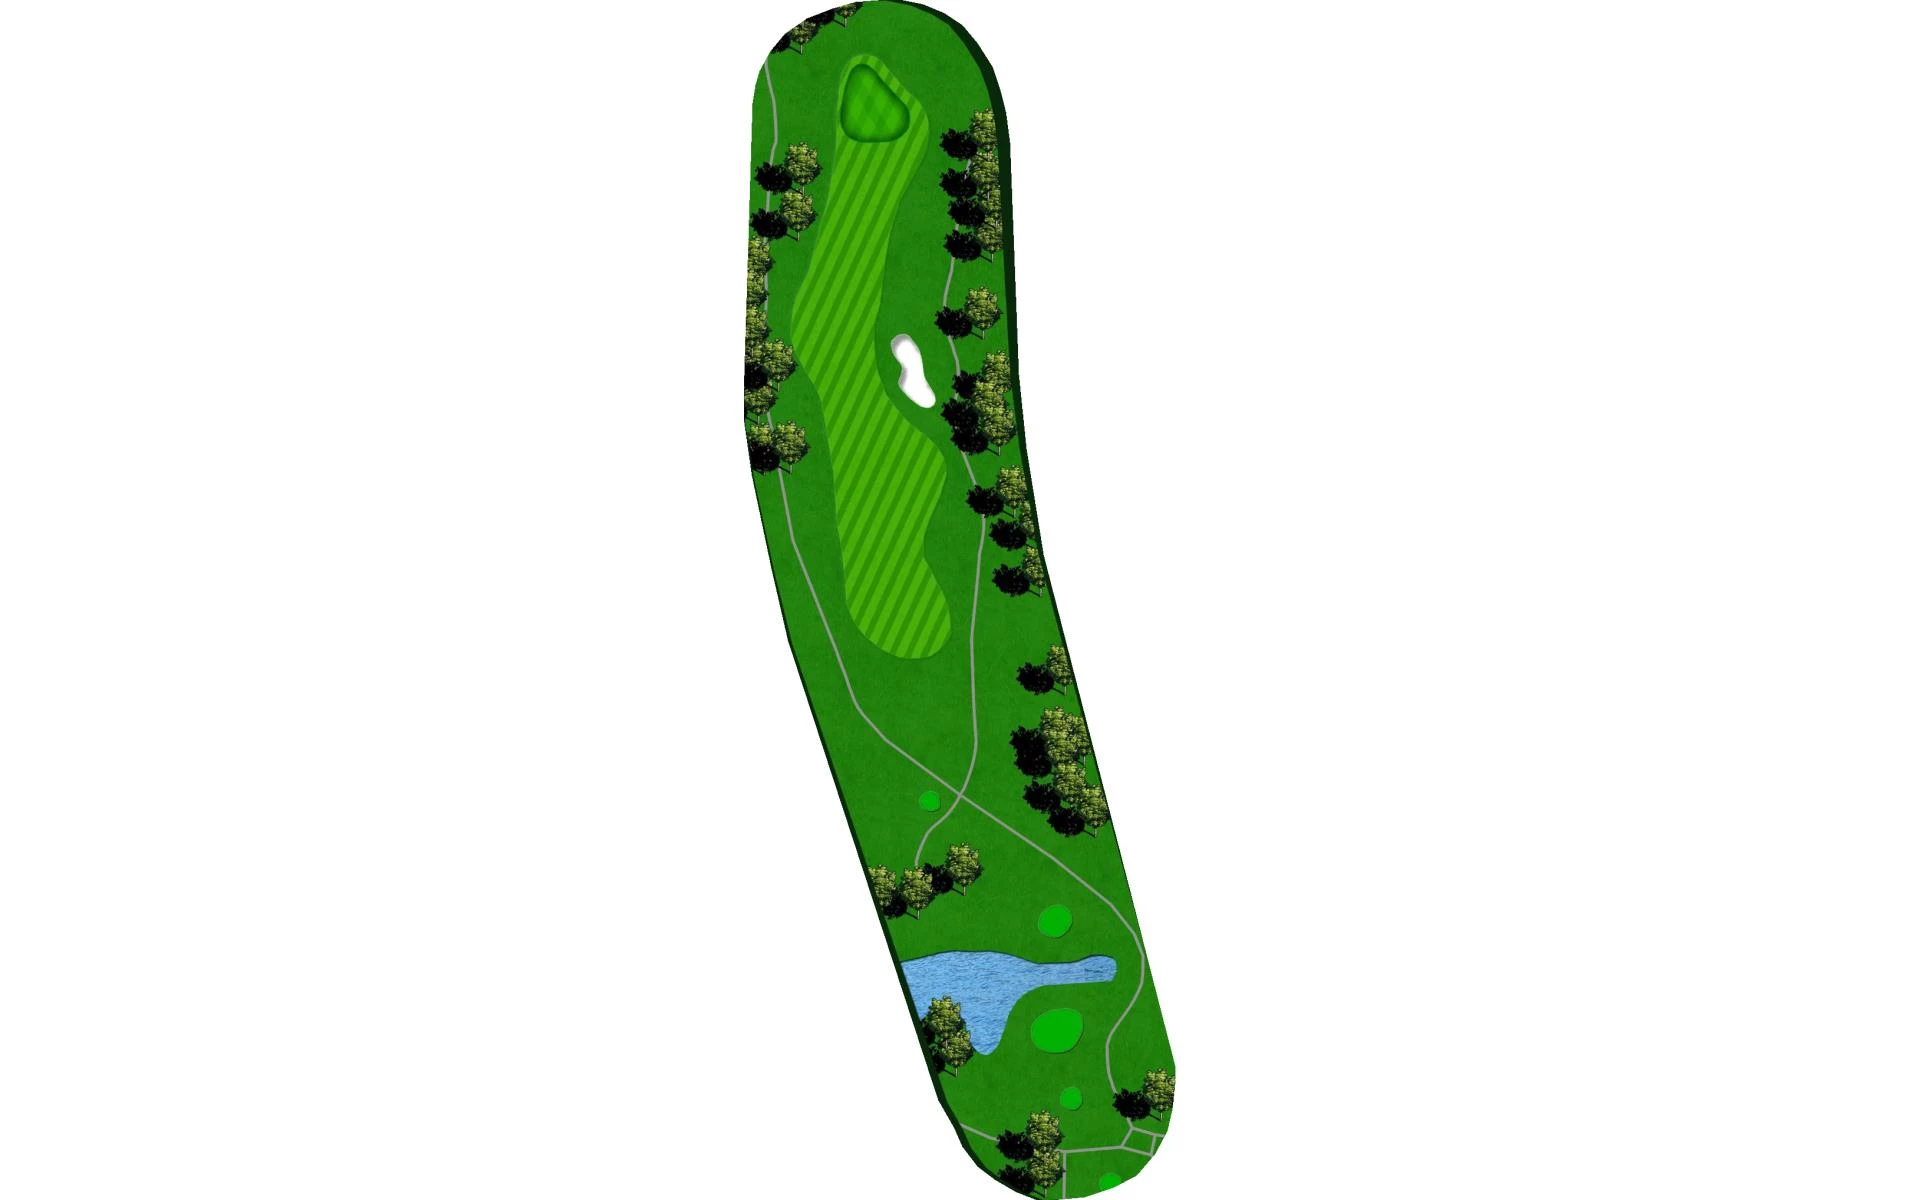
Number 1 is a slight Dogleg right depending on Tee Position. You want to keep your drive left of the fairway bunker to give yourself the best shot into the green. The green has a lower and upper plateu so being pin high or below the hole is very important.
# 2 / Hole #2
Par: 4
Yardage by Tee:
Blue 340
Gold 352
Red 450
White 460
Pro Tips
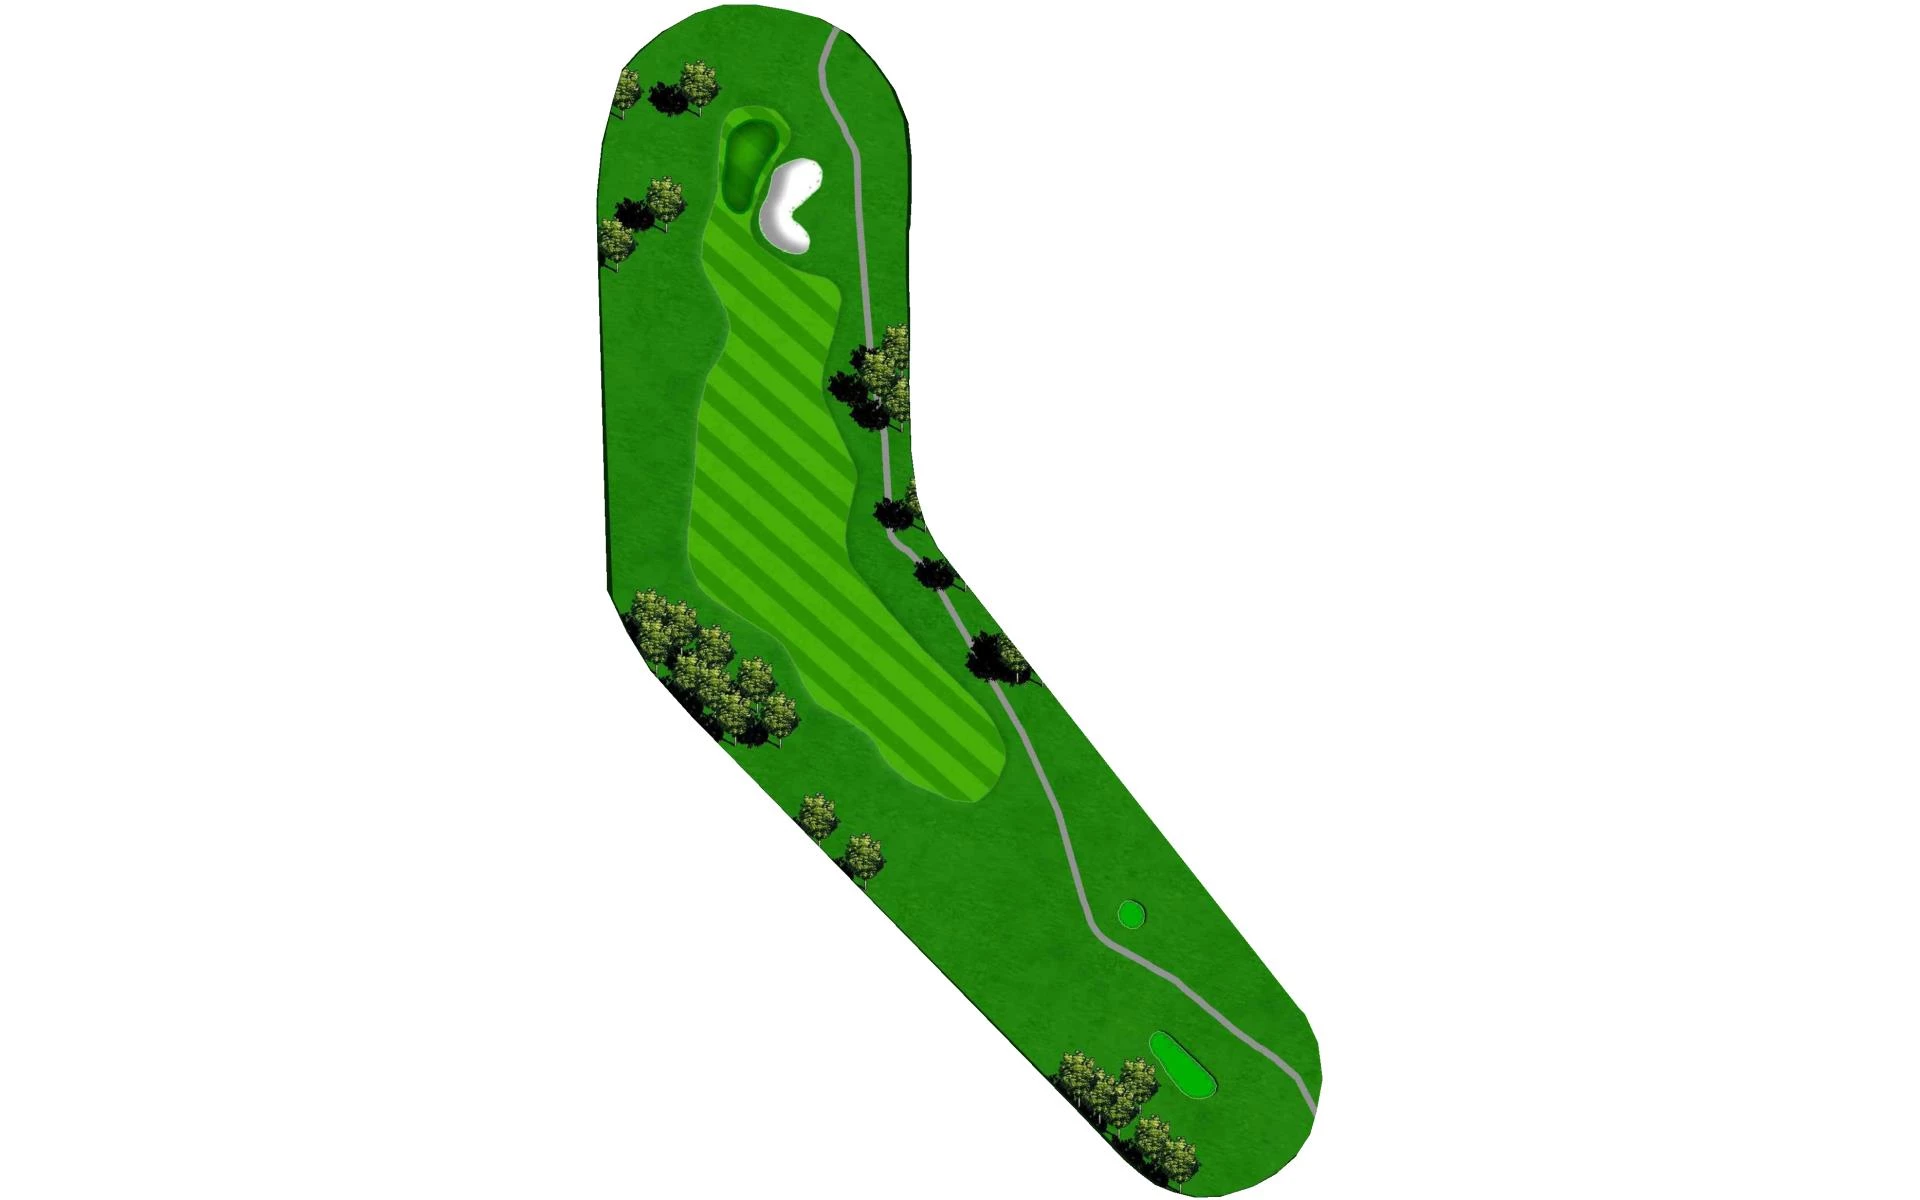
Number 2 is a dogleg right with a blind tee shot. Club selection off the tee is very important to ensure you avoid being on the upslope or downslope. The second shot you are hitting into a 2 teired green that the bottom area breaks away from the front of the green.
# 3 / Hole #3
Par: 5
Yardage by Tee:
Blue 508
Gold 524
Red 450
White 460
Pro Tips
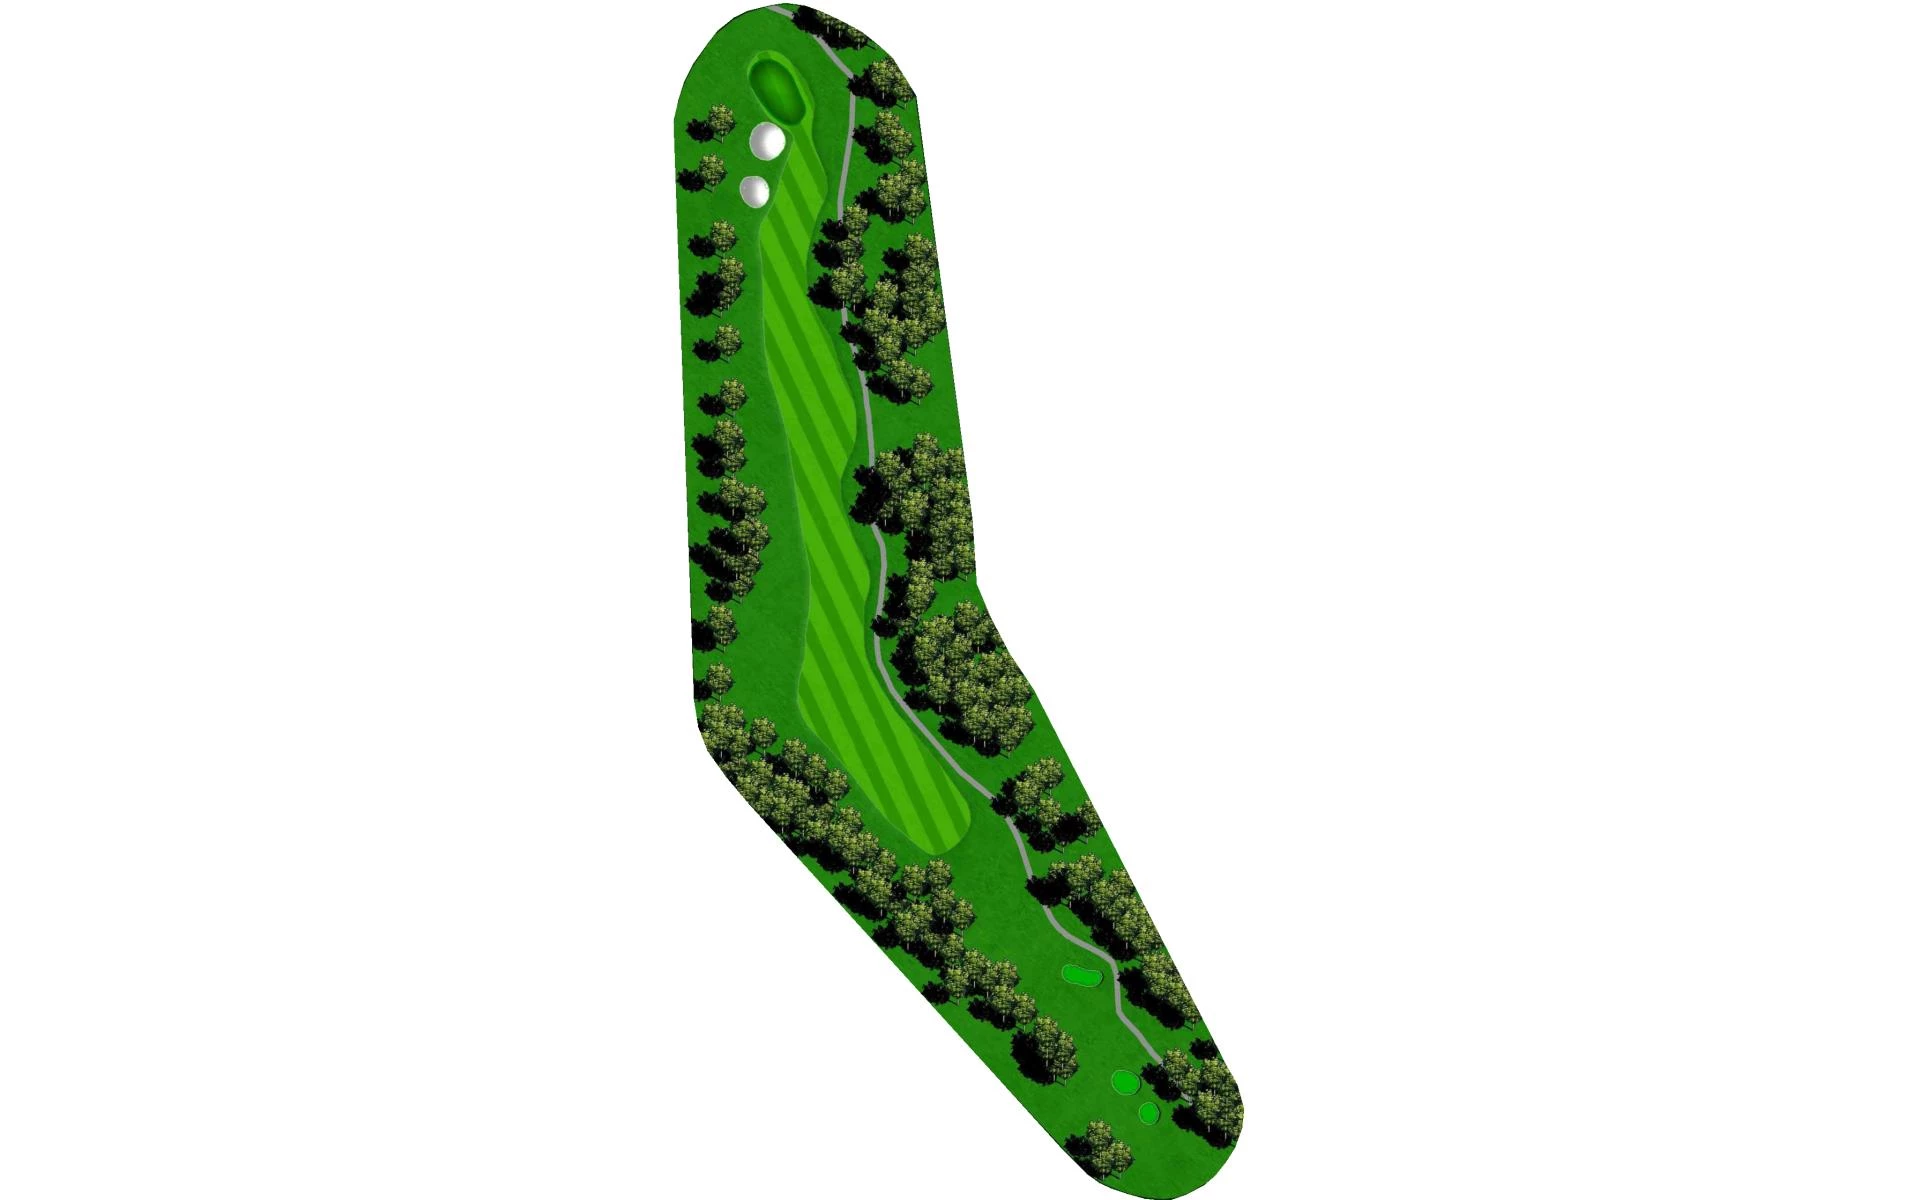
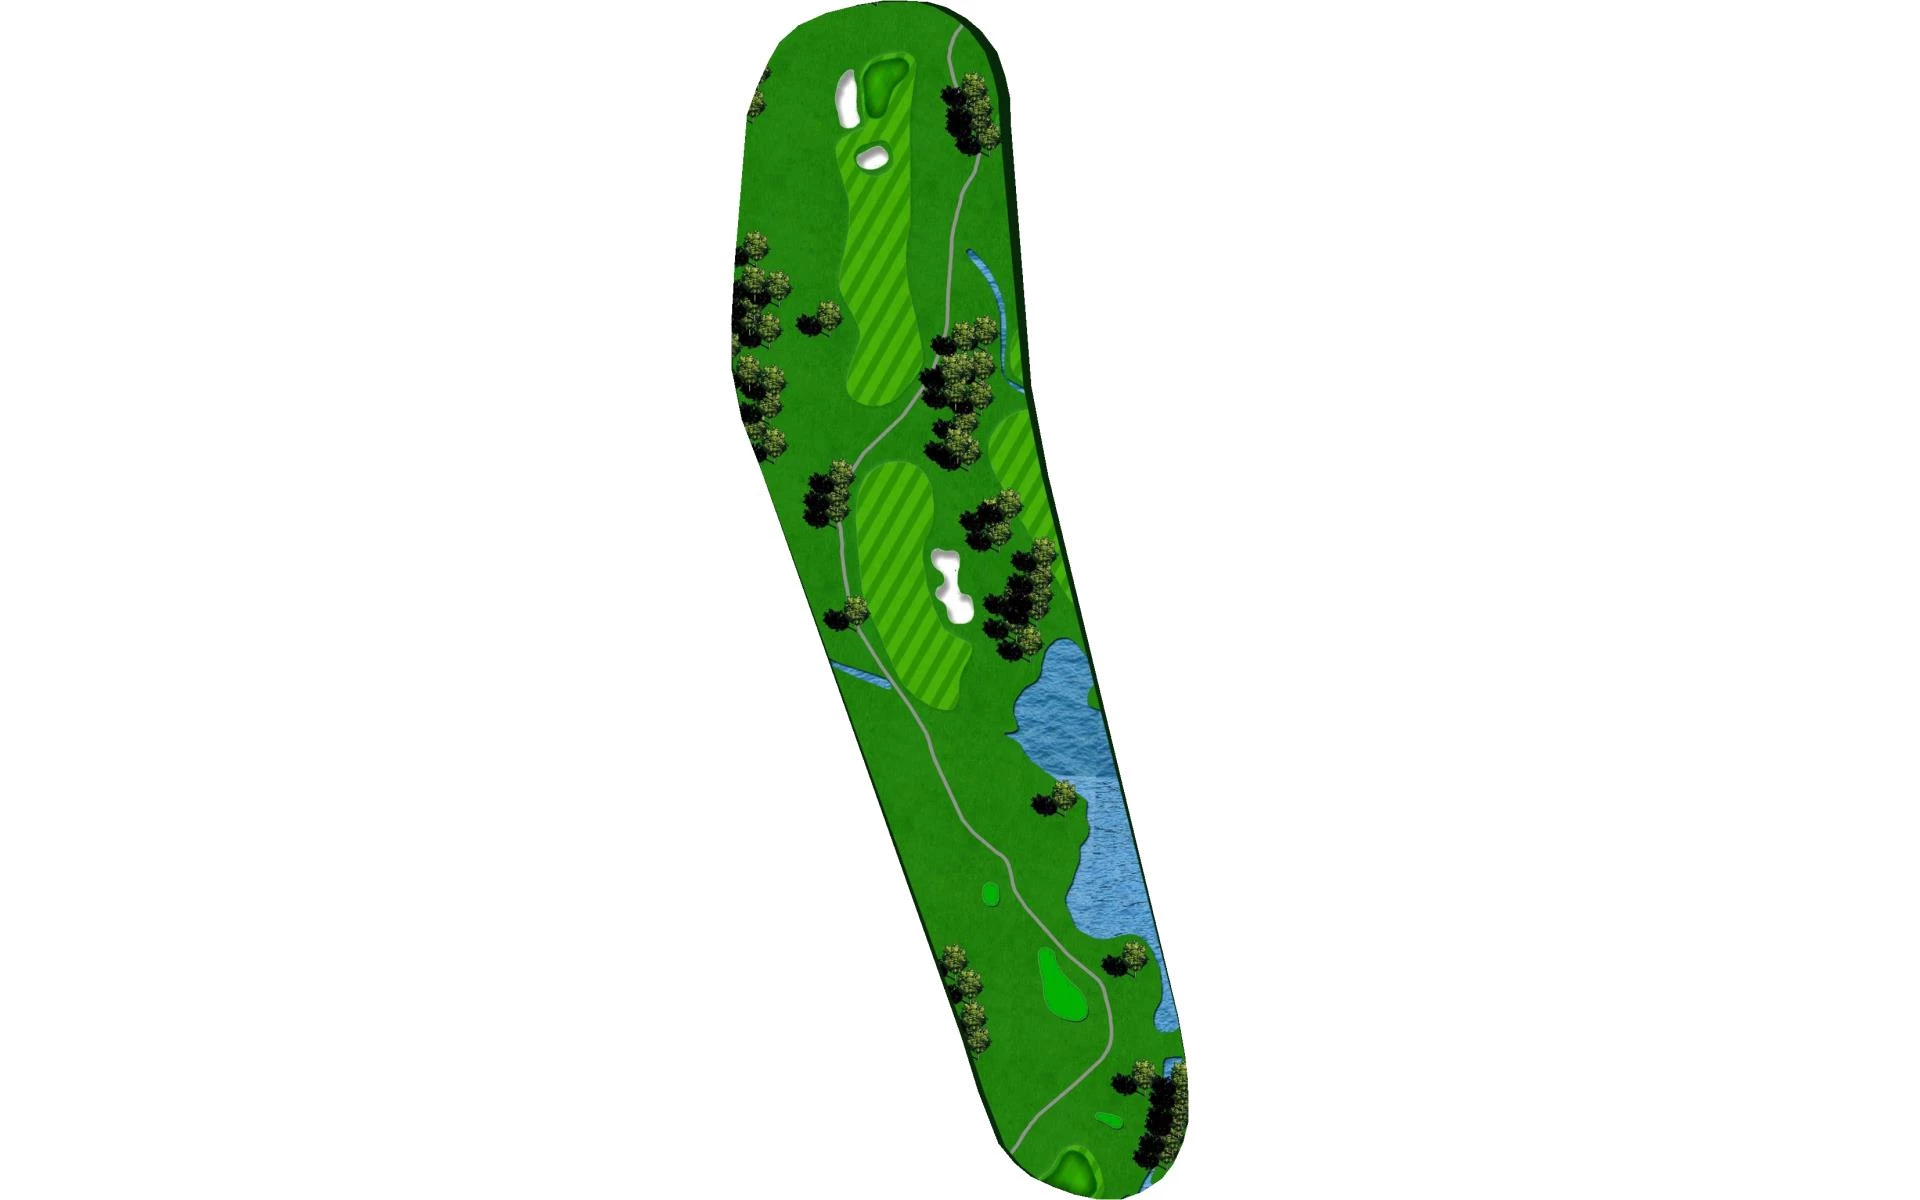
This dogleg right Par 5 requires a precise tee shot as there is out of bounds right and hazard right. The longer hitter can reach this green in two, for the perfect Layup however you want to be about 100 out to ensure the best angle to the green.
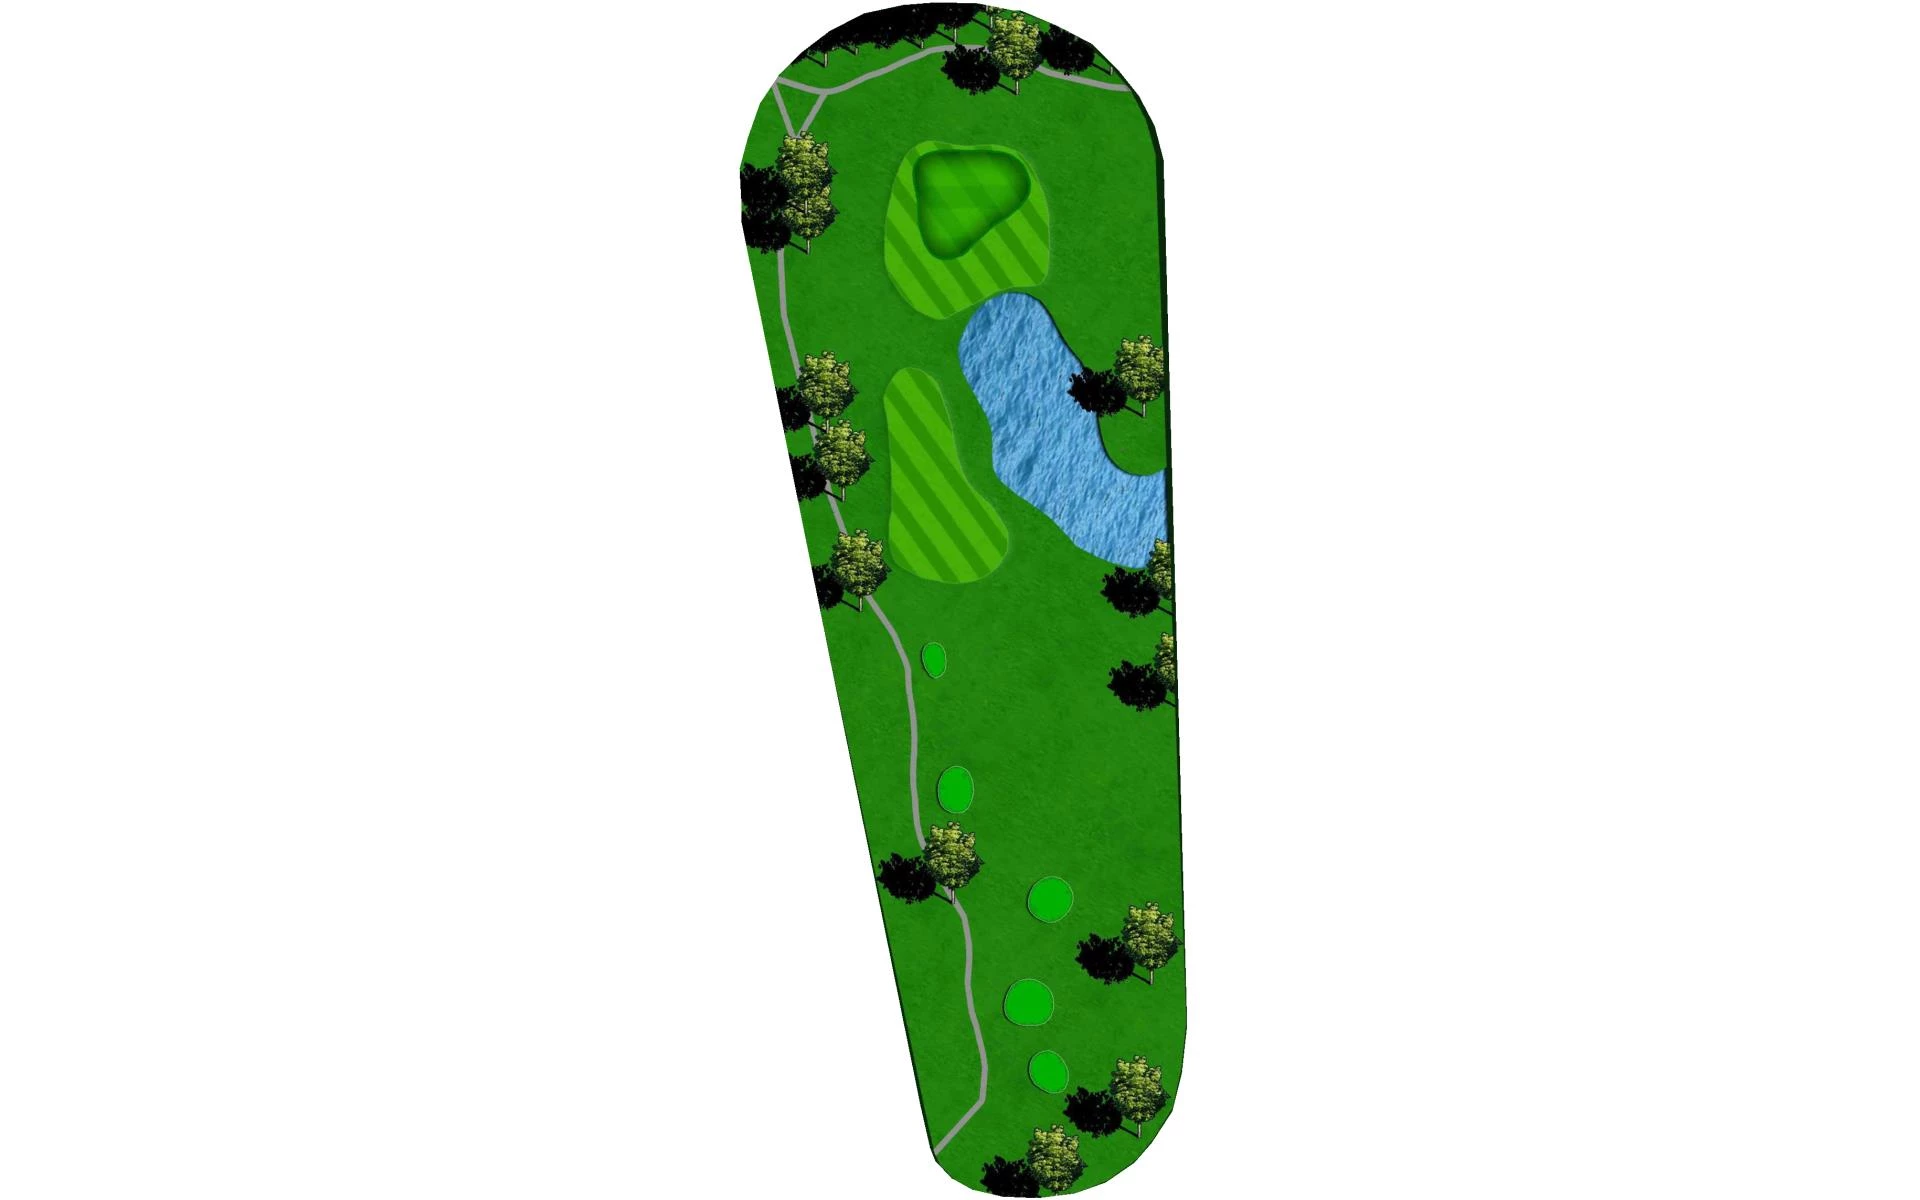
# 4 / Hole #4
Par: 3
Yardage by Tee:
Blue 195
Gold 195
Red 103
White 132
Pro Tips
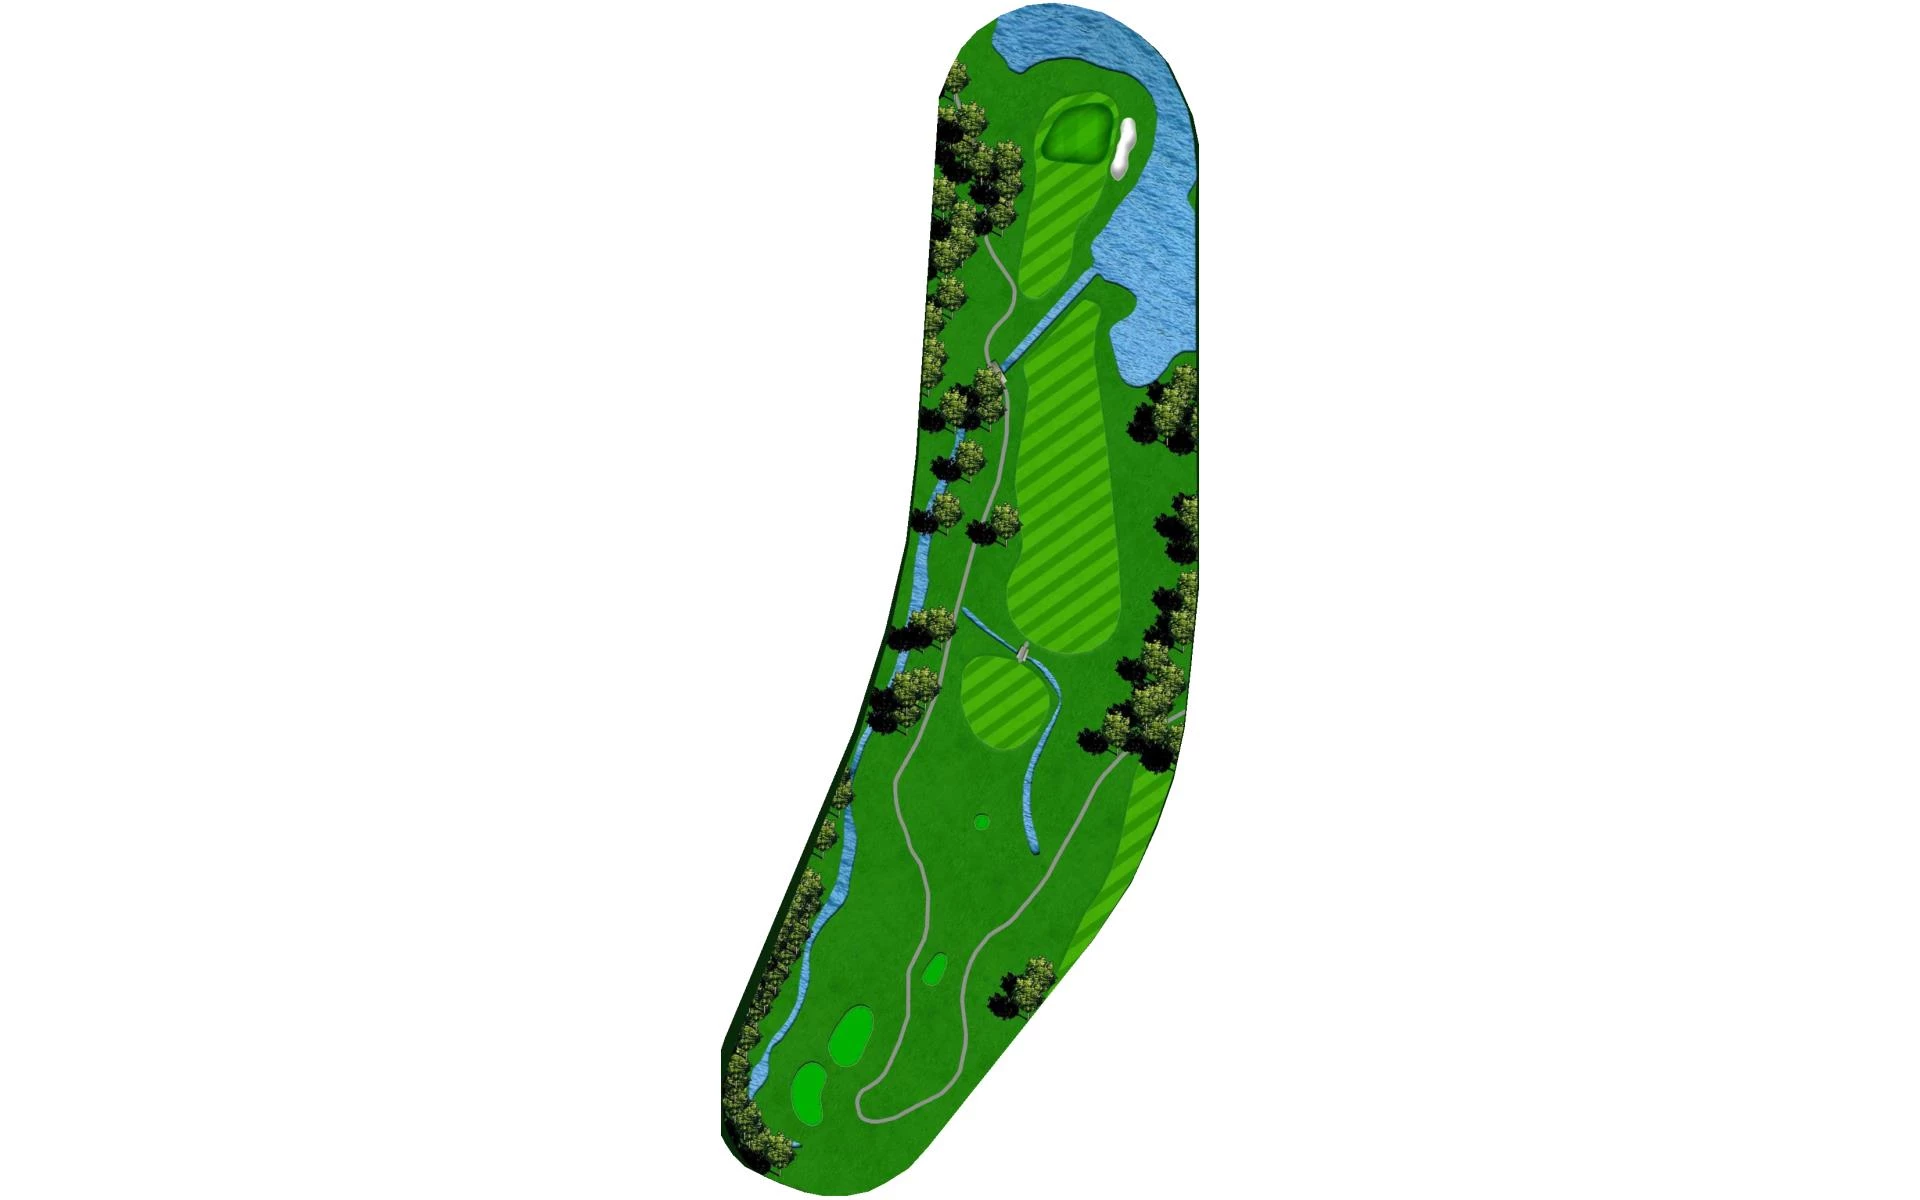
This long Par Three has a Hazard protecting the right side of the green and there is a Bail out area short left of the green. This tricky green has many different slopes in it so being below the hole is optimal.
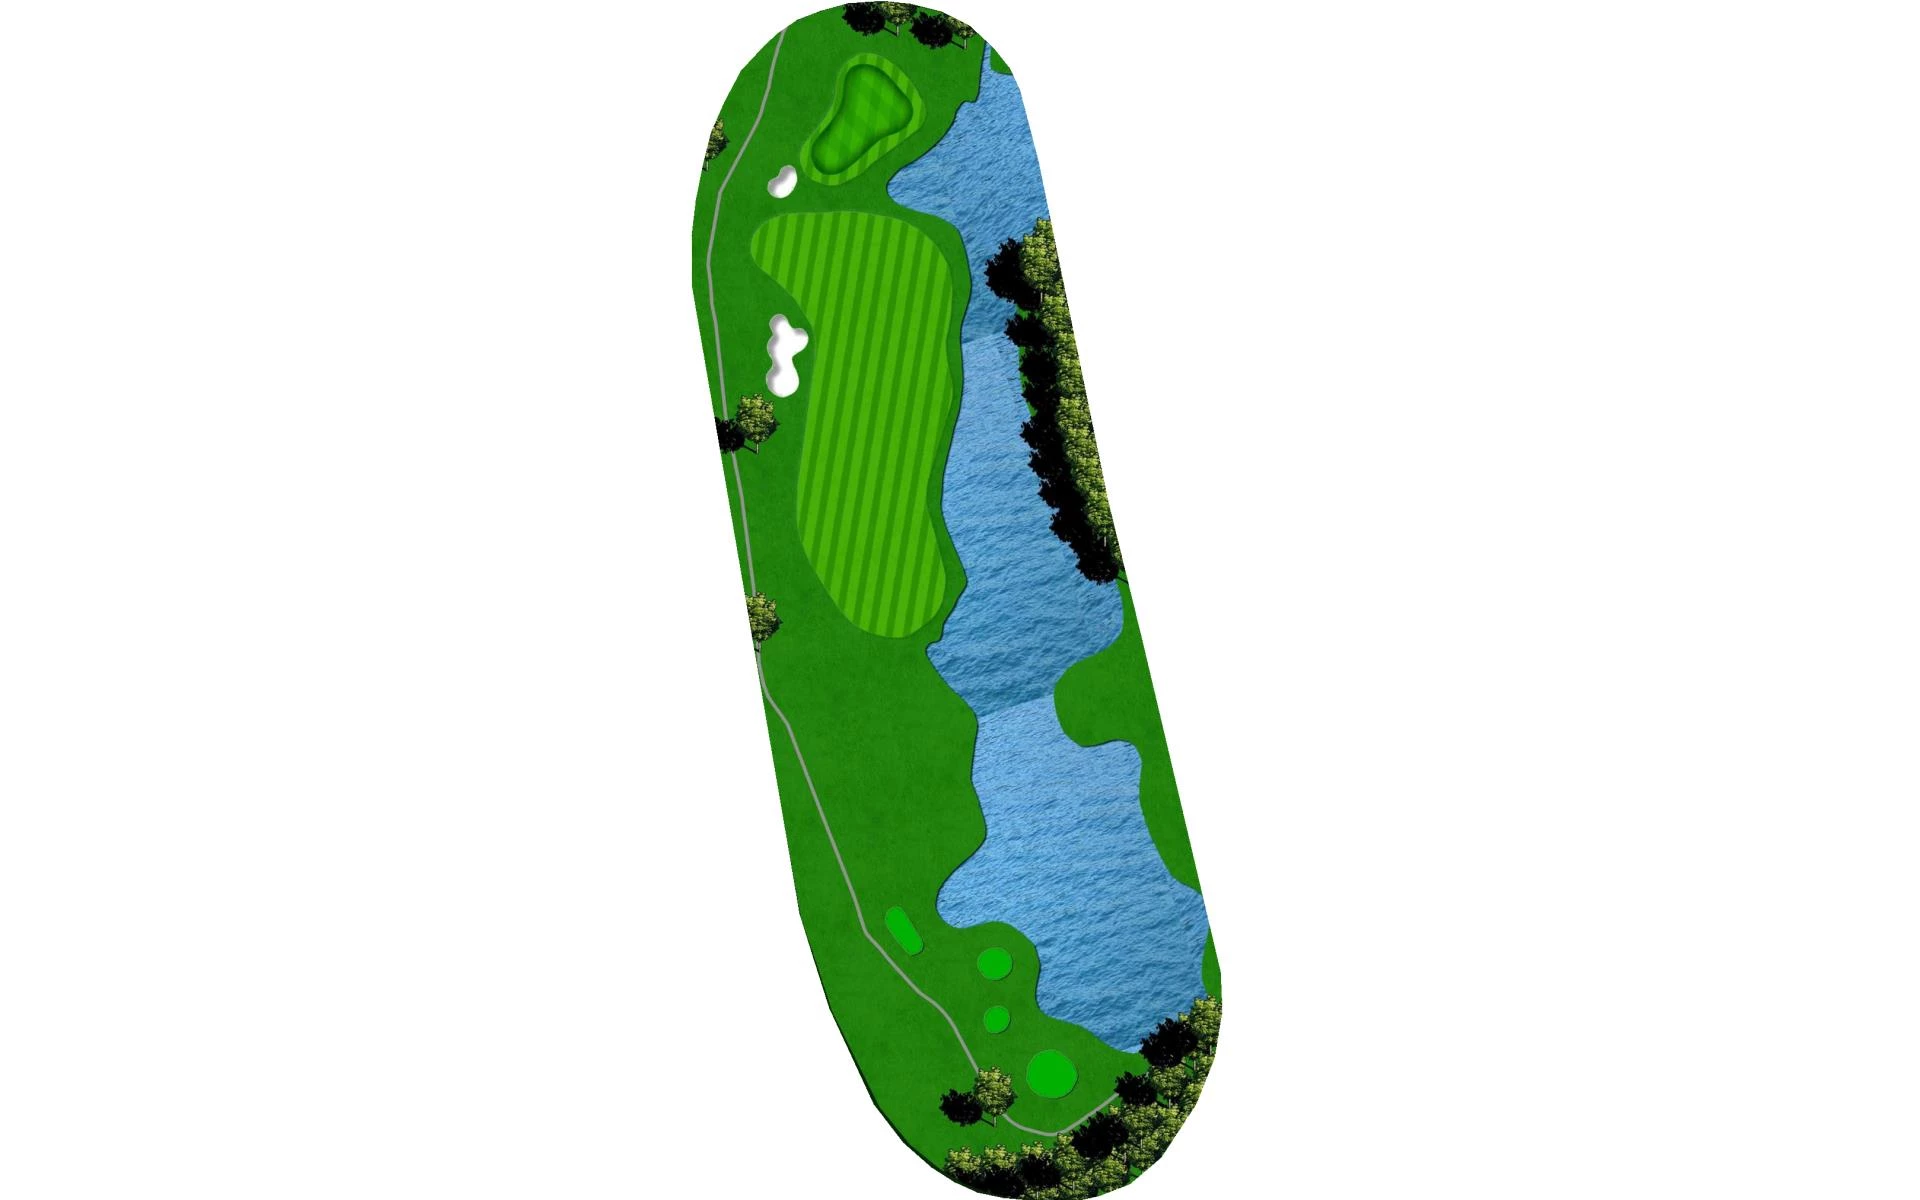
# 5 / Hole #5
Par: 4
Yardage by Tee:
Blue 368
Gold 393
Red 302
White 351
Pro Tips
This slight dog leg right around the bunker is a risk reward hole. The long hitter can try to clear the bunker to have a short wedge in or you can keep your tee shot just left of the bunker to play it safer. This is a very deep green back to front so being Pin High is very important.
# 6 / Hole #6
Par: 5
Yardage by Tee:
Blue 542
Gold 567
Red 388
White 494
Pro Tips
This Par 5 plays Uphill the entire hole. After a drive placed in the fairway you need to hit enough club to get you around the 100 yard marker to ensure an easier shot into the green. This 2 teir green slopes severely from back to front so it is a must to be on the correct teir and below the hole.
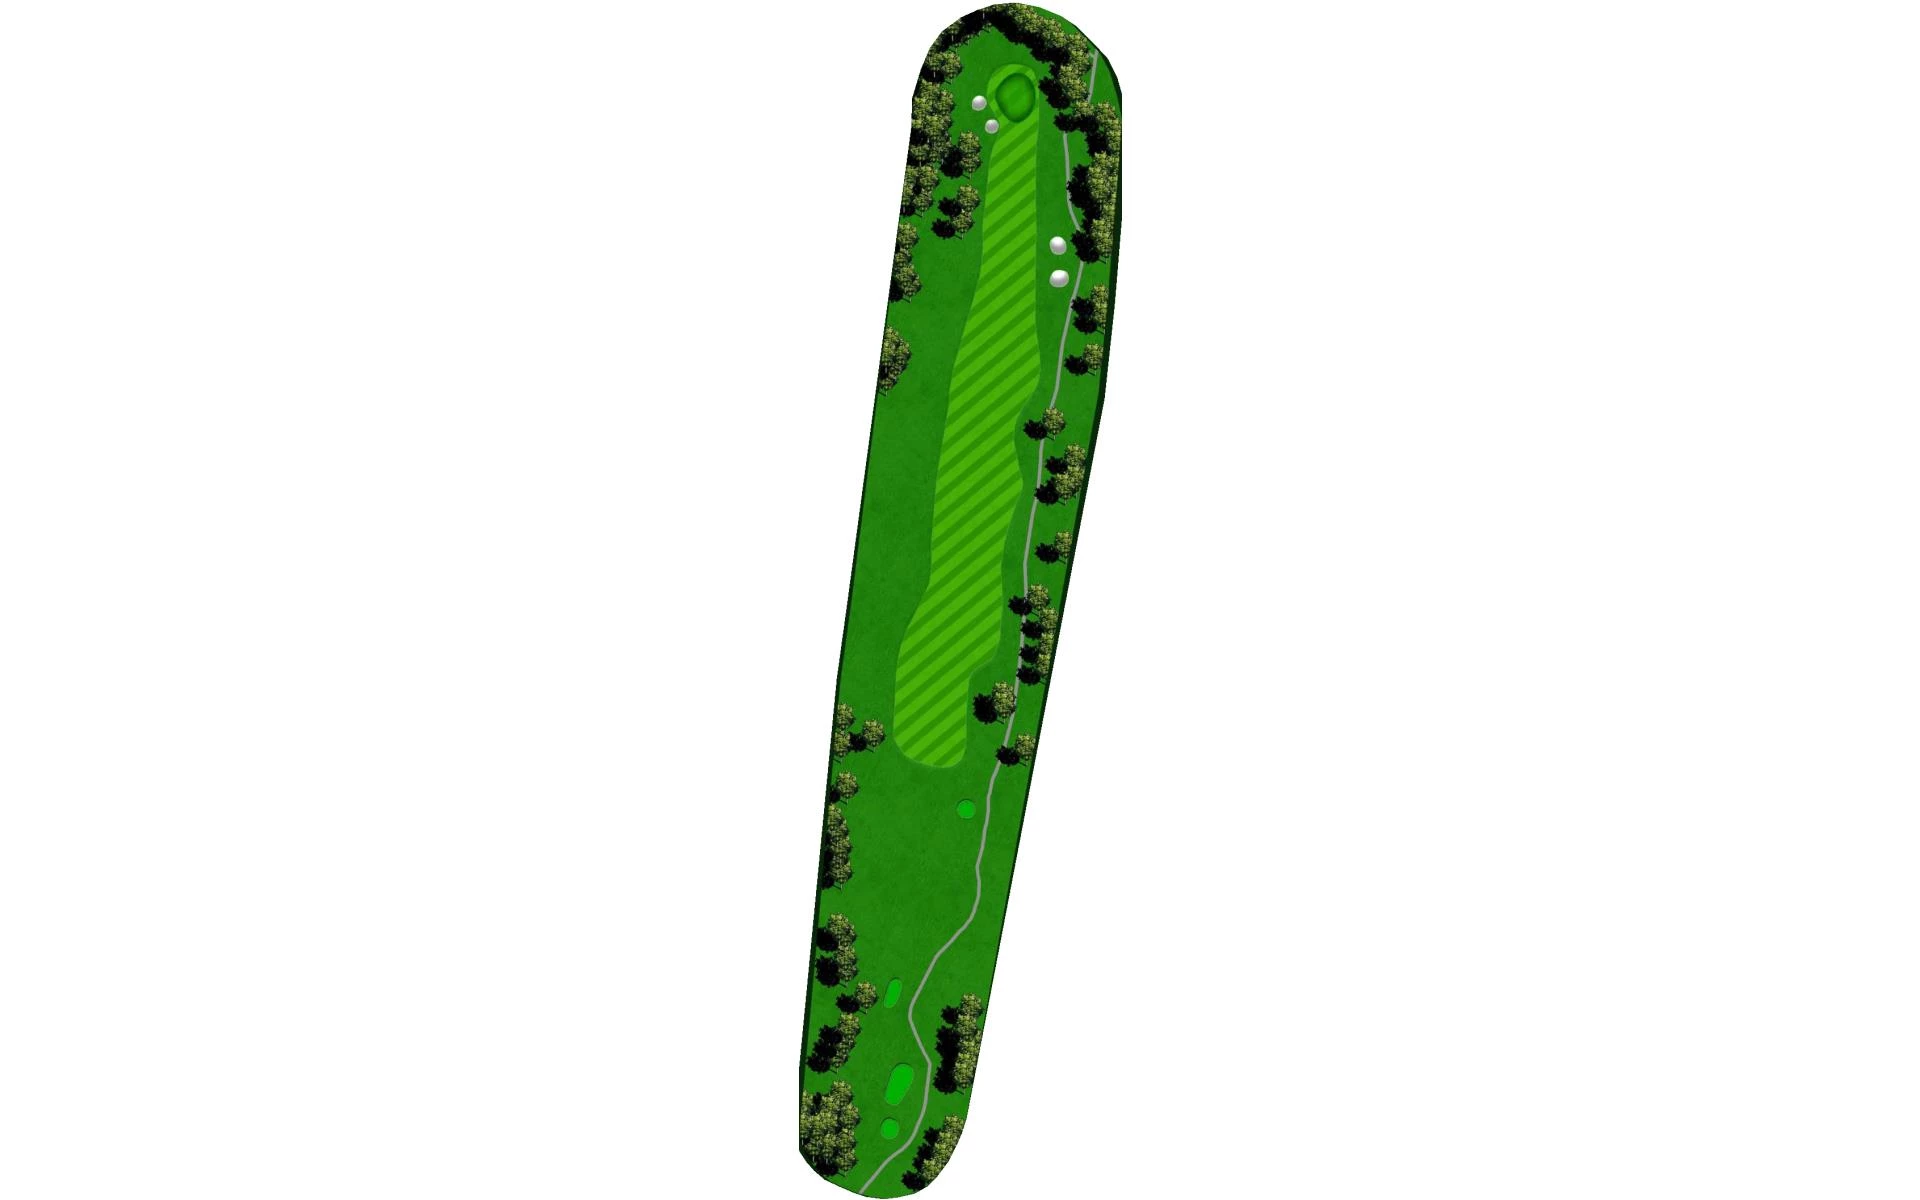
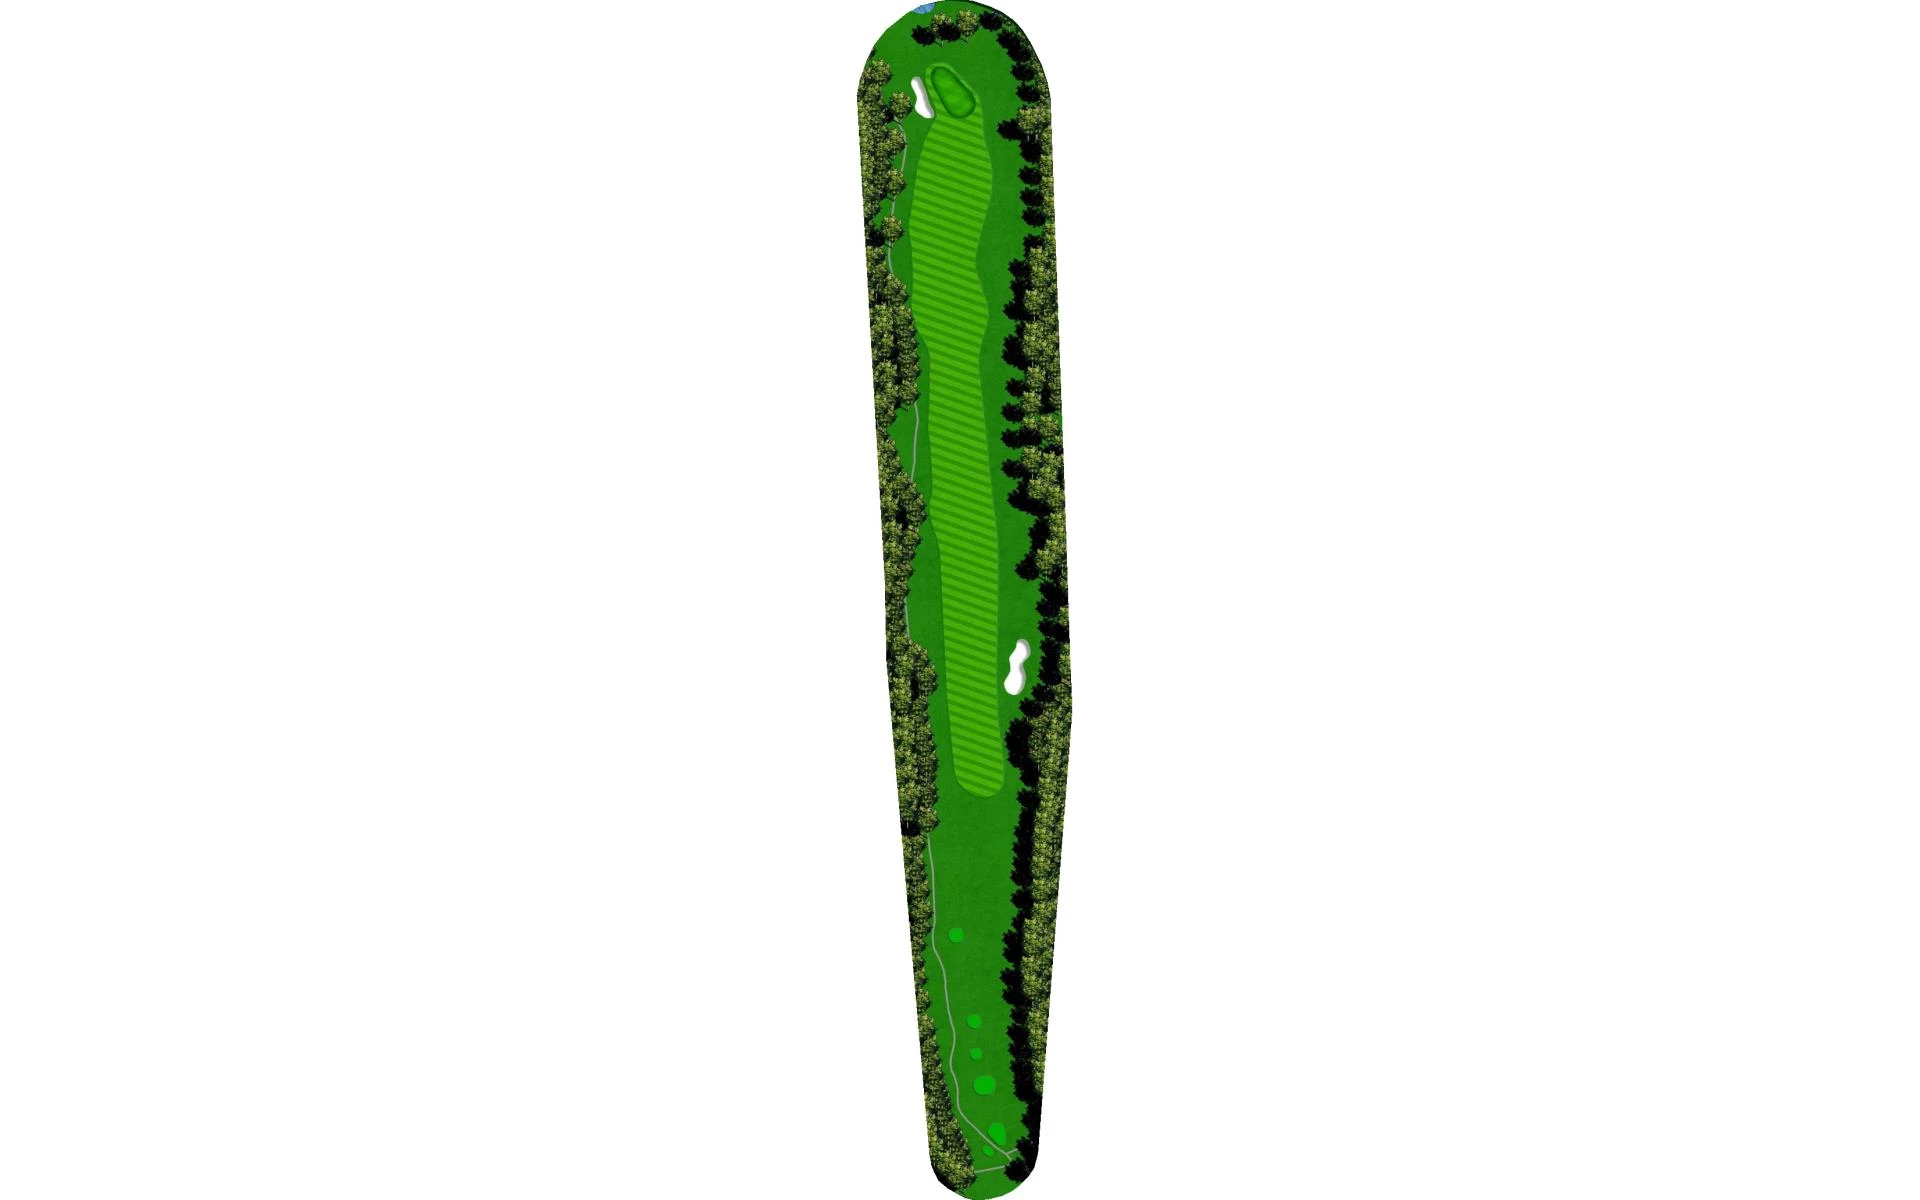
# 7 / Hole #7
Par: 4
Yardage by Tee:
Blue 405
Gold 405
Red 275
White 353
Pro Tips
This Straight away par 4 plays slightly uphill on the tee shot. A Drive on the right side of the fairway is optimal to have the best angle into the Green. The green is relatively flat but is a very deep green front to back.

# 8 / Hole #8
Par: 3
Yardage by Tee:
Blue 152
Gold 173
Red 122
White 130
Pro Tips
This uphill Par 3 has different teeboxes to give different angles into the green. The Green slopes back to front so make sure to hit a club that will leave you below the hole.
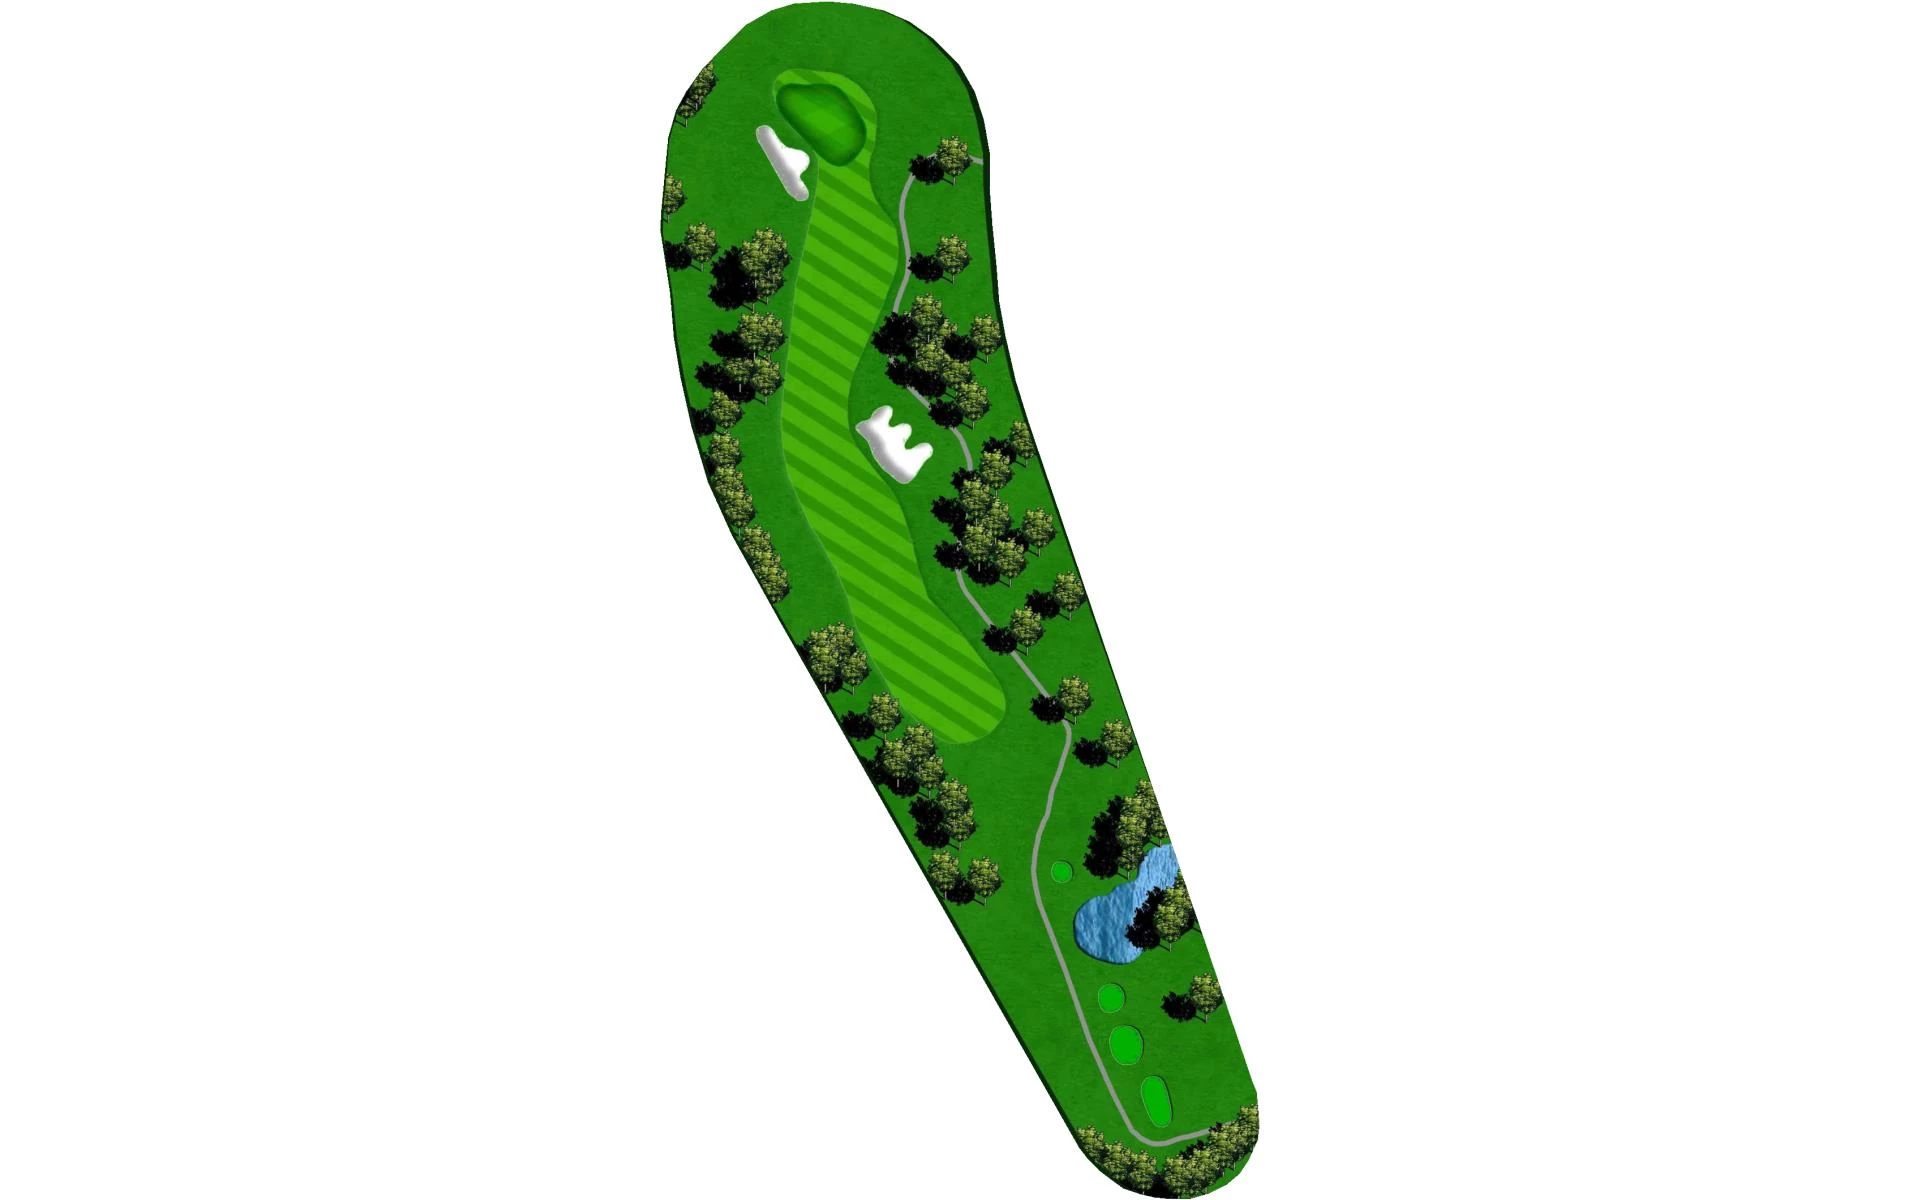
# 9 / Hole #9
Par: 4
Yardage by Tee:
Blue 414
Gold 433
Red 355
White 360
Pro Tips
This dogleg left long par 4 starts the toughest 3 hole strech on the golf course. Longer hitters can try to challenge the Fairway Bunker but if you do not have the length then a perfect drive is right at the 150 yard marker. The second shot needs to favor the right side of the green as there are bunkers protecting the green.
# 10 / Hole #10
Par: 4
Yardage by Tee:
Blue 389
Gold 418
Red 292
White 346
Pro Tips
This long Par 4 requires a precise tee shot to ensure you miss the Hazard on the Left and hazard on the right. Your second shot is just as demanding as this very long green is protected by Bunkers on the left and a hazard on the right and behind.

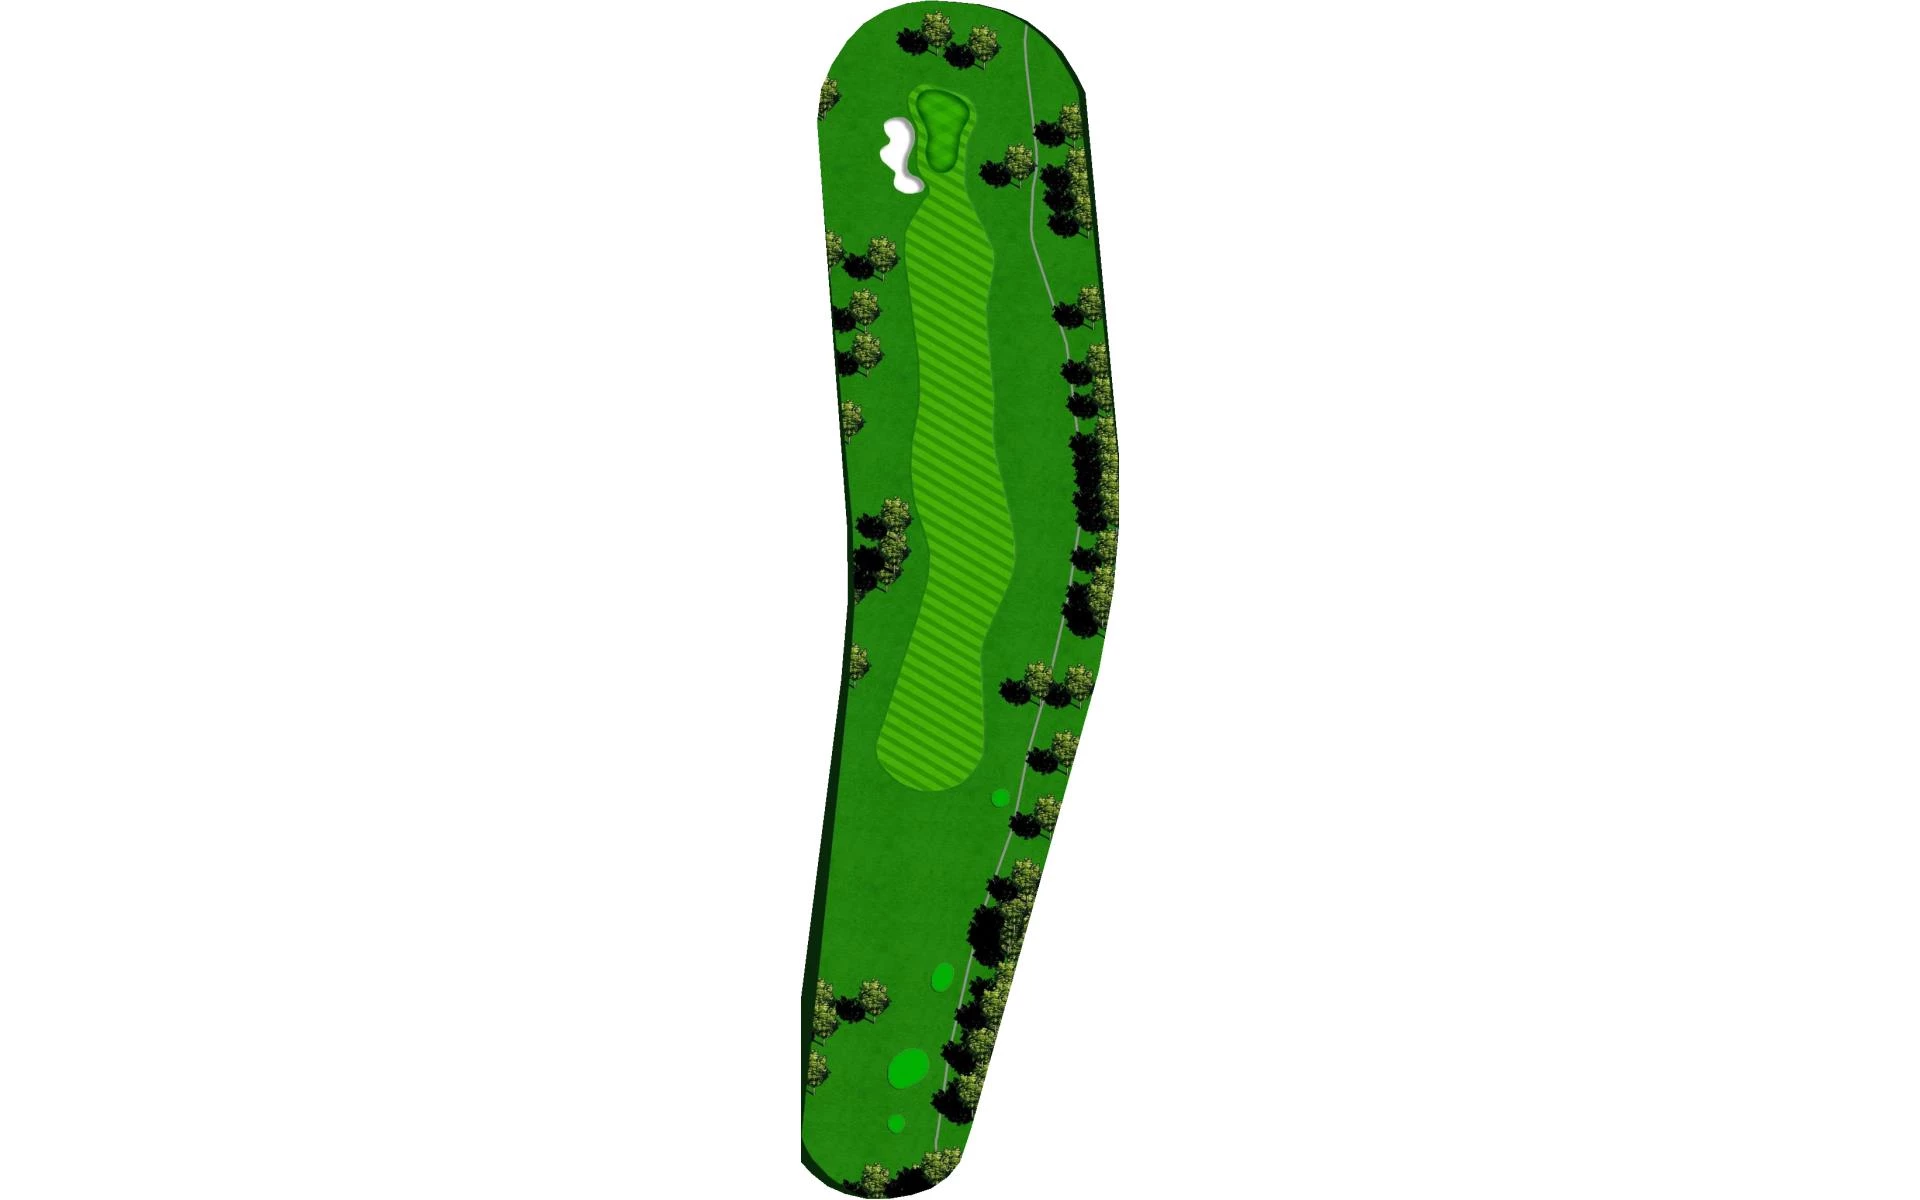
# 11 / Hole #11
Par: 4
Yardage by Tee:
Blue 369
Gold 387
Red 266
White 313
Pro Tips
This dog leg right requires a drive that lands in the left center of the fairway. The second shot plays longer then the yardage as it plays slightly uphill. This ungulating green is protected by a large bunker.

# 12 / Hole #12
Par: 3
Yardage by Tee:
Blue 152
Gold 172
Red 127
White 136
Pro Tips
This uphill Par 3 requires a tee shot that is Pin High as this is a very long green. There is a bail out area to the right but the left side of the green is protected by bunkers. Makes sure to take 1 more club to get up the hill.
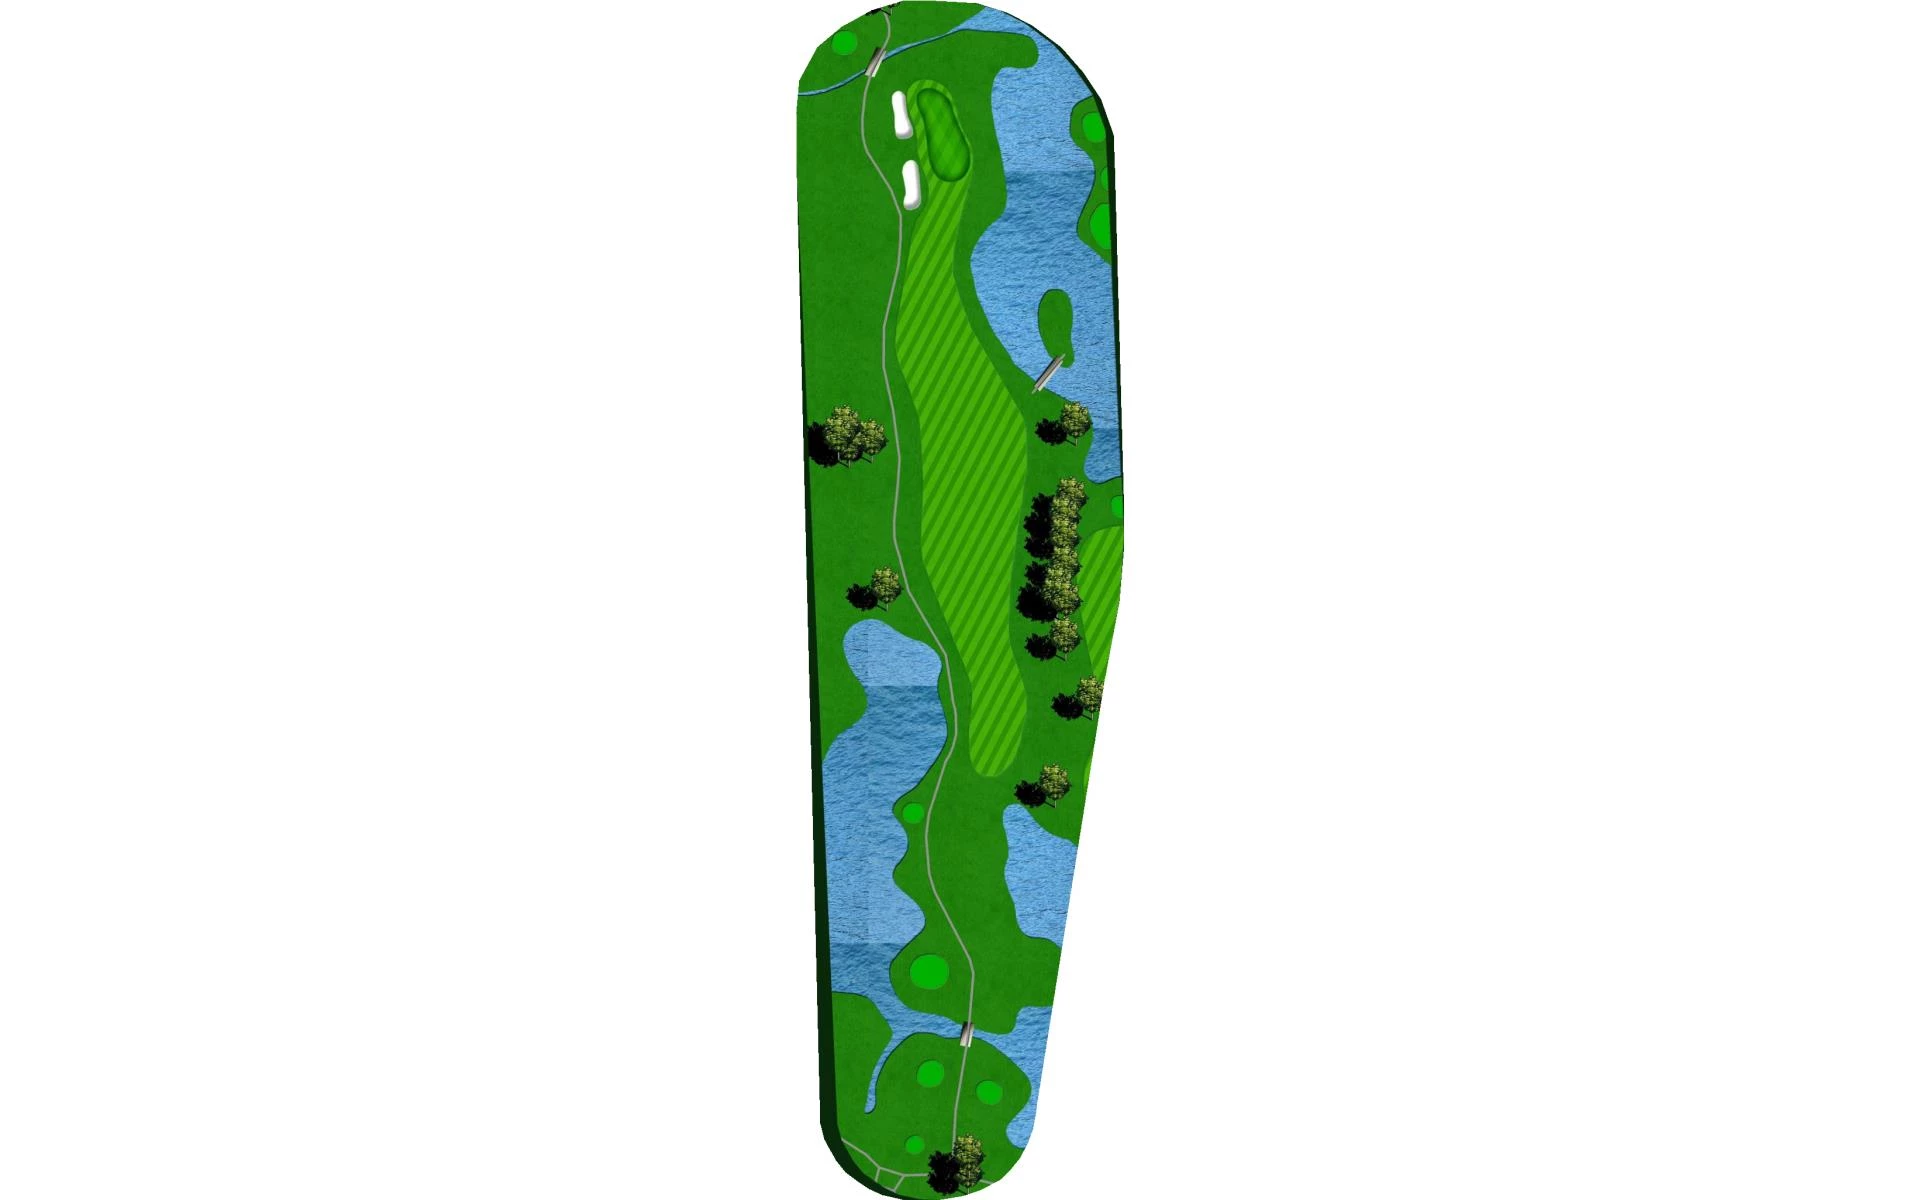
# 13 / Hole #13 / Signature Hole
Par: 5
Yardage by Tee:
Blue 540
Gold 567
Red 457
White 523
Pro Tips
This Tee Shot is one of the highest points in Denton County. After hitting your tee shot, longer players can have a go at this green in two. The perfect layyup wound be more on the right side of the fairway to ensure a great angle into the green.
# 14 / Hole #14
Par: 4
Yardage by Tee:
Blue 306
Gold 316
Red 256
White 285
Pro Tips
The ultimate risk-reward par 4. Longer players can reach the green with a tee shot that lands just short and hops on. However there is Bunkers running down the left side of the hole and hazard running down the right. With whatever decision you go with make sure to hit your second shot on the correct side of the green as this is a very wide but shallow green.
# 15 / Hole #15
Par: 5
Yardage by Tee:
Blue 474
Gold 533
Red 405
White 451
Pro Tips
This very short Par 5 is a slight dog leg right. A perfect tee shot will be just left of the Bunker to catch the little bit of down slope in the fairway. If you are going for the green in two ensure you have enough club to avoid the bunker that protects the front of the green. If you are laying up, pick the yardage you are most comfortable with and aim down the middle of the fairway. This is a very deep green and being pin high gives you the best chance to make birdie.
# 16 / Hole #16
Par: 4
Yardage by Tee:
Blue 420
Gold 420
Red 293
White 354
Pro Tips
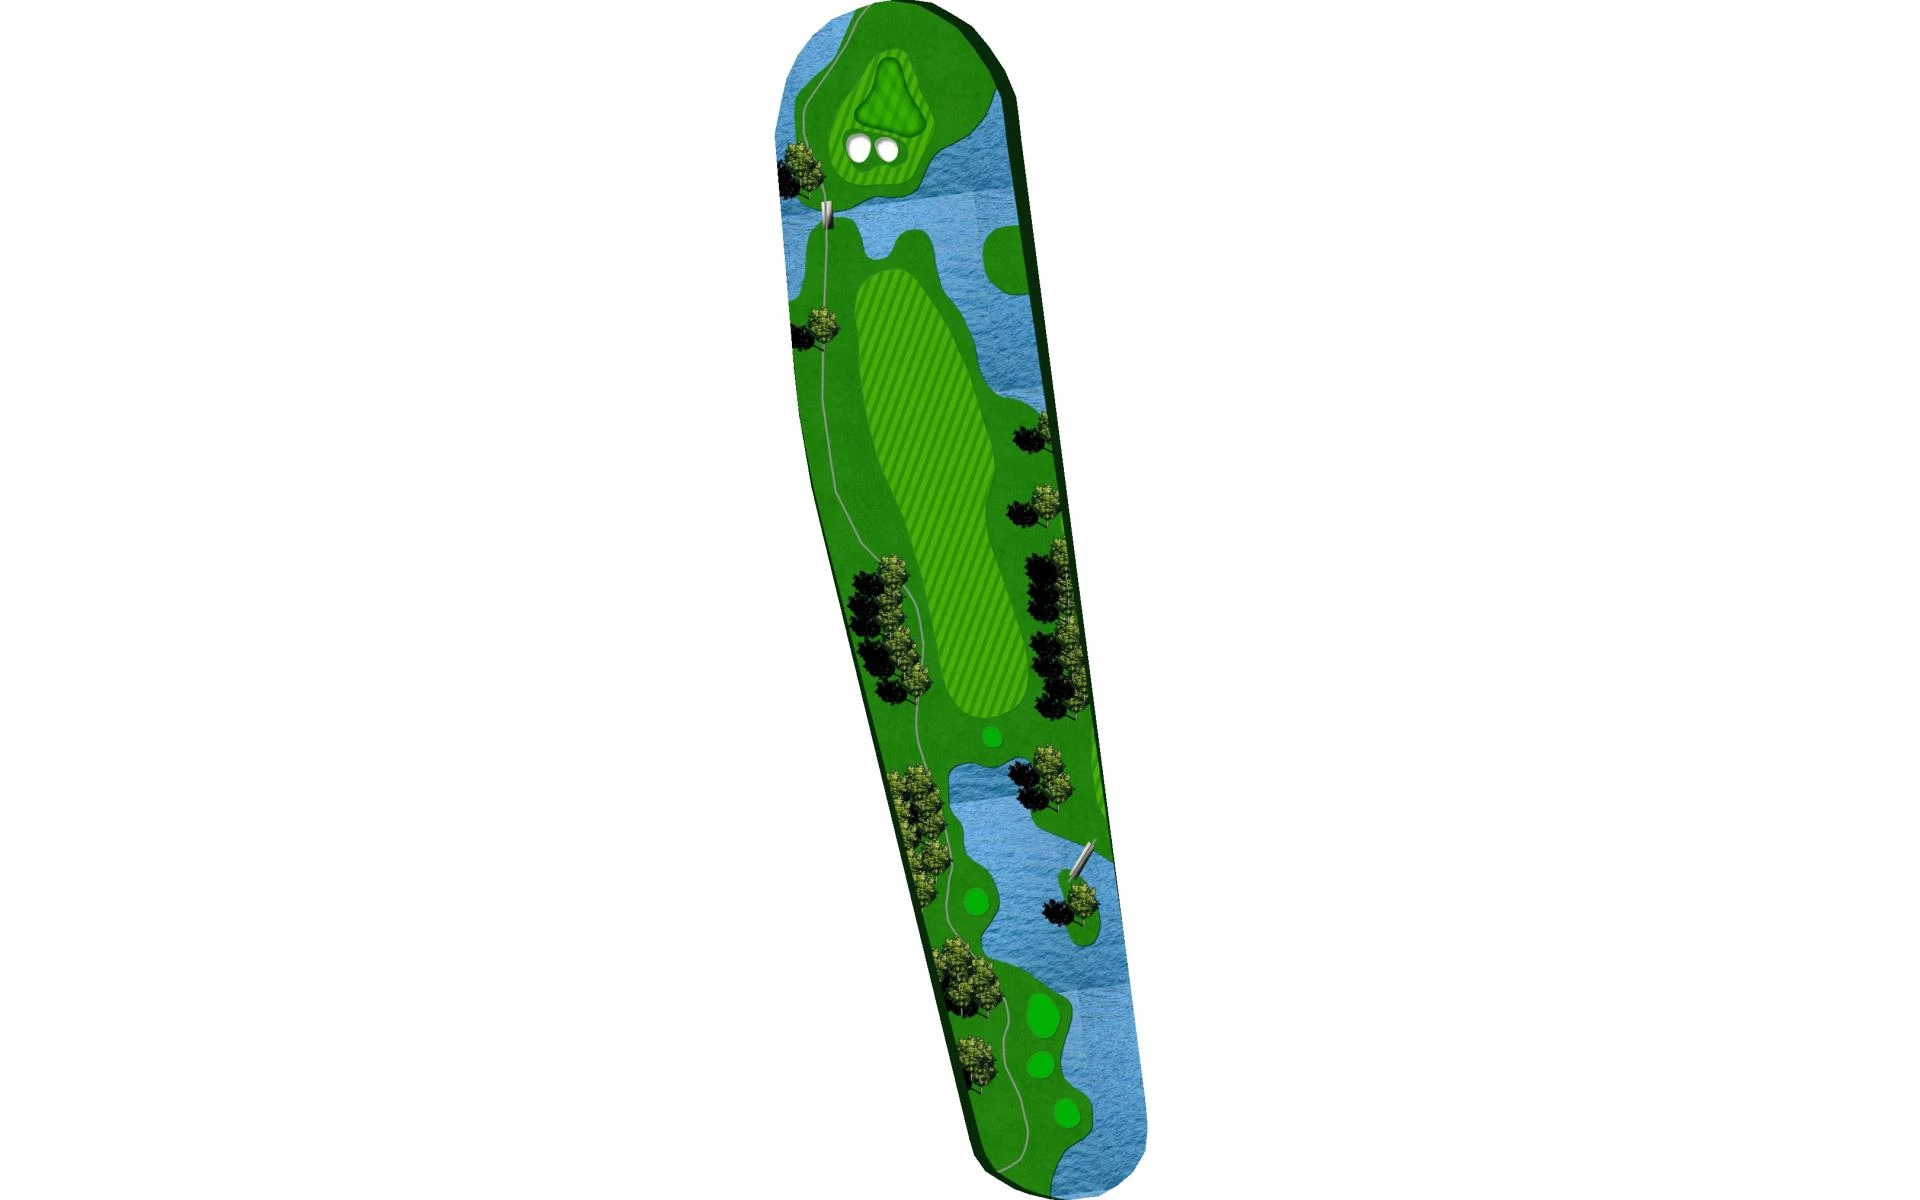
This slight dog leg left requires a precise tee shot that favors the right side of the fairway as the left is protected by trees and a Creek. Most players will have a long Iron in and need to favor the Center Left porton of the green to stay away from the Bunker and Water right of the green. This green as a decent amount of undulation in it so being in the correct section is vital.
# 17 / Hole #17
Par: 3
Yardage by Tee:
Blue 140
Gold 162
Red 123
White 138
Pro Tips
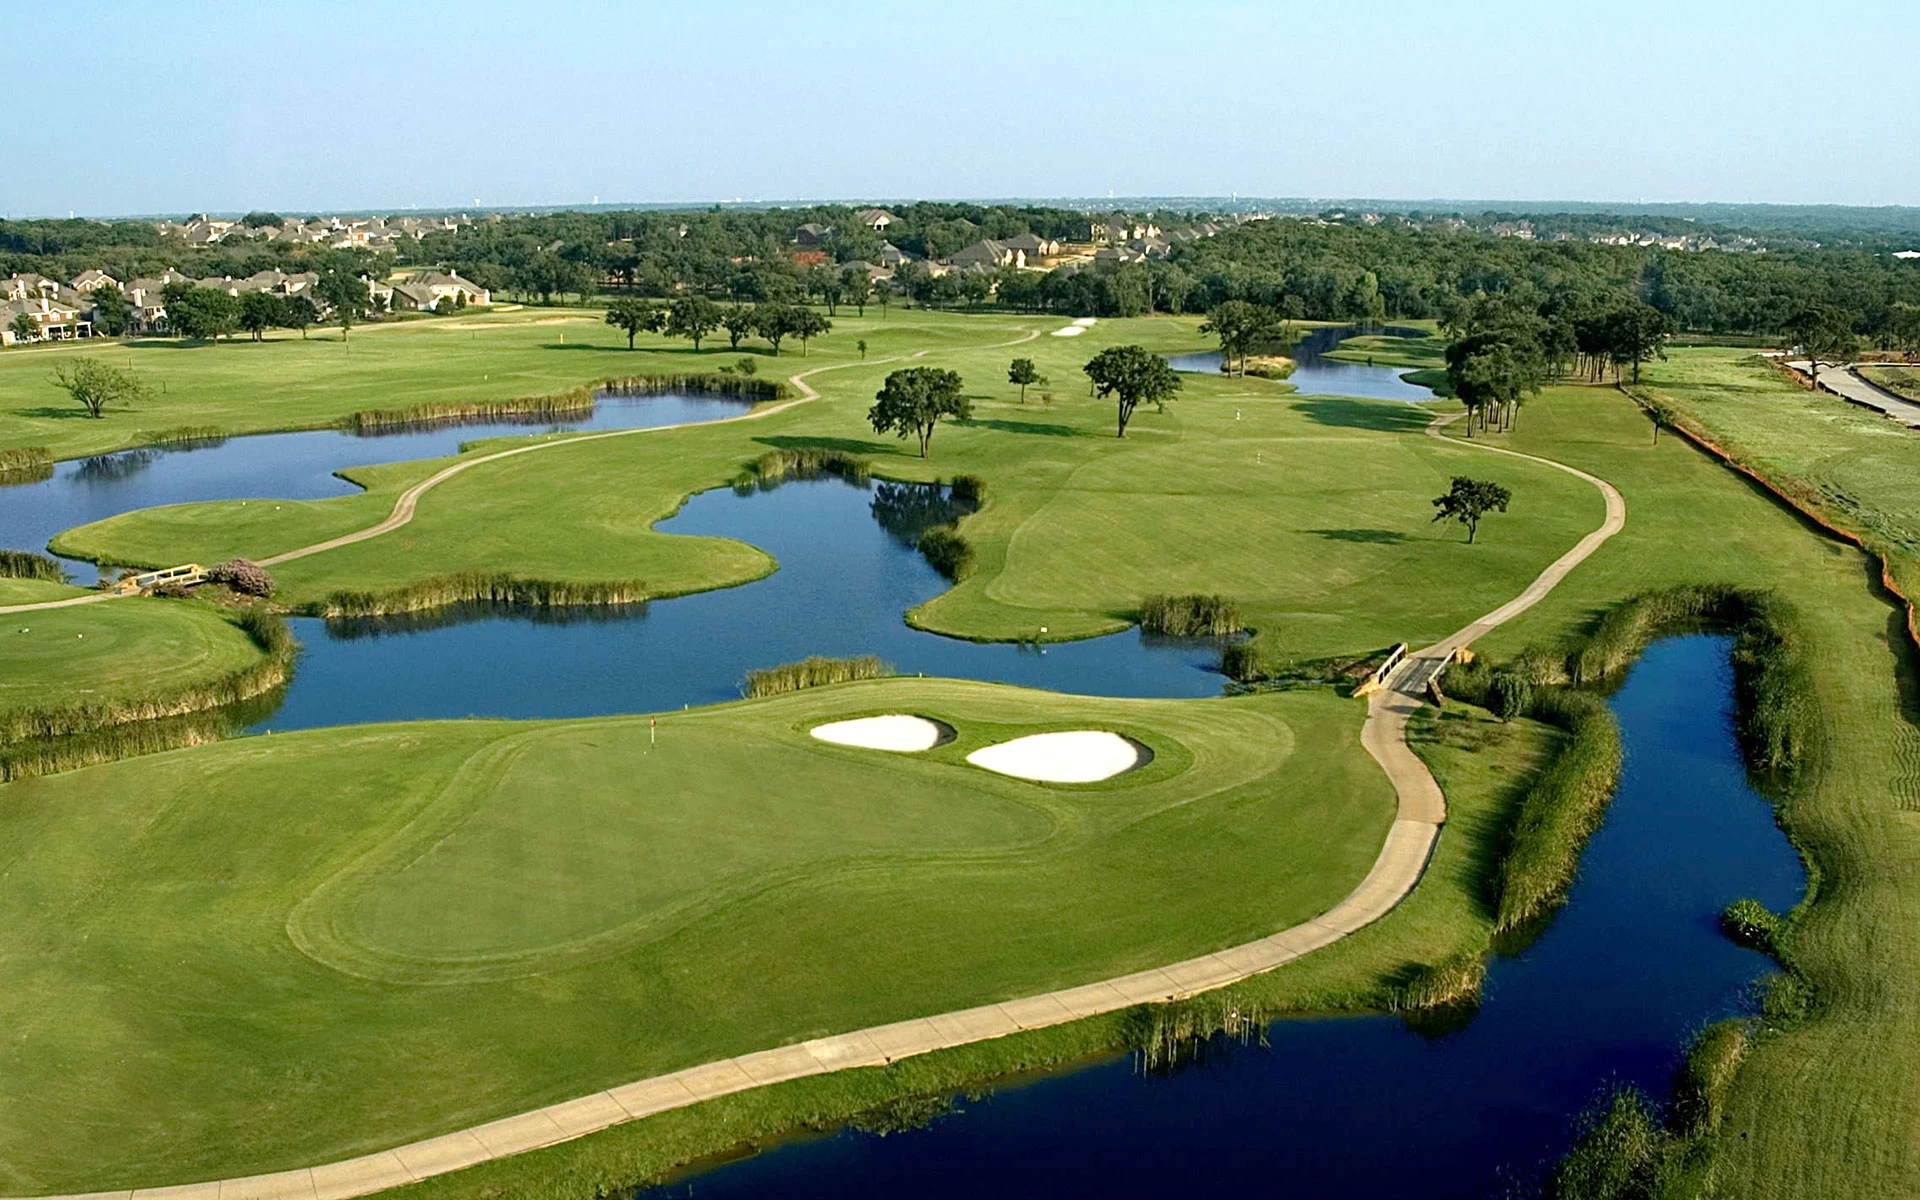
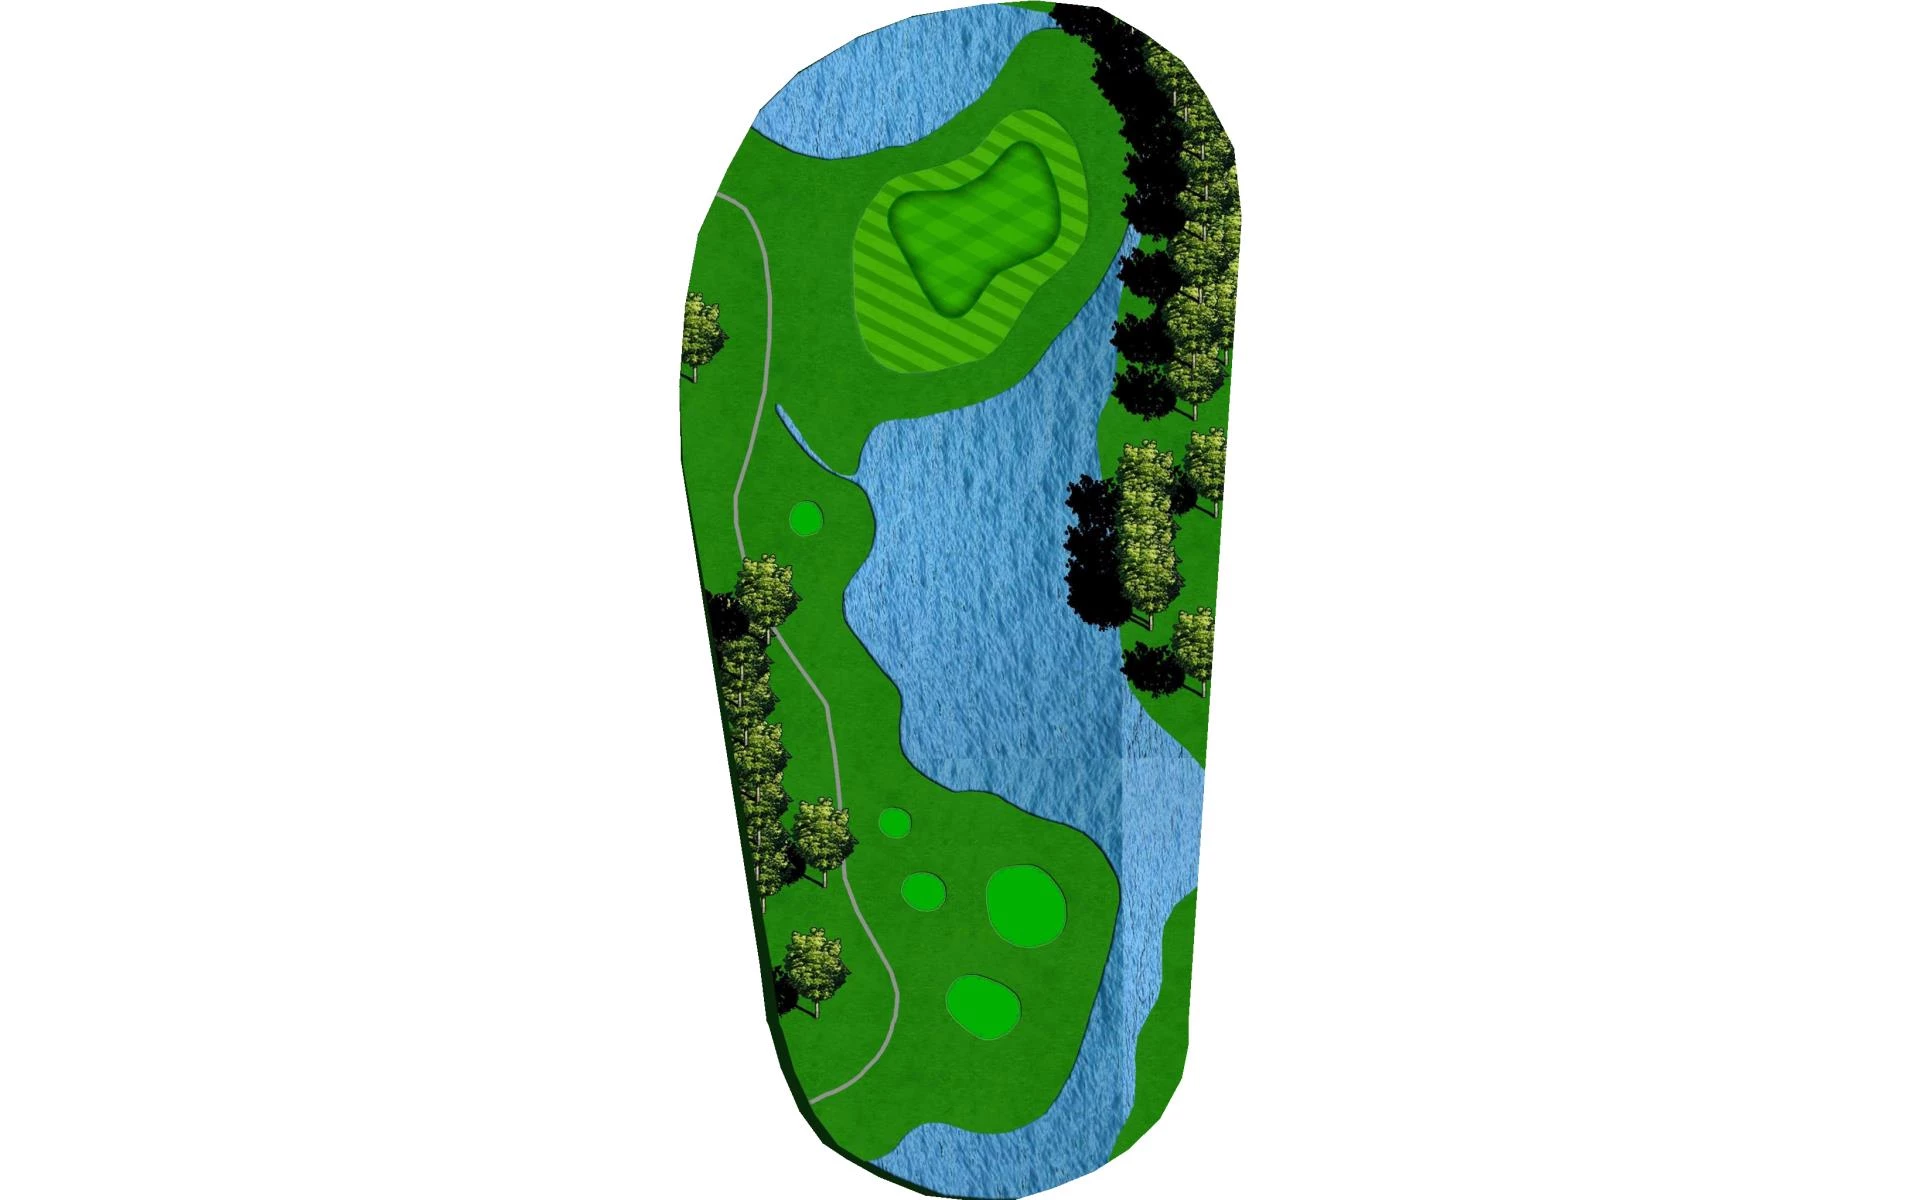
This Beatiful Par three has water hazard on three sides of the green. The green has two levels with the lower being on the left and the upper being on the right. Placement of the tee shot is vital as being on the wrong teir will cause a very long and difficult putt.
# 18 / Hole #18
Par: 4
Yardage by Tee:
Blue 401
Gold 422
Red 266
White 330
Pro Tips
The final hole has hazards by the tee boxes and right of the fairway. The perfect drive is positioned down the left center of the fairway. For your second shot you need to make sure to take the right club as there is hazards left, front, and behind the green as well as bunkers in front. The green has alot of slope in it so being below the hole is vital.