Rolling Green Golf Course
Designer: William Diddle
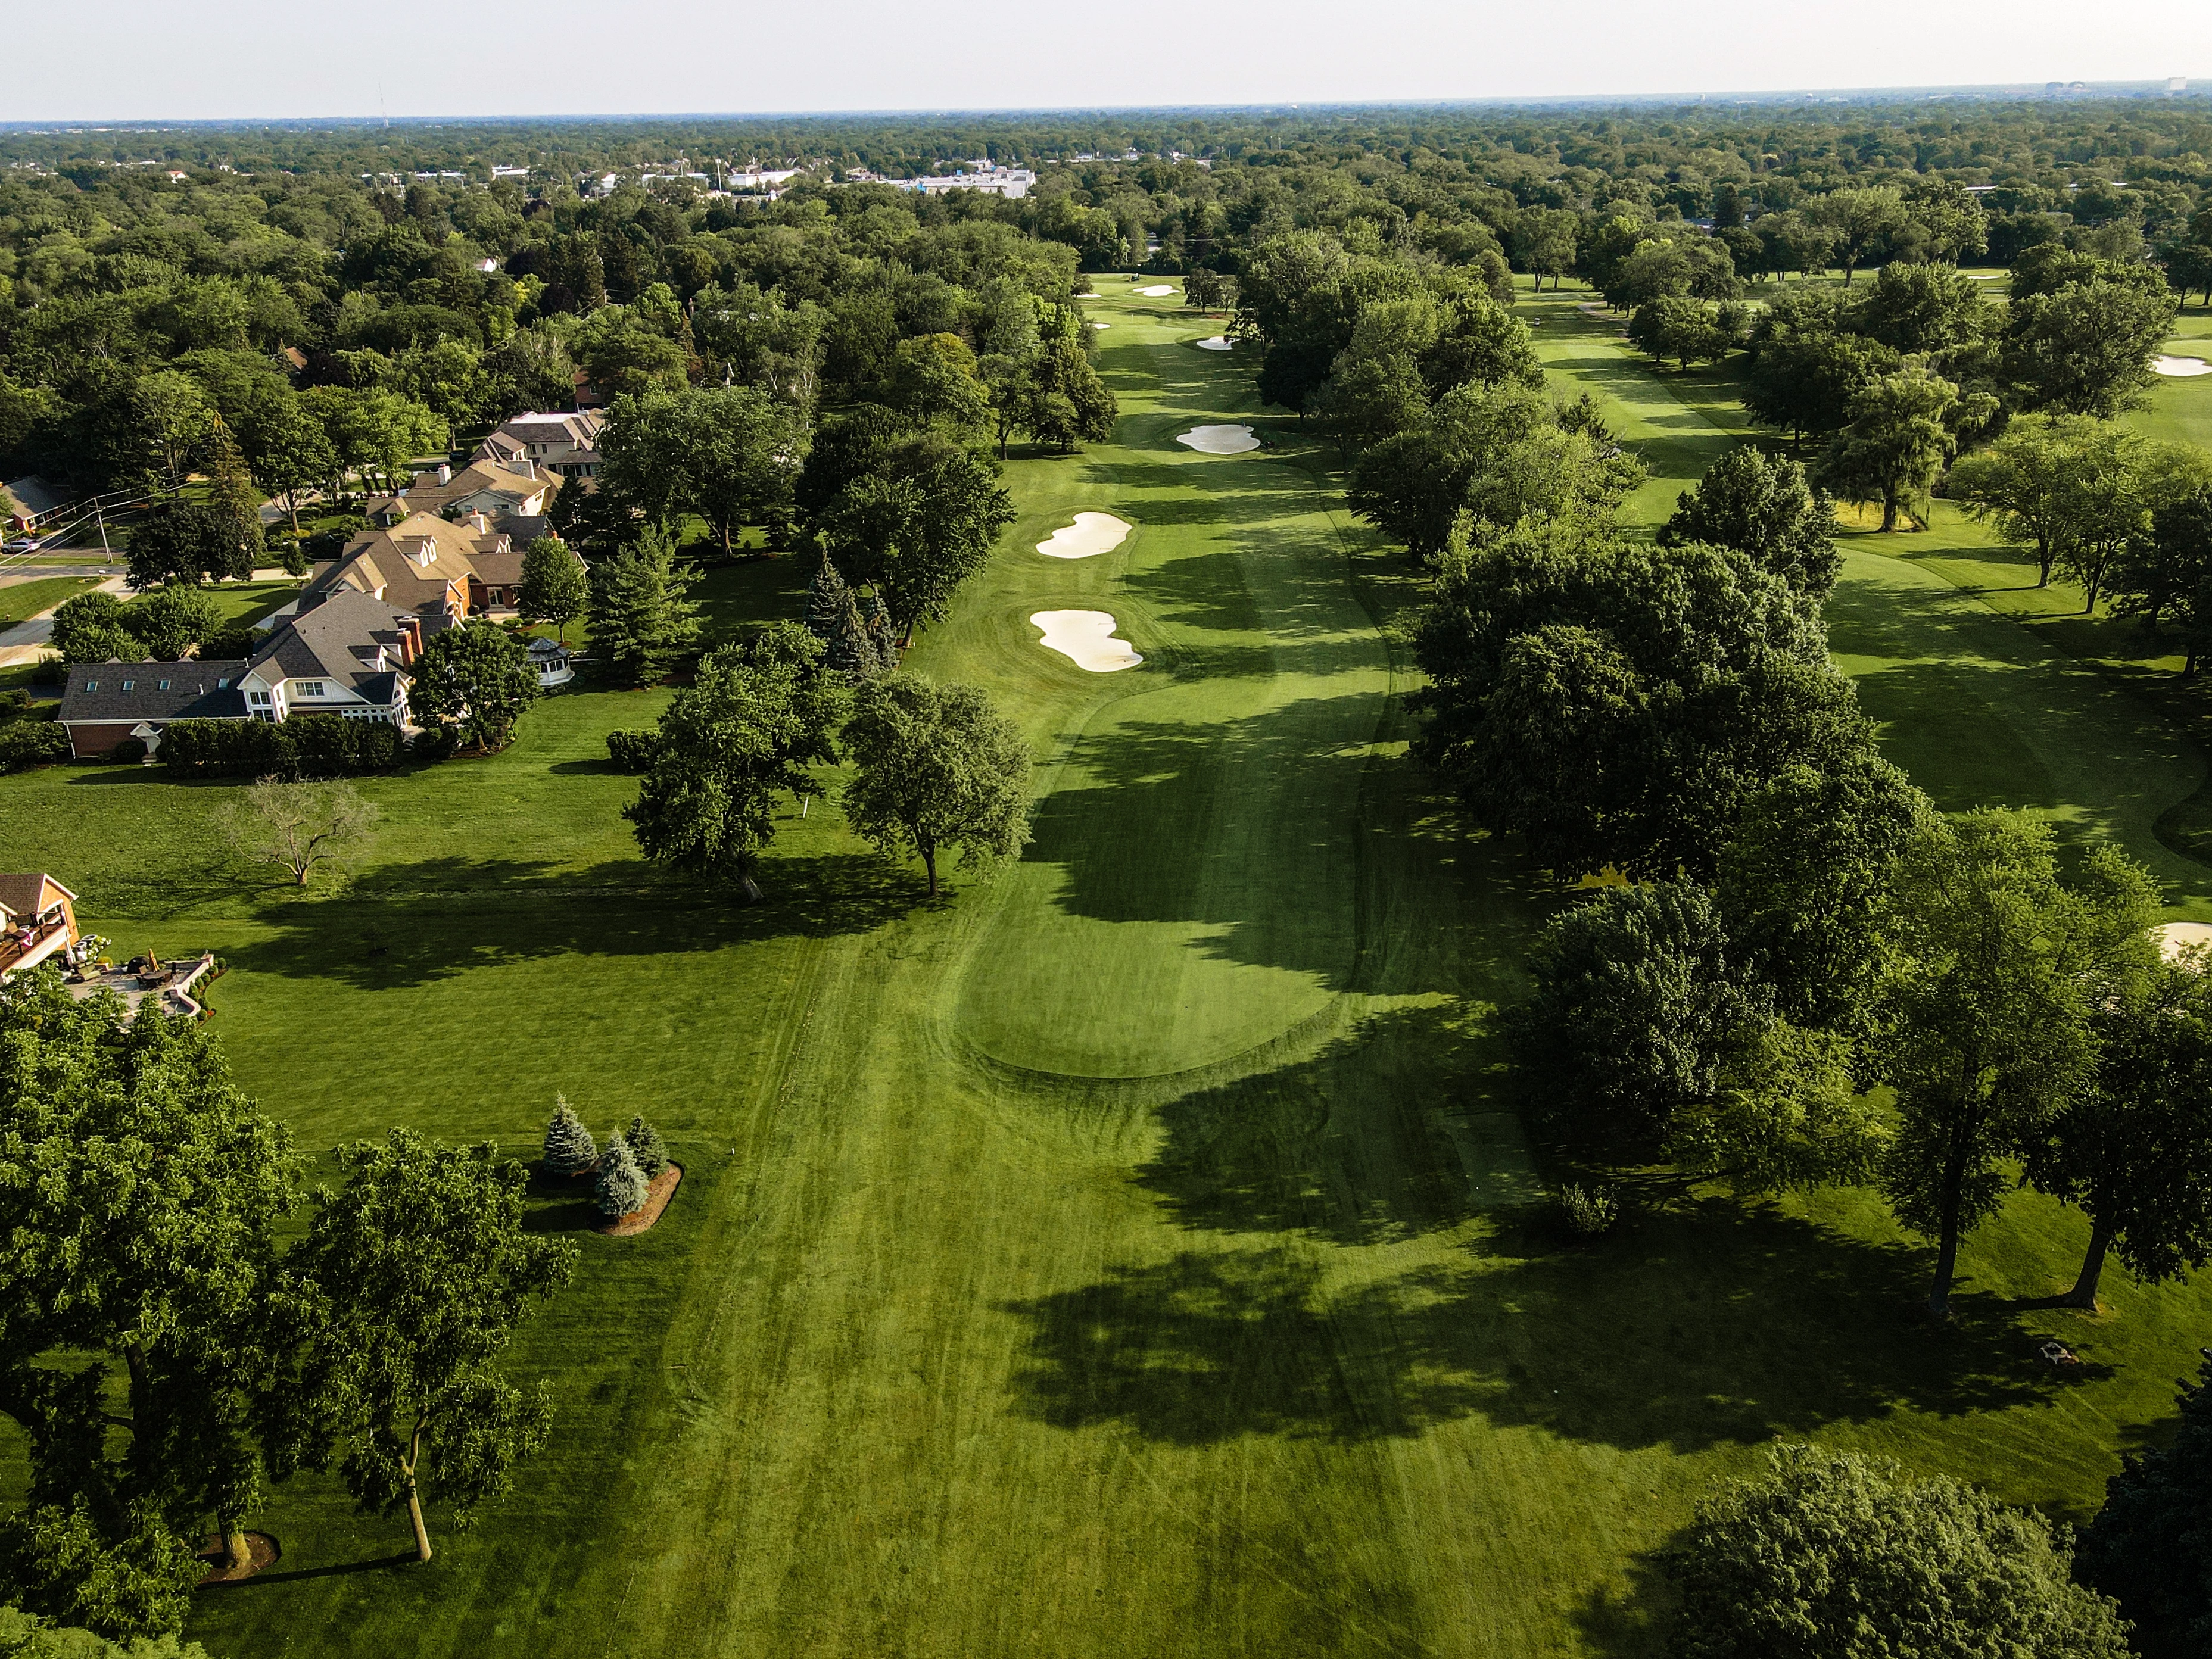
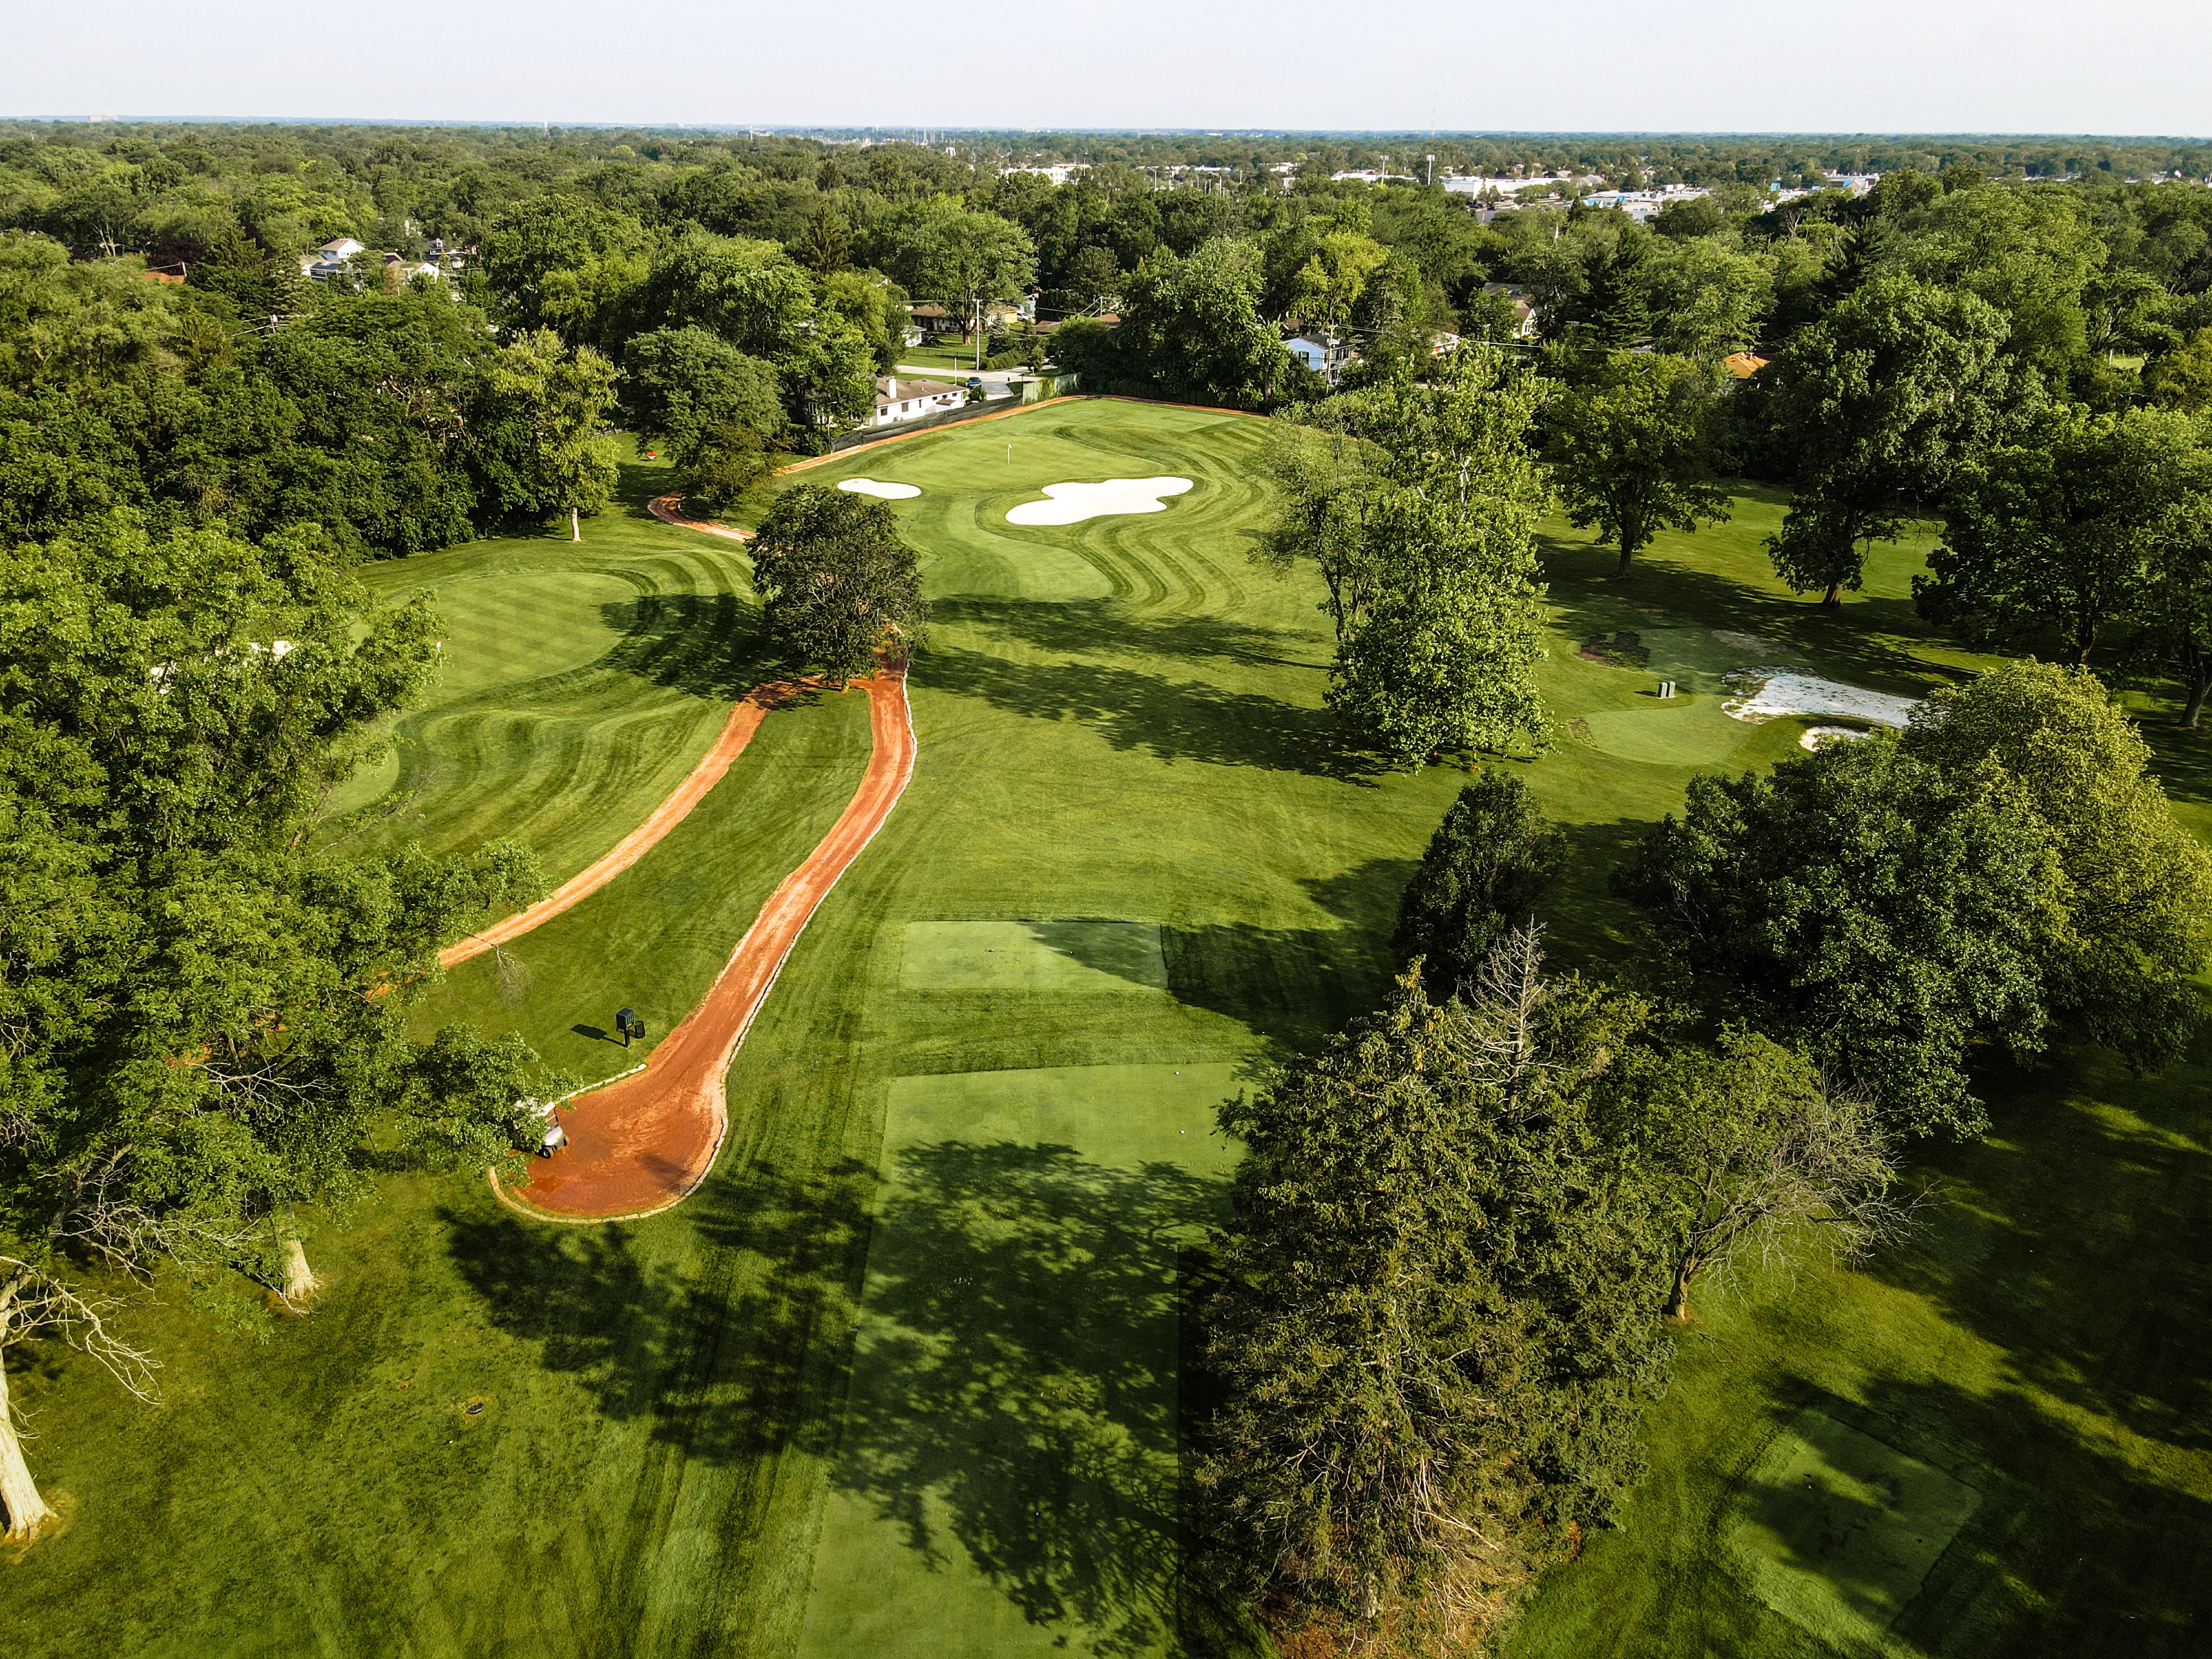
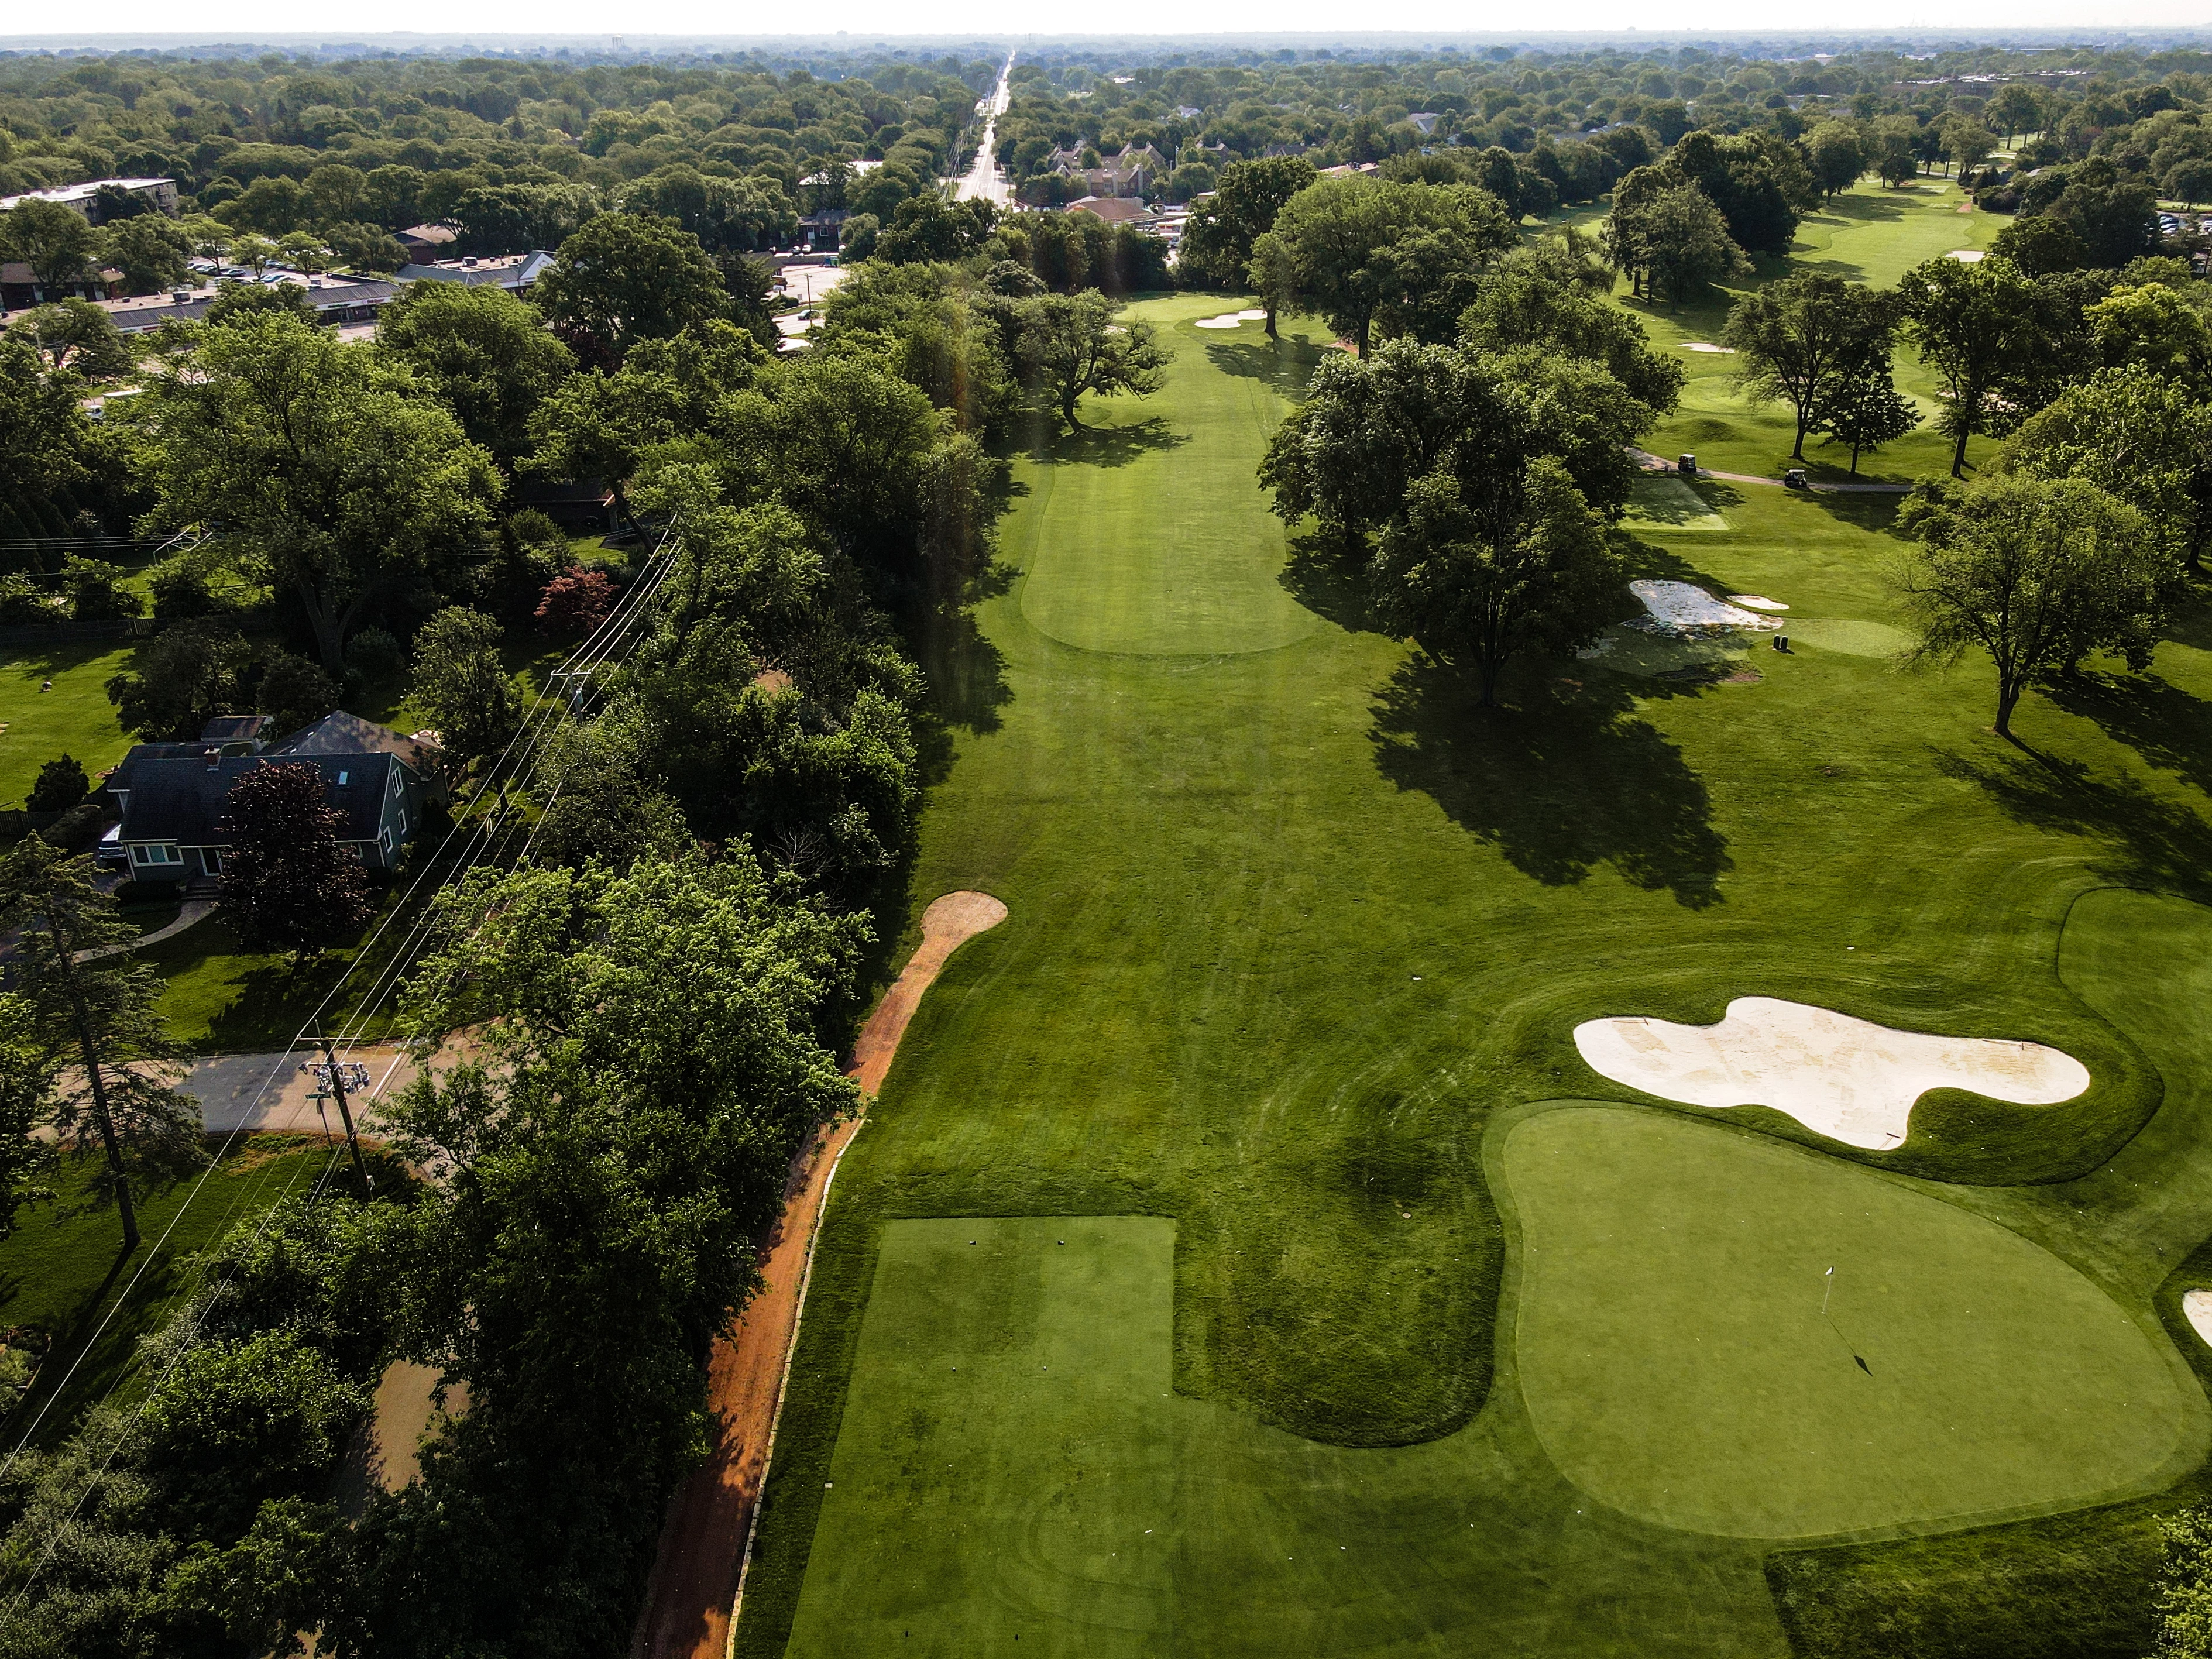
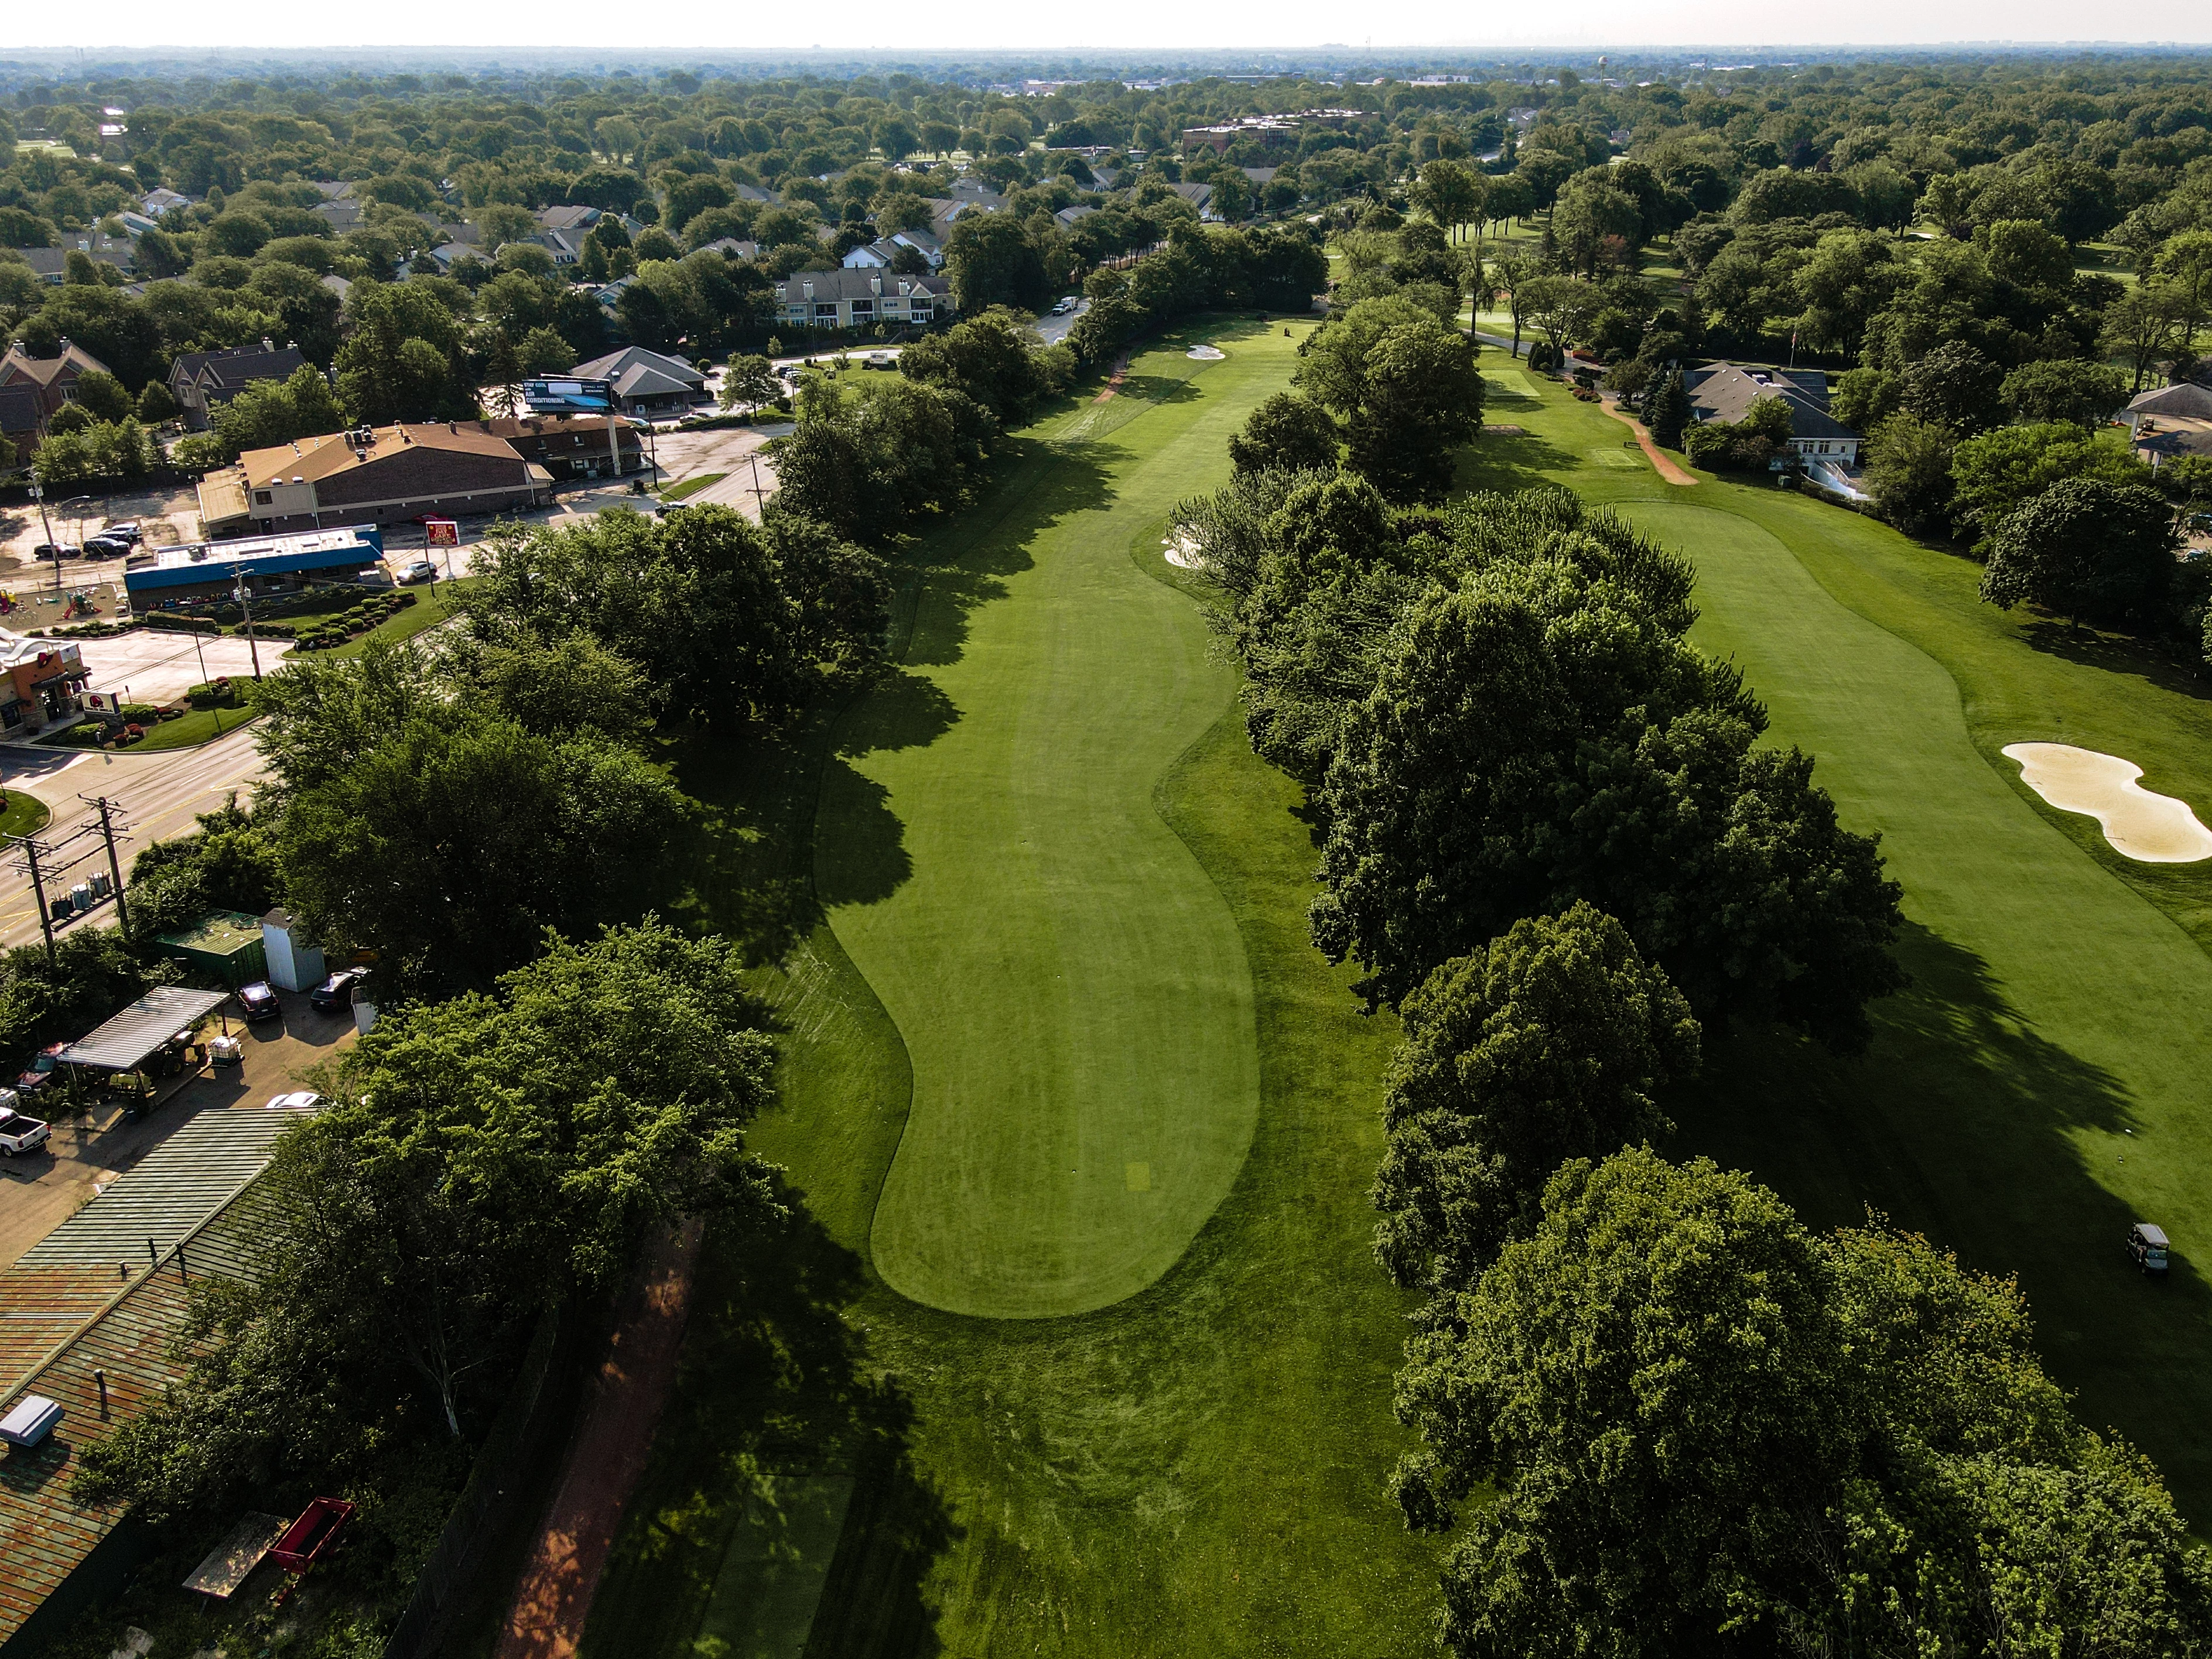
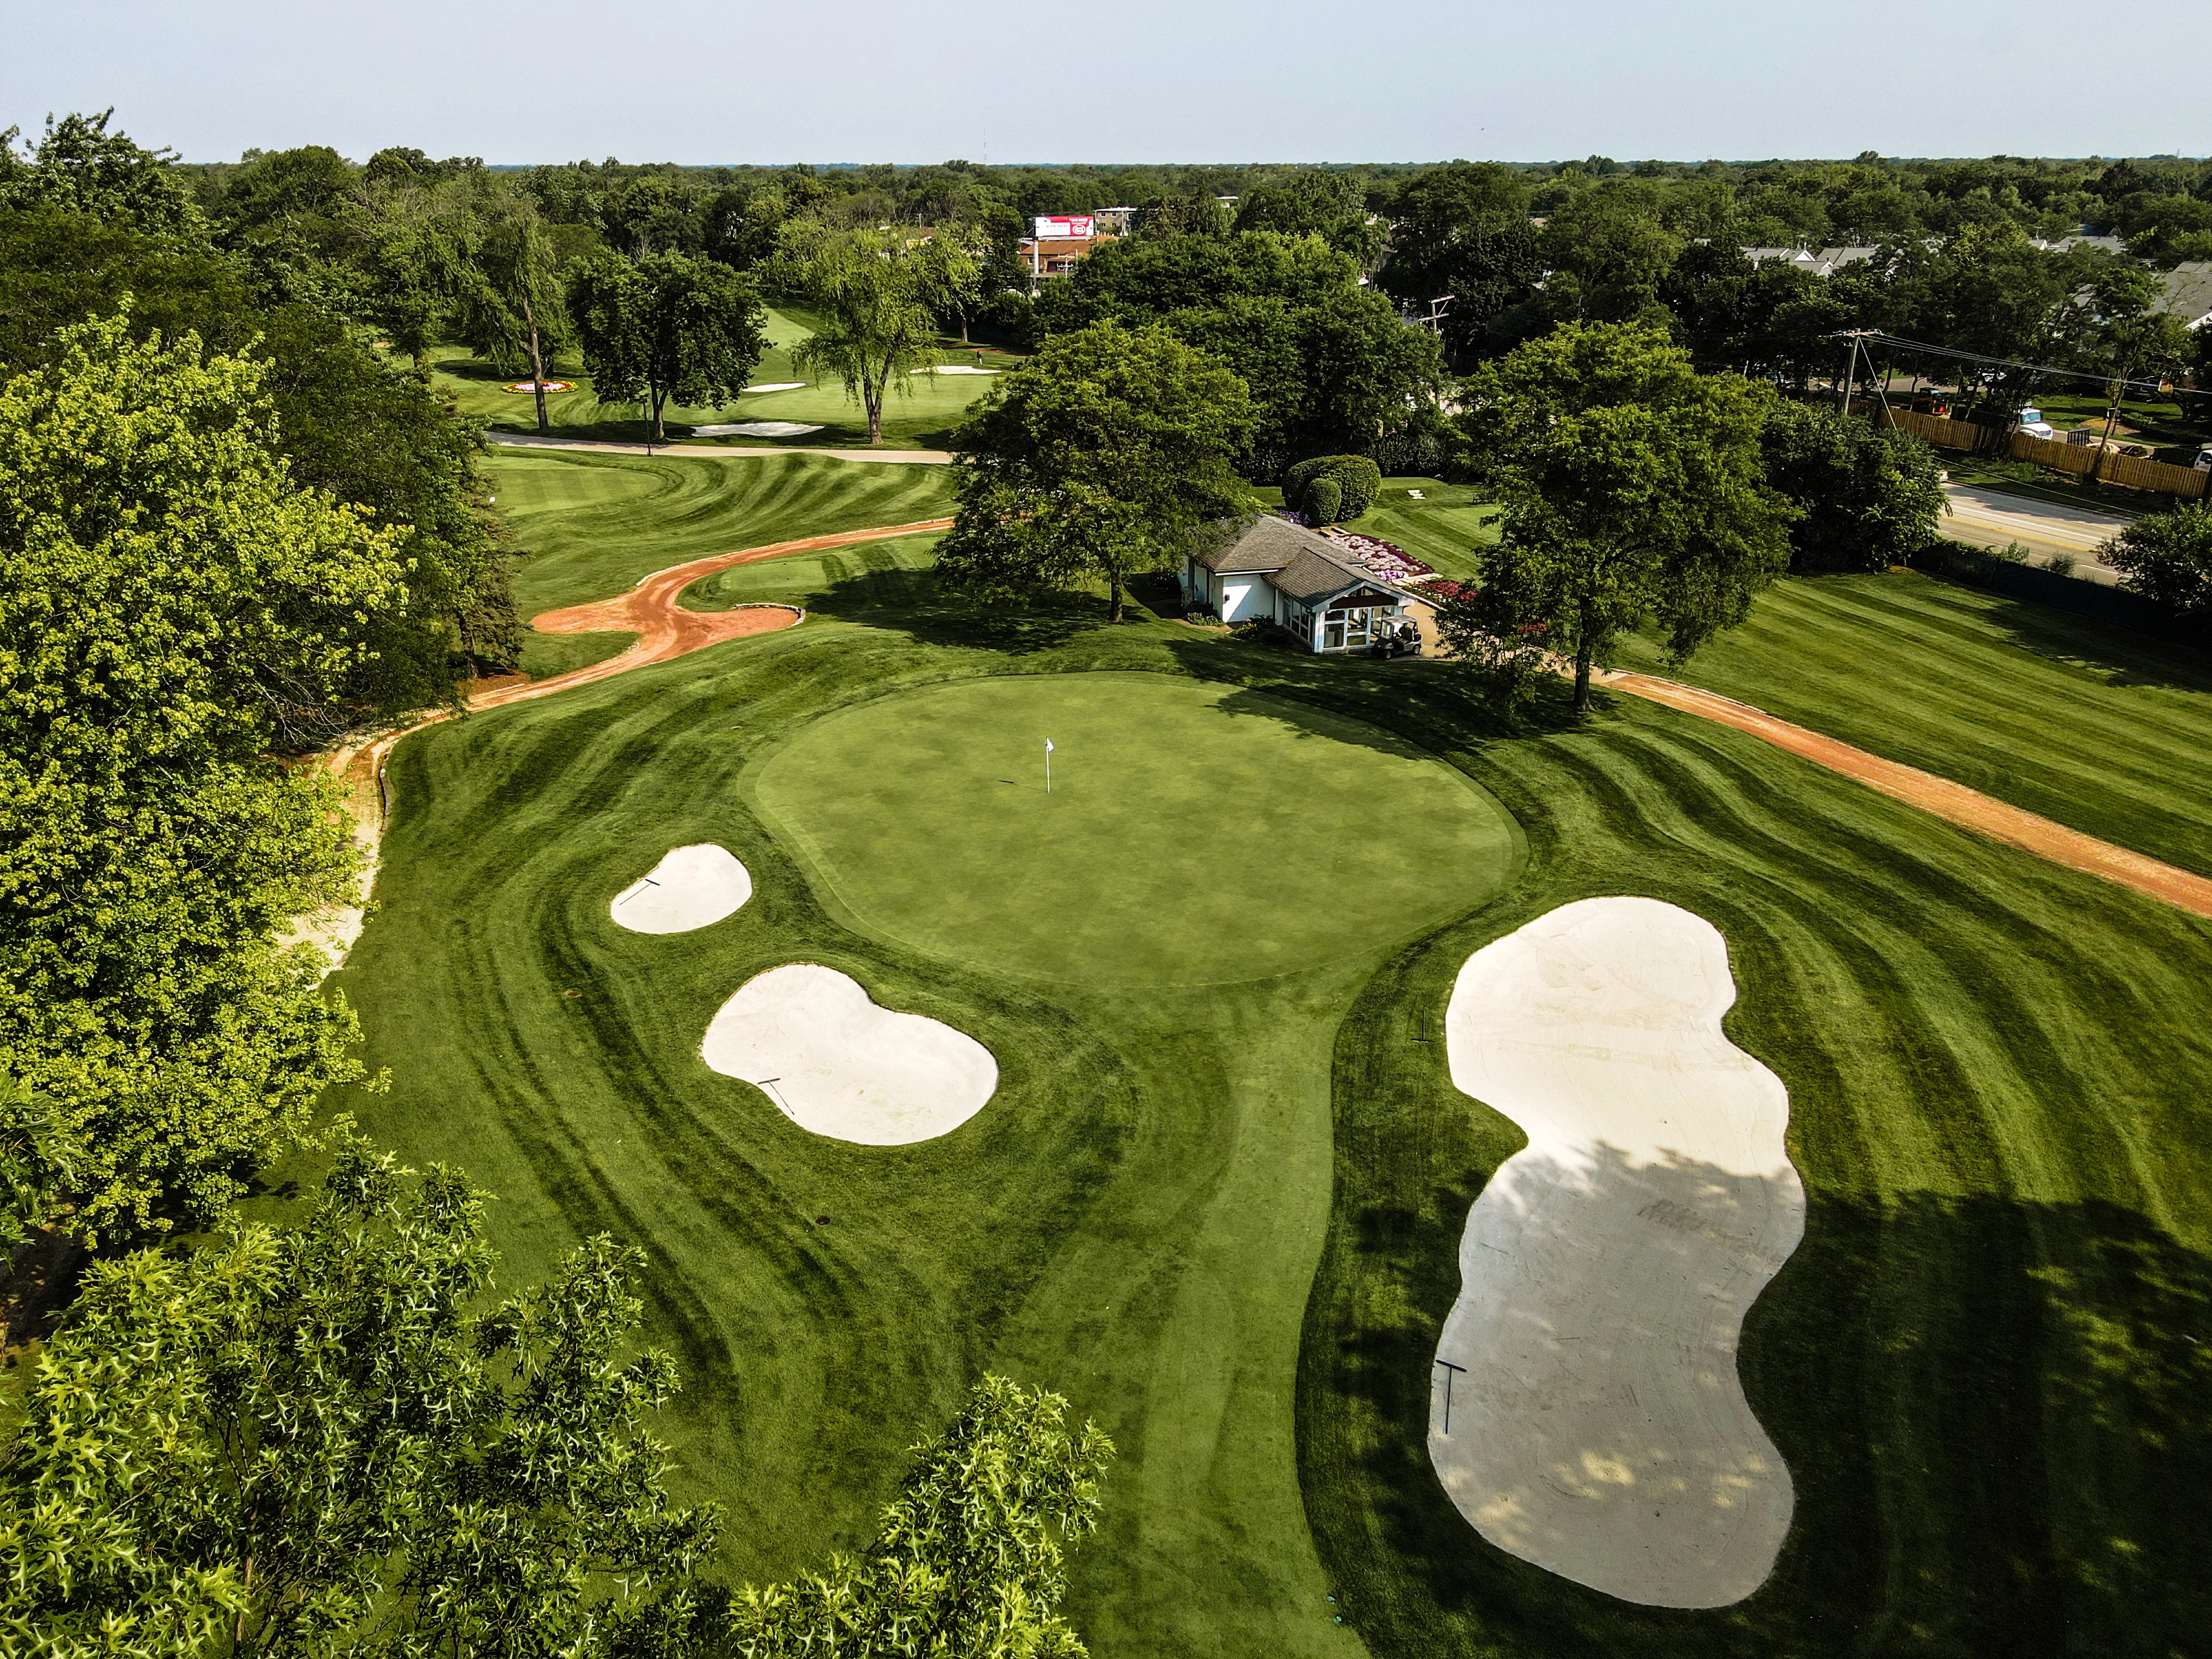
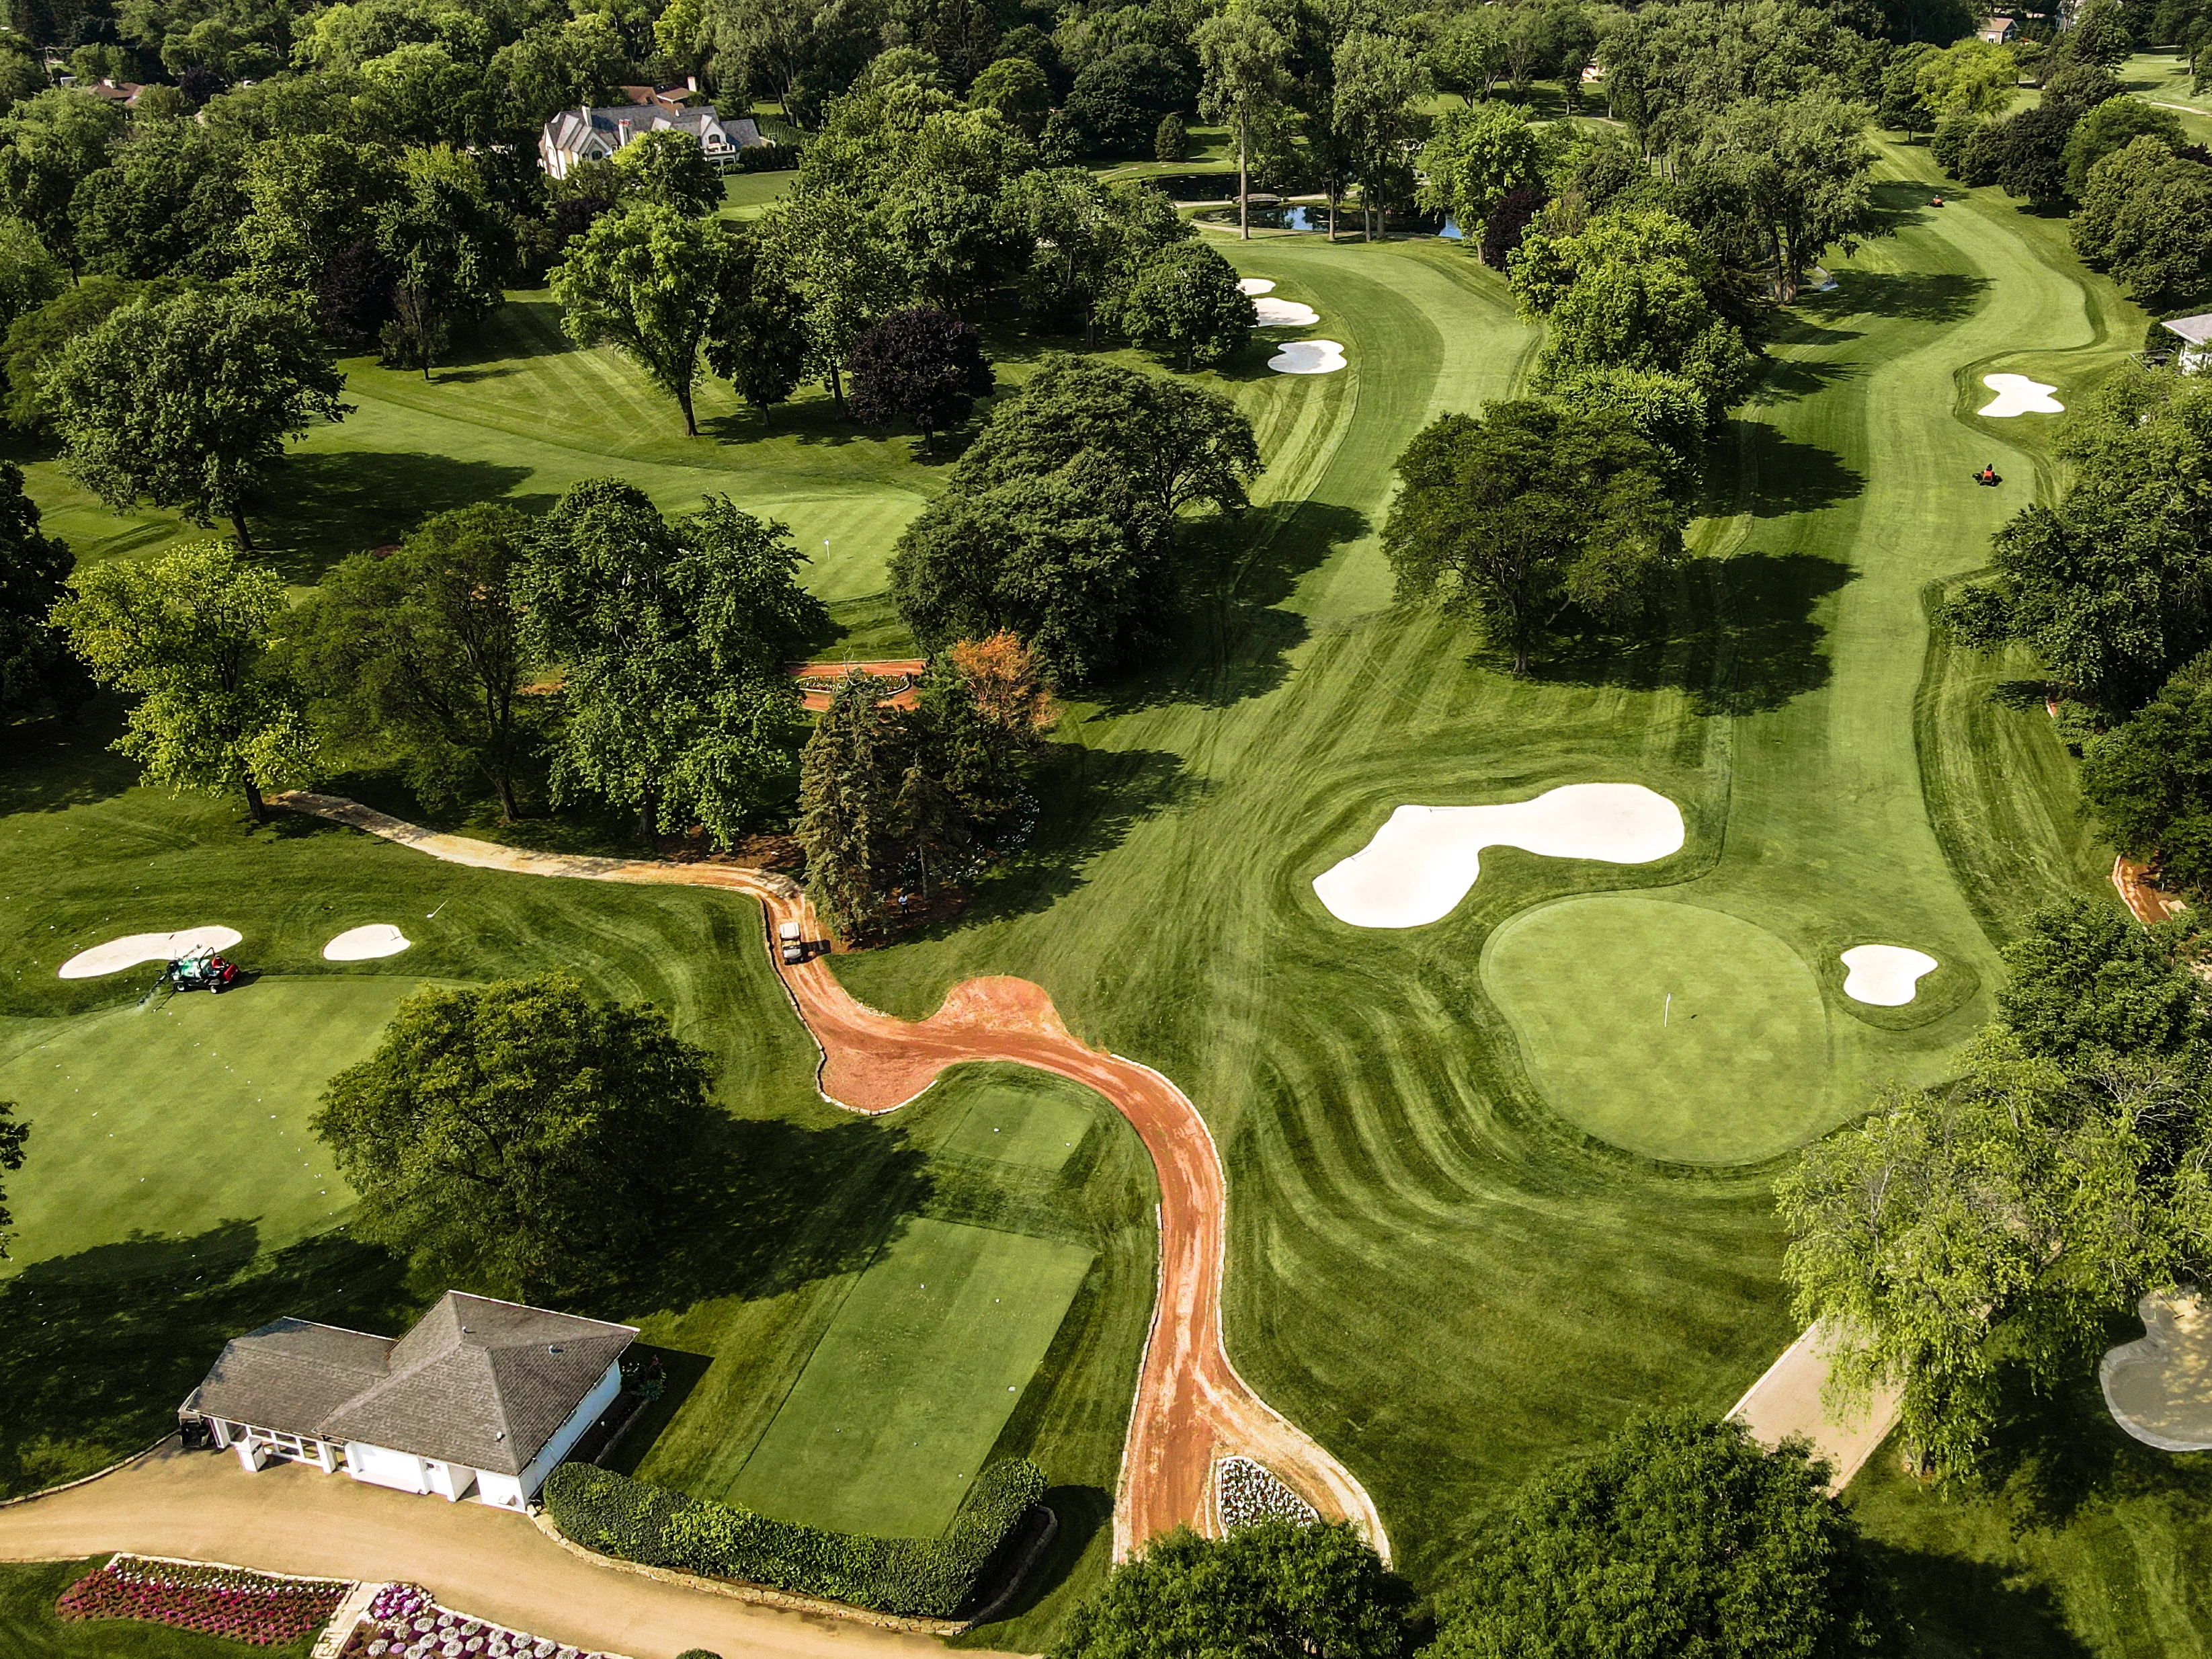
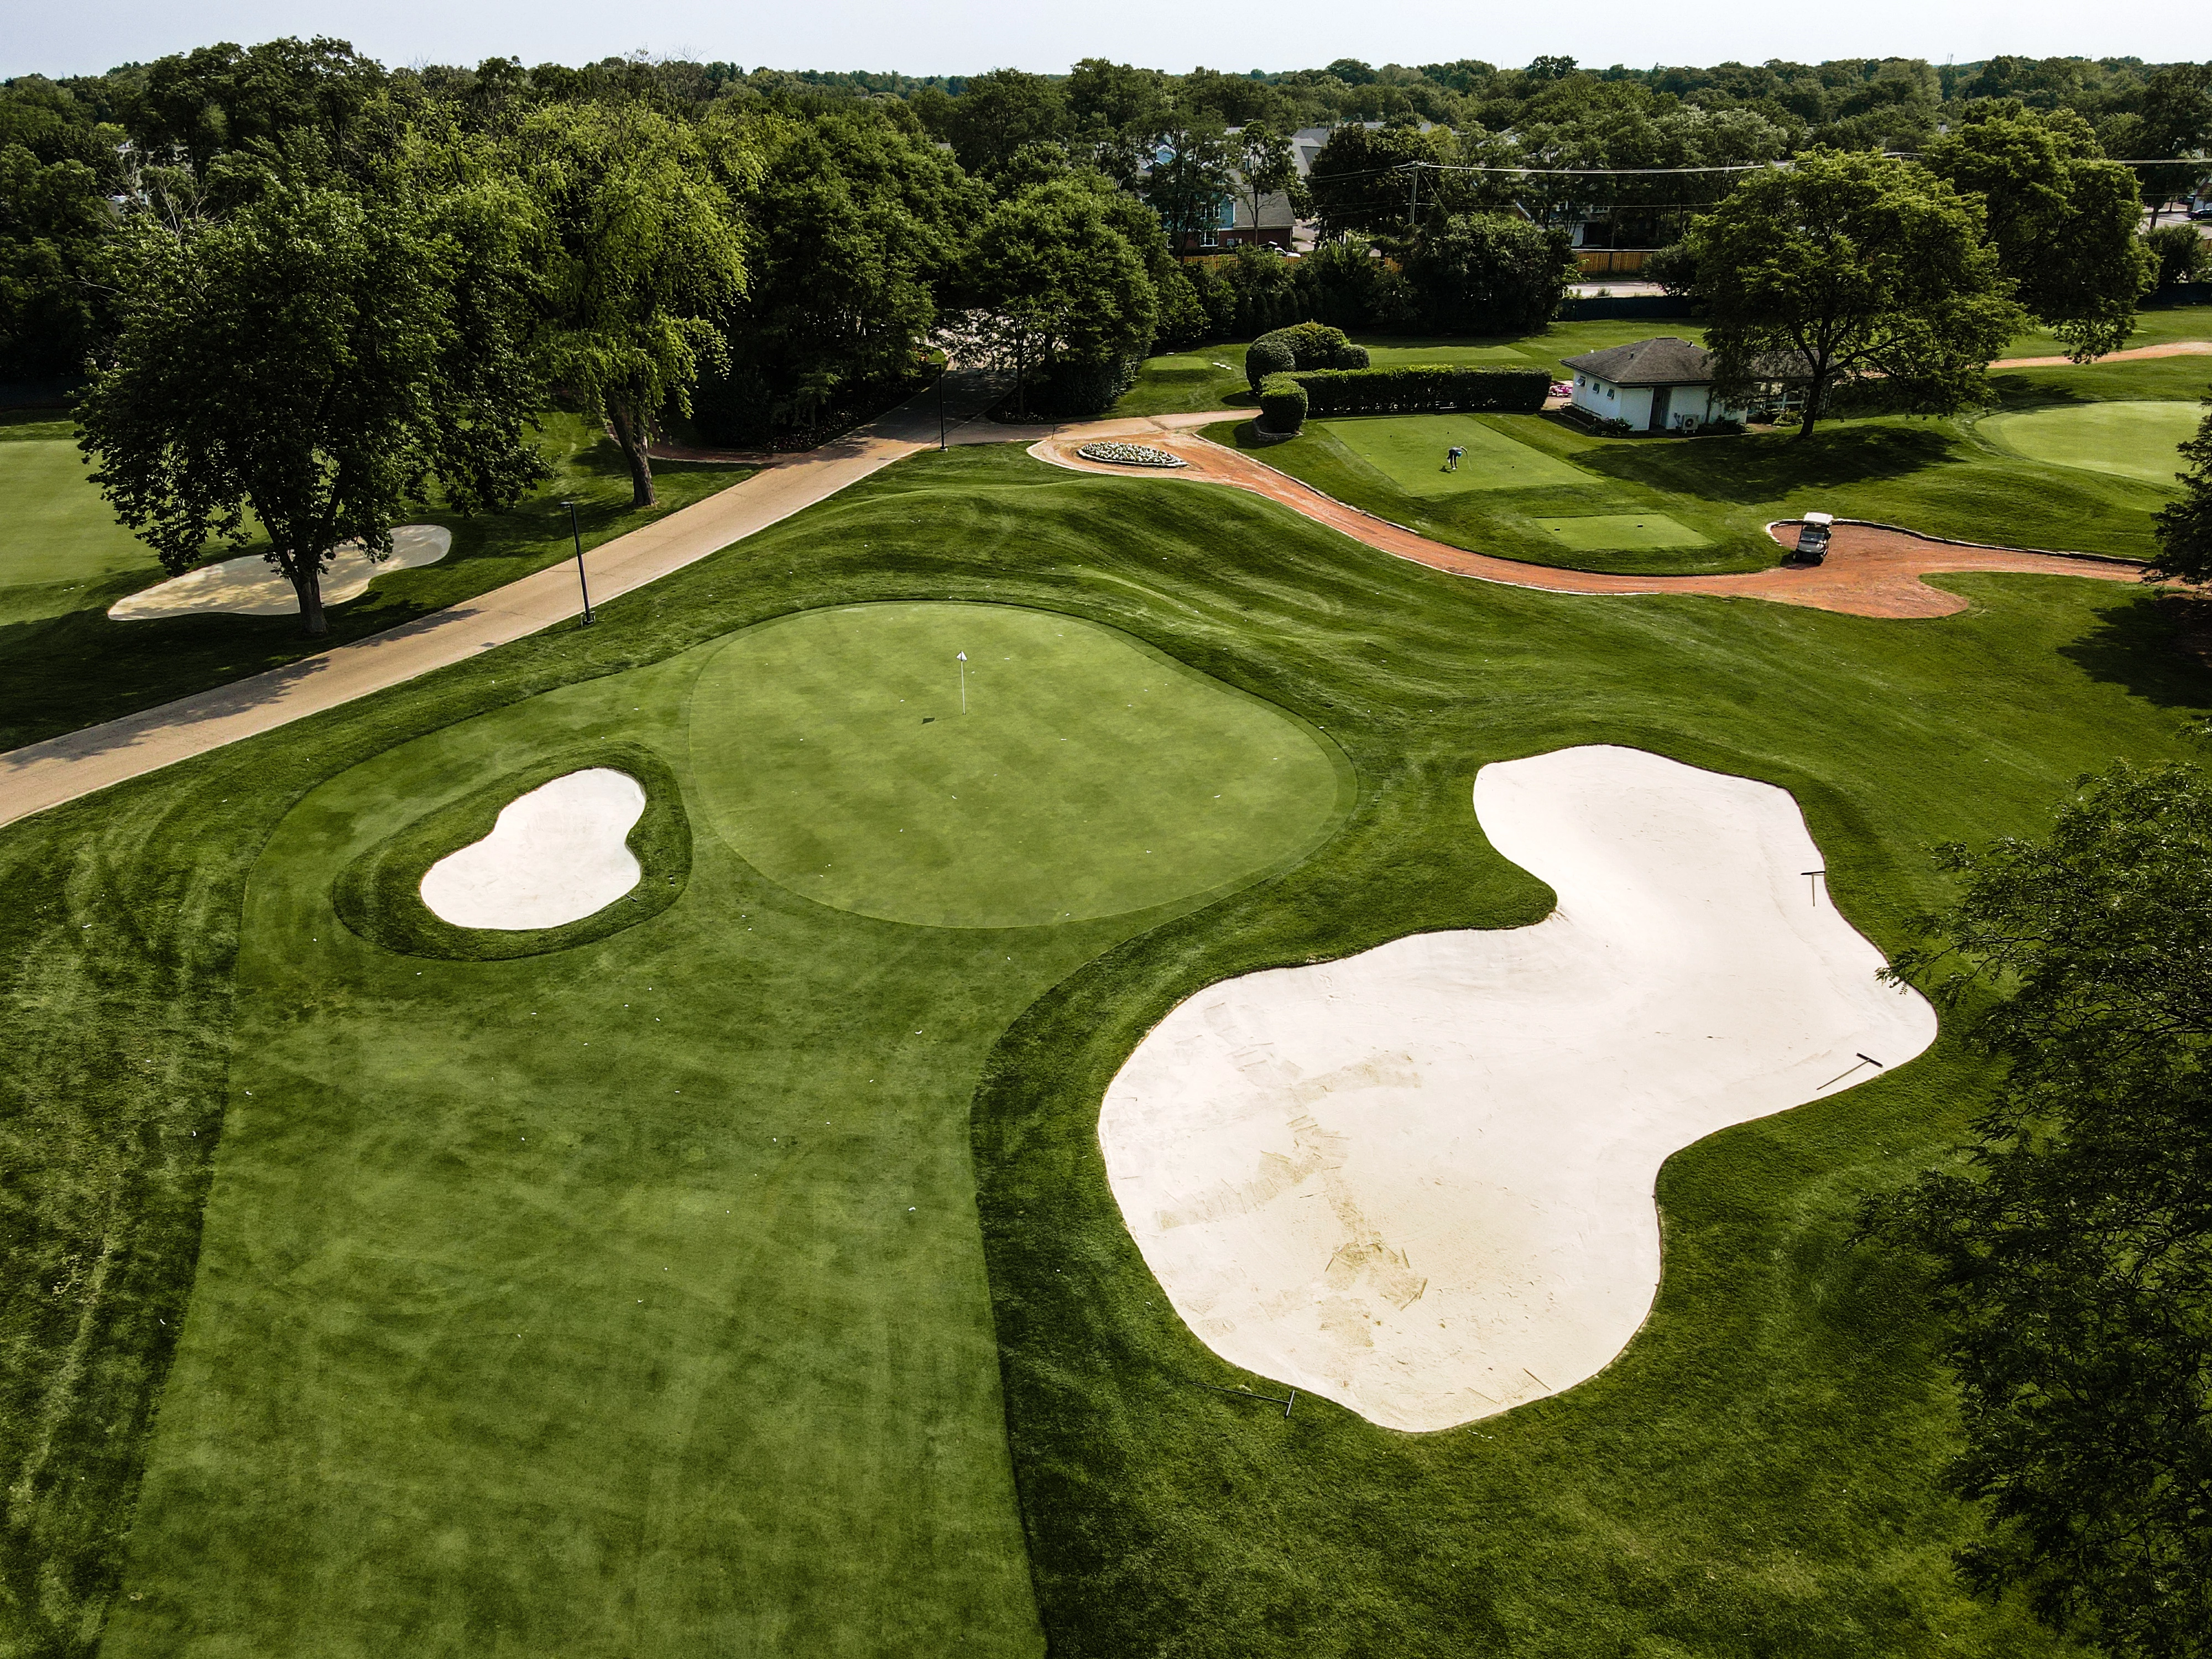
Rolling Green’s 18-hole golf course, designed by William Diddle in 1924, offers a rewarding challenge for golfers of all levels.Elevated tee…
Rolling Green’s 18-hole golf course, designed by William Diddle in 1924, offers a rewarding challenge for golfers of all levels.Elevated tees offer an excellent perspective of various holes and challenge players to play to their maximum potential. The well-maintained ponds reflect the blue of the sky and function as both decorations and hazards on nine of the eighteen holes. Many holes are demanding and difficult, but the natural splendor of the surrounding makes even a poorly played hole an enjoyable experience. Rolling Green has always maintained one of the best-conditioned golf courses in the Chicago area and offers tournament conditions everyday.The Championship Golf Course hosted Western Open qualifying tournaments throughout the 70's and continues to host Illinois PGA Tournaments. With bent grass tees, fairways and greens, Rolling Green CC offers a fair but challenging test of golf on a course that is maintained to the highest standards.

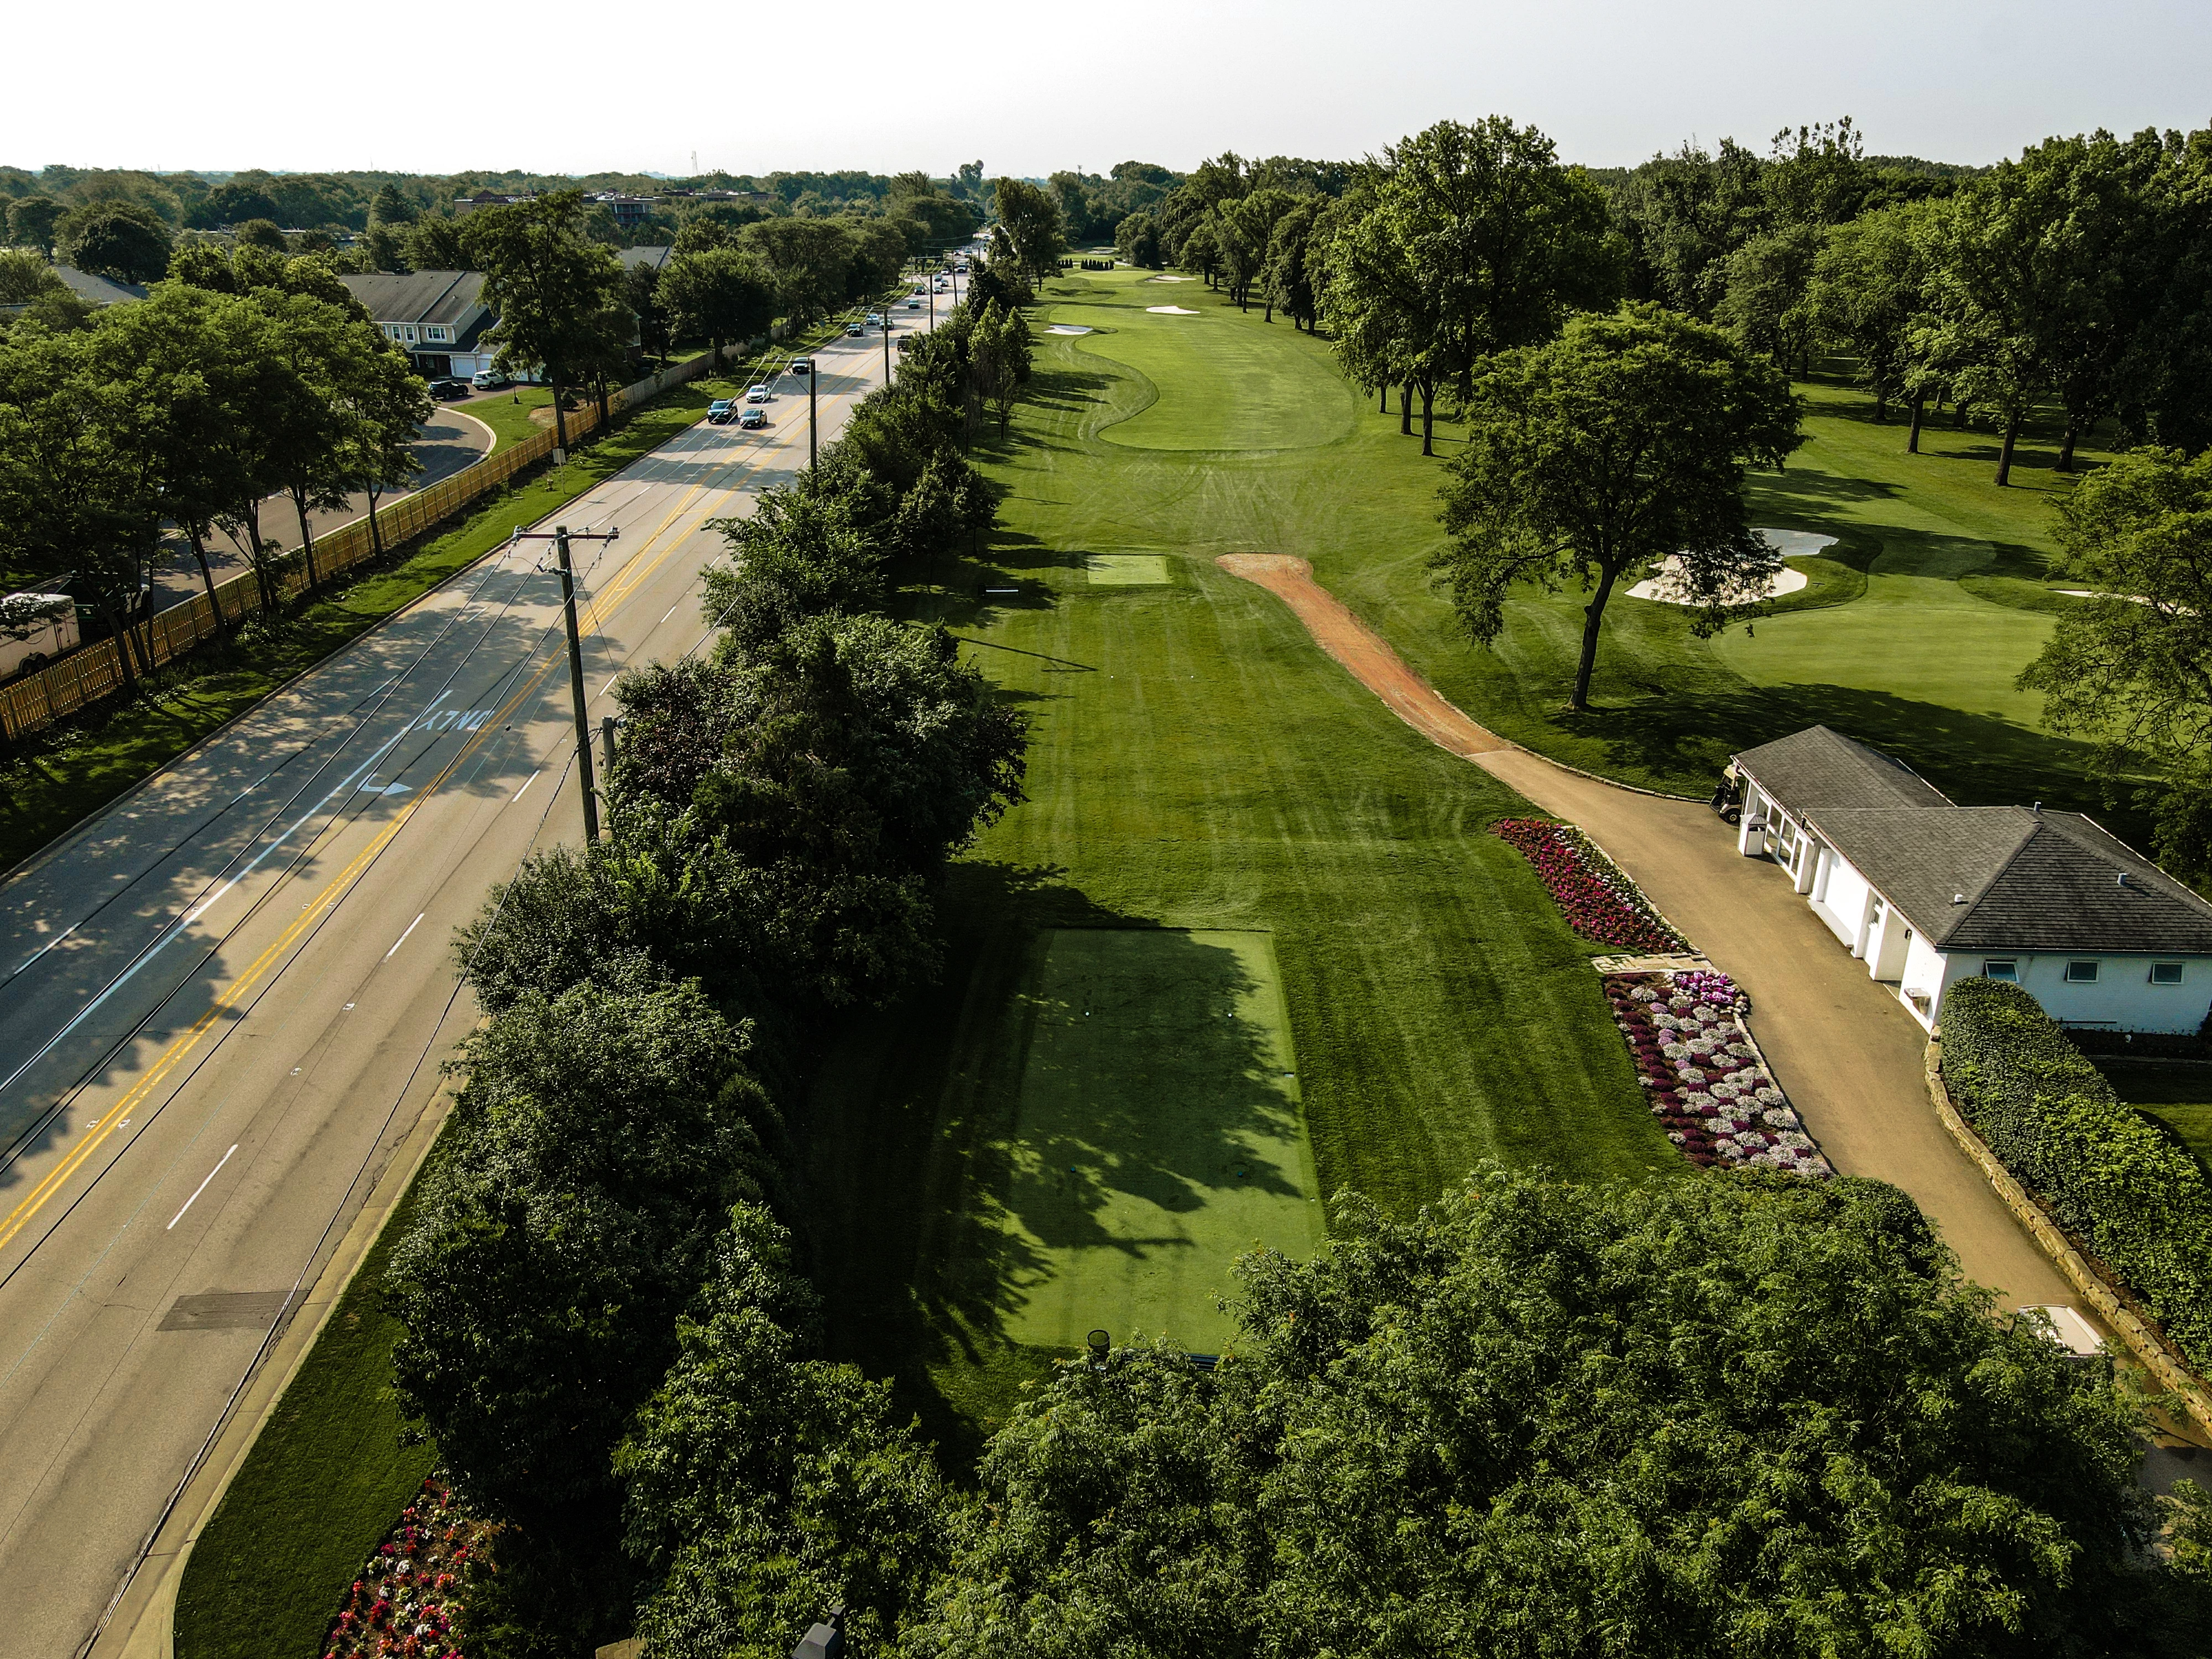
# 1 /
Par: 4
Handicaps:
Men's 9
Women's 14
Yardage by Tee:
BLUE 431
WHITE 391
SILVER 347
GOLD 329
GREEN 323
Slope:
Blue – 137 | White – 134 | Silver – 129 | Gold – 125 | Green – 130
Pro Tips
- As you stand on the first tee take the time to look at the American flag flying to your left…that’ll be your first indication of the influence of the wind
- The first hole favors a fade targeted at the right side of the bunker complex on the left.
- Fairway middle left is the best position to hit your approach on this tight opening hole
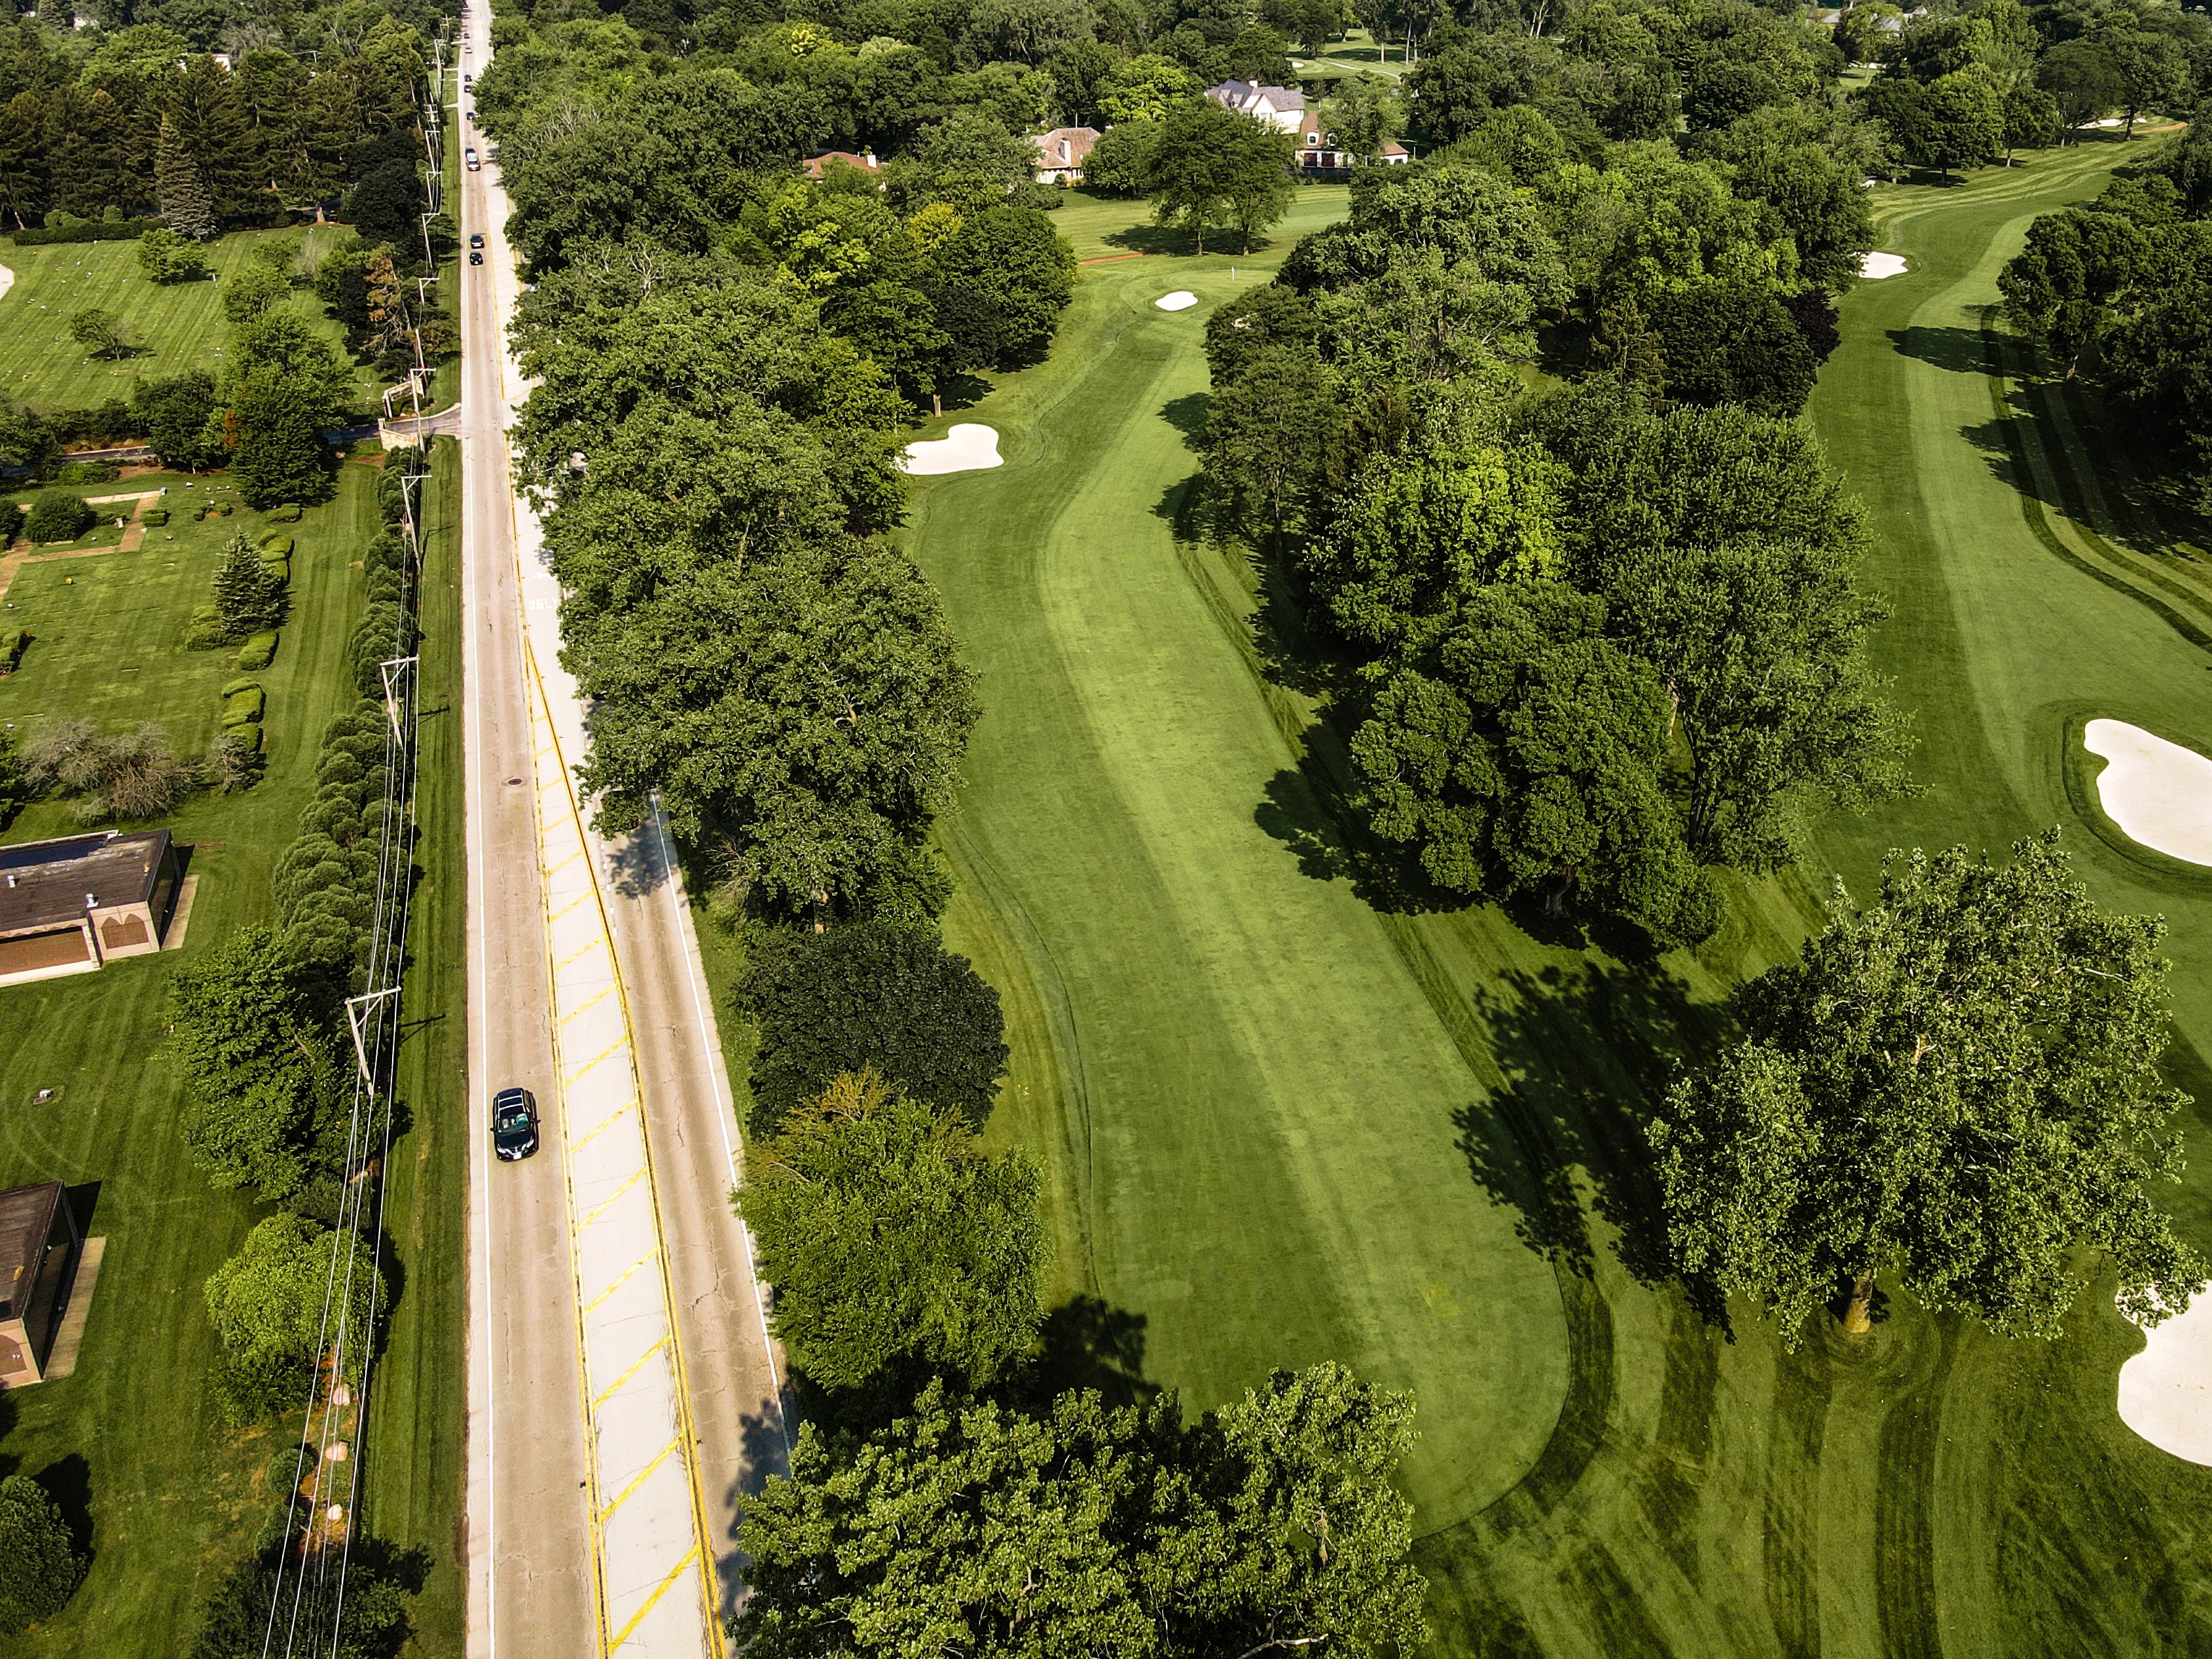
# 2 /
Par: 5
Handicaps:
Men's 13
Women's 4
Yardage by Tee:
BLUE 489
WHITE 469
SILVER 420
GOLD 399
GREEN 417
Slope:
Blue – 137 | White – 134 | Silver – 129 | Gold – 125 | Green – 130
Pro Tips
- A simple but deceptive Par 5 for most players, fairway middle-right is the preferred location off the tee to set up the best approach depending on the pin location. A tee shot inside the bunker complex on the right is the best spot to be.
- A tee shot left has the danger of slipping into the water which is hidden from view from the tee box and the large willow tree is an additional obstacle that will influence your shot selection for your subsequent approach shot.
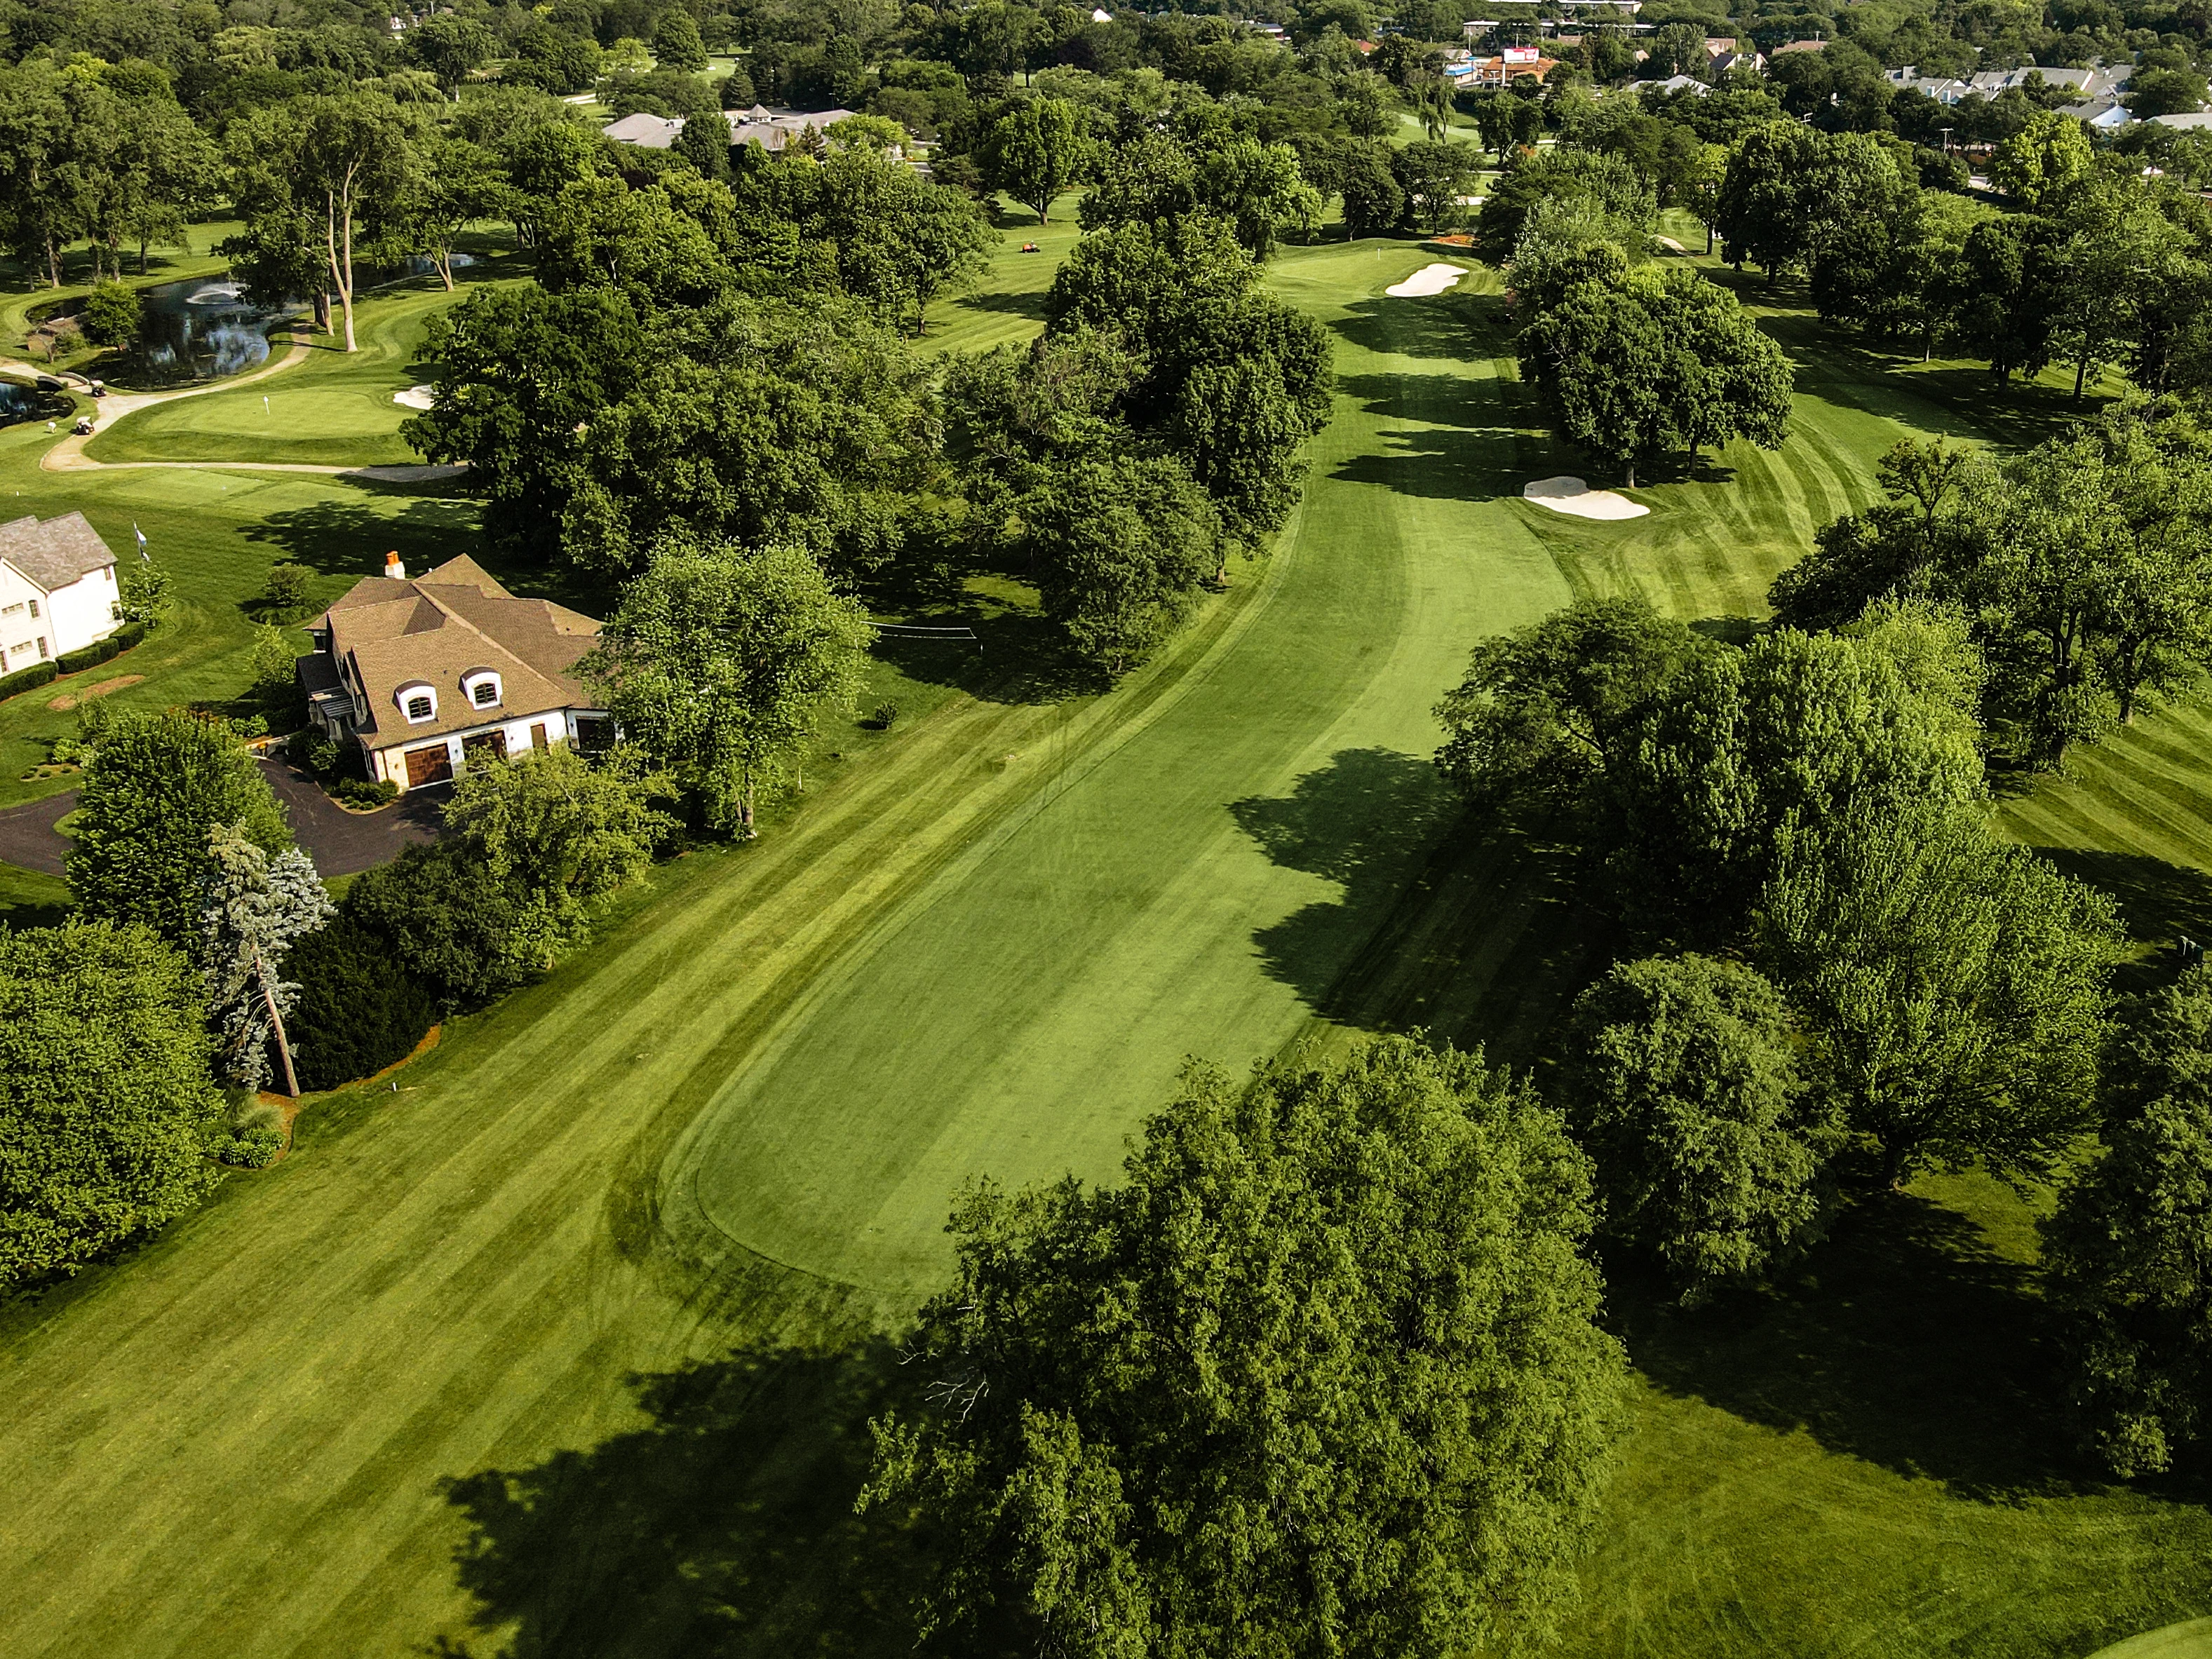
# 3 /
Par: 4
Handicaps:
Men's 3
Women's 8
Yardage by Tee:
BLUE 375
WHITE 368
SILVER 323
GOLD 298
GREEN 293
Slope:
Blue – 137 | White – 134 | Silver – 129 | Gold – 125 | Green – 130
Pro Tips
- With trees right and water left and long right, this relatively short par 4 demands a well-placed tee shot to reach the green in regulation…a tee ball middle left is critical.
- Depending on the tee shot result, the approach into this elevated green requires considering anywhere from a one to two club swing.
- Whatever you choose, staying below the hole is critical as a downhill putt on this green can be treacherous.
# 4 /
Par: 4
Handicaps:
Men's 7
Women's 6
Yardage by Tee:
BLUE 353
WHITE 346
SILVER 346
GOLD 311
GREEN 308
Slope:
Blue – 137 | White – 134 | Silver – 129 | Gold – 125 | Green – 130
Pro Tips
- The second of the two tightest holes on the course, here again the tee shot is critical to success.
- More powerful players can leverage a driver off of the tee or a well-placed long iron or hybrid.. in either case, a tee ball middle-left is critical
- The chimney of the house in the distance is the perfect line
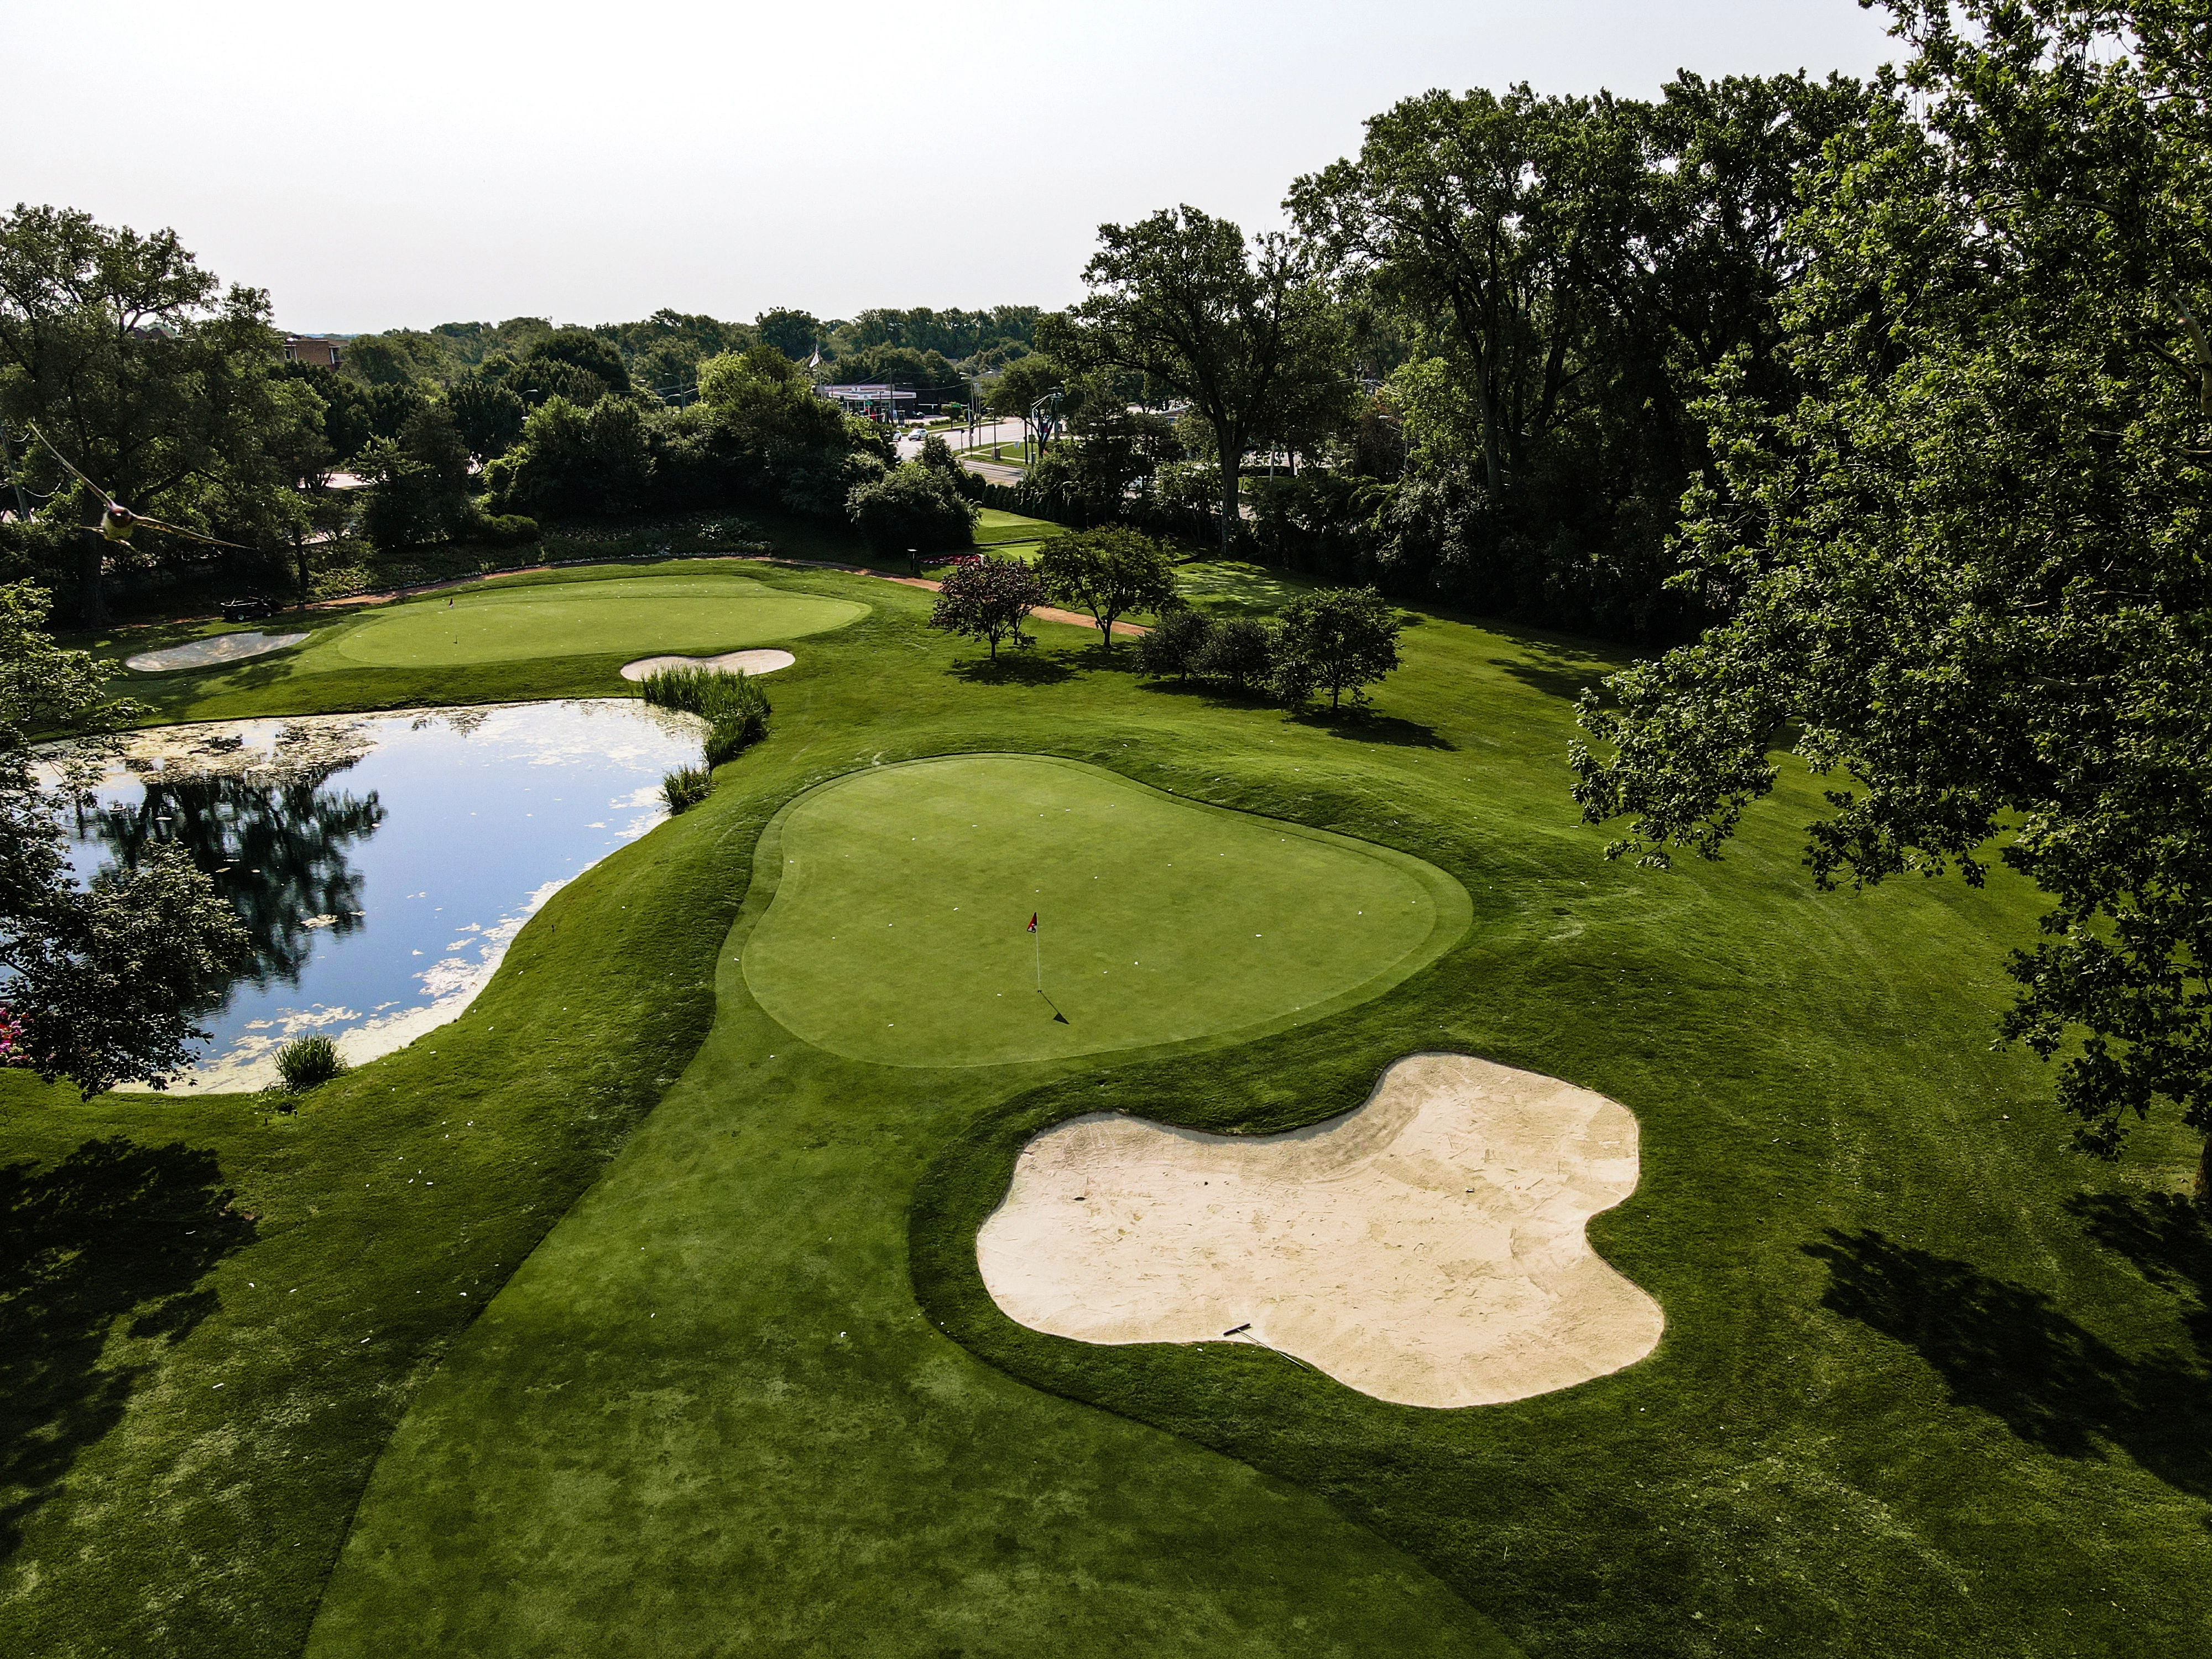
# 5 /
Par: 3
Handicaps:
Men's 11
Women's 16
Yardage by Tee:
BLUE 213
WHITE 189
SILVER 175
GOLD 175
GREEN 124
Slope:
Blue – 137 | White – 134 | Silver – 129 | Gold – 125 | Green – 130
Pro Tips
- Success on this simple par 3 relies heavily on the accuracy of your carry number
- With an elevated spine running from left to right, pins located in the extreme front or back of this green require the tee shot land in front of or behind the elevated spine for optimal chance at birdie
- Sneak a peek at the flags on the range to get an idea of the wind’s direction
# 6 /
Par: 5
Handicaps:
Men's 1
Women's 2
Yardage by Tee:
BLUE 536
WHITE 530
SILVER 486
GOLD 440
GREEN 435
Slope:
Blue – 137 | White – 134 | Silver – 129 | Gold – 125 | Green – 130
Pro Tips
- If there were a hole to “let it out” off of the tee this #1 handicap par 5 is it!
- Be careful as out of bounds left runs down the entire length of the hole but is most dangerous if a tee shot is pull-hooked.
- Relax into a “three shot hole” mentality and your patience will be rewarded, especially if your second shot is middle – right to set up your approach angle
# 7 /
Par: 3
Handicaps:
Men's 17
Women's 18
Yardage by Tee:
BLUE 157
WHITE 139
SILVER 139
GOLD 124
GREEN 121
Slope:
Blue – 137 | White – 134 | Silver – 129 | Gold – 125 | Green – 130
Pro Tips
- The elevated green and influence of the wind produce many shots that are under clubbed or over torqued on this hole.
- Know your carry number for the yardage you’re presented and take a conservative line with a committed swing.
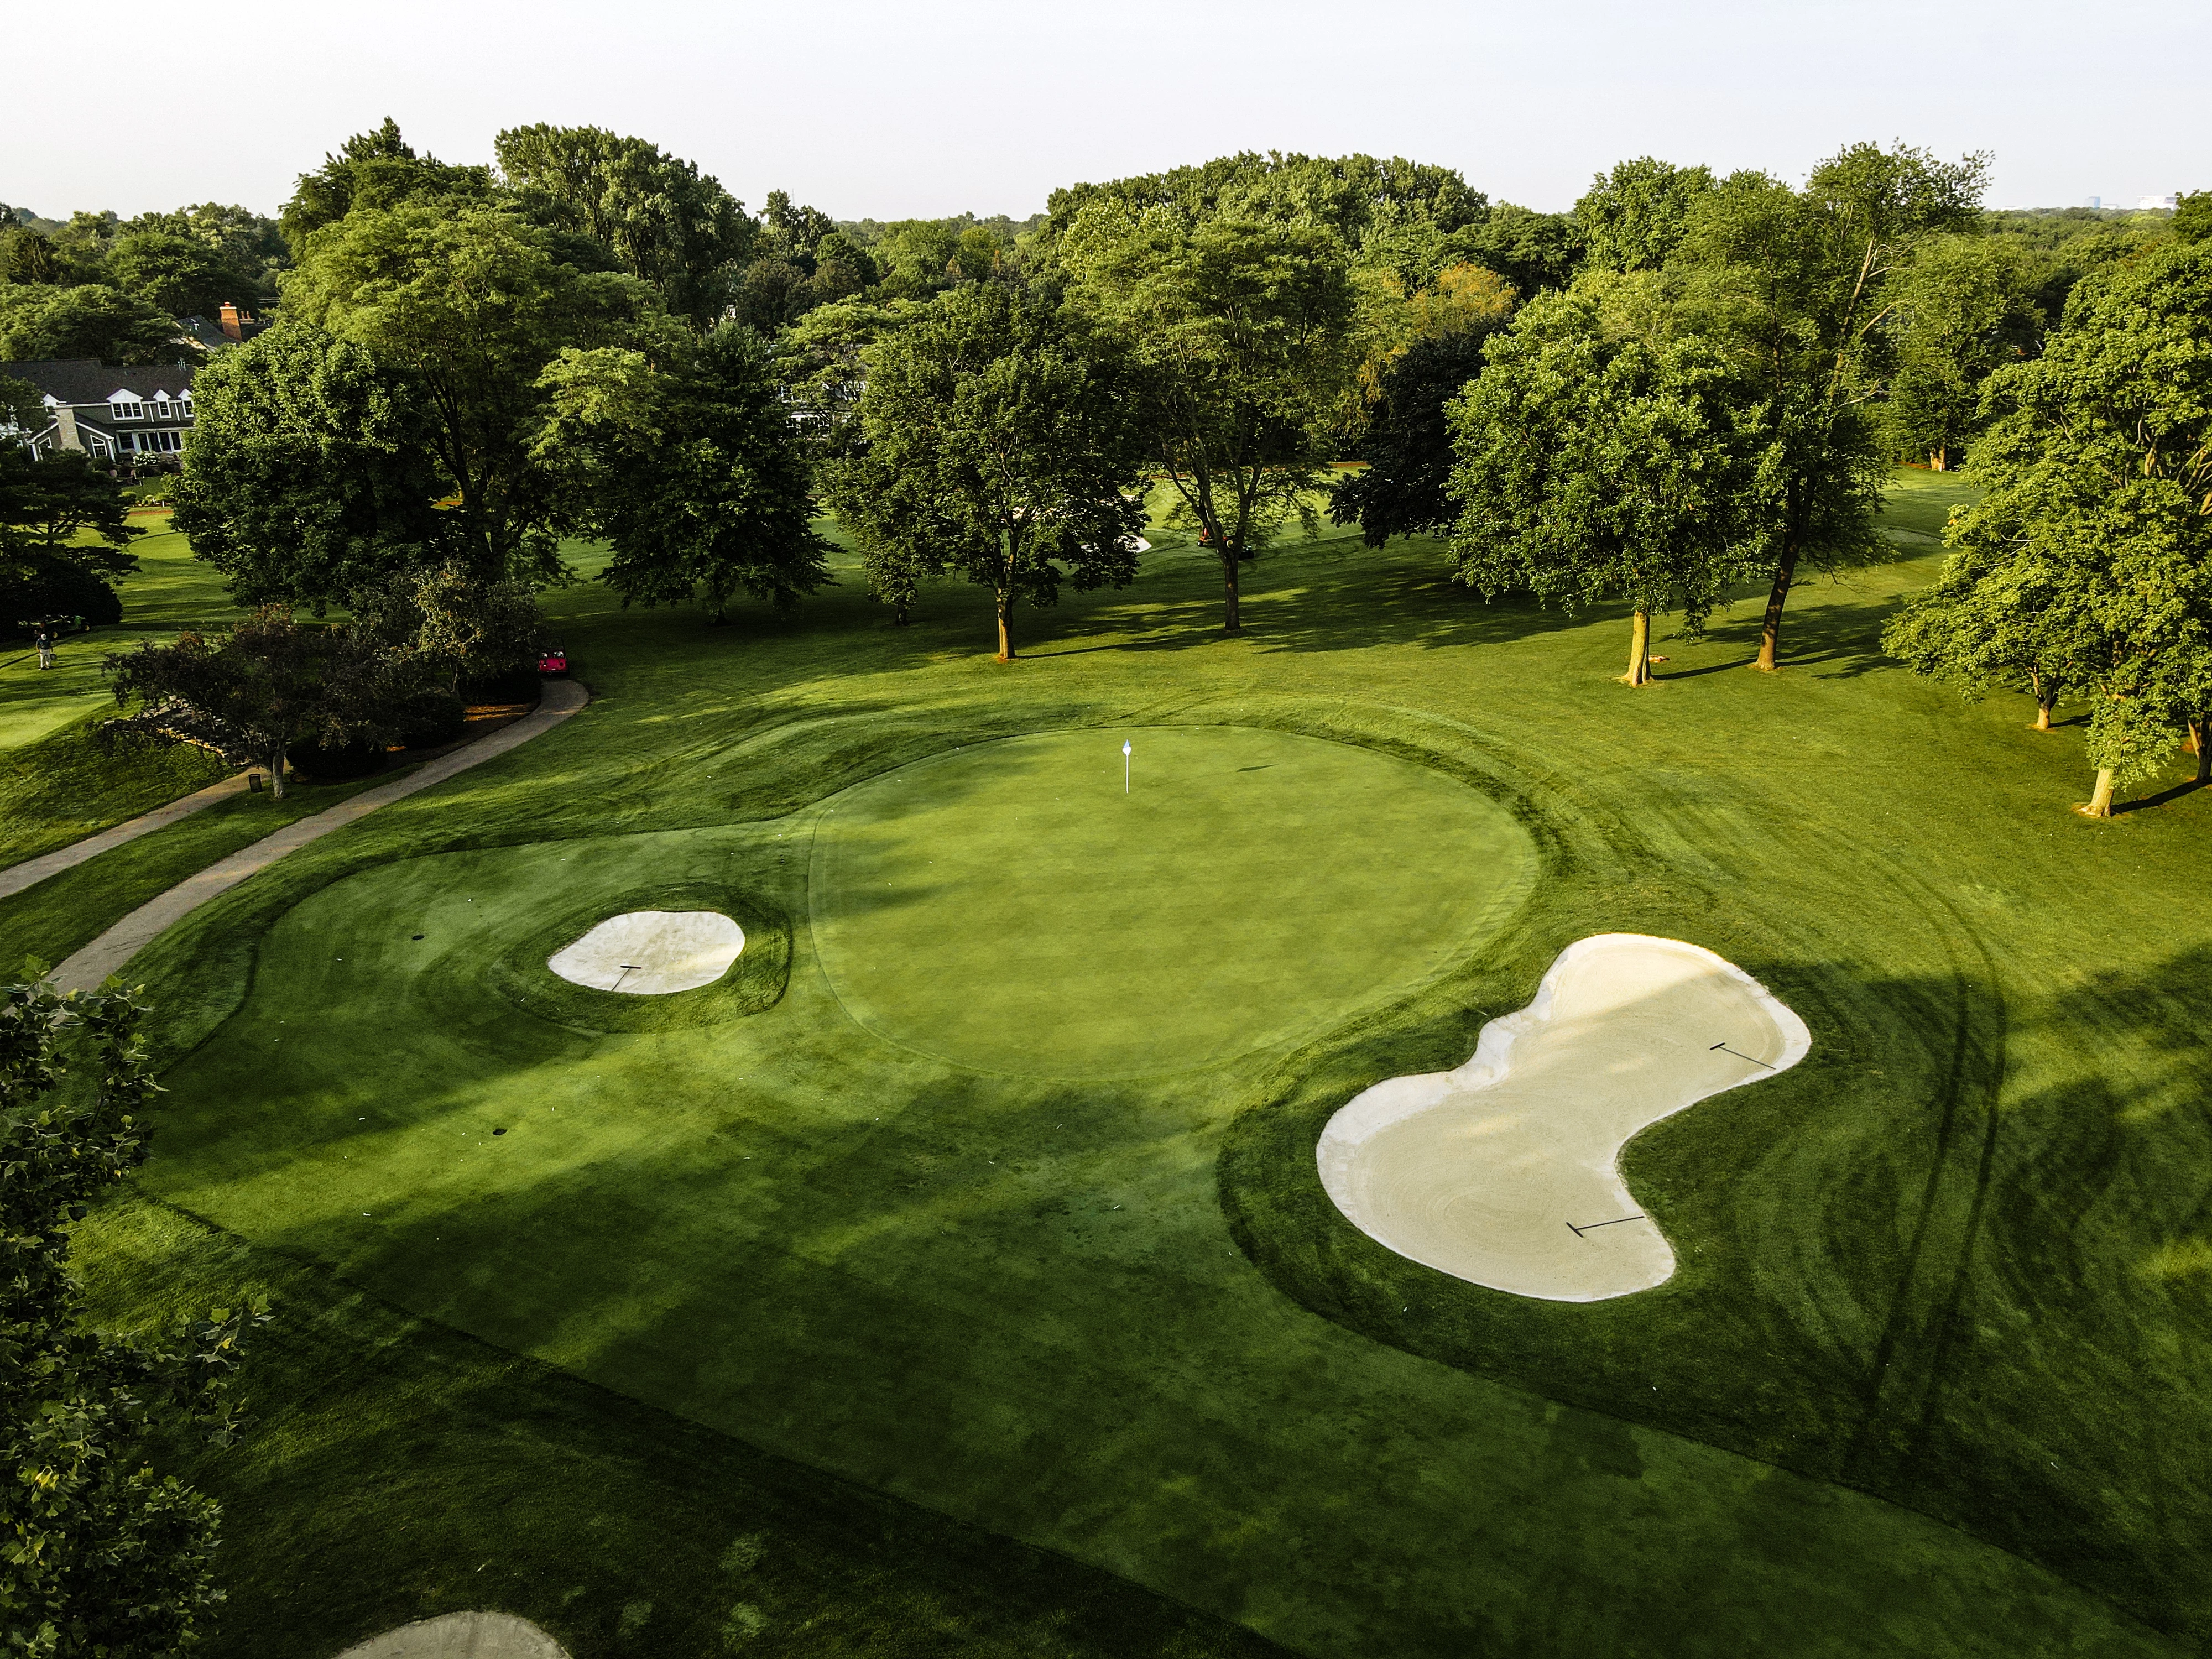
# 8 /
Par: 4
Handicaps:
Men's 15
Women's 12
Yardage by Tee:
BLUE 328
WHITE 318
SILVER 308
GOLD 298
GREEN 298
Slope:
Blue – 137 | White – 134 | Silver – 129 | Gold – 125 | Green – 130
Pro Tips
- With out of bounds on the left and trees and heavy rough on the right, this short par 4 demands that you pay attention to where the flag is located before you decided the strategy for your tee shot.
- A pin tucked in the upper right requires a tee shot middle-left
- In any case the old axiom “middle is good” applies to any approach into this green…par is easy if you’re on in regulation
# 9 /
Par: 4
Handicaps:
Men's 5
Women's 10
Yardage by Tee:
BLUE 446
WHITE 421
SILVER 393
GOLD 334
GREEN 328
Slope:
Blue – 137 | White – 134 | Silver – 129 | Gold – 125 | Green – 130
Pro Tips
- The #5 handicap hole at RGCC, this hole can easily increase in difficulty depending on the influence of the wind. Even with a generous fairway the tee shot can be pushed left, right or down by an unfavorable wind
- The green is large and receptive so play your carry number with a confident and aggressive swing to the pin.
# 10 /
Par: 4
Handicaps:
Men's 4
Women's 7
Yardage by Tee:
BLUE 423
WHITE 402
SILVER 367
GOLD 348
GREEN 343
Slope:
Blue – 137 | White – 134 | Silver – 129 | Gold – 125 | Green – 130
Pro Tips
- A tight out of bounds lining the left side of the entire hole, Intervening rough from the left that cuts to an otherwise straight fairway, and, trees along the entire right make for a narrow landing zone on this hole
- Any tee shot in the fairway is a good shot but a line that is inside the right-side fairway bunker is ideal
- With a back-to-front sloped green consider a half a club more to attack the pin

# 11 /
Par: 3
Handicaps:
Men's 16
Women's 17
Yardage by Tee:
BLUE 156
WHITE 146
SILVER 135
GOLD 135
GREEN 96
Slope:
Blue – 137 | White – 134 | Silver – 129 | Gold – 125 | Green – 130
Pro Tips
- No matter what it seems, the wind is always an influence on this tee shot to the green so don’t be afraid to take one more club if you’re not sure!
- Ideally, keeping the ball below the how is the play off of the tee but playing the tee shot to the middle of the green is a wise, conservative strategy that will pay dividends 9 times out of 10.
# 12 /
Par: 4
Handicaps:
Men's 10
Women's 9
Yardage by Tee:
BLUE 375
WHITE 353
SILVER 353
GOLD 341
GREEN 329
Slope:
Blue – 137 | White – 134 | Silver – 129 | Gold – 125 | Green – 130
Pro Tips
- Navigating this hole is simple but not necessarily easy, especially if the pin is on the extreme right side of the green which is not visible from the tee box As a result, it’s always advisable to position your tee shot to be middle left favoring the right side of the fairway bunker on the left side of the fairway.
- If you do find yourself in the trees to the right, take your medicine and hit a punch shot towards that fairway bunker. That should leave you 100 yards in and make any pin location accessible.
# 13 /
Par: 4
Handicaps:
Men's 8
Women's 11
Yardage by Tee:
BLUE 393
WHITE 386
SILVER 348
GOLD 326
GREEN 322
Slope:
Blue – 137 | White – 134 | Silver – 129 | Gold – 125 | Green – 130
Pro Tips
- A soft draw off of the tee cutting off of the left edge of the fairway bunker will reward you with an unrestricted approach shot into any pin location, while hugging the left side puts you in jeopardy of out of bounds for the first 150 yards of the hole.
- Be careful of attacking pin locations on the upper right as this pear -shaped green narrows creating a tight landing area that is hard to see from the fairway
# 14 /
Par: 5
Handicaps:
Men's 2
Women's 1
Yardage by Tee:
BLUE 552
WHITE 536
SILVER 484
GOLD 449
GREEN 445
Slope:
Blue – 137 | White – 134 | Silver – 129 | Gold – 125 | Green – 130
Pro Tips
- The number 2 handicap and longest hole of the course, this hole has a ton of nuance in its design.
- Middle - right off of the tee is critical to enable a proper selection to set up the approach into the green
- When in doubt favor the right side of the hole from tee to green…a water hazard lurks along the entire left side of the green complex that is unnoticed from the fairway and penalizes shots that are “too hot” into the left side of the green.
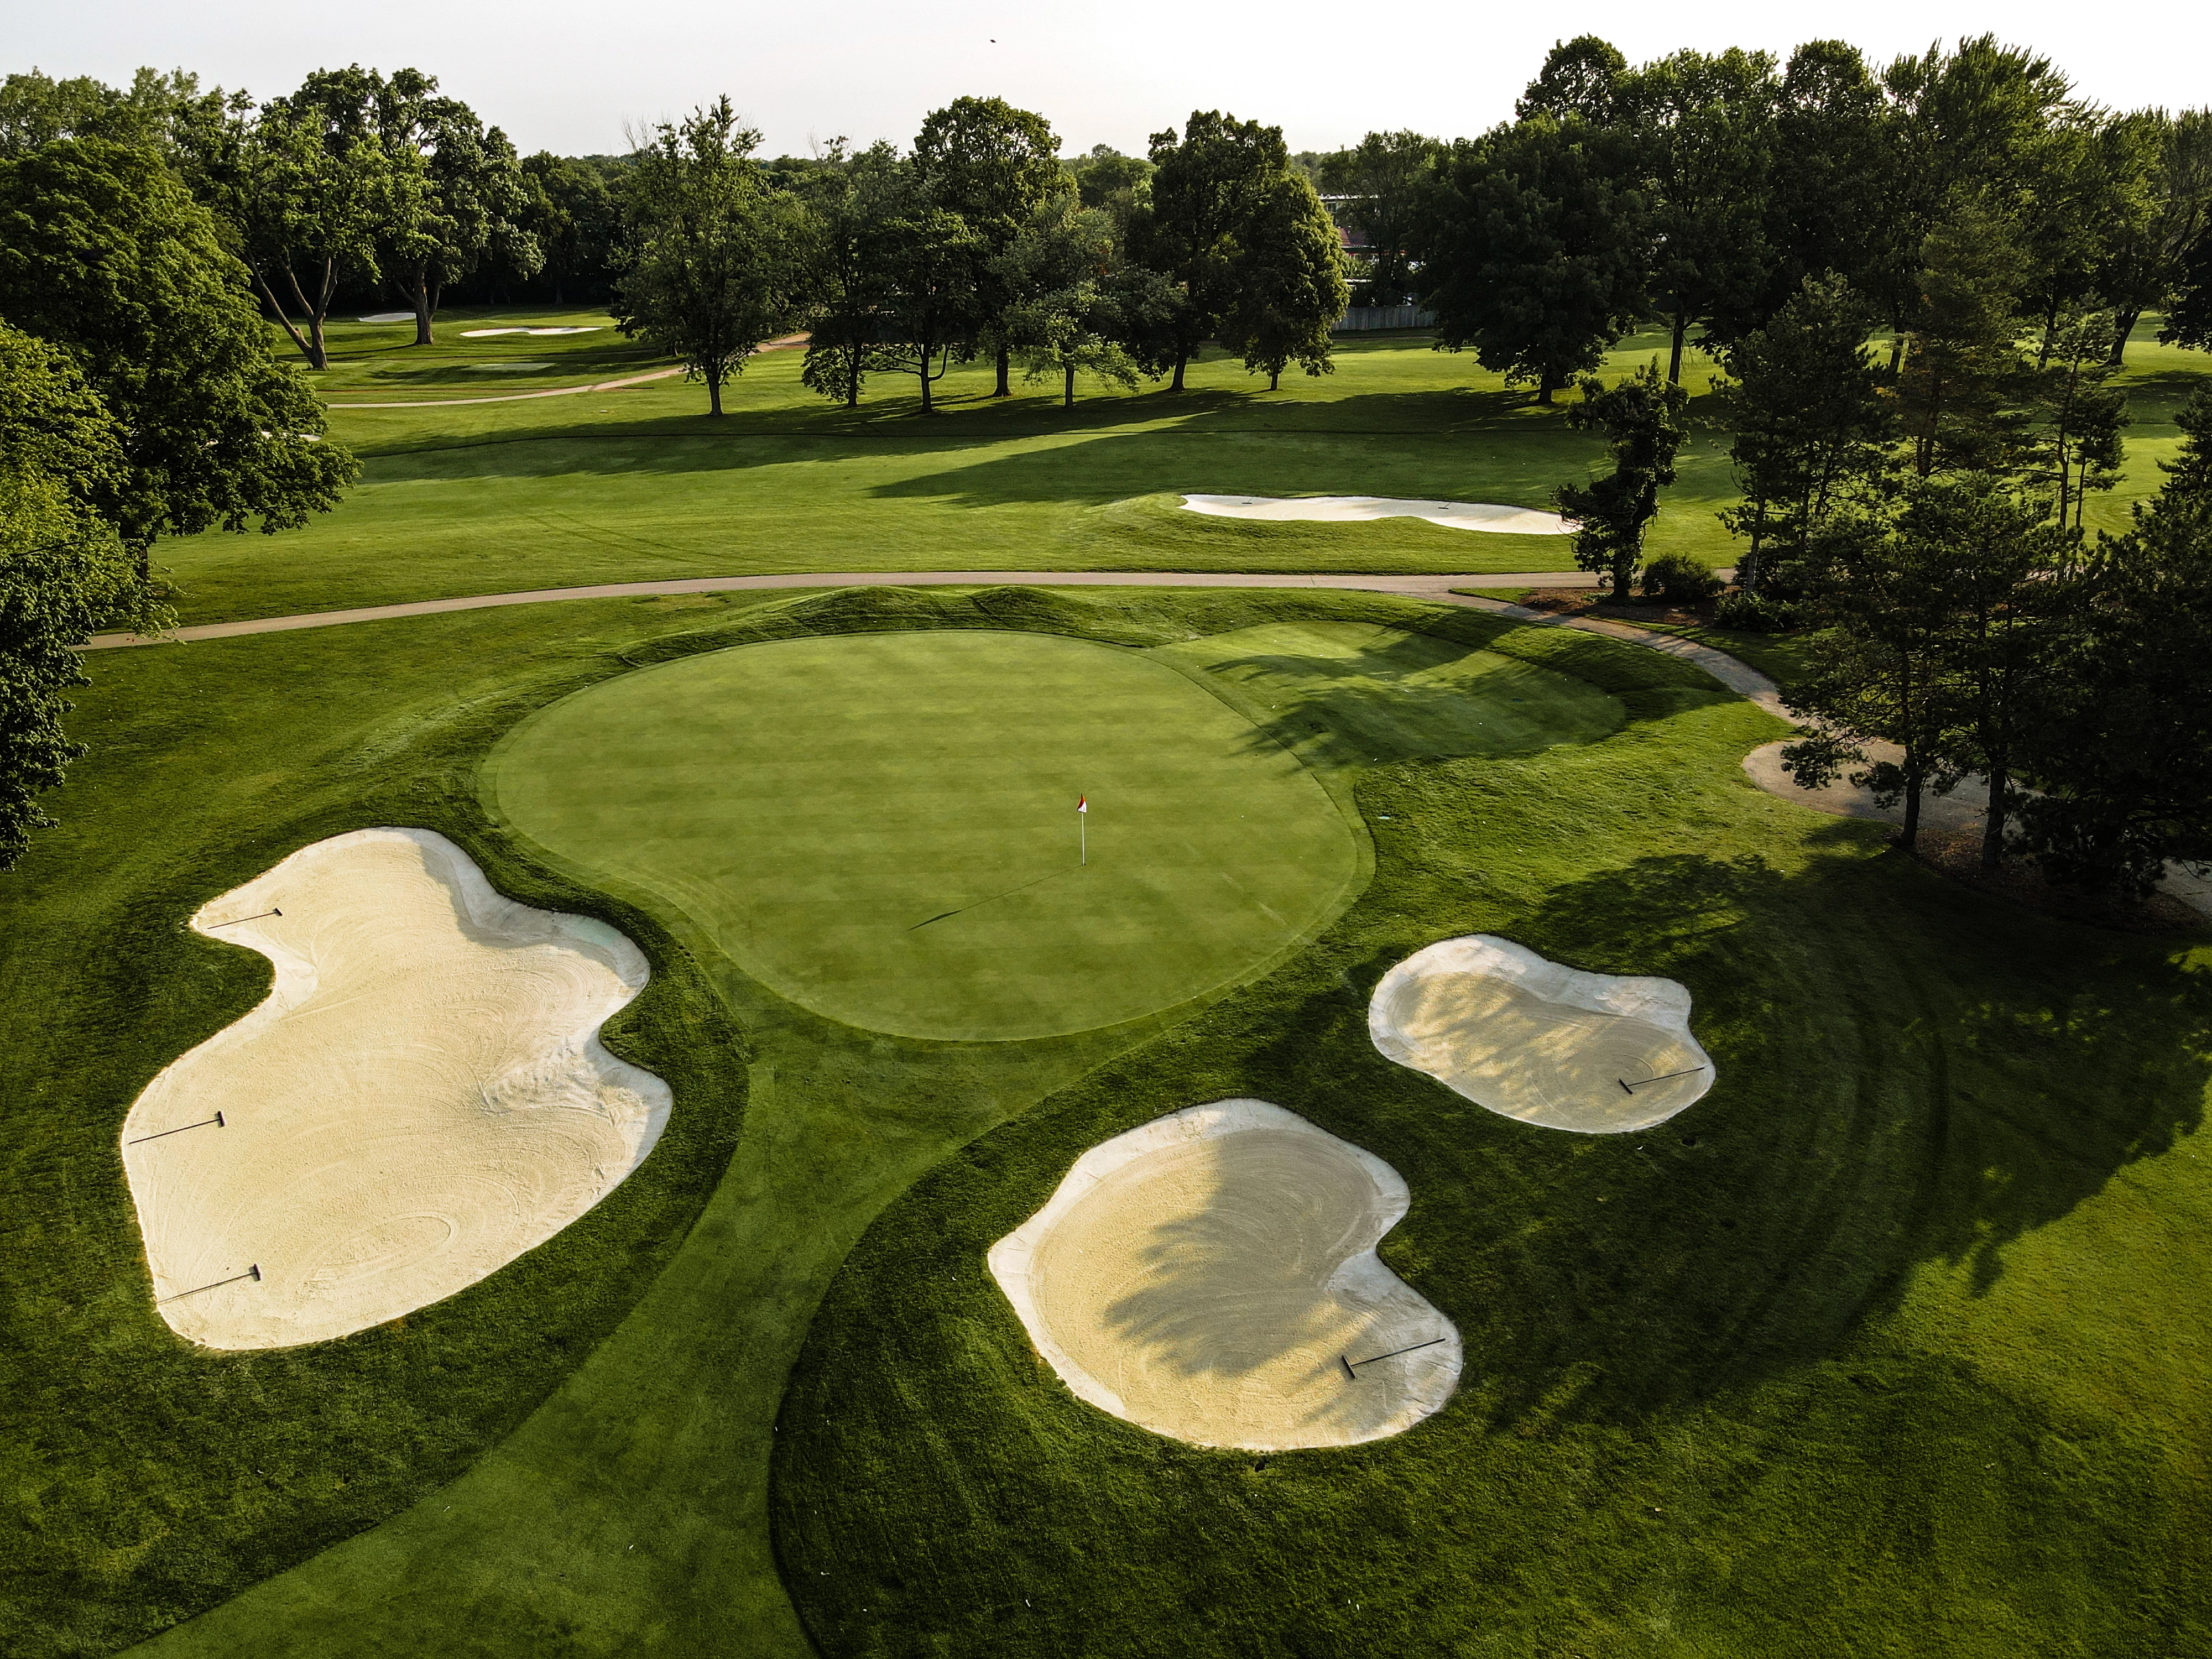
# 15 /
Par: 5
Handicaps:
Men's 14
Women's 5
Yardage by Tee:
BLUE 486
WHITE 474
SILVER 468
GOLD 437
GREEN 388
Slope:
Blue – 137 | White – 134 | Silver – 129 | Gold – 125 | Green – 130
Pro Tips
- This back -to- back par 5 offers a great birdie opportunity however going for the green in two is tricky as the green is well bunkered on the left and right creating a visually narrow entrance into the green.
- Tee shots favoring the left side of the fairway offer the best opportunity for a strategic set up shot.
- Resist the urge to hit a 3 wood for your second shot, favoring a smooth or accurate midiron leaving a pressure-free scoring club into the pin.
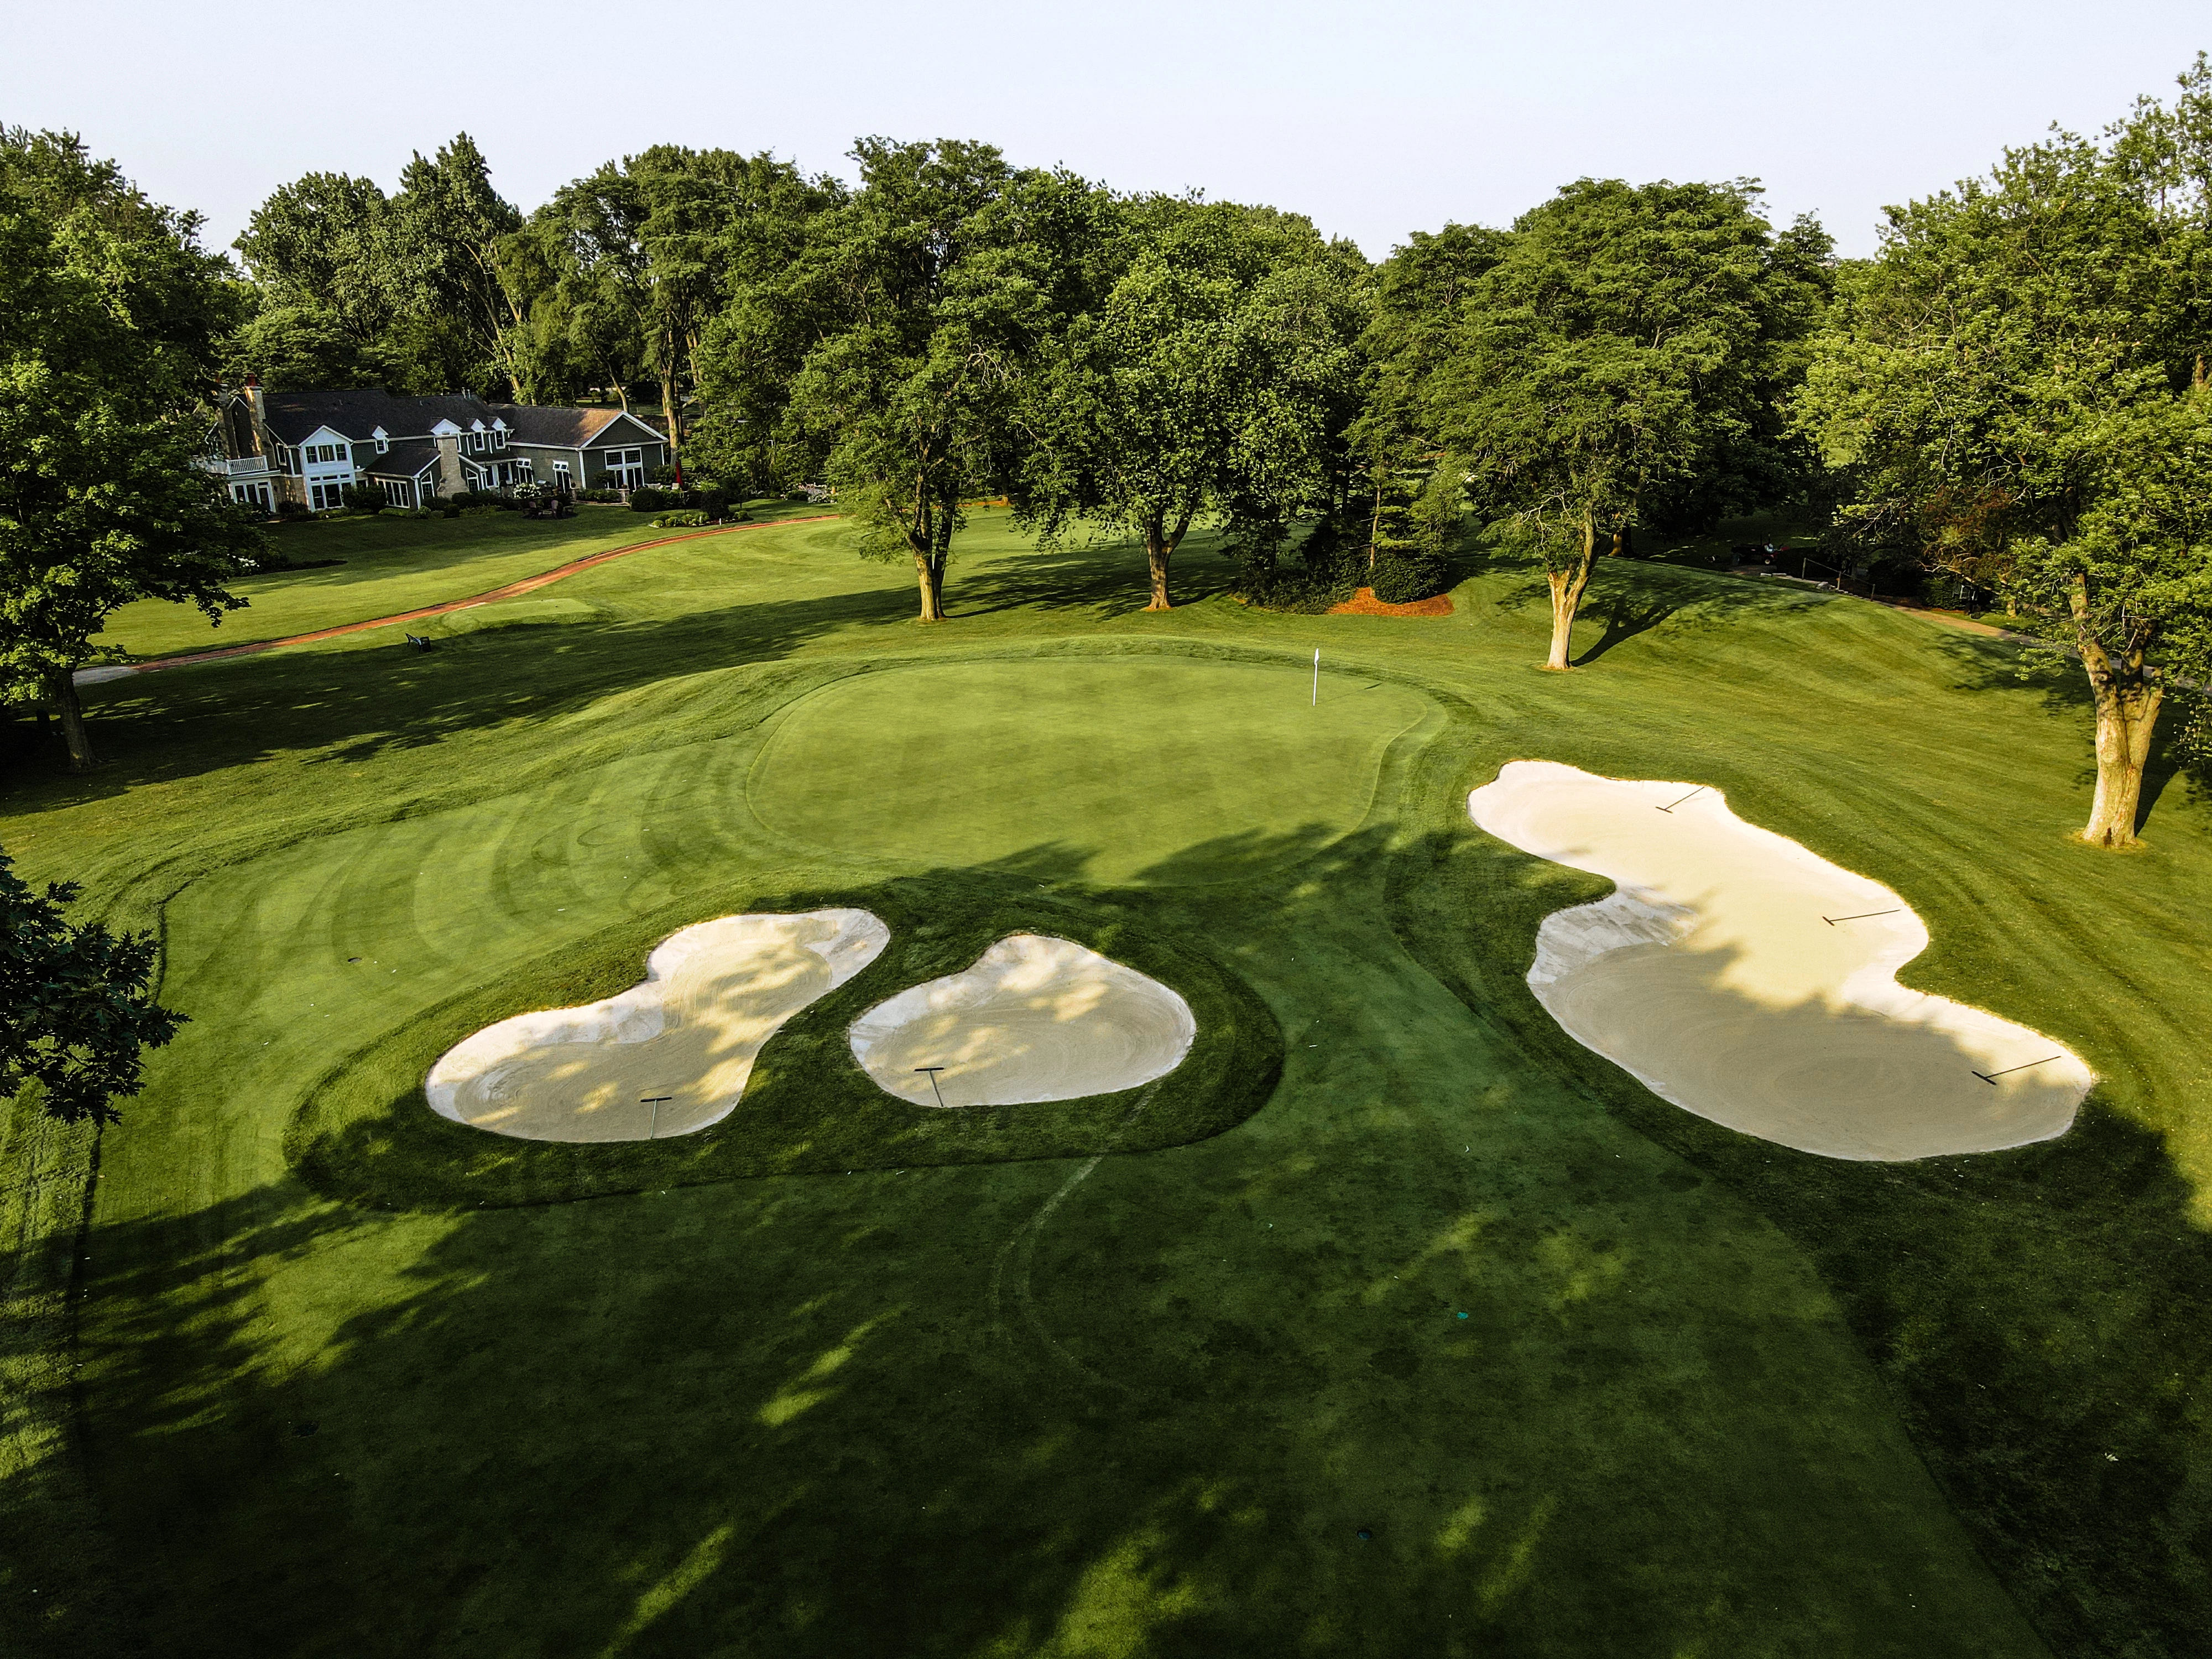
# 16 /
Par: 4
Handicaps:
Men's 18
Women's 13
Yardage by Tee:
BLUE 324
WHITE 312
SILVER 299
GOLD 299
GREEN 299
Slope:
Blue – 137 | White – 134 | Silver – 129 | Gold – 125 | Green – 130
Pro Tips
- While this hole can be visually intimidating, making the right shot selection off of the tee can make this a fun and easily accessible birdie opportunity.
- Hitting the ball long and through the fairway is a common mistake so placing the ball middle right of the fairway off the tee at 180 to 200 yards is all you need.
- Using the windmill as your target line is a good play
- Be thoughtful with your approach shot here as any ball above the hole makes for a tough two putt

# 17 /
Par: 3
Handicaps:
Men's 12
Women's 15
Yardage by Tee:
BLUE 191
WHITE 171
SILVER 155
GOLD 114
GREEN 110
Slope:
Blue – 137 | White – 134 | Silver – 129 | Gold – 125 | Green – 130
Pro Tips
- With out of bounds along the entire left side of the hole, this well bunkered green demands and accurate tee ball and confidence in your carry number of the club selected.
- This green has a dominant left to right downhill slope so middle – left is a safe way to approach your landing location.
- Over shooting this green should be avoided at all cost.
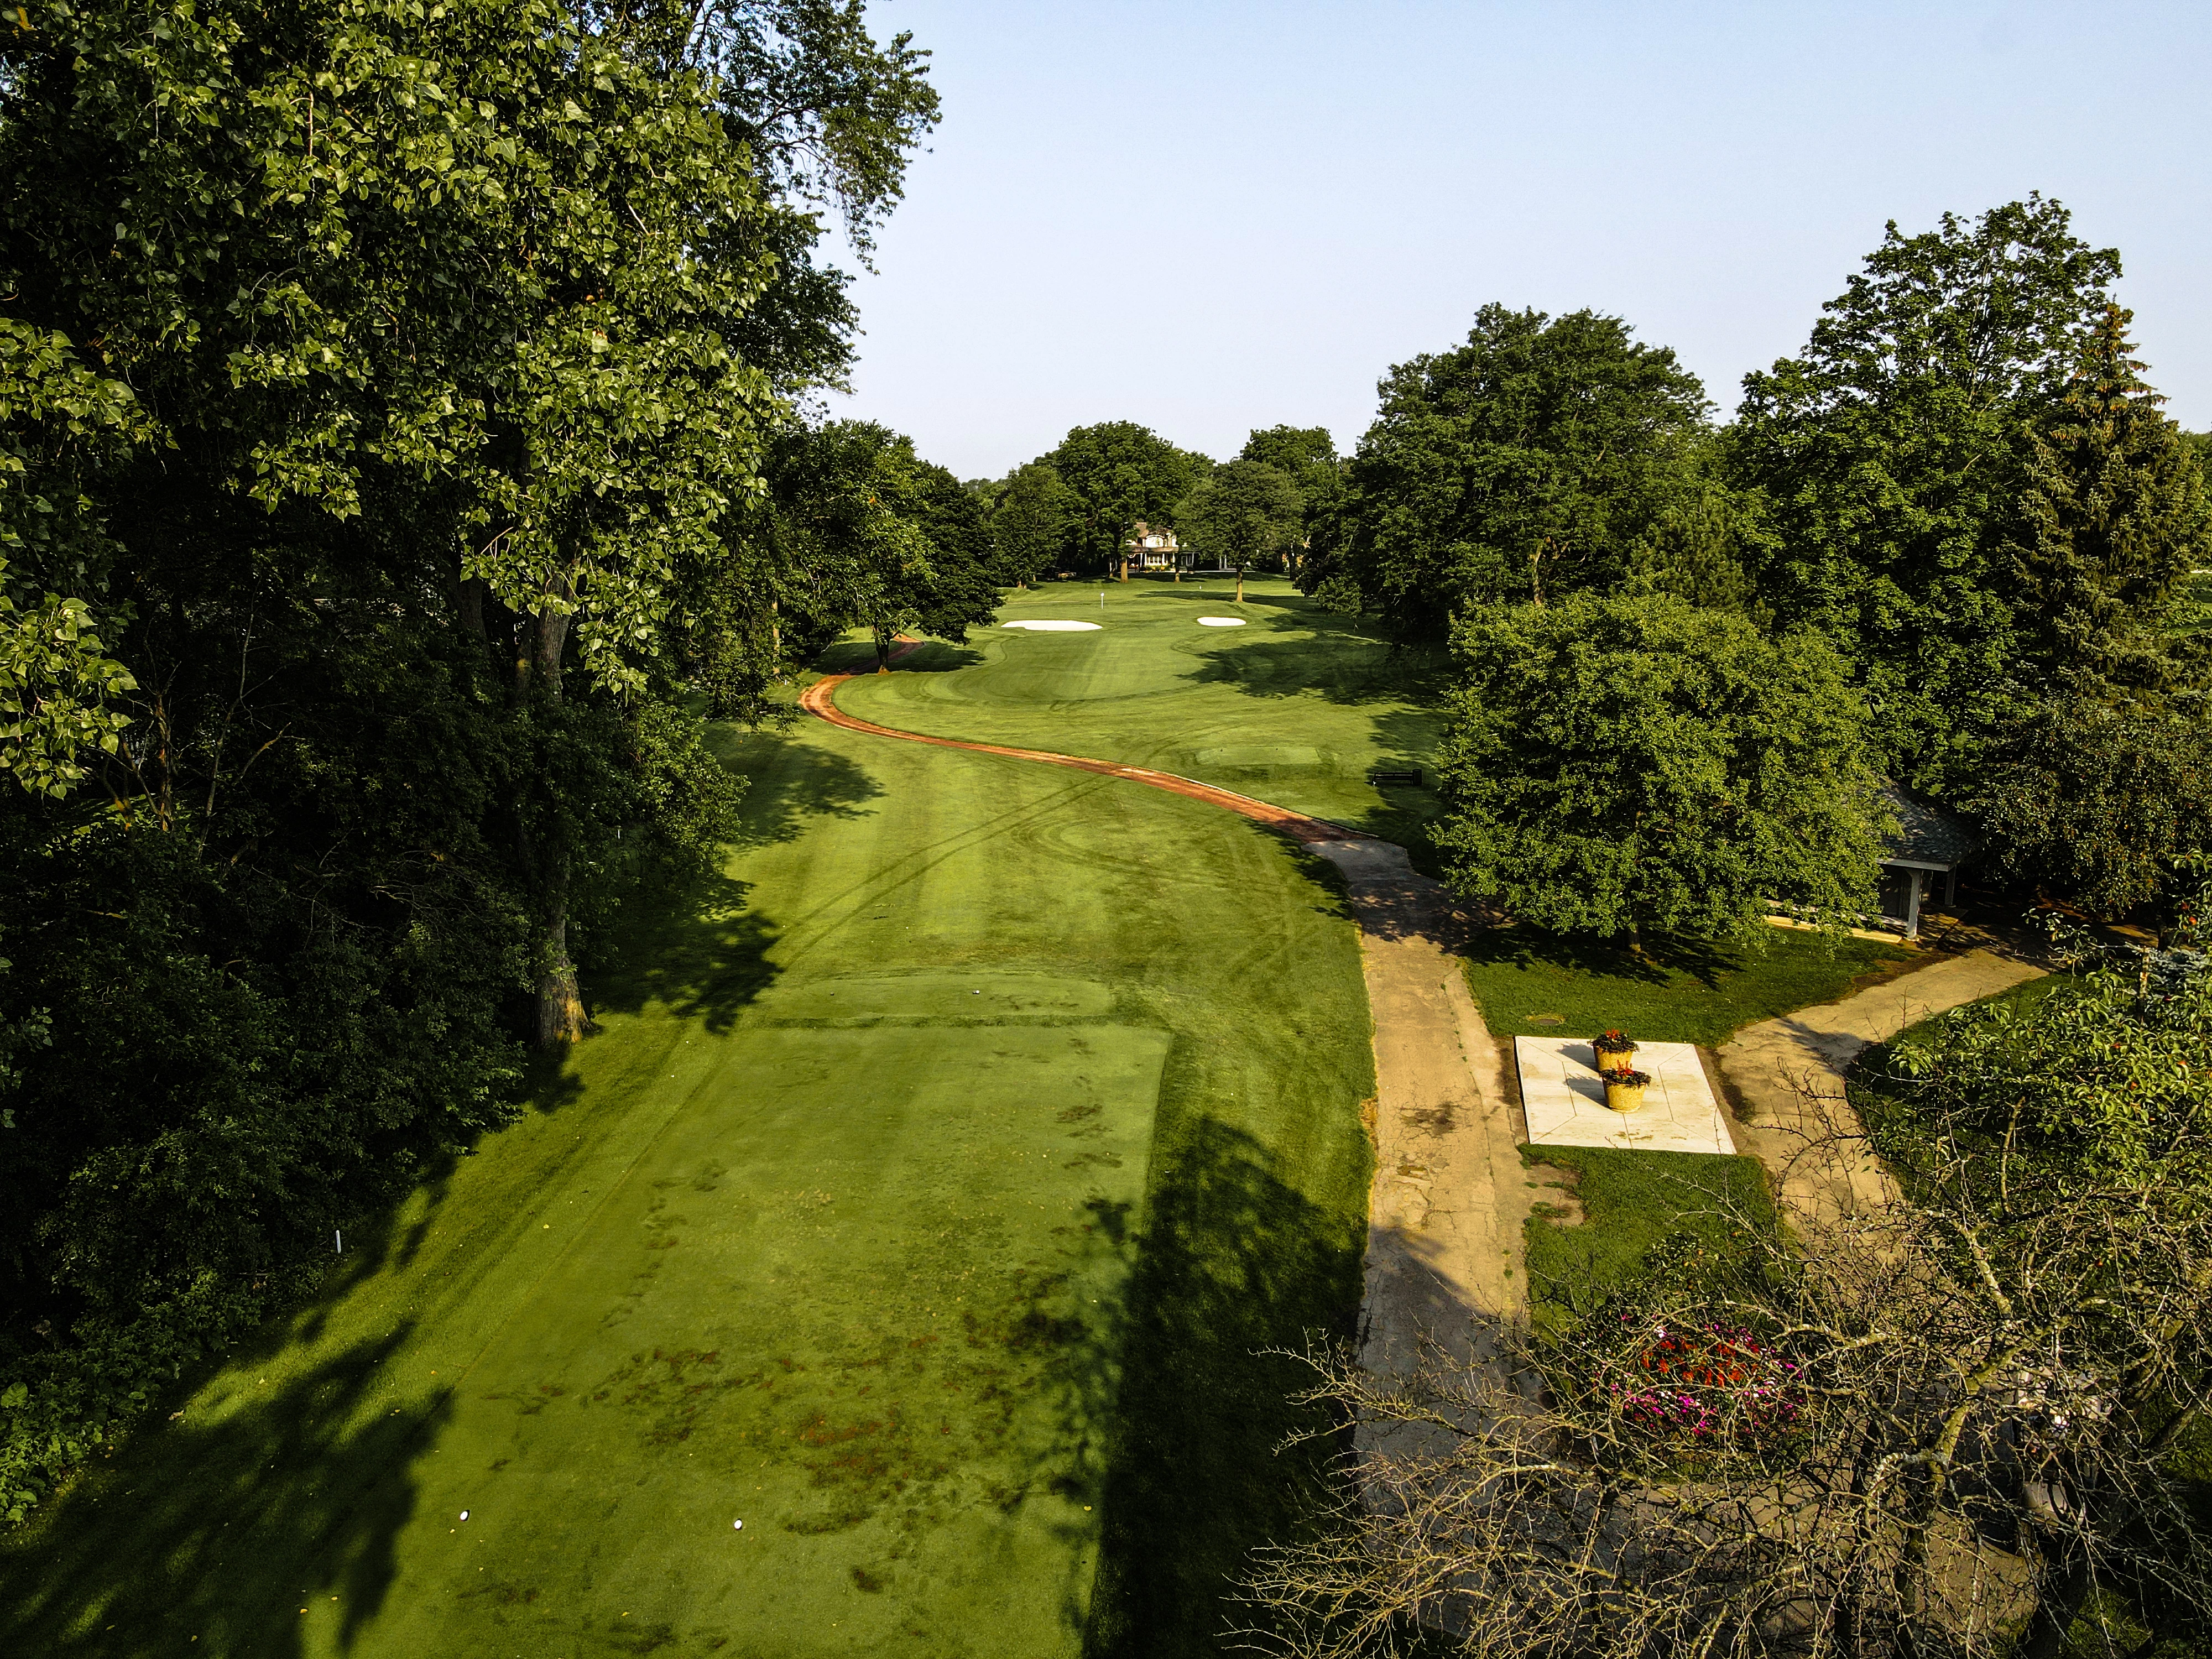
# 18 /
Par: 4
Handicaps:
Men's 6
Women's 3
Yardage by Tee:
BLUE 414
WHITE 400
SILVER 368
GOLD 334
GREEN 400
Slope:
Blue – 137 | White – 134 | Silver – 129 | Gold – 125 | Green – 130
Pro Tips
- Depending on the day, this #6 handicap closing hole can feel like the toughest hole on the course to hit in regulation.
- A fade cutting off of the middle of the fairway bunker is I deal or a straight ball aimed at the “268” maker painted into our version of Wrigley Field’s left field sets your up for a good line into this elevated green.
- Flag locations in the middle or back middle of the green can leverage an approach shot that take advantage of a ridge flowing from right to left and back that is imperceptible from the fairway.
- There is no shame in playing this a three shot hole