Stonehenge Golf Course
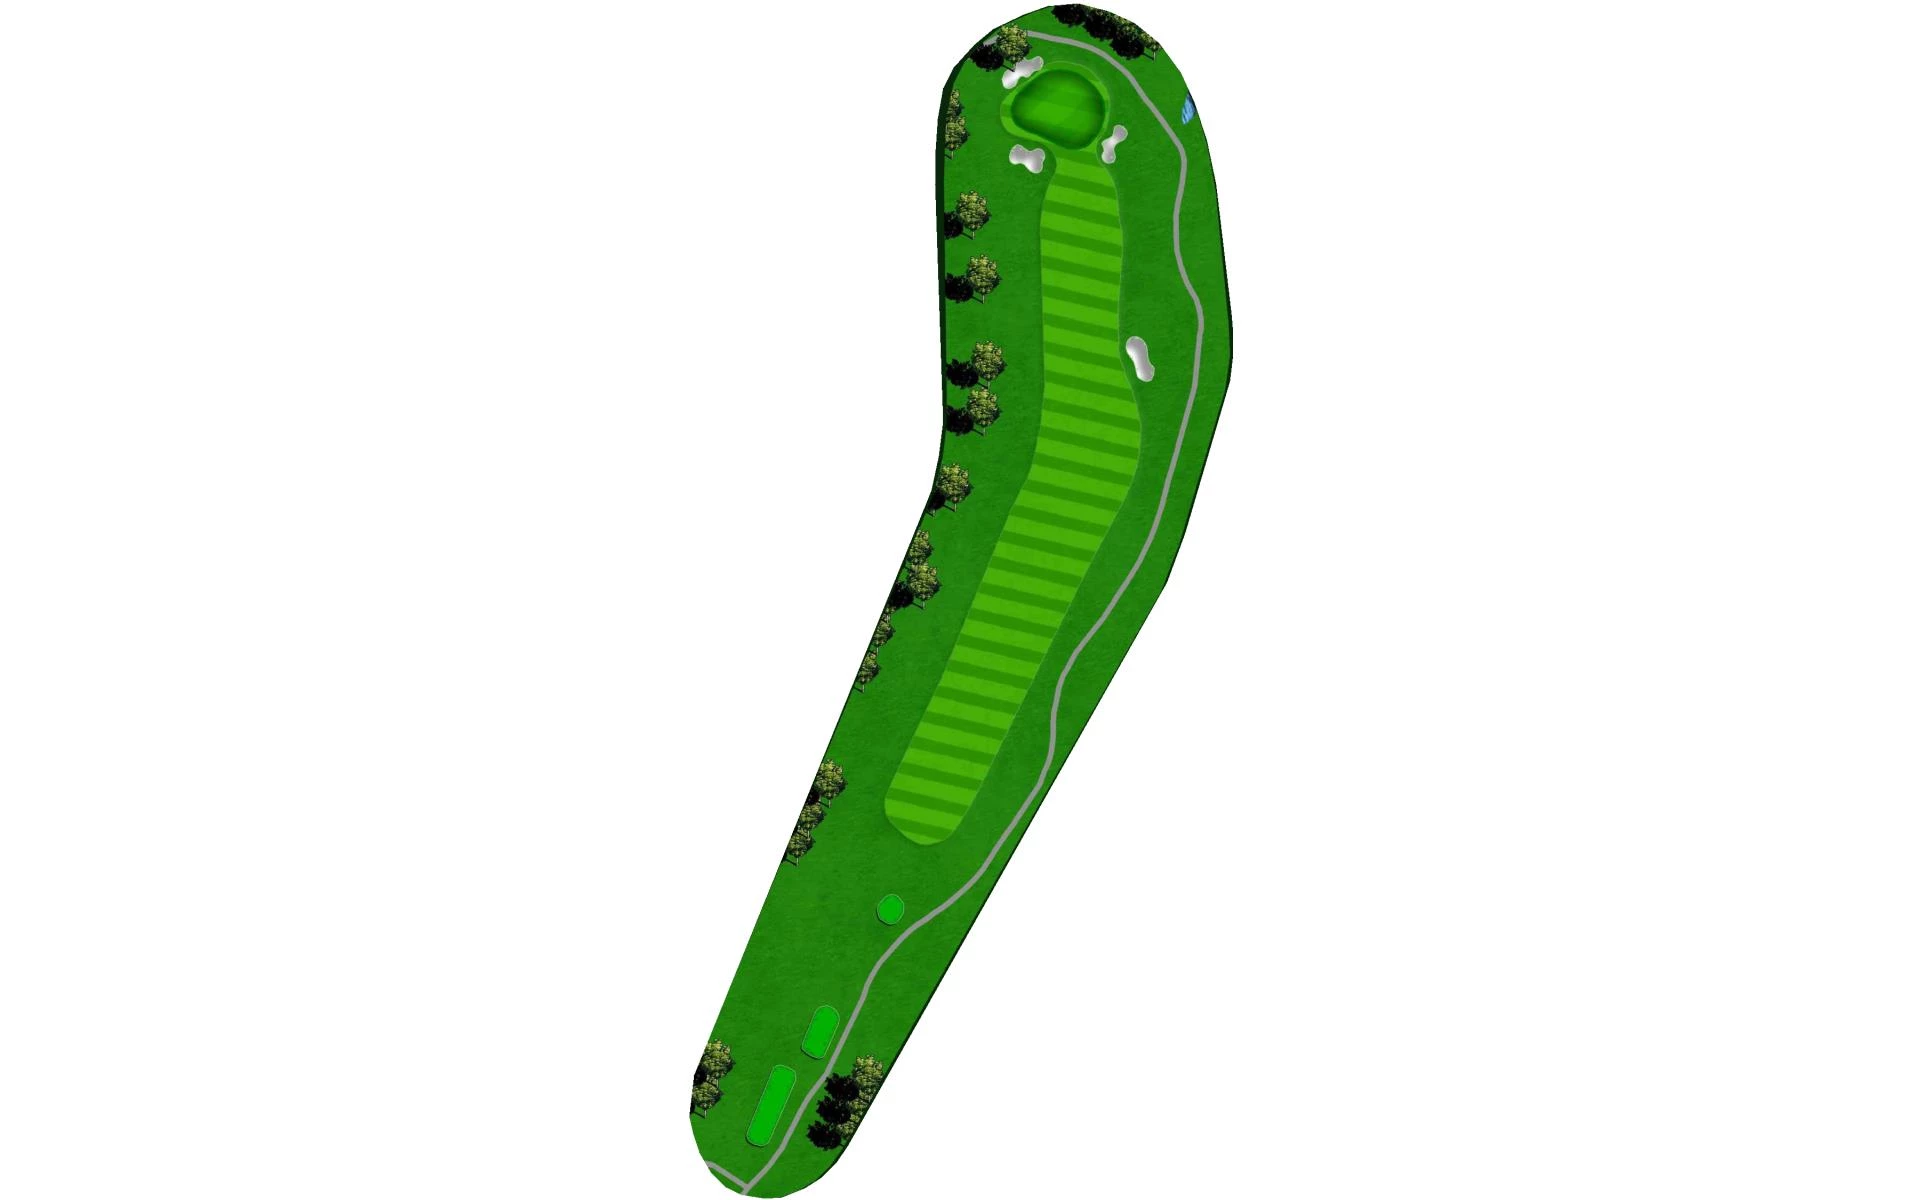
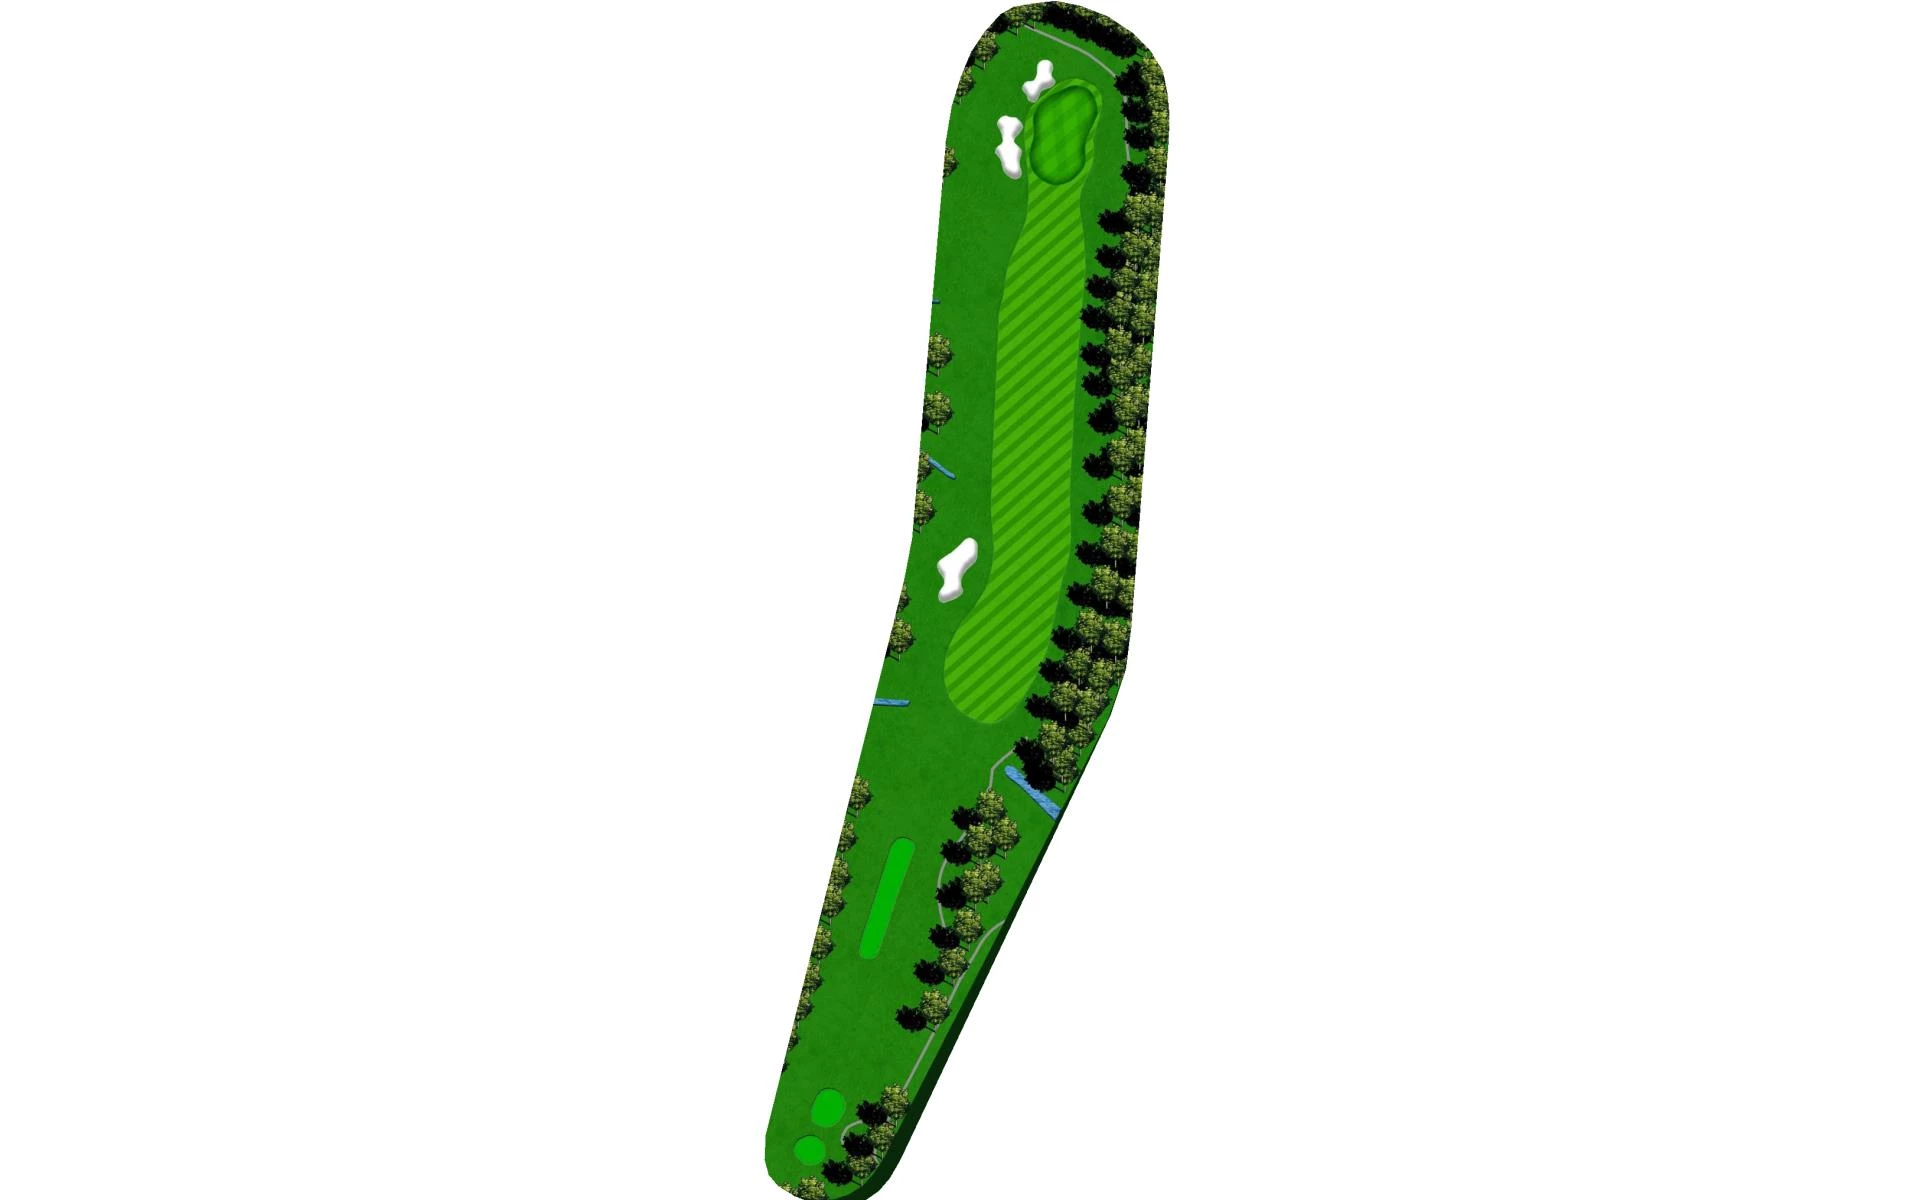
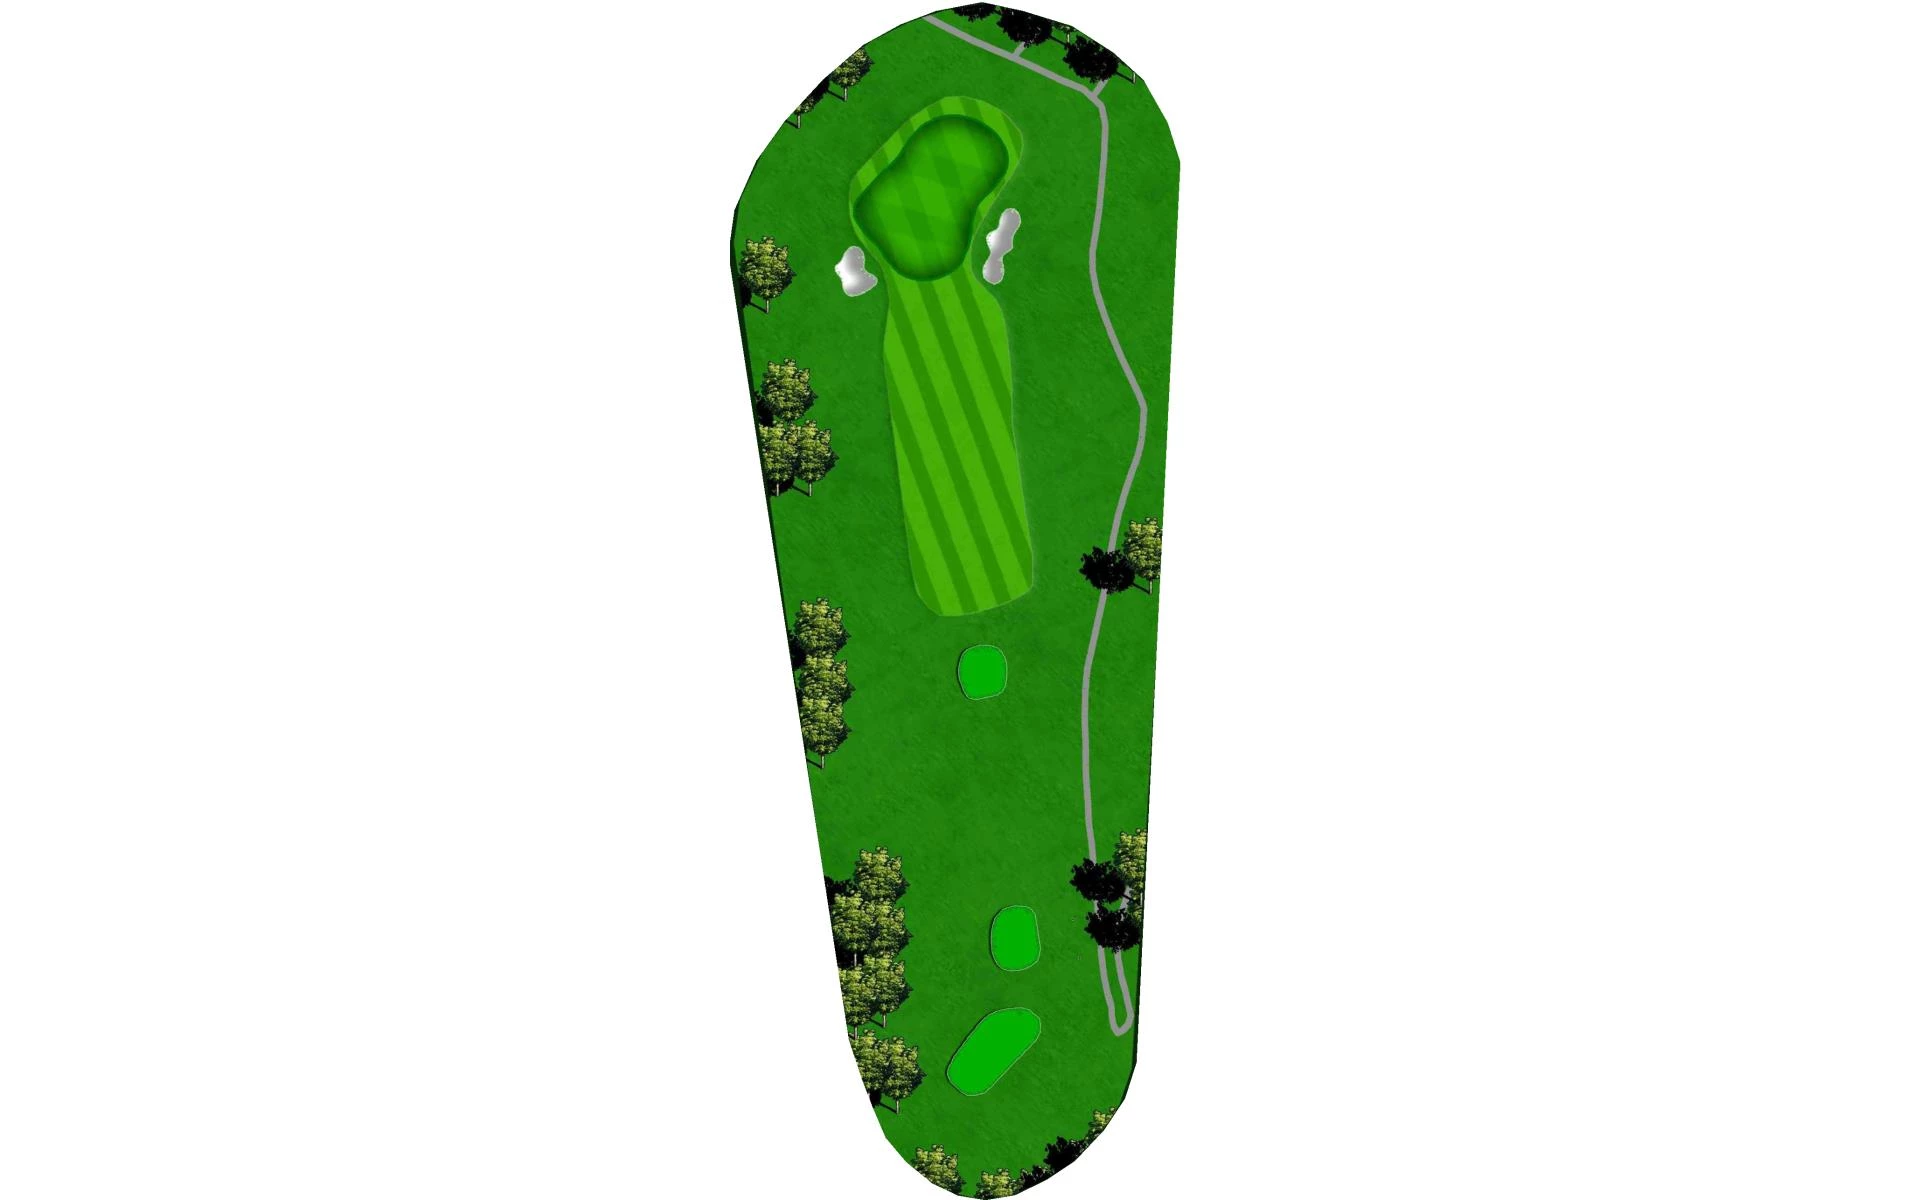
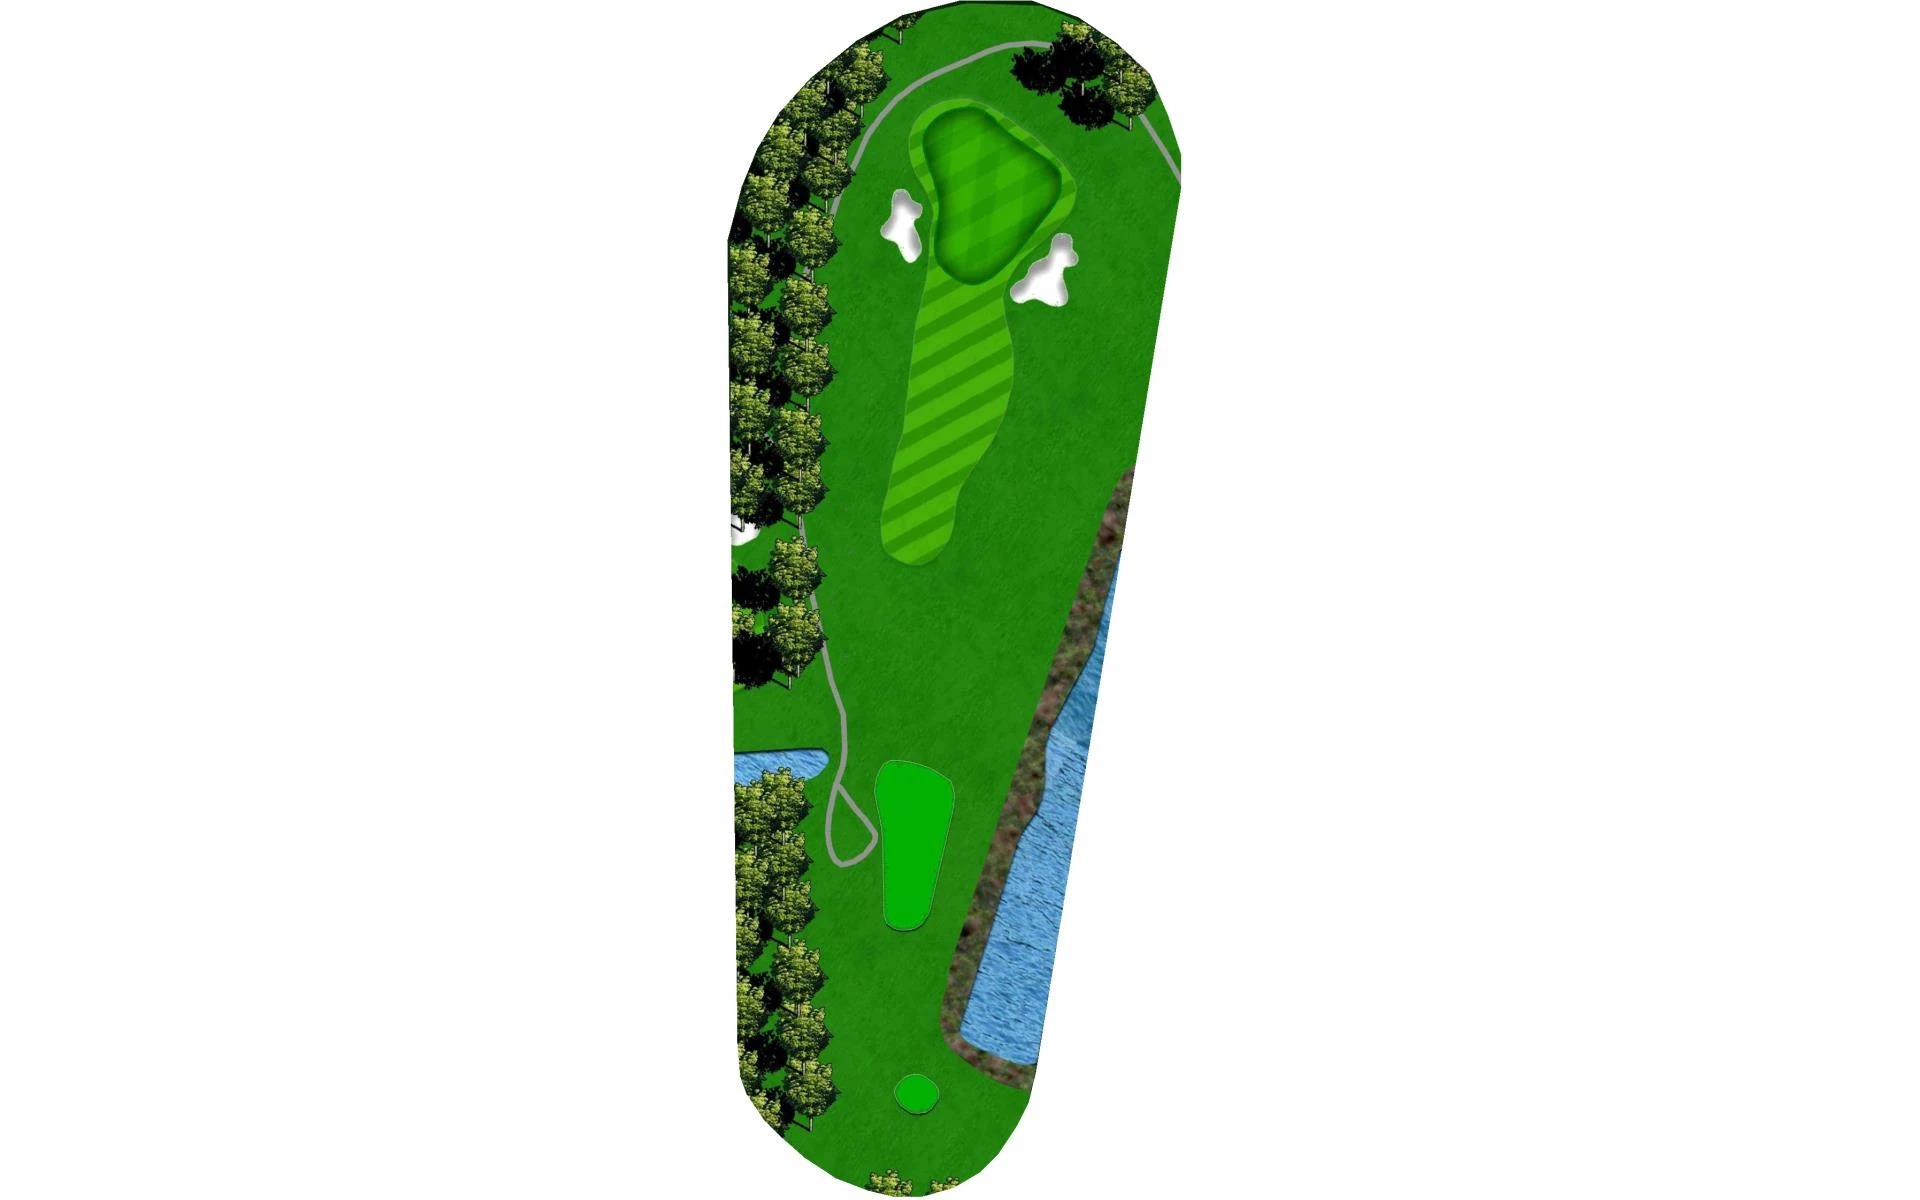
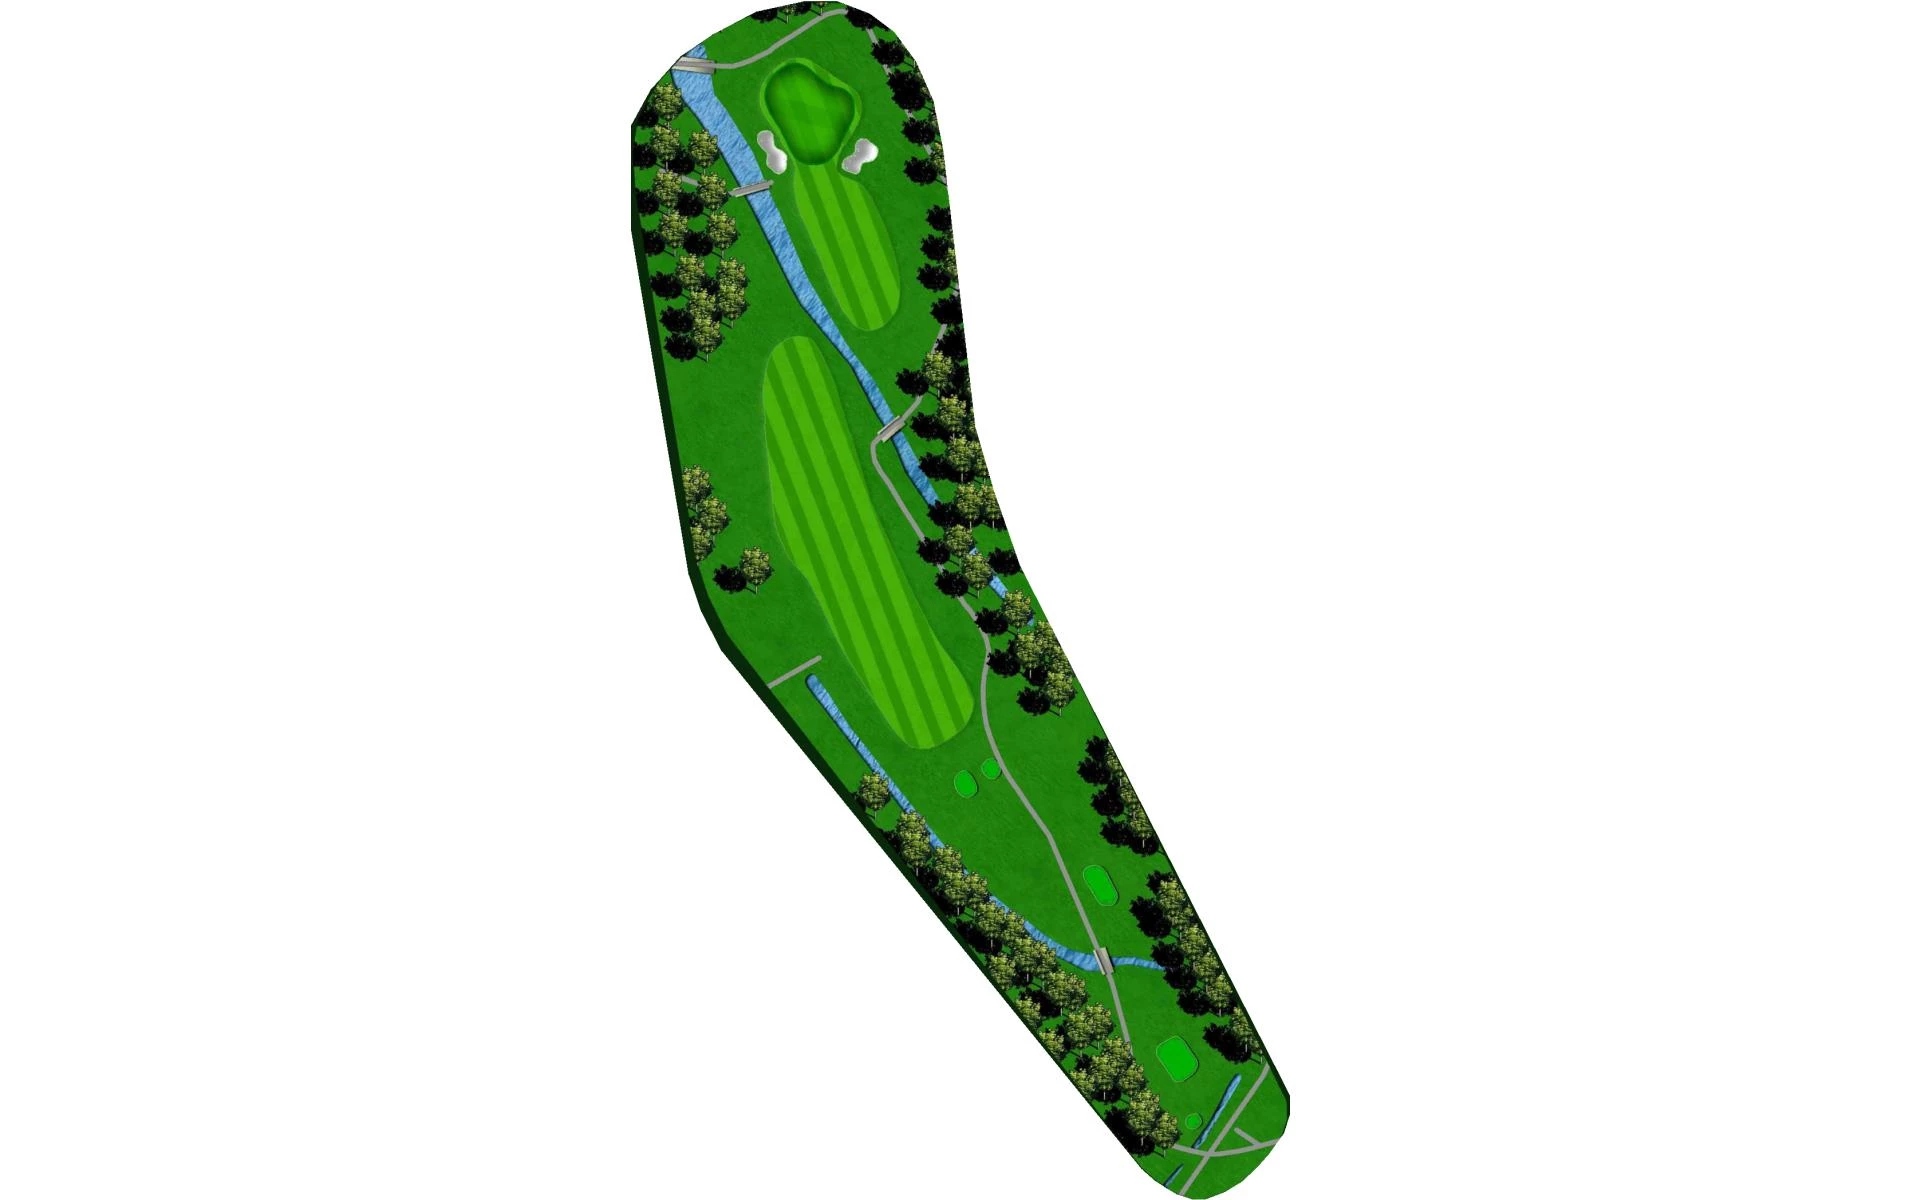
# 1 /
Par: 4
Yardage by Tee:
PURPLE 415
BLUE 413
WHITE 396
GREEN 371
GOLD 371
RED 317
Slope:
Purple 135 | Blue 132 | White 130 | Green 130 | Gold 127 | Black 117
Pro Tips
The first hole is a sweeping downhill, dogleg left par 4 that features a shallow putting surface. Player’s should aim their tee ball at the left edge of the fairway bunker, as it will feed to the center.
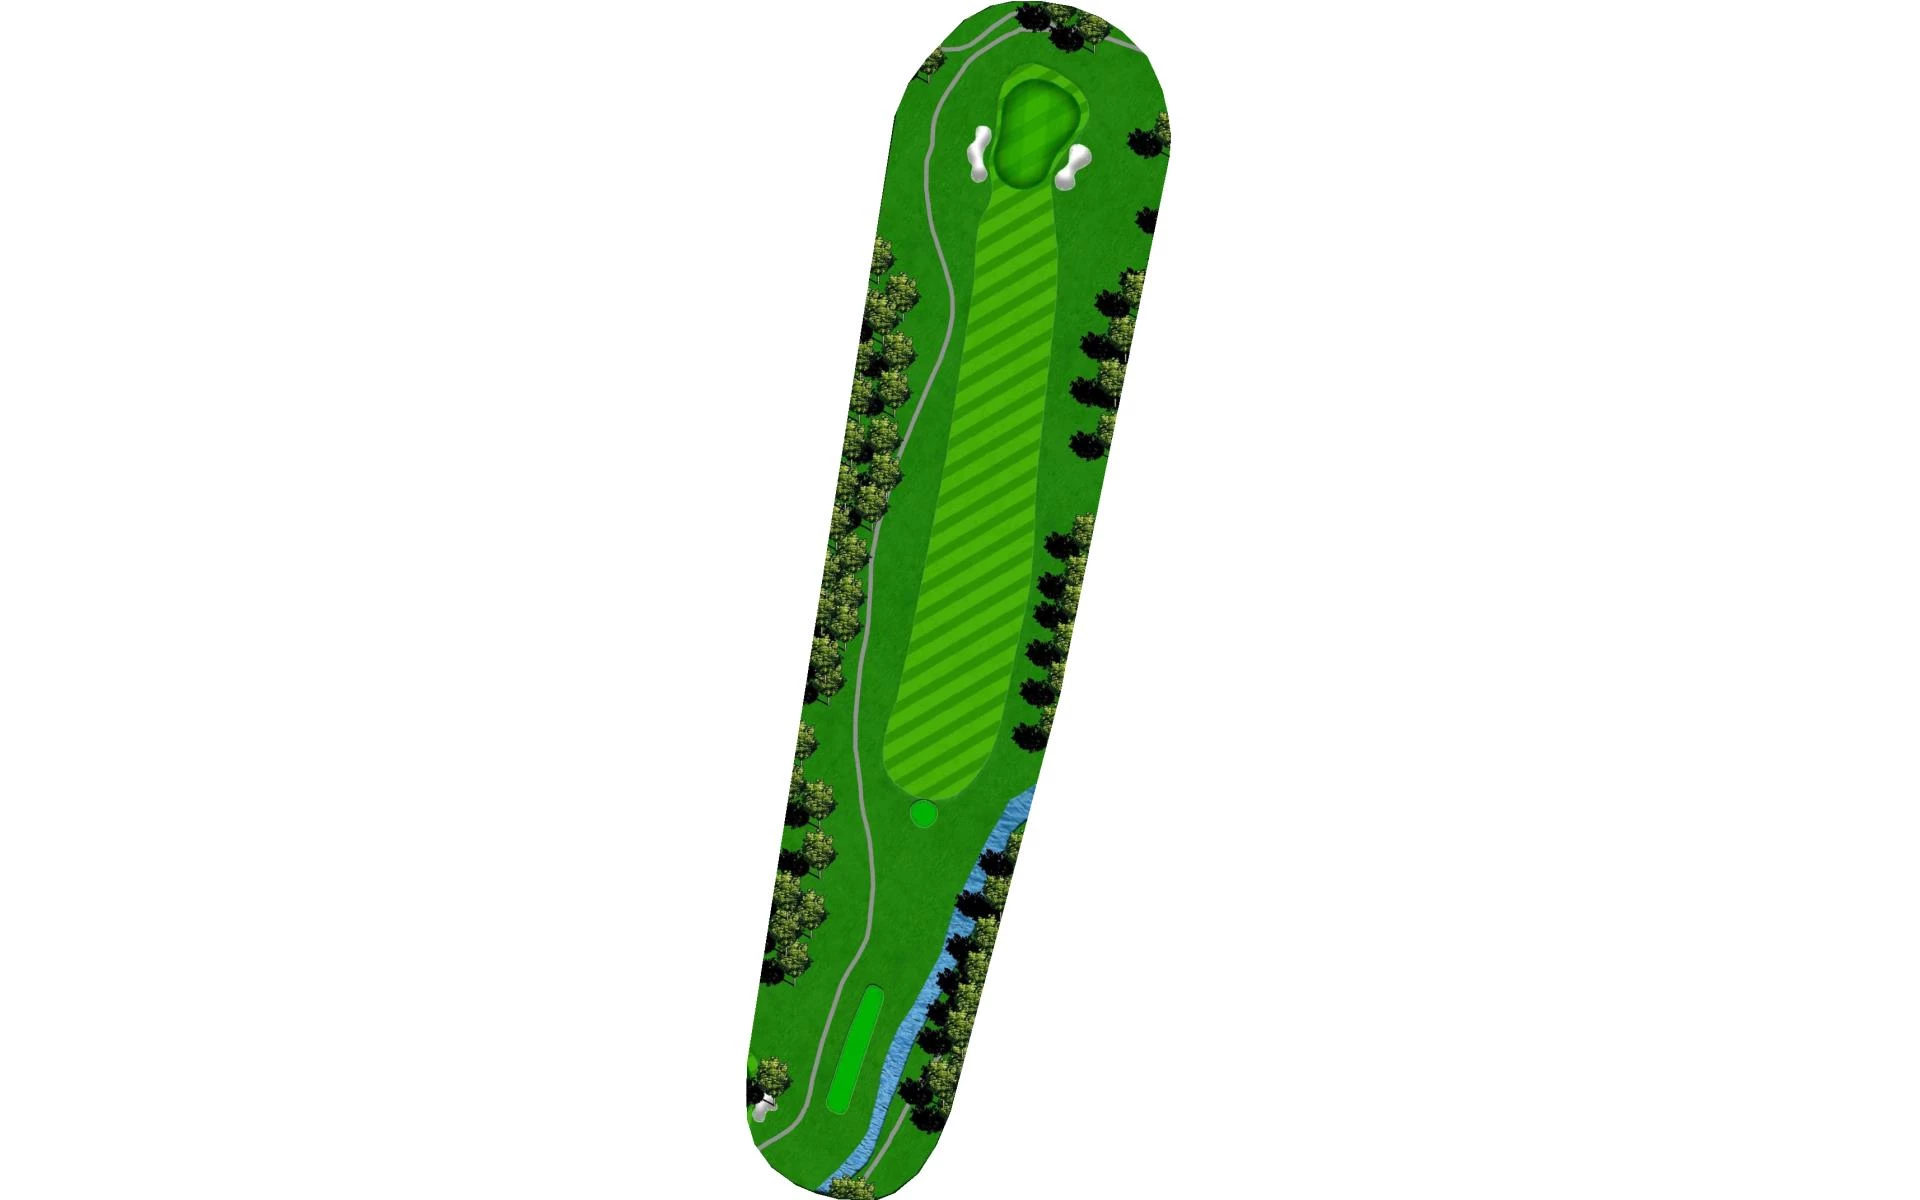
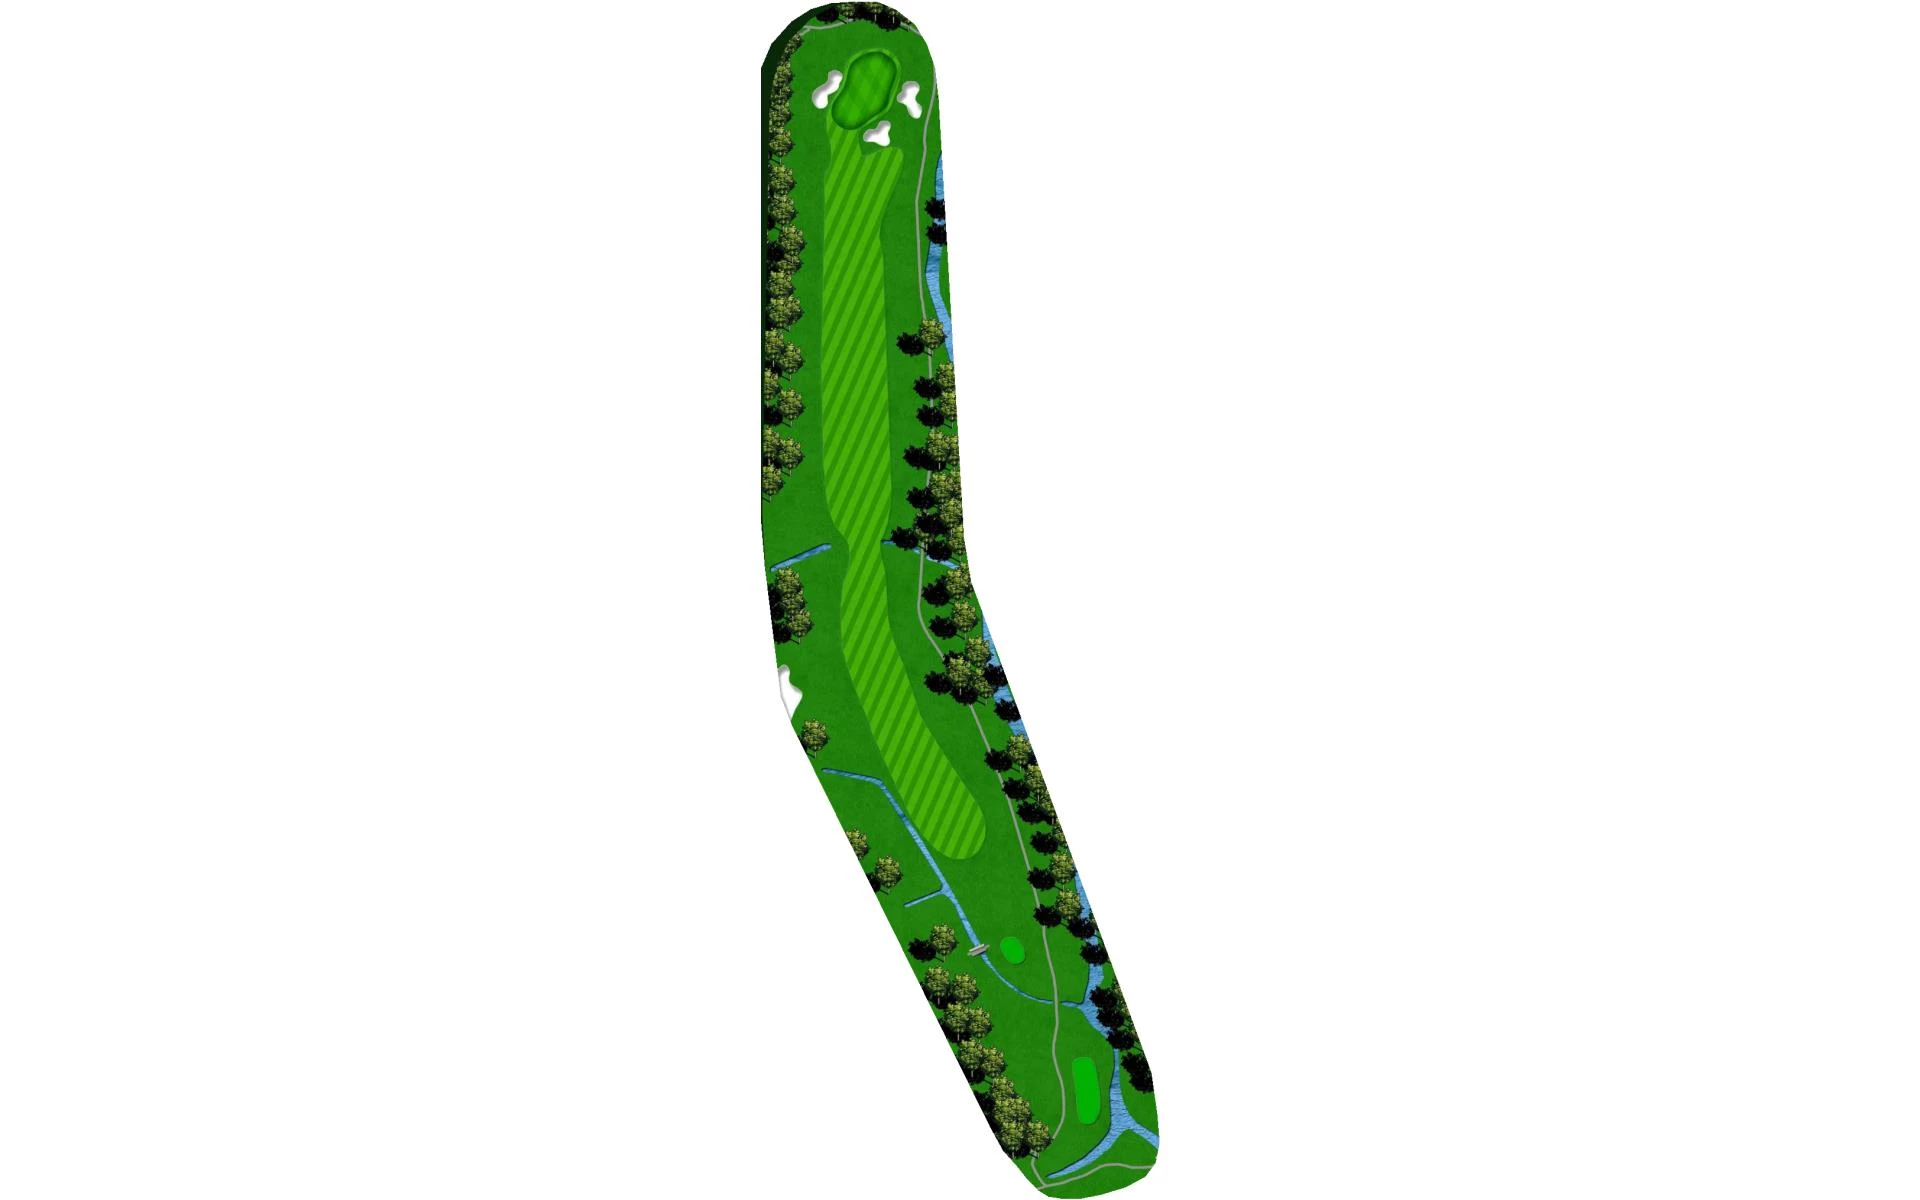
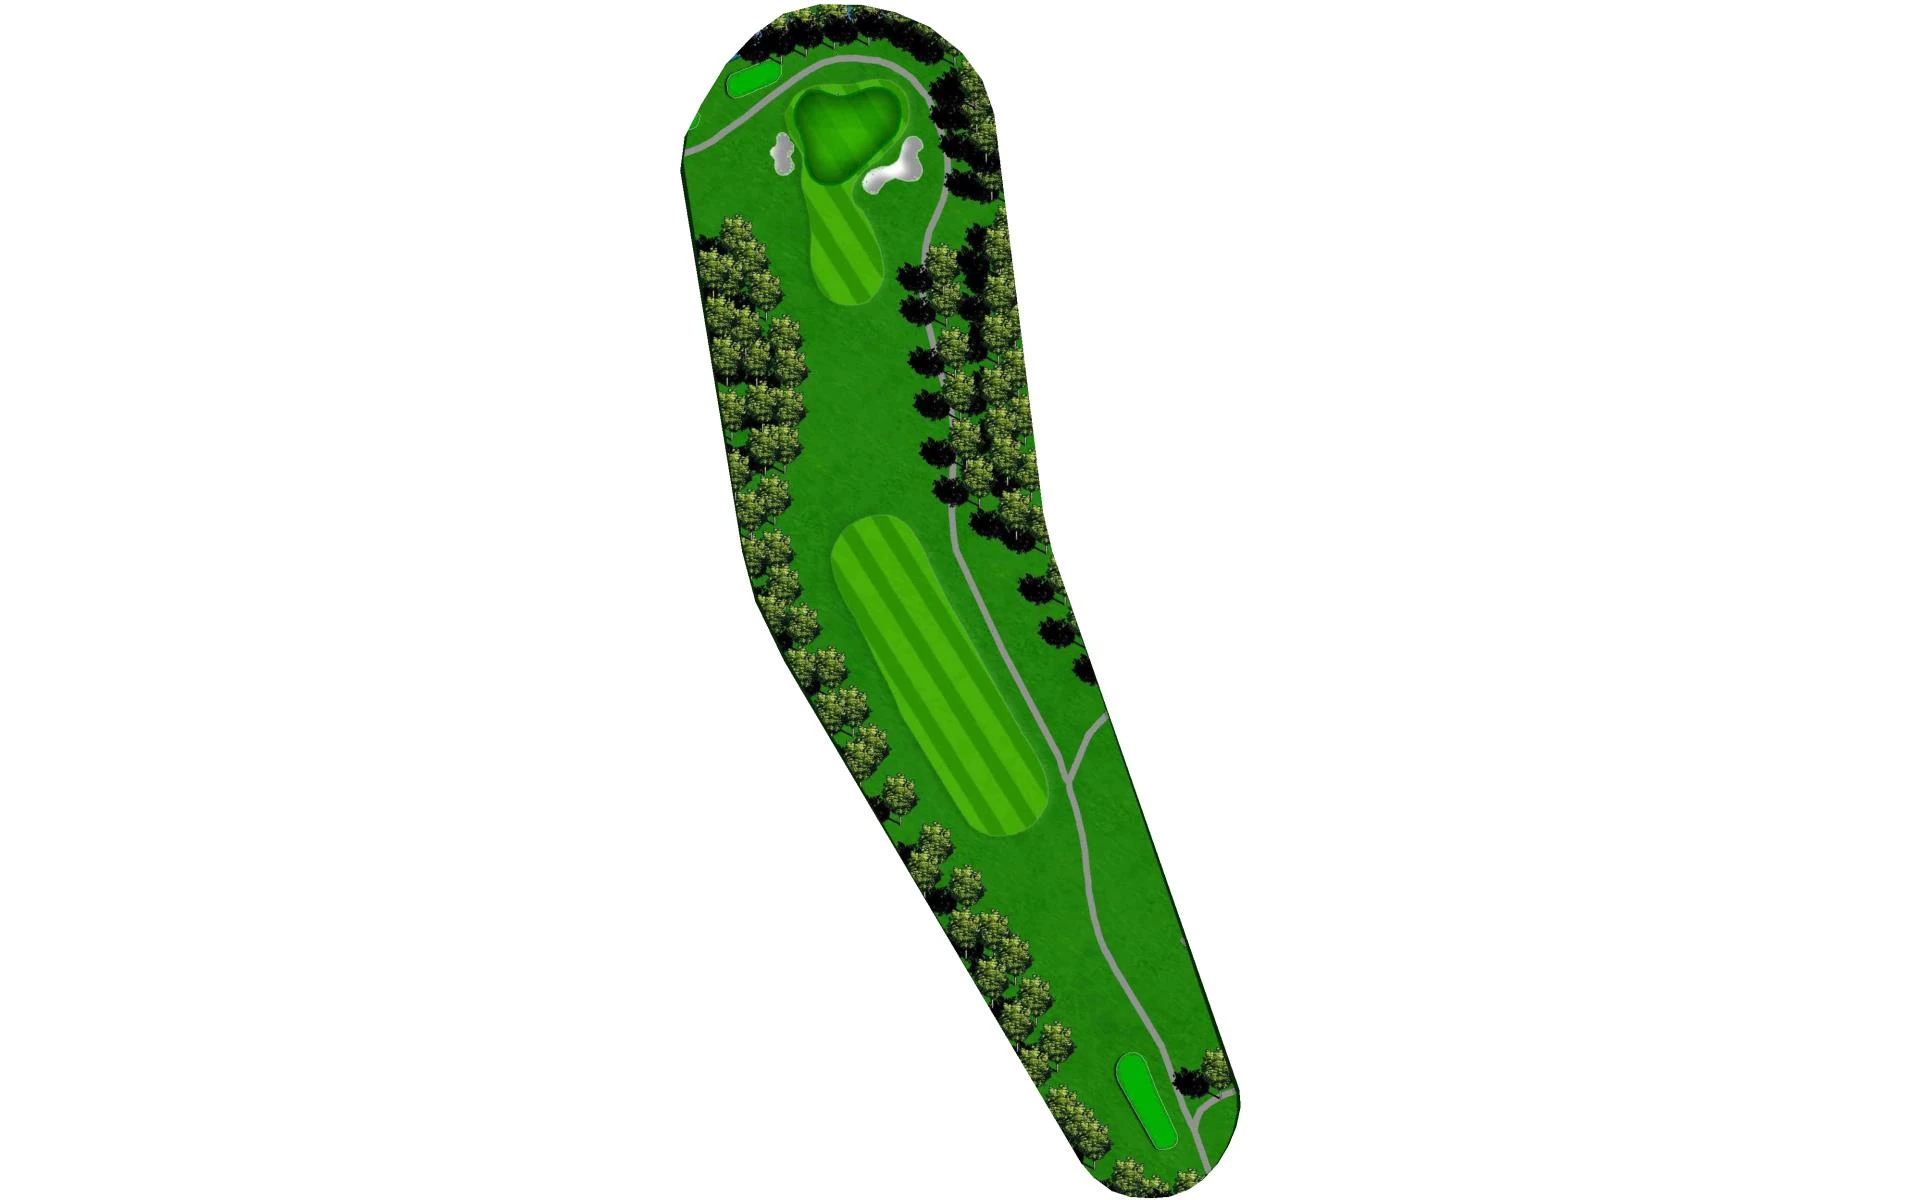
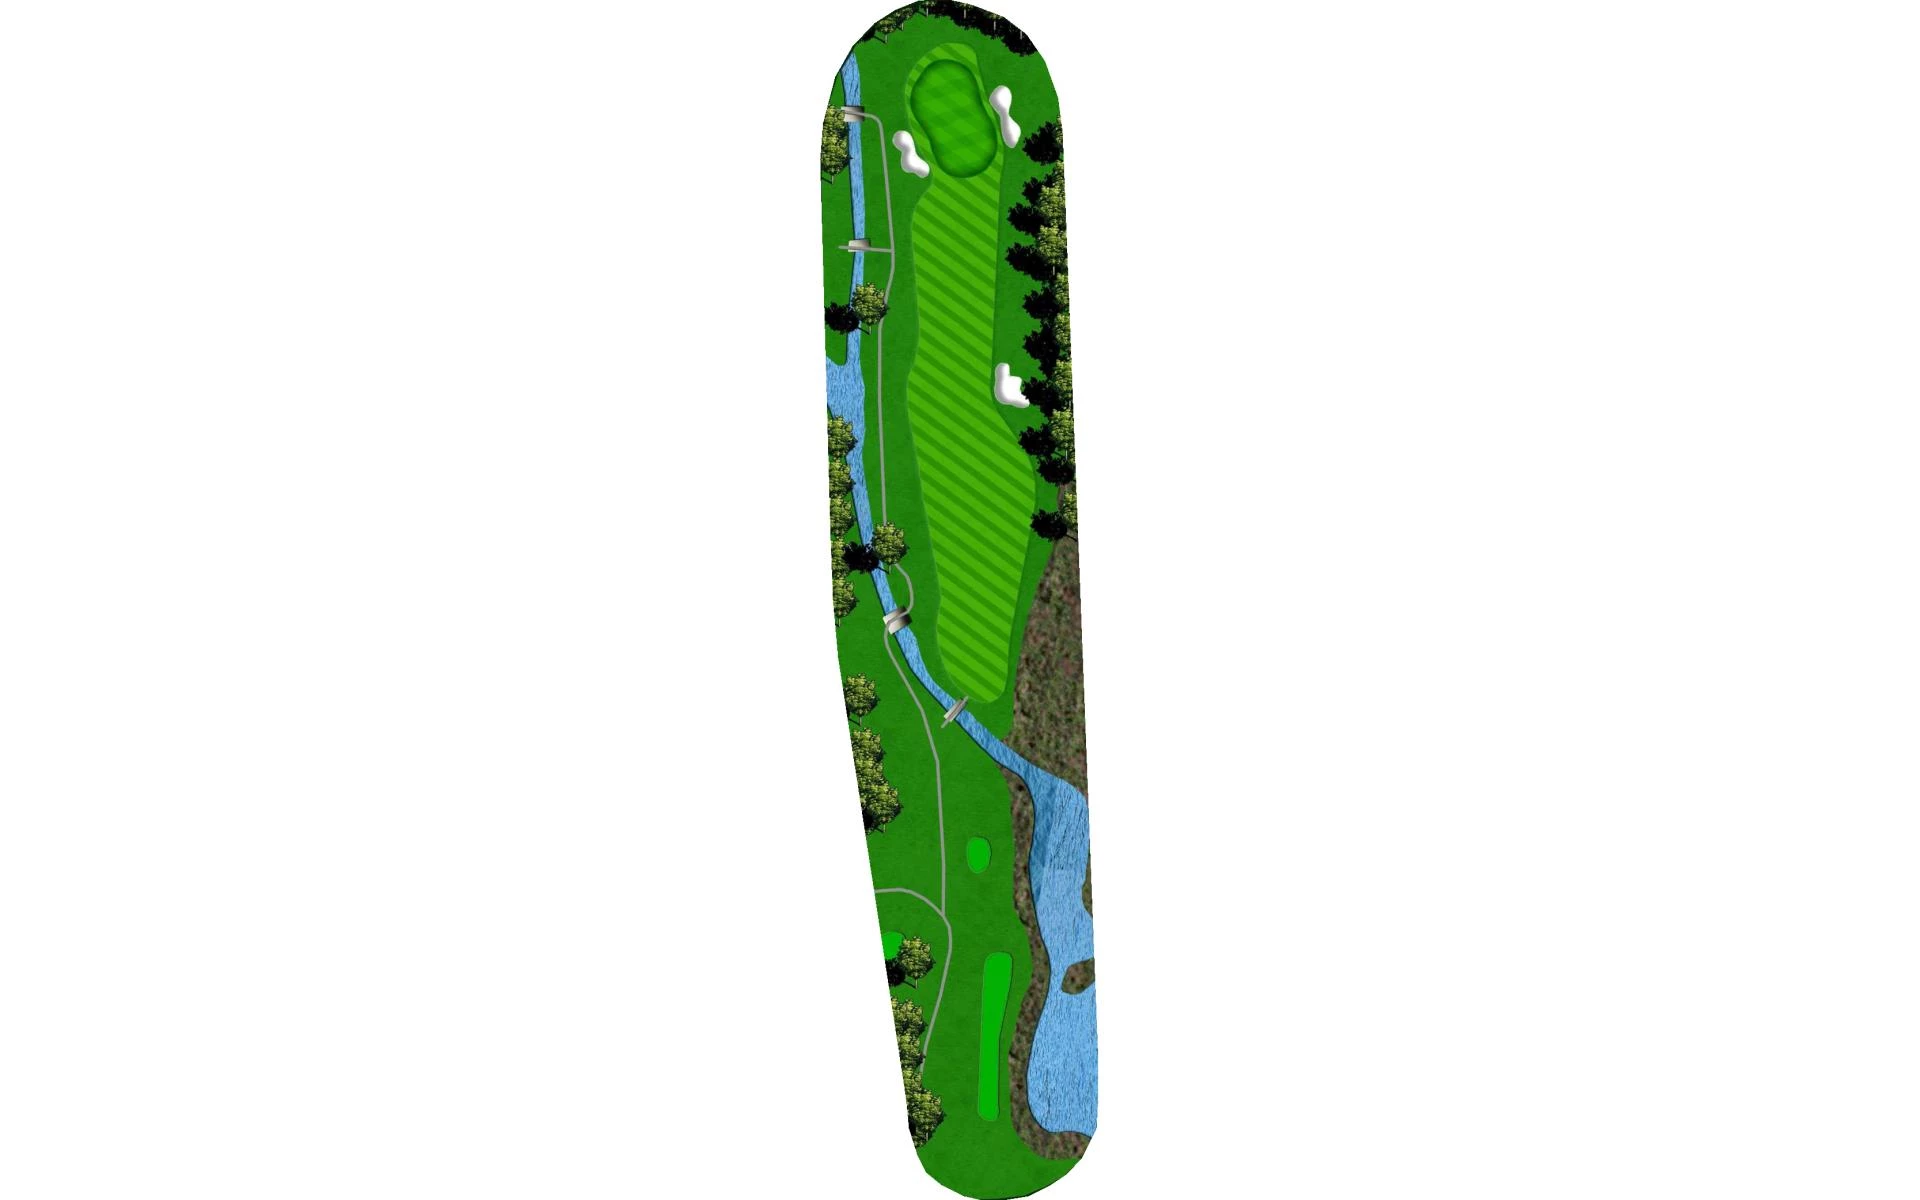
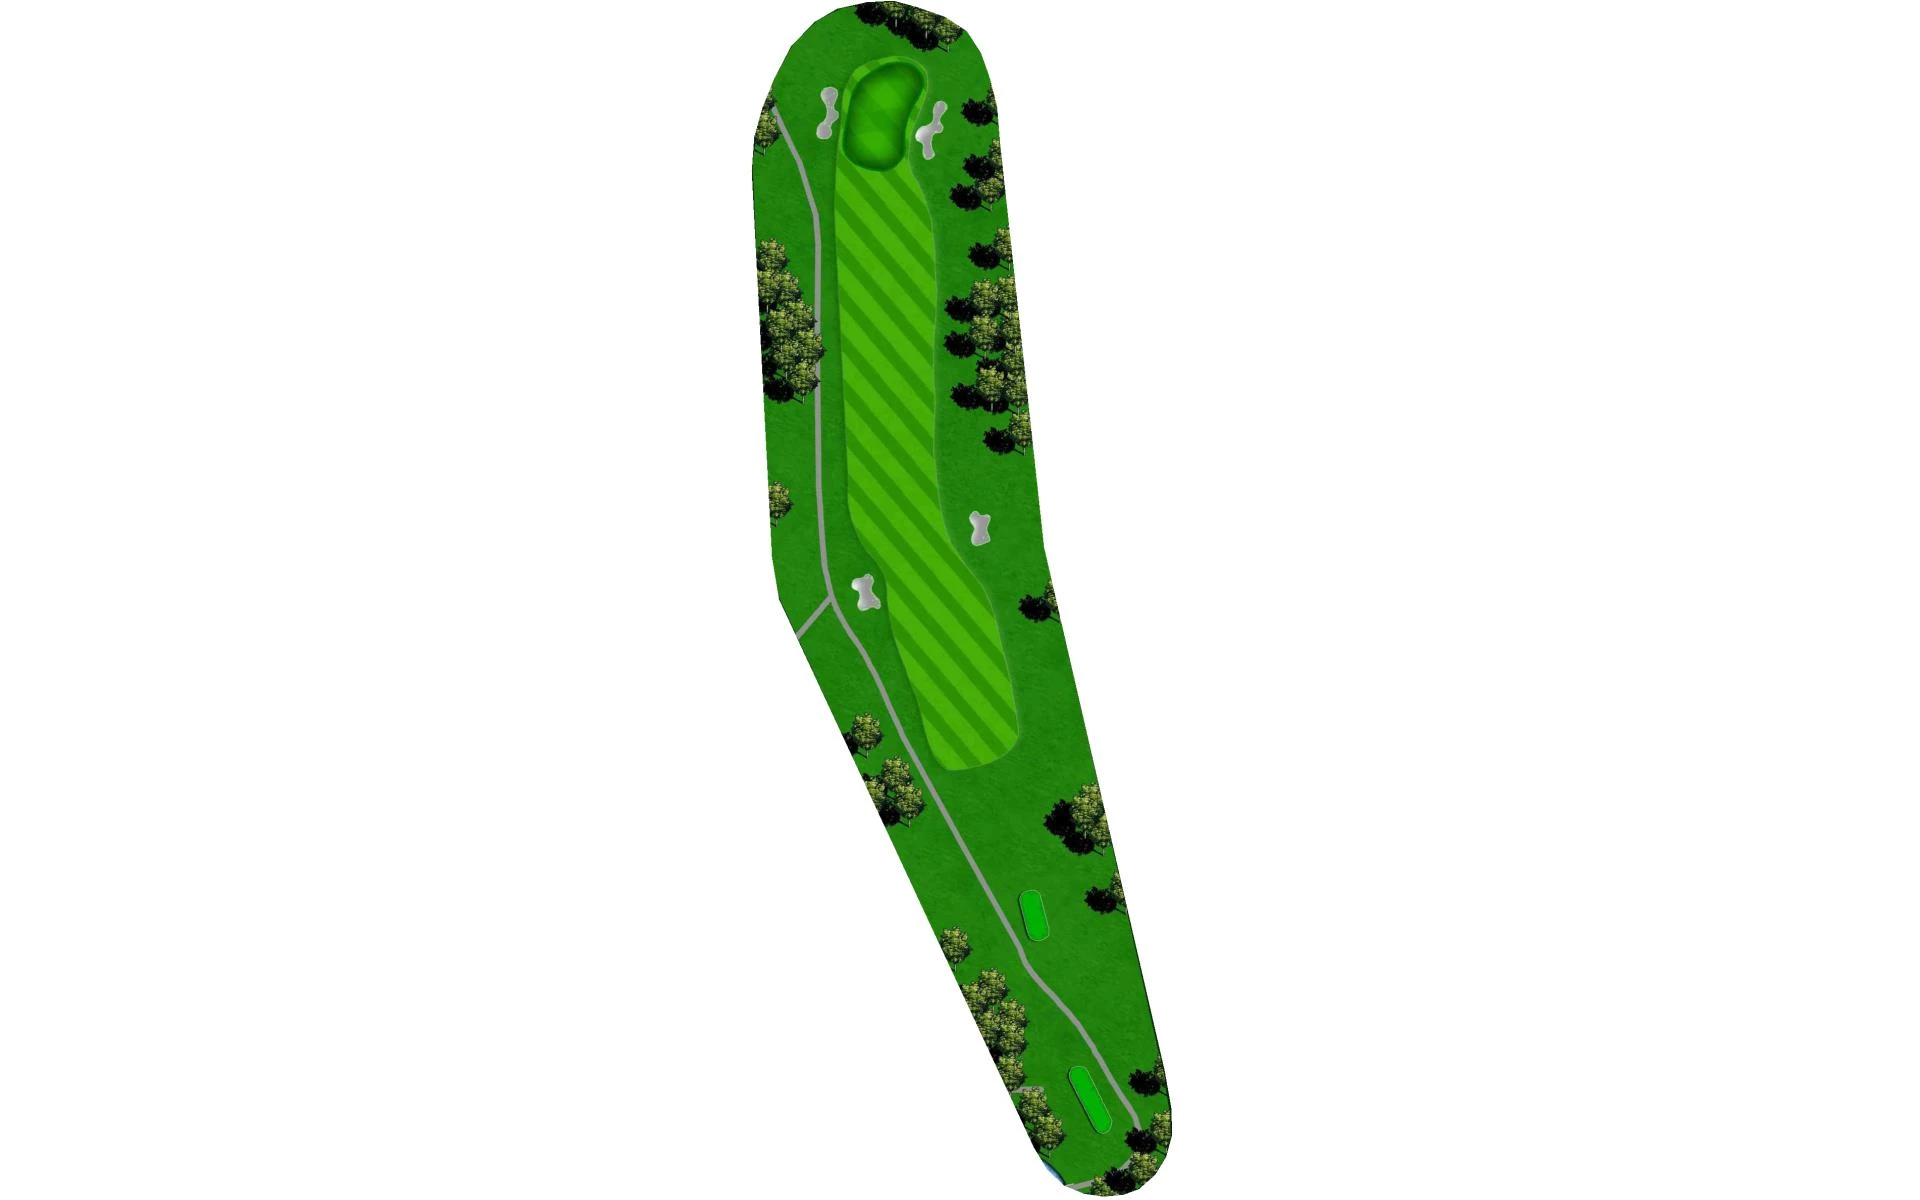
# 2 /
Par: 4
Yardage by Tee:
PURPLE 401
BLUE 363
WHITE 348
GREEN 348
GOLD 337
RED 329
Slope:
Purple 135 | Blue 132 | White 130 | Green 130 | Gold 127 | Black 117
Pro Tips
This short par 4 requires some accuracy, as hazards are set on both sides of the hole.
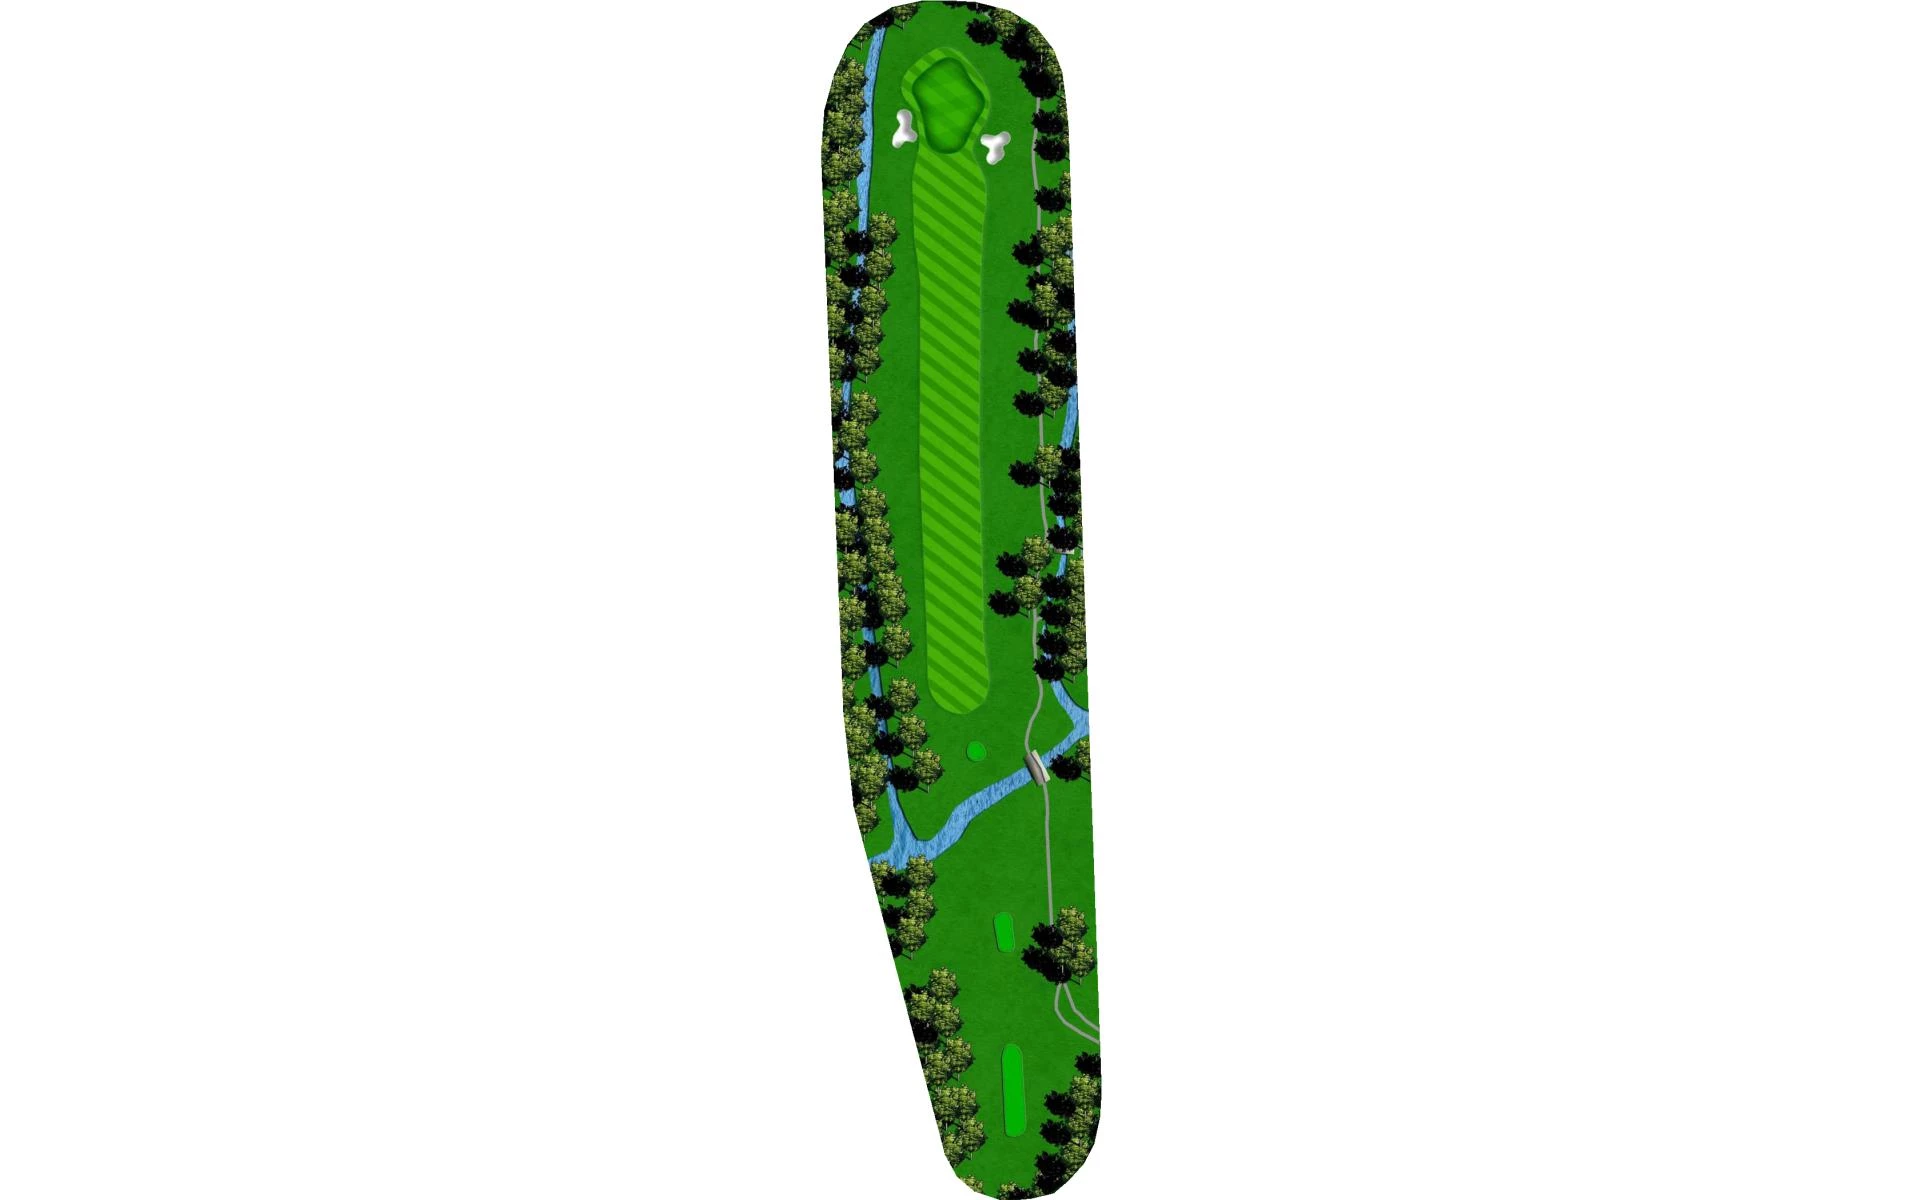
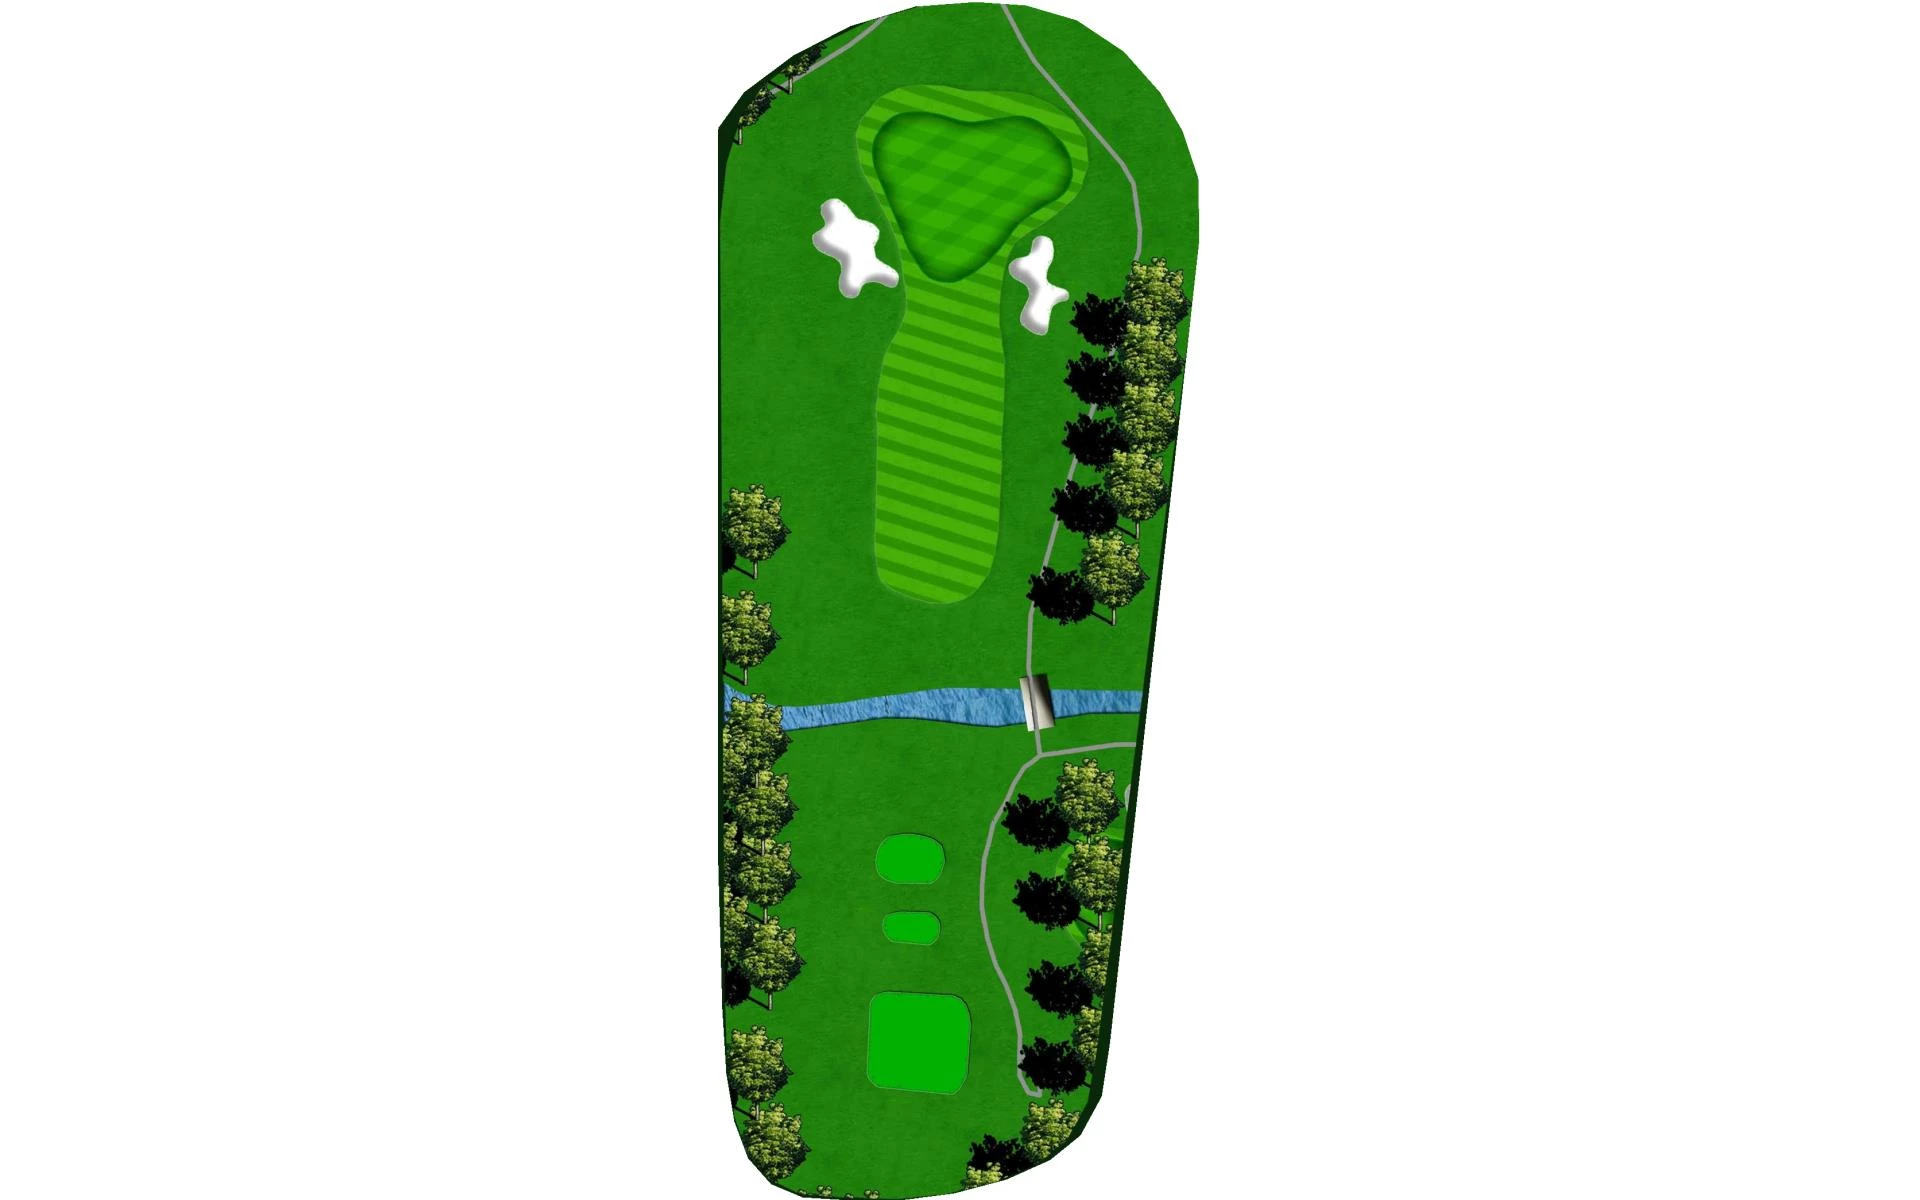
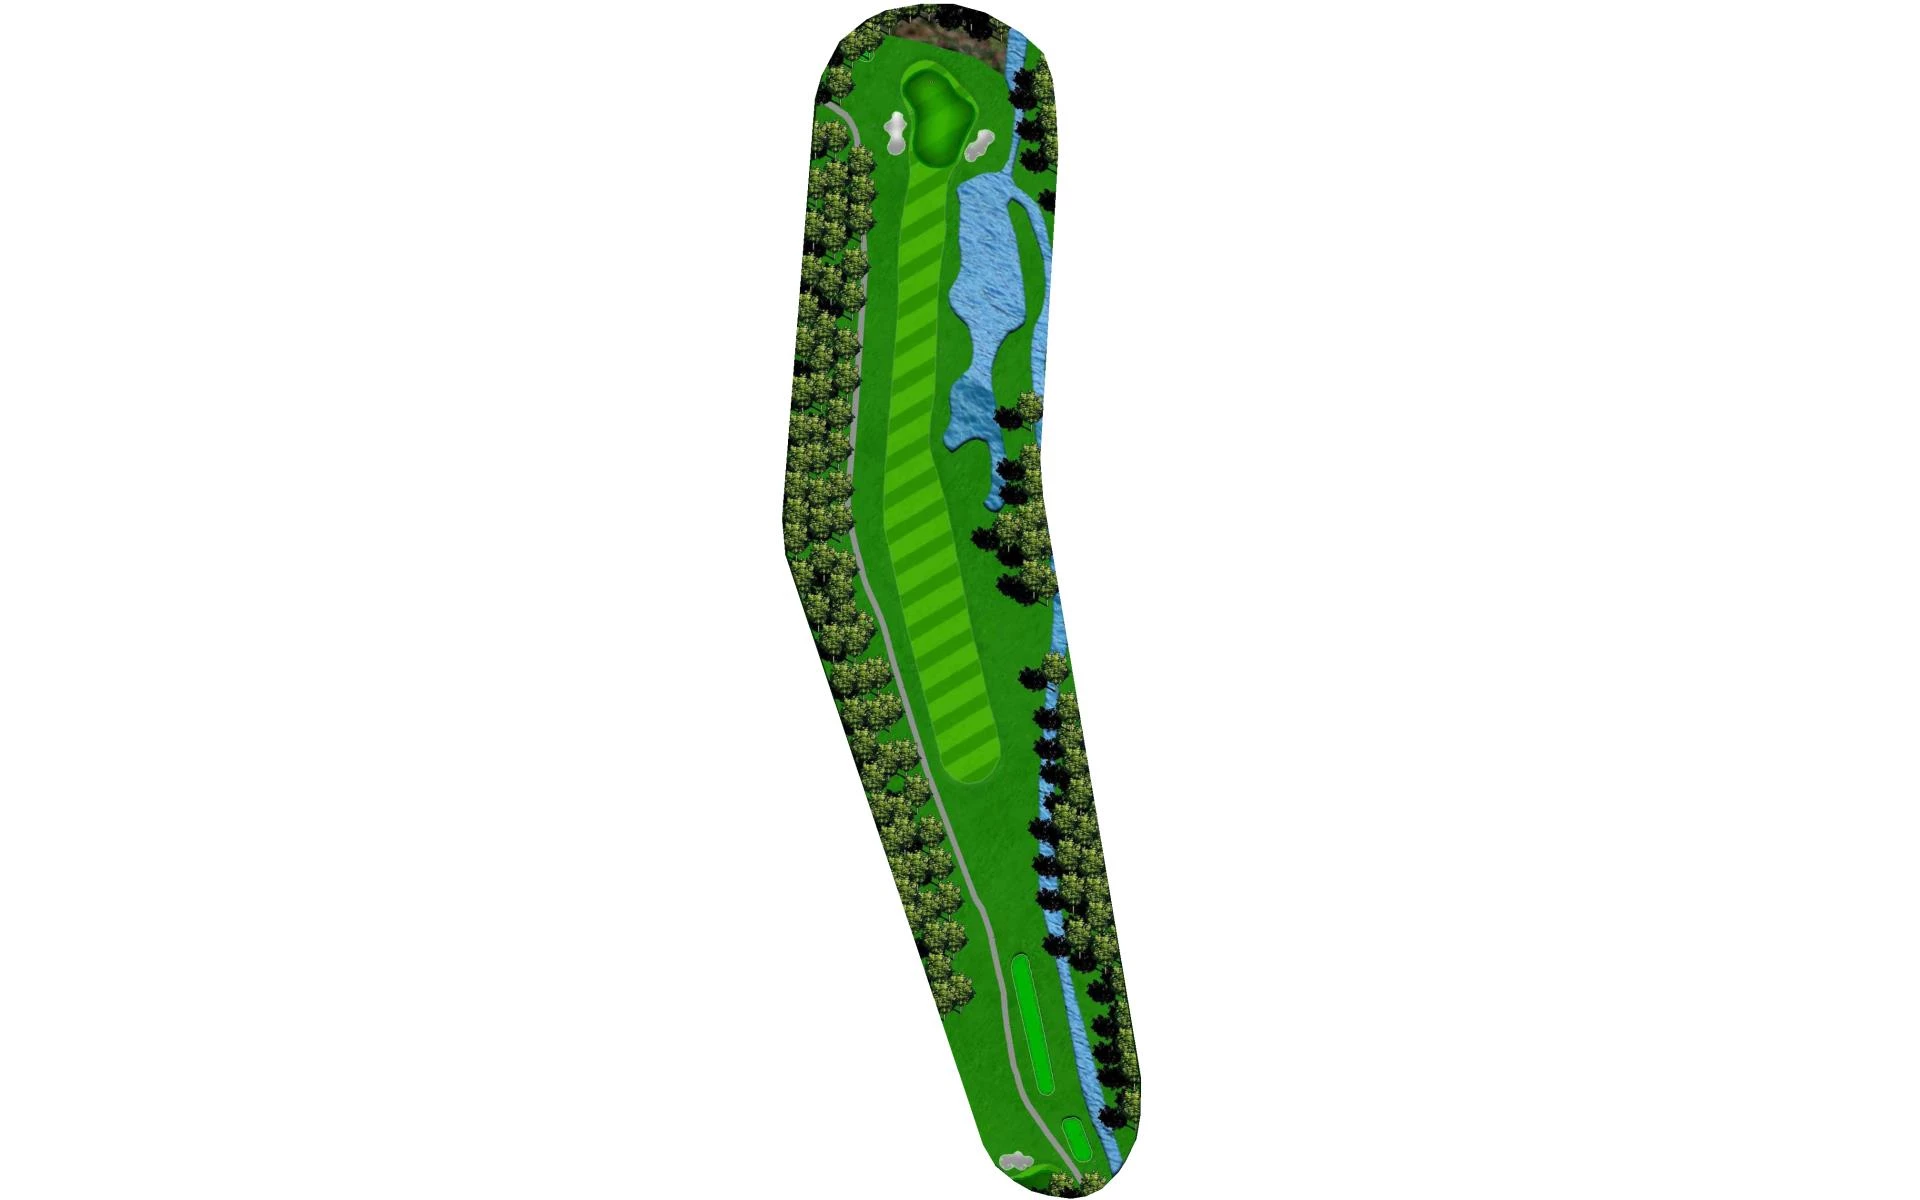
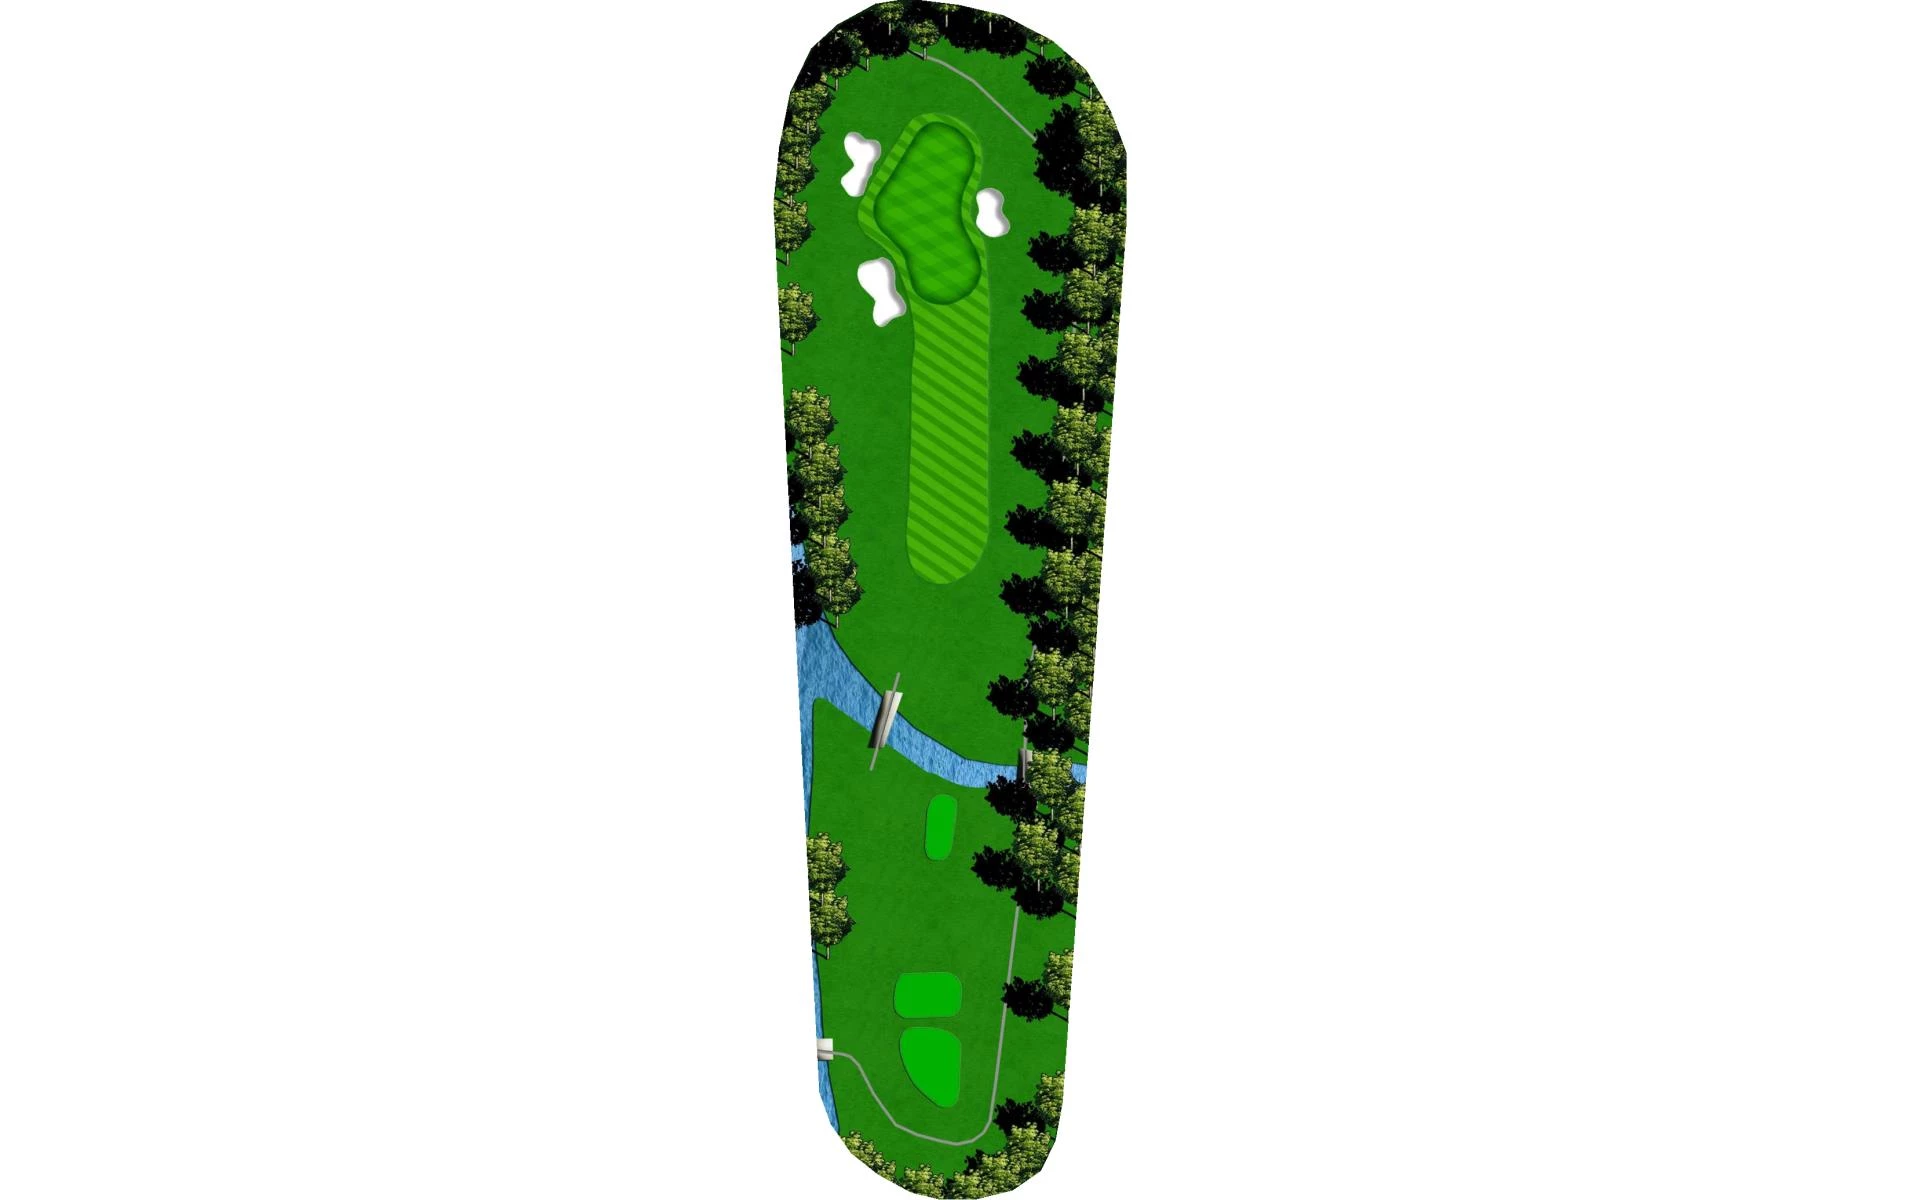
# 3 /
Par: 4
Yardage by Tee:
PURPLE 428
BLUE 420
WHITE 403
GREEN 403
GOLD 341
RED 266
Slope:
Purple 135 | Blue 132 | White 130 | Green 130 | Gold 127 | Black 117
Pro Tips
The third hole is a tough, narrow par 4 that plays fairly difficult from the back tees, but can be much easier from the forward tees. Hazards frame the hole, so a straight drive is critical.
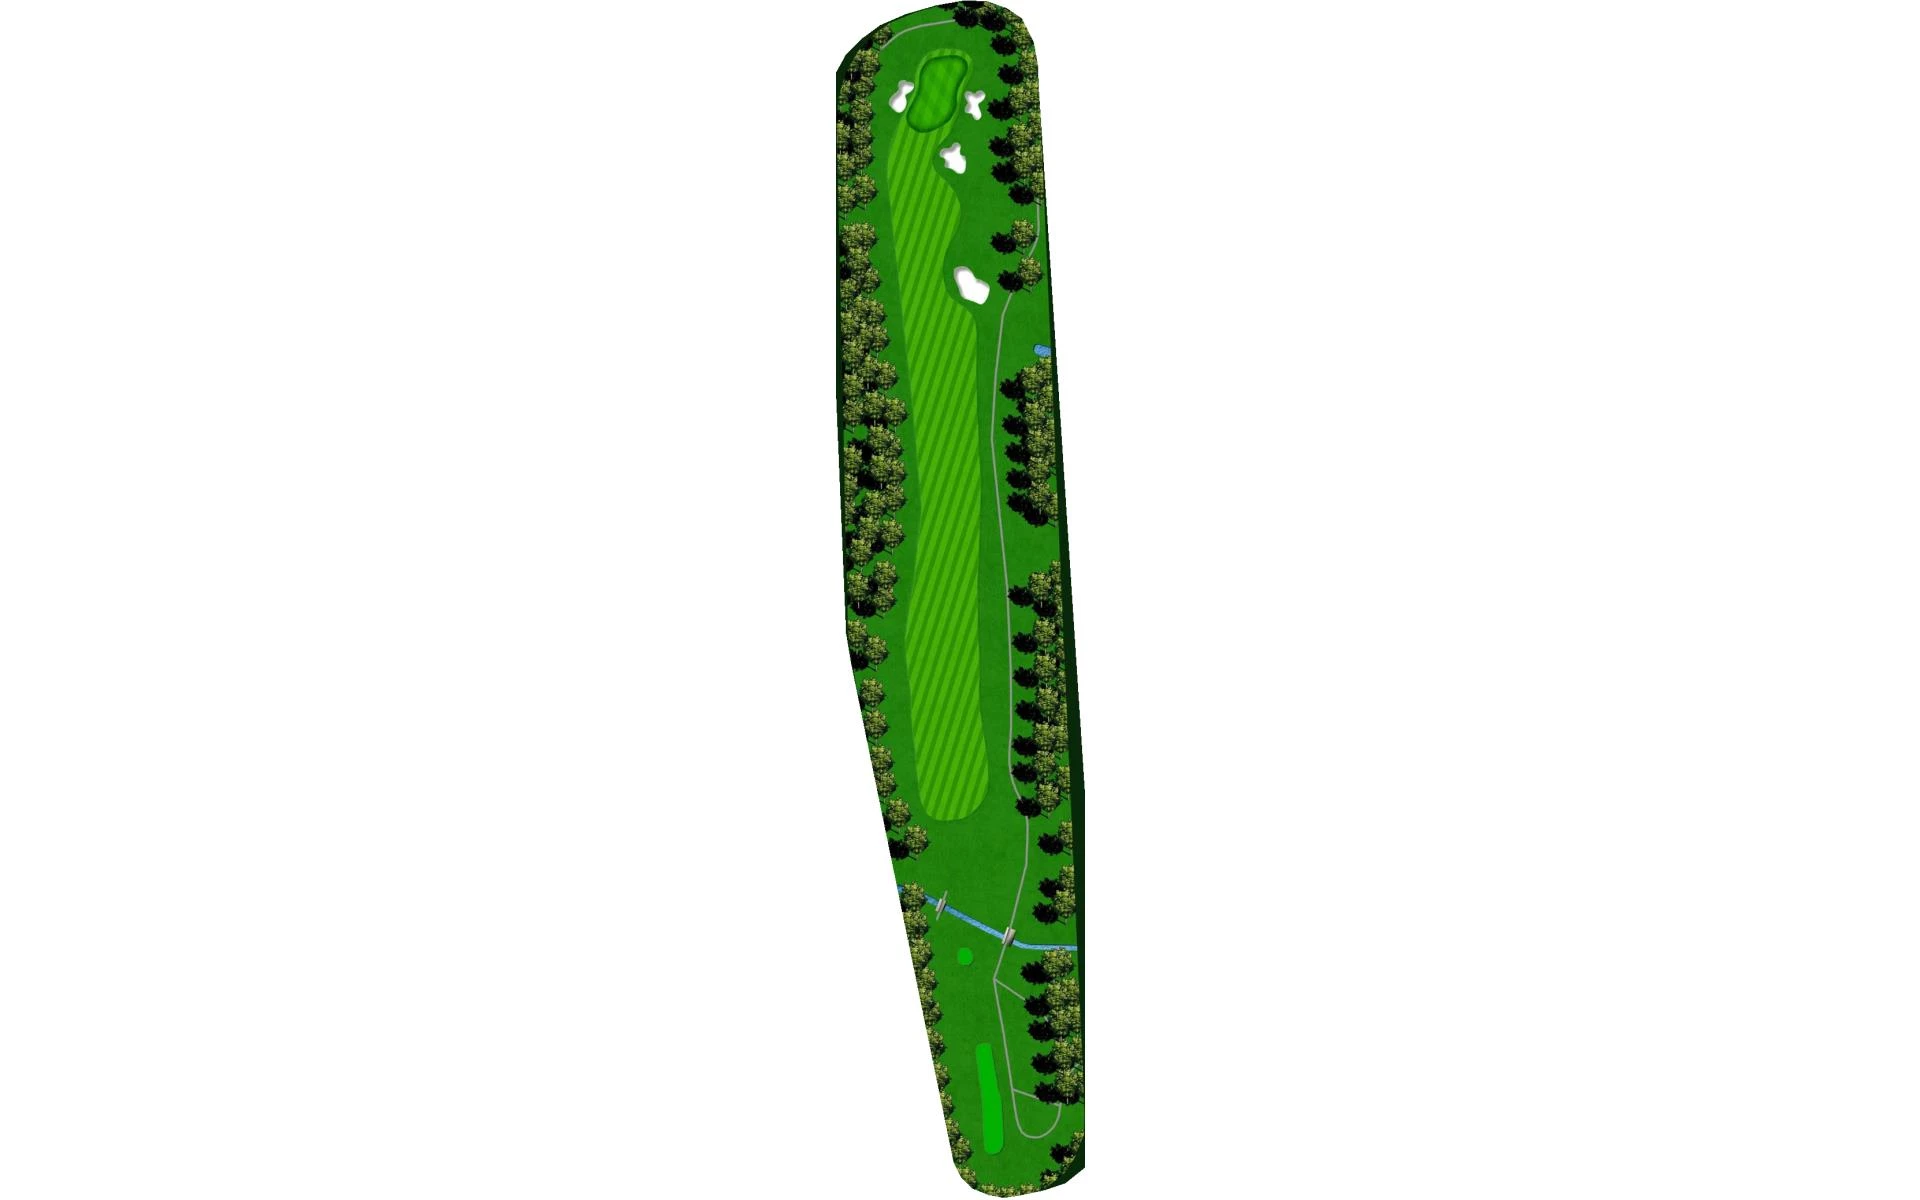
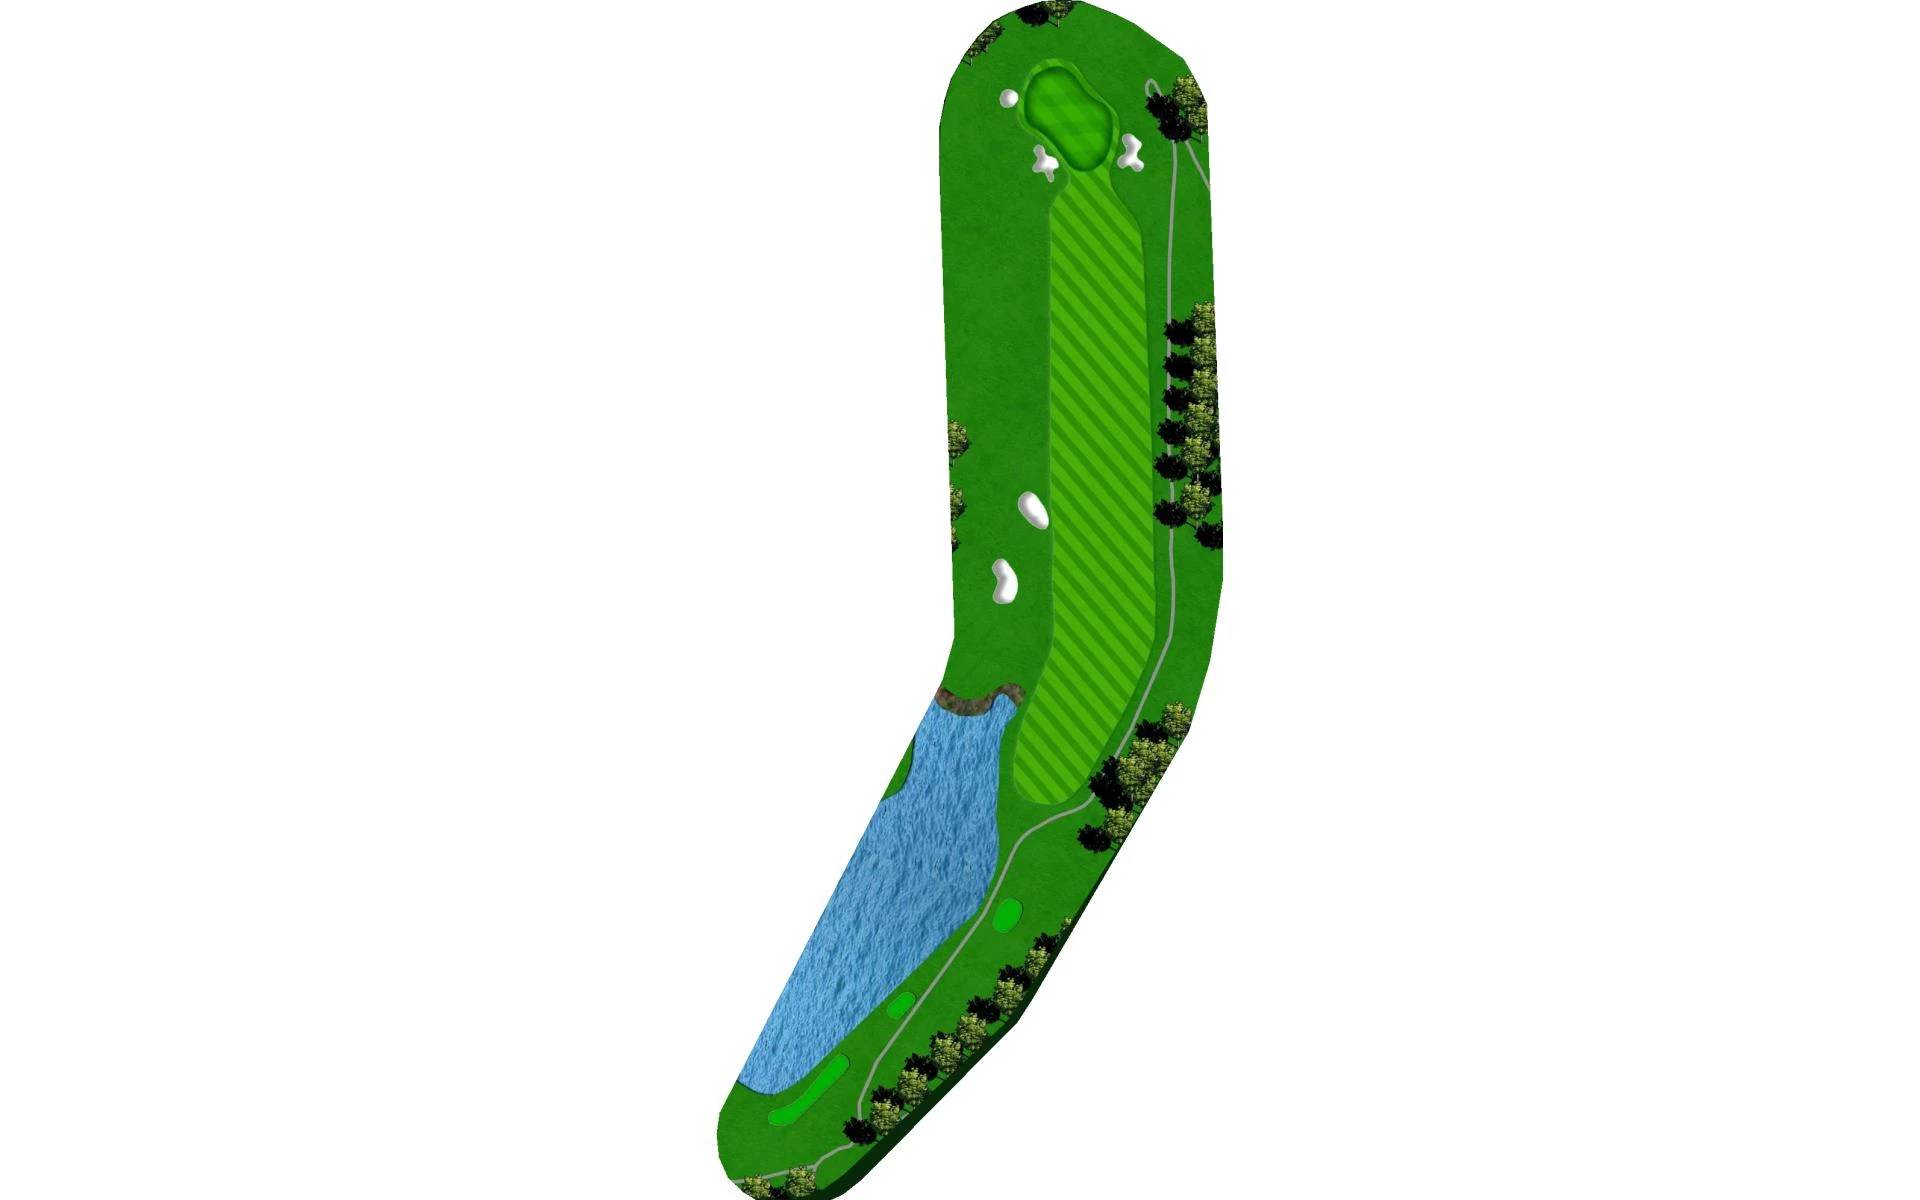
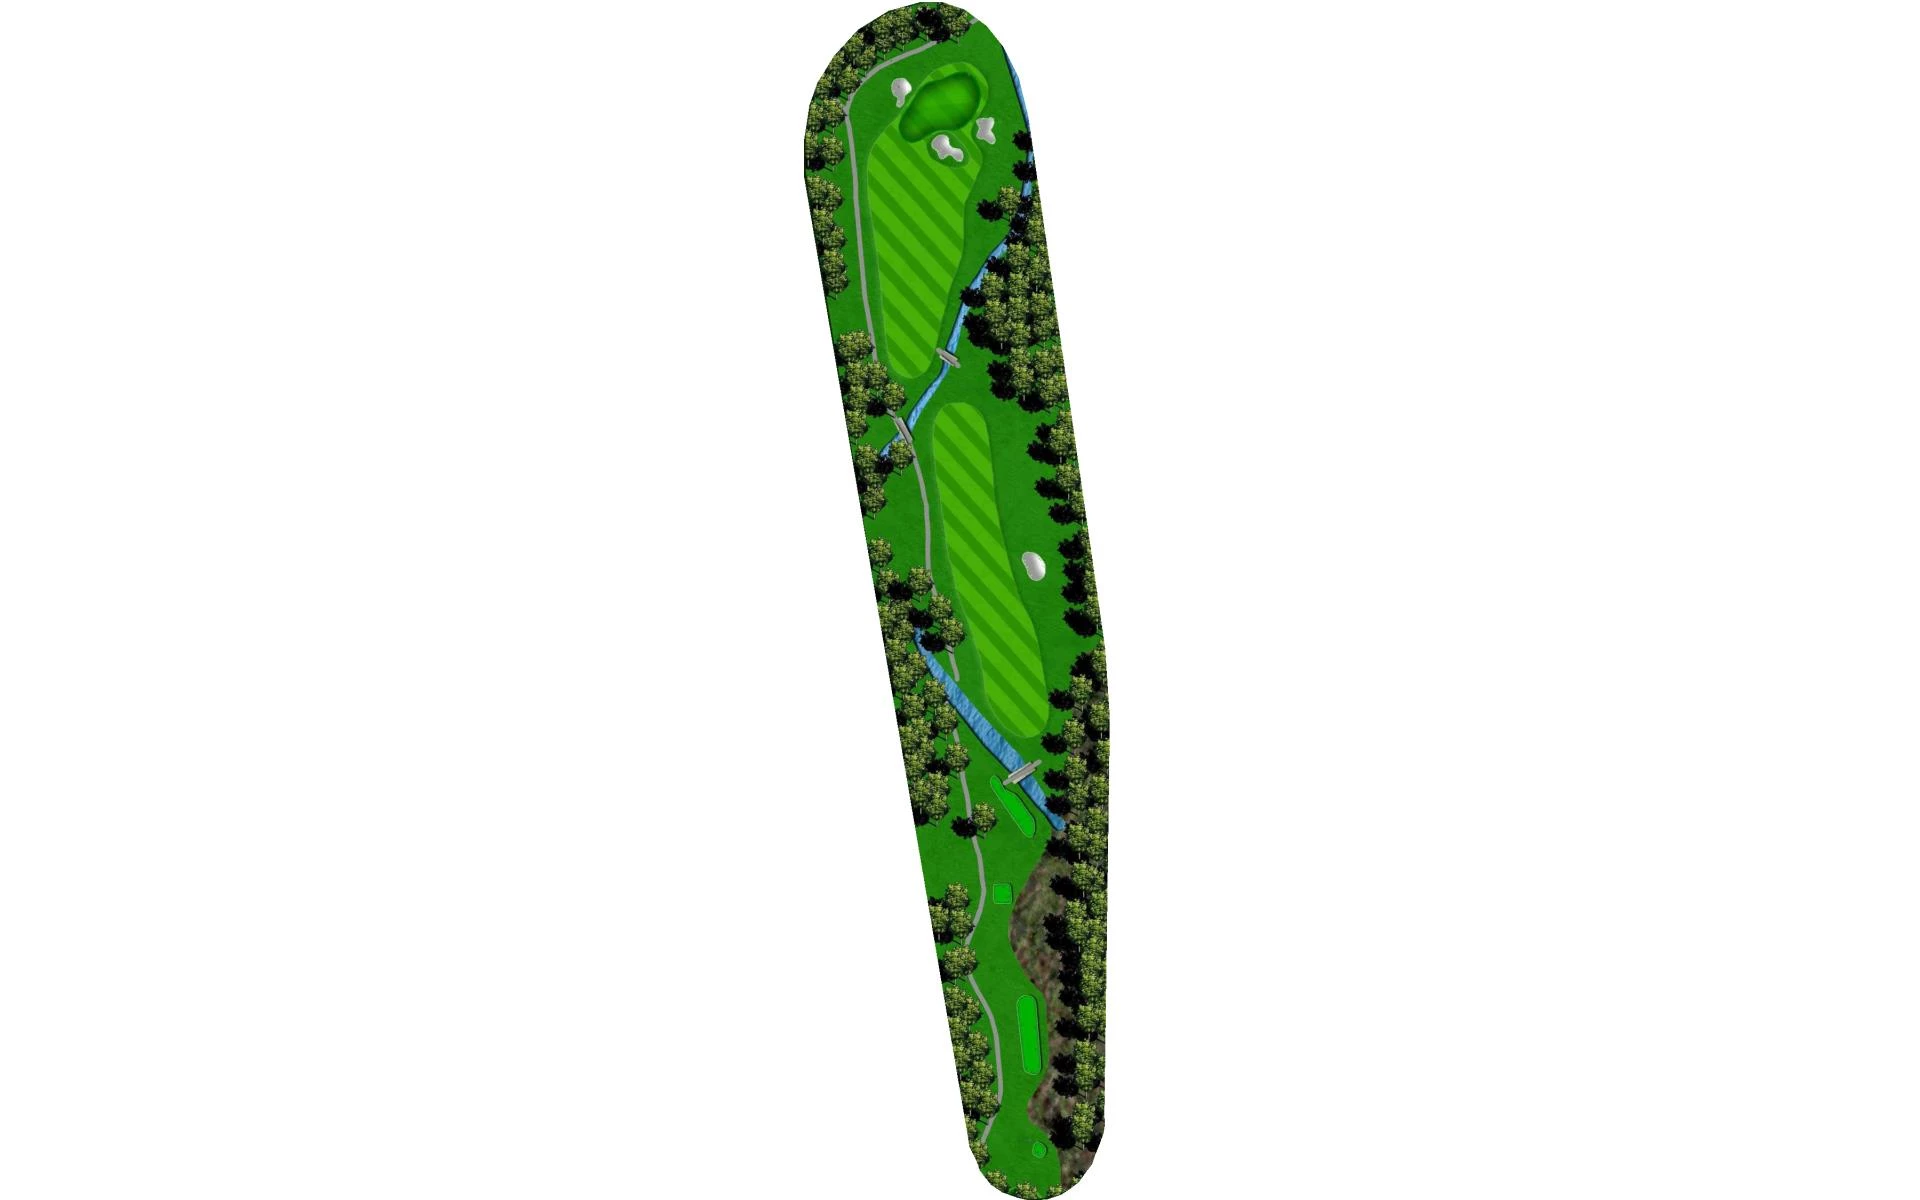
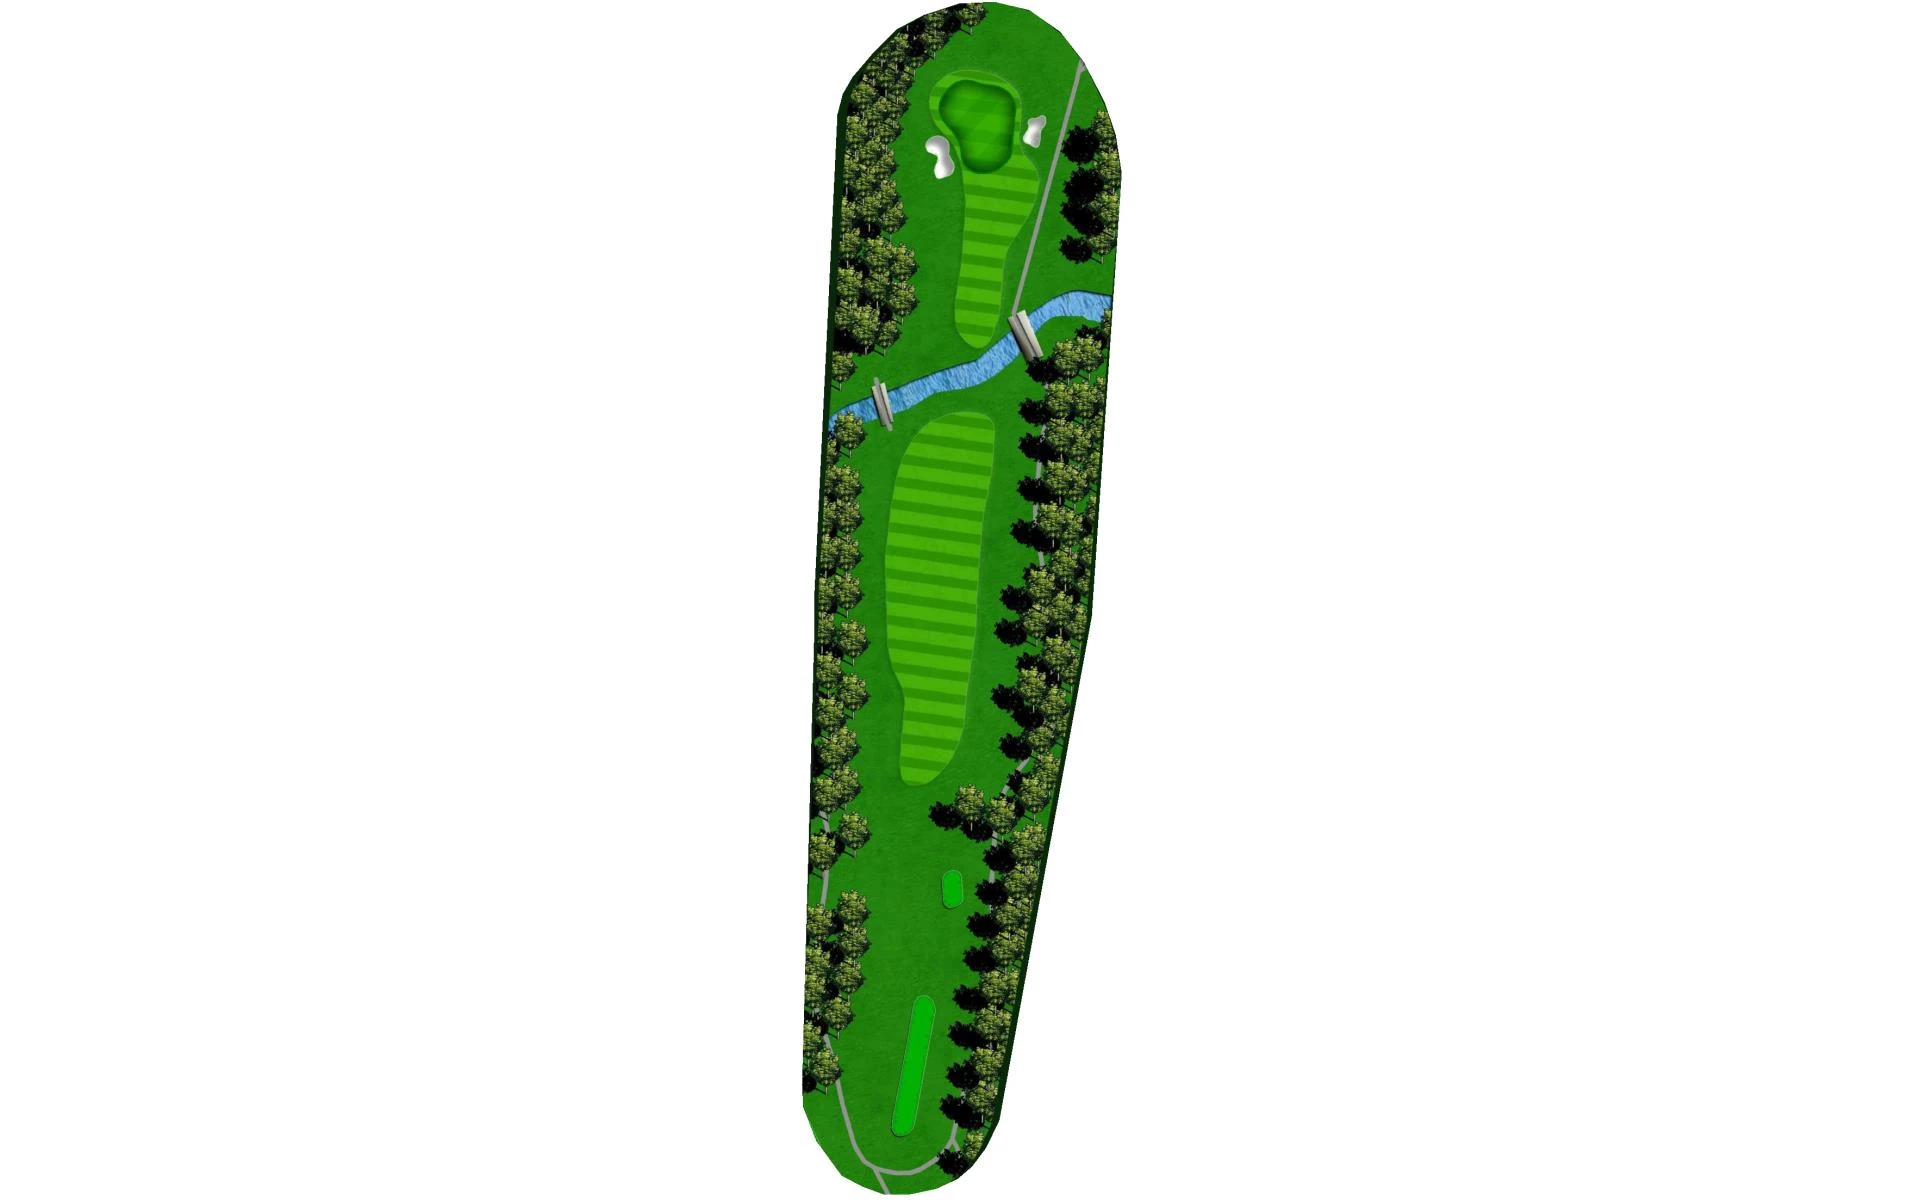
# 4 /
Par: 5
Yardage by Tee:
PURPLE 537
BLUE 533
WHITE 515
GREEN 493
GOLD 493
RED 434
Slope:
Purple 135 | Blue 132 | White 130 | Green 130 | Gold 127 | Black 117
Pro Tips
The first par 5 on the golf course is long and sloping with an uphill approach shot to the green. Three solid shots will get most players to the green with no problems.
# 5 /
Par: 4
Yardage by Tee:
PURPLE 449
BLUE 445
WHITE 424
GREEN 352
GOLD 352
RED 325
Slope:
Purple 135 | Blue 132 | White 130 | Green 130 | Gold 127 | Black 117
Pro Tips
The tee shot on the fifth is fairly tight and starts on an elevated tee box. Then, the green is very large and will require players to make the correct club selection to get it close.
# 6 /
Par: 5
Yardage by Tee:
PURPLE 510
BLUE 502
WHITE 494
GREEN 494
GOLD 486
RED 419
Slope:
Purple 135 | Blue 132 | White 130 | Green 130 | Gold 127 | Black 117
Pro Tips
The sixth is a reachable par 5 that requires a well-placed drive if a player wants to try to hit the green in two.
# 7 /
Par: 3
Yardage by Tee:
PURPLE 208
BLUE 172
WHITE 164
GREEN 164
GOLD 164
RED 147
Slope:
Purple 135 | Blue 132 | White 130 | Green 130 | Gold 127 | Black 117
Pro Tips
This par 3 is the signature hole for a reason, it’s visually stunning, so player’s will remember this for quite a while.
# 8 /
Par: 4
Yardage by Tee:
PURPLE 429
BLUE 422
WHITE 409
GREEN 362
GOLD 362
RED 315
Slope:
Purple 135 | Blue 132 | White 130 | Green 130 | Gold 127 | Black 117
Pro Tips
Hole 8 is a par 4 that features intimidating water front and left of the green and should be avoided.
# 9 /
Par: 3
Yardage by Tee:
PURPLE 215
BLUE 202
WHITE 186
GREEN 178
GOLD 178
RED 115
Slope:
Purple 135 | Blue 132 | White 130 | Green 130 | Gold 127 | Black 117
Pro Tips
The front nine closes with a long par 3 where the prevailing wind is into the golfer.
# 10 /
Par: 4
Yardage by Tee:
PURPLE 386
BLUE 379
WHITE 370
GREEN 370
GOLD 364
RED 358
Slope:
Purple 135 | Blue 132 | White 130 | Green 130 | Gold 127 | Black 117
Pro Tips
The back nine begins with a downhill, hard dogleg right par 4. Most players will want to hit their tee shot about 225 yards to set up the best approach.
# 11 /
Par: 4
Yardage by Tee:
PURPLE 469
BLUE 434
WHITE 423
GREEN 394
GOLD 394
RED 412
Slope:
Purple 135 | Blue 132 | White 130 | Green 130 | Gold 127 | Black 117
Pro Tips
The eleventh requires a tee shot down the left side of the fairway. Then, the approach will need to navigate water on the way to the green.
# 12 /
Par: 5
Yardage by Tee:
PURPLE 526
BLUE 479
WHITE 467
GREEN 453
GOLD 453
RED 396
Slope:
Purple 135 | Blue 132 | White 130 | Green 130 | Gold 127 | Black 117
Pro Tips
This straight par 5 features two creeks that player’s will need to clear on their way to the green.
# 13 /
Par: 3
Yardage by Tee:
PURPLE 215
BLUE 175
WHITE 163
GREEN 163
GOLD 151
RED 142
Slope:
Purple 135 | Blue 132 | White 130 | Green 130 | Gold 127 | Black 117
Pro Tips
The thirteenth is a short par 3 that plays as the easiest hole on the golf course.
# 14 /
Par: 4
Yardage by Tee:
PURPLE 377
BLUE 342
WHITE 327
GREEN 327
GOLD 314
RED 302
Slope:
Purple 135 | Blue 132 | White 130 | Green 130 | Gold 127 | Black 117
Pro Tips
The tee shot on this short par 4 should play short of the bunker to stay safe. Hazards frame this hole on the right and left.
# 15 /
Par: 3
Yardage by Tee:
PURPLE 221
BLUE 217
WHITE 213
GREEN 213
GOLD 158
RED 152
Slope:
Purple 135 | Blue 132 | White 130 | Green 130 | Gold 127 | Black 117
Pro Tips
The fifteenth is the final par 3. The yardage is long and it often plays longer due to the prevailing wind into the golfer’s face.
# 16 /
Par: 4
Yardage by Tee:
PURPLE 396
BLUE 386
WHITE 375
GREEN 375
GOLD 363
RED 303
Slope:
Purple 135 | Blue 132 | White 130 | Green 130 | Gold 127 | Black 117
Pro Tips
This par 4 features a creek that comes into play off the tee for longer hitters. From the back tees, a 250 yard club should do the trick, while the forward tees only require about 185 yards off the tee box.
# 17 /
Par: 4
Yardage by Tee:
PURPLE 436
BLUE 414
WHITE 408
GREEN 408
GOLD 339
RED 275
Slope:
Purple 135 | Blue 132 | White 130 | Green 130 | Gold 127 | Black 117
Pro Tips
The seventeenth is a dogleg right with a creek that crosses the fairway around 300 yards. Players should take their tee shots left of the large tree on the right.
# 18 /
Par: 4
Yardage by Tee:
PURPLE 431
BLUE 427
WHITE 417
GREEN 338
GOLD 338
RED 329
Slope:
Purple 135 | Blue 132 | White 130 | Green 130 | Gold 127 | Black 117
Pro Tips
The closing hole typically plays with the wind. It’s a straight par 4 where player’s will need to avoid the bunkers on the left and right off the tee.