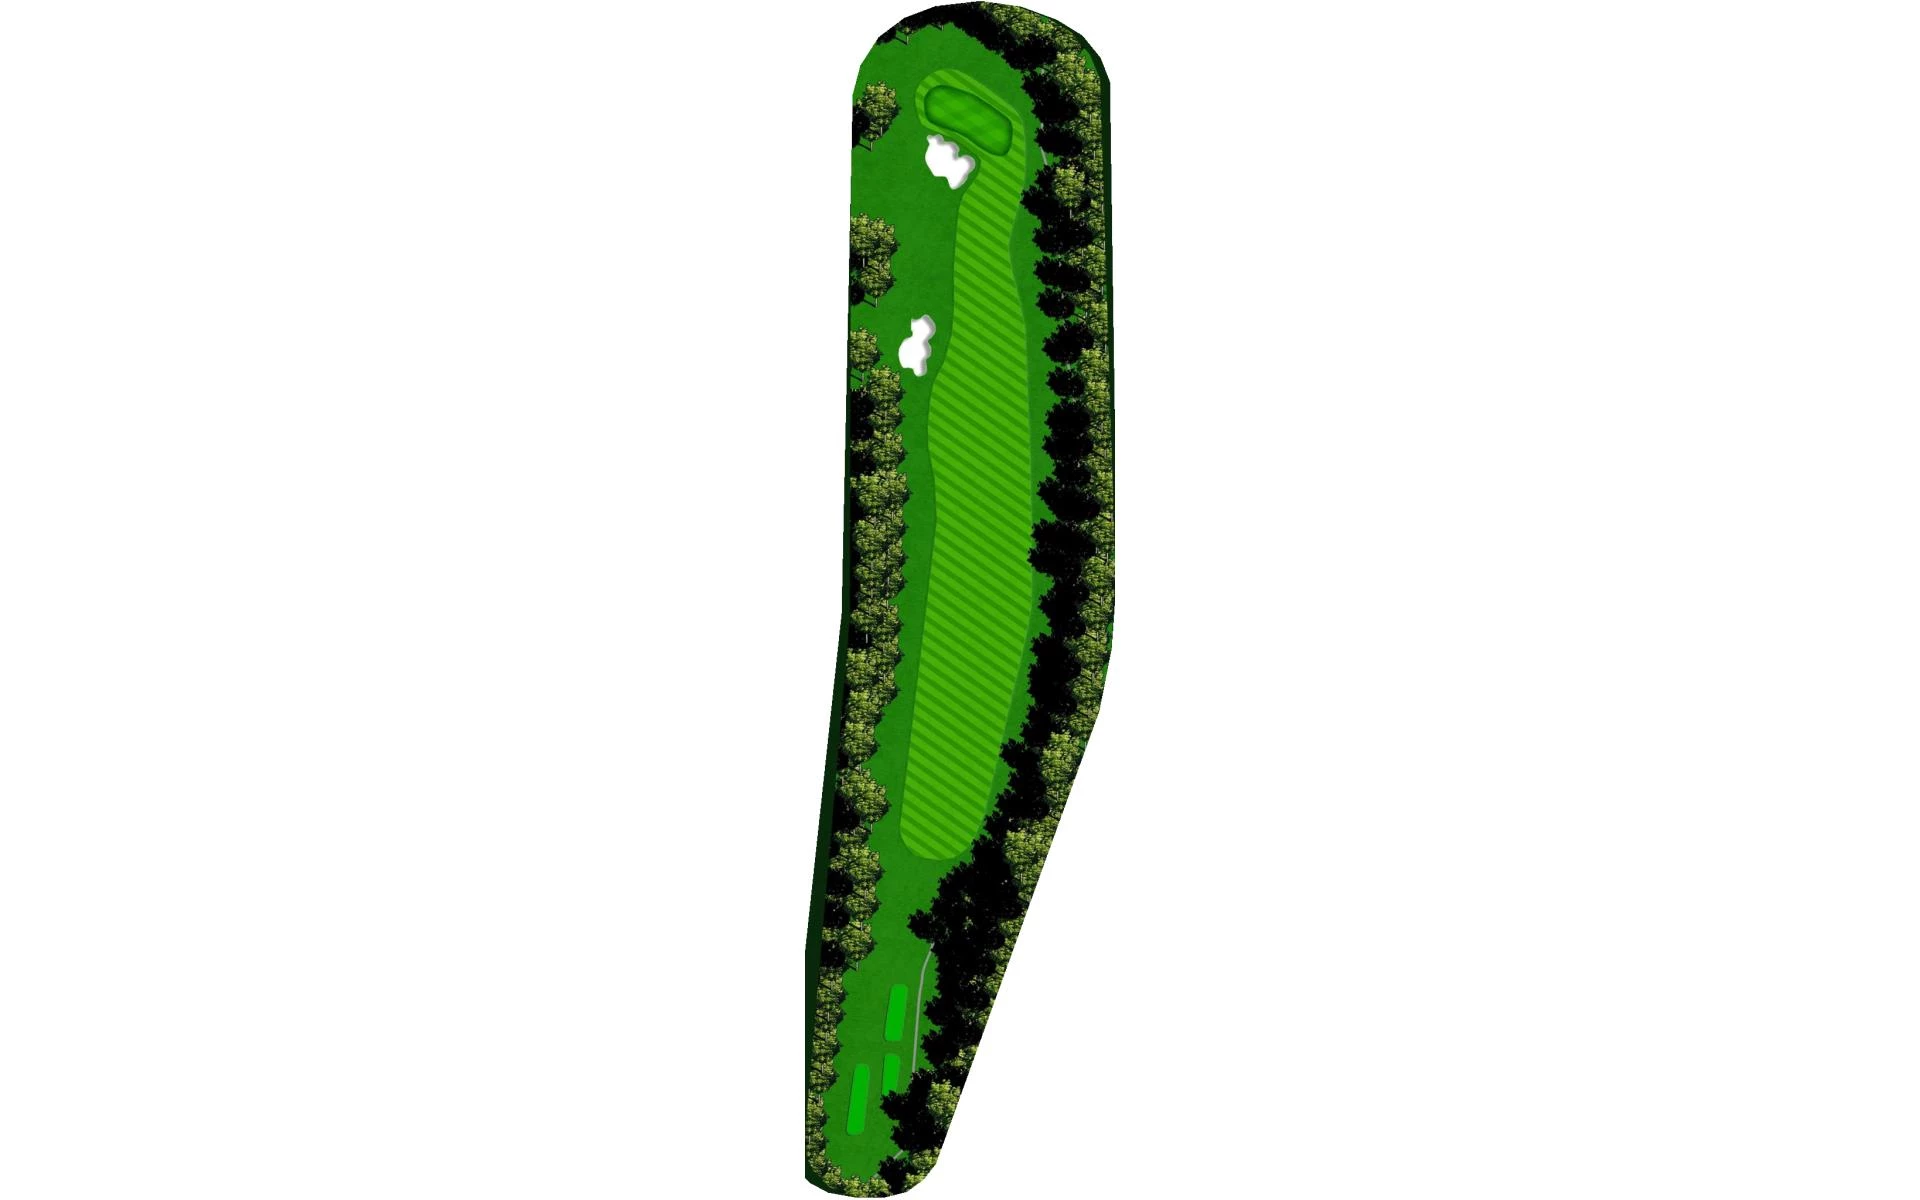
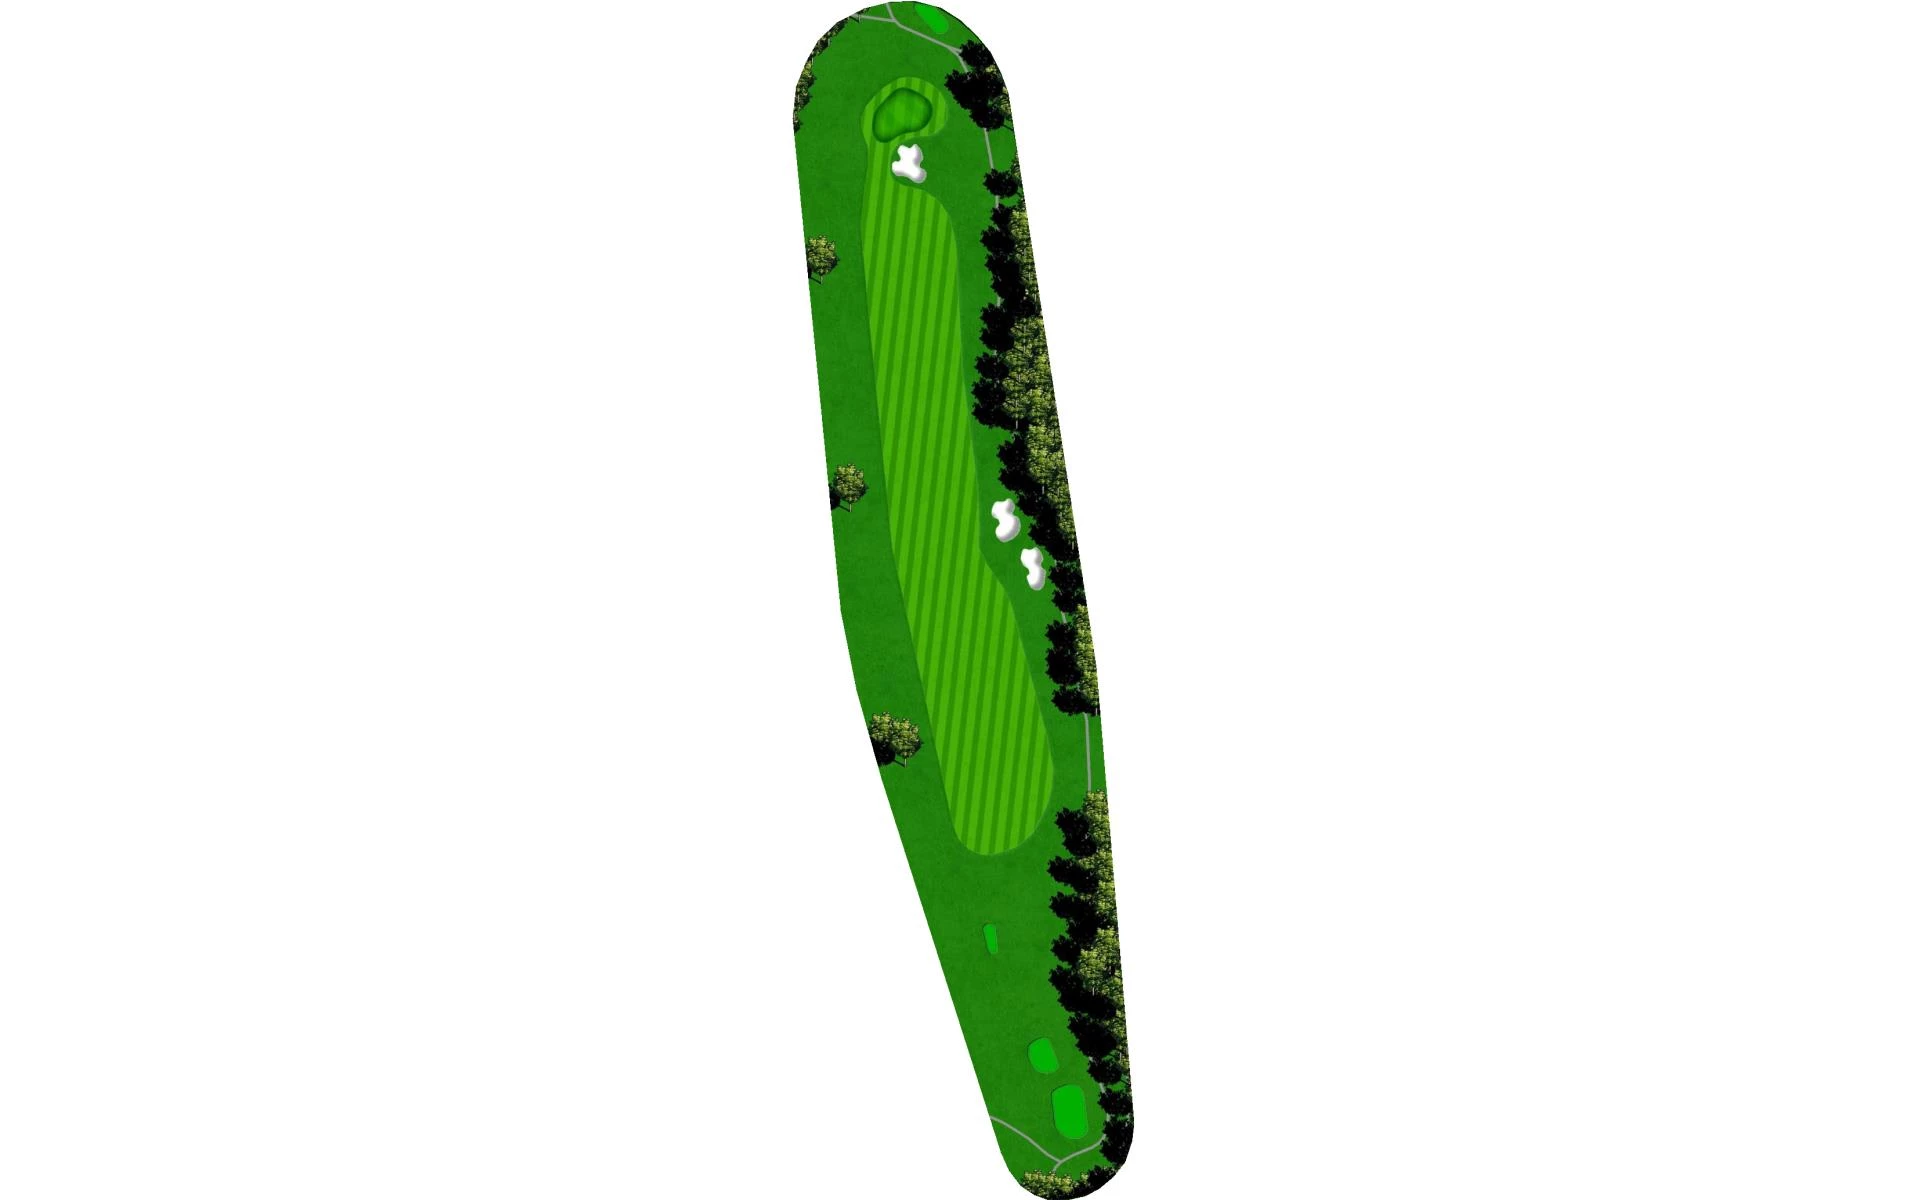
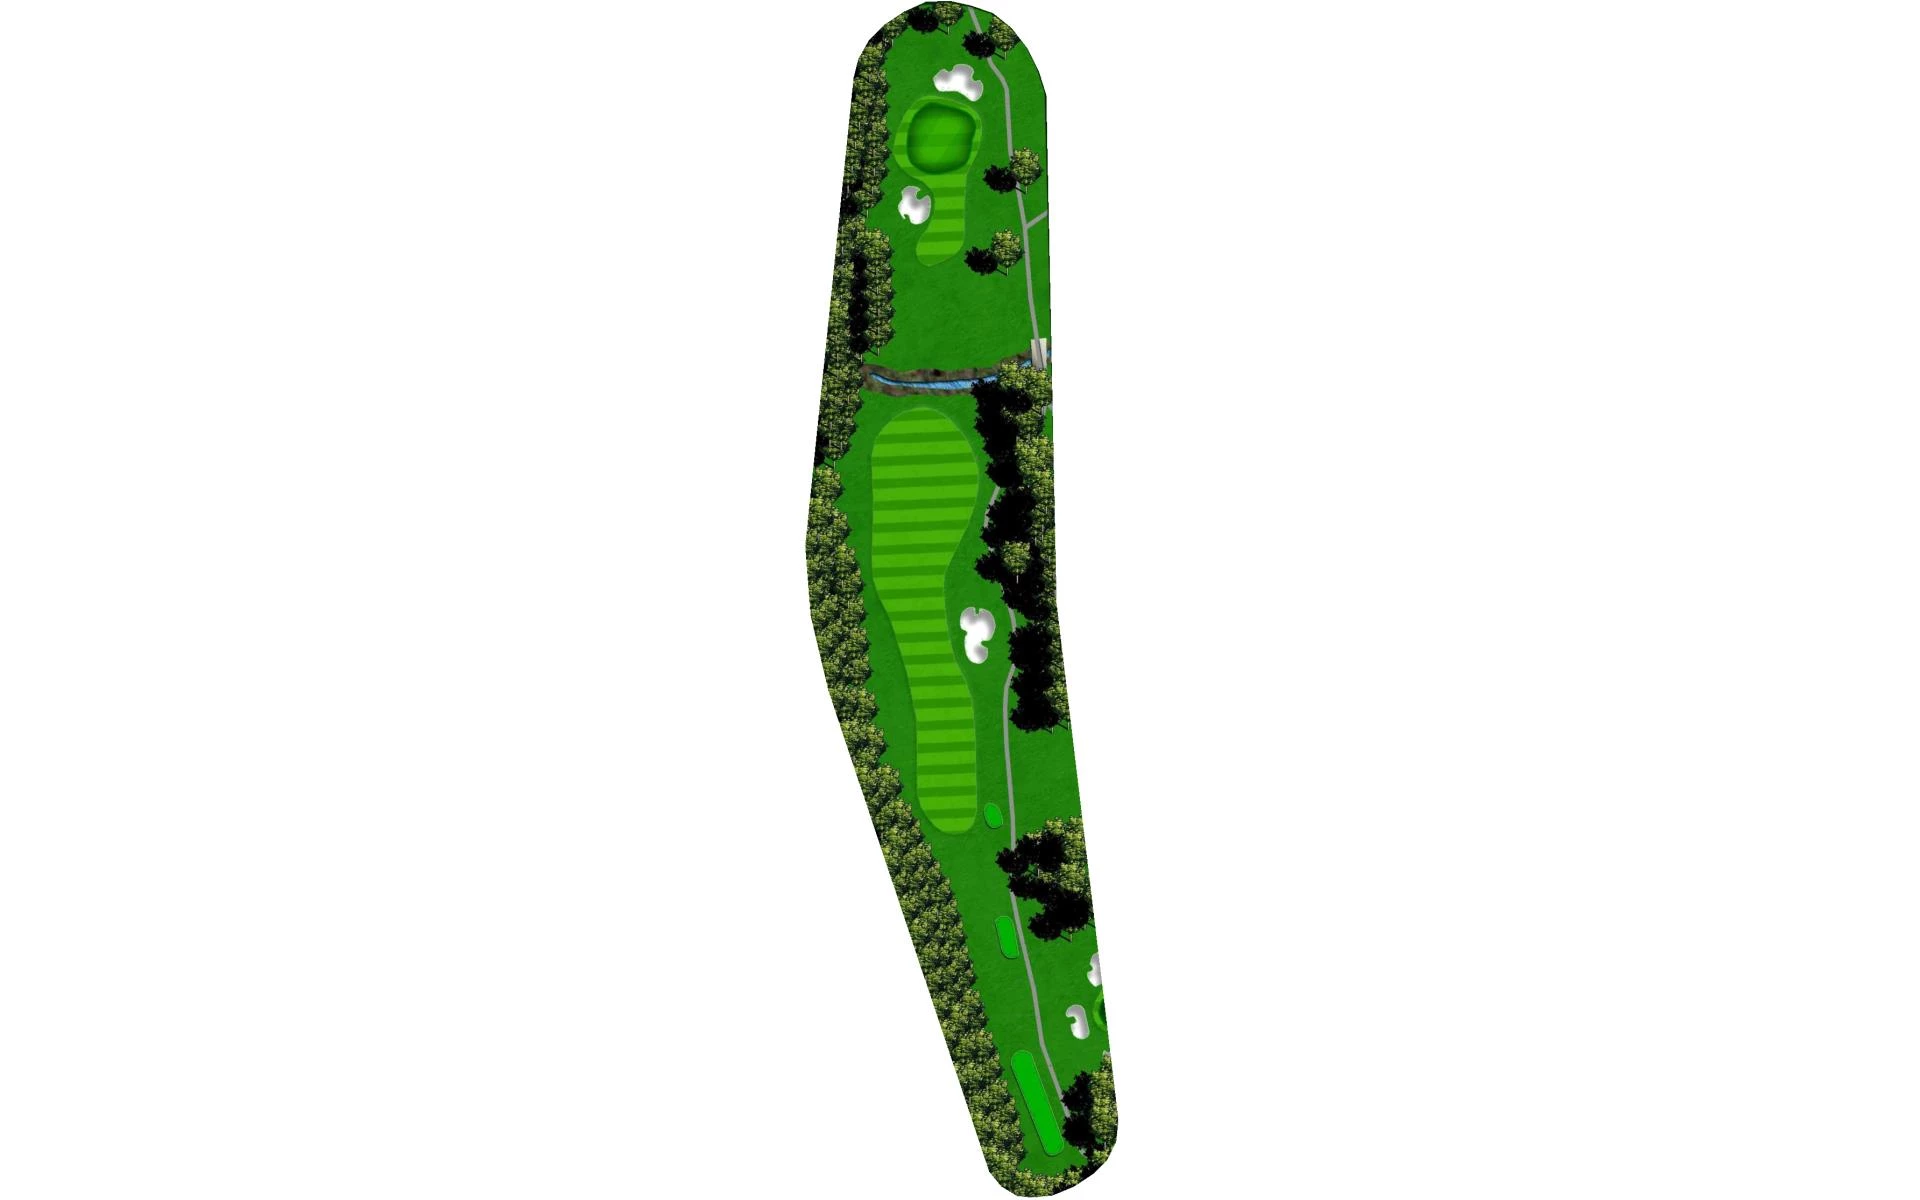
Canongate 1 - Lee Course
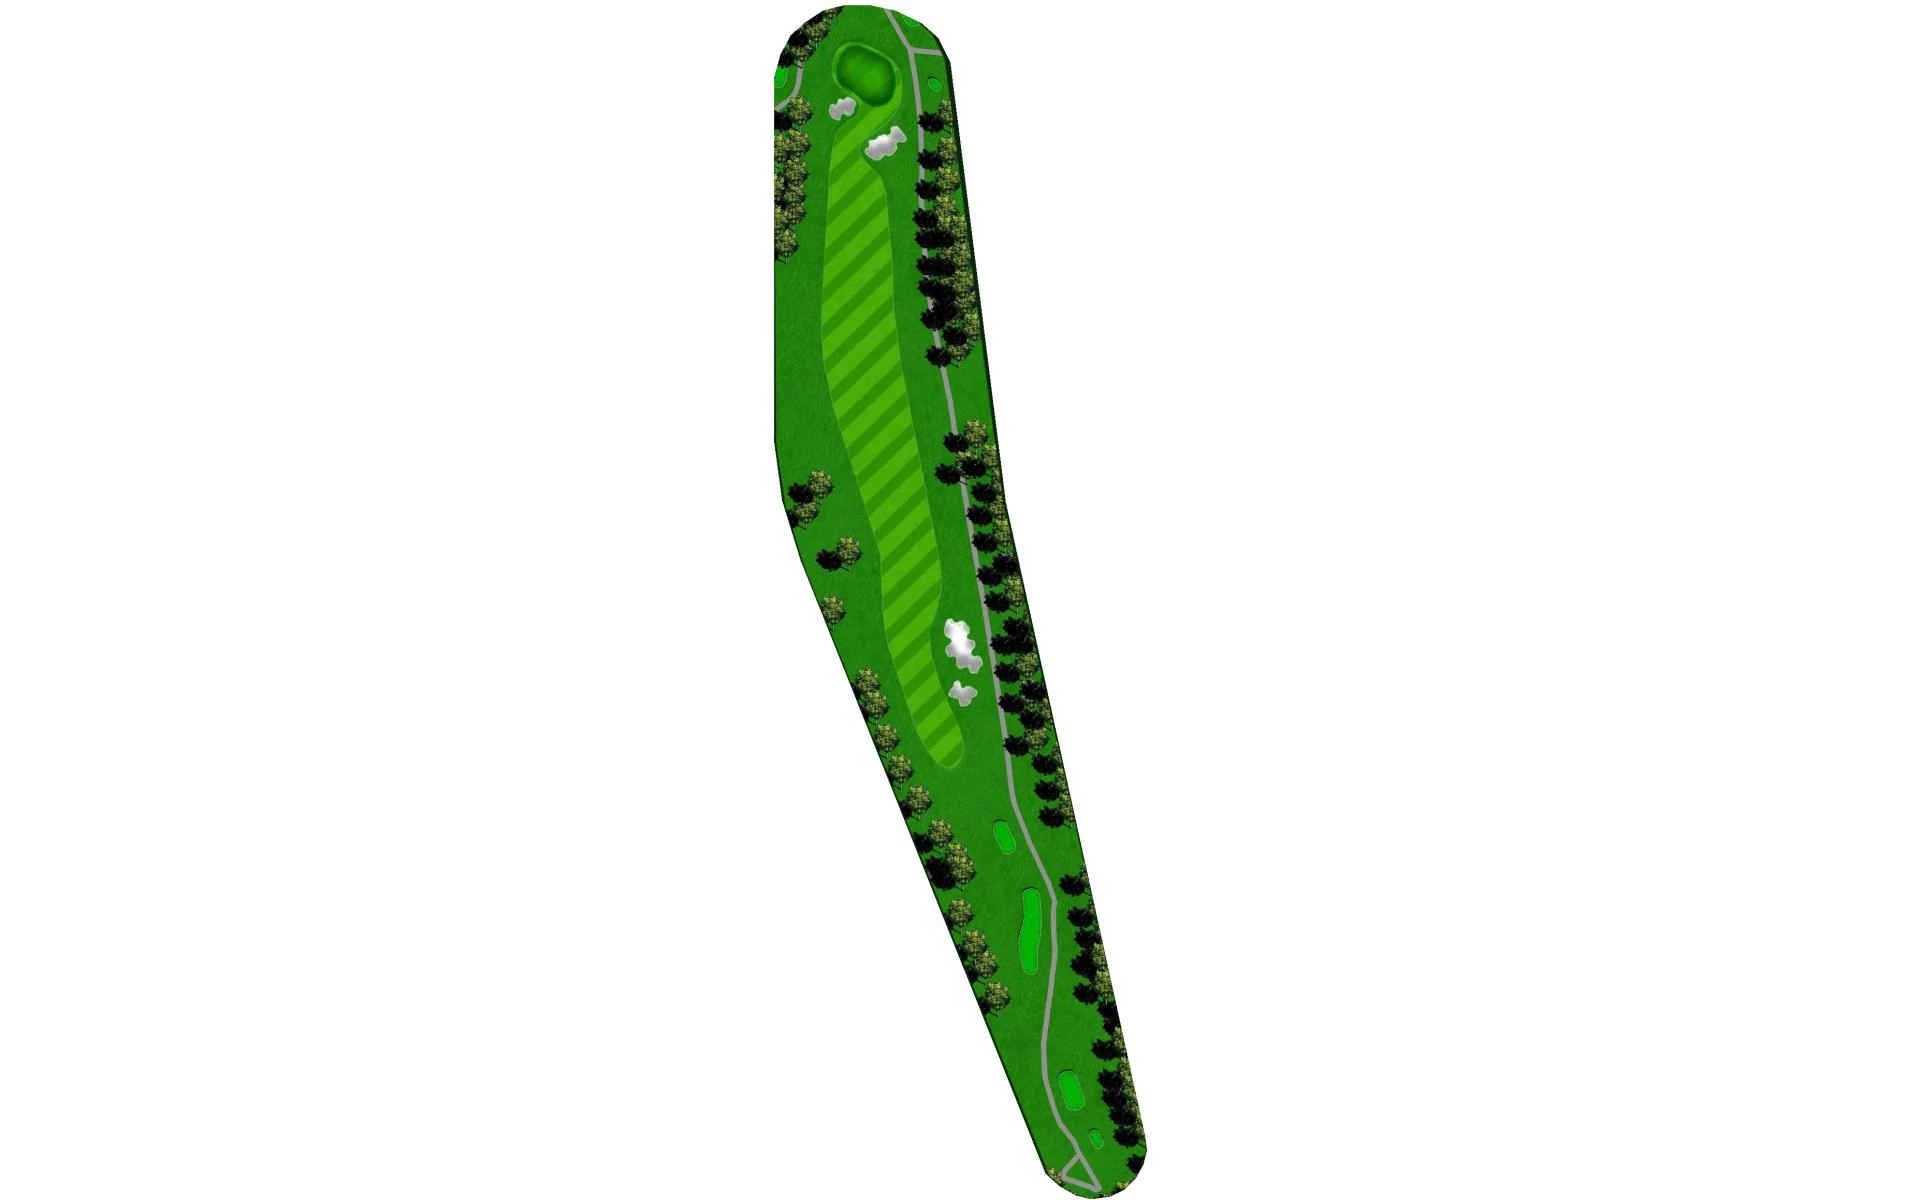
# 1 /
Par: 5
Yardage by Tee:
GOLD 560
BLUE 534
WHITE 450
GREEN 410
PURPLE 402
Pro Tips
A downhill par 5 .Avoid the fairway bunkers and this one is reachable in two.
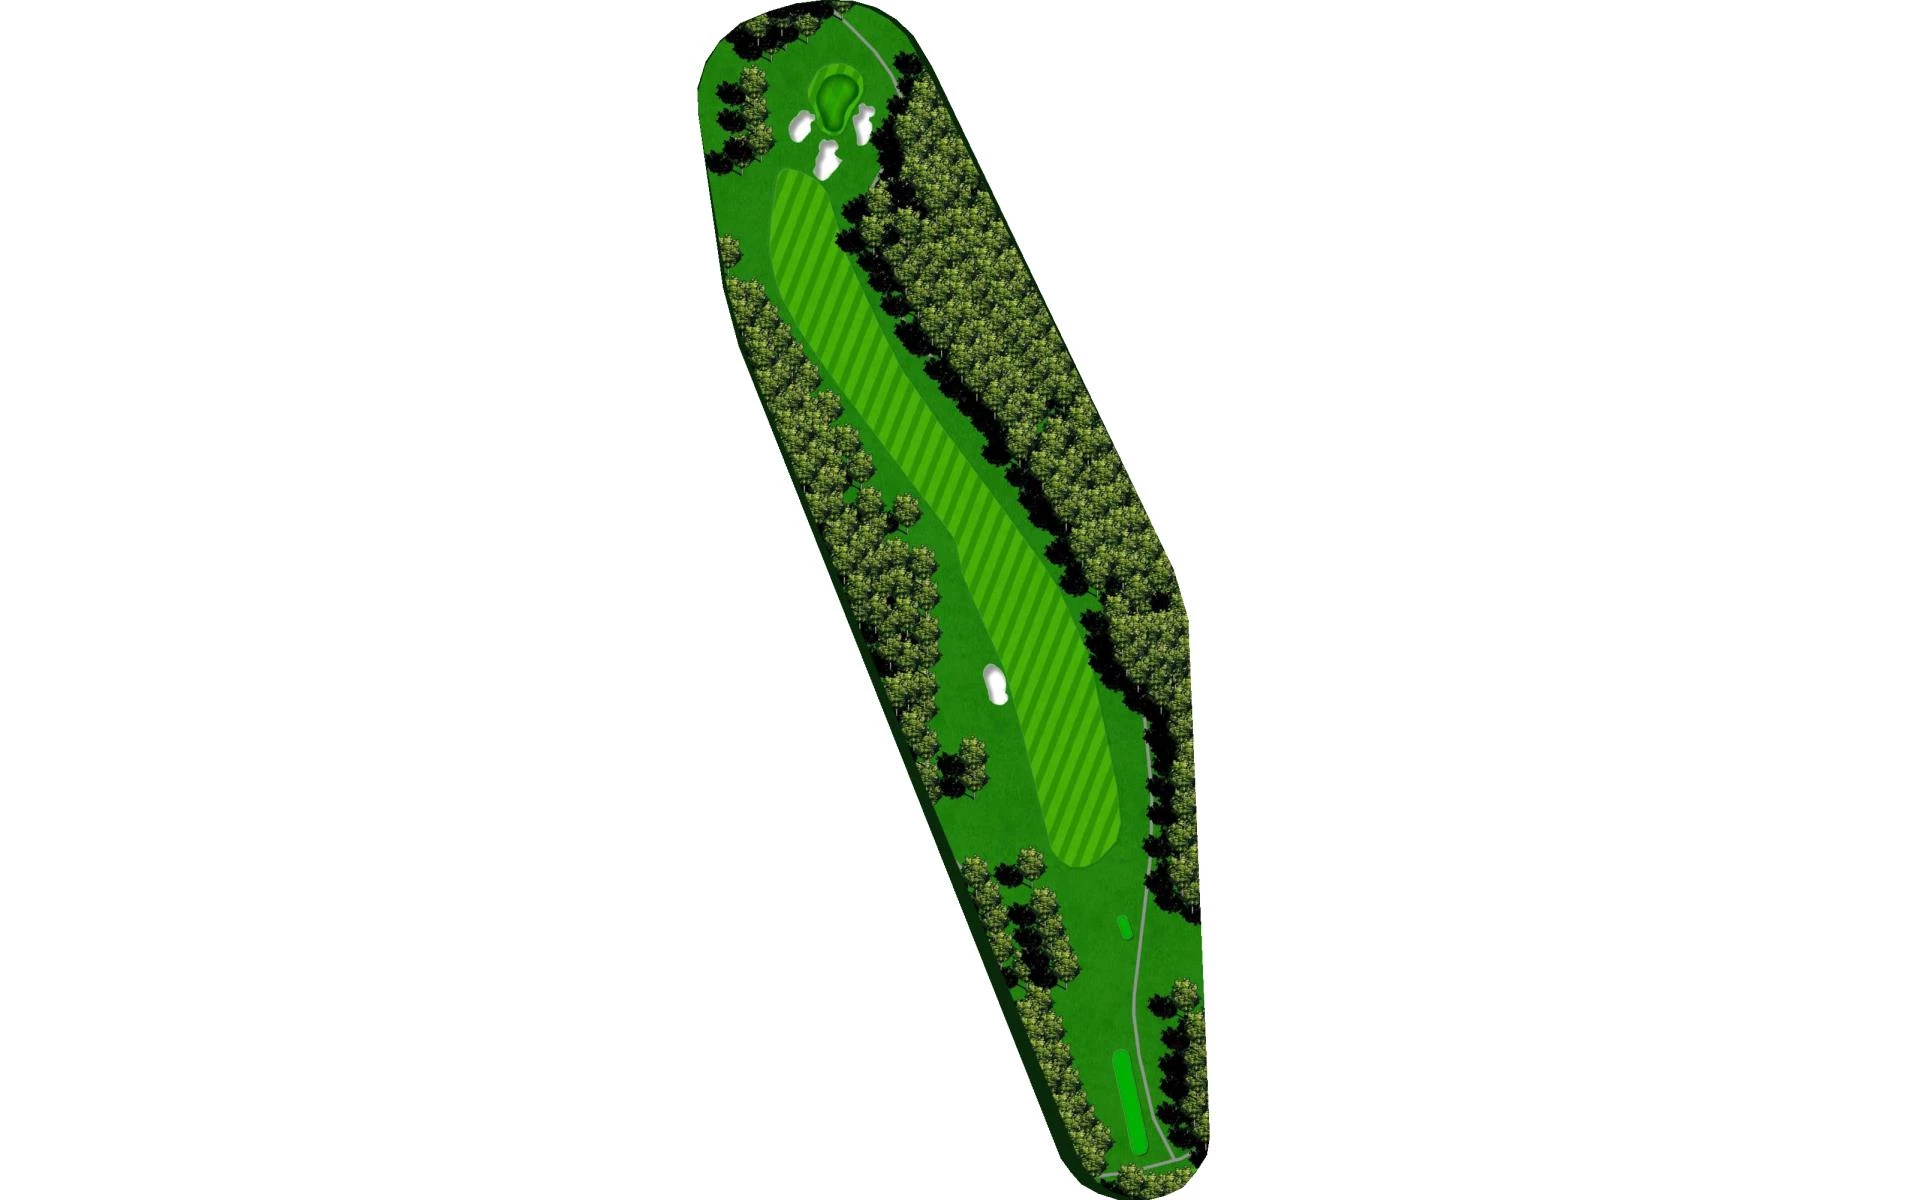
# 2 /
Par: 4
Yardage by Tee:
GOLD 433
BLUE 378
WHITE 358
GREEN 316
PURPLE 313
Pro Tips
On this par 4 take an extra club on your second shot as this one is uphill.
# 3 /
Par: 4
Yardage by Tee:
GOLD 377
BLUE 363
WHITE 349
GREEN 346
PURPLE 264
Pro Tips
Another par 4 . A slight draw is recommended off the tee as the fairway slopes to the

# 4 /
Par: 3
Yardage by Tee:
GOLD 177
BLUE 157
WHITE 136
GREEN 132
PURPLE 96
Pro Tips
The first par 3 .Stay below the hole for an uphill putt.
# 5 /
Par: 4
Yardage by Tee:
GOLD 362
BLUE 333
WHITE 311
GREEN 301
PURPLE 298
Pro Tips
The secret to this par four is landing your second shot on the left side of the green.
# 6 /
Par: 4
Yardage by Tee:
GOLD 347
BLUE 333
WHITE 312
GREEN 304
PURPLE 301
Pro Tips
A straight away par 4 .Bombs away.
# 7 /
Par: 5
Yardage by Tee:
GOLD 502
BLUE 485
WHITE 468
GREEN 410
PURPLE 408
Pro Tips
On this par 5. The second shot must avoid the two pines trees fronting the right side of the green.
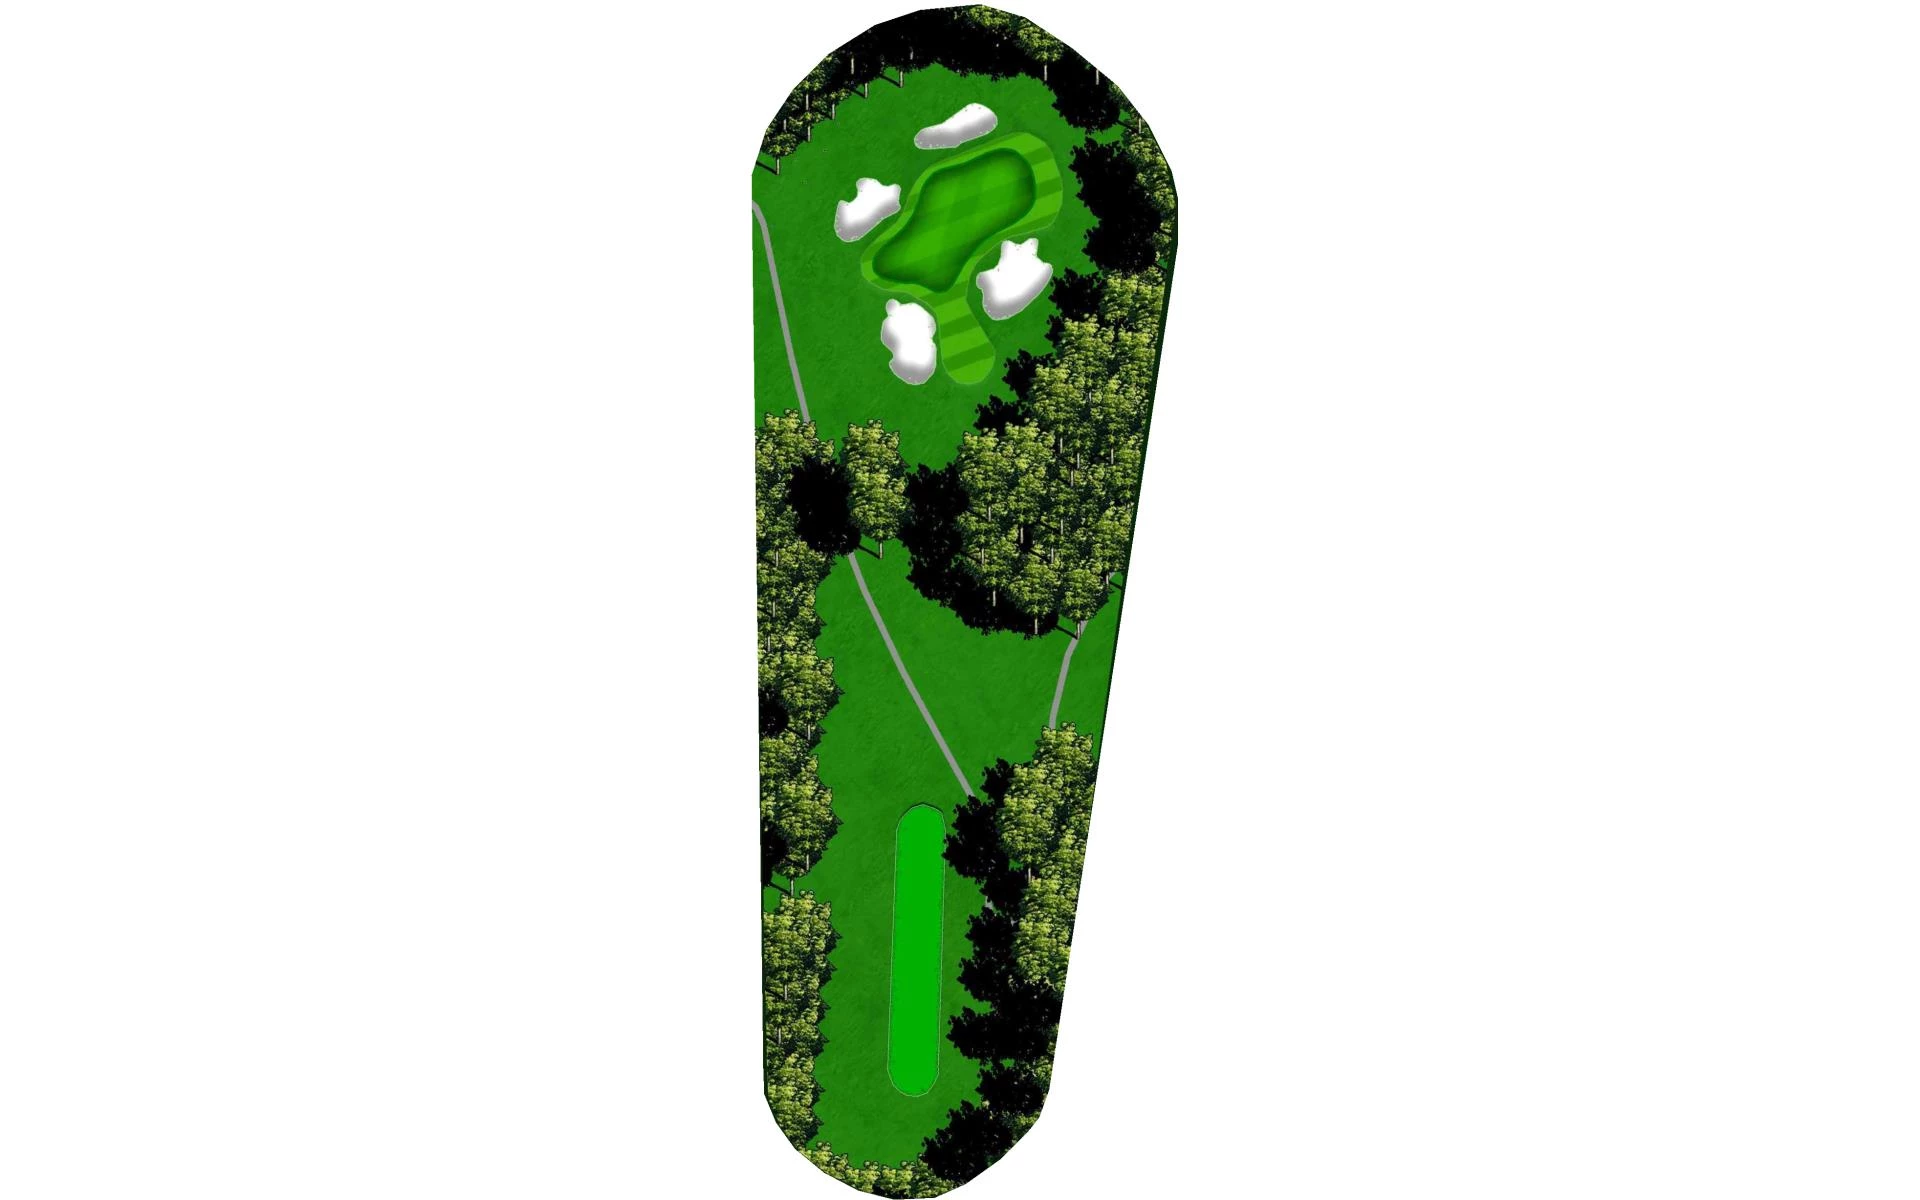
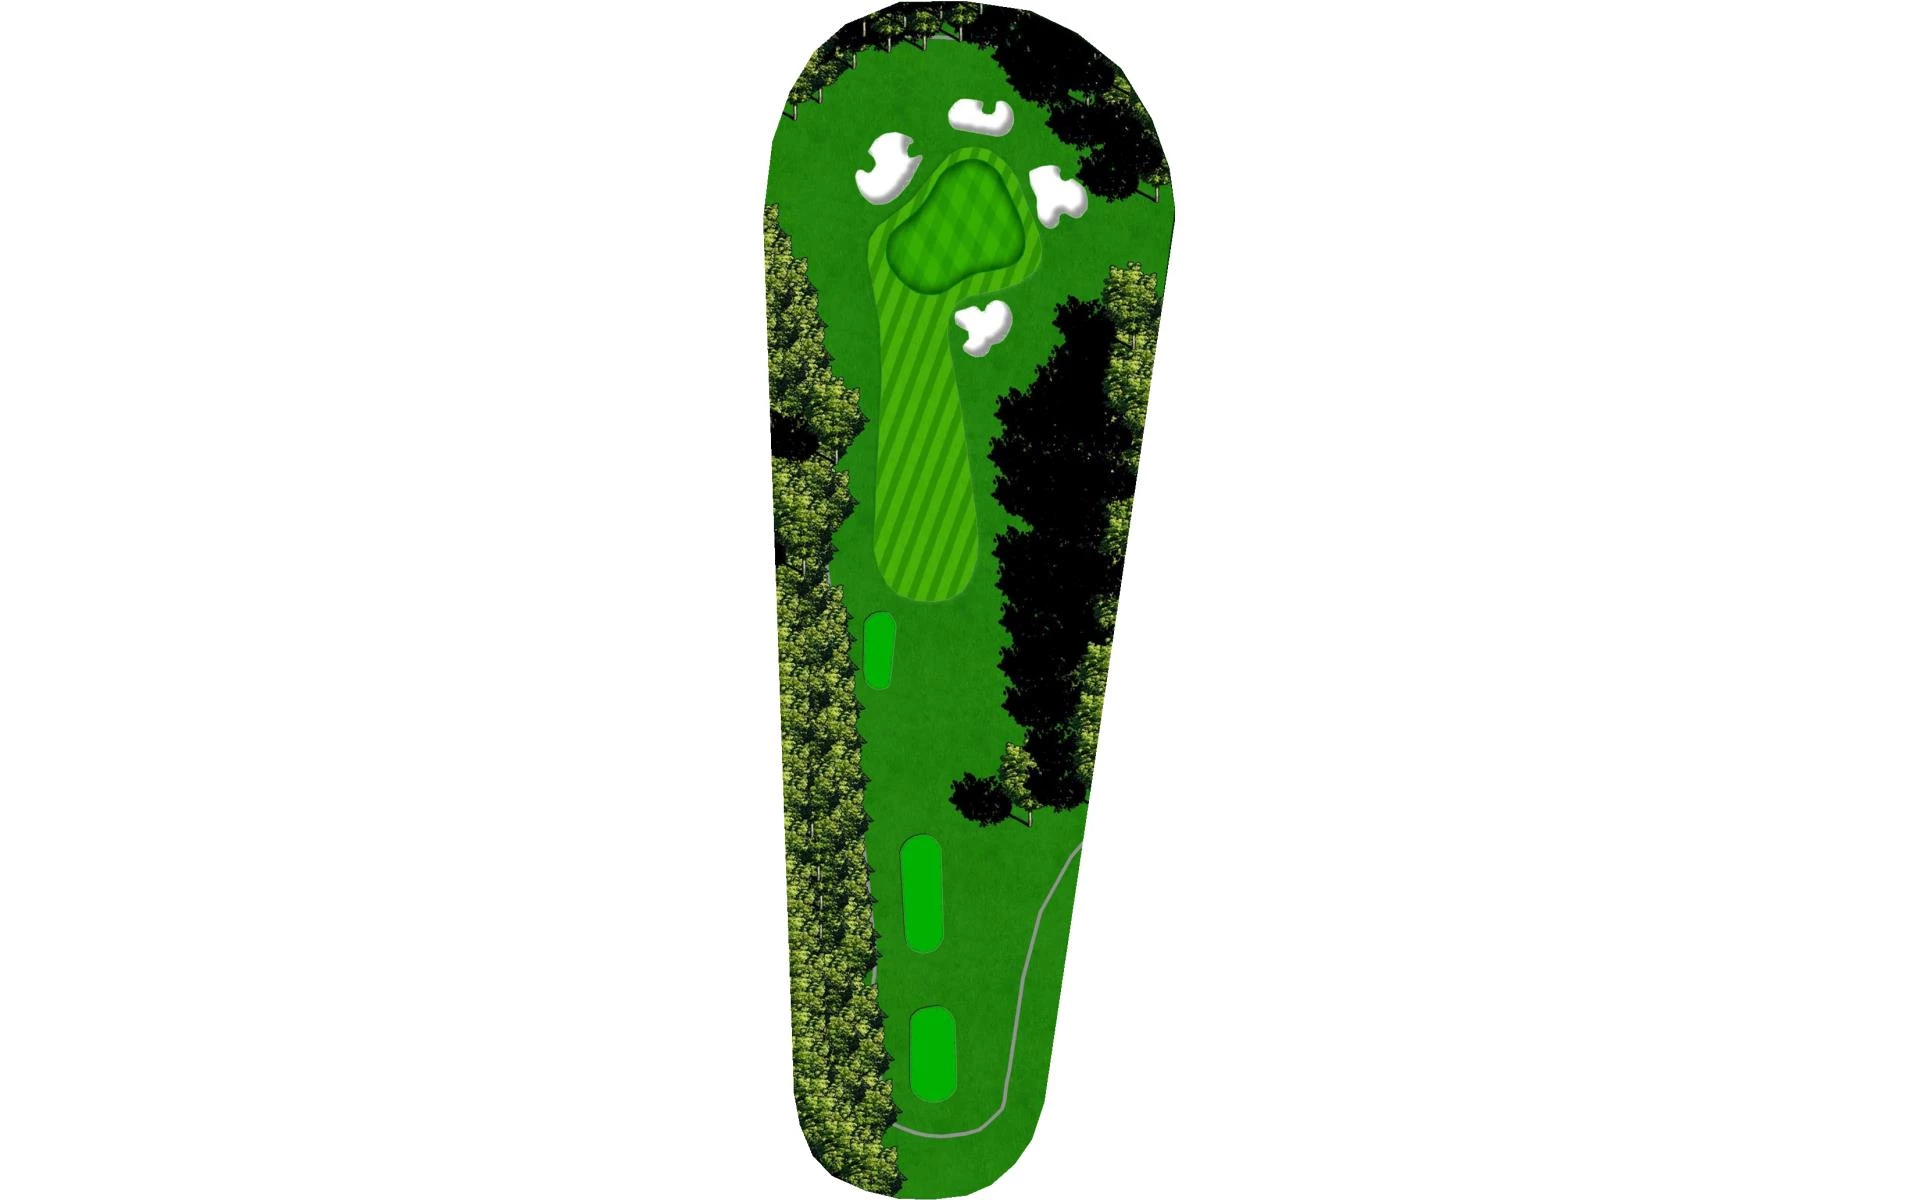
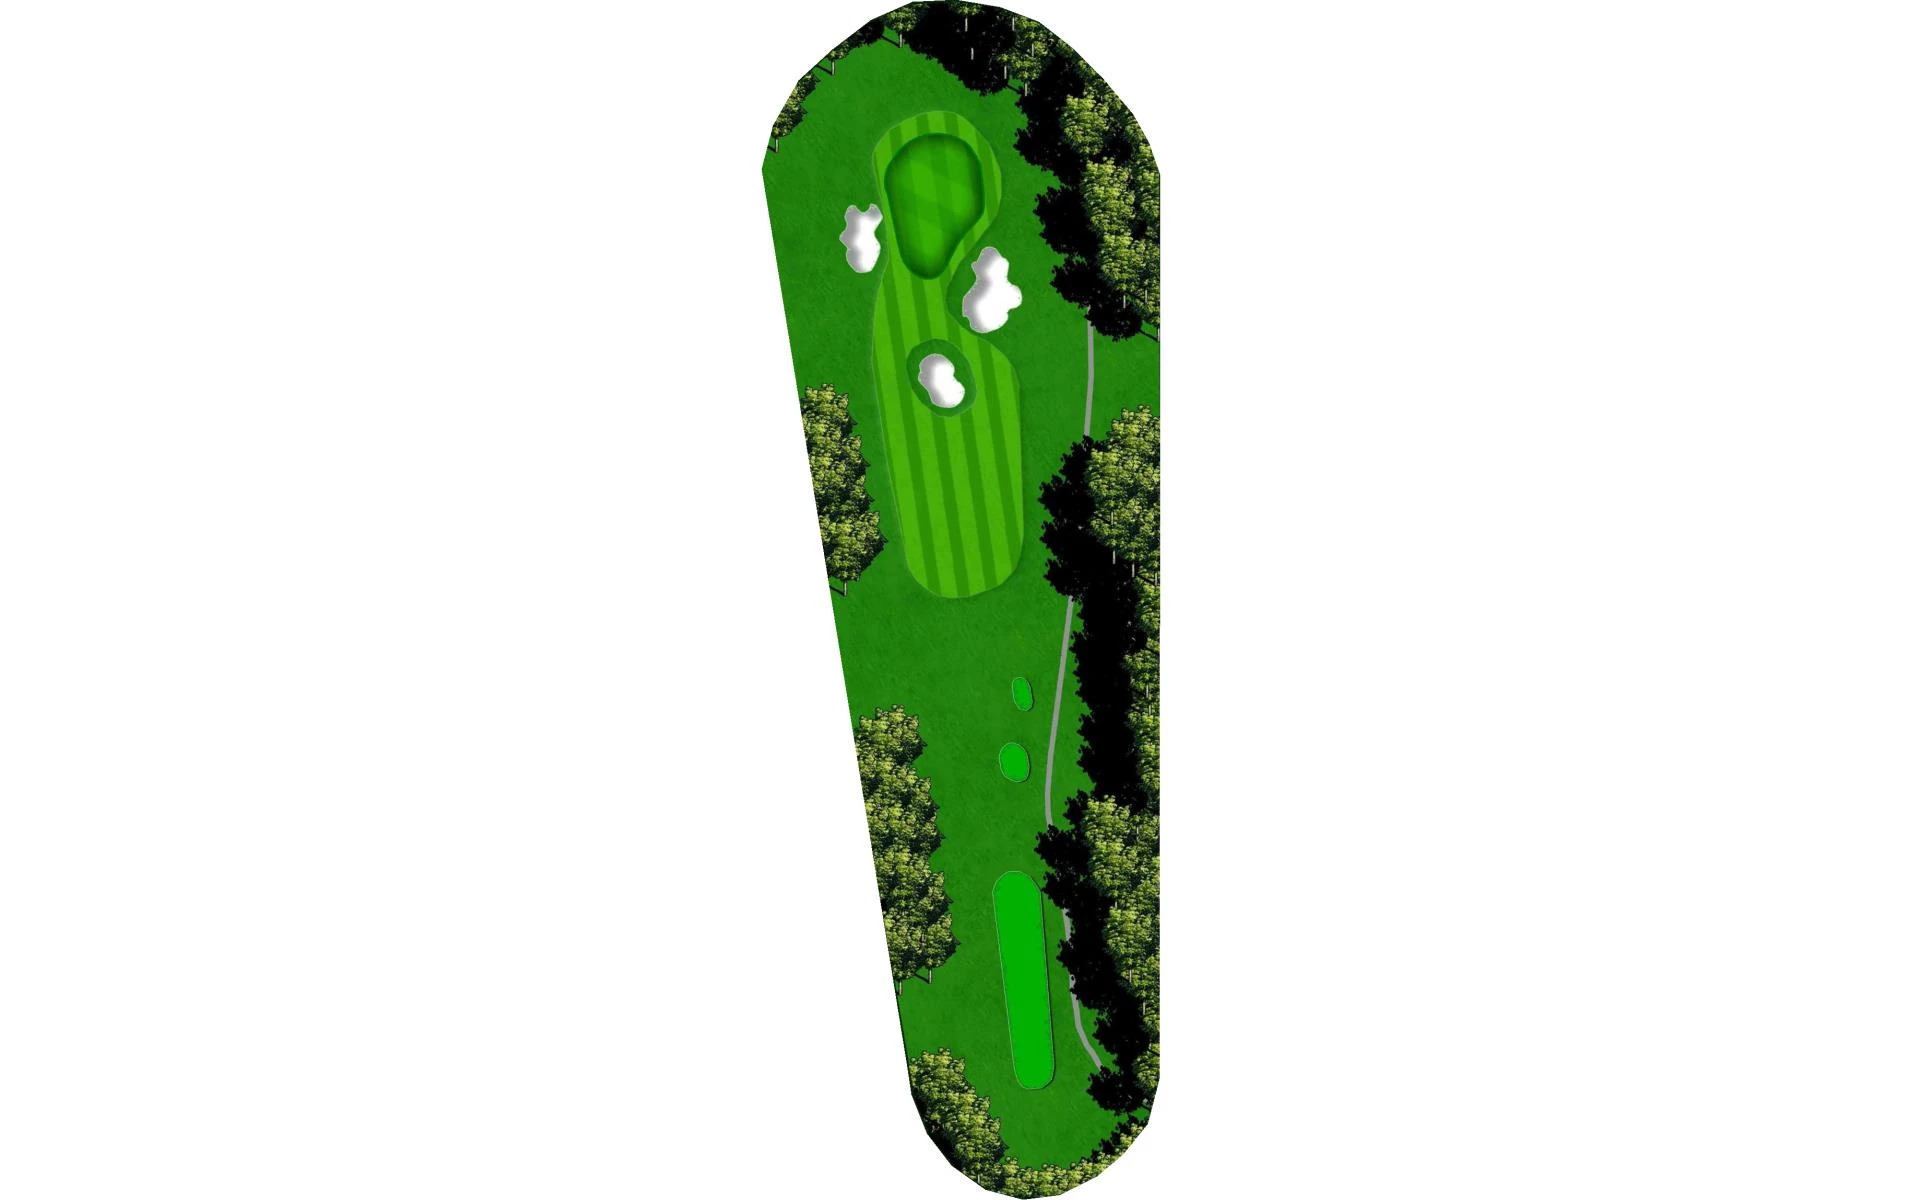
# 8 /
Par: 3
Yardage by Tee:
GOLD 166
BLUE 152
WHITE 138
GREEN 130
PURPLE 124
Pro Tips
On this par 3 avoid the two front bunkers and the two back bunkers and a birdie putt will be the result.
# 9 /
Par: 4
Yardage by Tee:
GOLD 438
BLUE 419
WHITE 400
GREEN 308
PURPLE 306
Pro Tips
A dogleg right par 4 .Take an extra club on your second shot .Try and stay below the hole for an uphill putt.
# 10 /
Par: 4
Yardage by Tee:
GOLD 382
BLUE 382
WHITE 362
GREEN 319
PURPLE 316
Pro Tips
The second shot is the key to this par 4. A small green fronted by a large bunker. Select the correct club and have a short birdie putt.
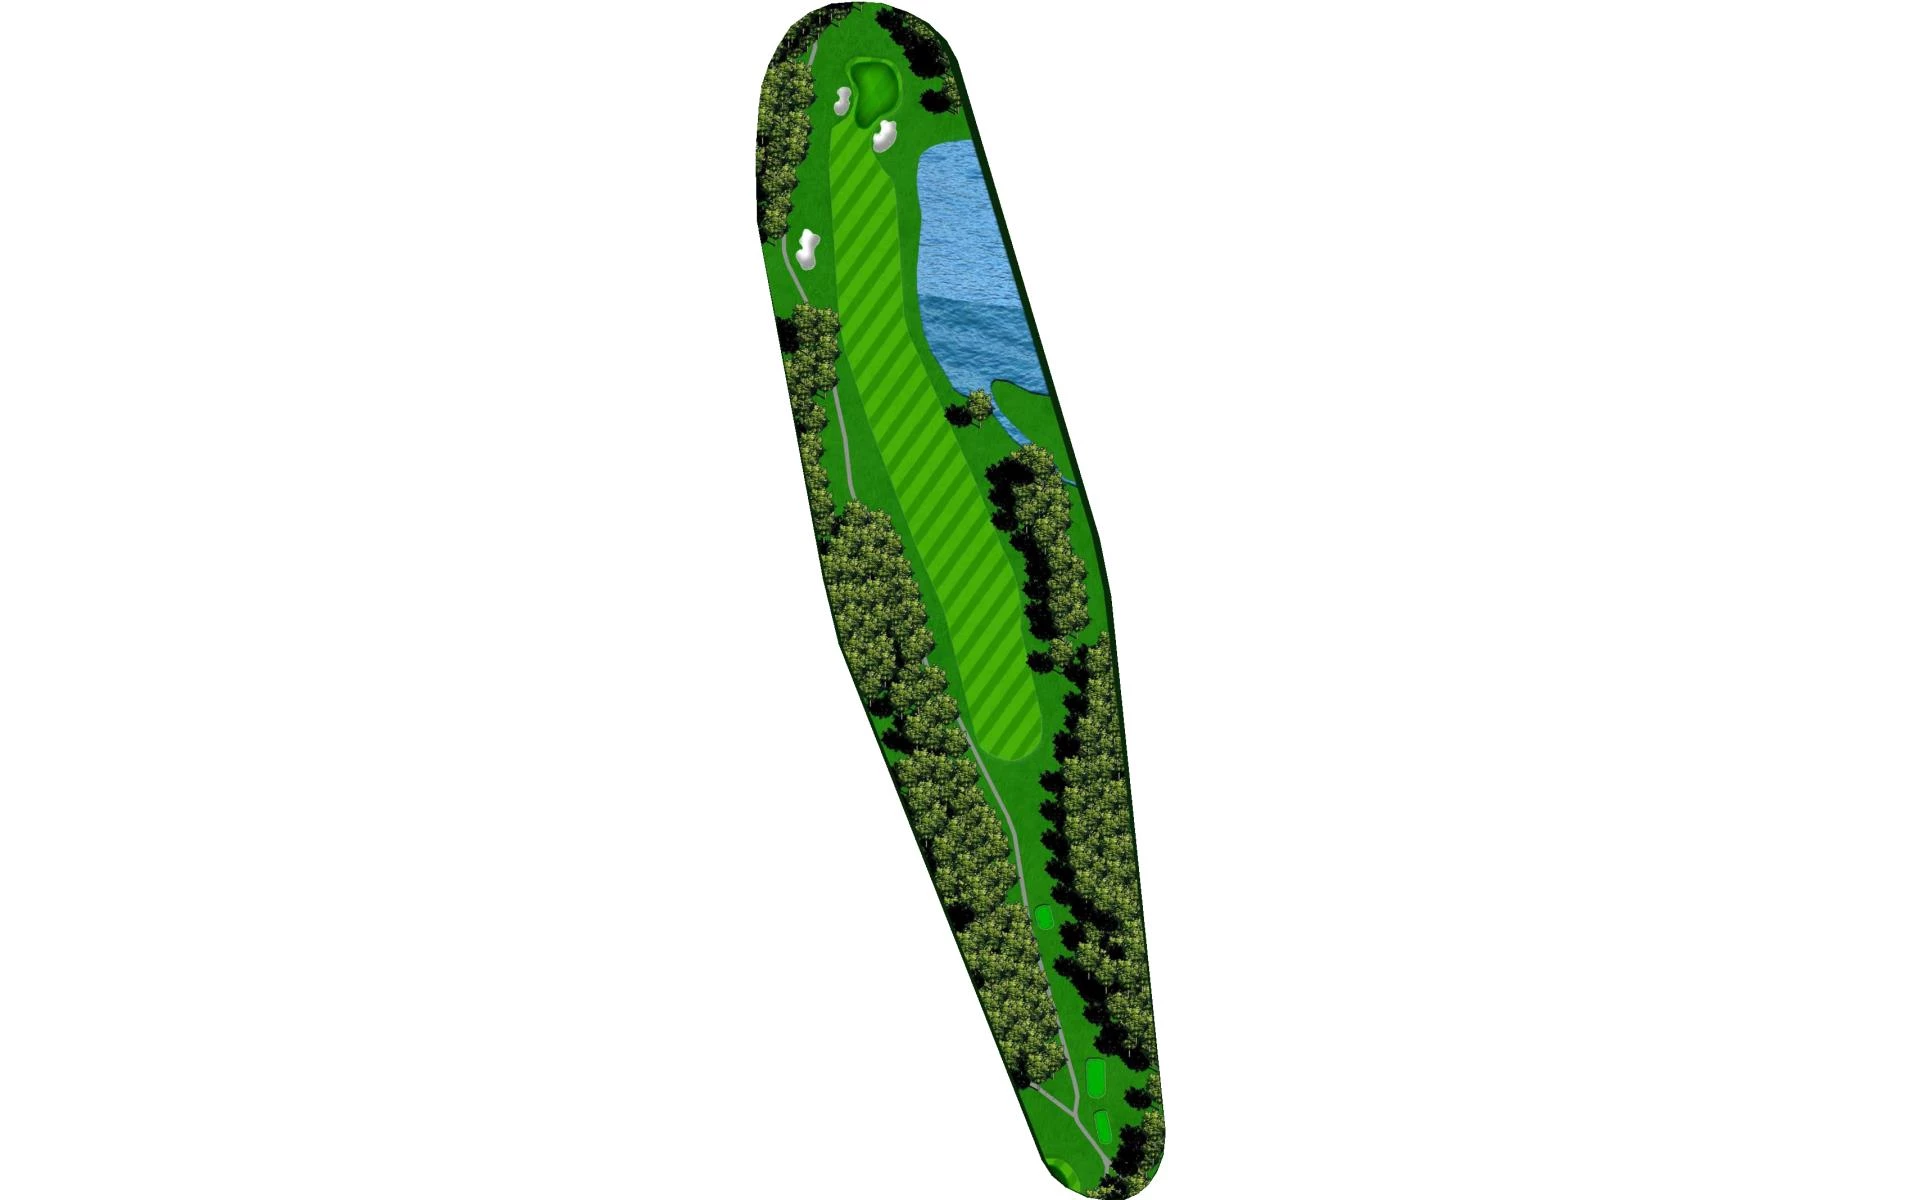
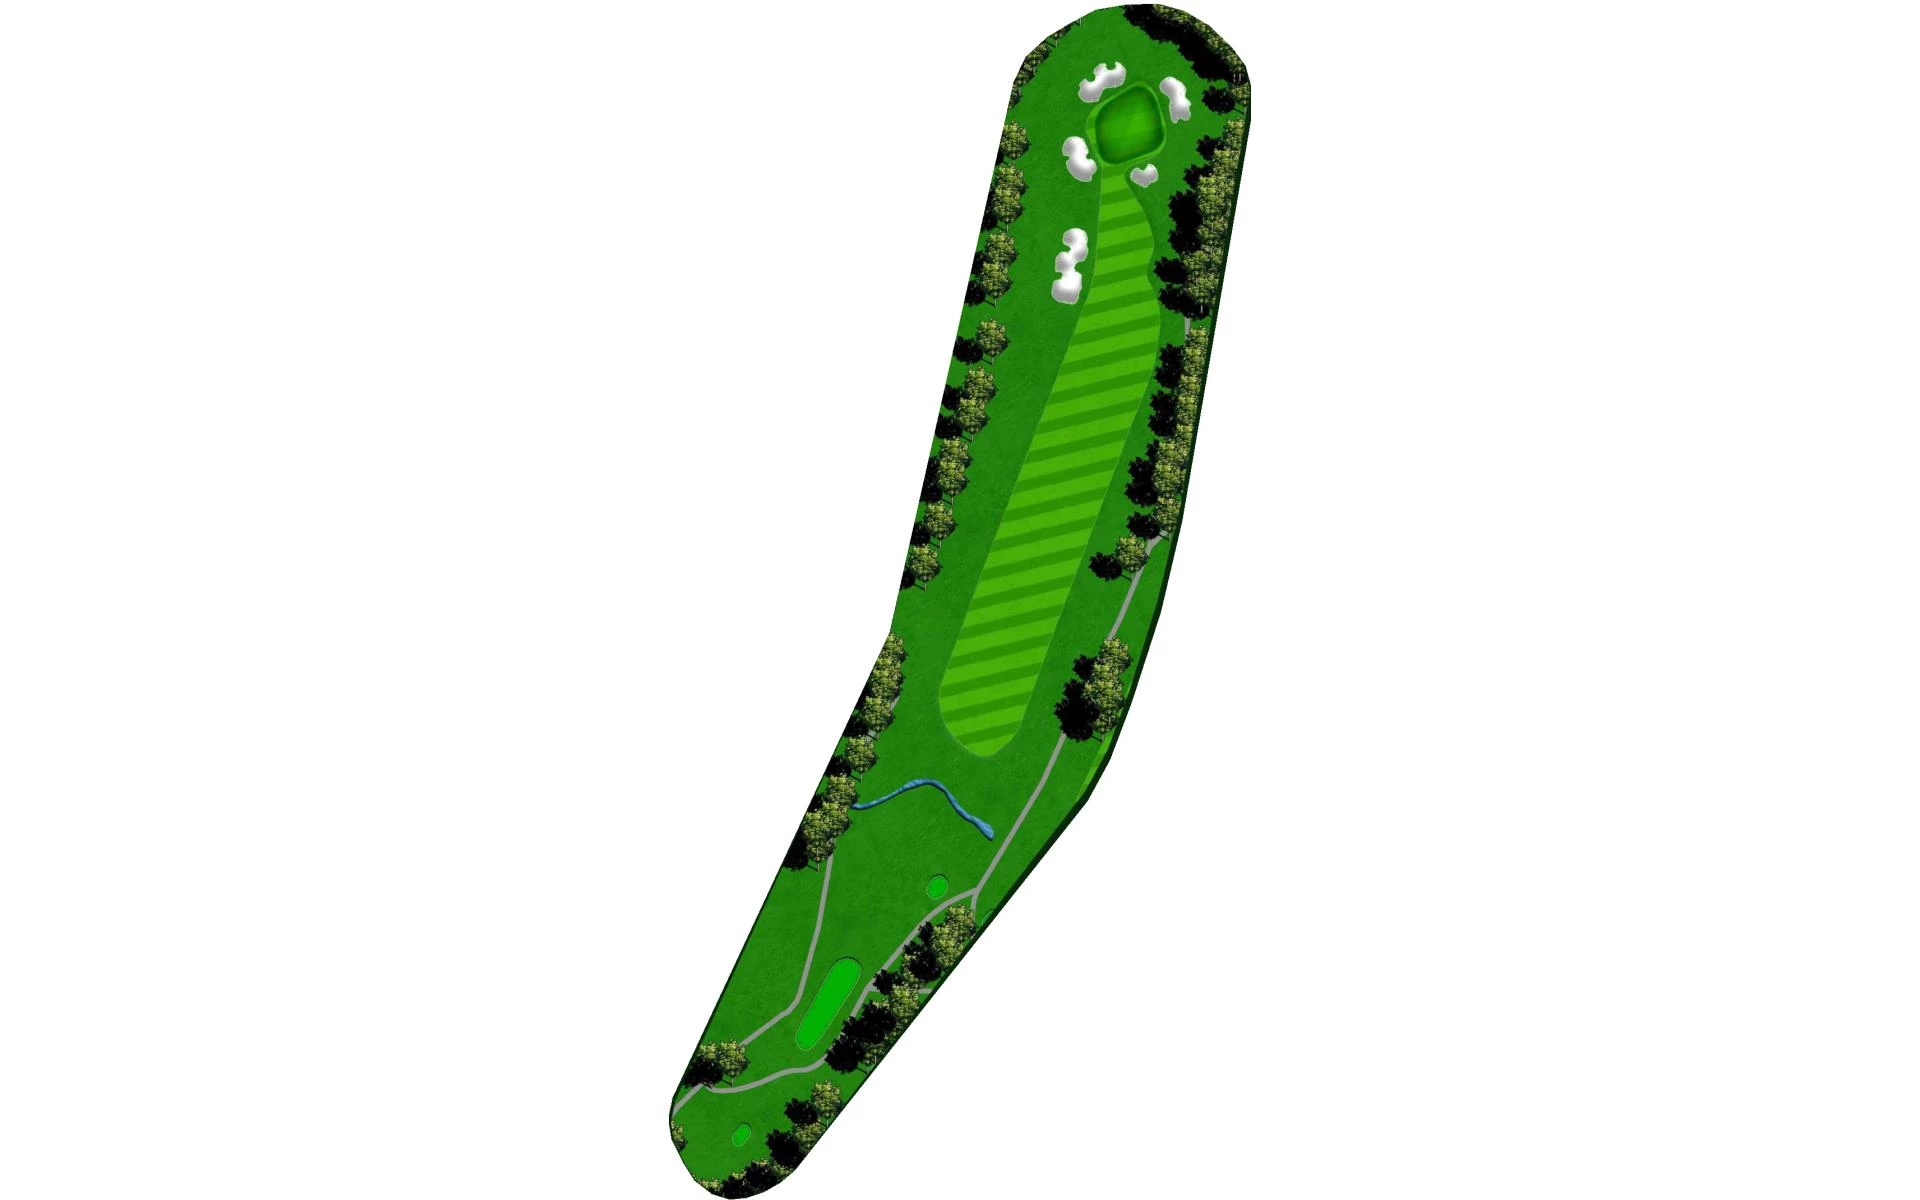
# 11 /
Par: 5
Yardage by Tee:
GOLD 514
BLUE 503
WHITE 482
GREEN 407
PURPLE 407
Pro Tips
This par 5 has water down the right side on the second shot. Stay left for an open shot to the flag.
# 12 /
Par: 4
Yardage by Tee:
GOLD 304
BLUE 287
WHITE 268
GREEN 261
PURPLE 258
Pro Tips
A three wood may be the choice for the tee shot leaving a wedge to a two tiered green.

# 13 /
Par: 4
Yardage by Tee:
GOLD 405
BLUE 385
WHITE 363
GREEN 338
PURPLE 314
Pro Tips
A slight dogleg left par 4 avoid the fairway bunkers for a short second.
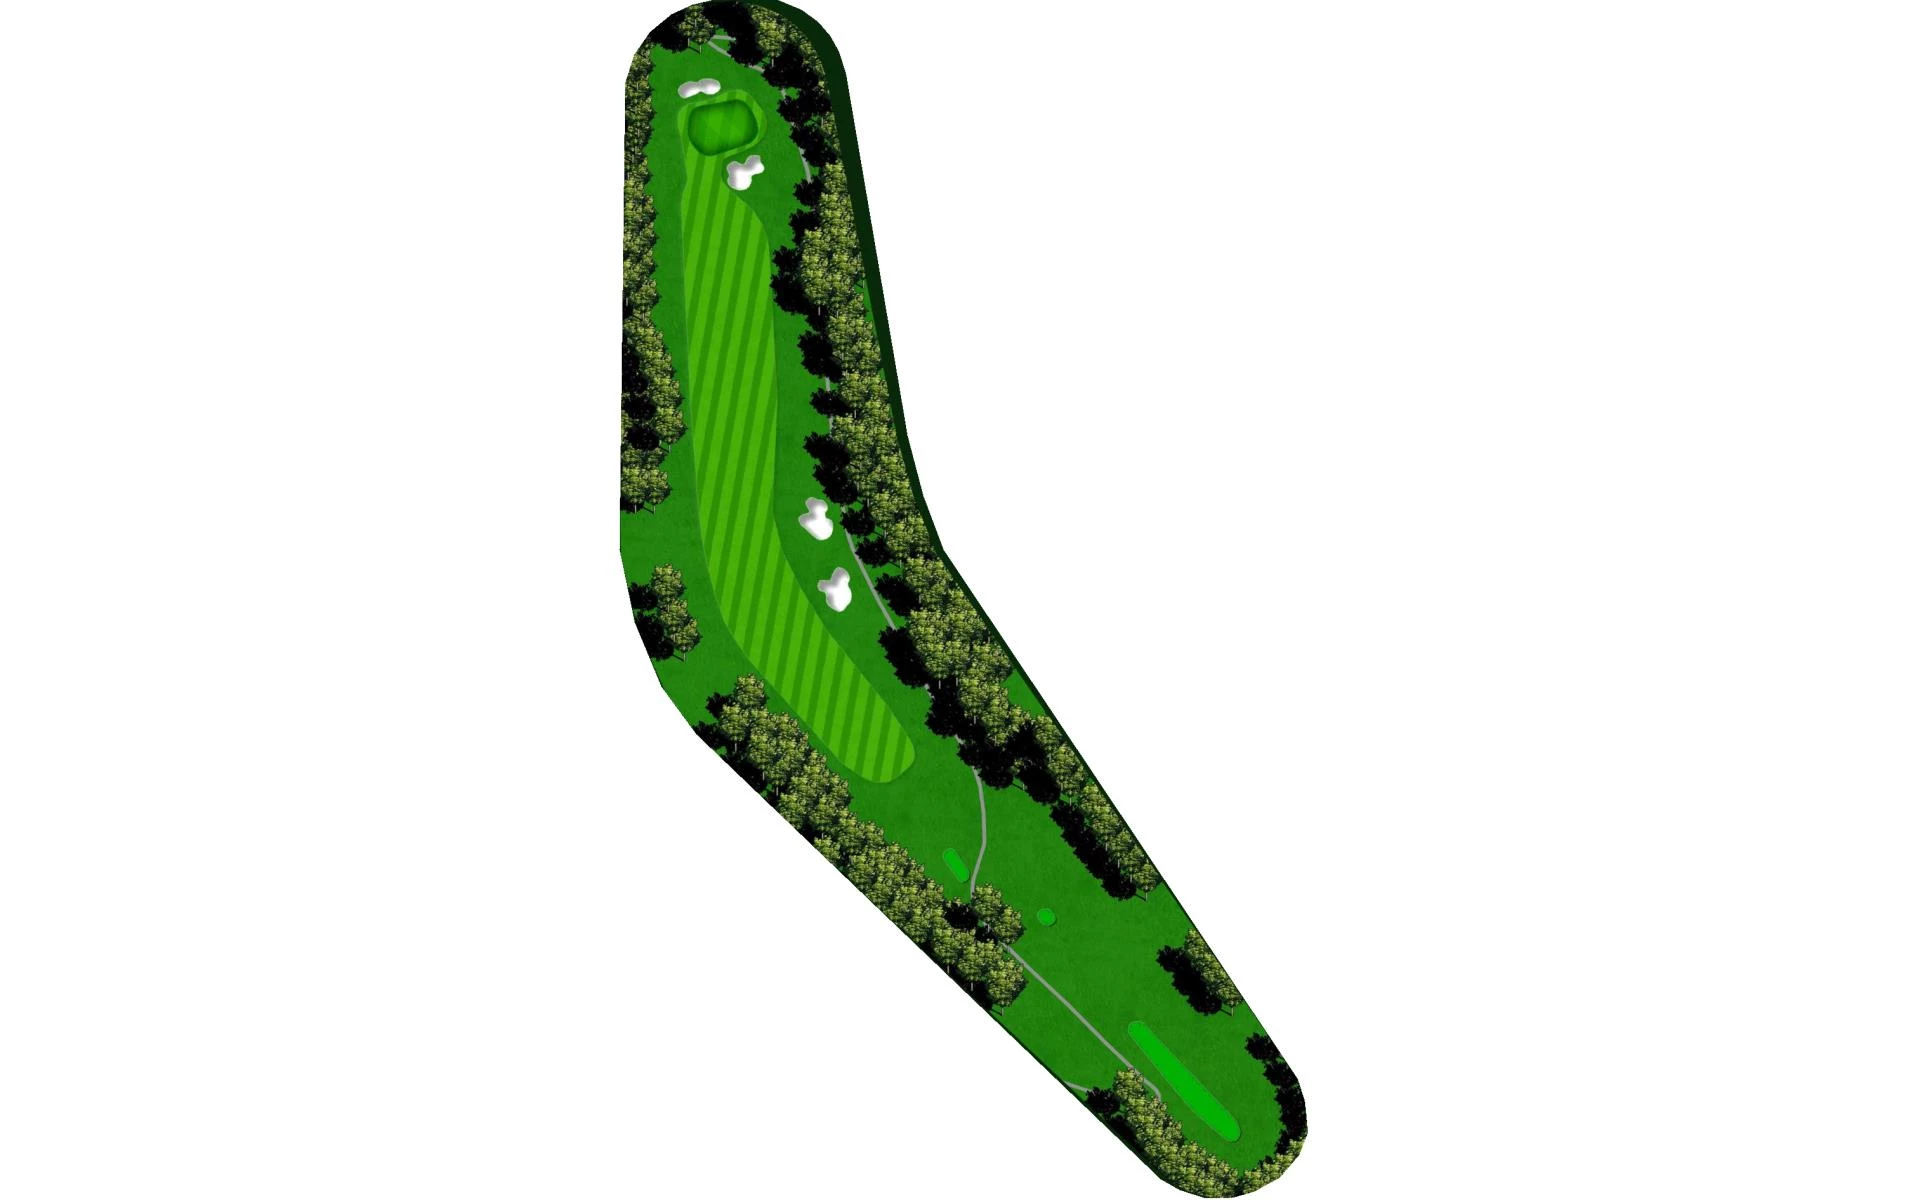
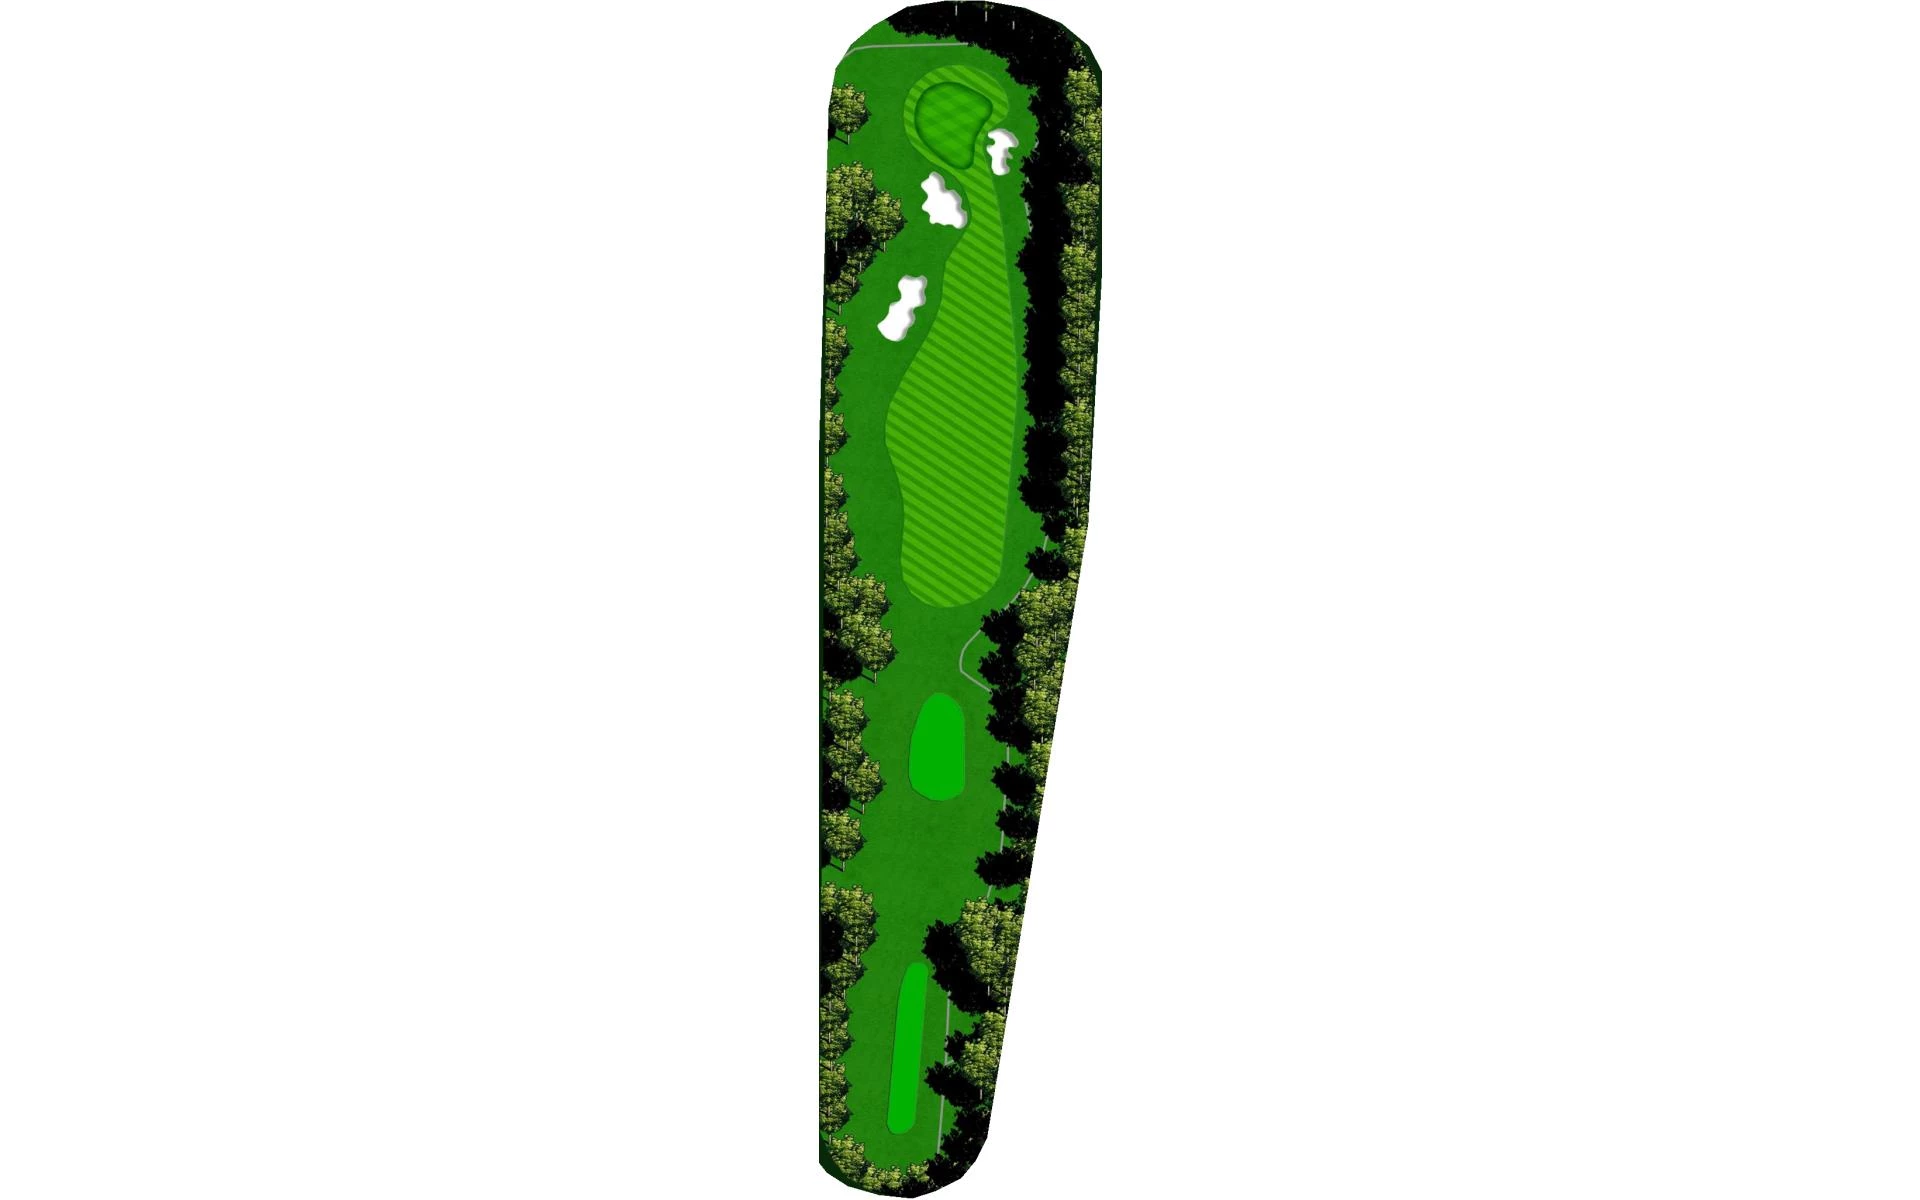
# 14 /
Par: 3
Yardage by Tee:
GOLD 179
BLUE 146
WHITE 134
GREEN 131
PURPLE 91
Pro Tips
A par 3 with a two tiered green .If the flagstick is back left club selection is critical.
# 15 /
Par: 4
Yardage by Tee:
GOLD 408
BLUE 400
WHITE 374
GREEN 320
PURPLE 272
Pro Tips
A tight par 4 with a penalty area at the end of the fairway. Long hitters will need a fairway wood of the tee.
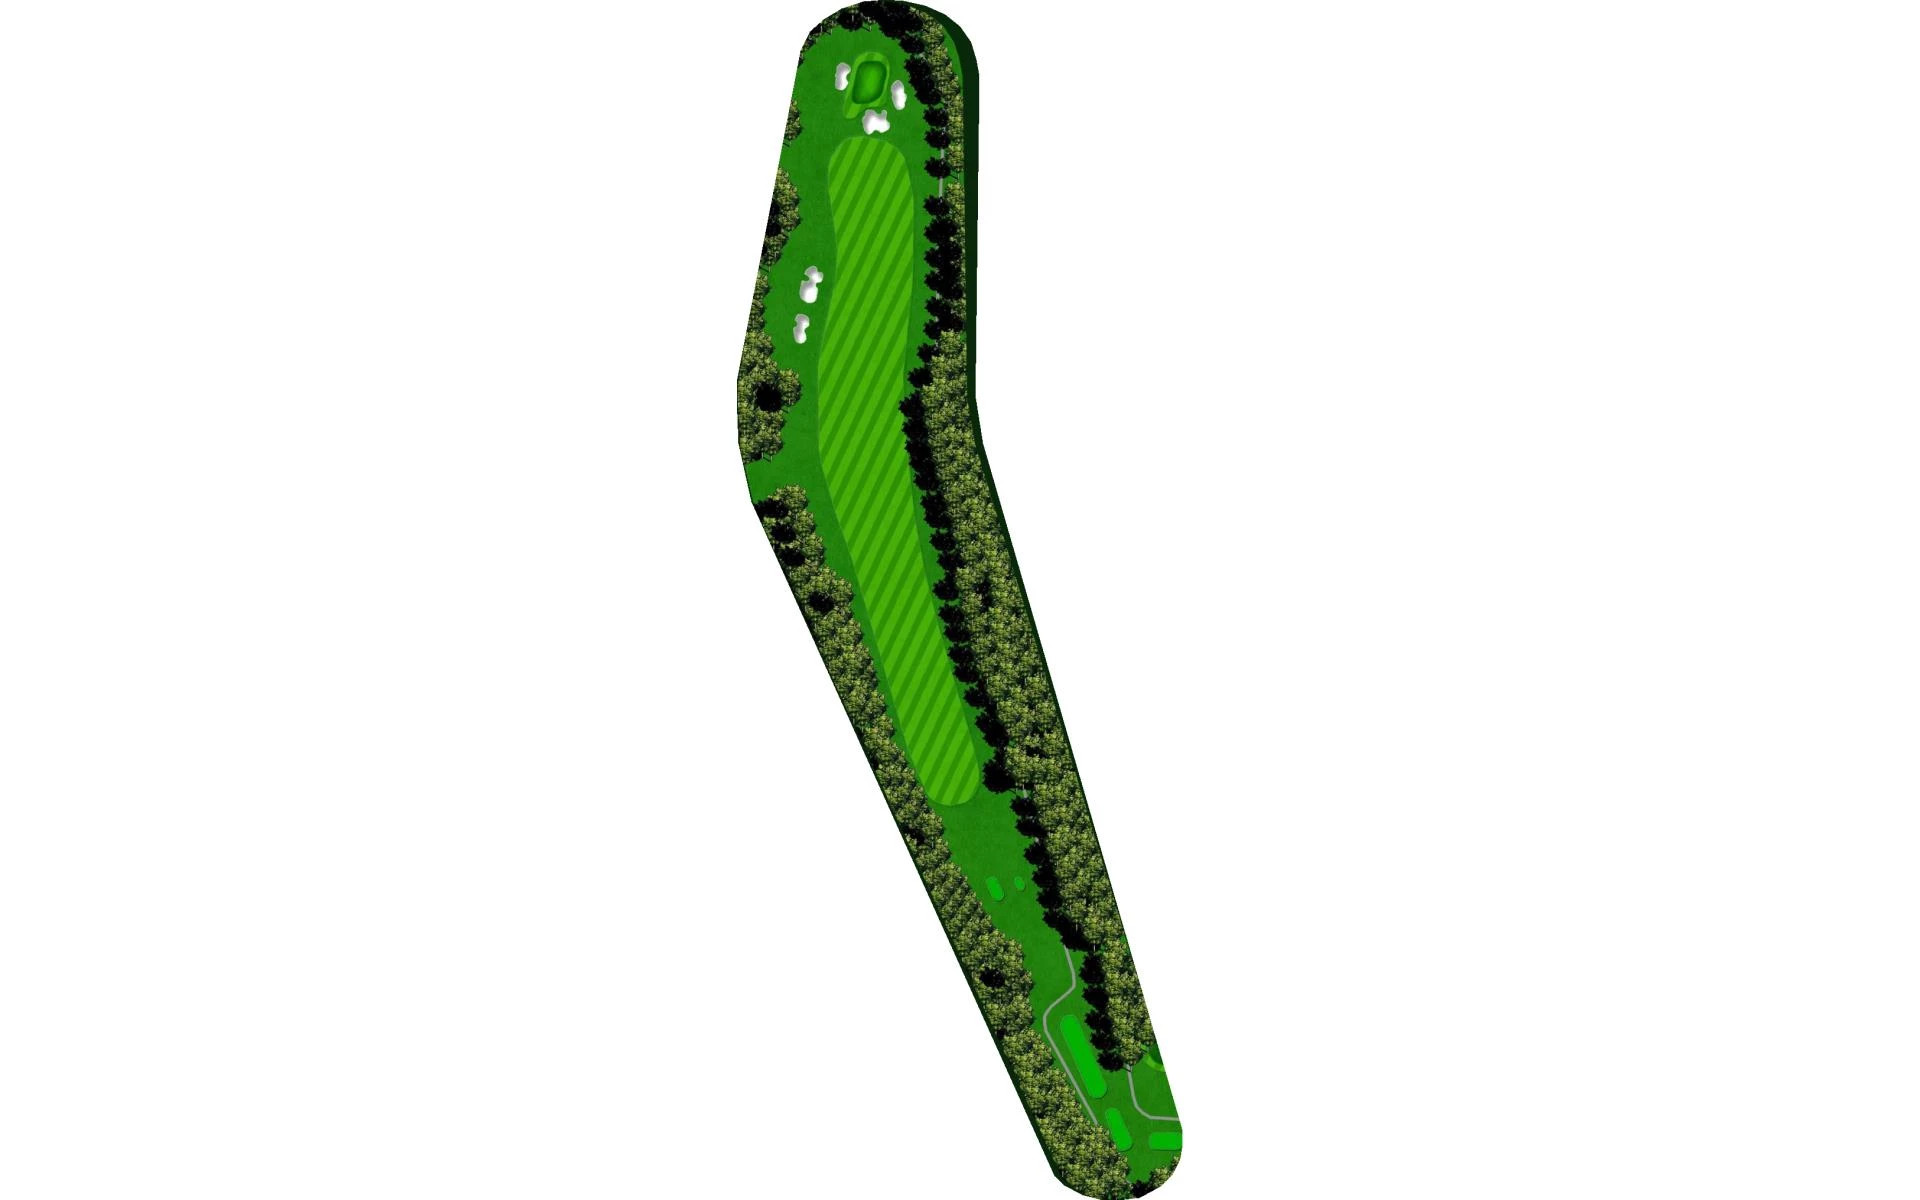
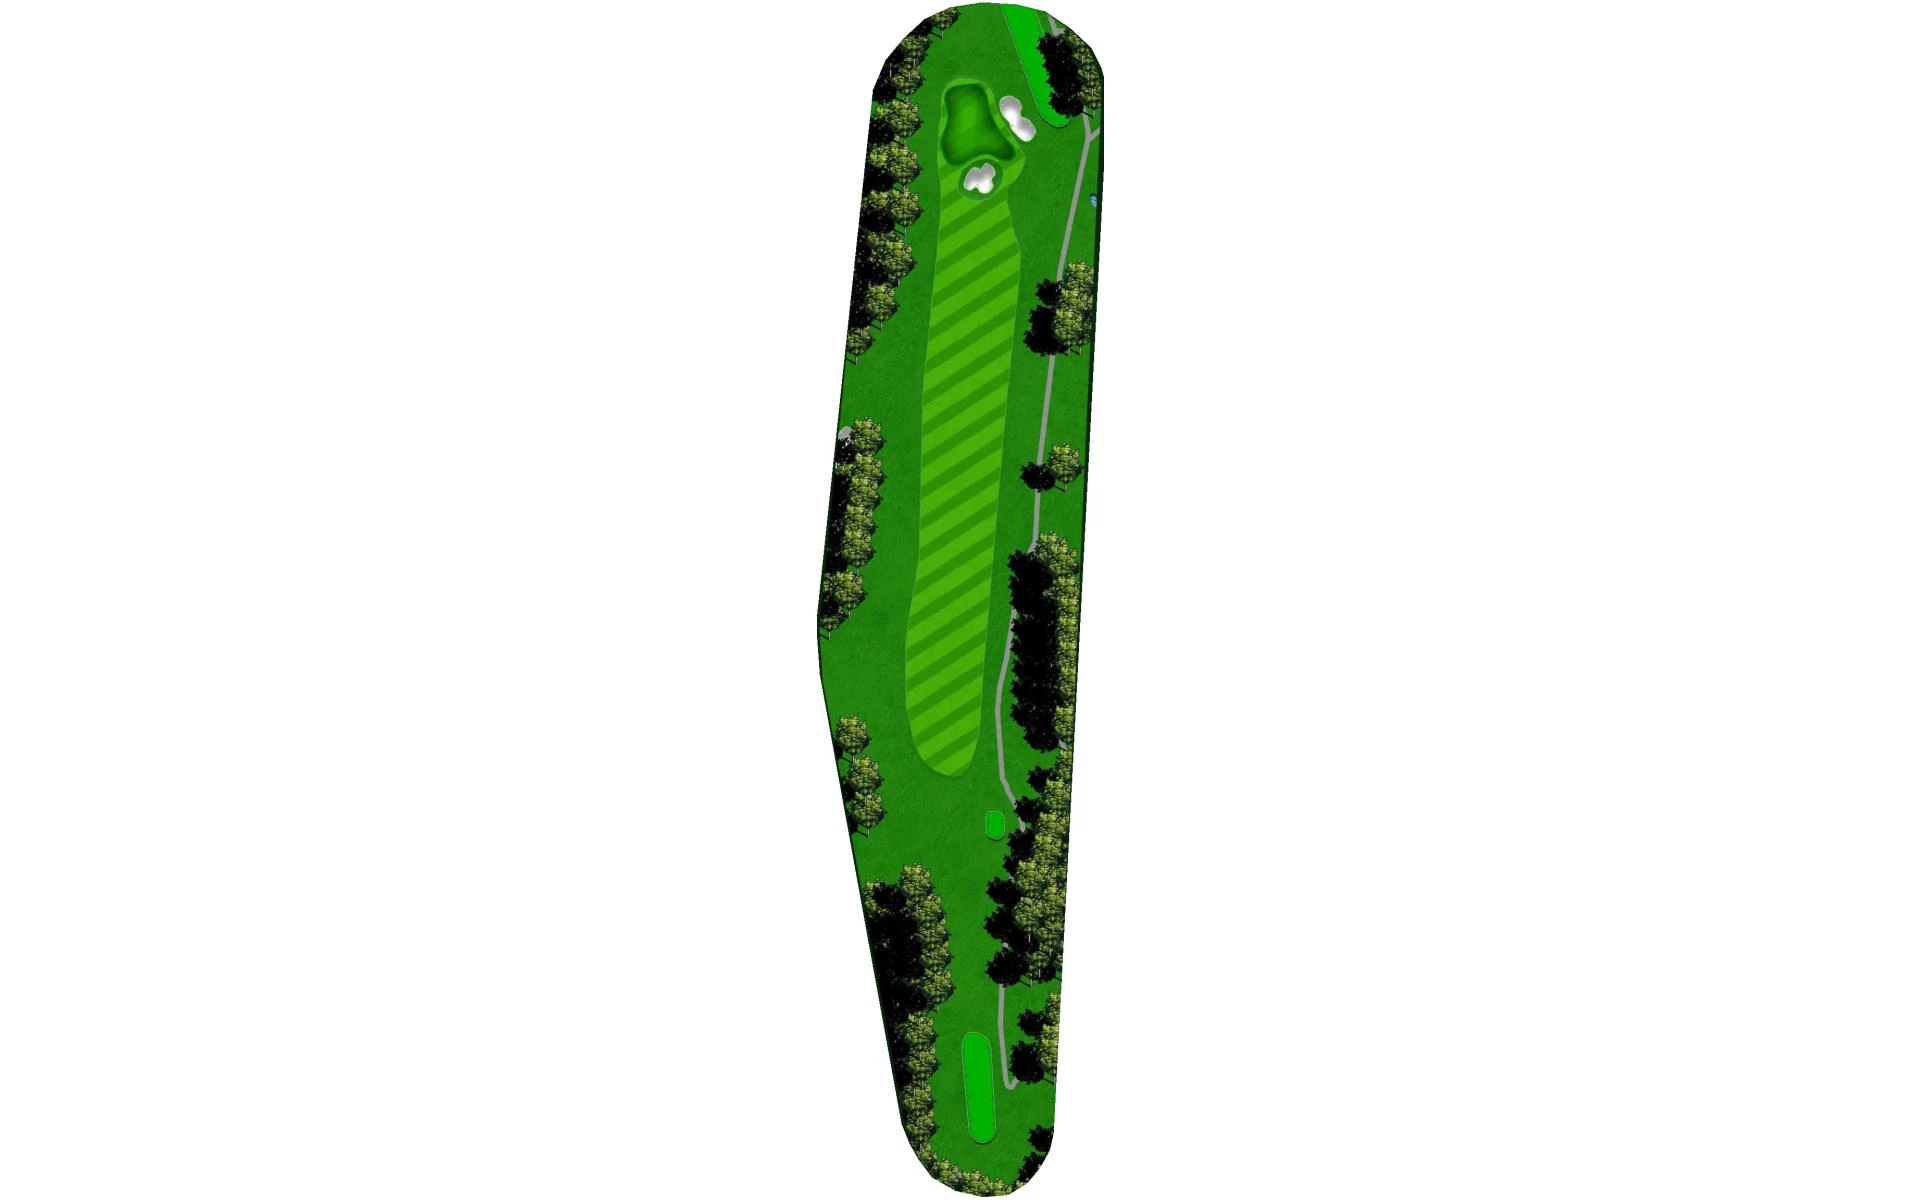
# 16 /
Par: 5
Yardage by Tee:
GOLD 545
BLUE 517
WHITE 497
GREEN 418
PURPLE 415
Pro Tips
This long par 5 will require a accurate 3rd to a small green. Laying up to your favorite distance is the key.
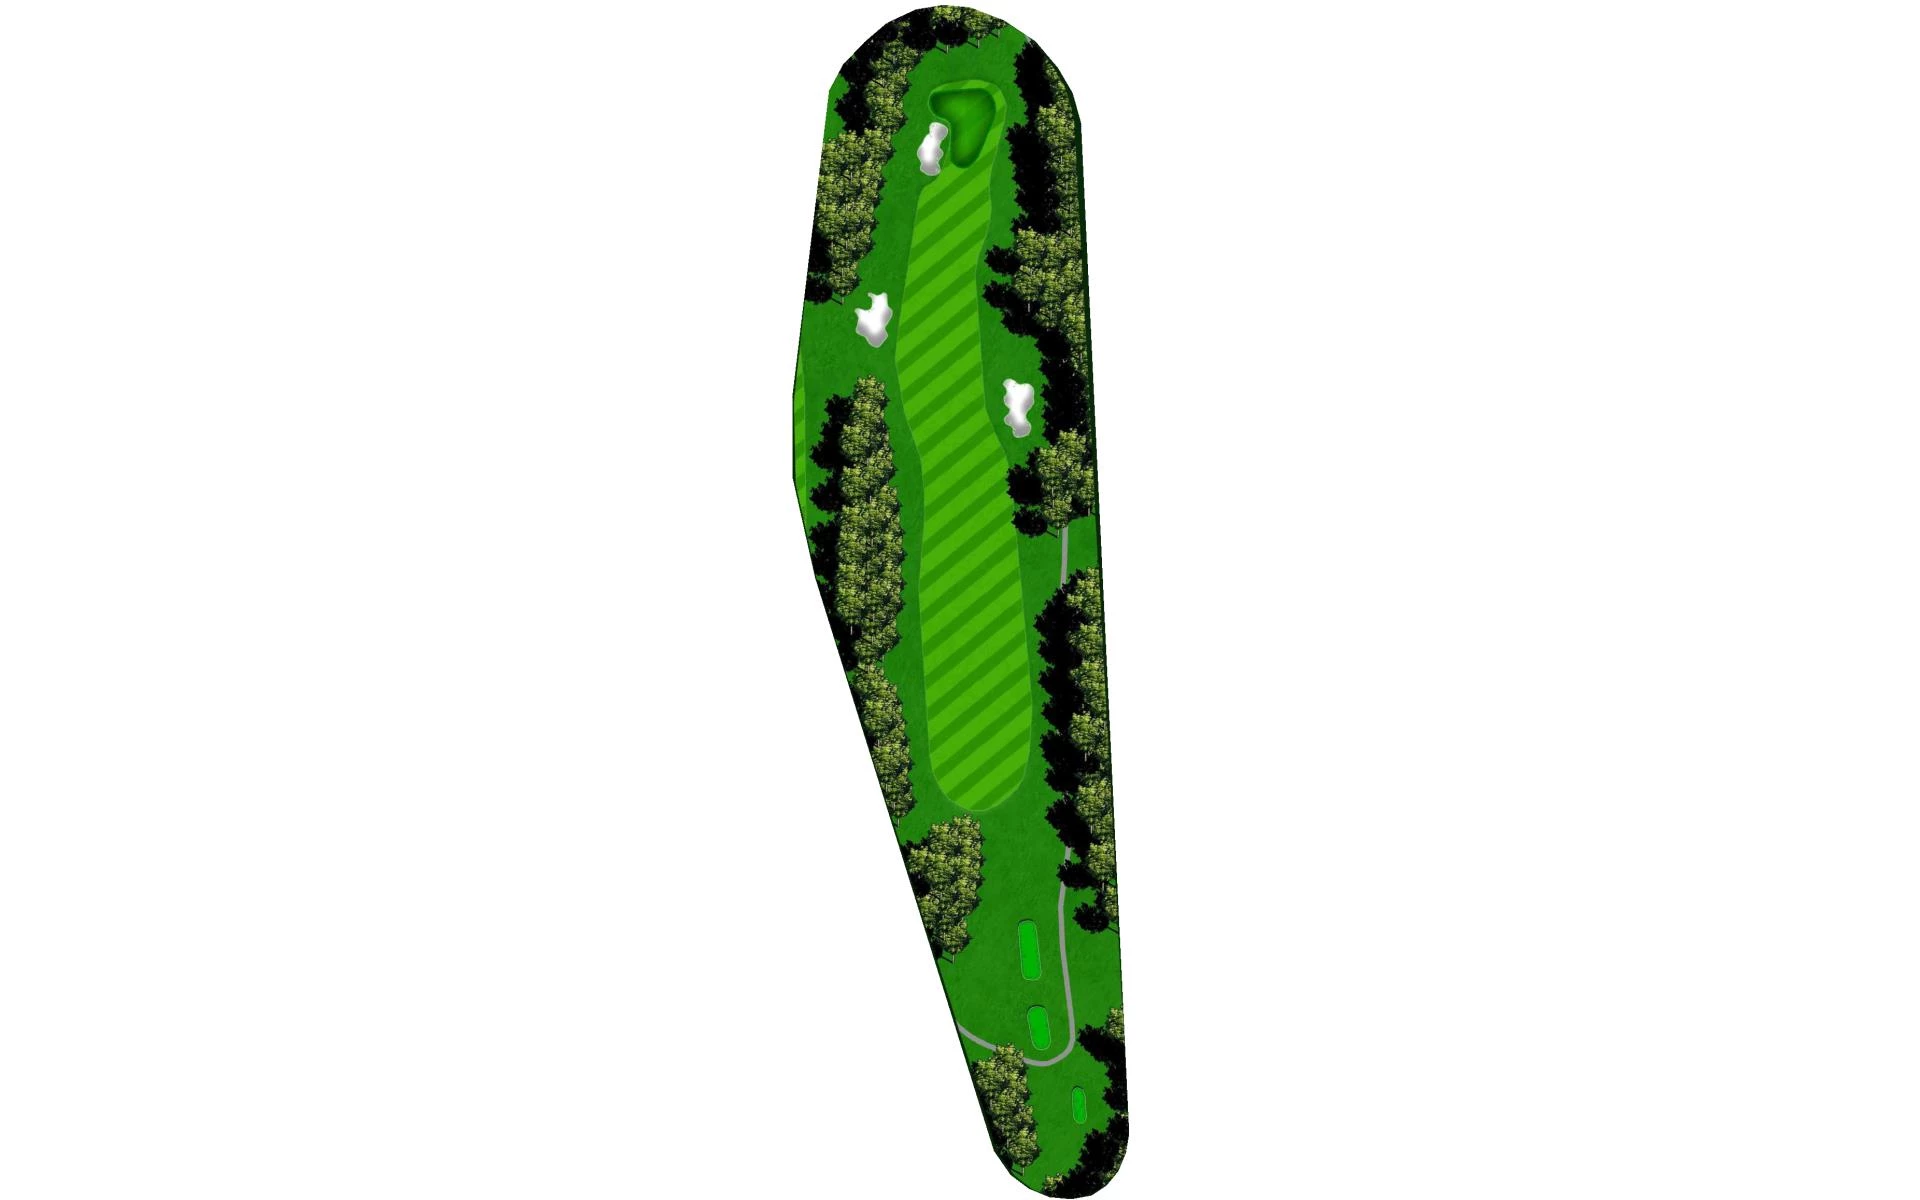
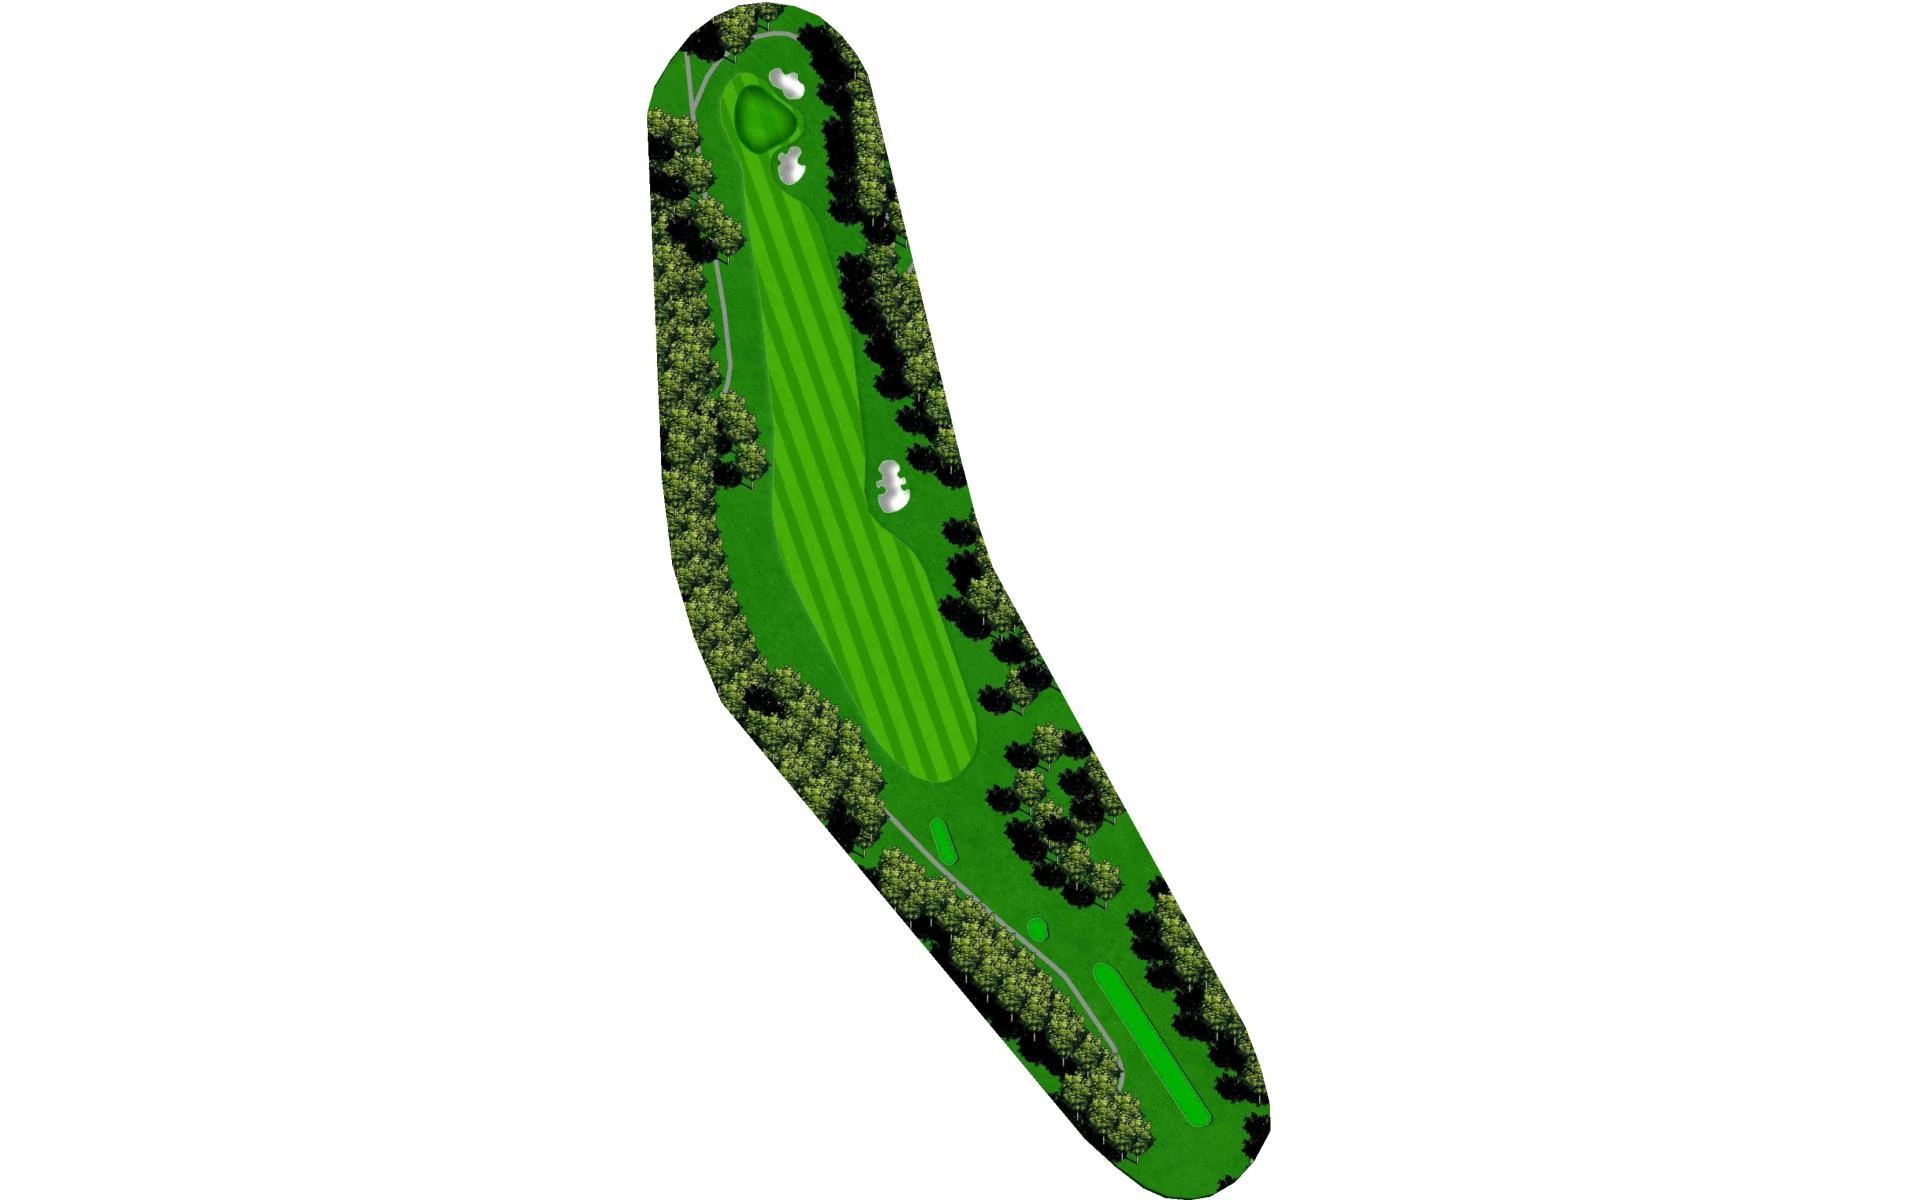
# 17 /
Par: 3
Yardage by Tee:
GOLD 202
BLUE 183
WHITE 163
GREEN 140
PURPLE 116
Pro Tips
A long par 3 with a narrow opening to the green .Par here is a good score.
# 18 /
Par: 4
Yardage by Tee:
GOLD 410
BLUE 387
WHITE 363
GREEN 328
PURPLE 279
Pro Tips
A great finishing hole .Keep it left of the fairway bunker and right of the magnolia tree and you will have a mid iron second.