The Currituck Club Golf Course
Designer: Rees Jones
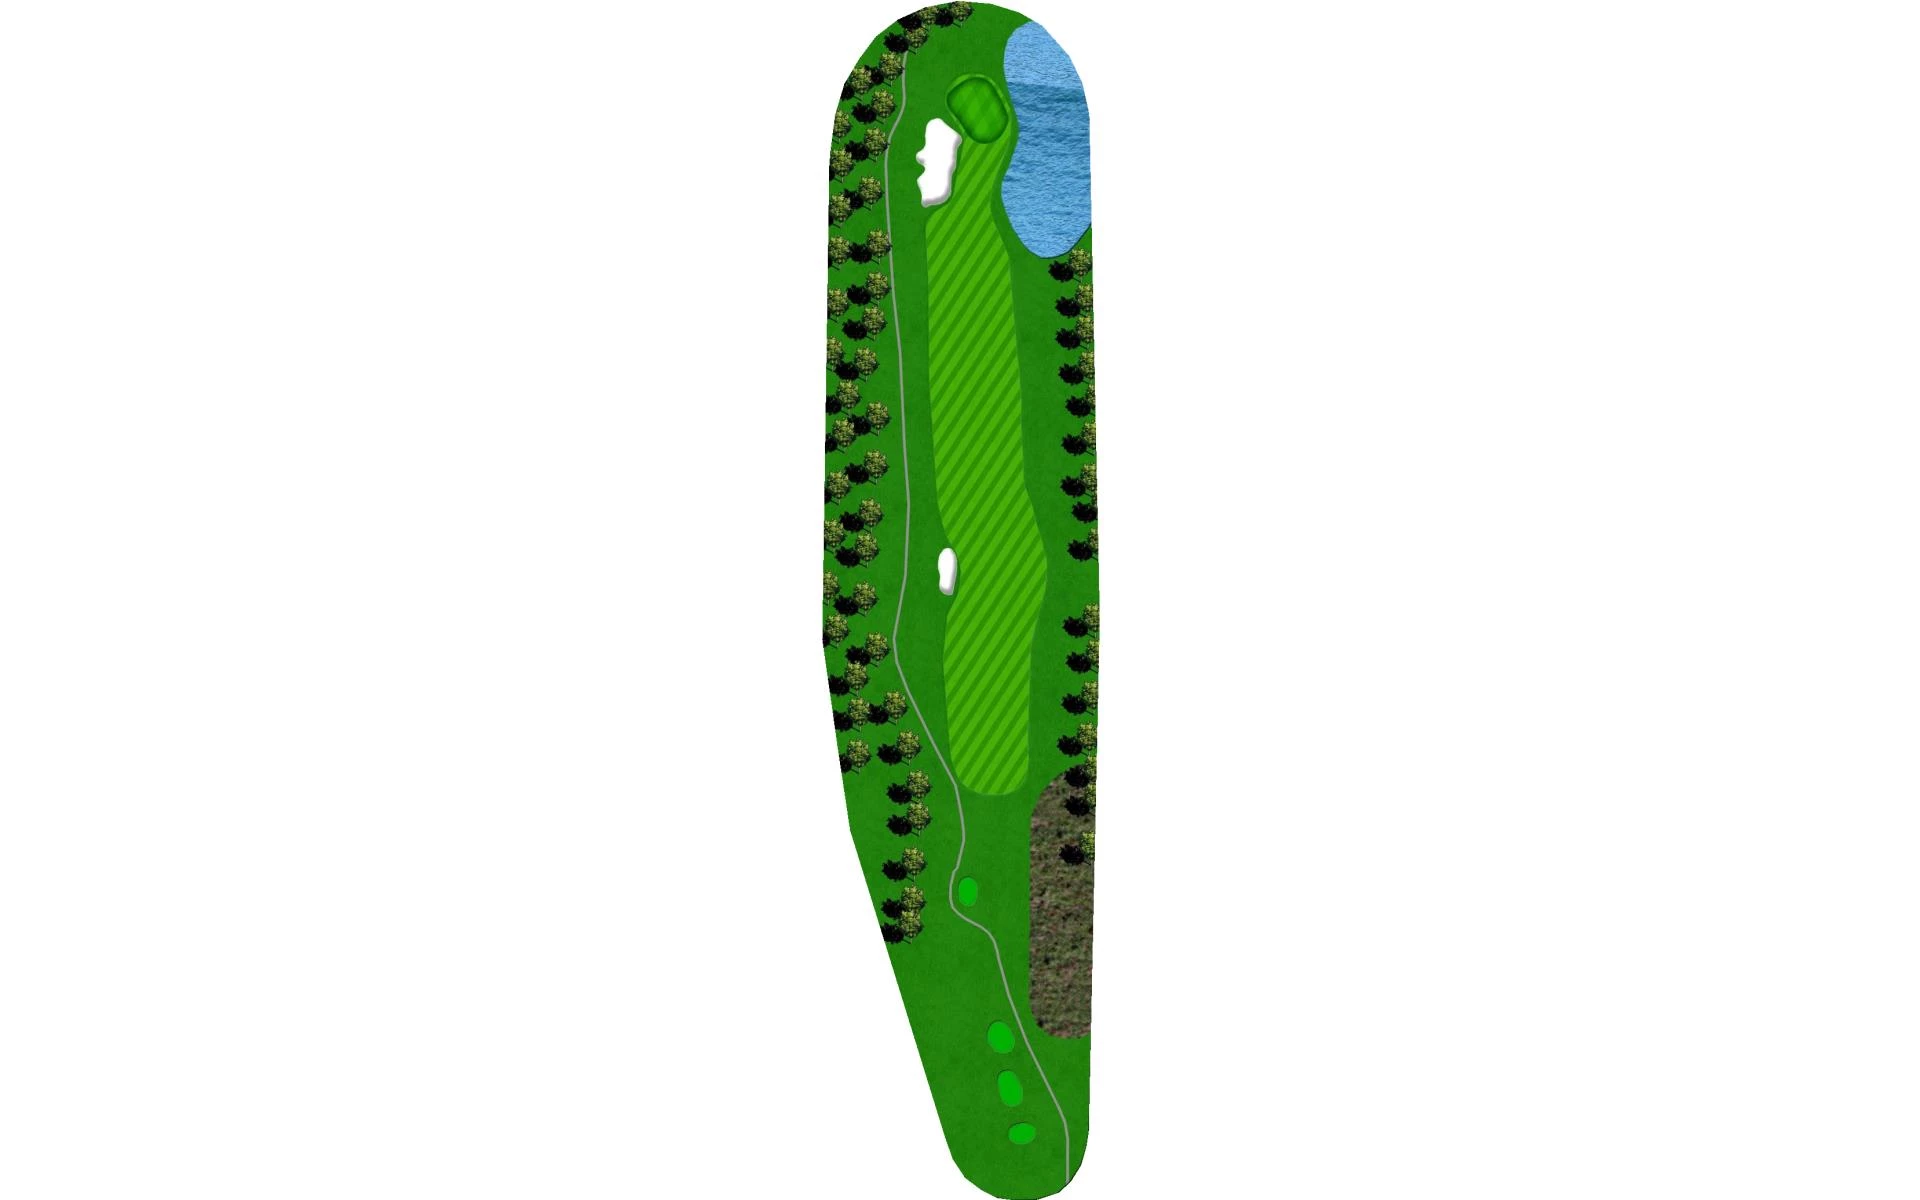
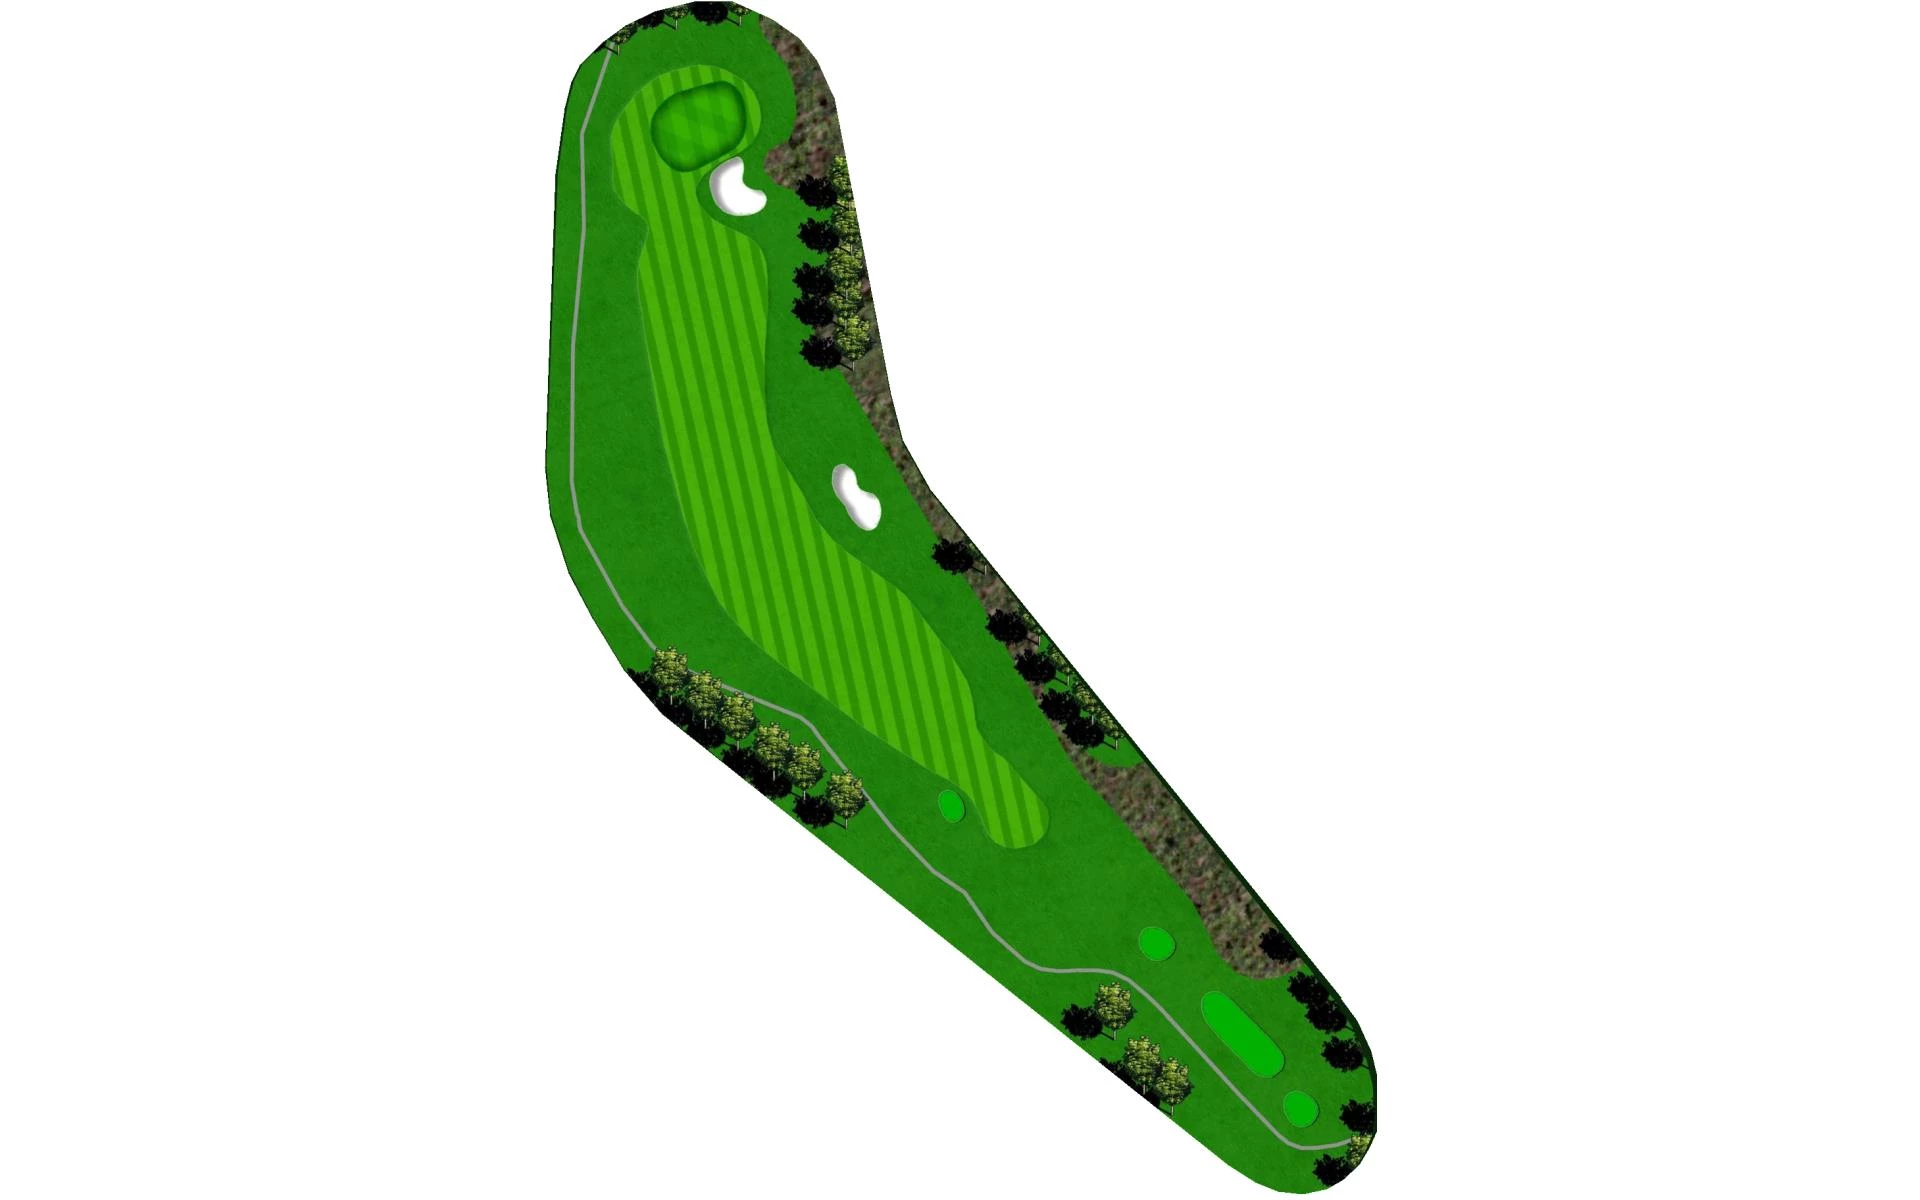
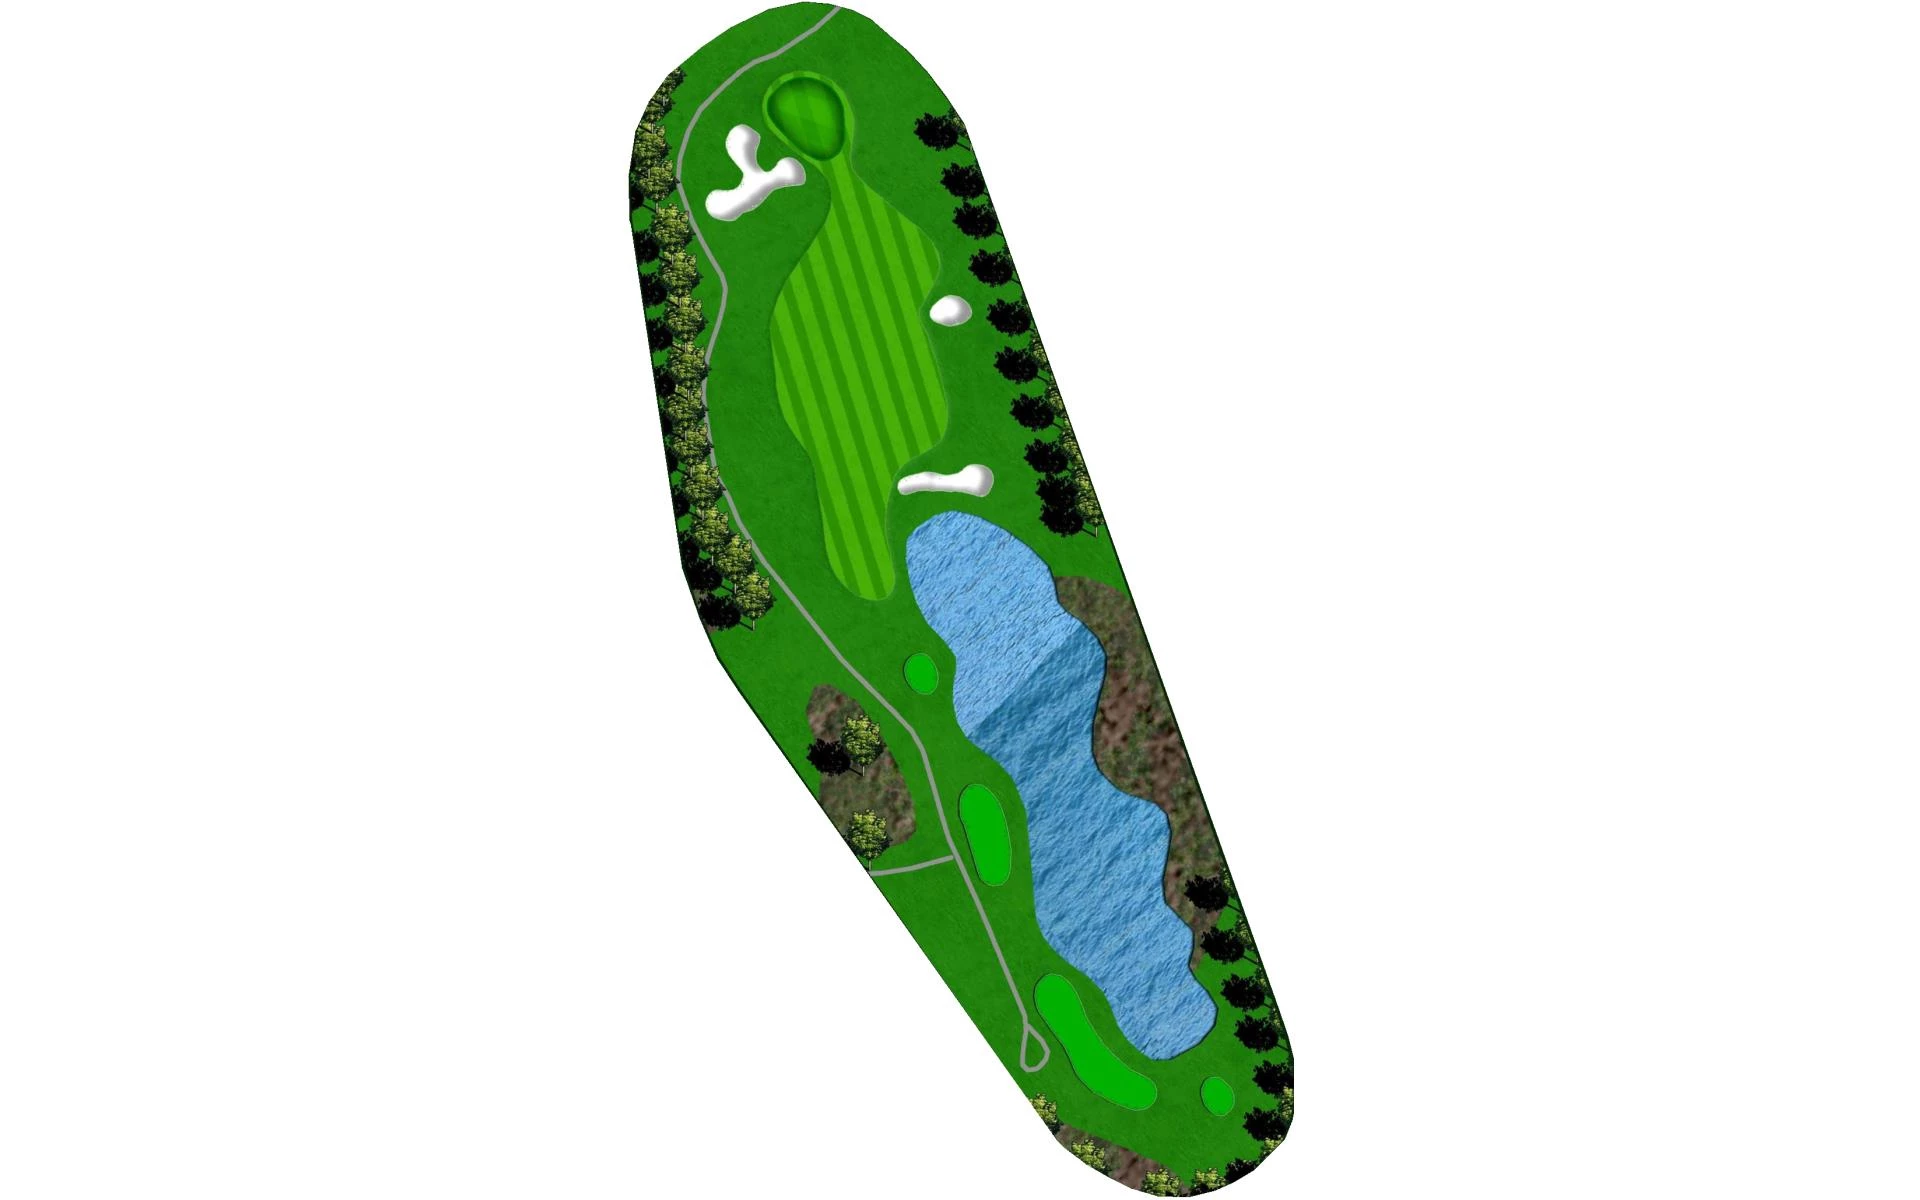
# 1 /
Par: 5
Handicaps:
Men's 4
Women's 4
Yardage by Tee:
BLACK 541
BLUE 516
WHITE 488
GOLD 418
RED 412
Slope:
Black-136 | Blue-129 | White-136 | Gold-128 | Red-117
Pro Tips
Aim at the 150 post in the middle of the fairway, there’s more room to the right than there appears! This will help avoid the fairway bunker. Ideal lay up is 100 yards out, making any hole location accessible. Don’t be greedy! The closer to the green, brings water on the right in play and a large difficult bunker on the left.
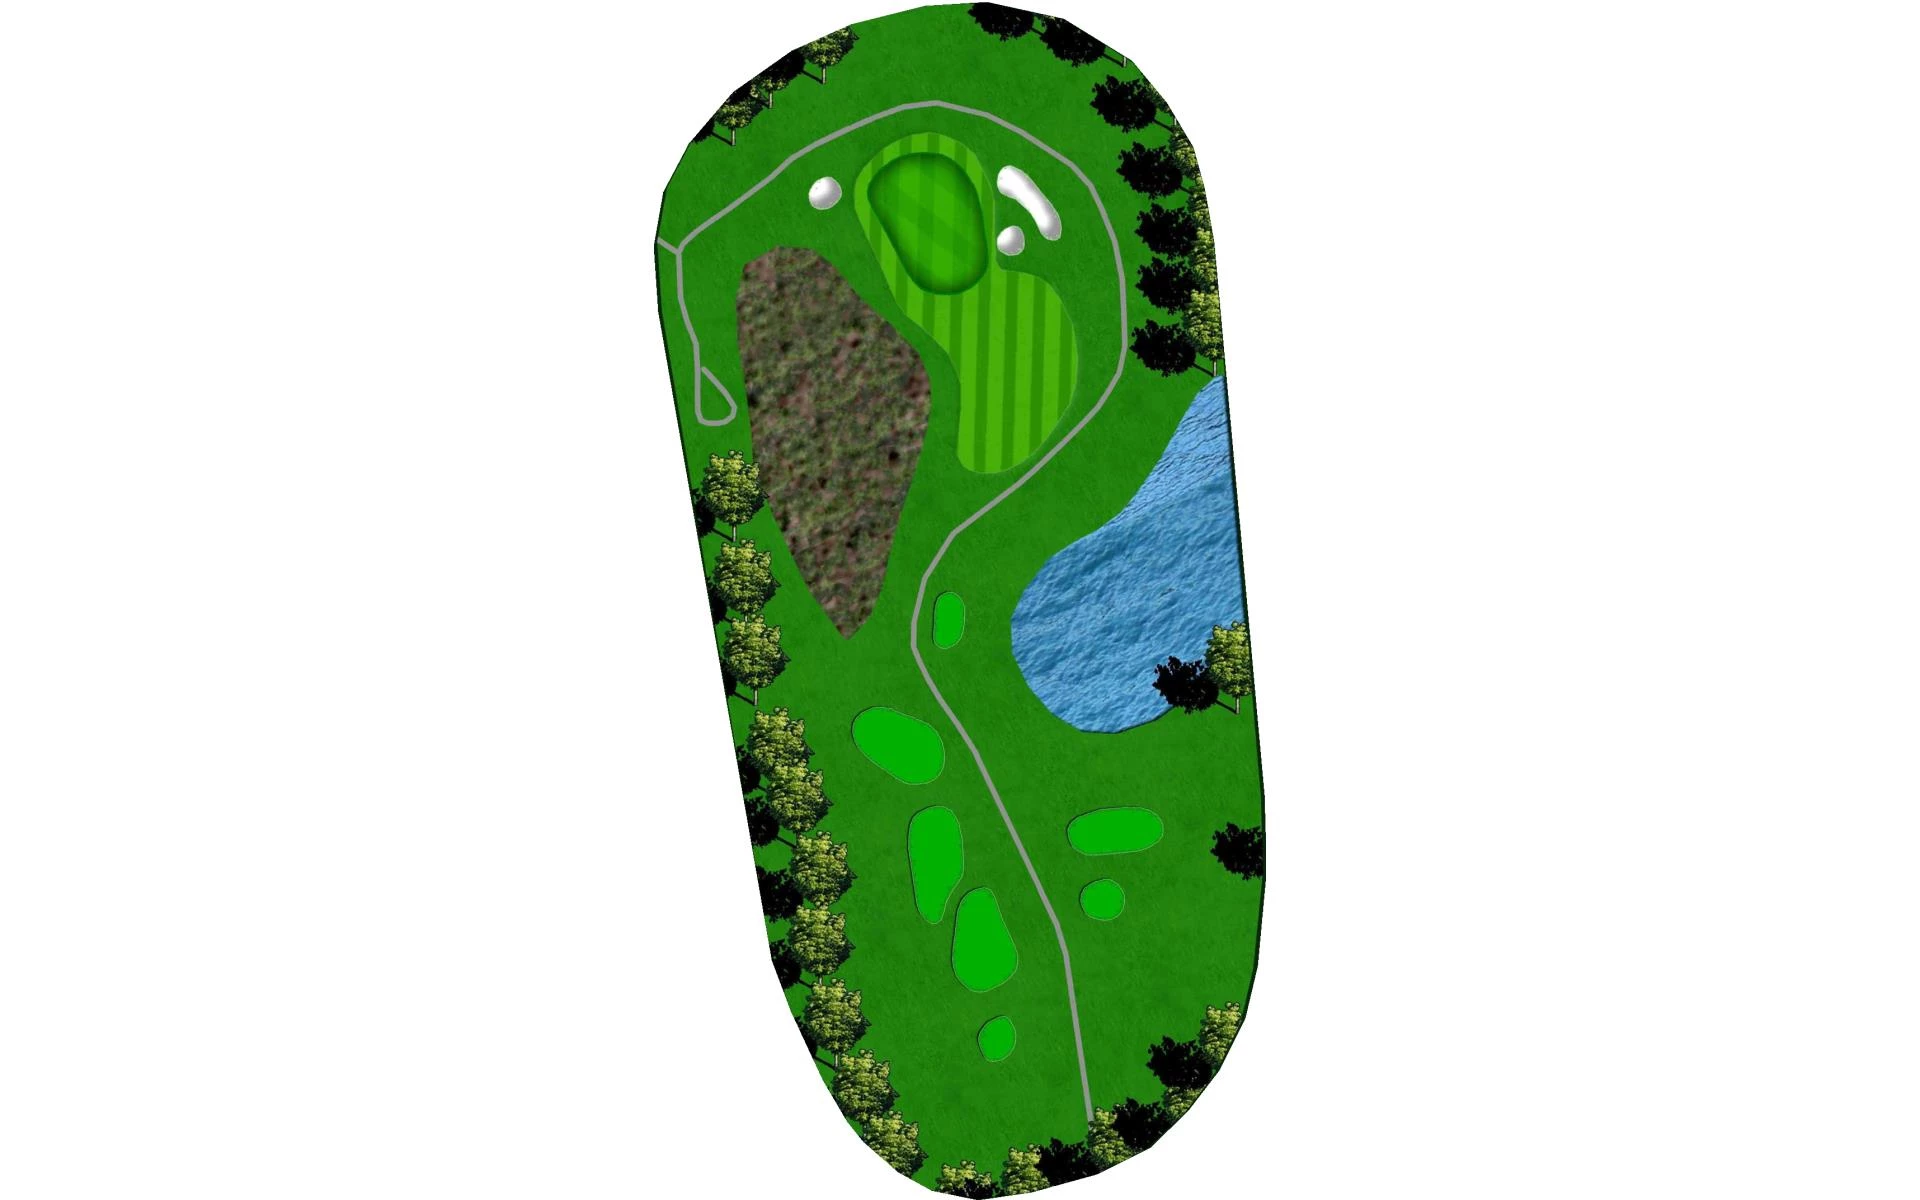
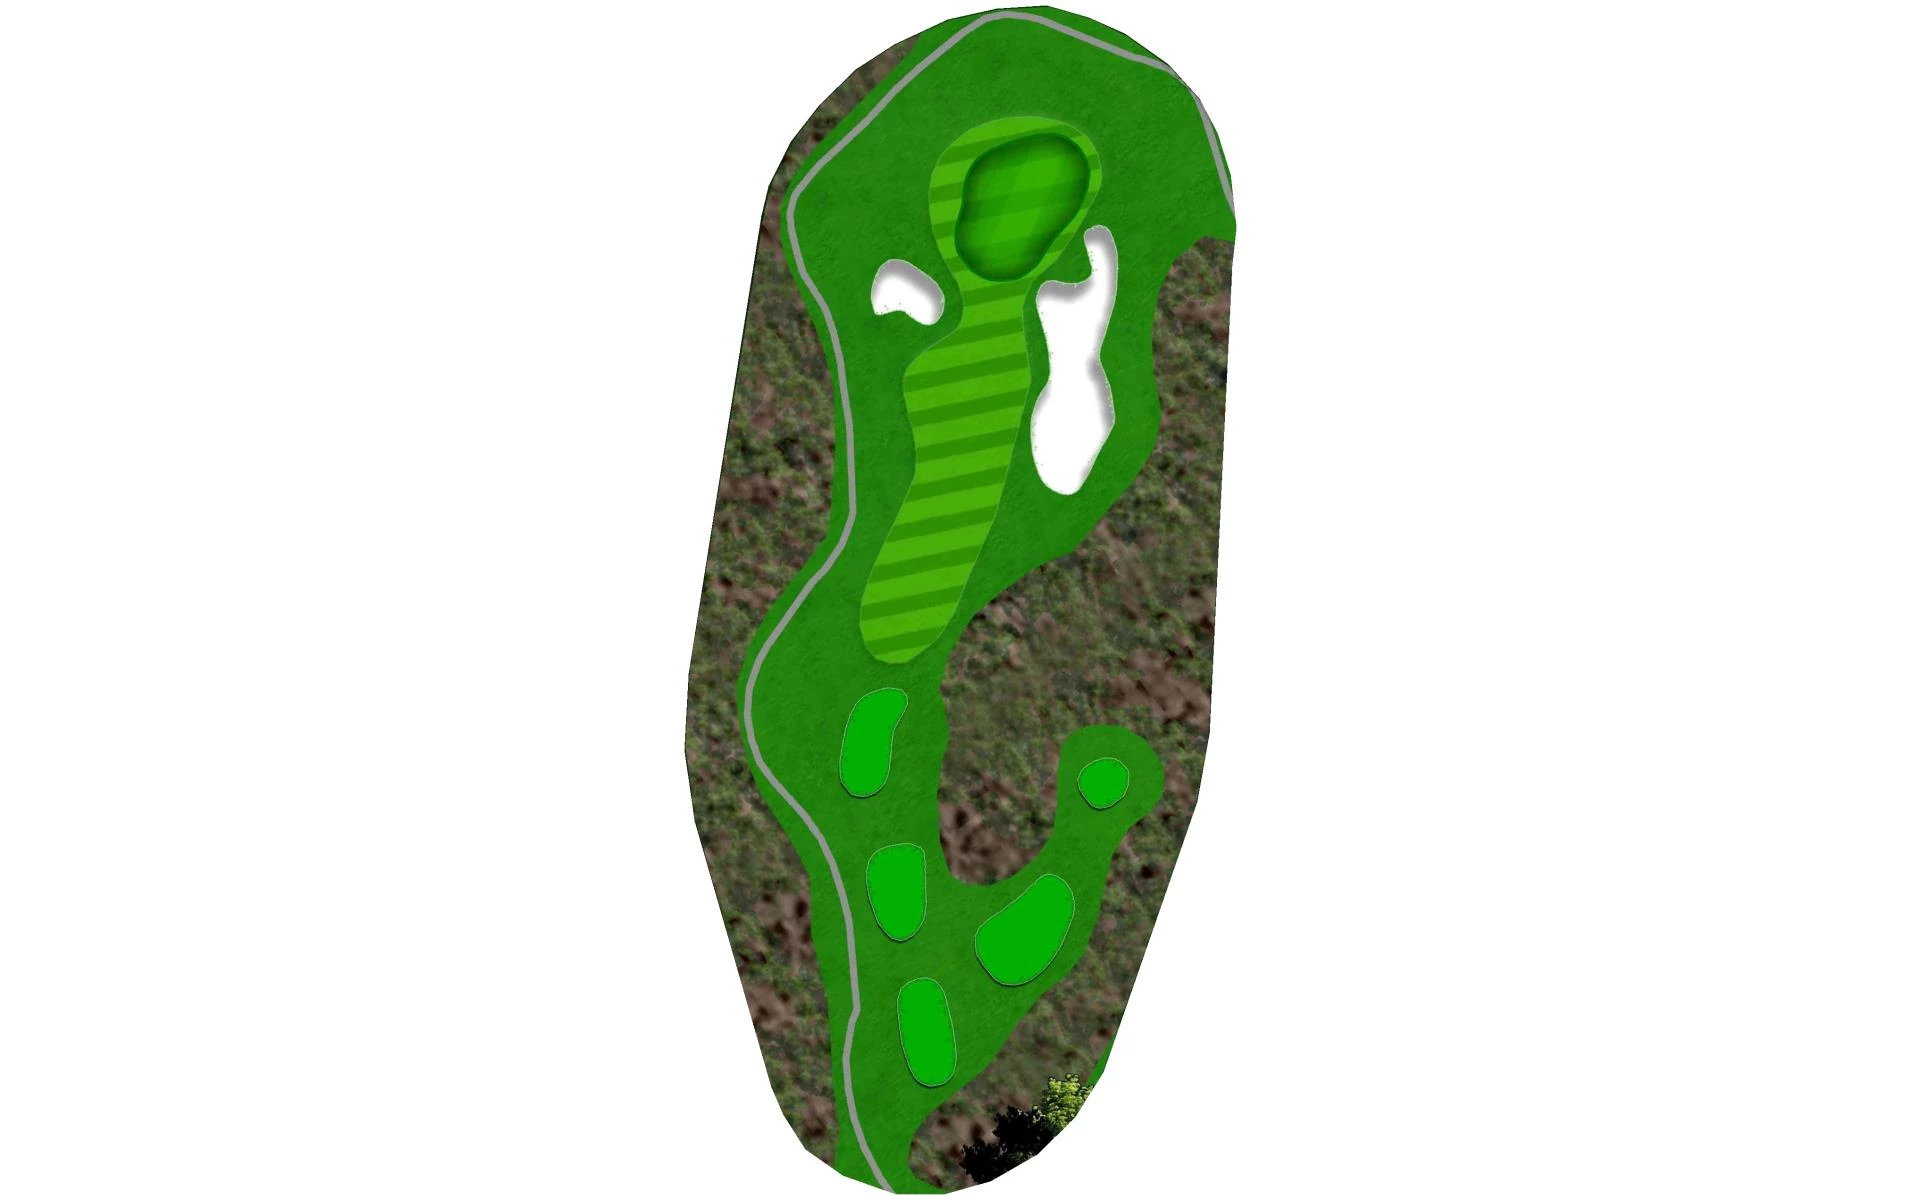
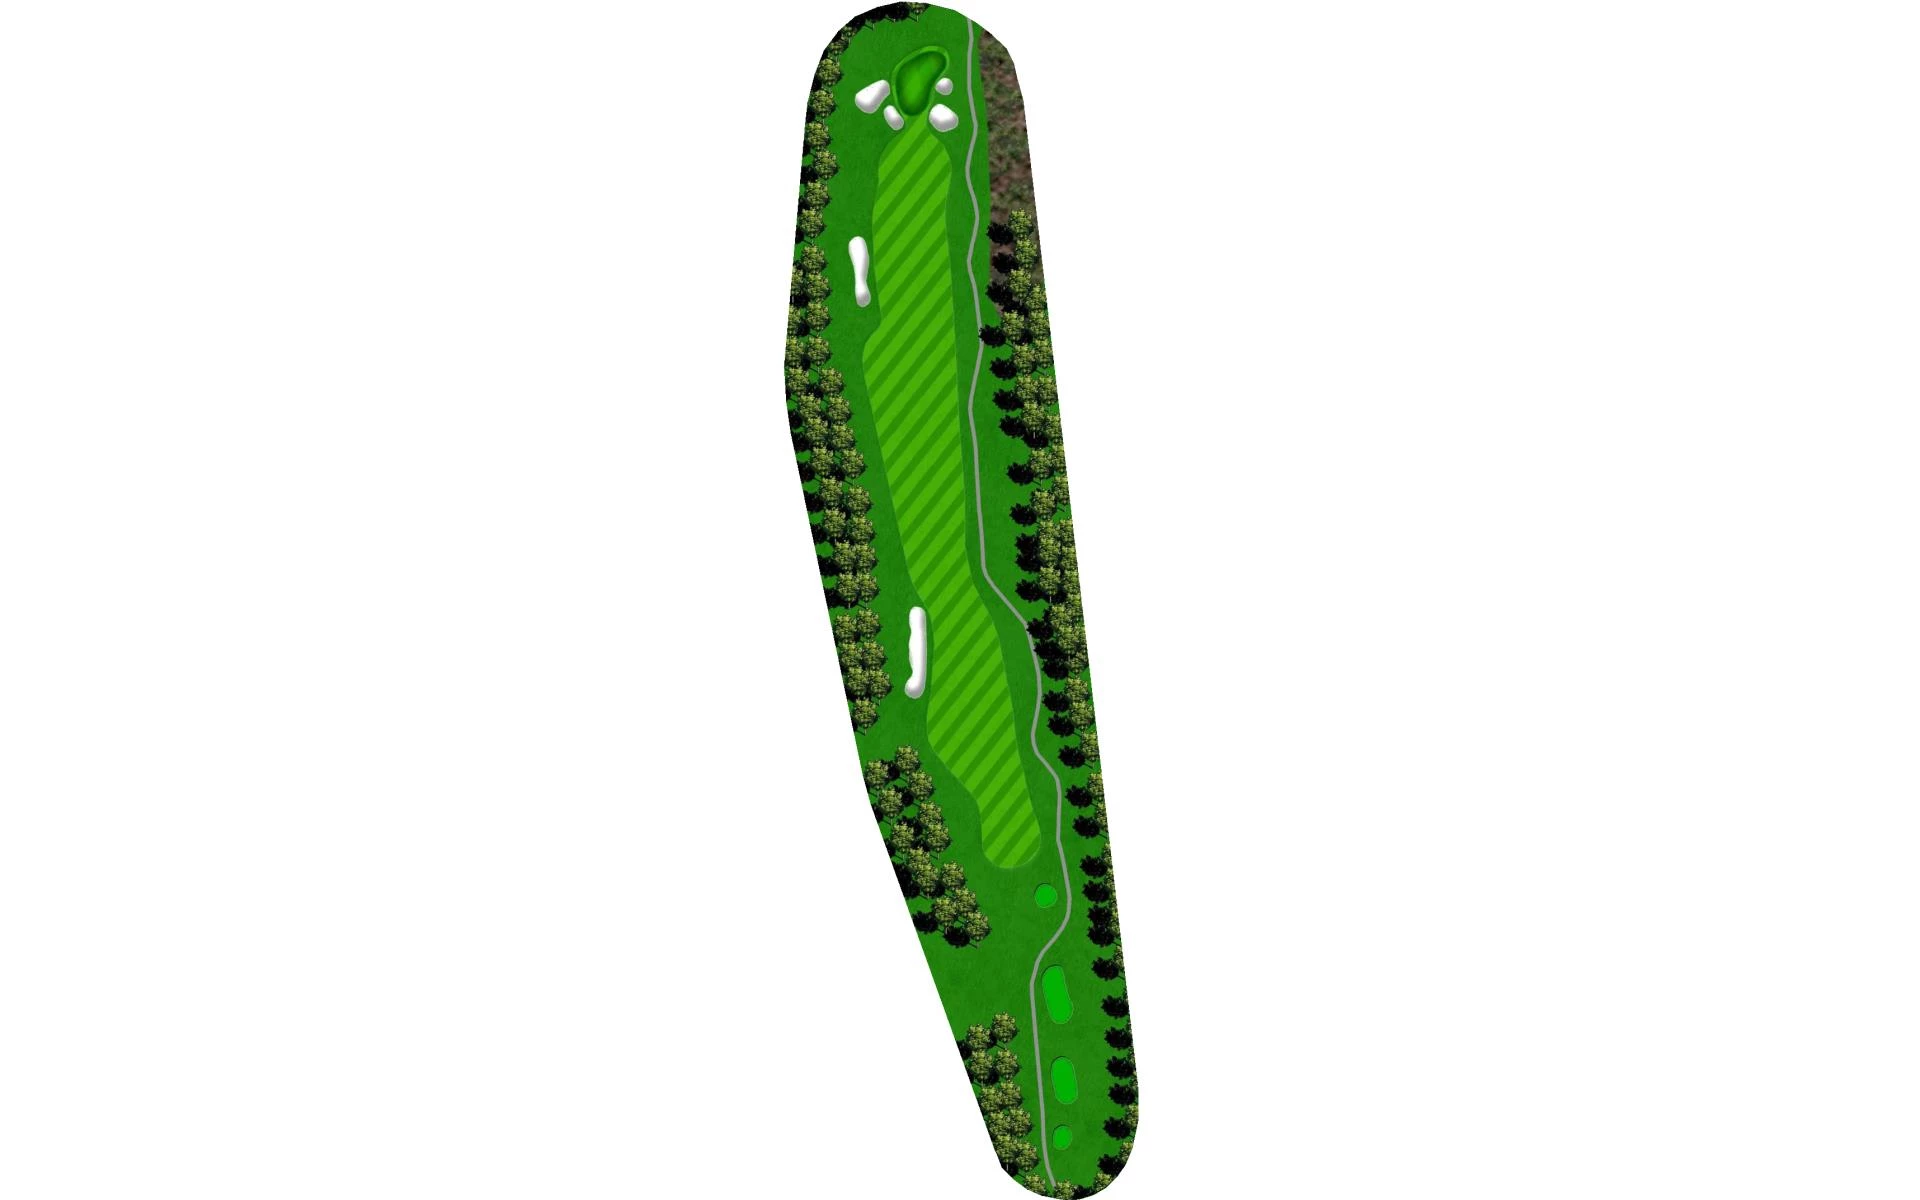
# 2 /
Par: 3
Handicaps:
Men's 18
Women's 18
Yardage by Tee:
BLACK 168
BLUE 145
WHITE 130
GOLD 107
RED 107
Slope:
Black-136 | Blue-129 | White-136 | Gold-128 | Red-117
Pro Tips
Play to the middle of the green and putt to the corners, a miss to the left is trouble and the right isn’t much better! Take par on this short but menacing Par 3.
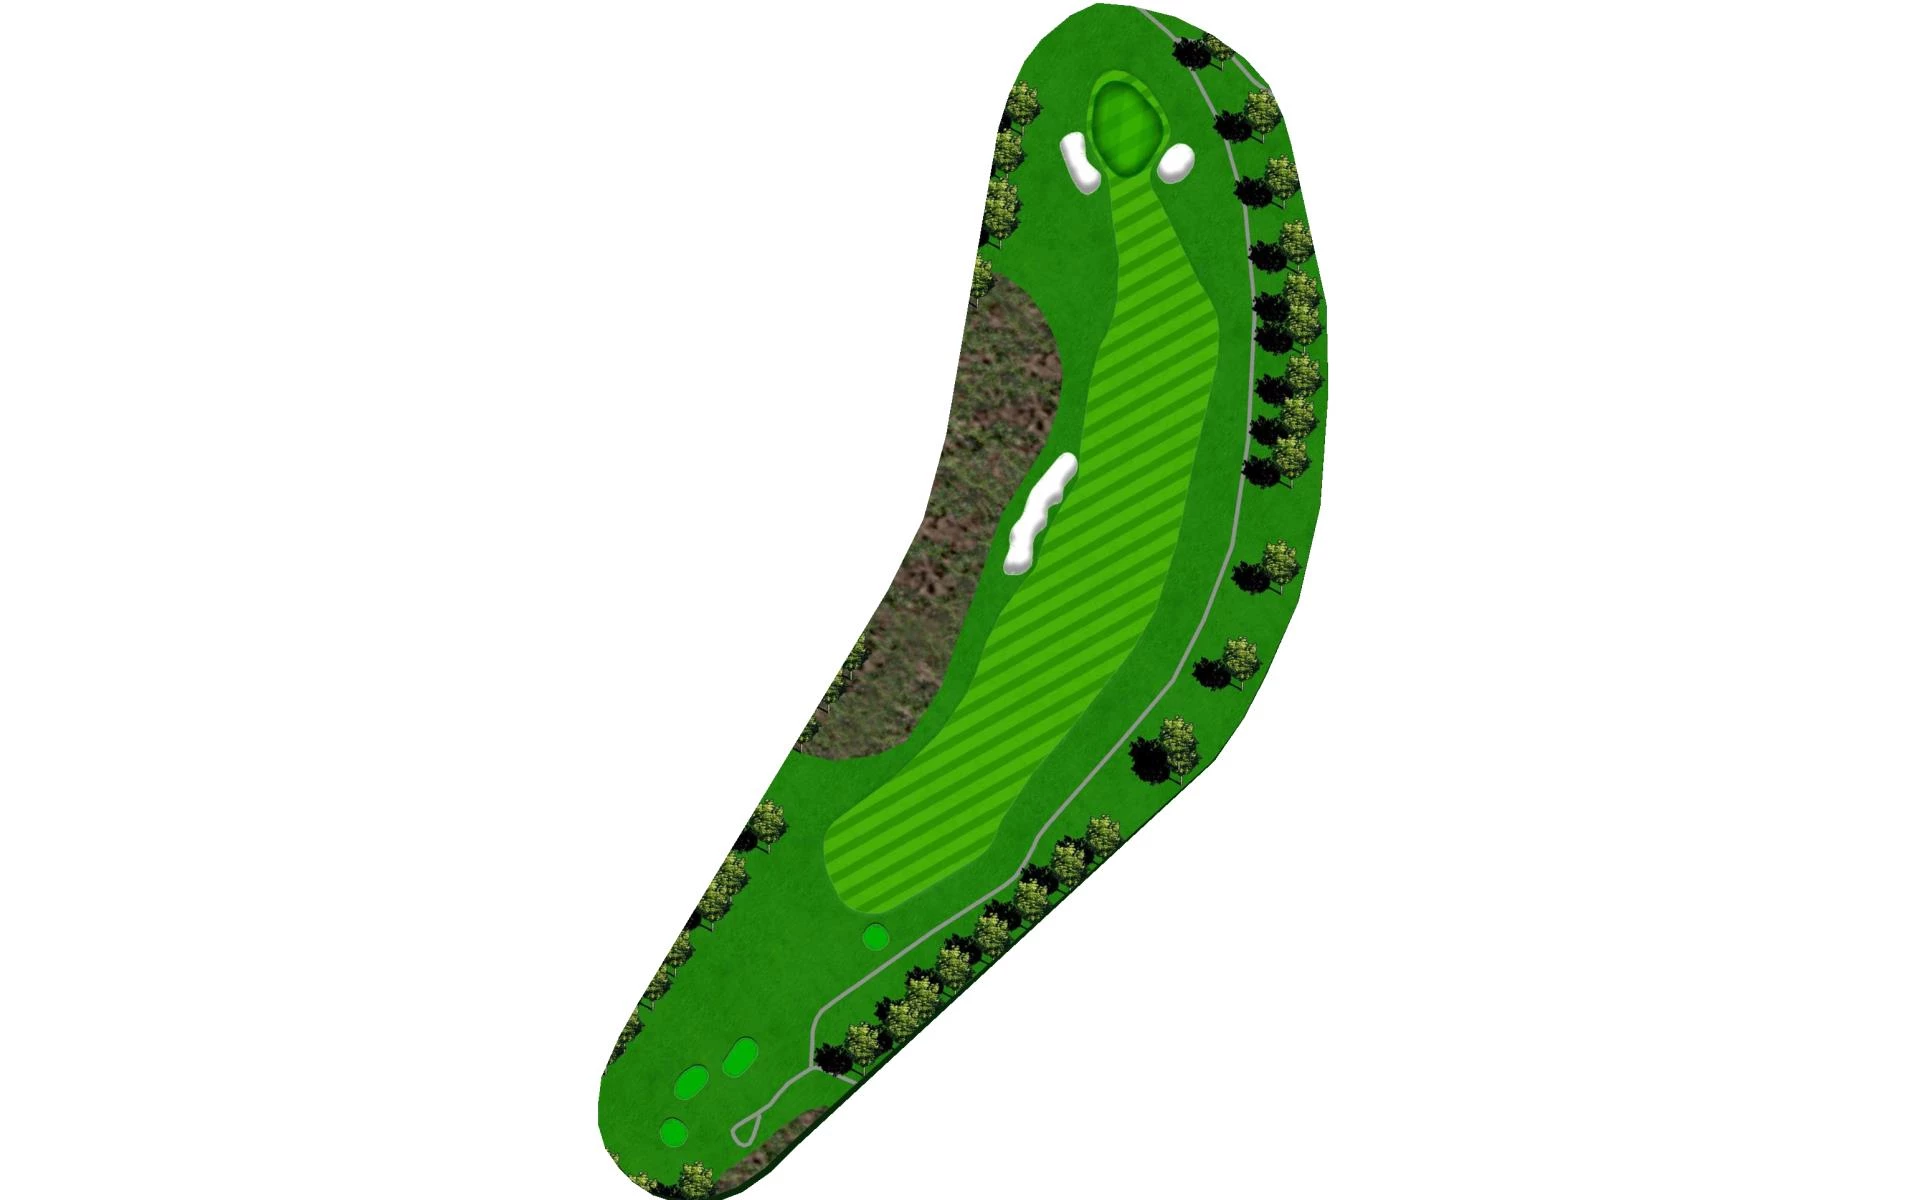
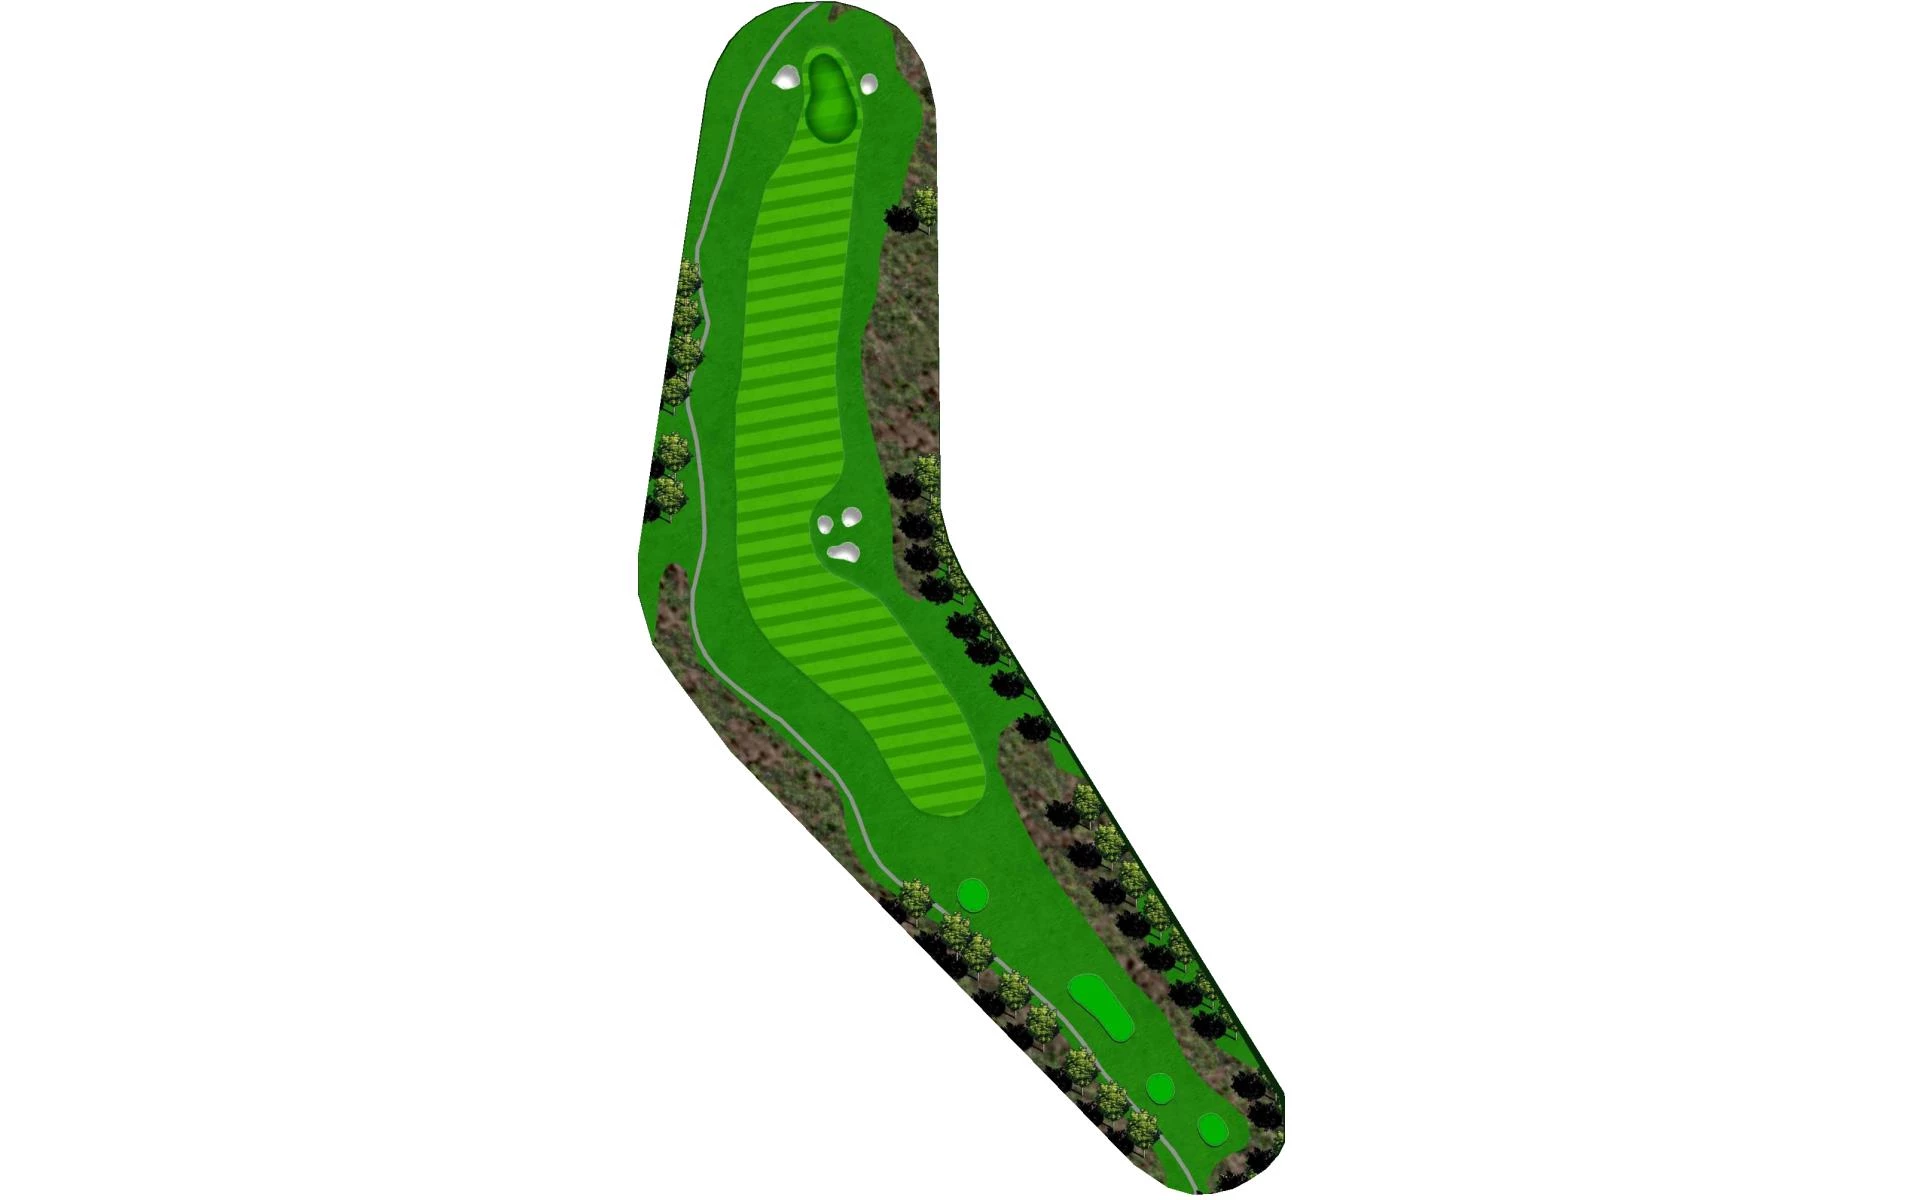
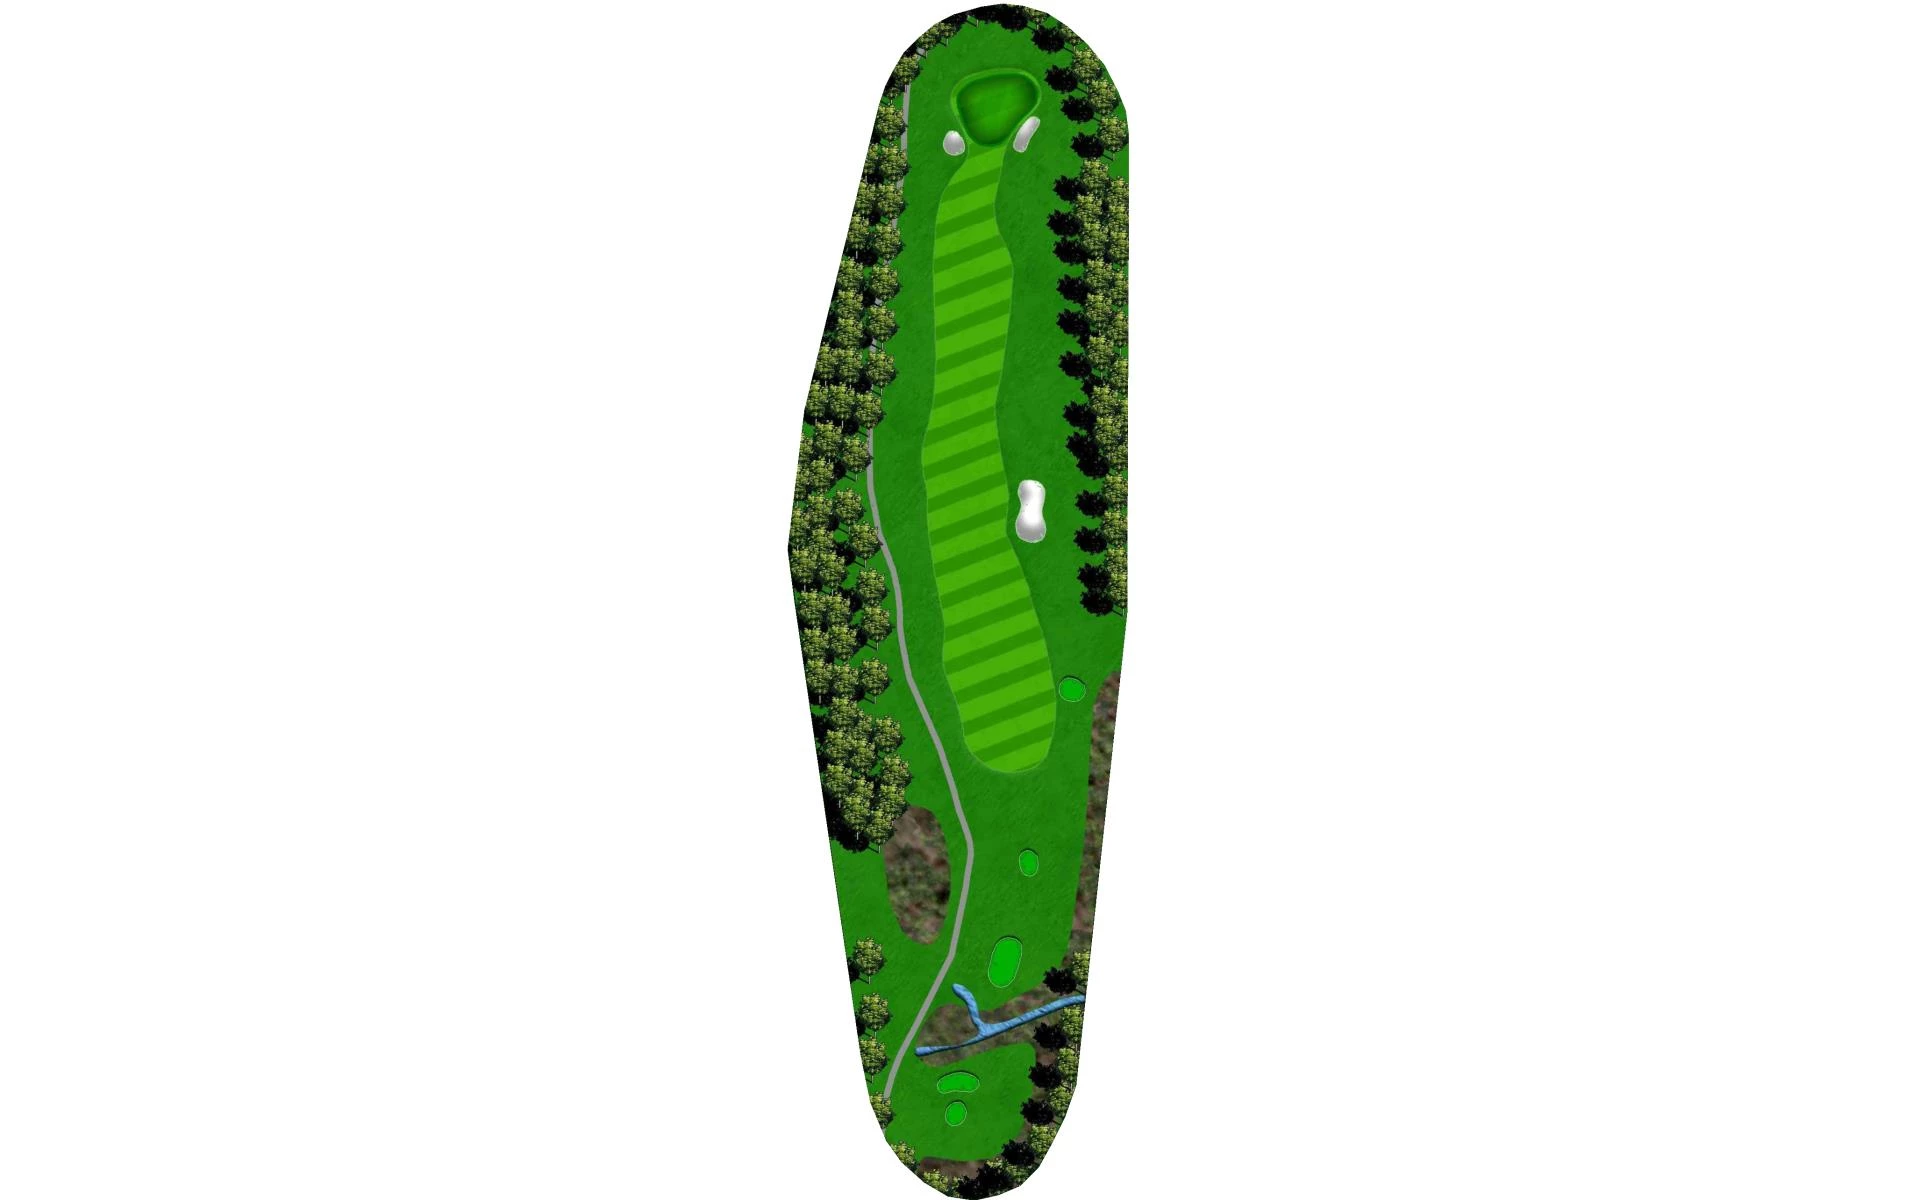
# 3 /
Par: 4
Handicaps:
Men's 12
Women's 12
Yardage by Tee:
BLACK 401
BLUE 379
WHITE 361
GOLD 347
RED 298
Slope:
Black-136 | Blue-129 | White-136 | Gold-128 | Red-117
Pro Tips
Once again, the 150 post is your ideal aimpoint off the tee! A tee shot in this is a fairway must.
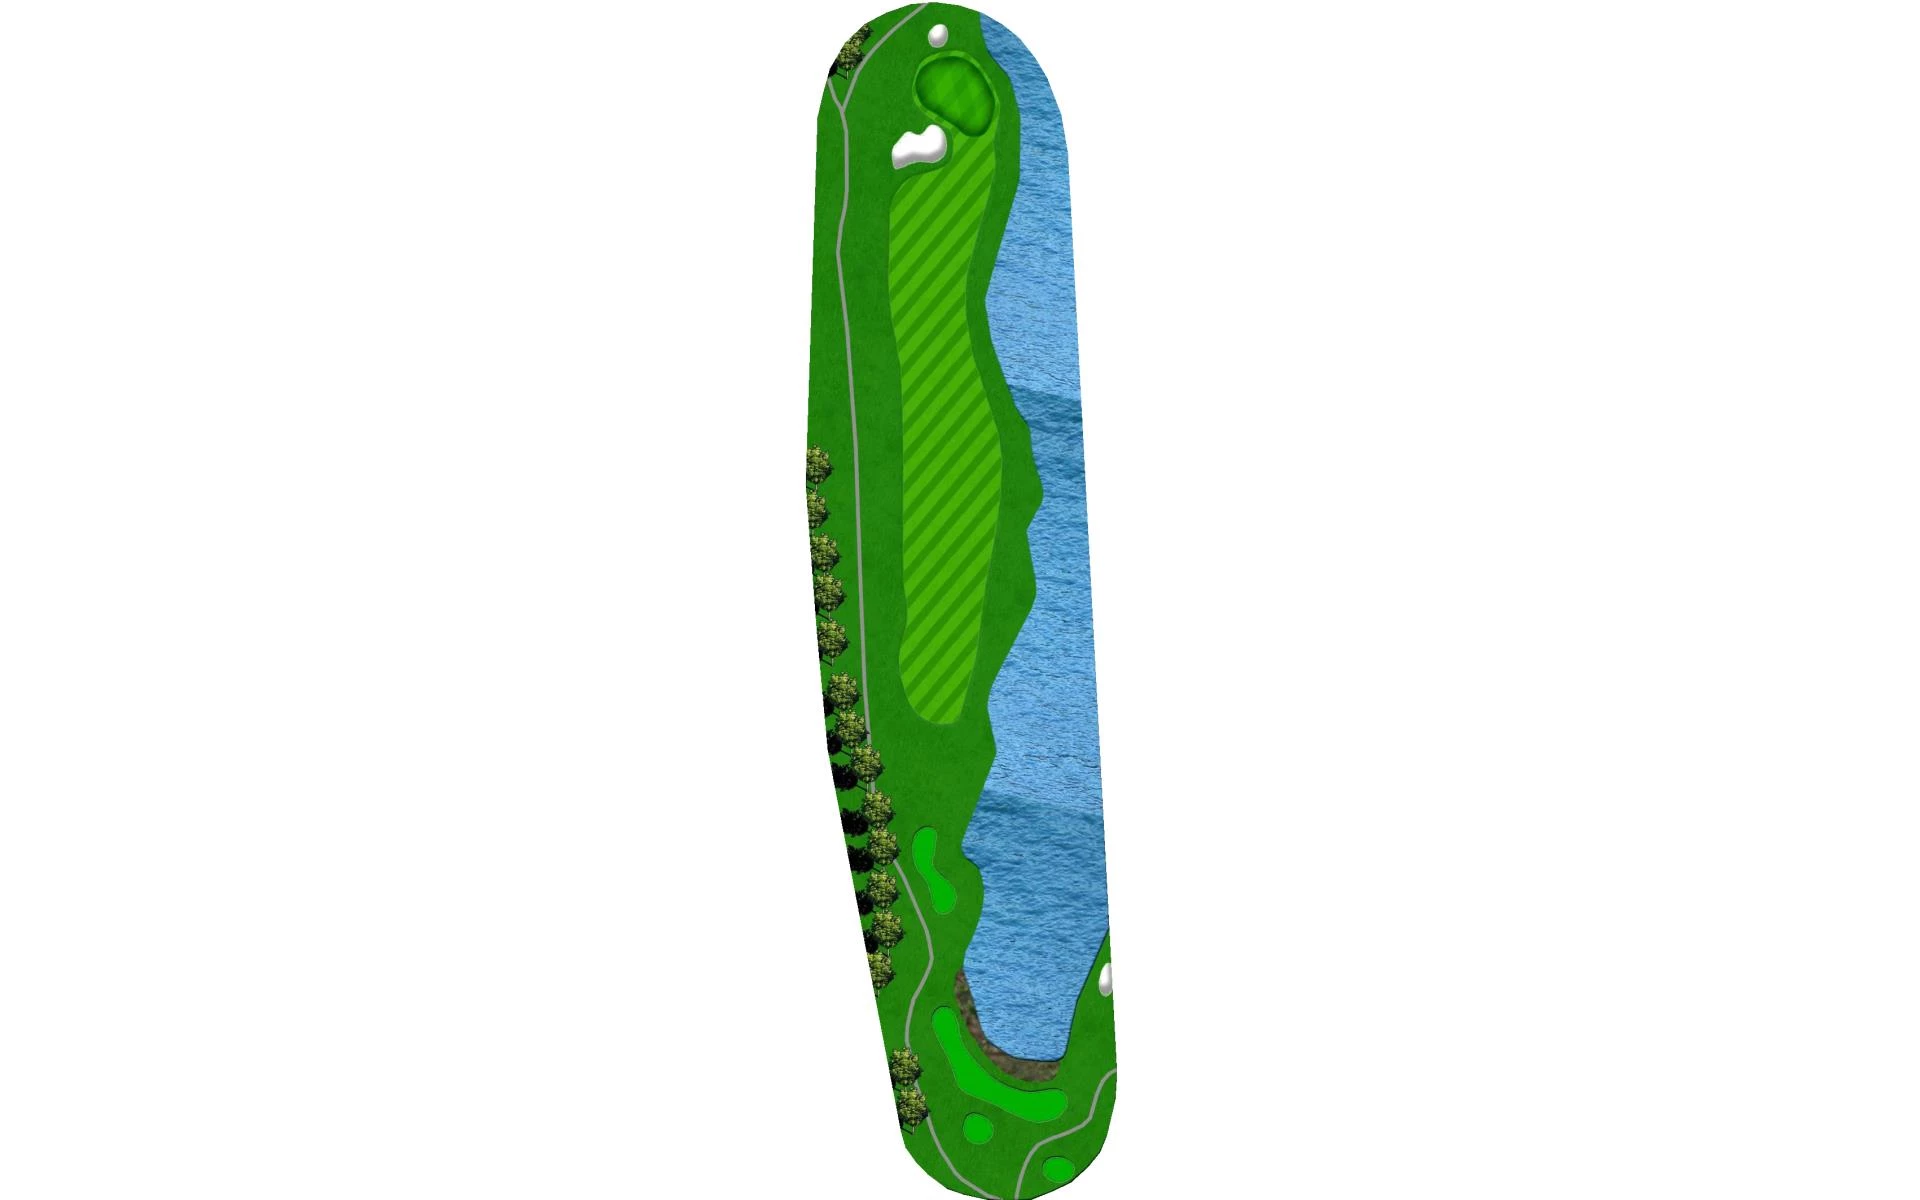
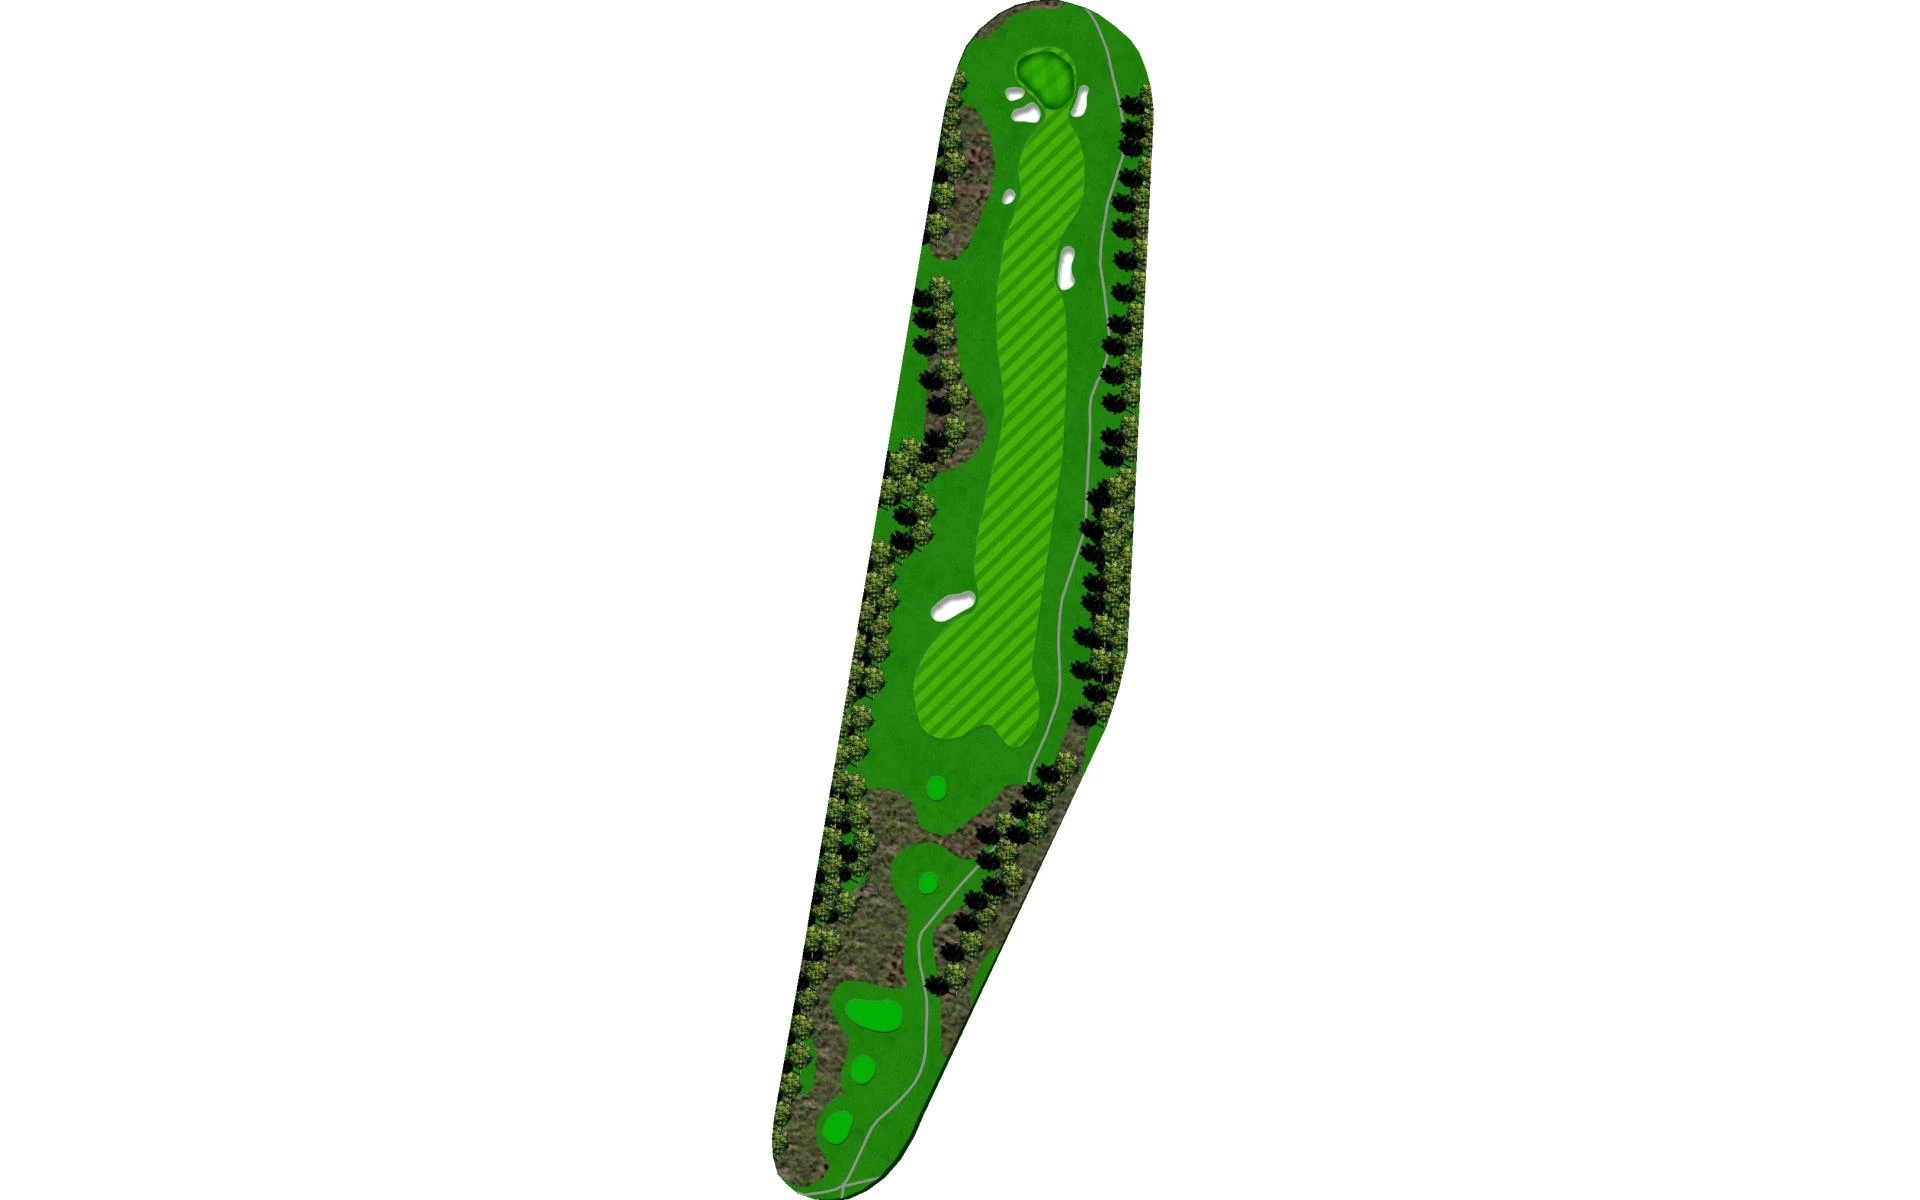
# 4 /
Par: 4
Handicaps:
Men's 6
Women's 6
Yardage by Tee:
BLACK 412
BLUE 390
WHITE 360
GOLD 323
RED 302
Slope:
Black-136 | Blue-129 | White-136 | Gold-128 | Red-117
Pro Tips
The “gauntlet begins”, water all down the right and OB left. Aim at the tower on the horizon, any tee shot in play is a good tee shot.
# 5 /
Par: 4
Handicaps:
Men's 10
Women's 10
Yardage by Tee:
BLACK 390
BLUE 360
WHITE 333
GOLD 292
RED 253
Slope:
Black-136 | Blue-129 | White-136 | Gold-128 | Red-117
Pro Tips
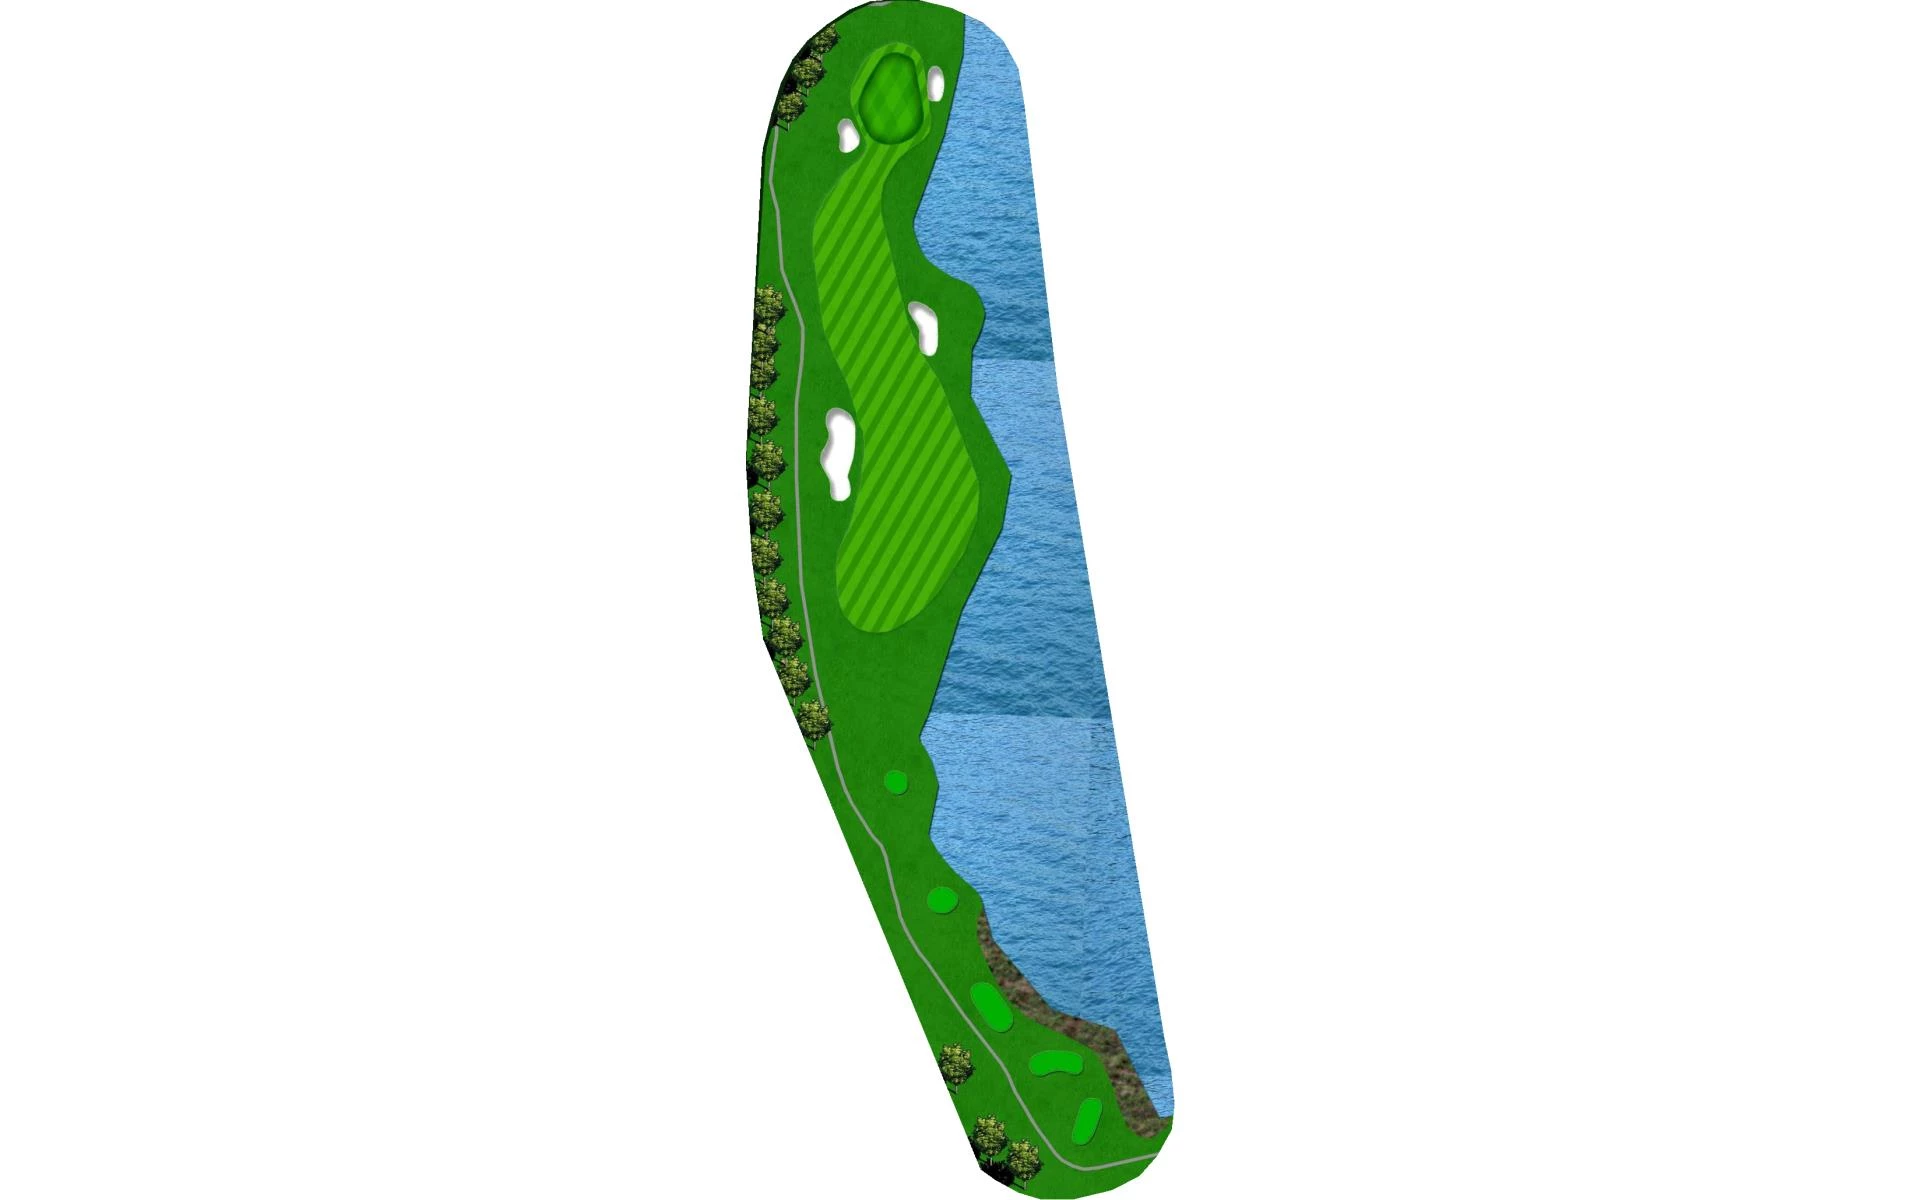
This shorter par 4 has lot going on, water all down the right, penalty area left, and a very penal bunker just left of the fairway as well. A big tee shot is not necessary, favor a fairway wood or hybrid off the tee to find the widest part of the fairway. A small, testy green requires a well placed second shot.

# 6 /
Par: 3
Handicaps:
Men's 16
Women's 16
Yardage by Tee:
BLACK 200
BLUE 174
WHITE 158
GOLD 136
RED 115
Slope:
Black-136 | Blue-129 | White-136 | Gold-128 | Red-117
Pro Tips
The gauntlet continues! This ominous par 3 is mostly water carry to a very narrow green. Play middle of the green yardage, regardless of the pin placement! Par is a great score on this the most difficult par 3 on the course.
# 7 /
Par: 5
Handicaps:
Men's 2
Women's 2
Yardage by Tee:
BLACK 532
BLUE 502
WHITE 475
GOLD 410
RED 405
Slope:
Black-136 | Blue-129 | White-136 | Gold-128 | Red-117
Pro Tips
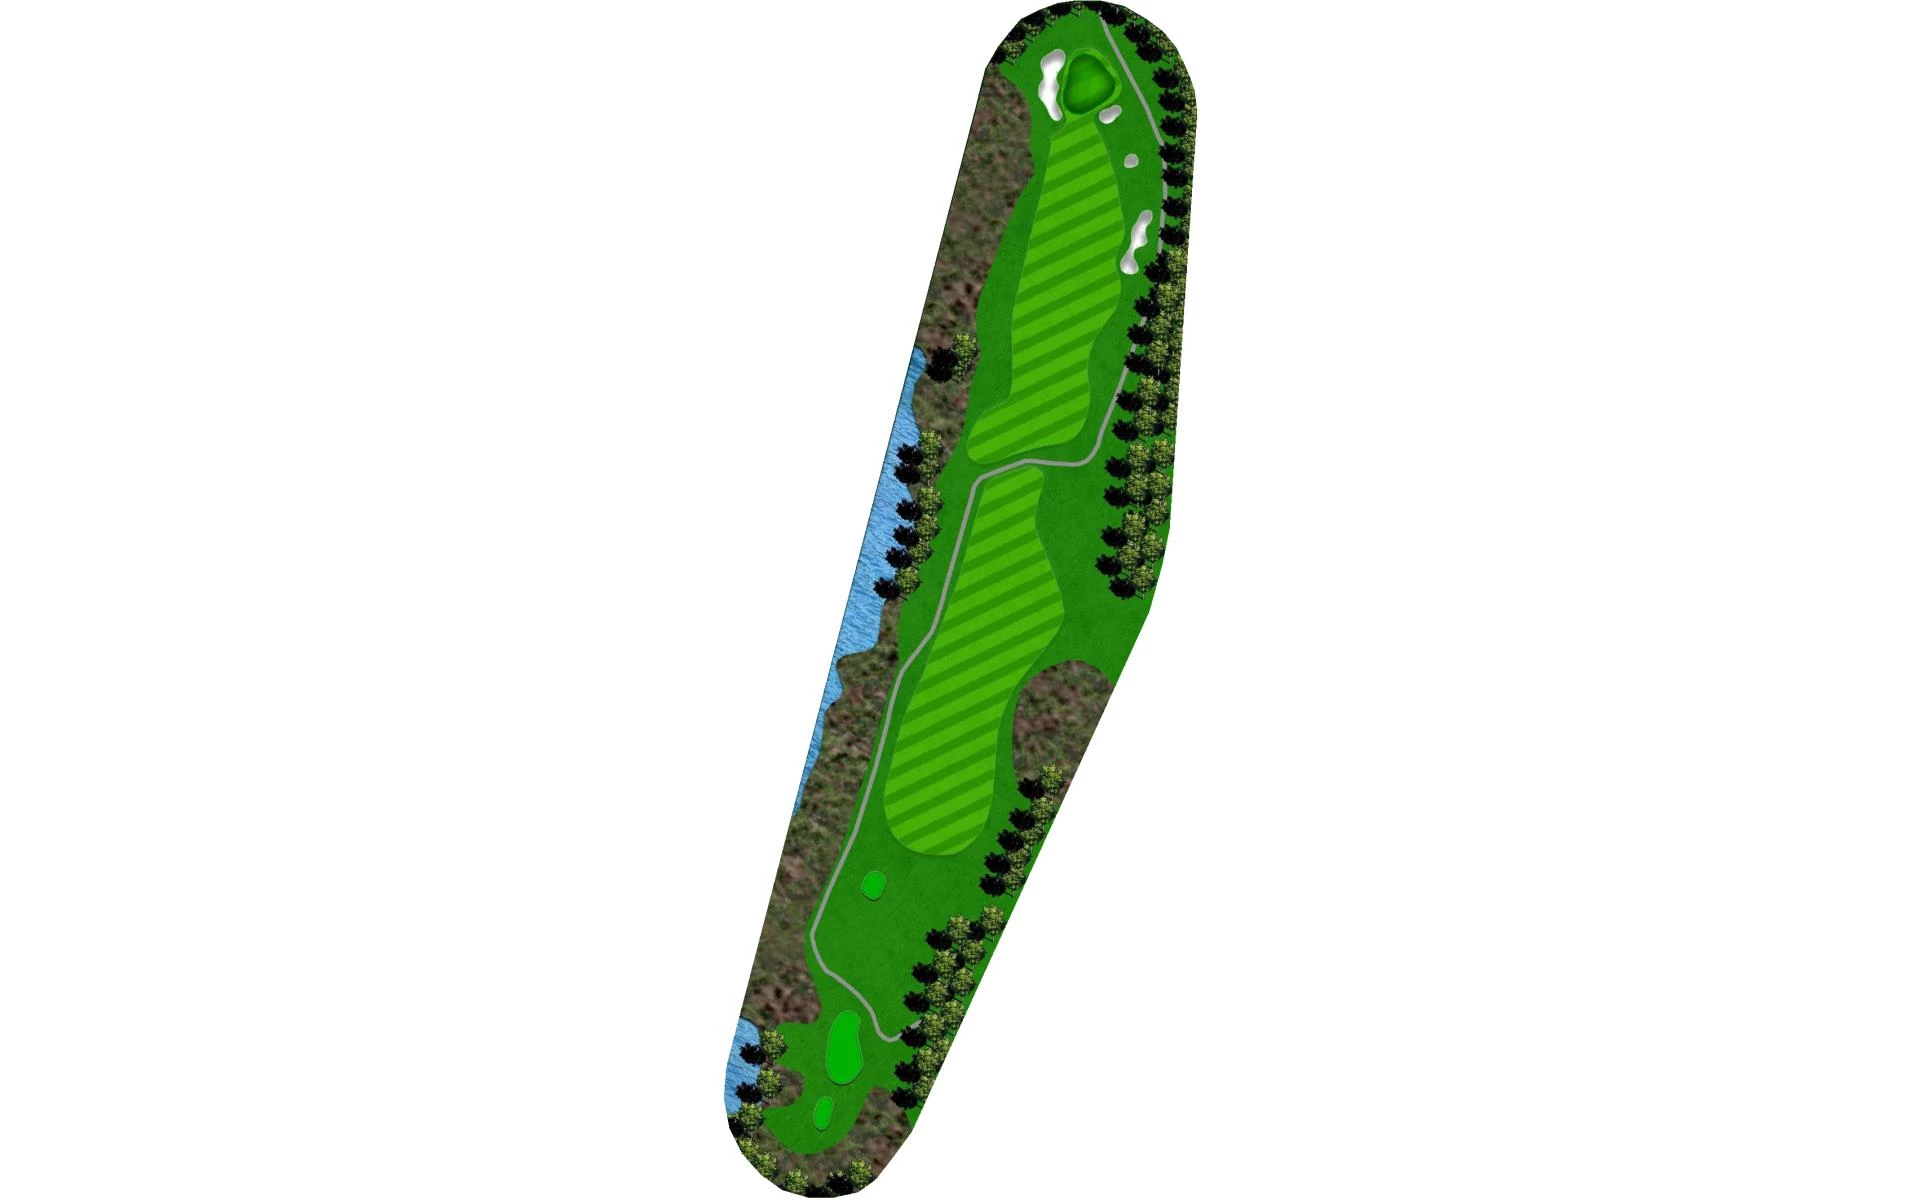
A straight away Par 5 on the banks of the Currituck Sound! A straight tee shot will leave you with the option to reach in two.
# 8 /
Par: 4
Handicaps:
Men's 8
Women's 8
Yardage by Tee:
BLACK 432
BLUE 385
WHITE 344
GOLD 335
RED 0
Slope:
Black-136 | Blue-129 | White-136 | Gold-128 | Red-117
Pro Tips
A straight way Par 4, also on the banks of the Currituck Sound. The perfect tee shot is just left of the 150 post. Beware this treacherous green, sloping from back to front
# 9 /
Par: 4
Handicaps:
Men's 14
Women's 14
Yardage by Tee:
BLACK 356
BLUE 331
WHITE 310
GOLD 302
RED 258
Slope:
Black-136 | Blue-129 | White-136 | Gold-128 | Red-117
Pro Tips
A short Par 4 leading back up to the Clubhouse. Keep the driver in the bag unless the wind is in your face. Ideal tee shot need only be 200 yards to be in the widest part of the fairway. The teeth of this hole is the green, a precision approach is a must to this very undulated and well-guarded green.
# 10 /
Par: 4
Handicaps:
Men's 11
Women's 11
Yardage by Tee:
BLACK 383
BLUE 361
WHITE 307
GOLD 310
RED 245
Slope:
Black-136 | Blue-129 | White-136 | Gold-128 | Red-117
Pro Tips
Another short Par 4 with a very generous fairway, but take heed, the green slopes from front to back. Too much spin on your approach will put on the front edge of the green.
# 11 /
Par: 3
Handicaps:
Men's 17
Women's 17
Yardage by Tee:
BLACK 190
BLUE 164
WHITE 152
GOLD 127
RED 125
Slope:
Black-136 | Blue-129 | White-136 | Gold-128 | Red-117
Pro Tips
A breathtaking Par 3 with Ocean views from the green. Avoid the large bunker on the right side. Definitely a Rees Jones masterpiece!
# 12 /
Par: 4
Handicaps:
Men's 1
Women's 1
Yardage by Tee:
BLACK 454
BLUE 427
WHITE 370
GOLD 371
RED 322
Slope:
Black-136 | Blue-129 | White-136 | Gold-128 | Red-117
Pro Tips
The number one handicap hole on the course, this par 4 puts a premium on the tee shot. Depending on the wind, longer players can challenge the bunkers on the right, leaving a short iron approach to a small, tough green. But this hole definitely requires a tee shot in the fairway as there is penalty areas on the right and left of fairway.
# 13 /
Par: 5
Handicaps:
Men's 3
Women's 3
Yardage by Tee:
BLACK 578
BLUE 535
WHITE 505
GOLD 498
RED 430
Slope:
Black-136 | Blue-129 | White-136 | Gold-128 | Red-117
Pro Tips
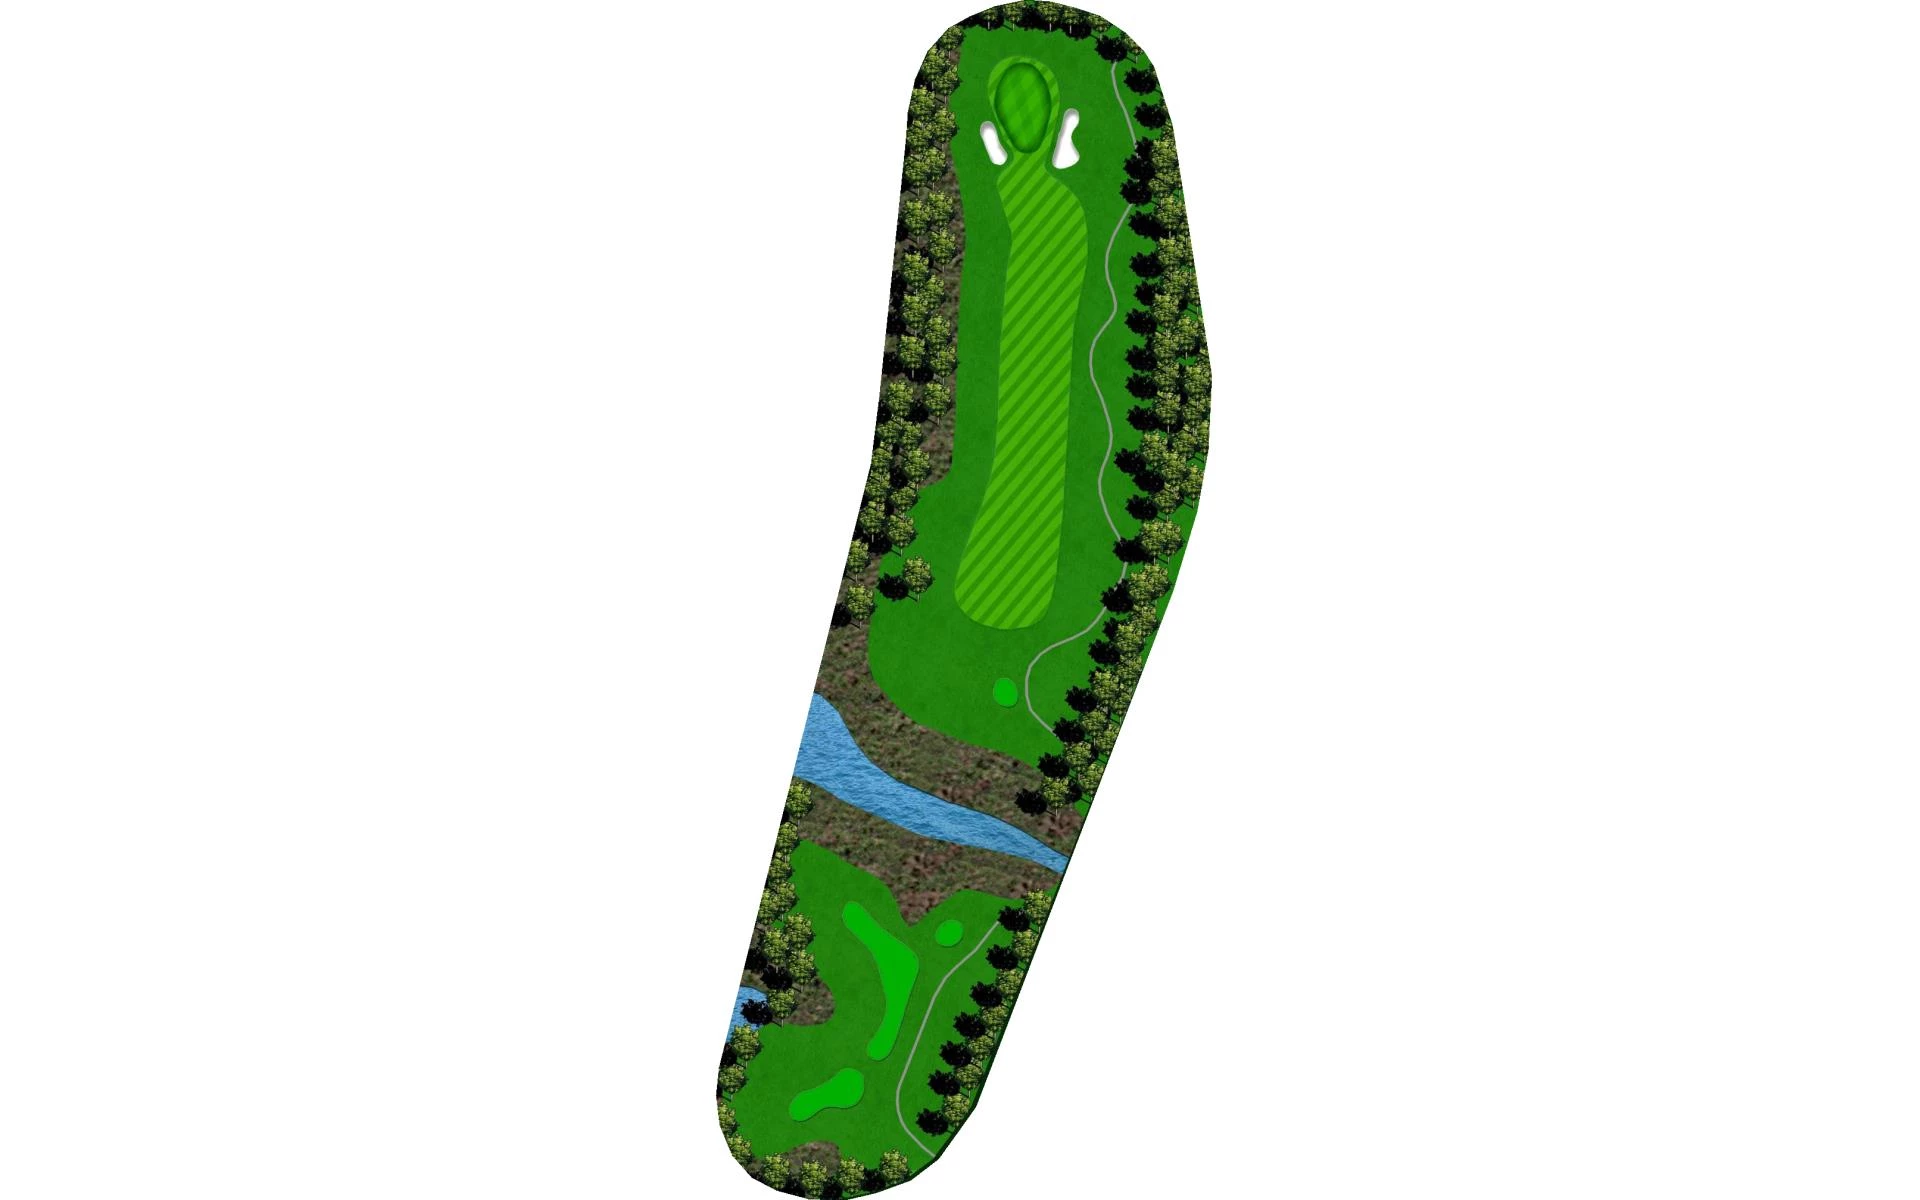
A long, beautiful par 5 with a tee box that sits atop one of the highest points in Corolla. Void the bunker on the left on your tee shot, then be mindful of the 150 post as an ideal target for your second shot. Definitely a three shot hole, to a large green that is well guarded by three bunkers.
# 14 /
Par: 4
Handicaps:
Men's 13
Women's 13
Yardage by Tee:
BLACK 332
BLUE 311
WHITE 270
GOLD 214
RED 171
Slope:
Black-136 | Blue-129 | White-136 | Gold-128 | Red-117
Pro Tips
A short par 4 heading back west, this green is drivable in the right wind conditions. It’s well protected by a large bunker in front. But this is a definite birdie hole to make stroke up on.

# 15 /
Par: 3
Handicaps:
Men's 15
Women's 15
Yardage by Tee:
BLACK 174
BLUE 151
WHITE 126
GOLD 115
RED 110
Slope:
Black-136 | Blue-129 | White-136 | Gold-128 | Red-117
Pro Tips
The last par 3, views of the sound, this hole is down hill. The green is well protected, any short shot will end up in the penalty area in front of the green. Be mindful of the wind as you select your club!
# 16 /
Par: 5
Handicaps:
Men's 5
Women's 5
Yardage by Tee:
BLACK 523
BLUE 501
WHITE 458
GOLD 442
RED 401
Slope:
Black-136 | Blue-129 | White-136 | Gold-128 | Red-117
Pro Tips
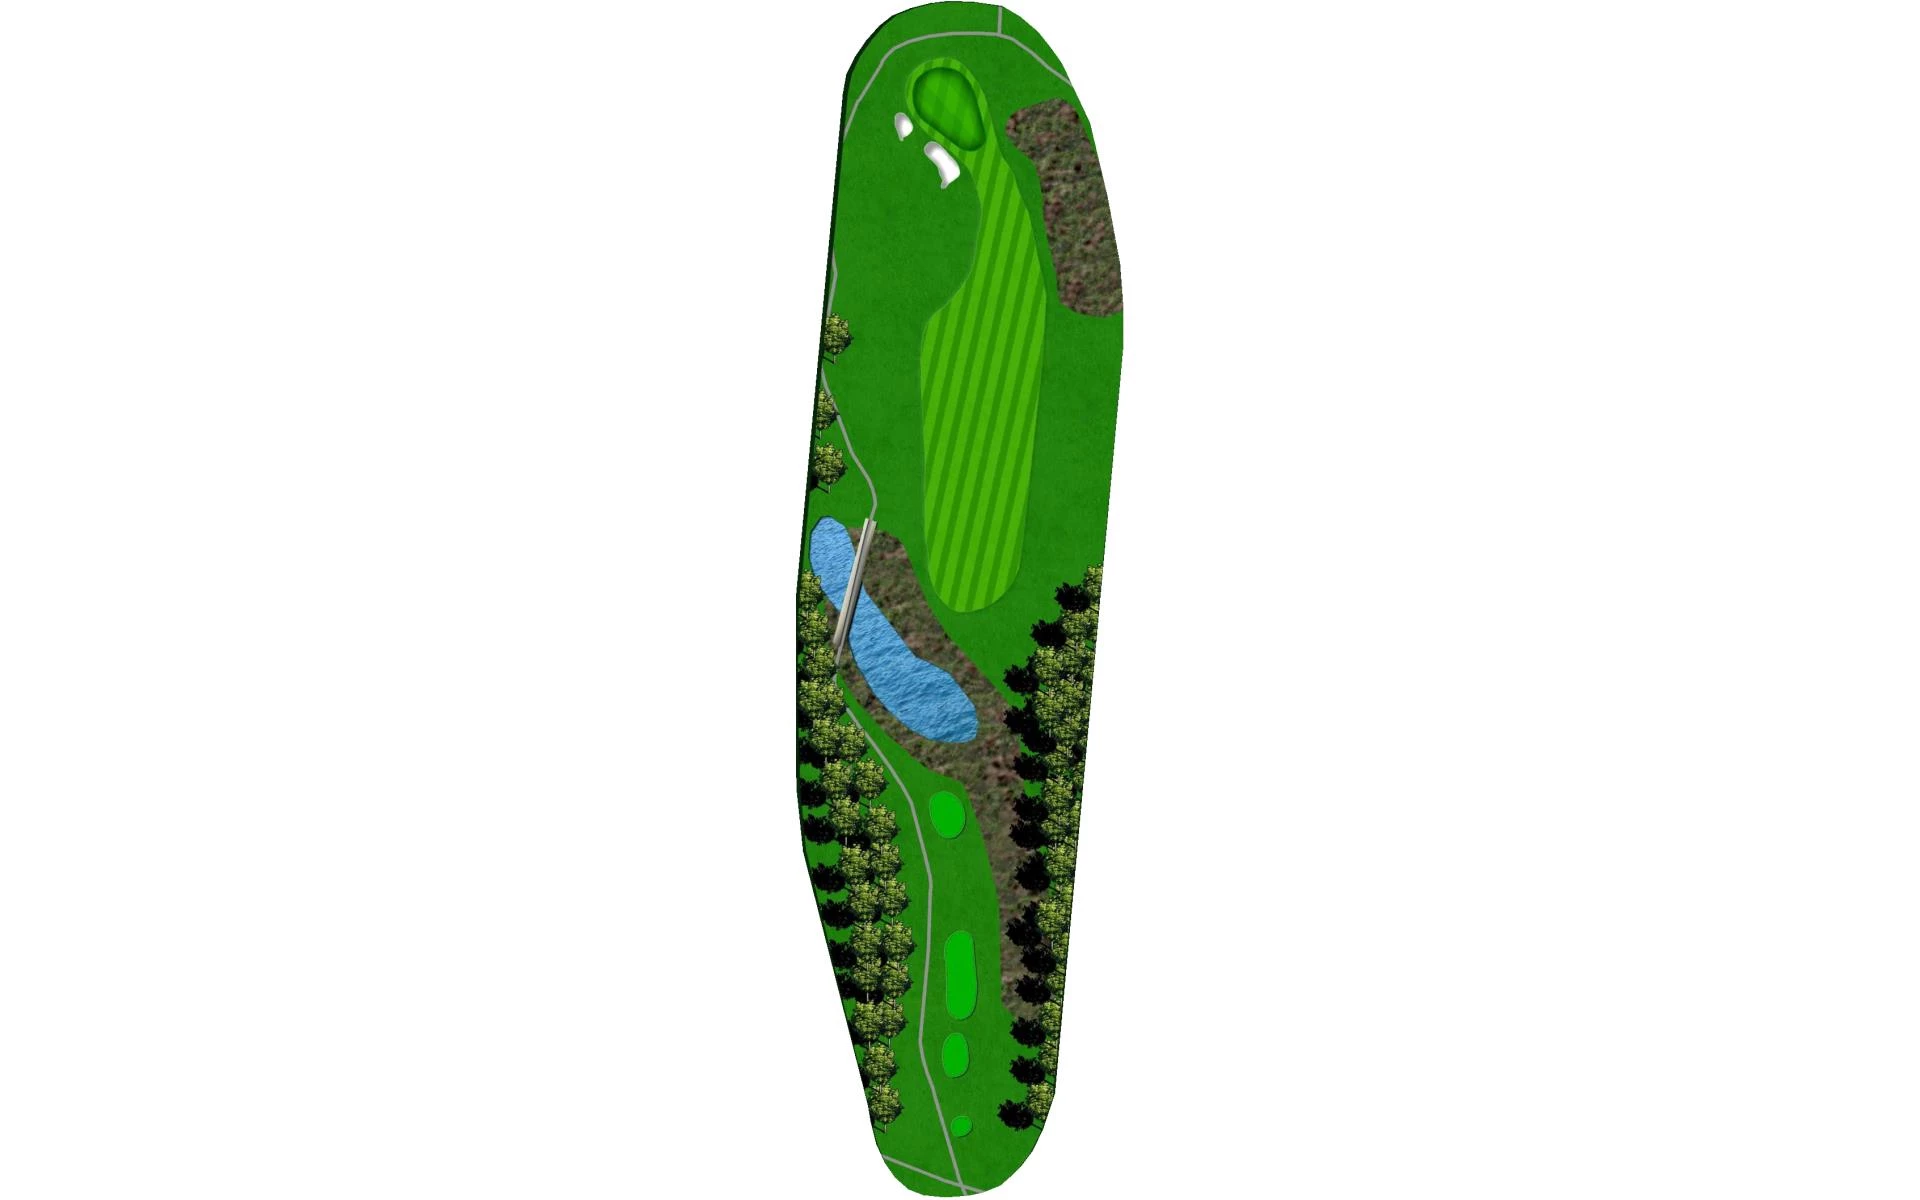
The last par 5, straight way with a definite premium on hitting the fairway. A well struck tee shot down the left will set you up with a chance to reach in two. But it’s risk-reward, as this green is heavily protected by four penal bunkers.
# 17 /
Par: 4
Handicaps:
Men's 9
Women's 9
Yardage by Tee:
BLACK 409
BLUE 389
WHITE 341
GOLD 306
RED 304
Slope:
Black-136 | Blue-129 | White-136 | Gold-128 | Red-117
Pro Tips
Down the home stretch, this short par 4 requires a well placed tee shot down the middle. Driver not required, hitting the fairway however, is a must!

# 18 /
Par: 4
Handicaps:
Men's 7
Women's 7
Yardage by Tee:
BLACK 410
BLUE 483
WHITE 326
GOLD 292
RED 268
Slope:
Black-136 | Blue-129 | White-136 | Gold-128 | Red-117
Pro Tips
The home hole, a par 4 with danger lurking. Don’t be fooled, there is almost no room left with OB down the left side. Ideal tee shot is no more than 20 yards beyond the 150 post, as the fairway narrows. But you’re not done yet, your approach is to a green with severe undulation and protected by three massive bunkers.