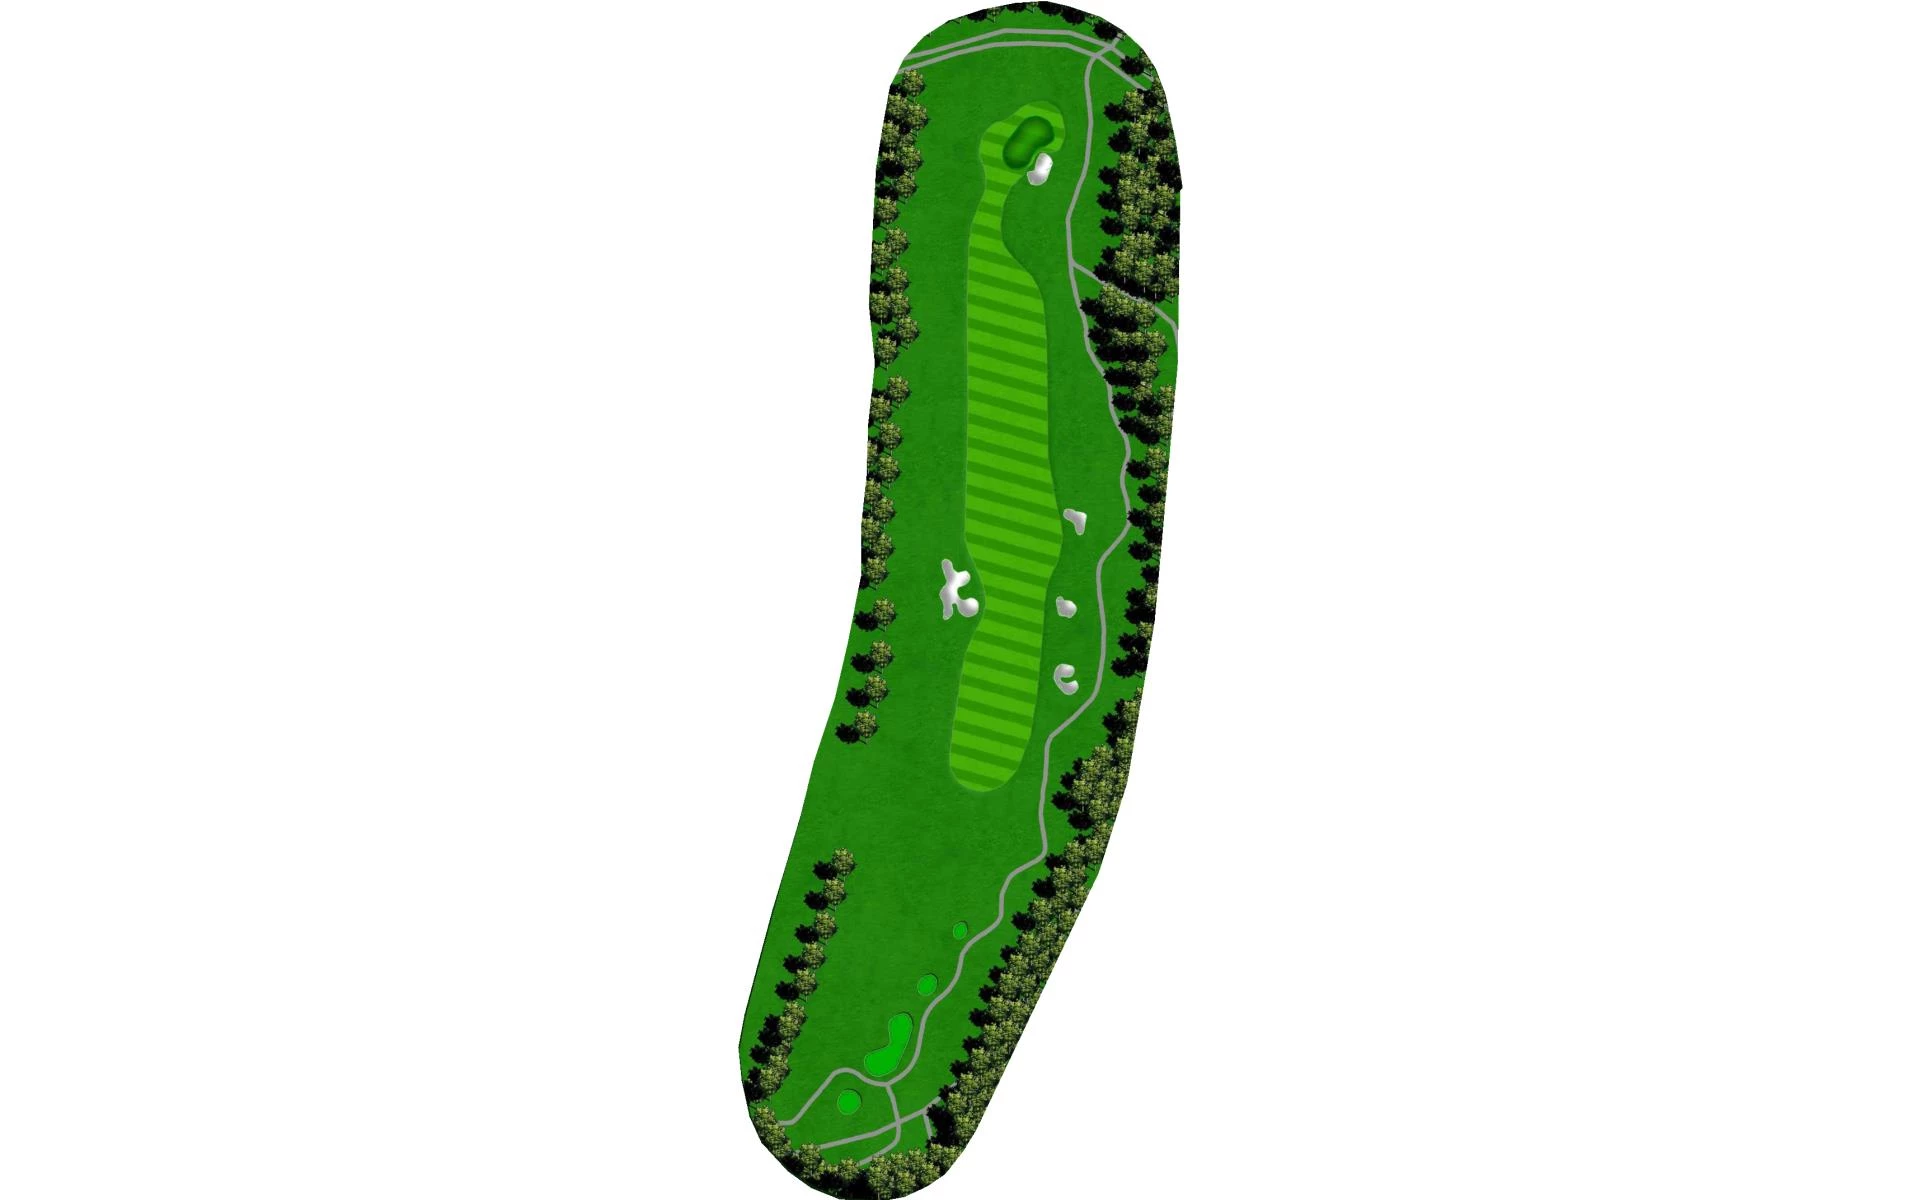
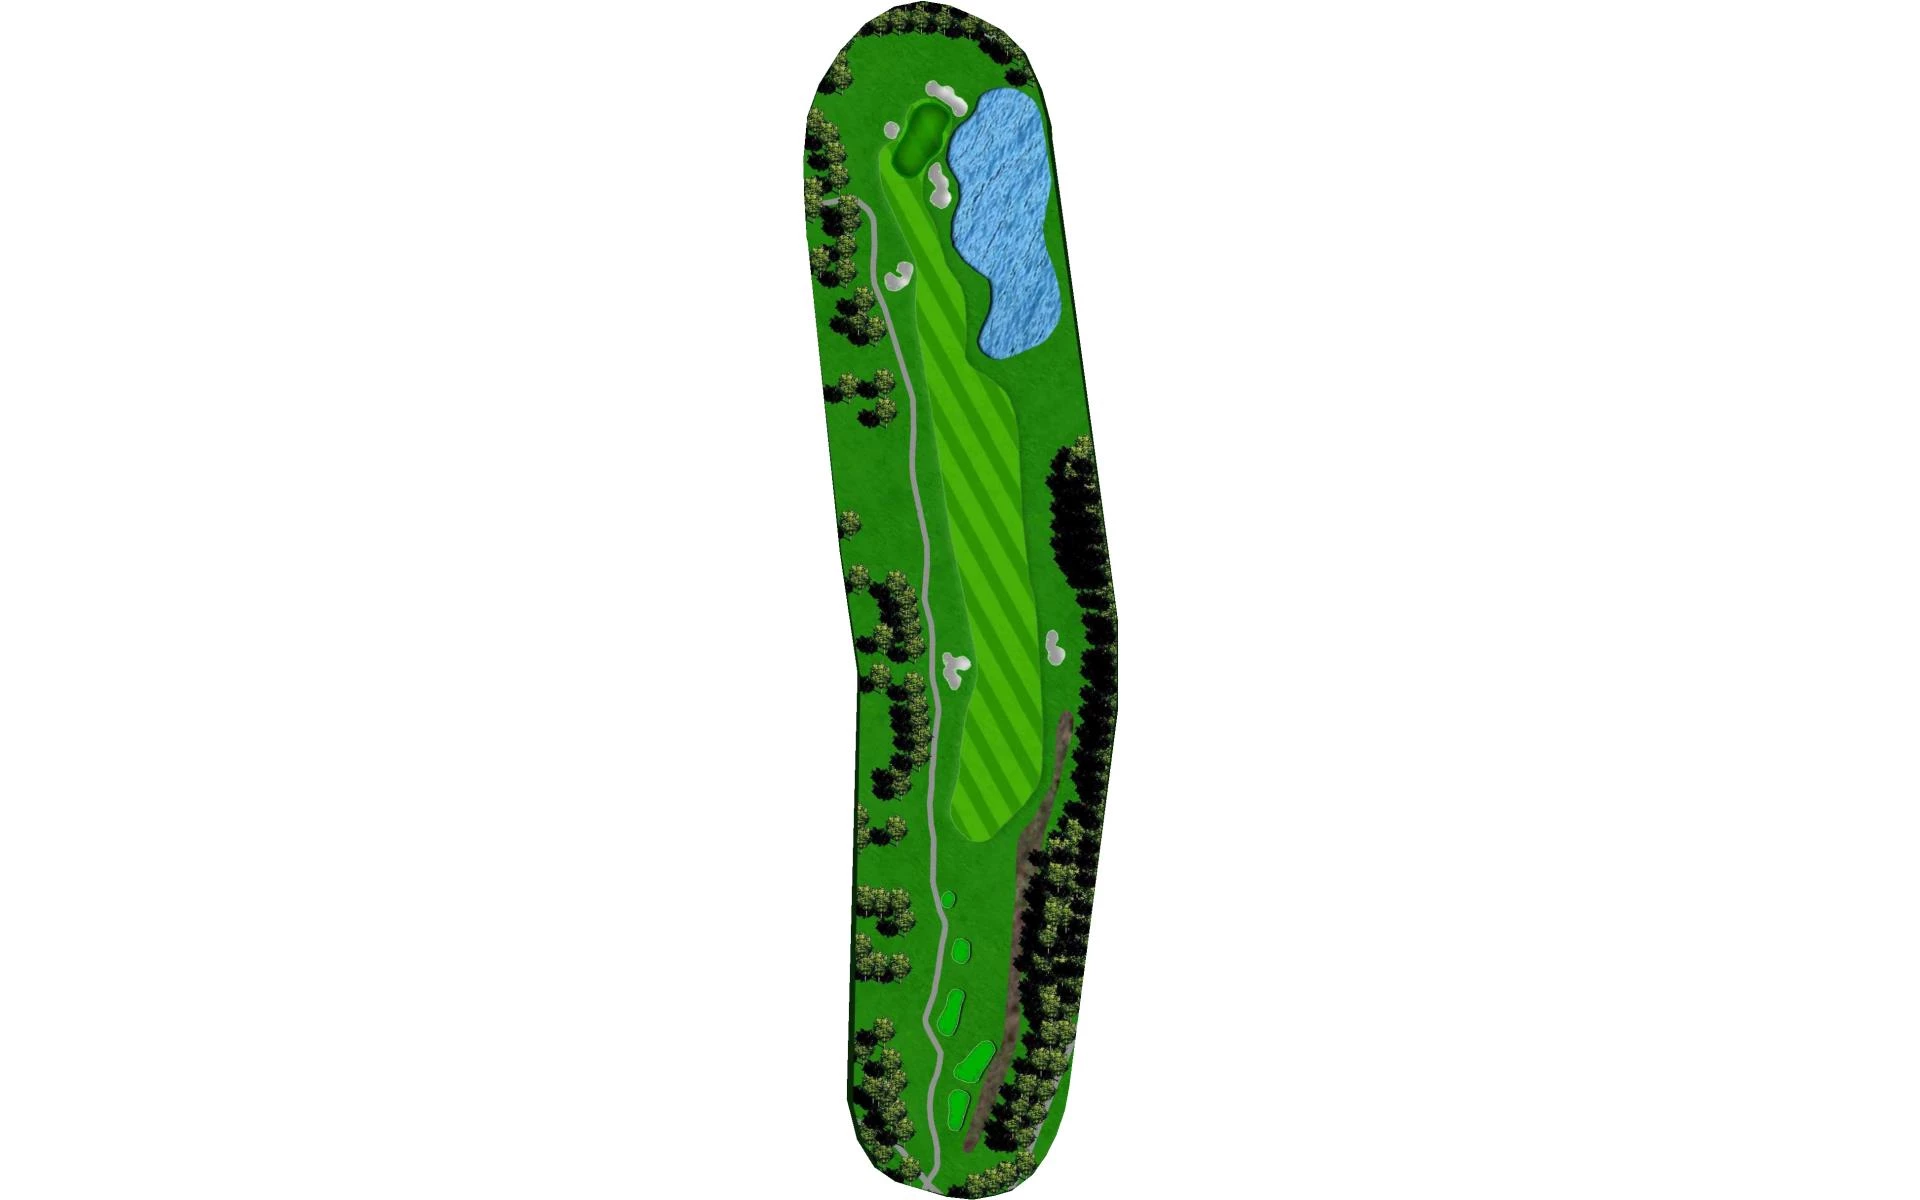
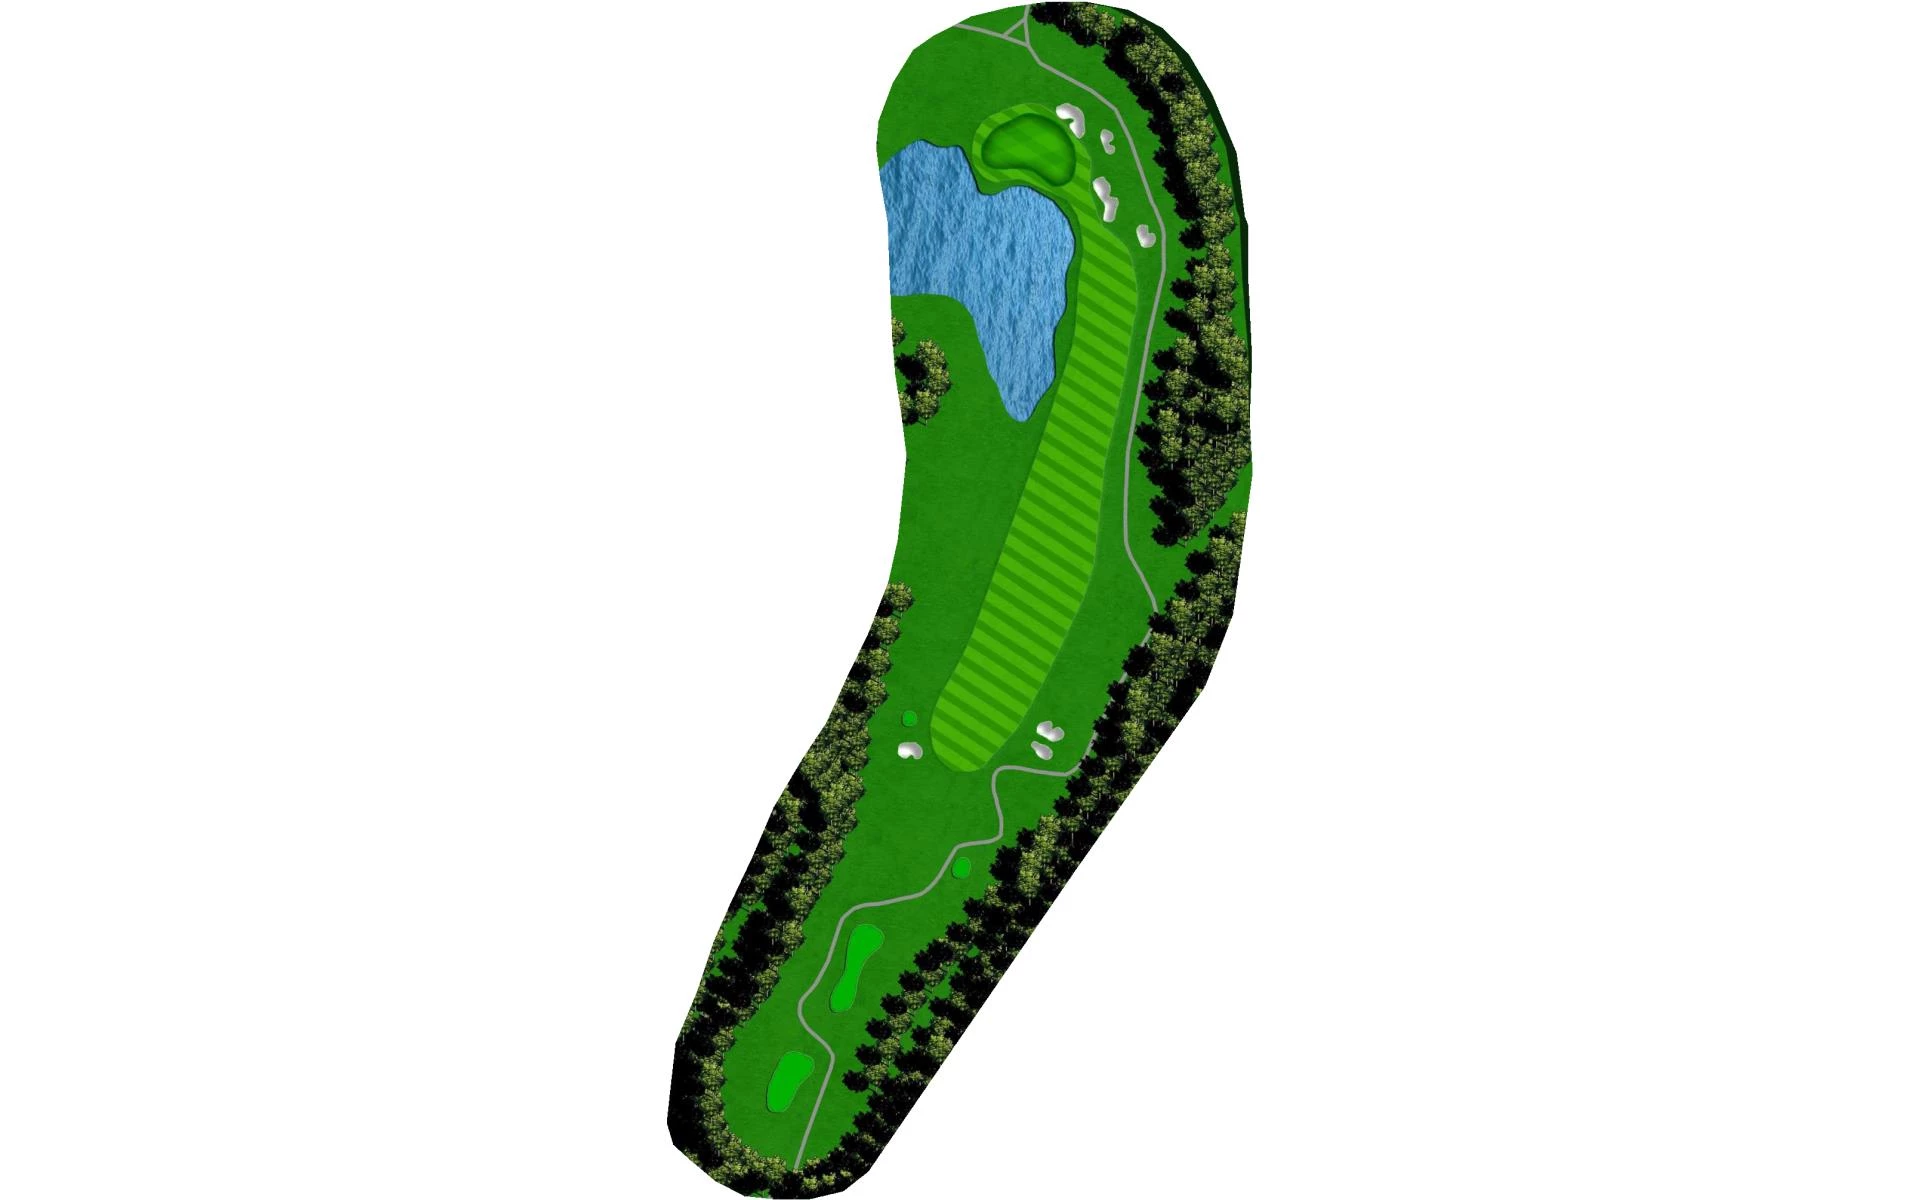
Windermere Golf Course
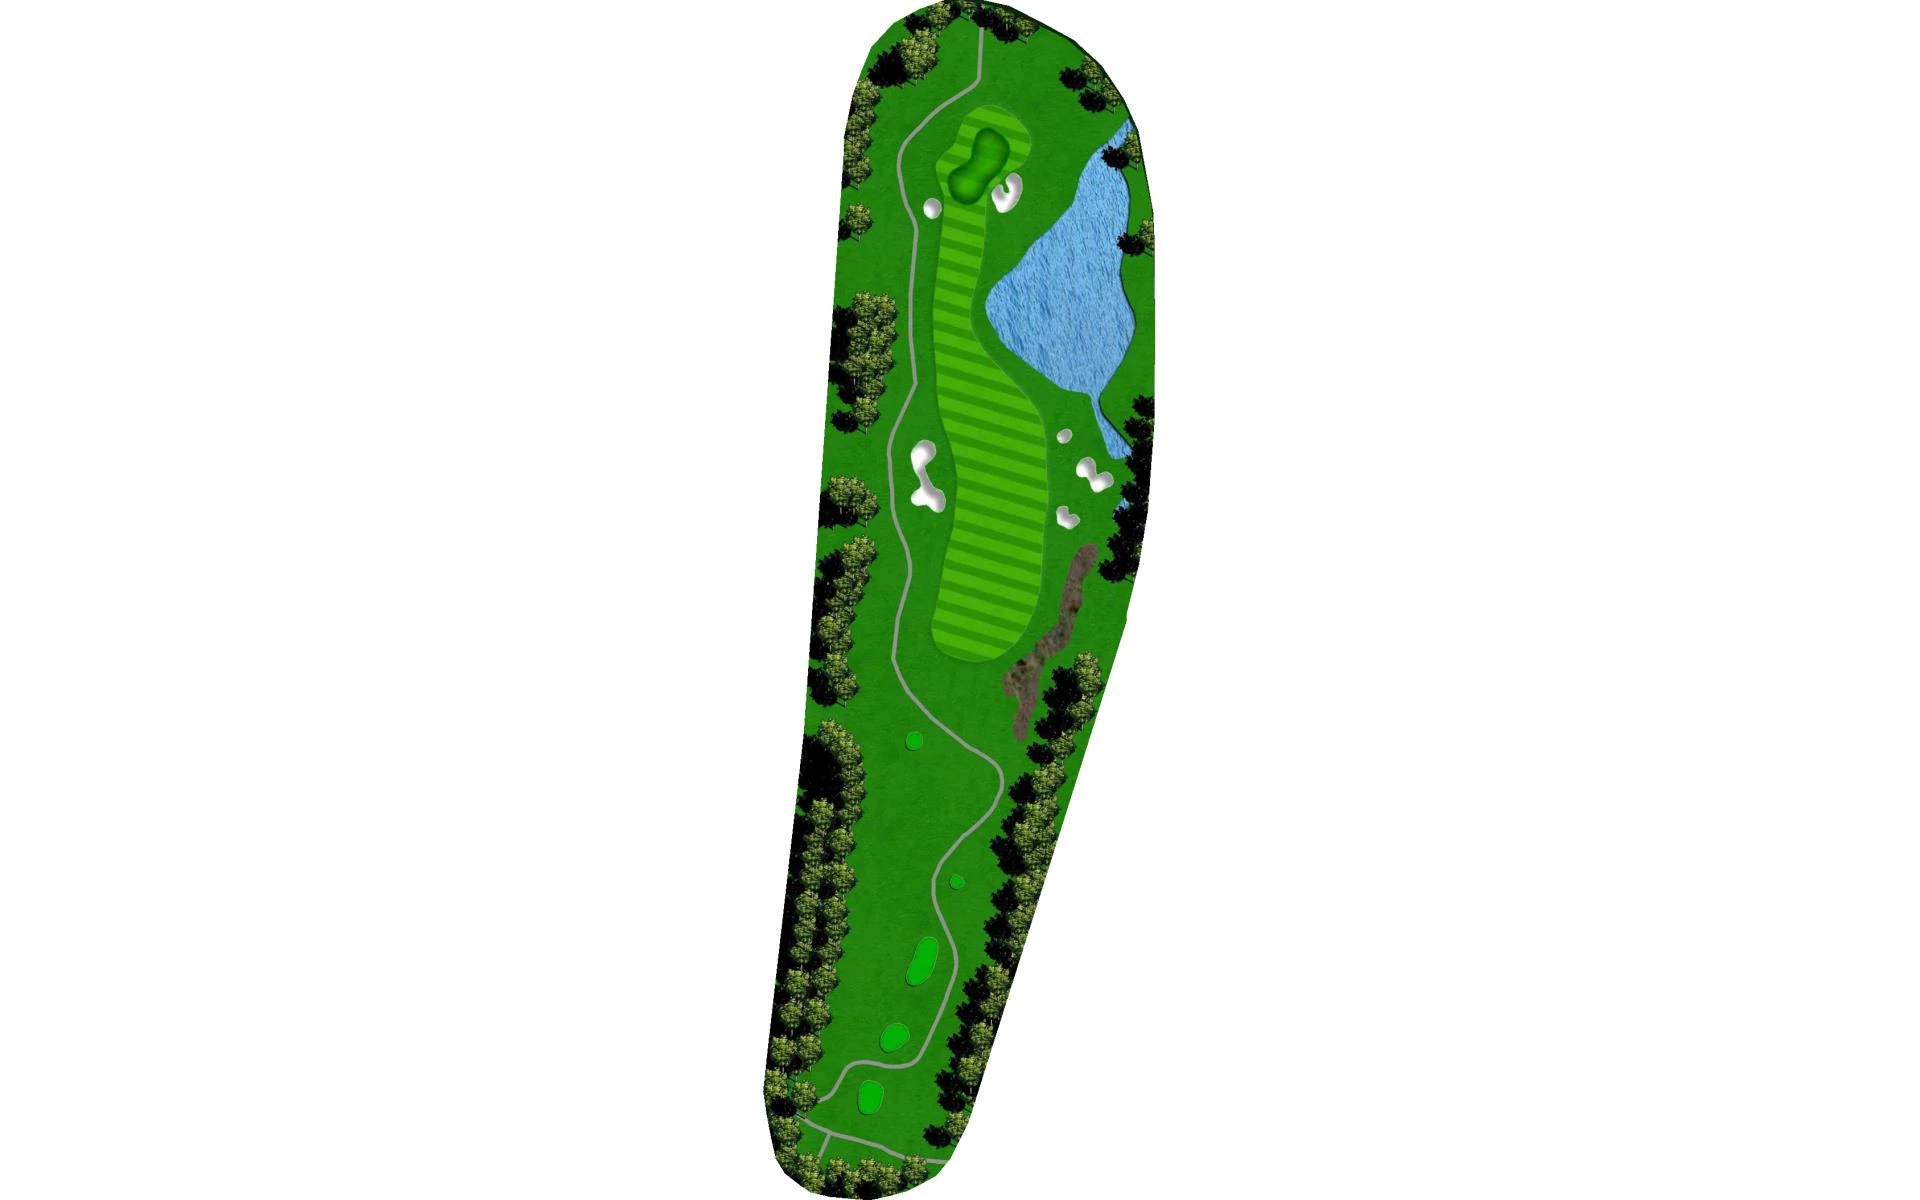
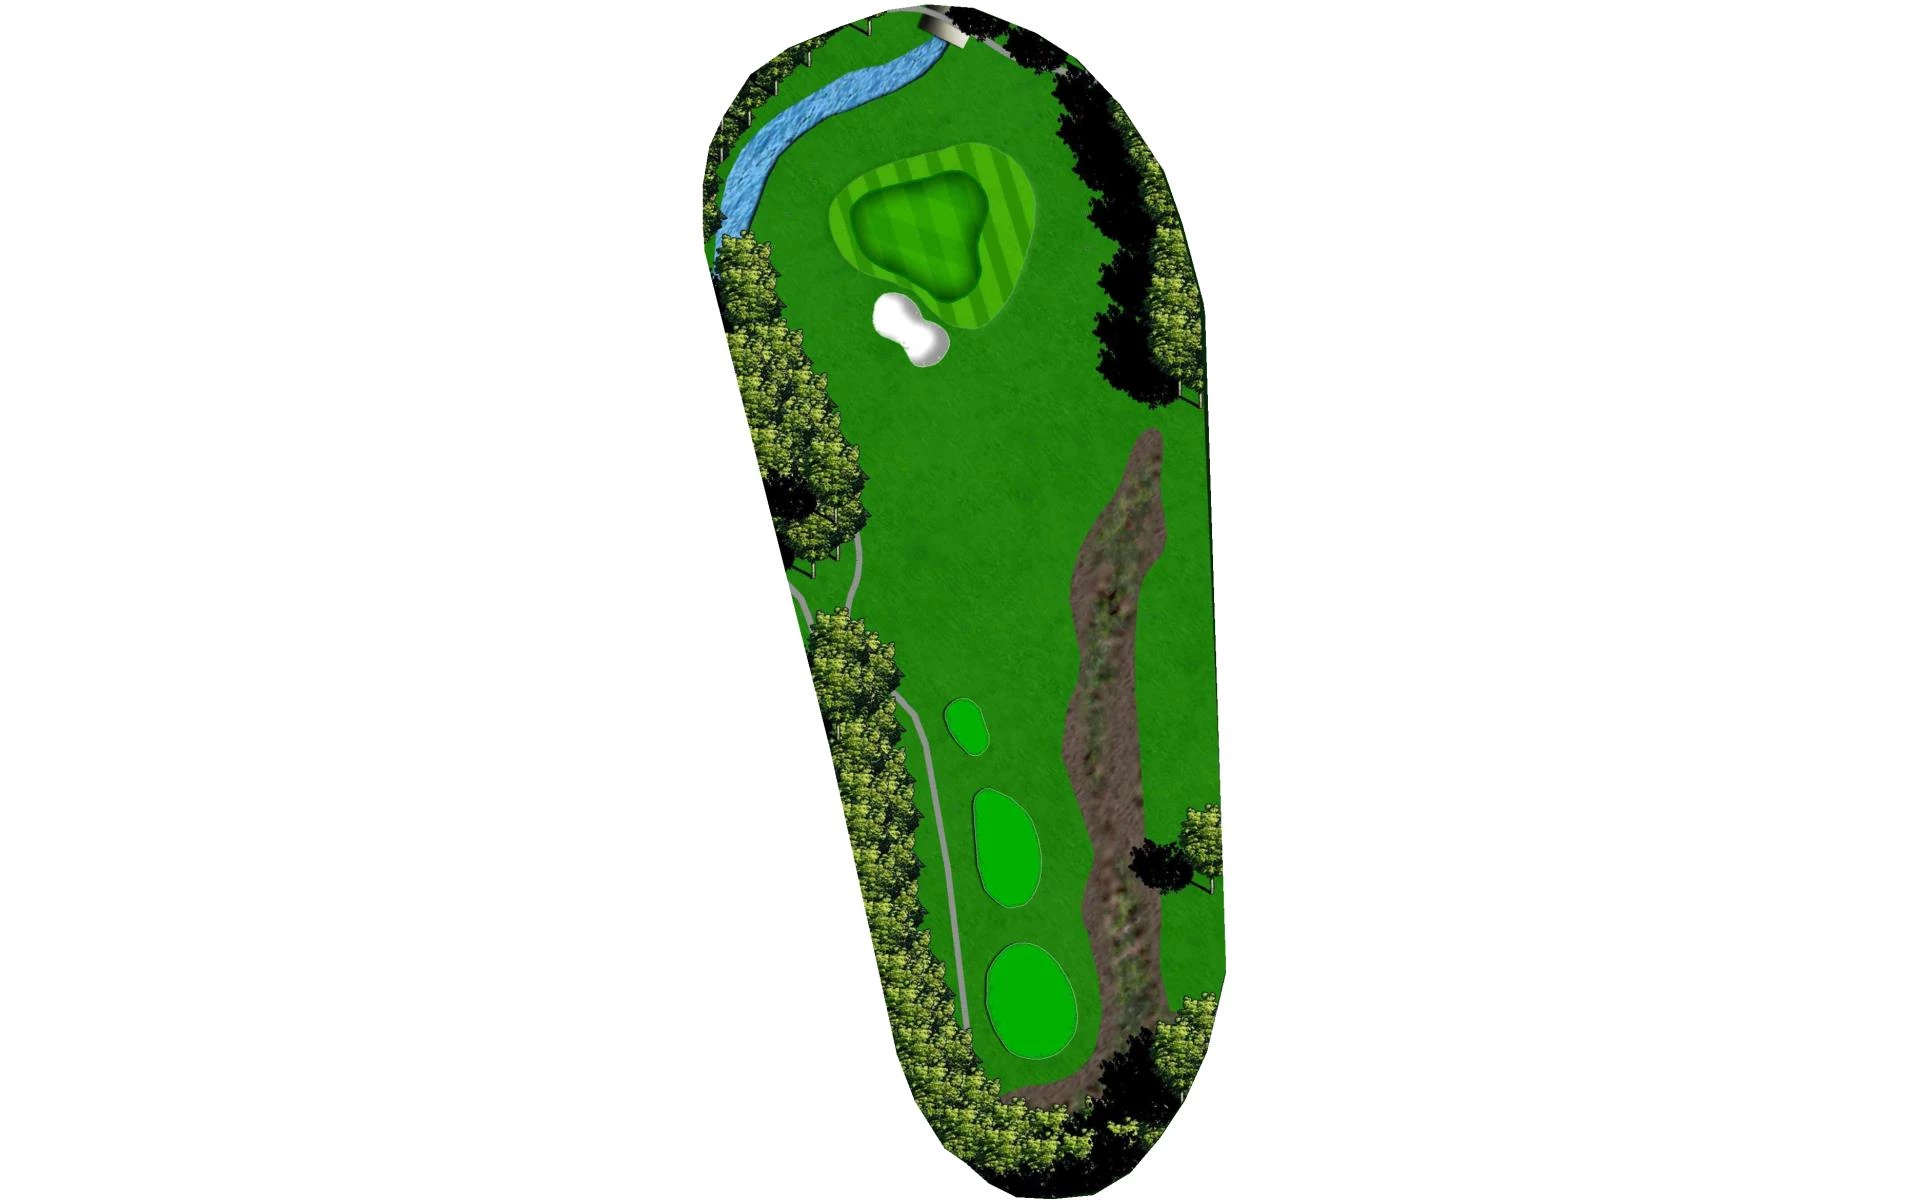
# 1 /
Par: 4
Yardage by Tee:
BLACK 446
PINK 420
Light Blue 420
WHITE 381
SILVER 381
GREEN 282
Pro Tips
This challenging opening Par 4 is best played by favoring the Left Center of the Fairway on your tee shot as that shortens your approach to the green. Favor the left side of the green with your approach as the greens slopes hard left to right. If above the hole on the green play the putt softly as the green slops towards to the water and plays fast downhill
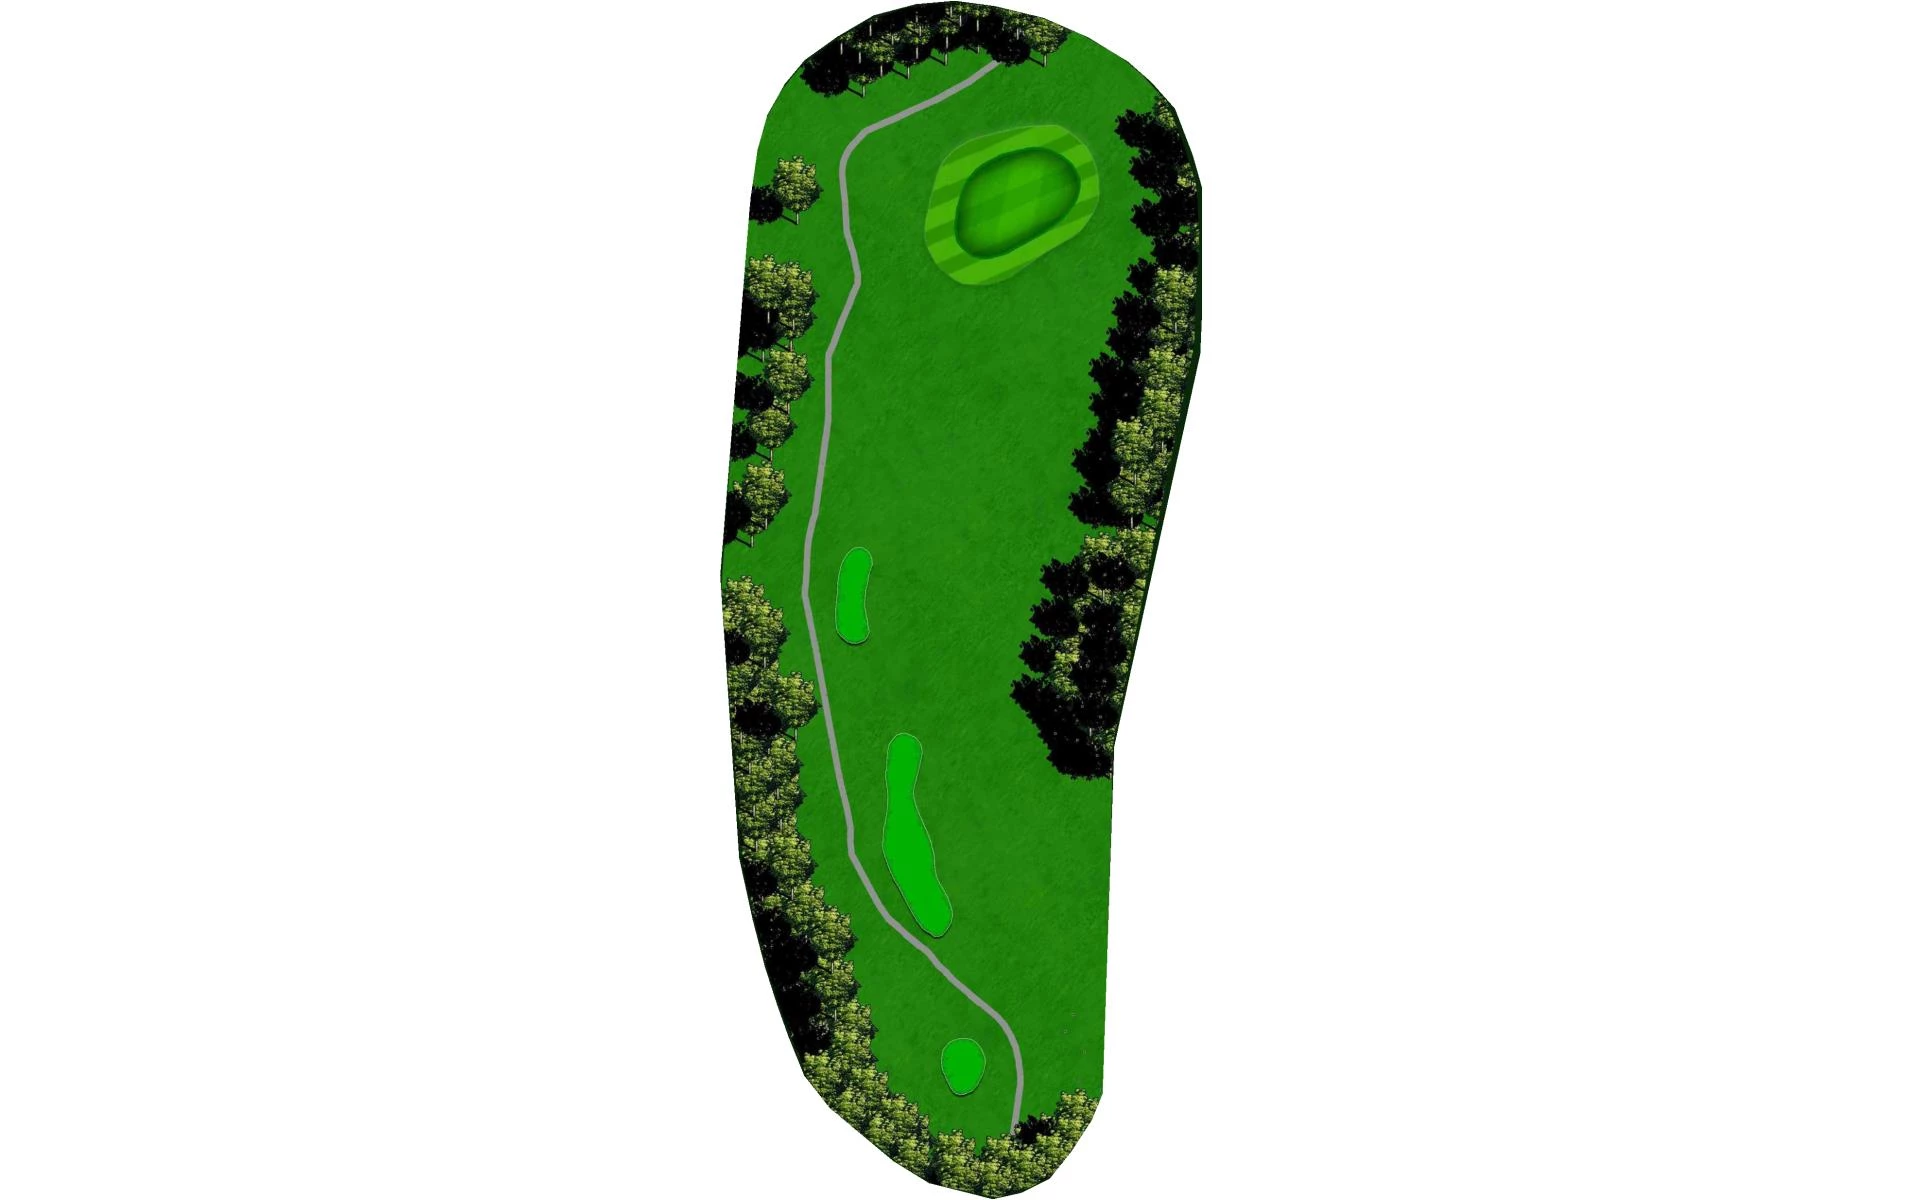
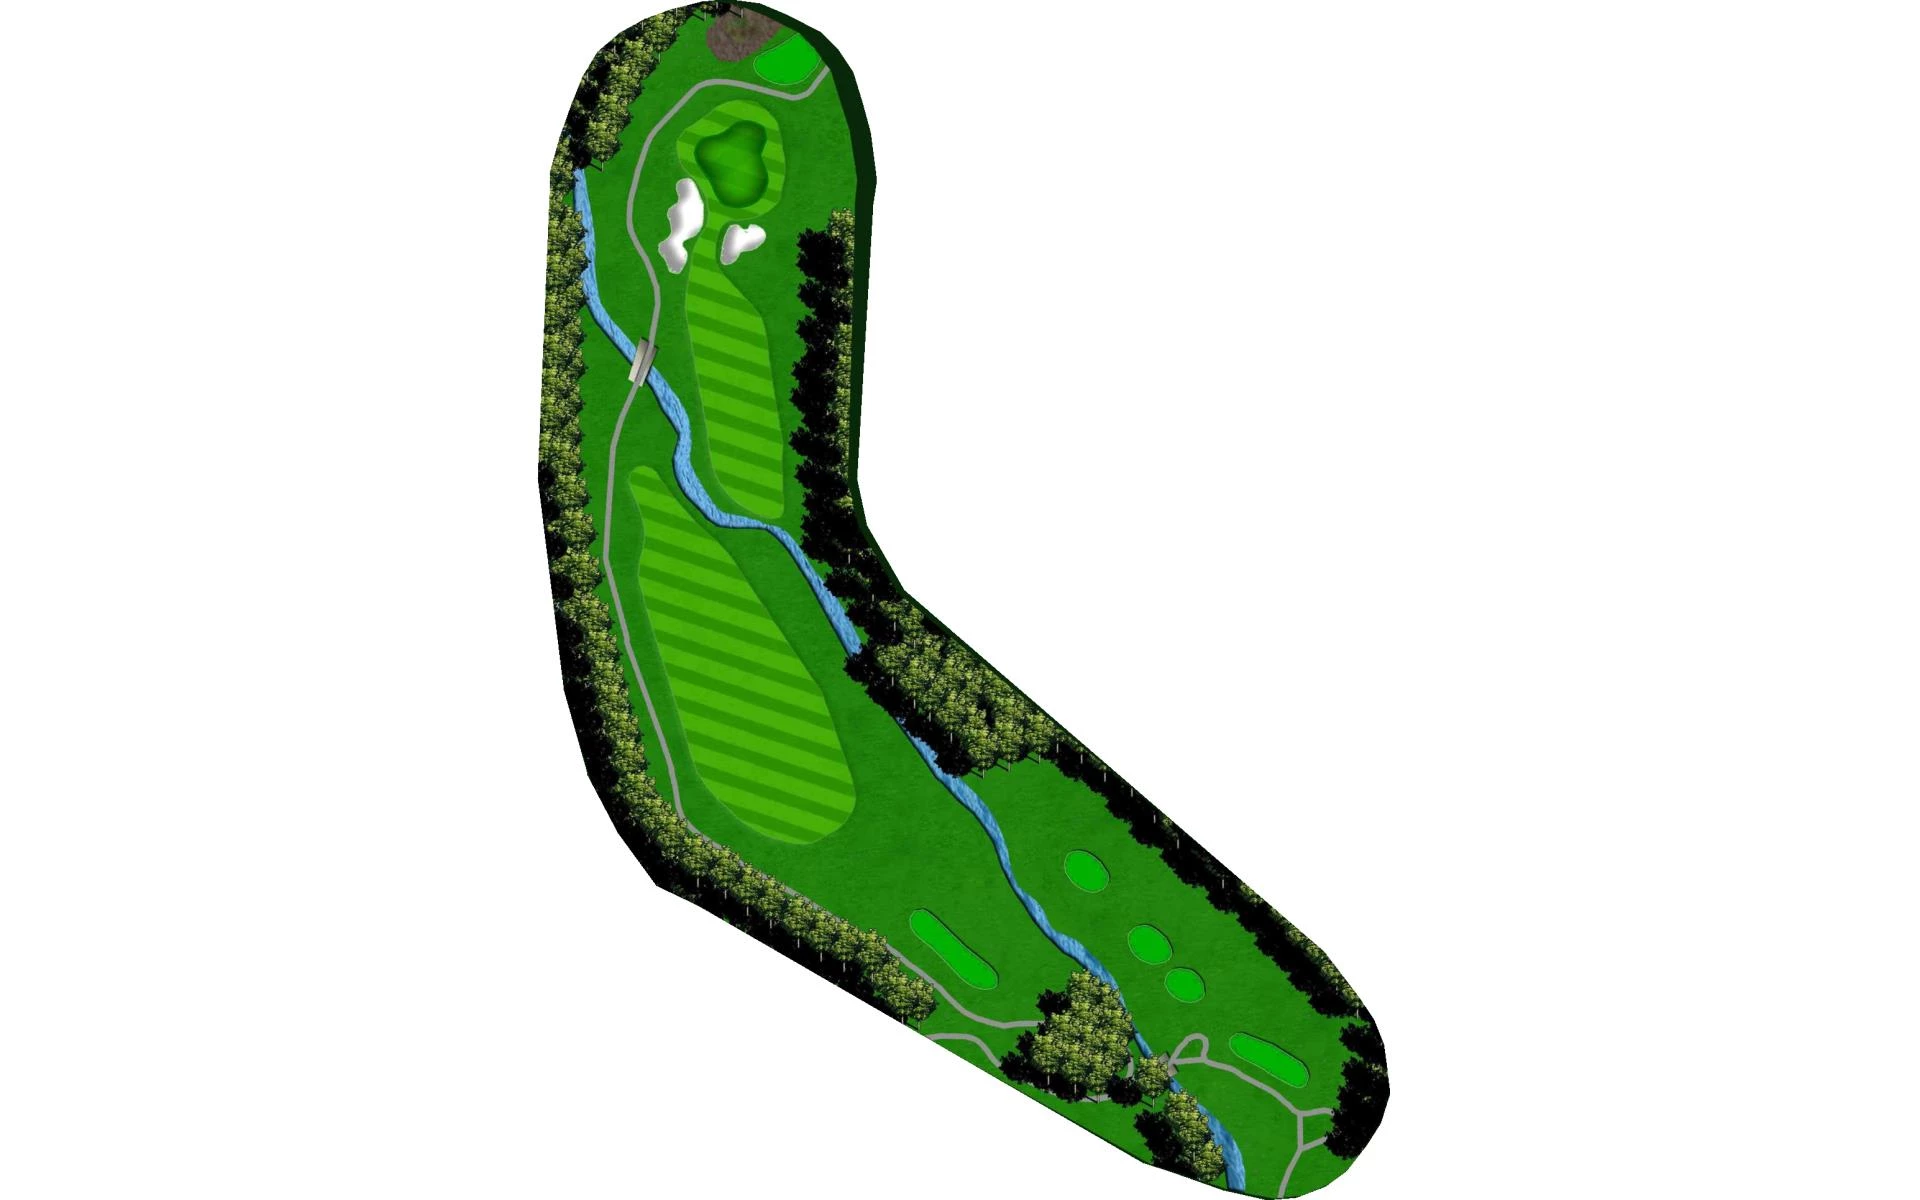
# 2 /
Par: 3
Yardage by Tee:
BLACK 233
PINK 184
Light Blue 184
WHITE 160
SILVER 114
GREEN 114
Pro Tips
This Par 3 is defined by a challenging green. Do everything you can to be short of the hole as any put that is hole high or beyond is extremely challenging as these putts will be extremely quick.
# 3 /
Par: 5
Yardage by Tee:
BLACK 497
PINK 497
Light Blue 480
WHITE 477
SILVER 416
GREEN 416
Pro Tips
Downhill, dogleg left Par 5 is truly a risk reward hole. The more prudent play is a layup with a Fairway Wood that favors the right center of the fairway as the hill will deflect the ball towards the center of the fairway. If you choose driver you will want to favor the right center of the fairway with a draw. If executed well you will leave yourself inside 250 yards to go for the green. If that’s not your cup of tea, lay up on the tee and from the fairway to 100 yards and play from there.
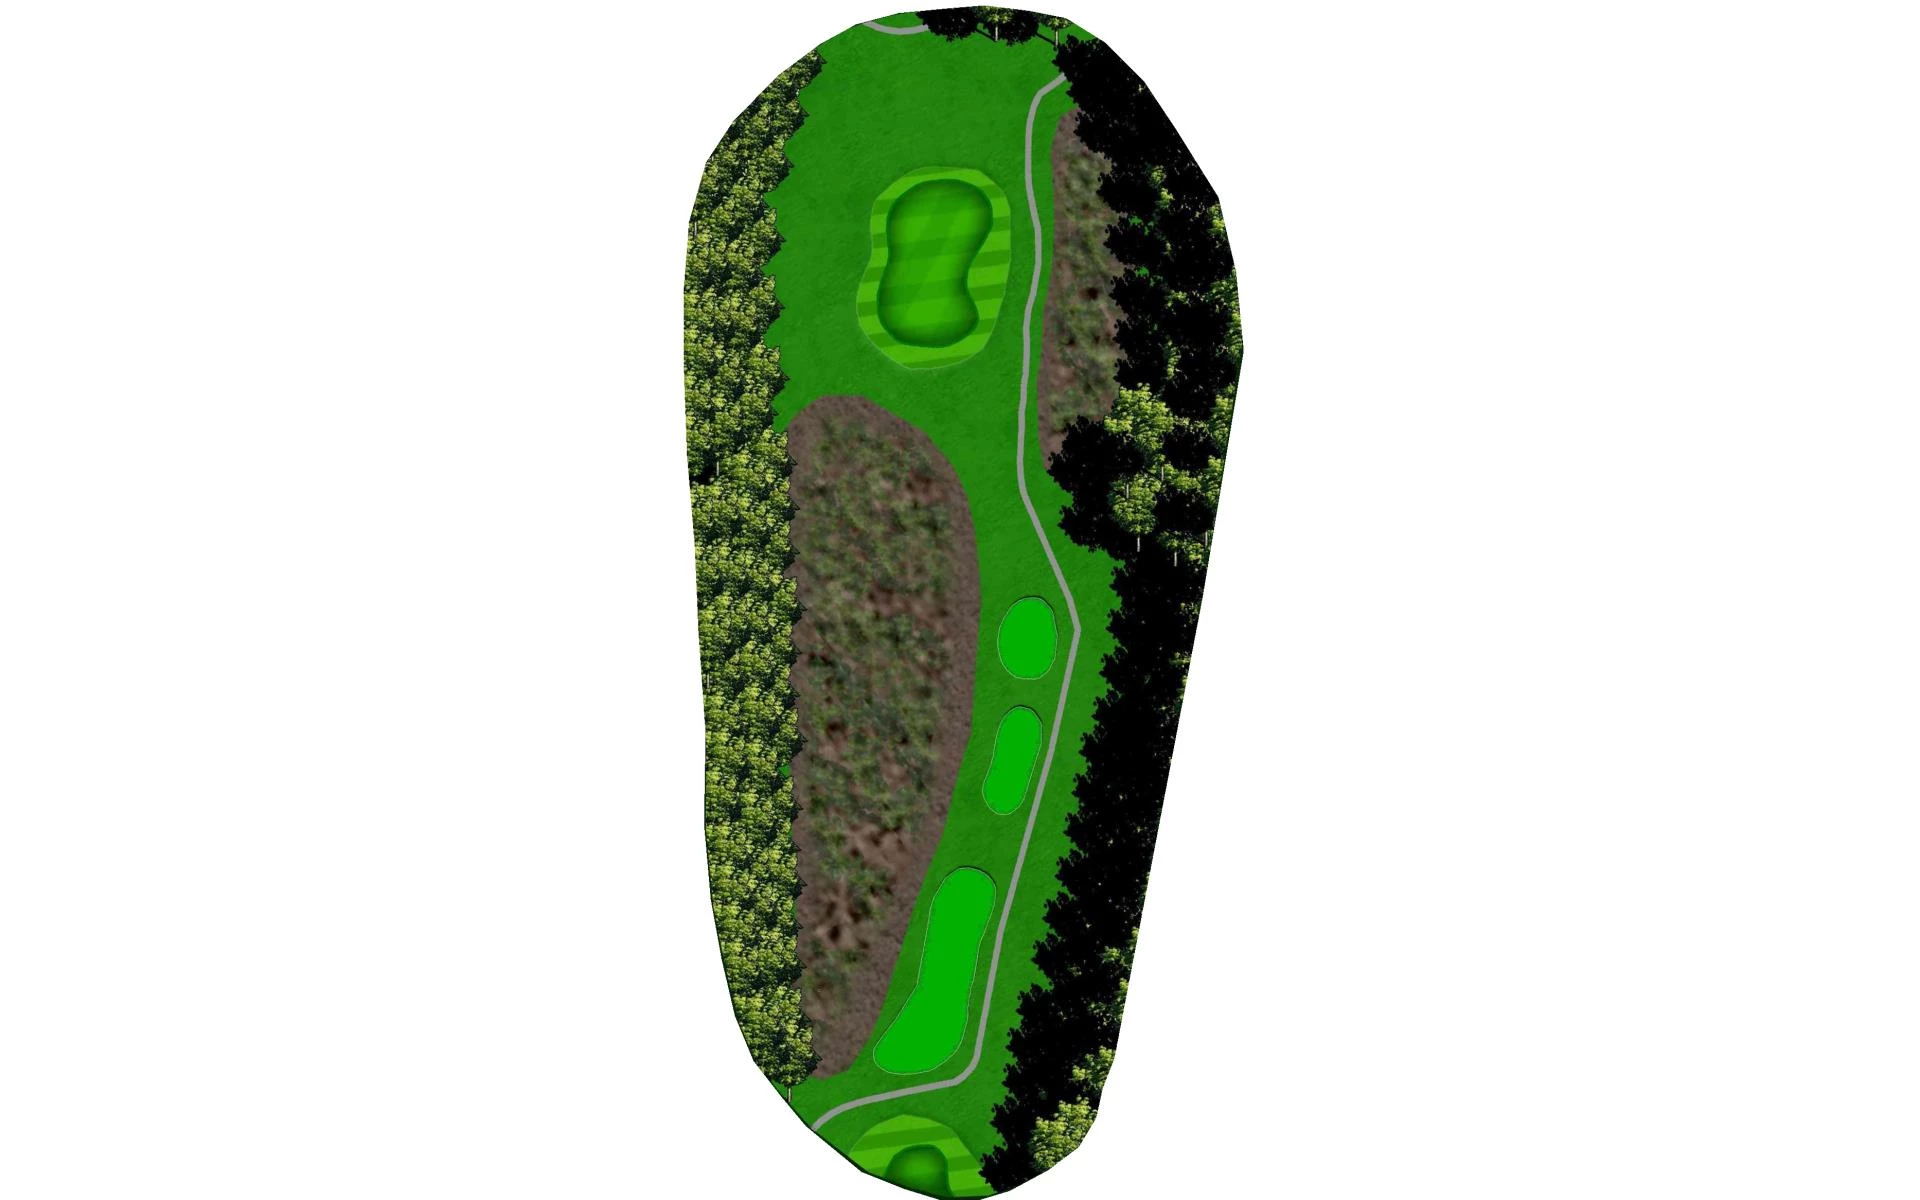
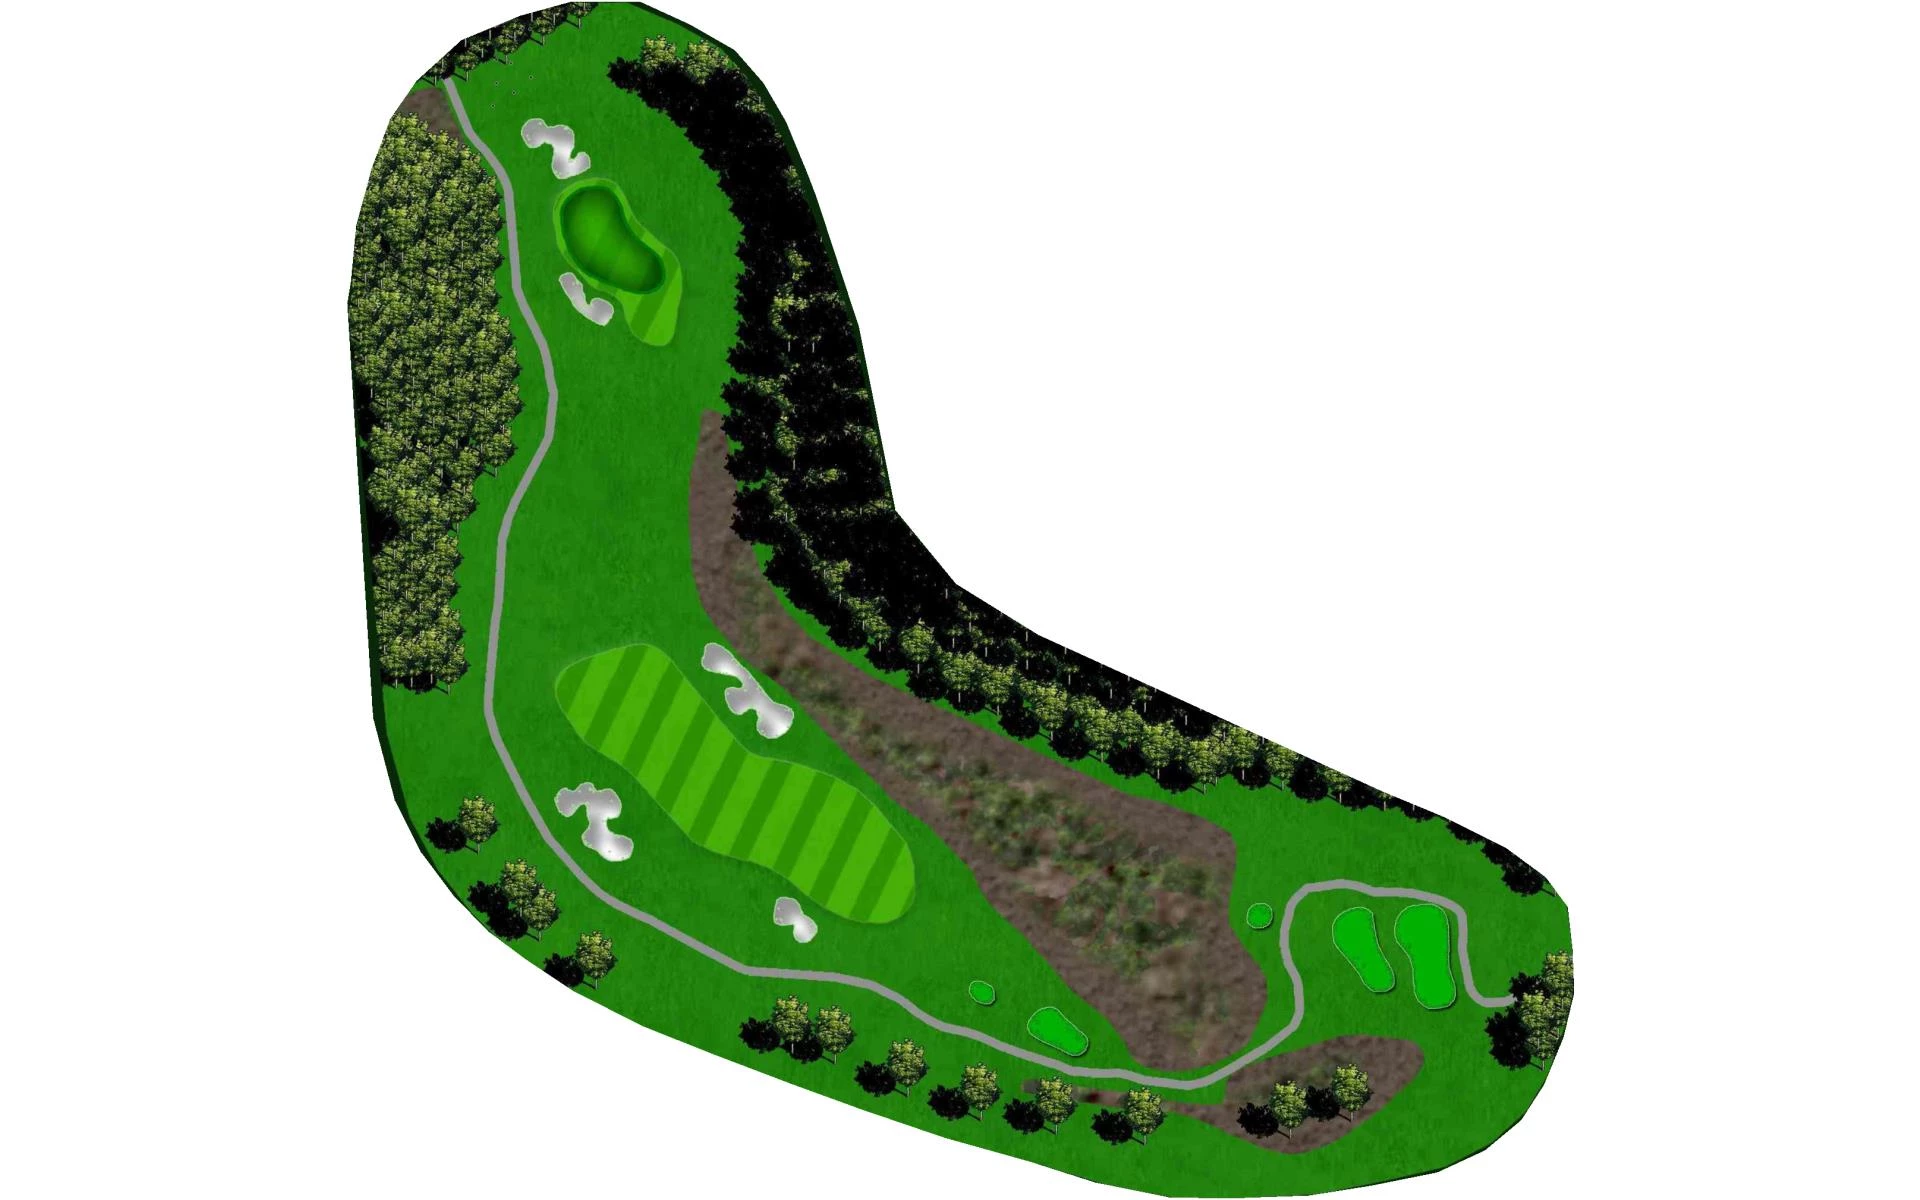
# 4 /
Par: 4
Yardage by Tee:
BLACK 387
PINK 387
Light Blue 355
WHITE 326
SILVER 326
GREEN 218
Pro Tips
Tempting short Par 4 that is best played by laying up to 110 yards from tee in between the fairway bunkers. Green has a bowl on the right side that deflects in mishit balls to the right. Favor the left side of the green when pin is on the left
# 5 /
Par: 3
Yardage by Tee:
BLACK 163
PINK 163
Light Blue 143
WHITE 121
SILVER 121
GREEN 101
Pro Tips
Straight away Par 3 that you want to favor the right side as shots that challenge the large greenside bunker will either end up in the bunker or will have a challenge holding the green as there is a creek behind the green that will act as a magnet to any mishit tee shots.
# 6 /
Par: 4
Yardage by Tee:
BLACK 414
PINK 414
Light Blue 388
WHITE 310
SILVER 310
GREEN 291
Pro Tips
This is one of the more challenging Par 4s on the golf course. You will need to aim for the center of the fairway and hit whatever club will get you closest to 150 yards as you can. Favor the Right Center of the green with your approach and you should have a good chance to make a par on this hole
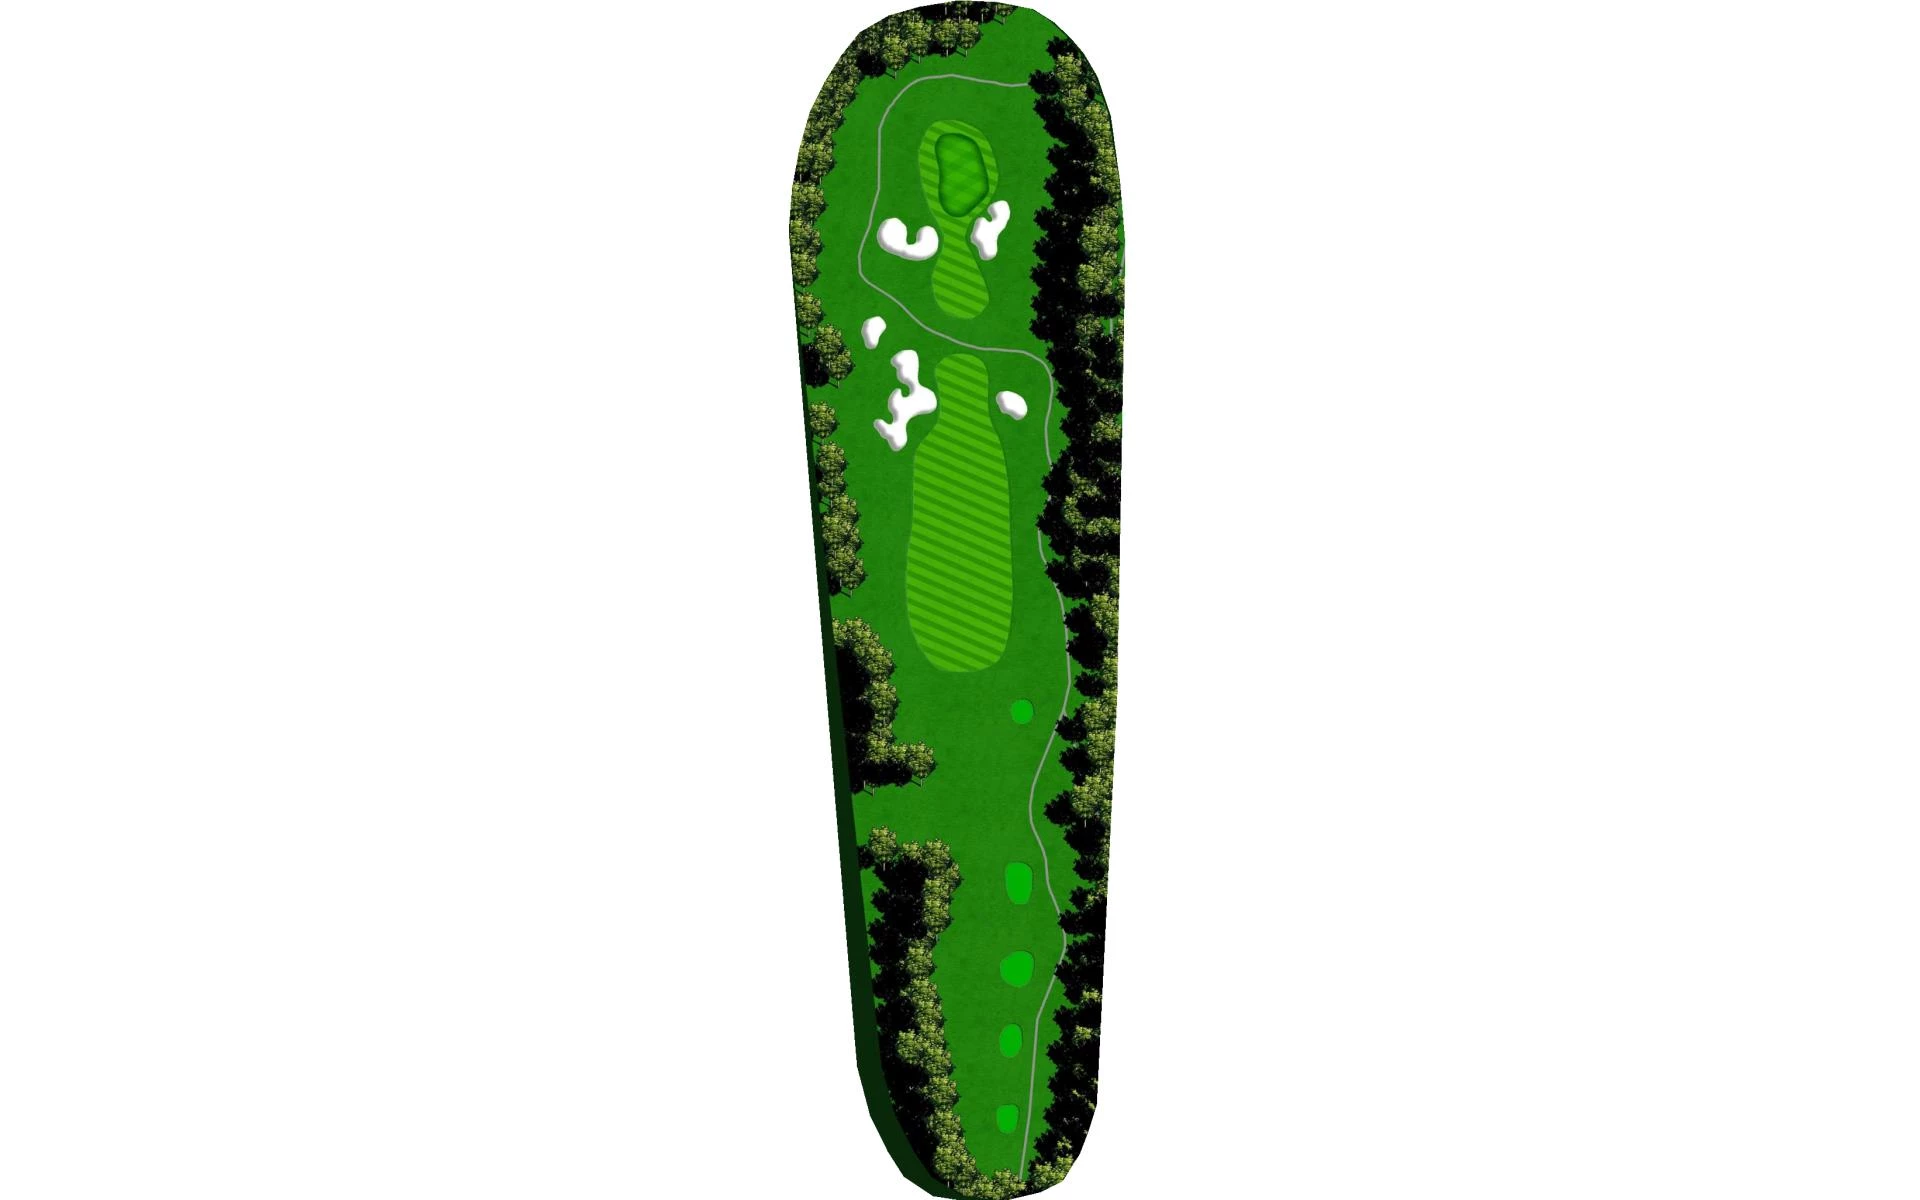
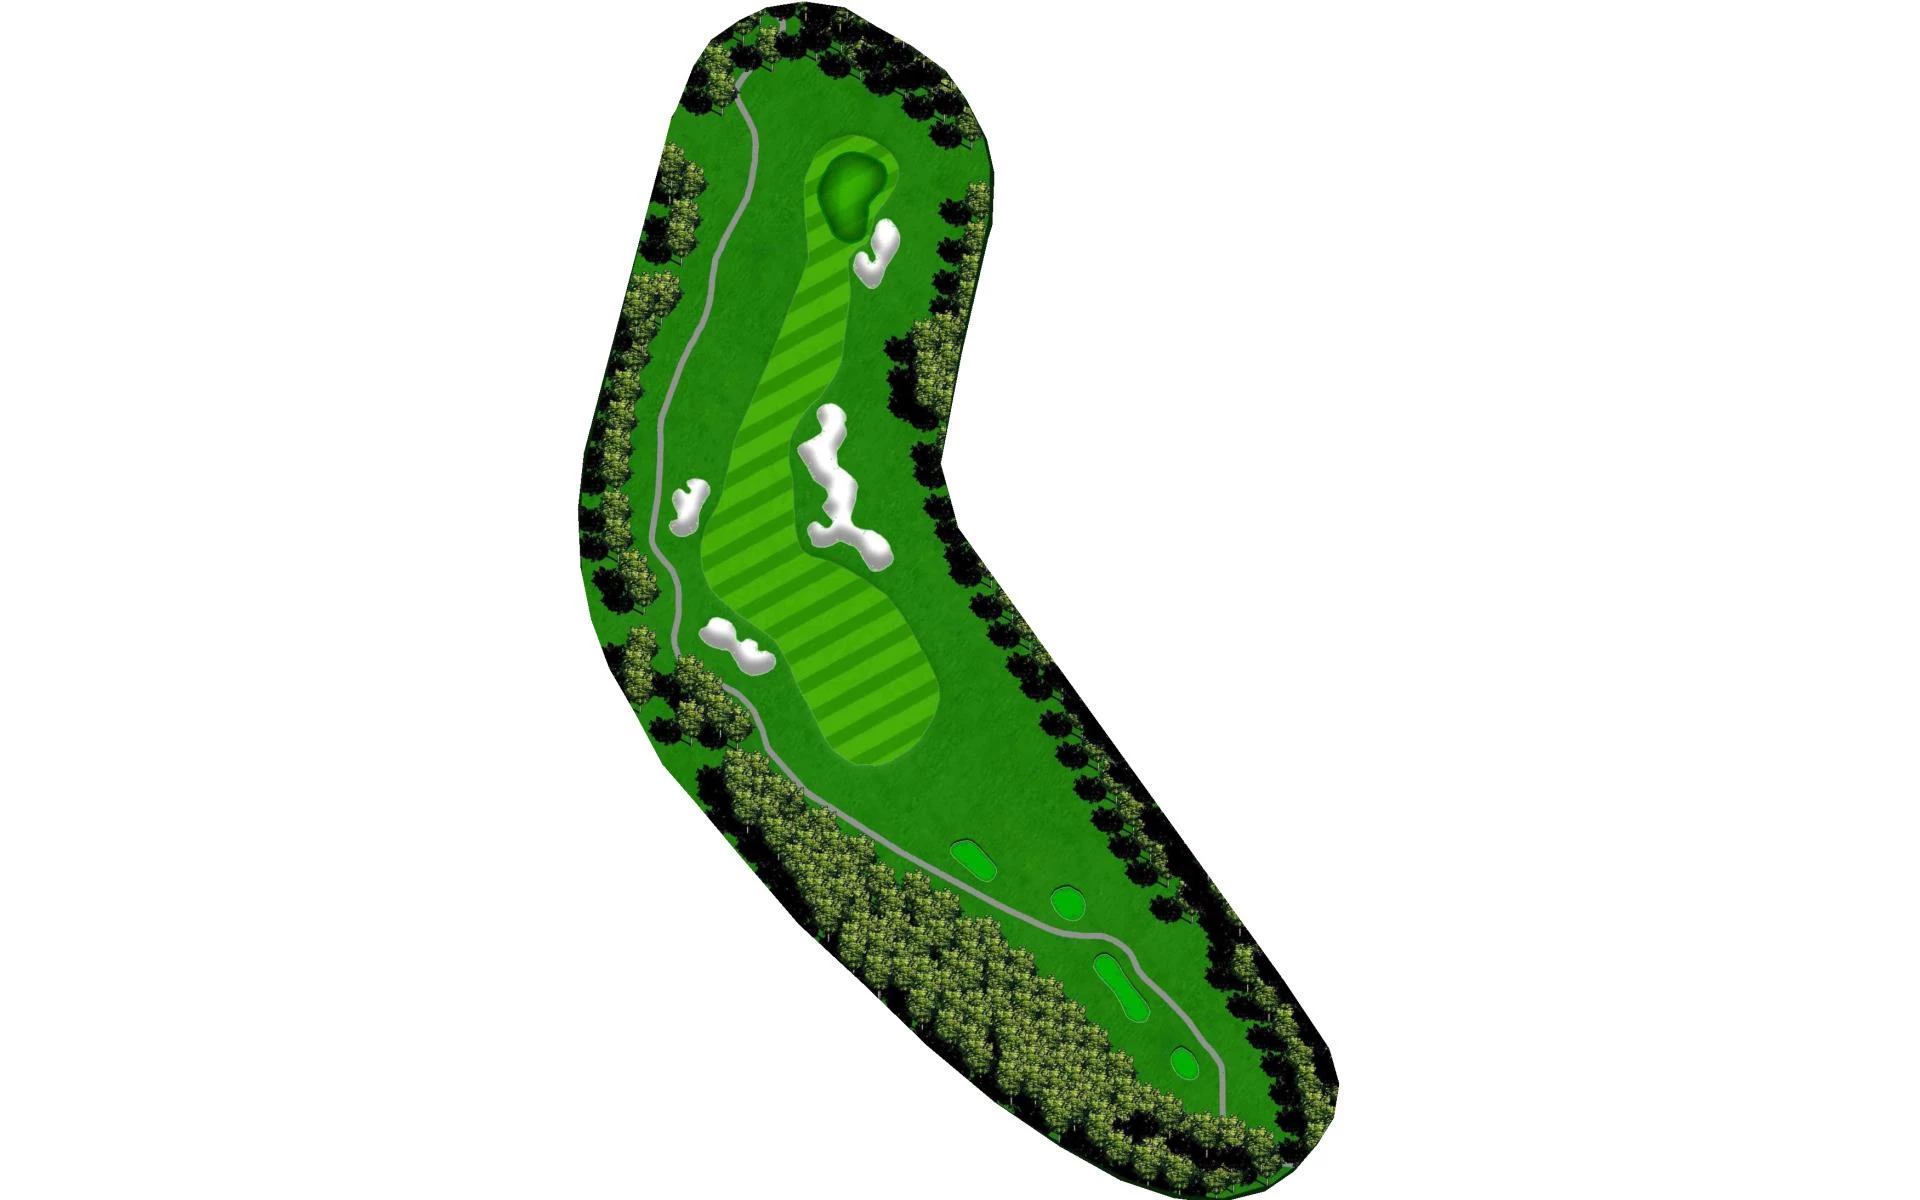
# 7 /
Par: 3
Yardage by Tee:
BLACK 159
PINK 159
Light Blue 141
WHITE 106
SILVER 106
GREEN 81
Pro Tips
Good little Par 3 that requires good distance control and alignment as any shot that is too far left or right will be deflected into some gnarly rough. There is also a grass bunker short of the green that will provide a challenging up and down if you hit it there. Find your distance to the center of the green and take that club and you will have the best chance for par from there.
# 8 /
Par: 4
Yardage by Tee:
BLACK 428
PINK 404
Light Blue 404
WHITE 370
SILVER 319
GREEN 319
Pro Tips
Dogleg left Par 4 that requires a drive that favors the right center of the fairway as there is a tree on the left side that will reap havoc on your approach. Ideally play your approach short of the pin as this green slopes hard back to front and putts from above this hole are a great challenge.
# 9 /
Par: 5
Yardage by Tee:
BLACK 533
PINK 533
Light Blue 496
WHITE 460
SILVER 428
GREEN 428
Pro Tips
Straight away Par 5 that you play between the fairway bunkers with your tee shot. This hole is typically going to be a 3 shot hole in which only the longest hitters can go for the green. This two tiered green is extremely challenging to wedge a ball close to the pin, but find your yardage and do your best to hit the ball that distance.
# 10 /
Par: 4
Yardage by Tee:
BLACK 382
PINK 382
Light Blue 346
WHITE 304
SILVER 304
GREEN 254
Pro Tips
Short extremely challenging Par 3 that will tempt the longest hitters to go for the green. Best played out to the left of the fairway bunker to about 100 yards from the pin. Do everything you can to keep the ball short of pin high or below as this green is extremely fast down hill and down grain.
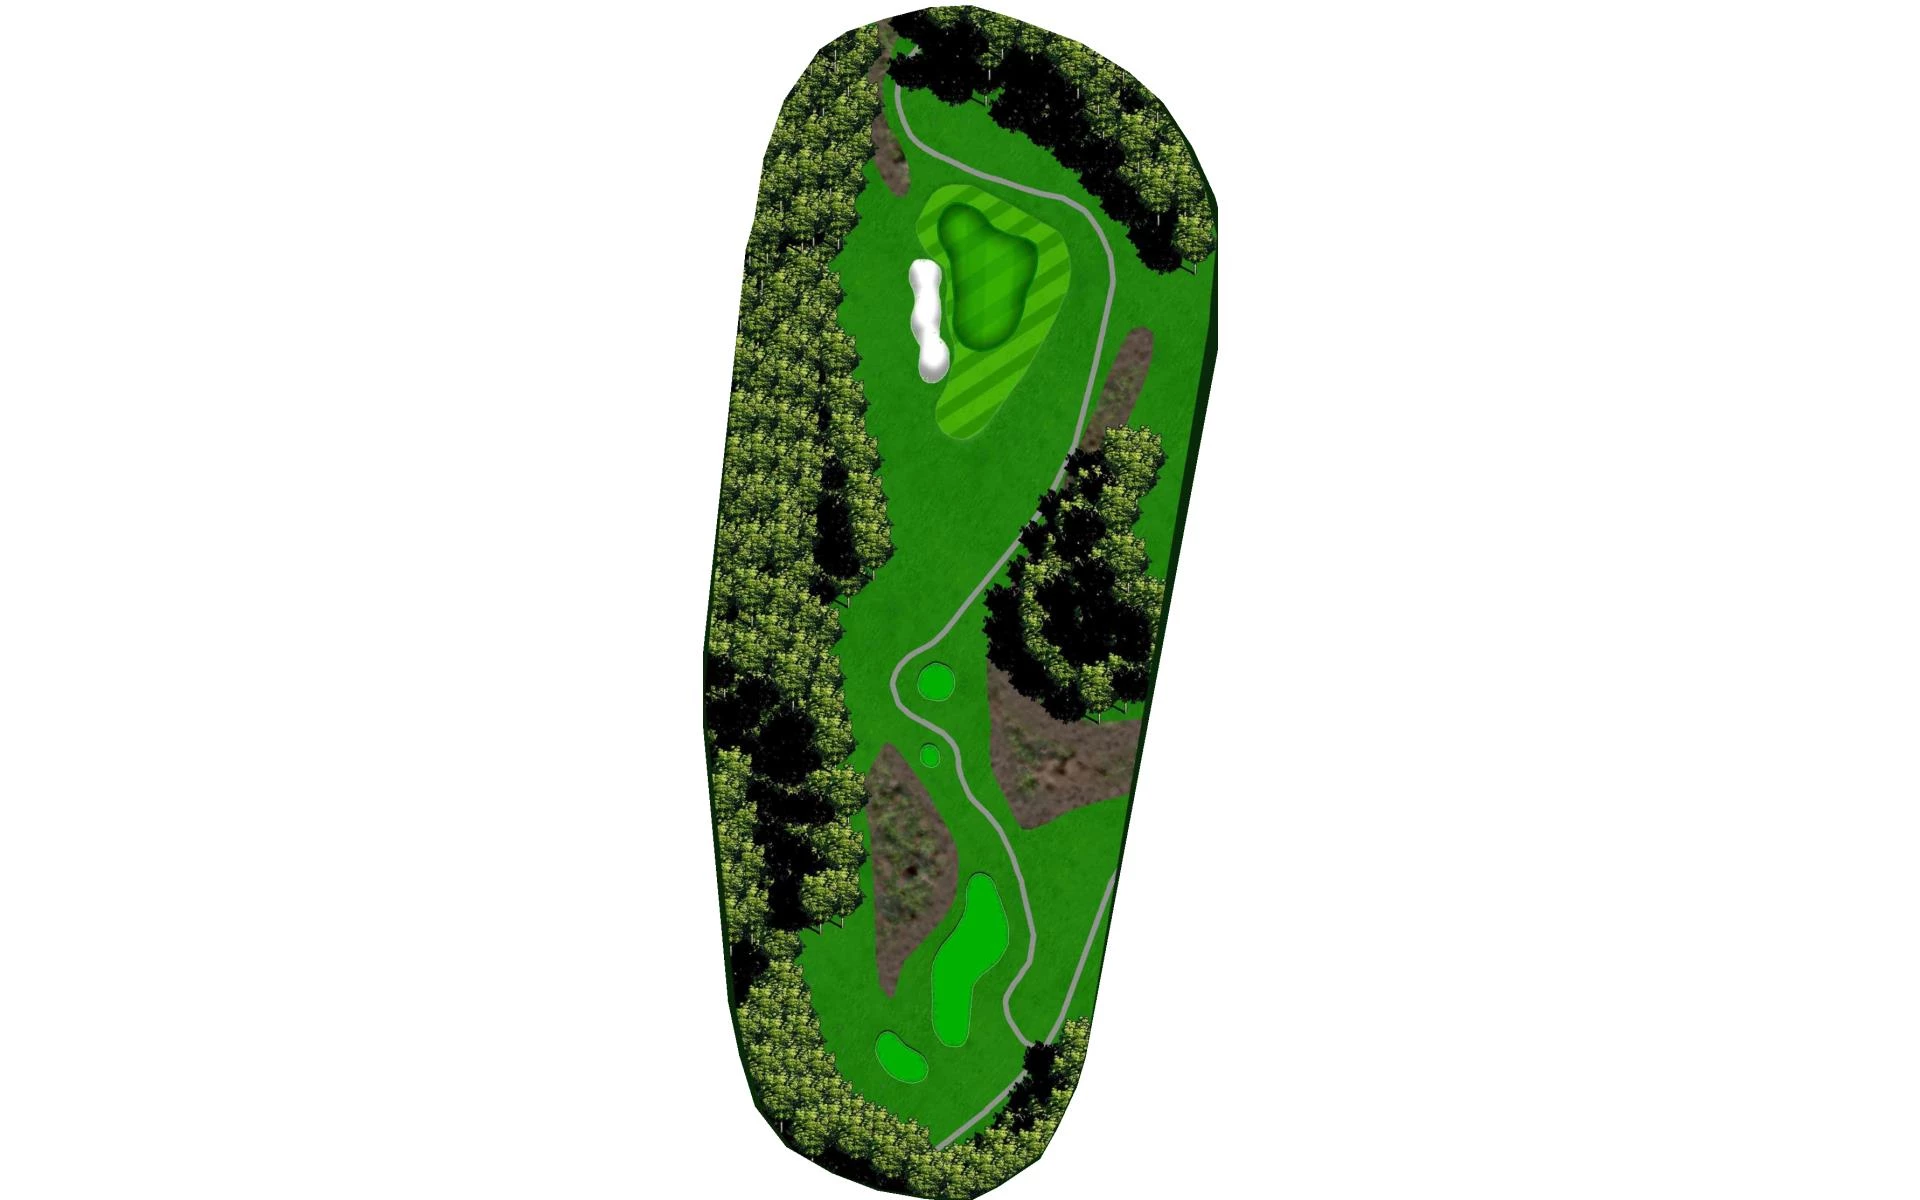
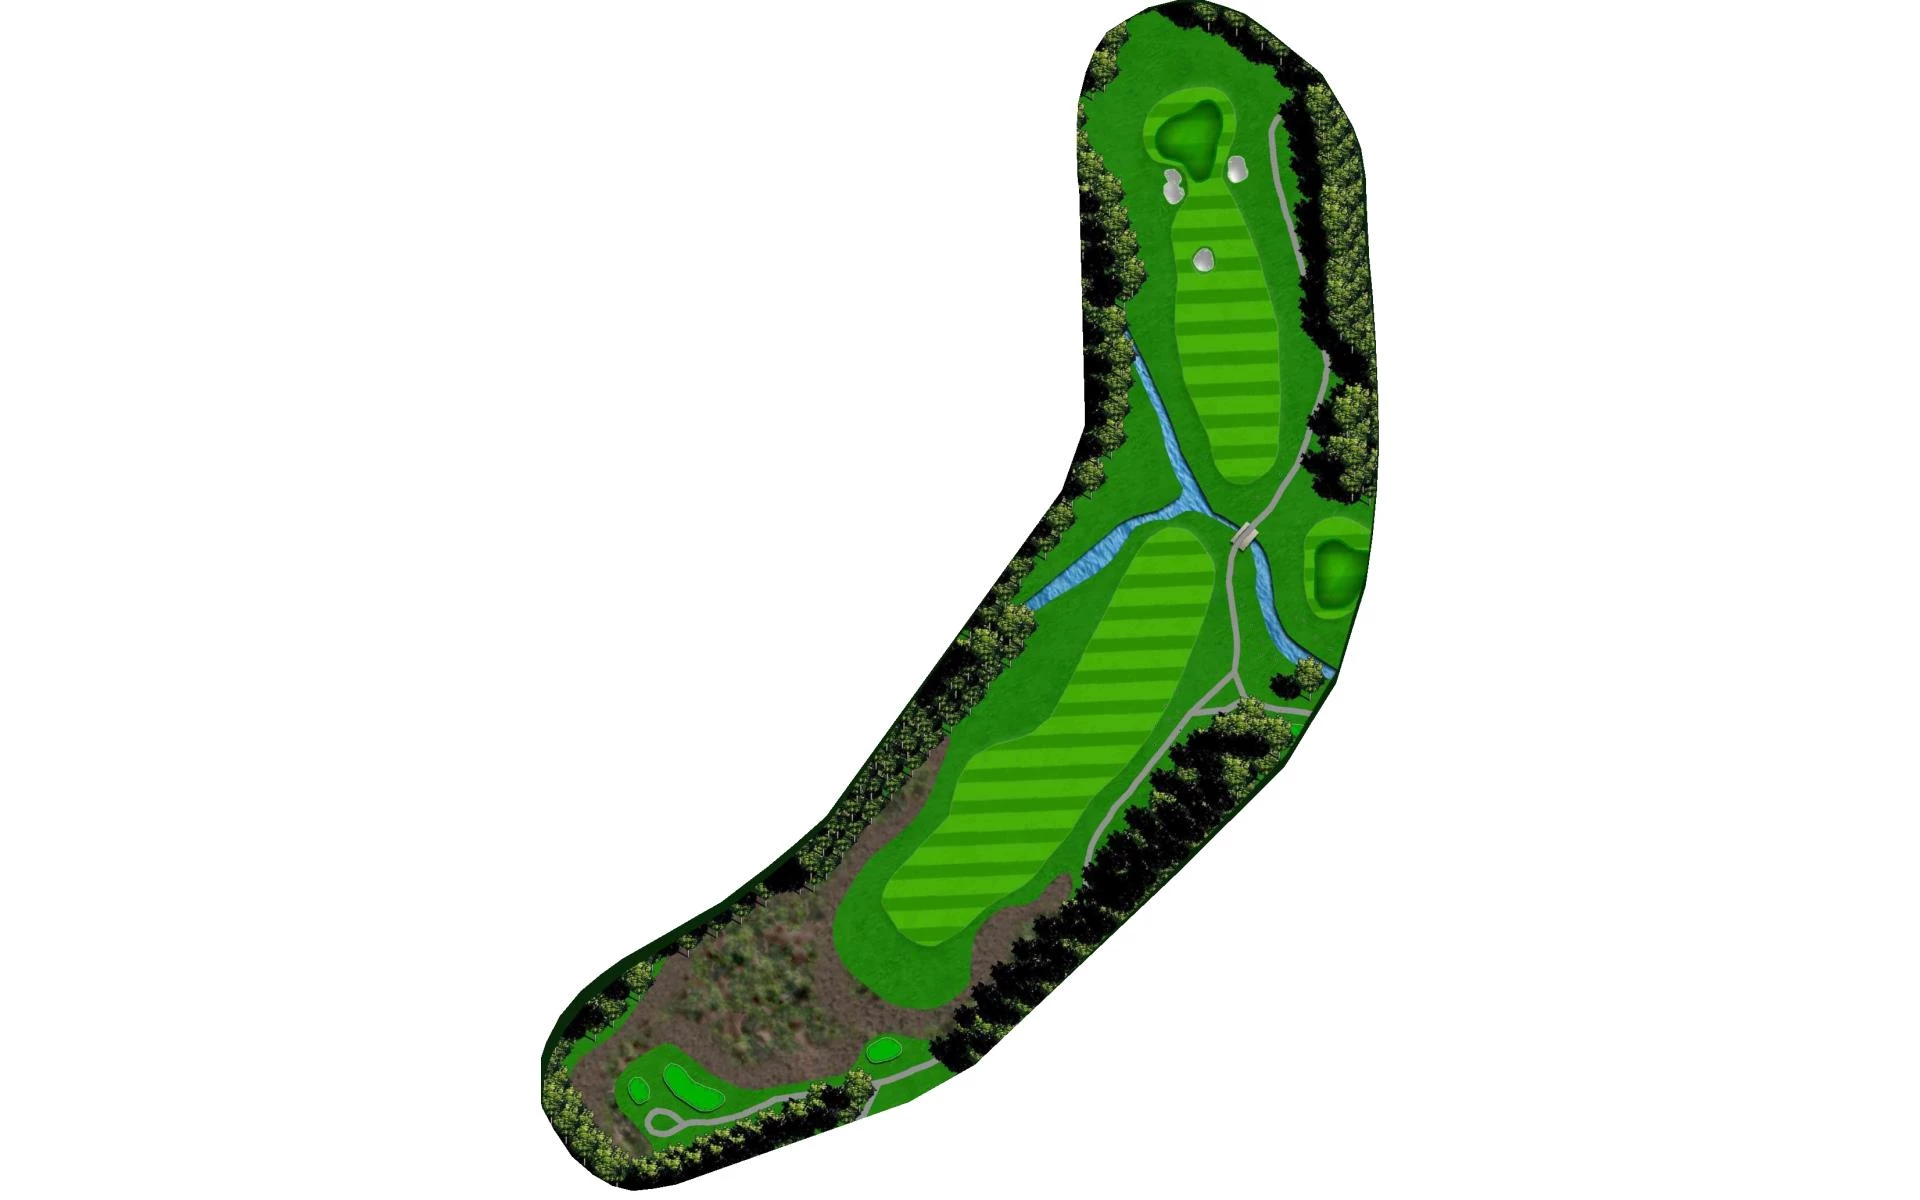
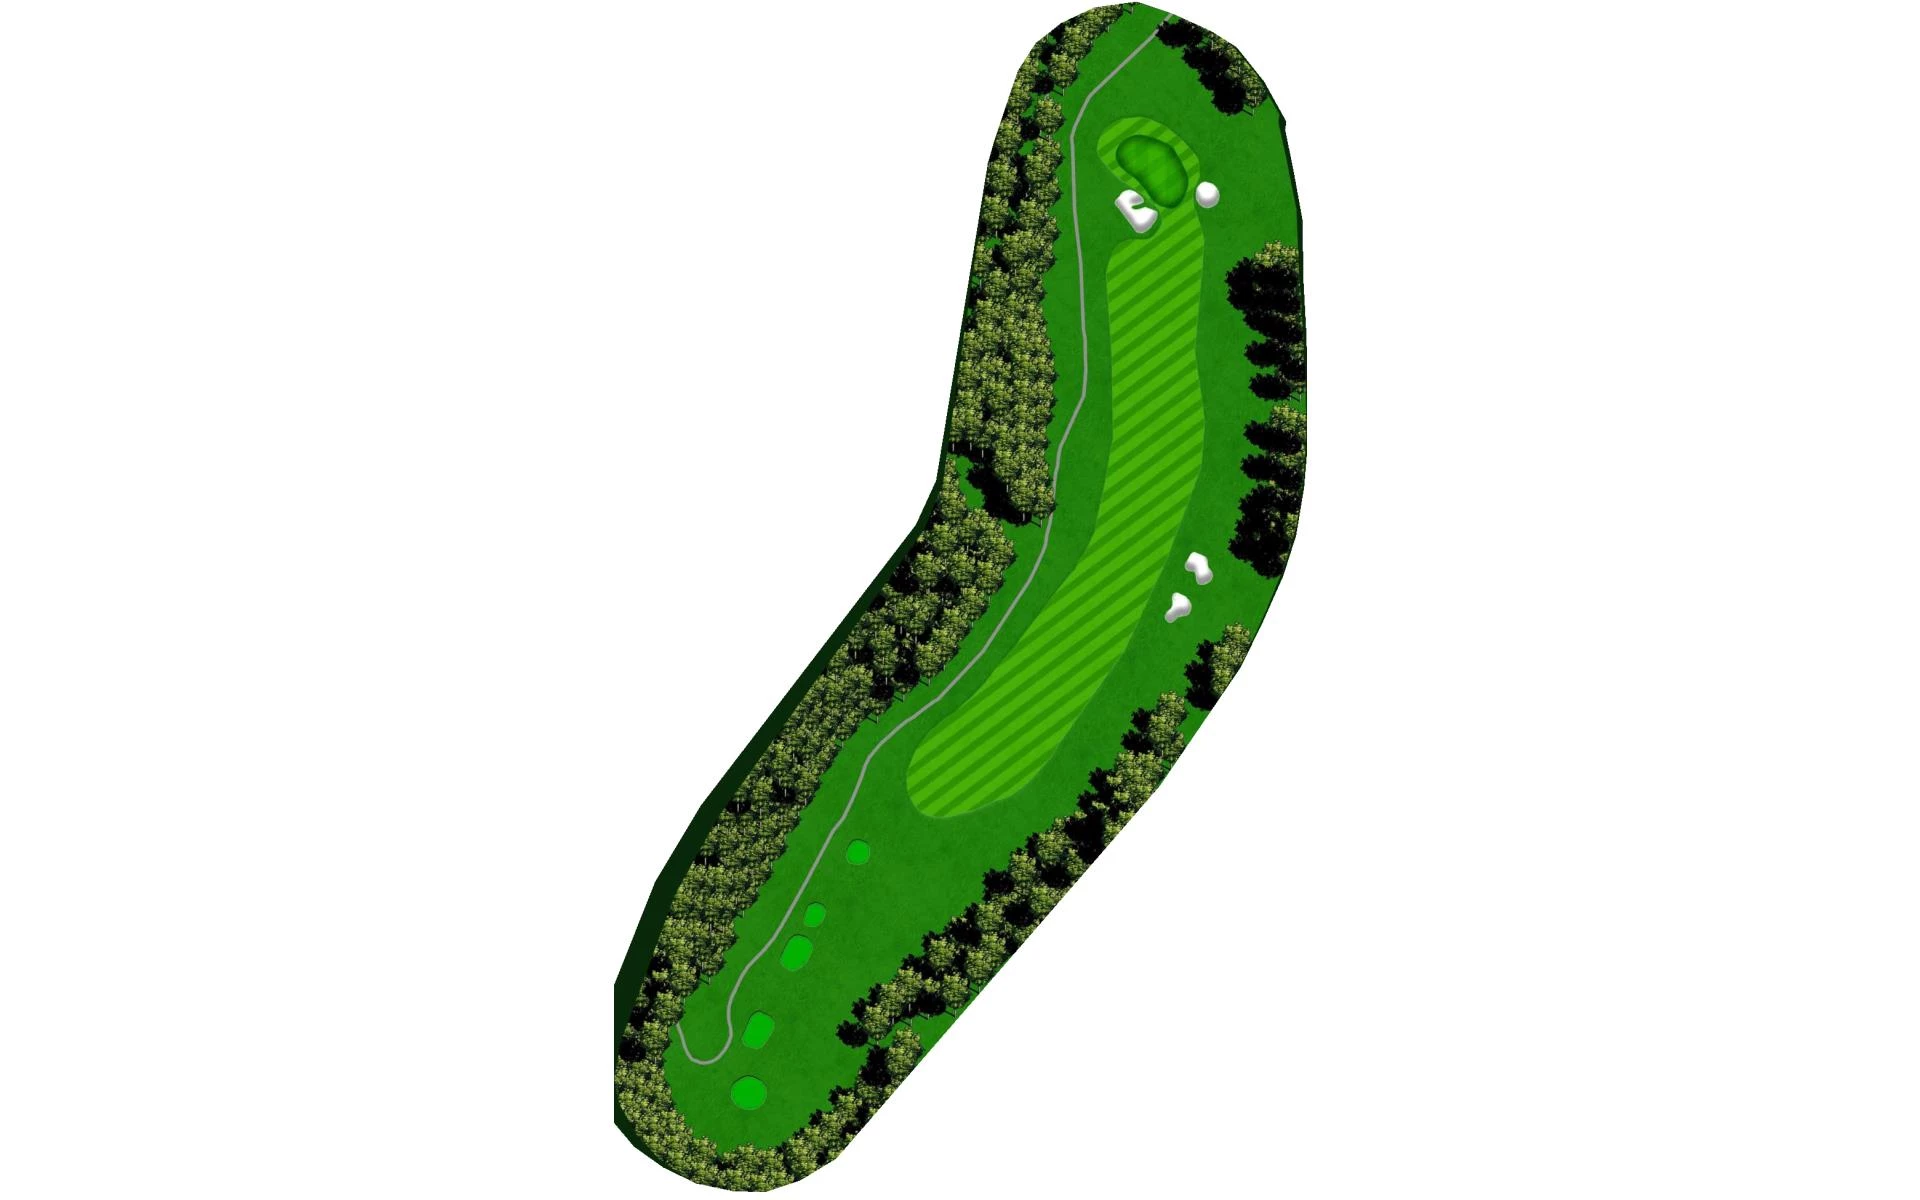
# 11 /
Par: 3
Yardage by Tee:
BLACK 222
PINK 191
Light Blue 191
WHITE 171
SILVER 139
GREEN 117
Pro Tips
Long and challenging Par 3 that is best played by favoring the right side of the green as the balls will tend to deflect to the left. Par is a great score on this hole.

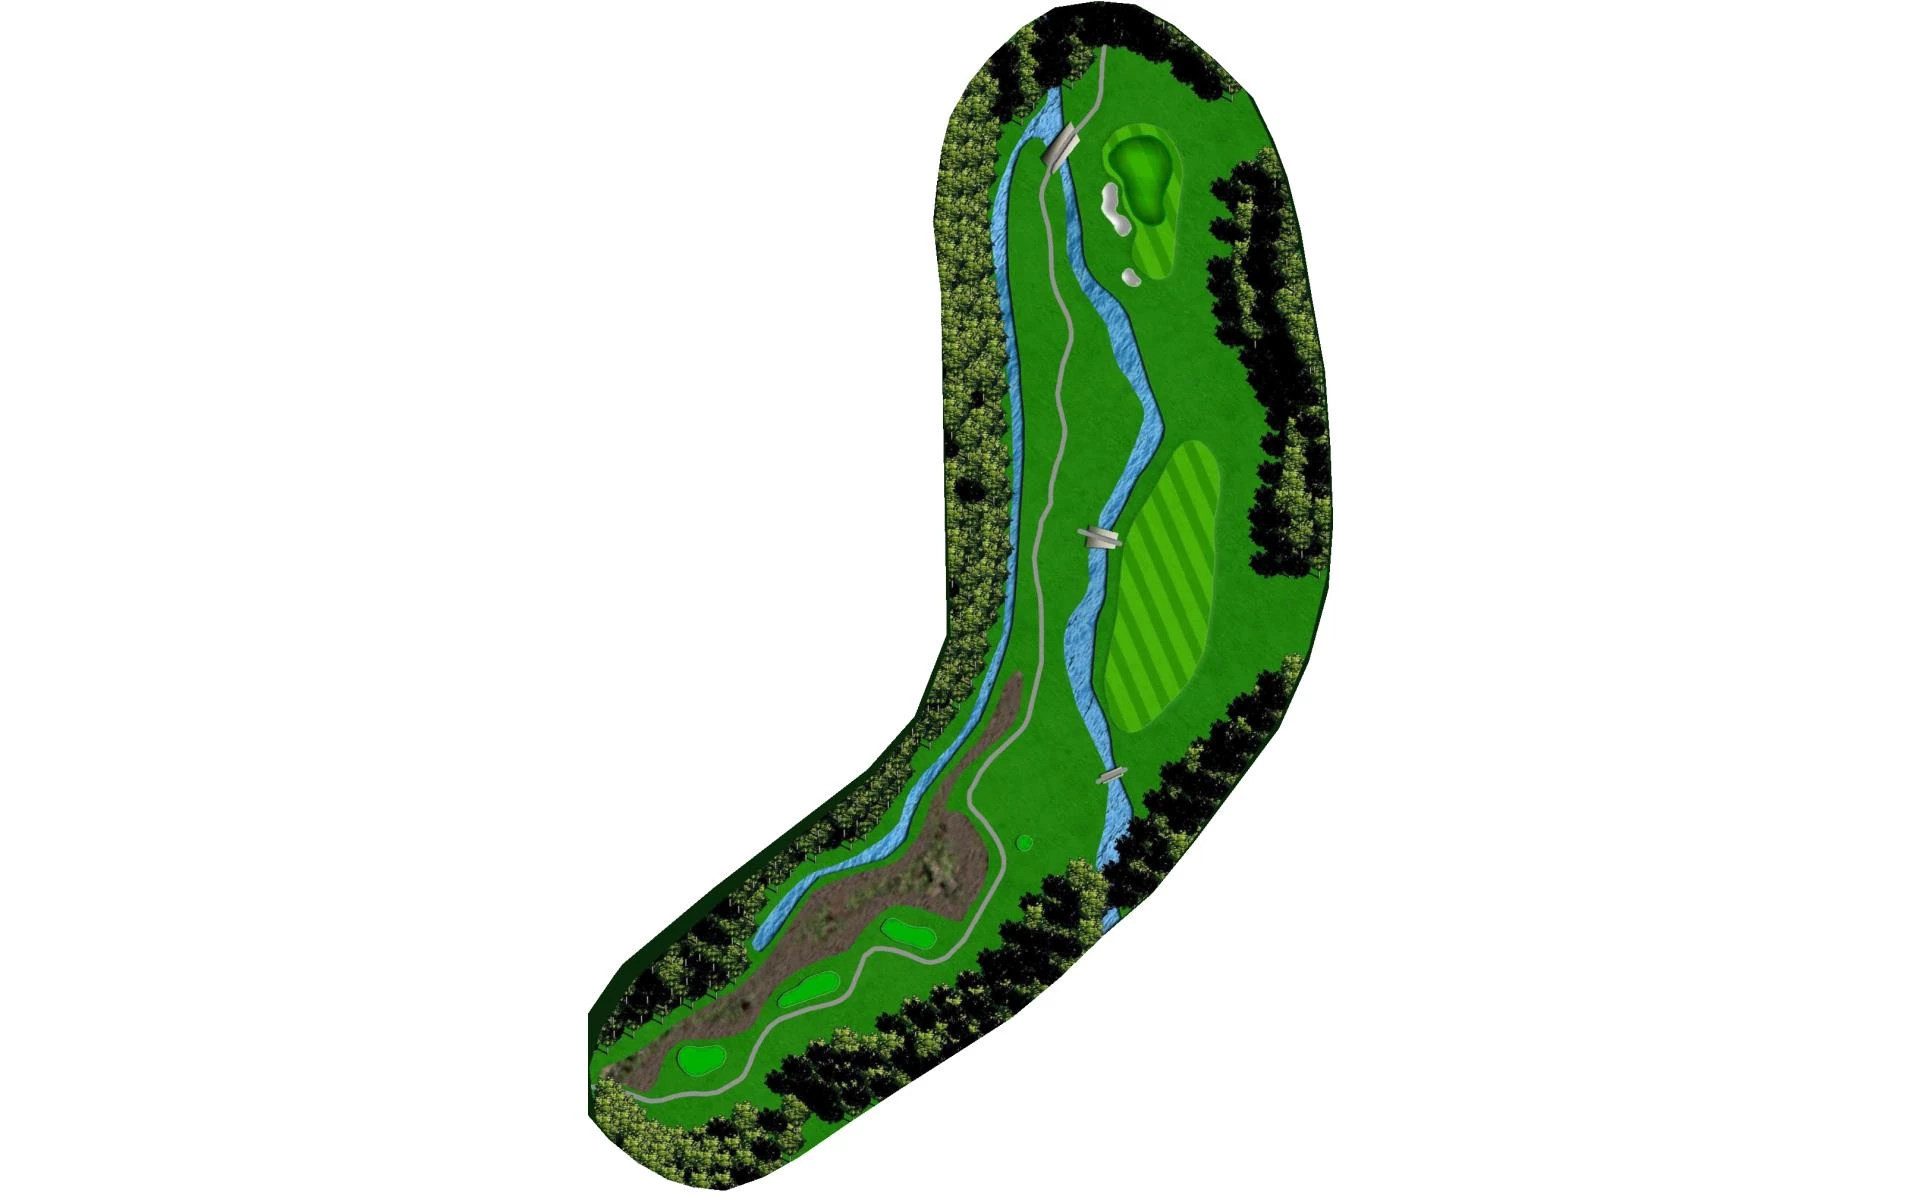
# 12 /
Par: 4
Yardage by Tee:
BLACK 411
PINK 411
Light Blue 393
WHITE 295
SILVER 295
GREEN 274
Pro Tips
One of our more scenic tee shots. Start this Par 4 by playing your tee shots to the right center of the fairway as there is a creek that runs the entire left side of the hole. Play to the green by favoring the right side of the green. If the pin is on the left side behind the bunker add 1 club to whatever you are thinking.
# 13 /
Par: 4
Yardage by Tee:
BLACK 403
PINK 403
Light Blue 365
WHITE 327
SILVER 283
GREEN 283
Pro Tips
Risk reward Par 4 that the prudent play is the right center of the fairway and left of the right side fairway bunker. Longest hitters can carry the right fairway bunker. Uphill approach shot to the green needs an additional club as there is a false front that will send poorly struck golf shots short of the green.
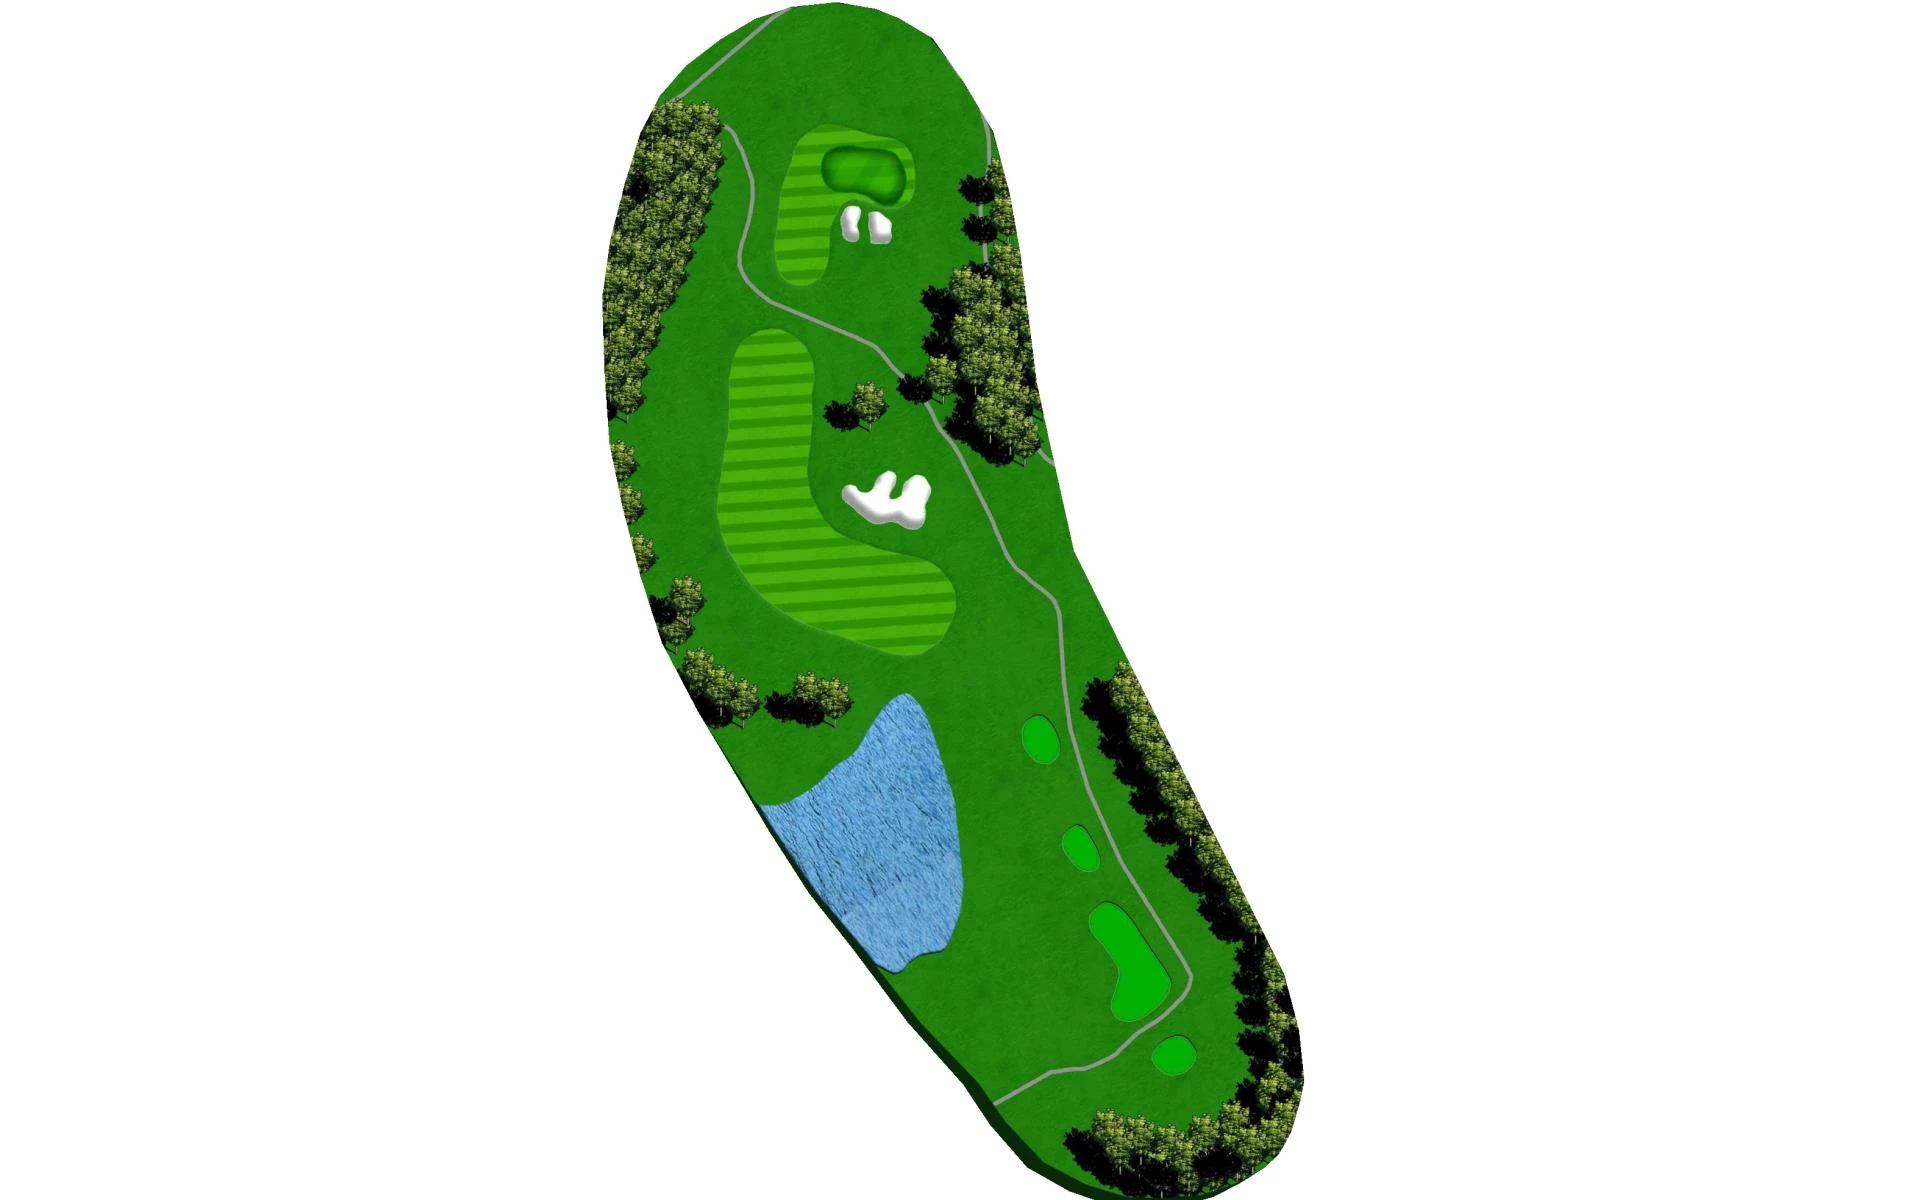
# 14 /
Par: 5
Yardage by Tee:
BLACK 569
PINK 569
Light Blue 539
WHITE 494
SILVER 494
GREEN 448
Pro Tips
Another great Par 5 that you need to favor the left center of the fairway on your tee shot. This is where the hole begins as you want to lay up to 100-150 yards, but there is a lake to the right side of the fairway so be careful with your layup as the farther up the hole you play the more the penalty are comes in play. Green slopes hard left to right so once again distance control is key to you having a chance at birdie here. The longest players do have a shot at reaching this green, but requires two well struck shots
# 15 /
Par: 4
Yardage by Tee:
BLACK 418
PINK 418
Light Blue 395
WHITE 361
SILVER 316
GREEN 292
Pro Tips
This challenging Par 4 requires a well struck tee shot over the ravine to a level fairway. Favoring the right center provides best approach to the green. Favor the right side of the green as there is a bunker left, and thick, rough left as well.
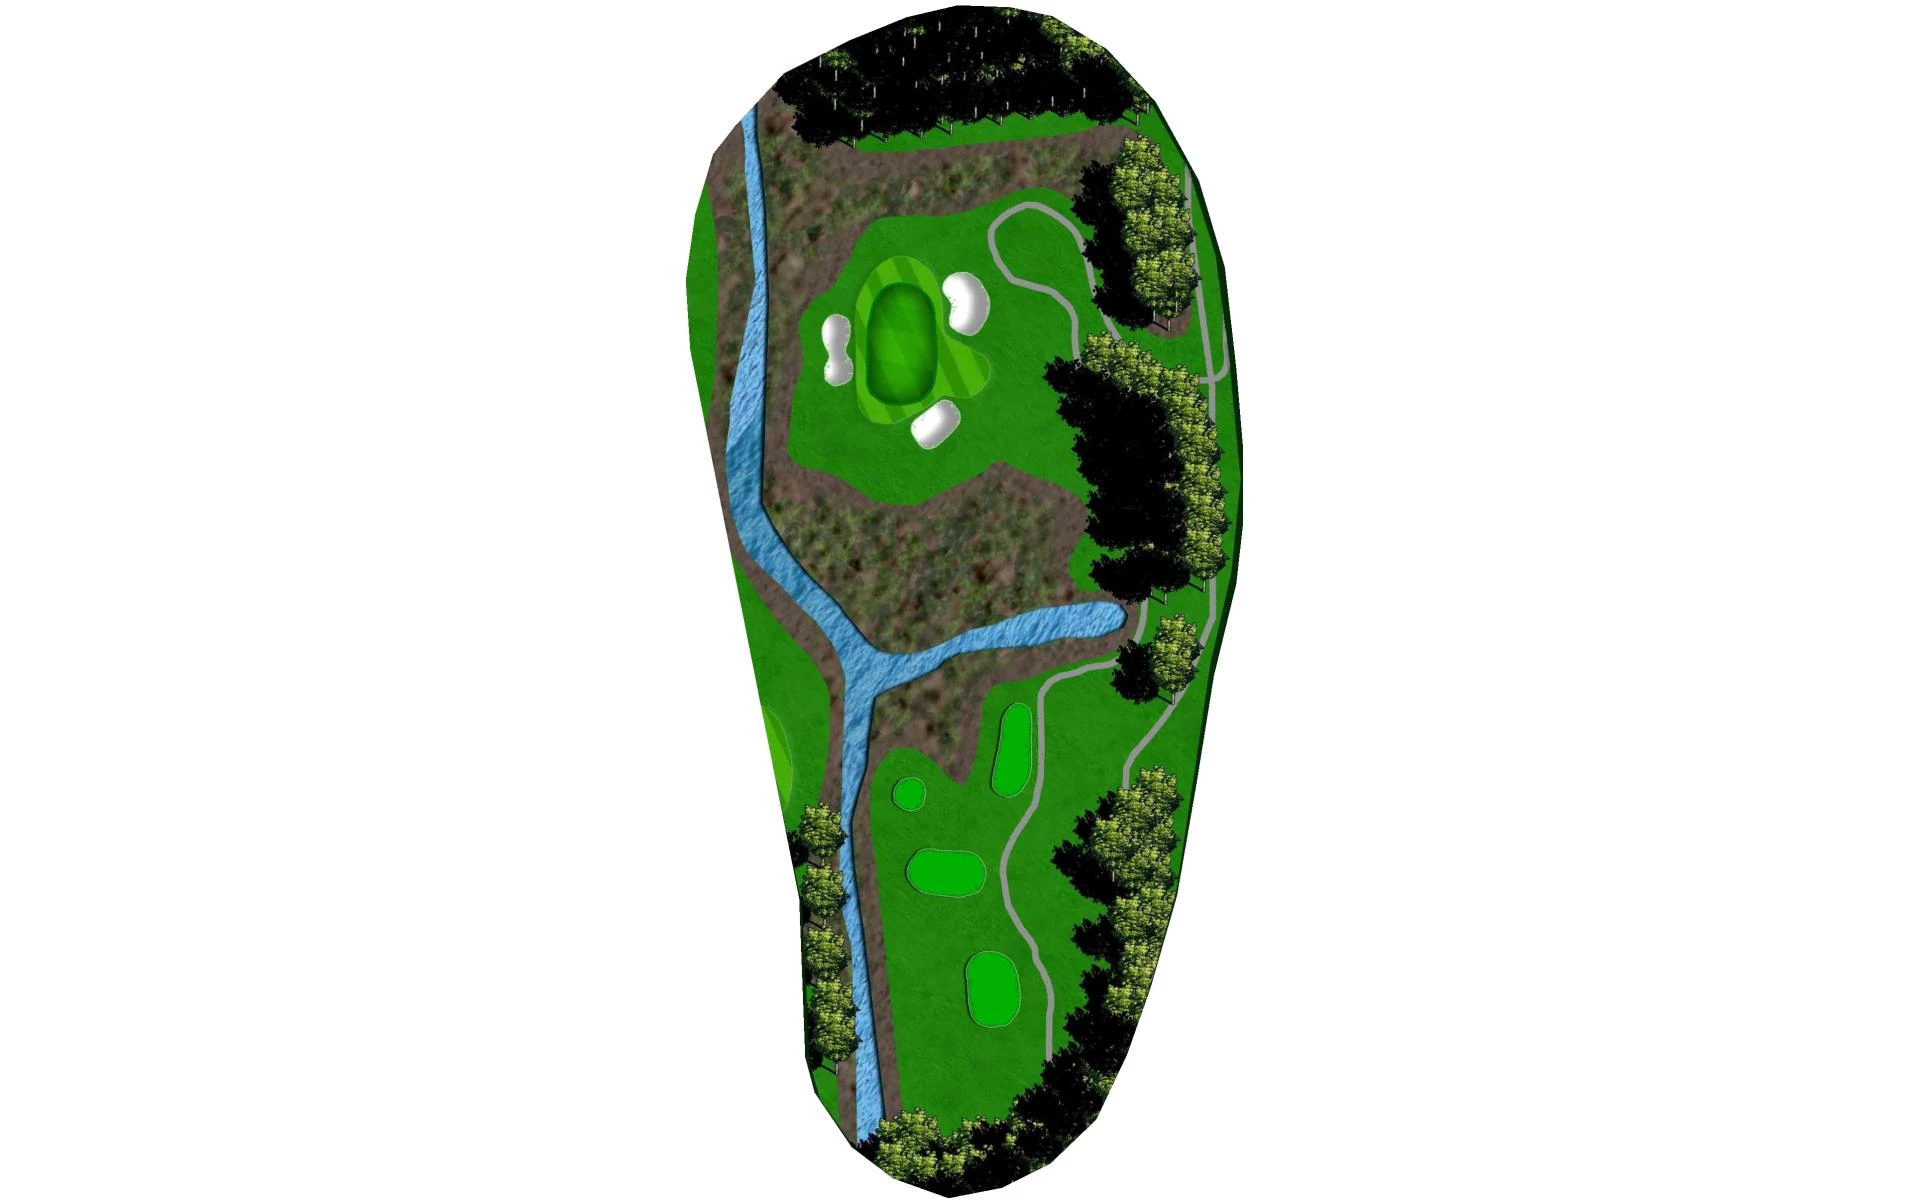
# 16 /
Par: 4
Yardage by Tee:
BLACK 457
PINK 407
Light Blue 407
WHITE 357
SILVER 293
GREEN 293
Pro Tips
Dogleg left Par 4 that flows with a creek that runs up the middle of the hole. Play your drive with a driver or fairway wood out to the 150 stone. Favor the right side of the green as your approaches will bounce left. This is a good 3 club green so pay attention to the where the pin is for your best chance to par the hole.
# 17 /
Par: 3
Yardage by Tee:
BLACK 178
PINK 145
Light Blue 145
WHITE 123
SILVER 123
GREEN 113
Pro Tips
Beautiful Par 3 that you play your mid iron to the green. Distance control is important as an approach an uphill putt will leave you a great chance for a birdie
# 18 /
Par: 5
Yardage by Tee:
BLACK 505
PINK 505
Light Blue 491
WHITE 450
SILVER 421
GREEN 311
Pro Tips
Great risk reward Par 5 as a tee shot that favors the left side of the fairway will leave most golfers will have the temptation to go for the green in two. Add a club to what you are planning to hit if you are going for the green as long of the pin and green will provide a good chance for an up and down for a birdie. If you are concerned about going for the green lay up to the right to 100 yards and work to wedge it close.