Course
Designer: Jack Nicklaus
The Country Club of the South is home to a Jack Nicklaus-designed golf course. Lush pines and hardwoods, rolling hills, lakes, streams, and …
The Country Club of the South is home to a Jack Nicklaus-designed golf course. Lush pines and hardwoods, rolling hills, lakes, streams, and granite outcroppings make this course one of unsurpassed natural beauty. This course presents one of the most challenging layouts in the area. Opened in 1987, the course was voted one of the “Top 20 Best Courses in Georgia” by Golf Digest. It was also home to the Champions Tour Nationwide Championship from 1991 to 1994.
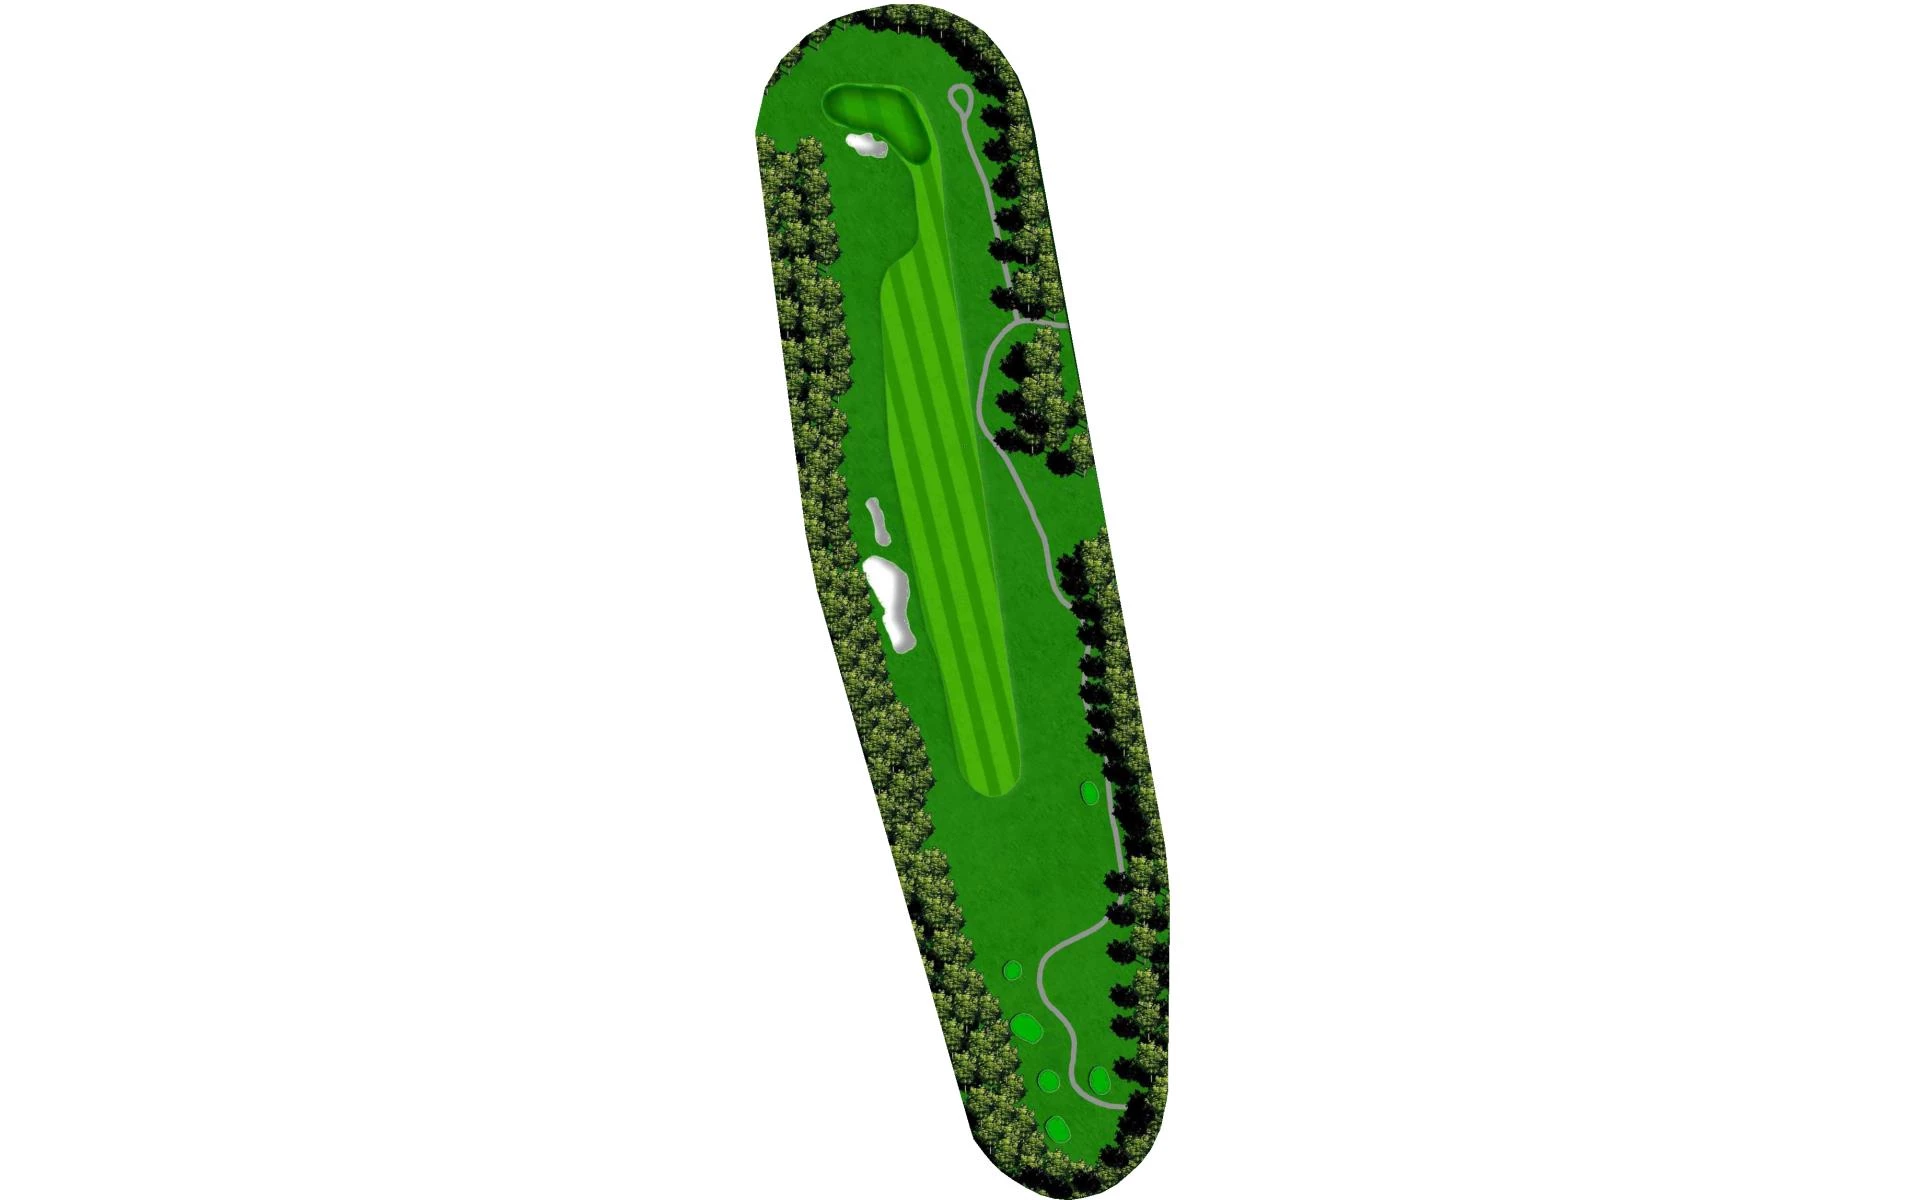
# 1 /
Par: 4
Yardage by Tee:
BLACK 428
BLUE 378
GOLD 385
WHITE 324
Pro Tips
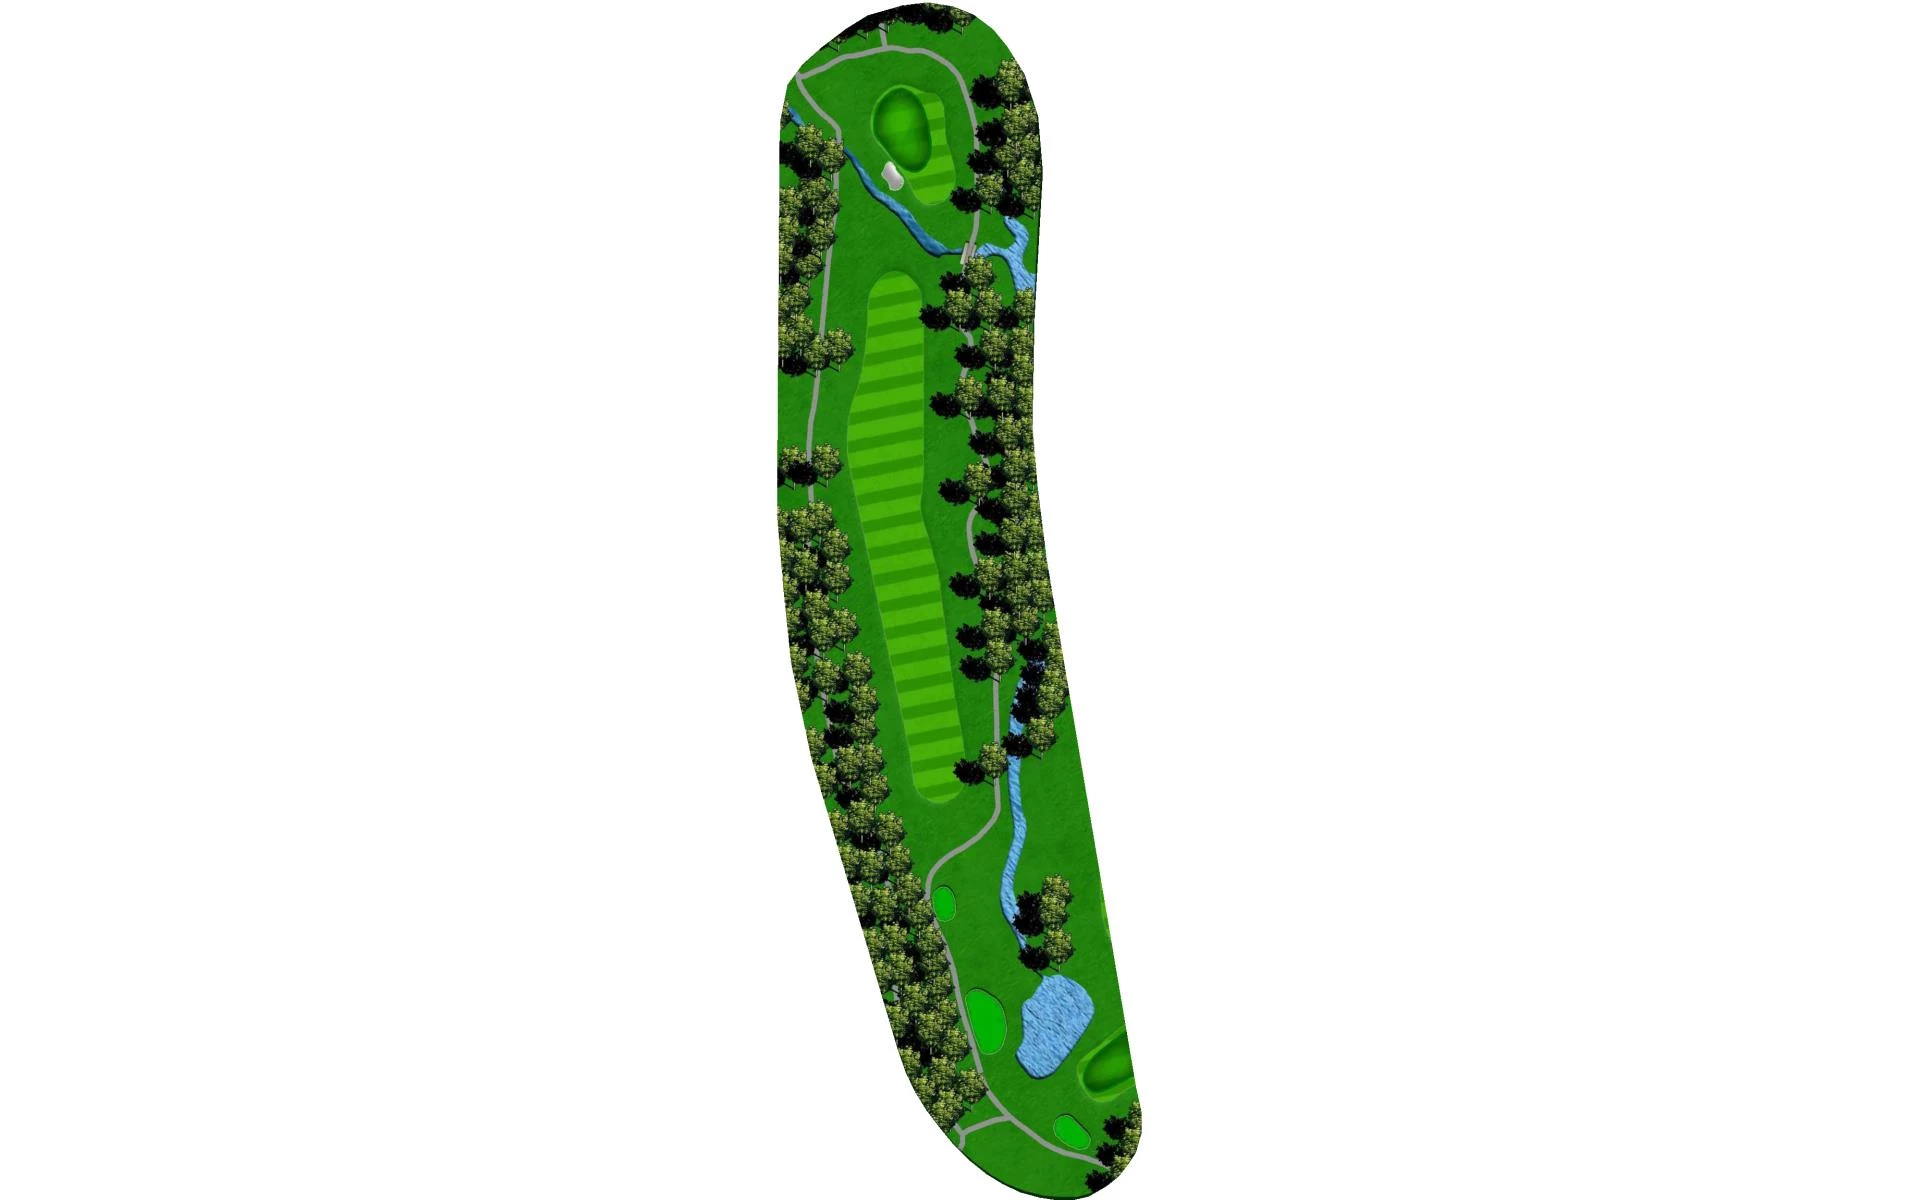
The course opens with a relatively straight par 4 with a fairway that slopes left-to-right. The approach shot will have to navigate a creek that runs across the front of the green and a bunker short left. This green slopes back-to-front.

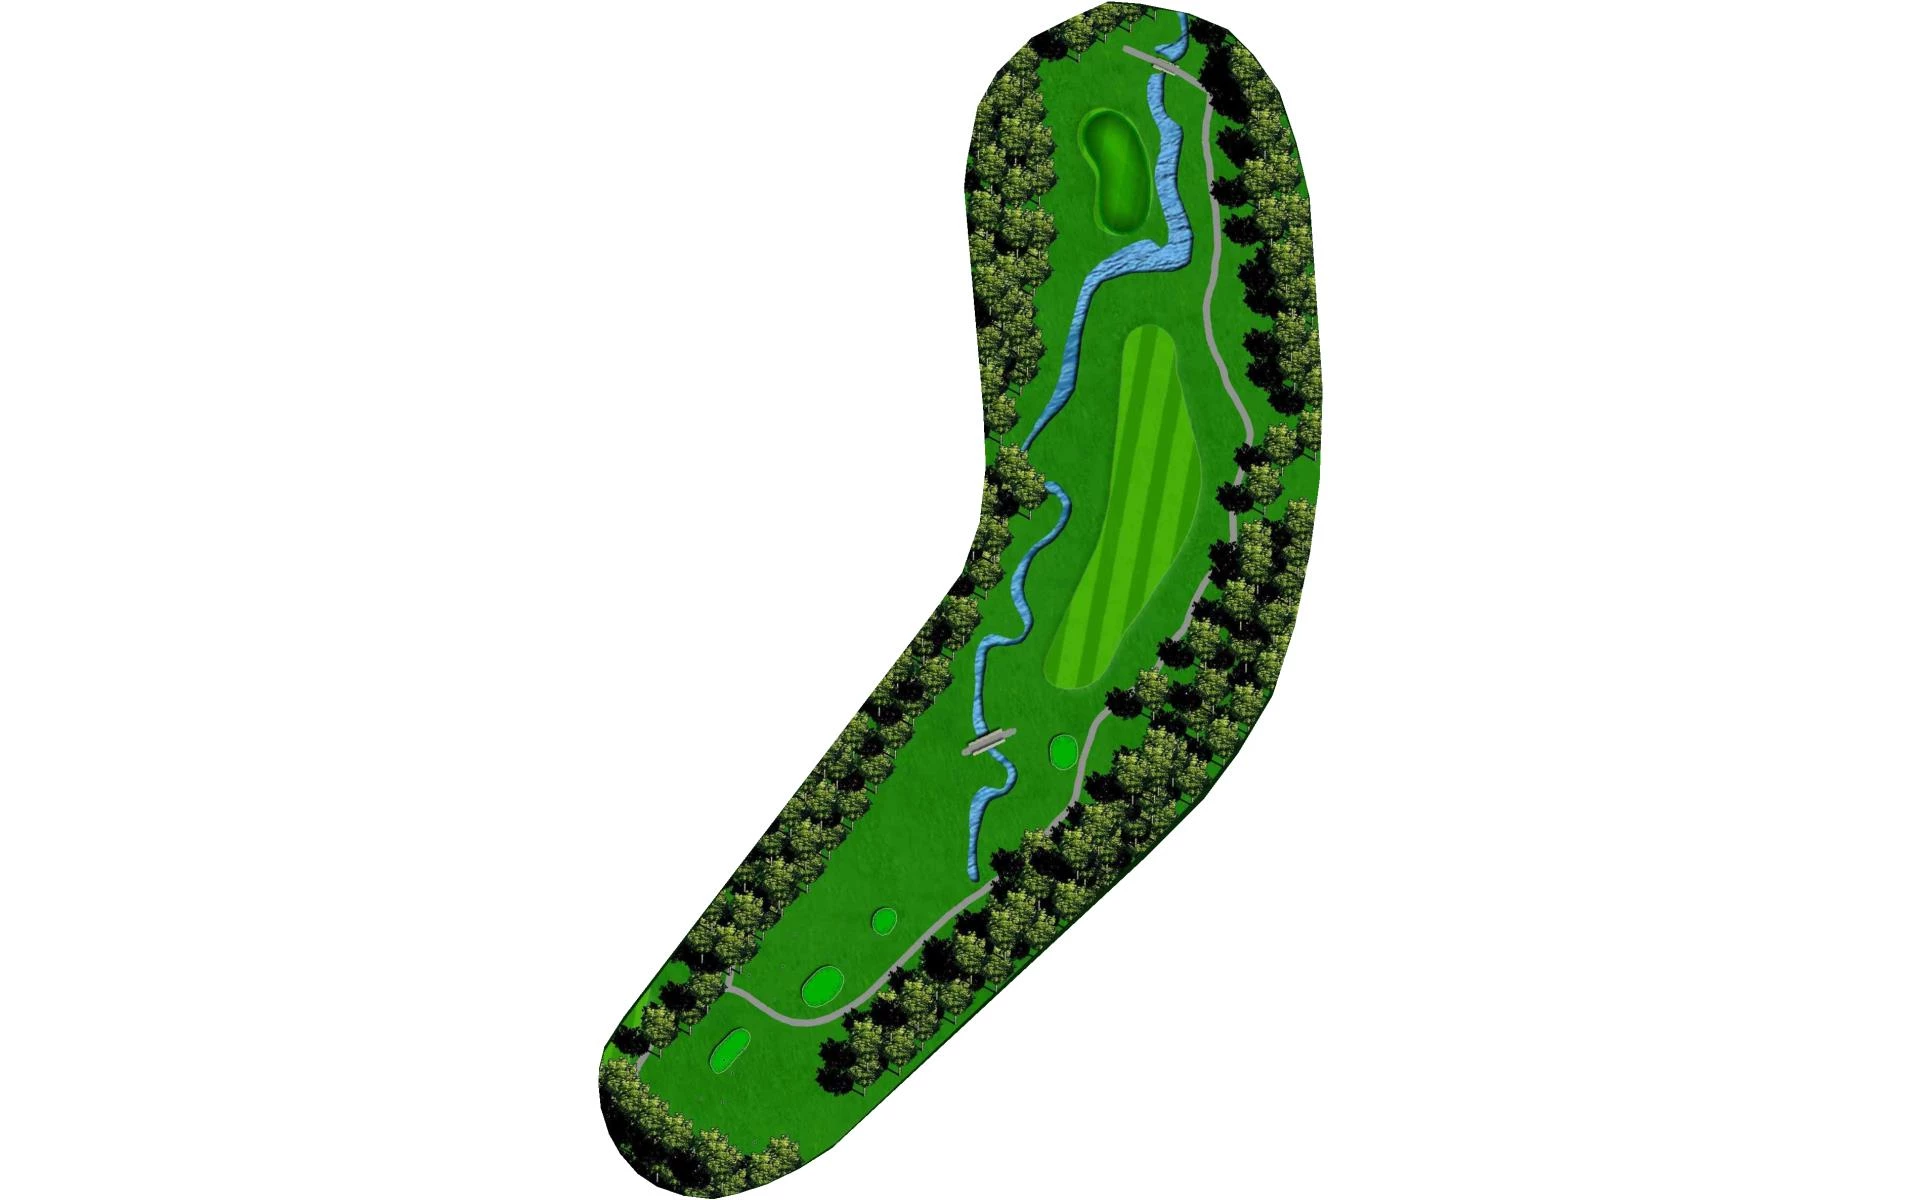
# 2 /
Par: 4
Yardage by Tee:
BLACK 370
BLUE 330
GOLD 336
WHITE 312
Pro Tips
This short par 4 requires a drive to be placed down the left-center of the fairway that slopes left-to-right. A well placed drive will avoid the creek that runs down the right side of the hole, while setting up a good angle into the green, which is guarded by a tree short right. The green is also protected by a creek that wraps around the perimeter and a deep bunker on the right.
# 3 /
Par: 5
Yardage by Tee:
BLACK 570
BLUE 529
GOLD 545
WHITE 503
Pro Tips
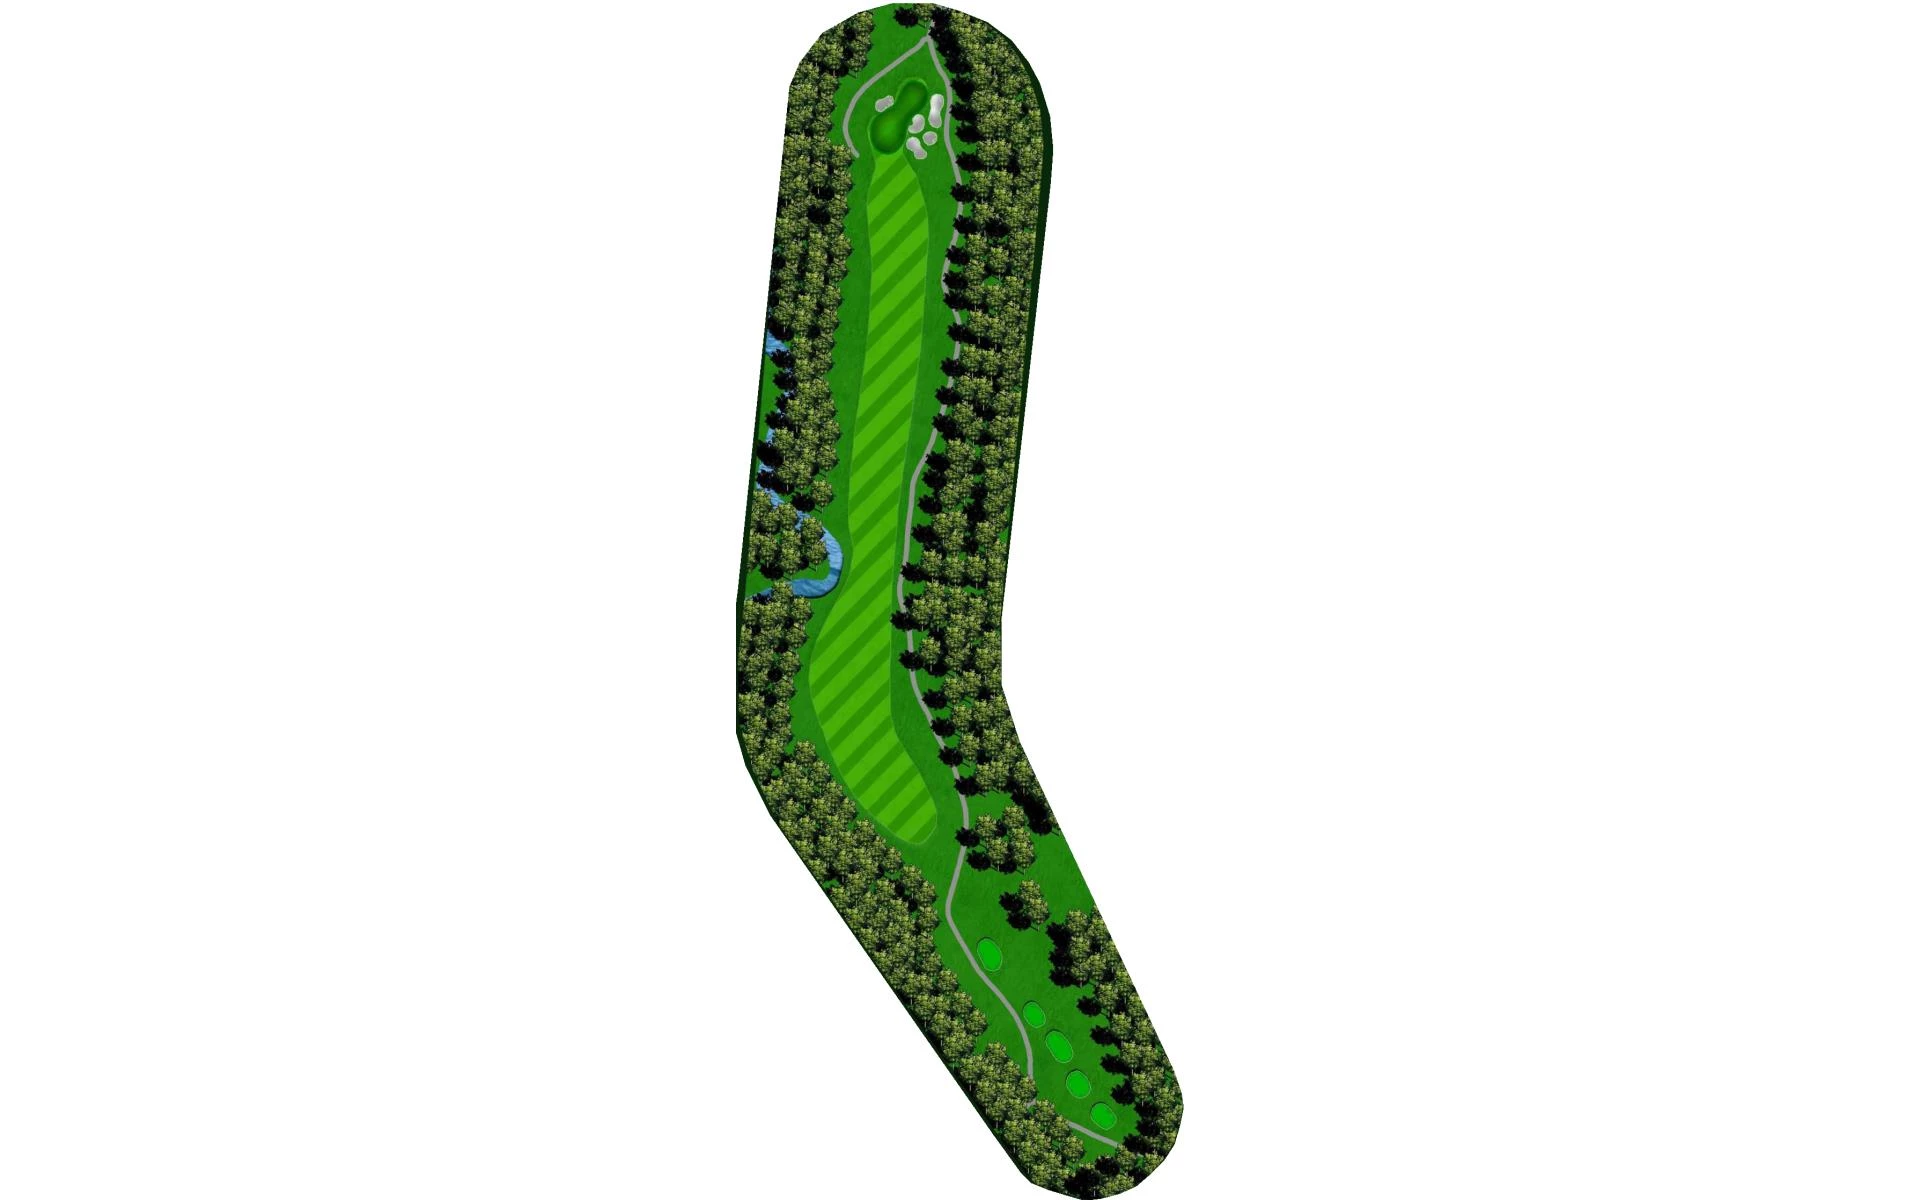
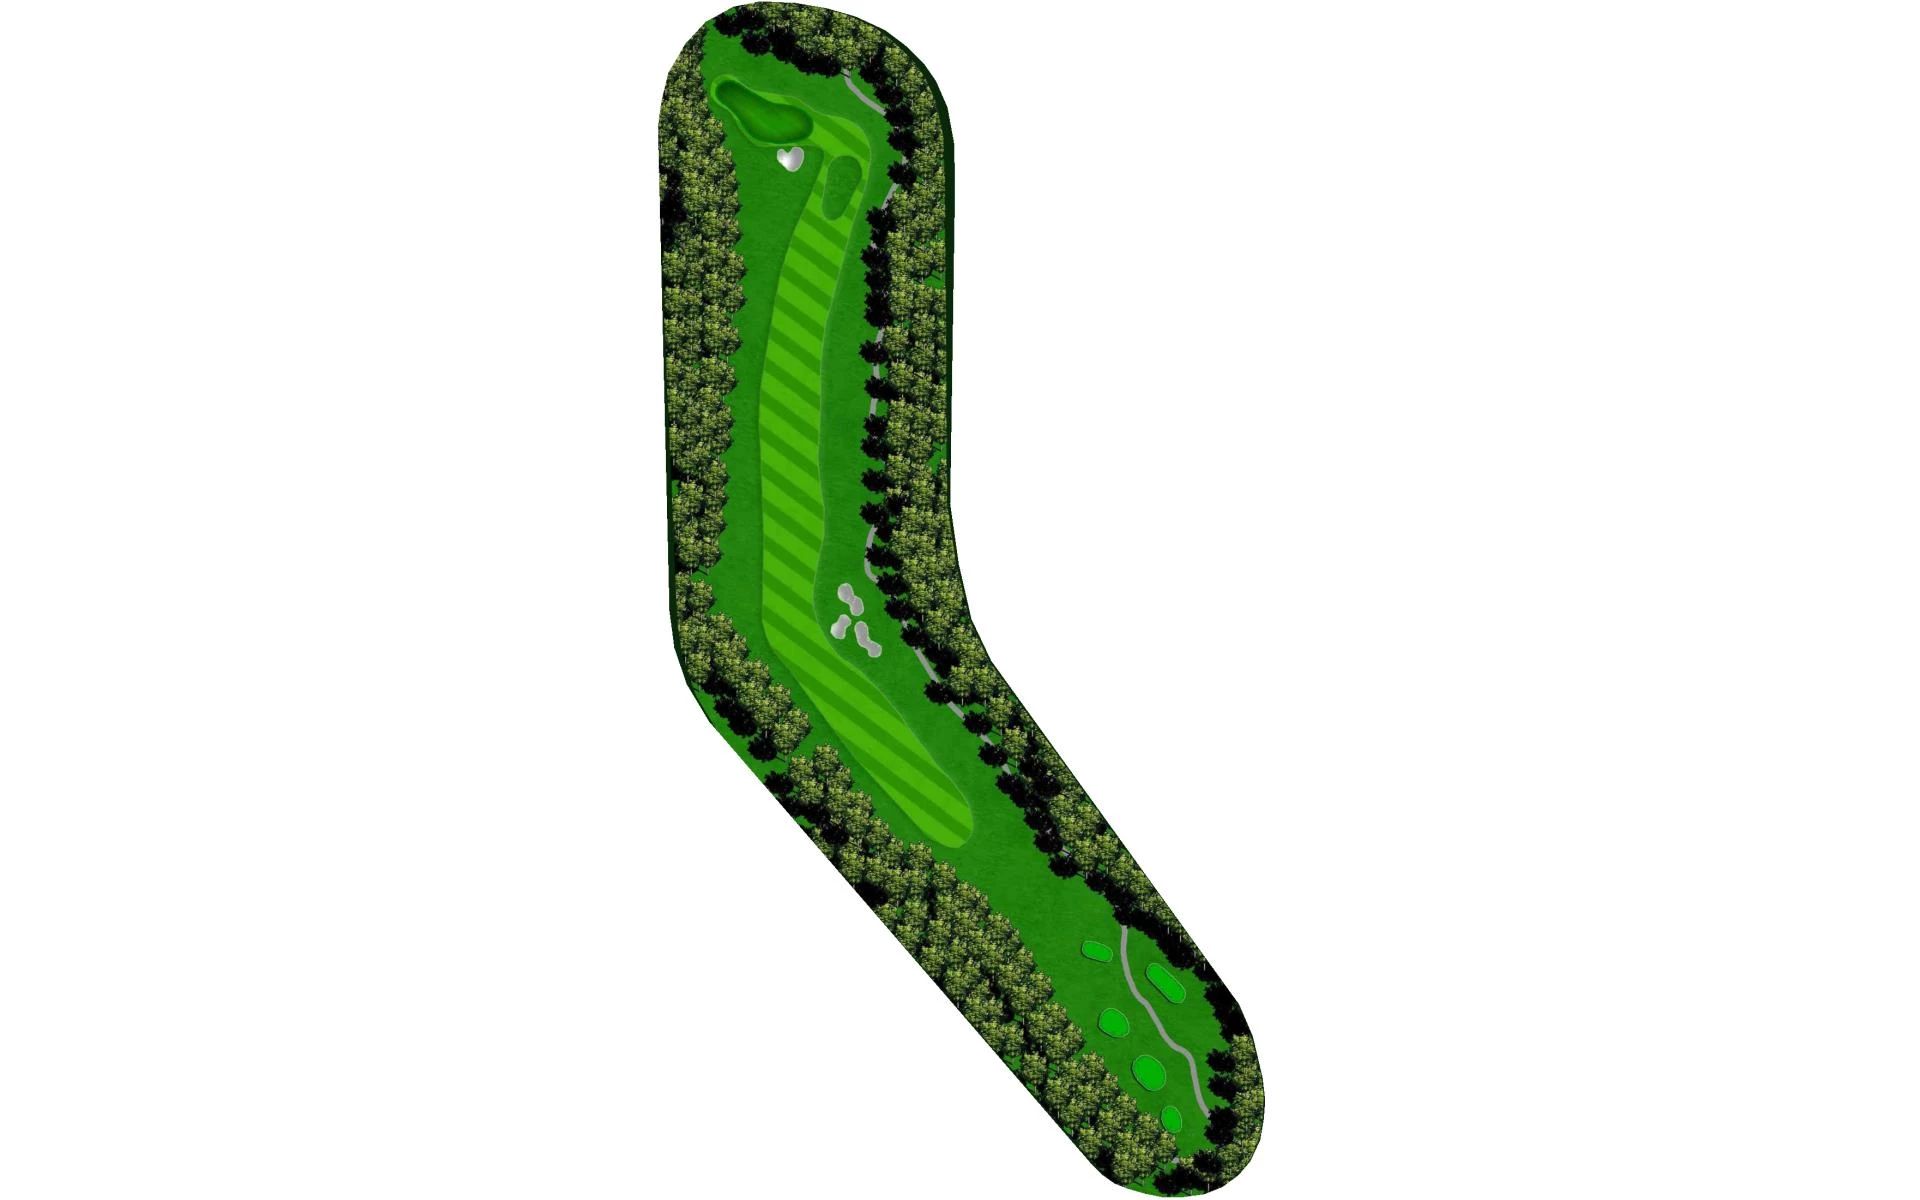
The third hole is a dogleg par 5 with a fairway that slopes right-to-left off the tee. The approach will require players to avoid an extensive series of deep bunkers.
# 4 /
Par: 4
Yardage by Tee:
BLACK 404
BLUE 324
GOLD 378
WHITE 316
Pro Tips
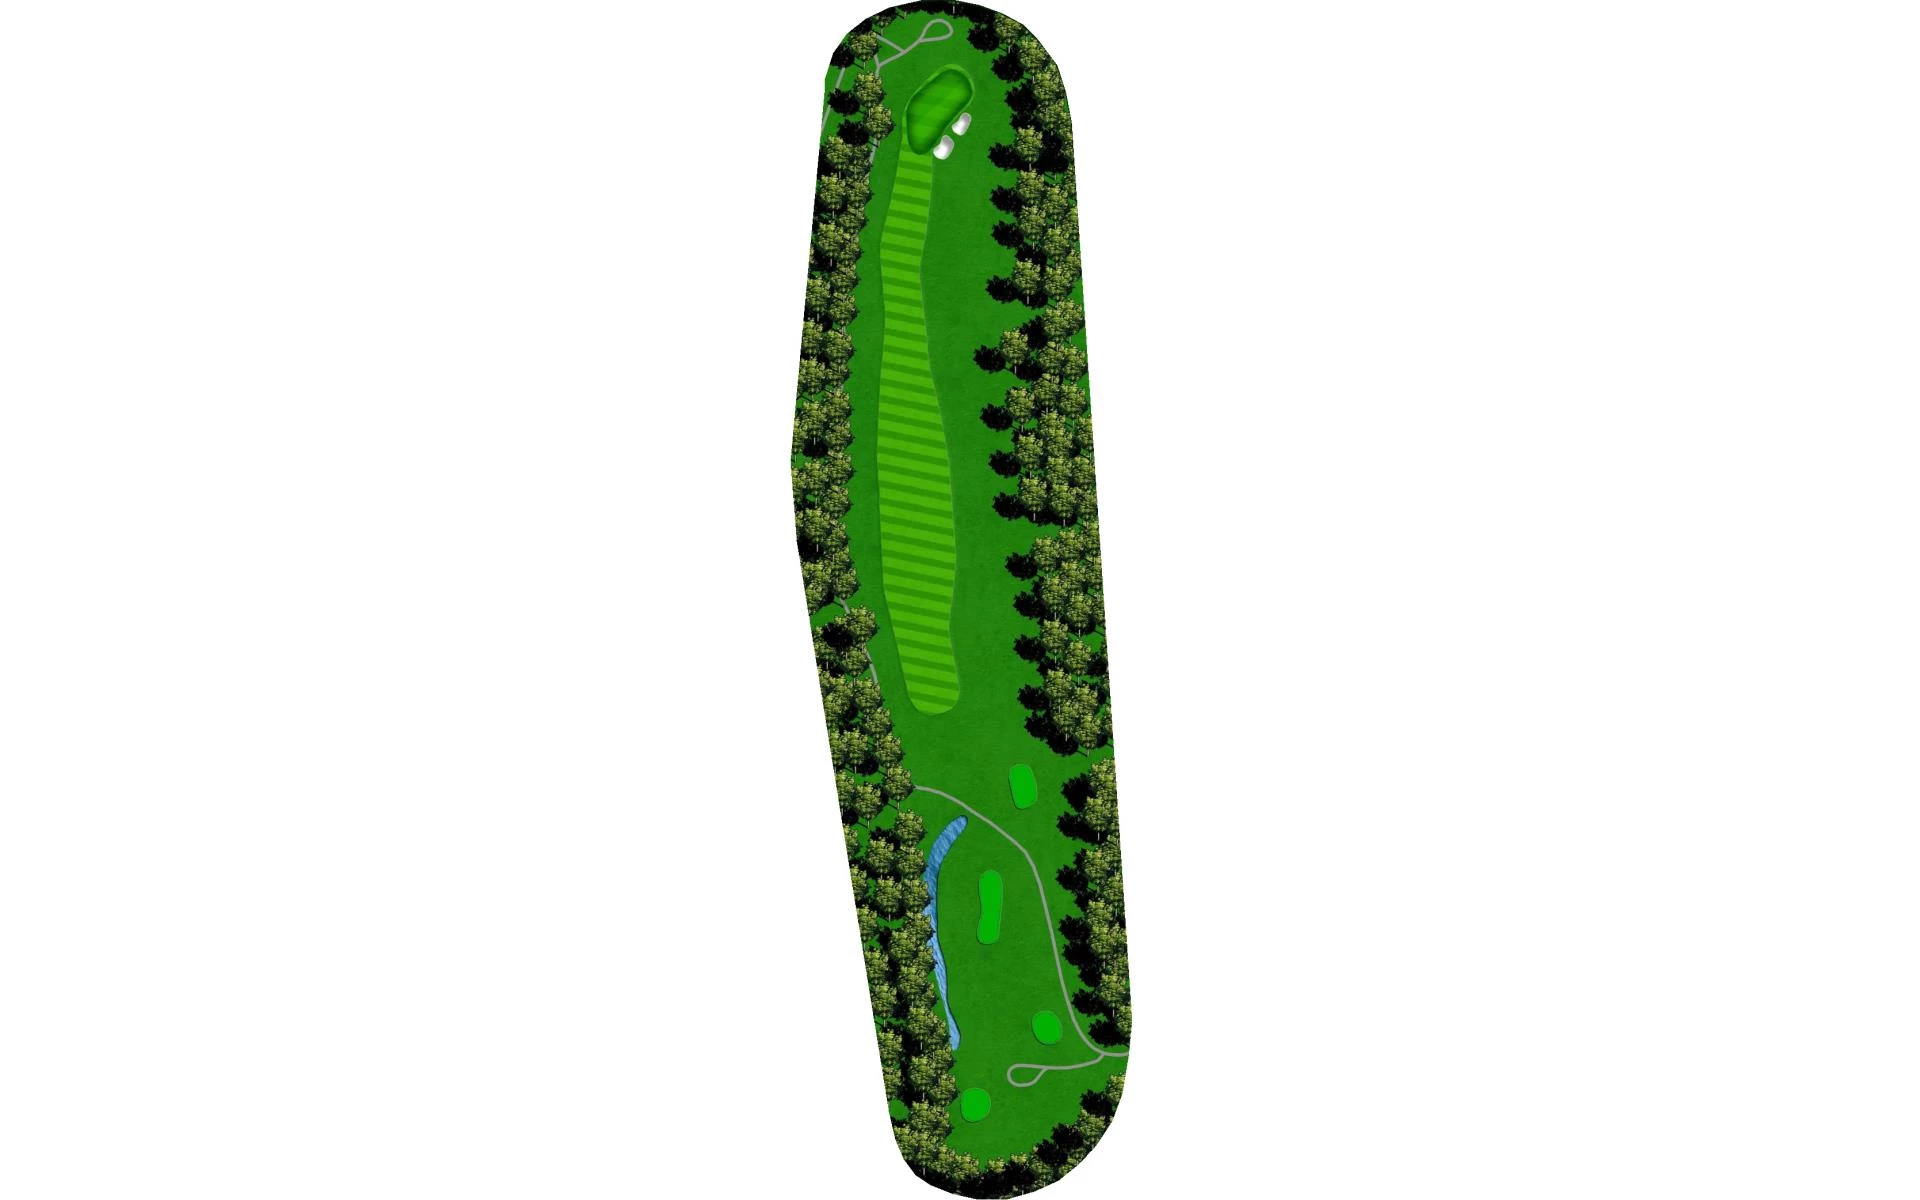
The fourth hole places a premium on hitting the fairway off the tee. This green is protected by two deep bunkers on the right side.
# 5 /
Par: 3
Yardage by Tee:
BLACK 177
BLUE 139
GOLD 171
WHITE 113
Pro Tips
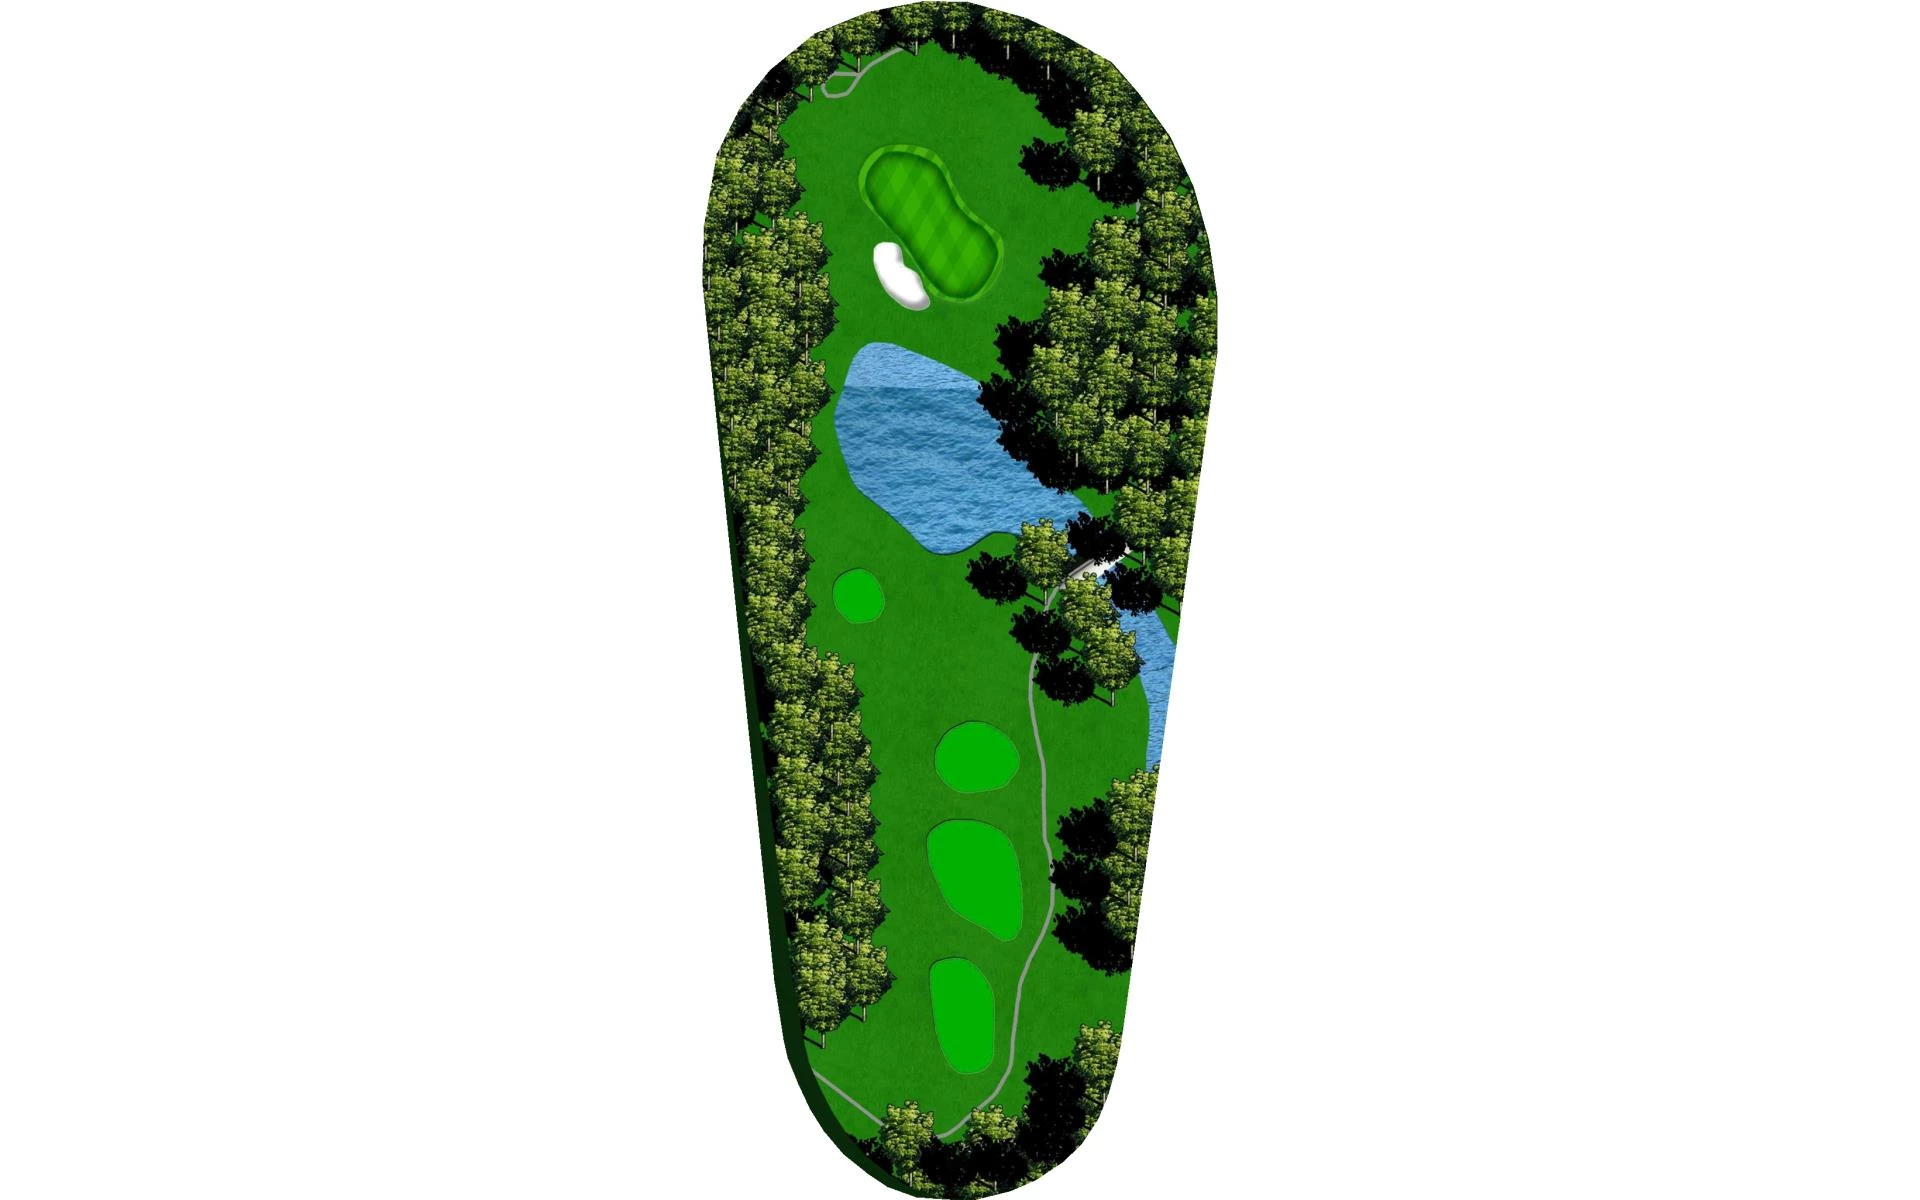
The green on this par 3 features a false front that can bring a short shot back into the pond. There’s also a deep bunker short left of the green that slopes left-to-right and back-to-front.
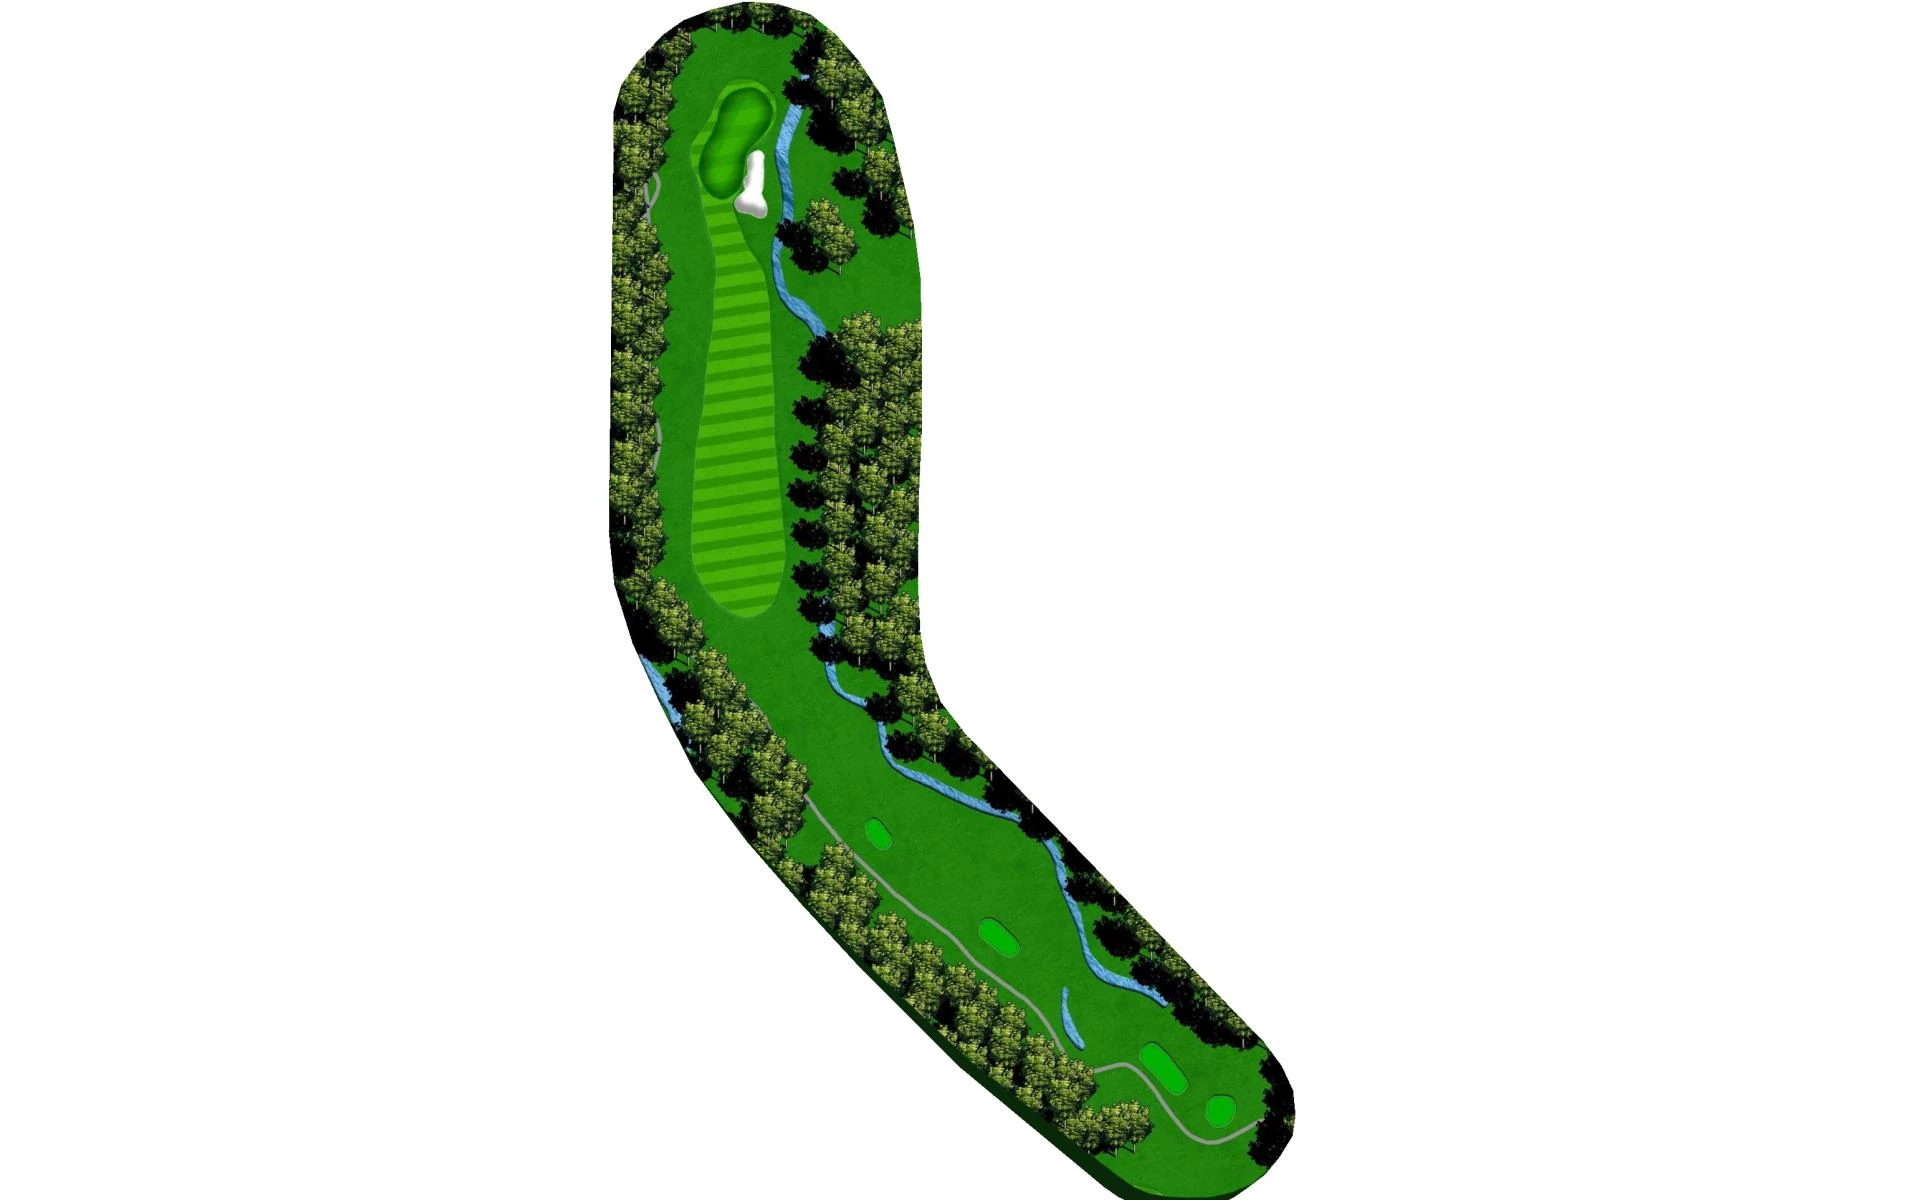
# 6 /
Par: 5
Yardage by Tee:
BLACK 503
BLUE 475
GOLD 480
WHITE 453
Pro Tips
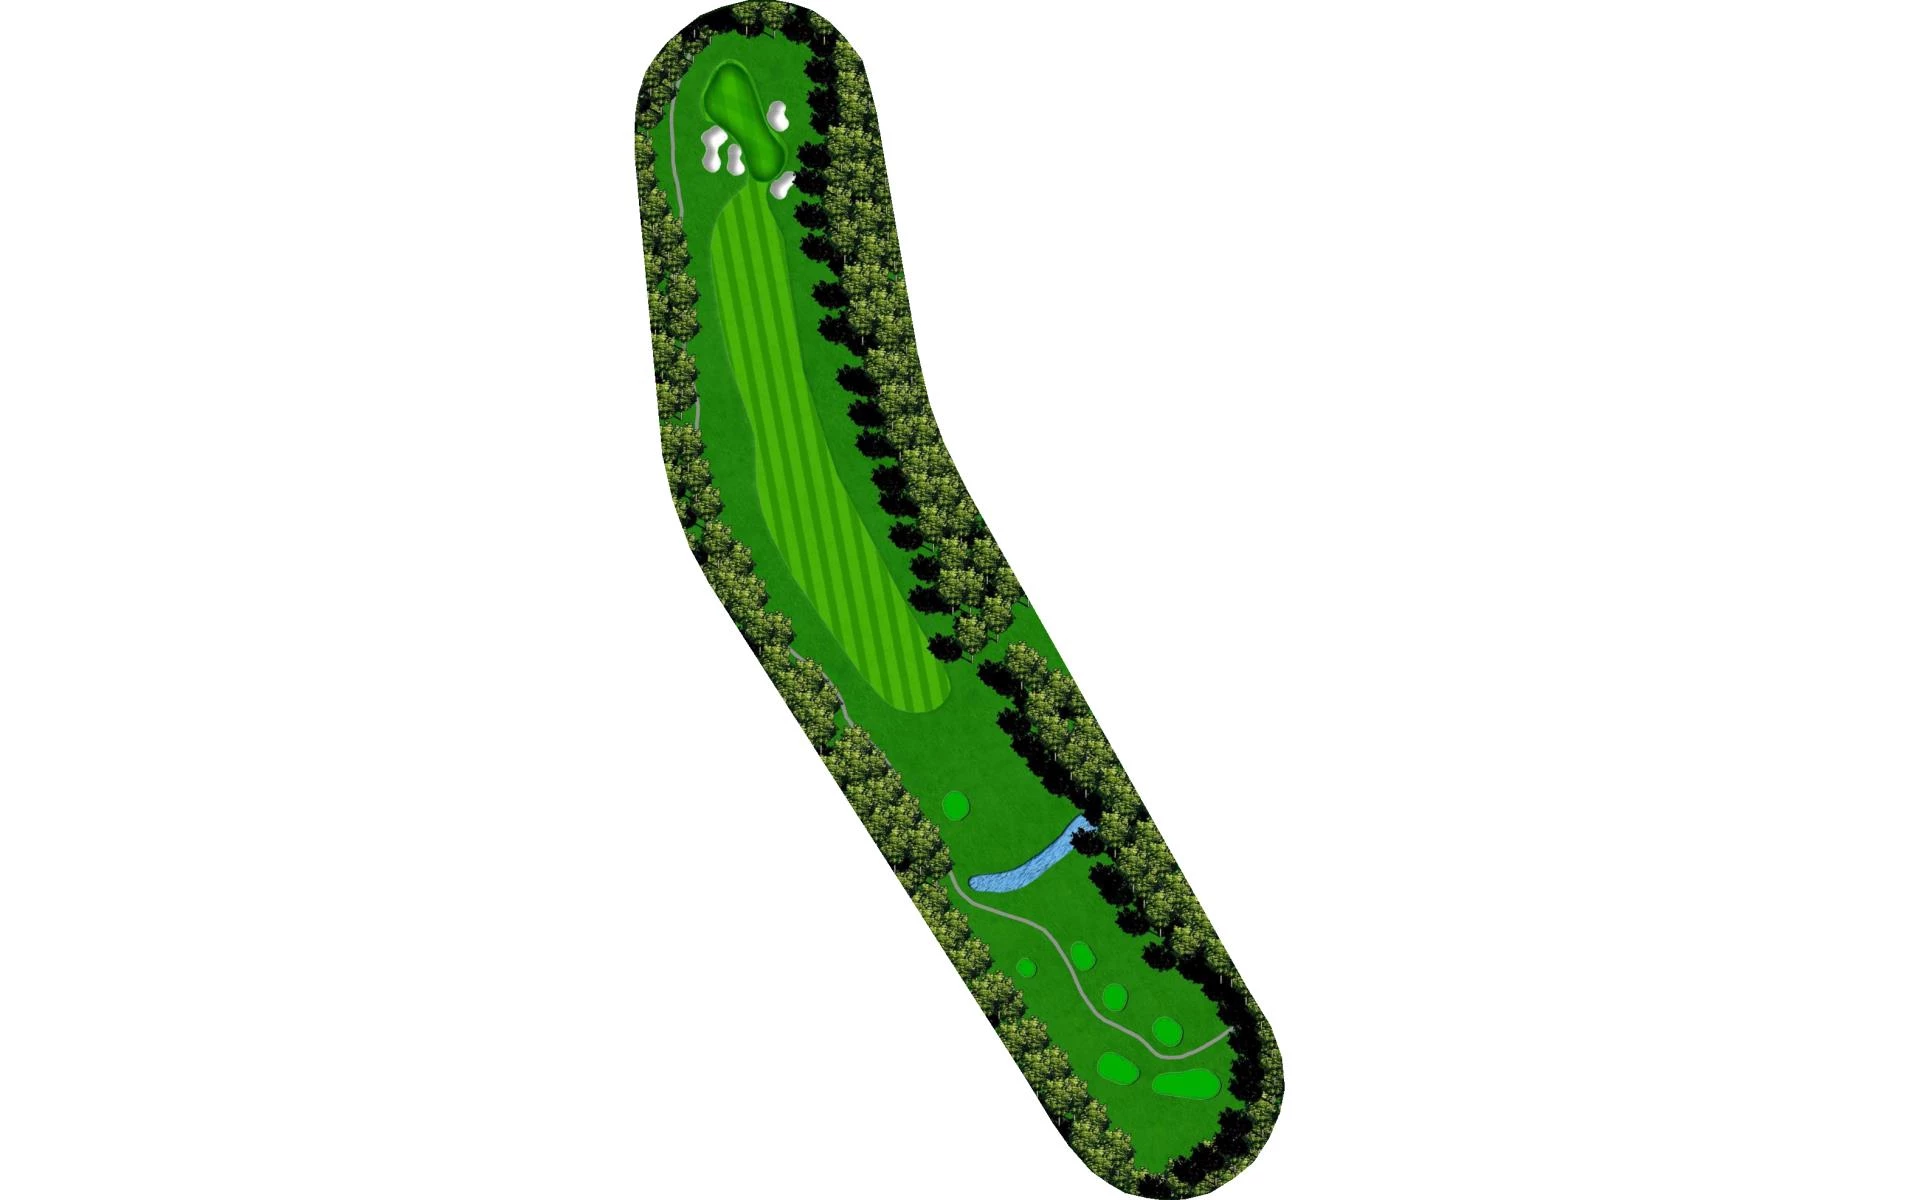
The sixth is a short, downhill, dogleg par 5. An ideal drive will avoid the fairway bunkers down the right side of the landing area. The green has two-tiers and is guarded by a hazard left and a deep bunker in the front.
# 7 /
Par: 4
Yardage by Tee:
BLACK 420
BLUE 371
GOLD 393
WHITE 350
Pro Tips
The tee shot on this par 4 is downhill, but the approach shot is uphill. This hole features another two-tiered green that’s protected by four bunkers, meaning accuracy is crucial on the approach.
# 8 /
Par: 3
Yardage by Tee:
BLACK 196
BLUE 164
GOLD 179
WHITE 150
Pro Tips
This downhill par 3 is well-protected by two greenside bunkers. Distance control is critical to landing the ball on the correct level, while avoiding the sand.
# 9 /
Par: 4
Yardage by Tee:
BLACK 455
BLUE 399
GOLD 428
WHITE 369
Pro Tips
The front nine closes with a long par 4. The tee shot will have to avoid two bunkers on the right, leaving a long iron or fairway wood approach. The putting surface is protected on the right by a pond.

# 10 /
Par: 5
Yardage by Tee:
BLACK 507
BLUE 490
GOLD 504
WHITE 484
Pro Tips
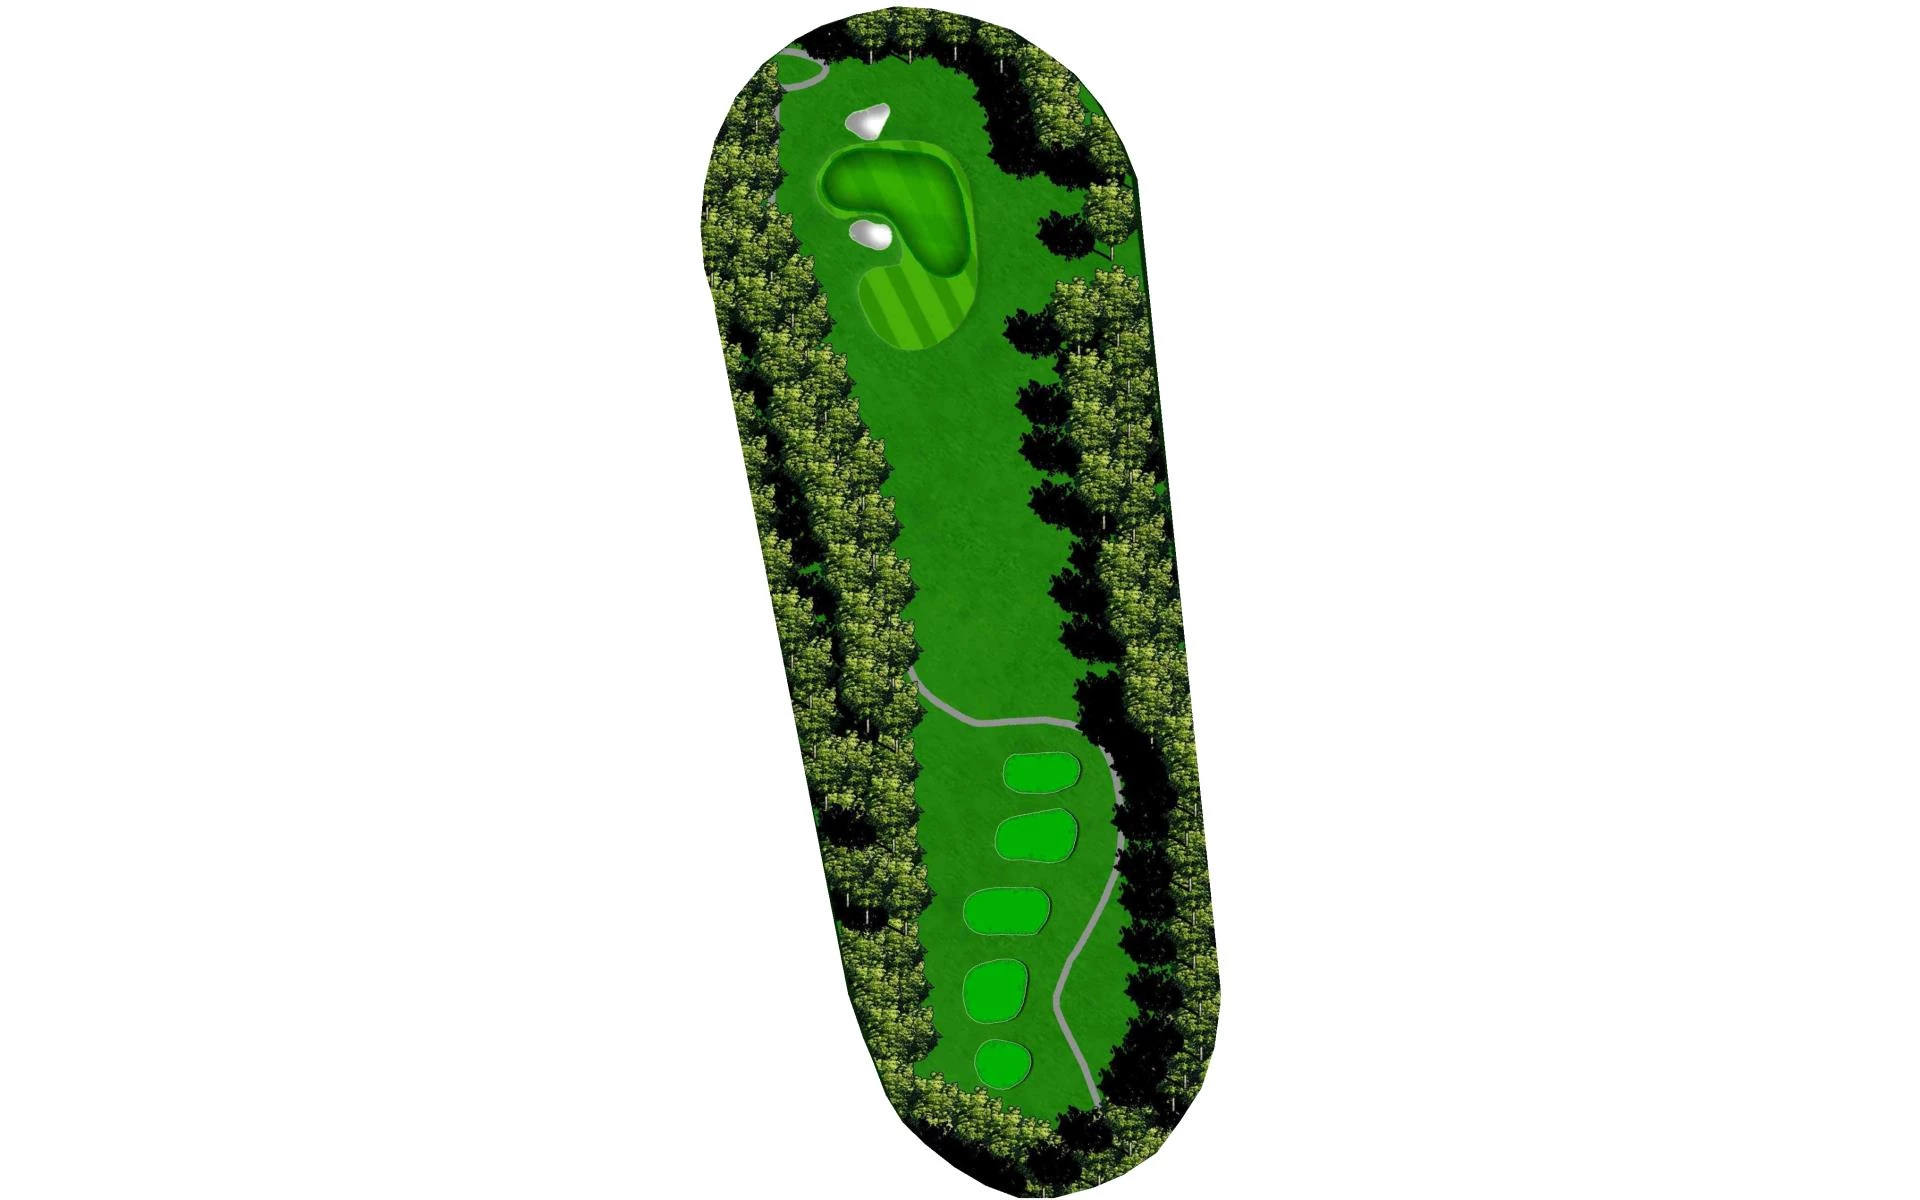
The back nine opens with a straightforward par 5. Off the tee, players will want to make sure to hit the fairway with longer drives rewarded with a chance to hit the green in two. This green is protected by a series of deep bunkers on the right side.
# 11 /
Par: 4
Yardage by Tee:
BLACK 449
BLUE 401
GOLD 429
WHITE 375
Pro Tips
The tee shot on this long par 4 features a generous landing area, where players need to avoid the two bunkers on the left. The largest green complex on the course is found on the eleventh, which also has a distinct spine in the middle, making an accurate approach important. A large, deep bunker protects this green, adding to its challenge.
# 12 /
Par: 4
Yardage by Tee:
BLACK 354
BLUE 317
GOLD 349
WHITE 285
Pro Tips
This short, downhill par 4 requires less than a driver off the tee. A creek runs down the left side of the hole and cuts across the front and right side of the green. The putting surface slopes back-to-front.
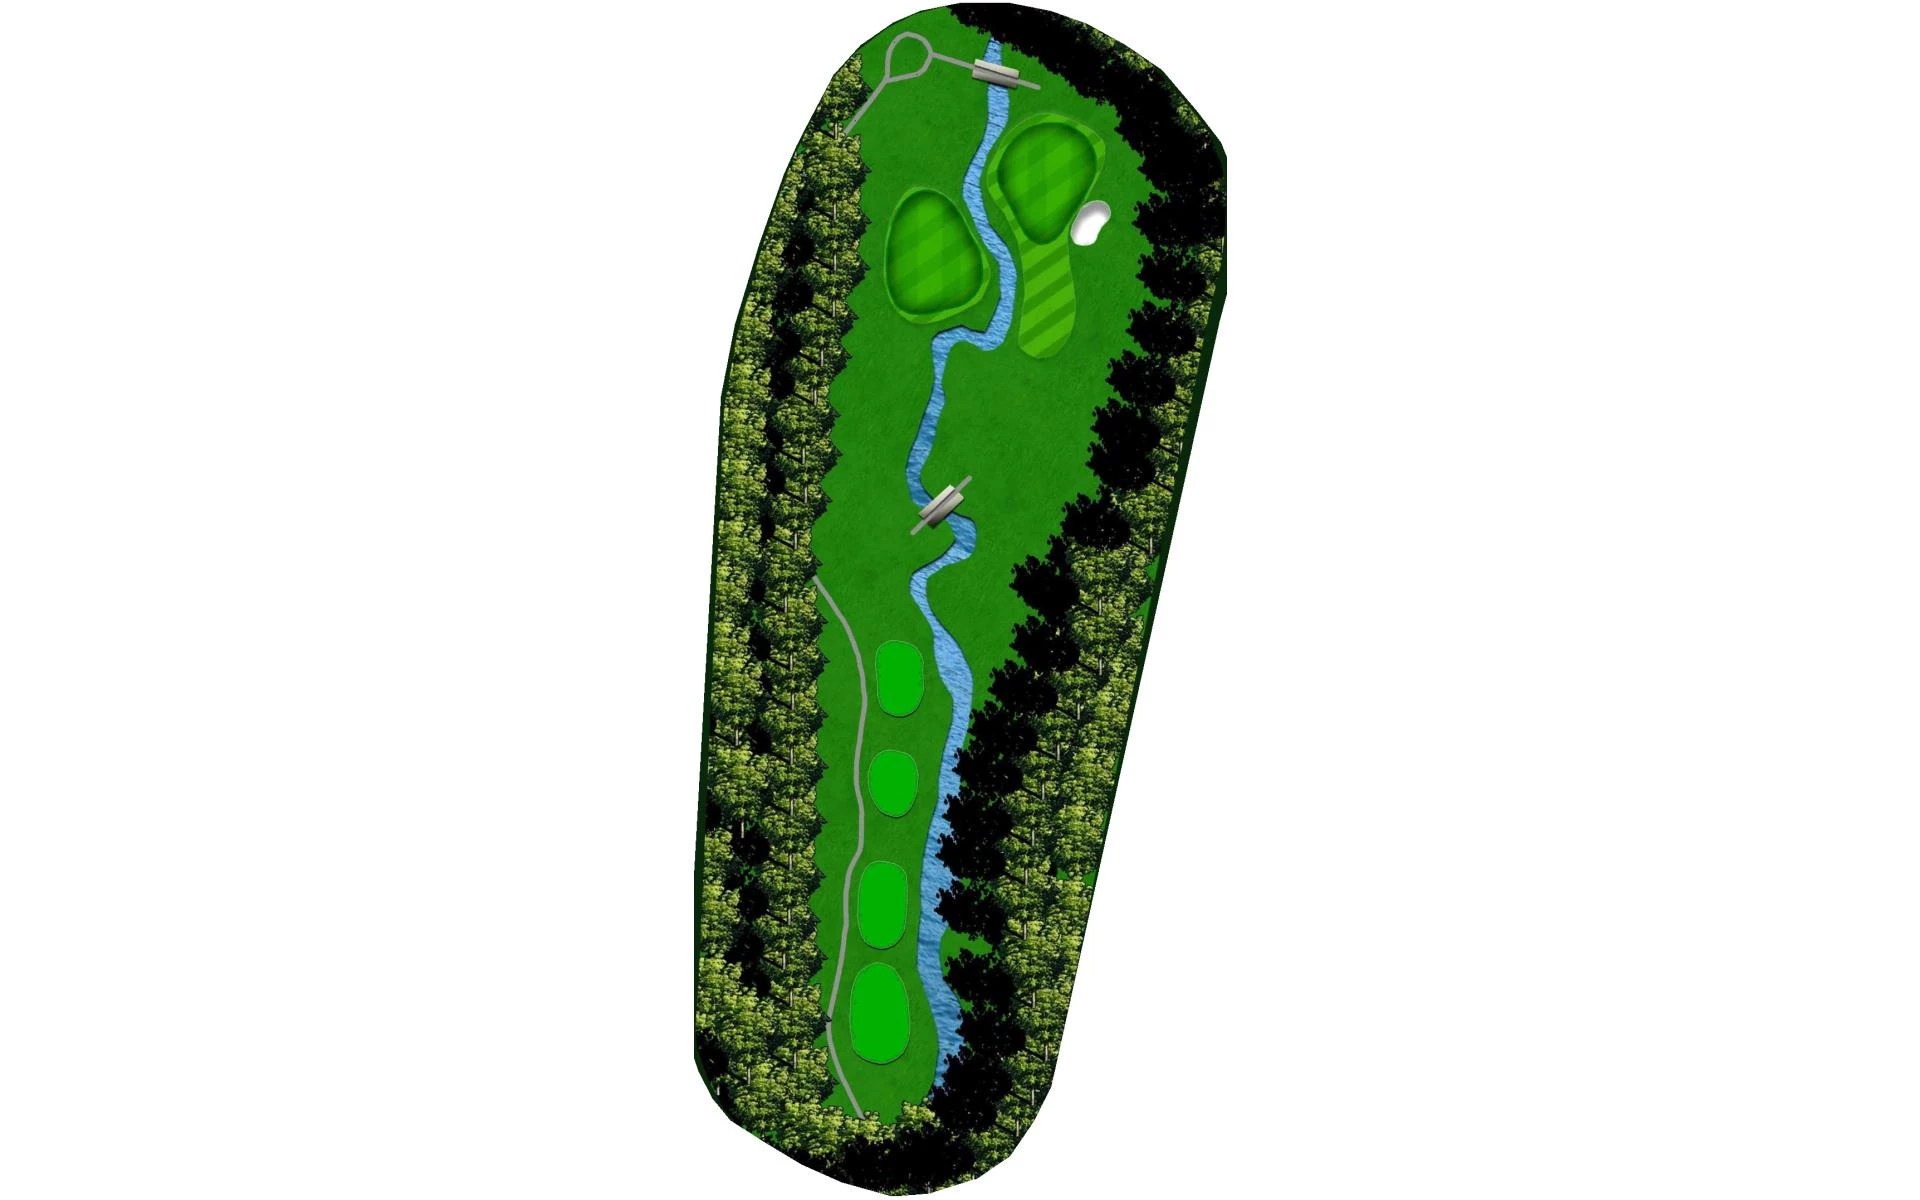
# 13 /
Par: 3
Yardage by Tee:
BLACK 164
BLUE 137
GOLD 142
WHITE 119
Pro Tips
The green on this par 3 is split into two by a creek running through the middle. Club selection is of utmost importance if players want to have success on this treacherous signature hole.
# 14 /
Par: 4
Yardage by Tee:
BLACK 406
BLUE 374
GOLD 379
WHITE 315
Pro Tips
The ideal tee shot on this dogleg par 4 is right-center of the fairway, which will provide the best angle into the green. The putting surface is protected by multiple grass bunkers and swales and slopes both back-to-front and right-to-left.
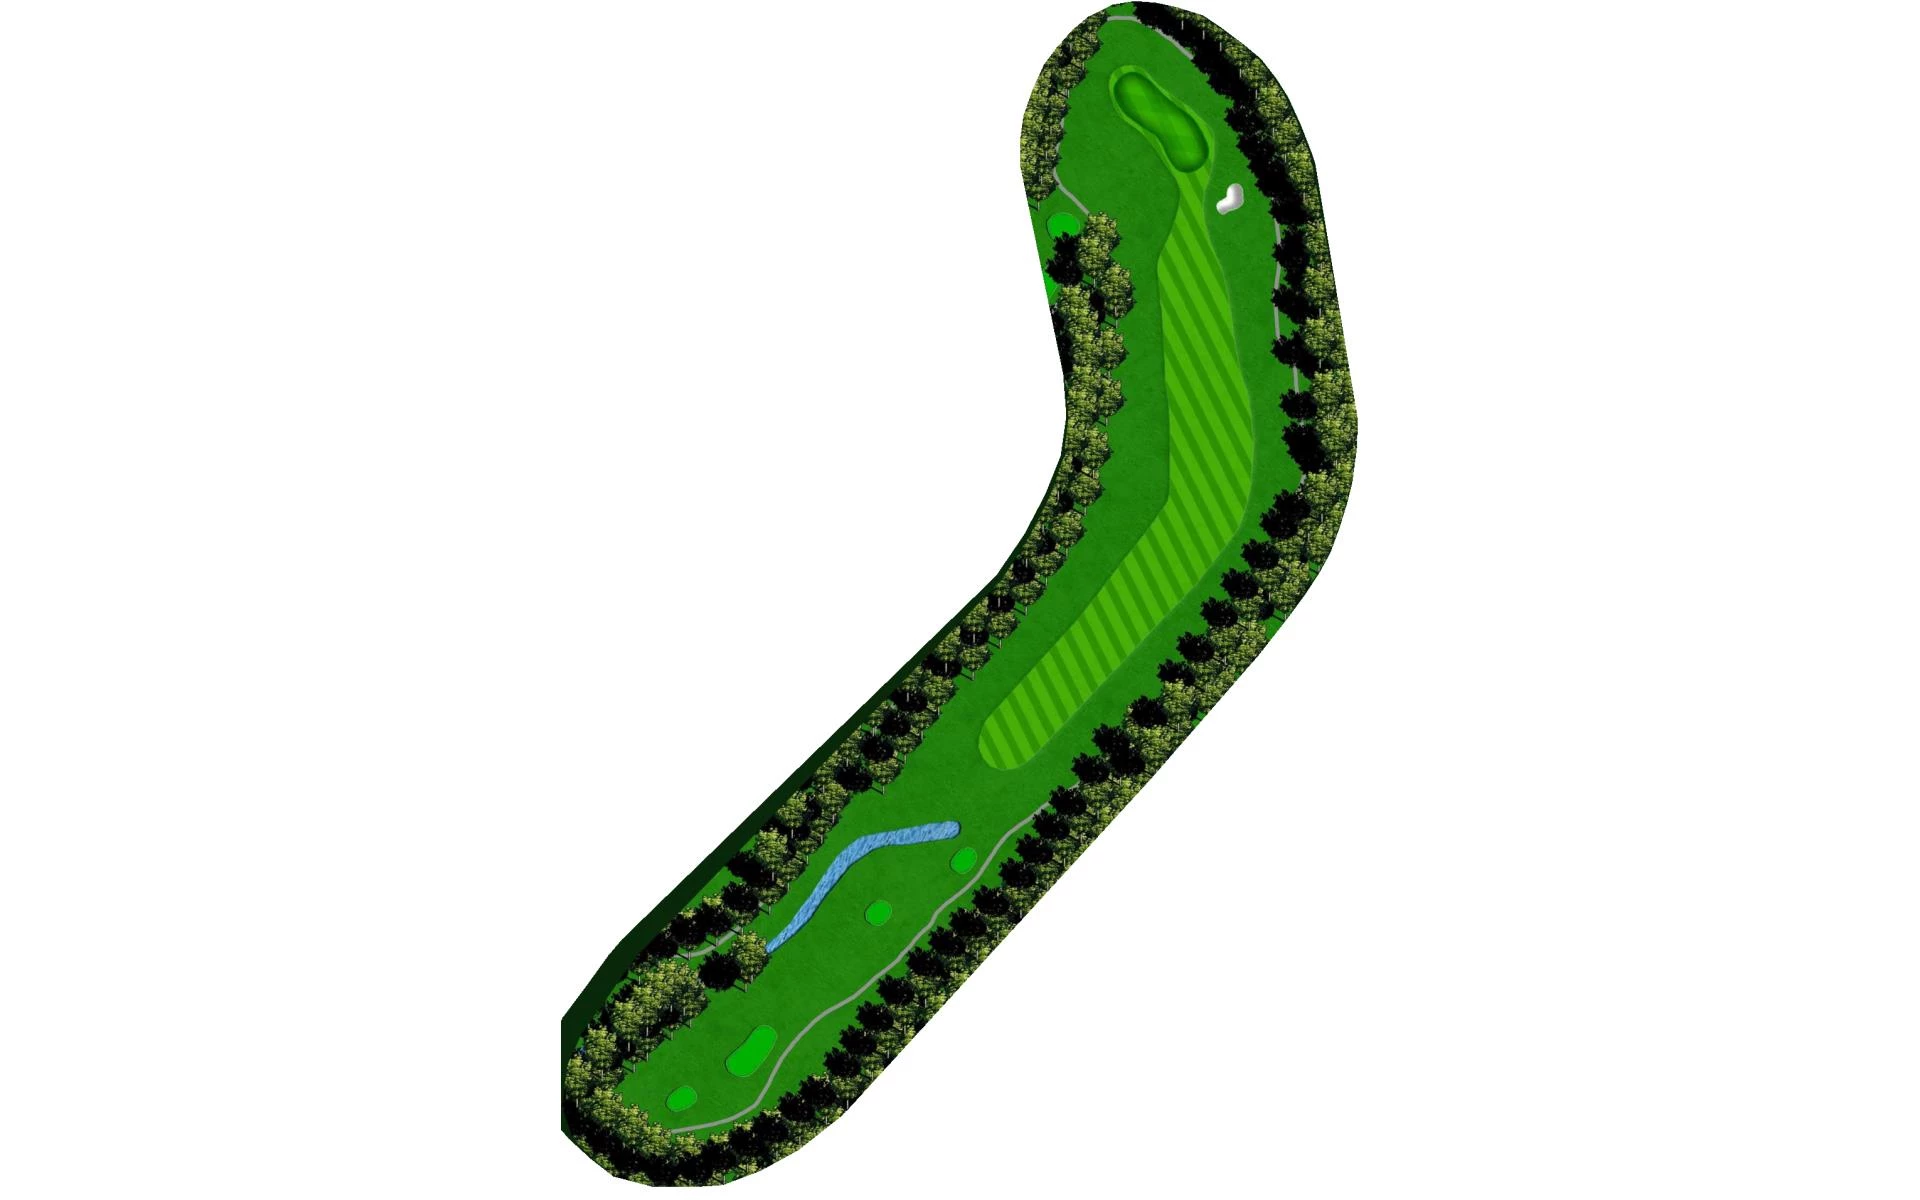
# 15 /
Par: 4
Yardage by Tee:
BLACK 396
BLUE 370
GOLD 375
WHITE 302
Pro Tips
This dogleg right par 4 features a creek that runs down the entire right side of the hole. The green on the fifteenth is guarded by a bunker on the right and a large oak tree on the left.
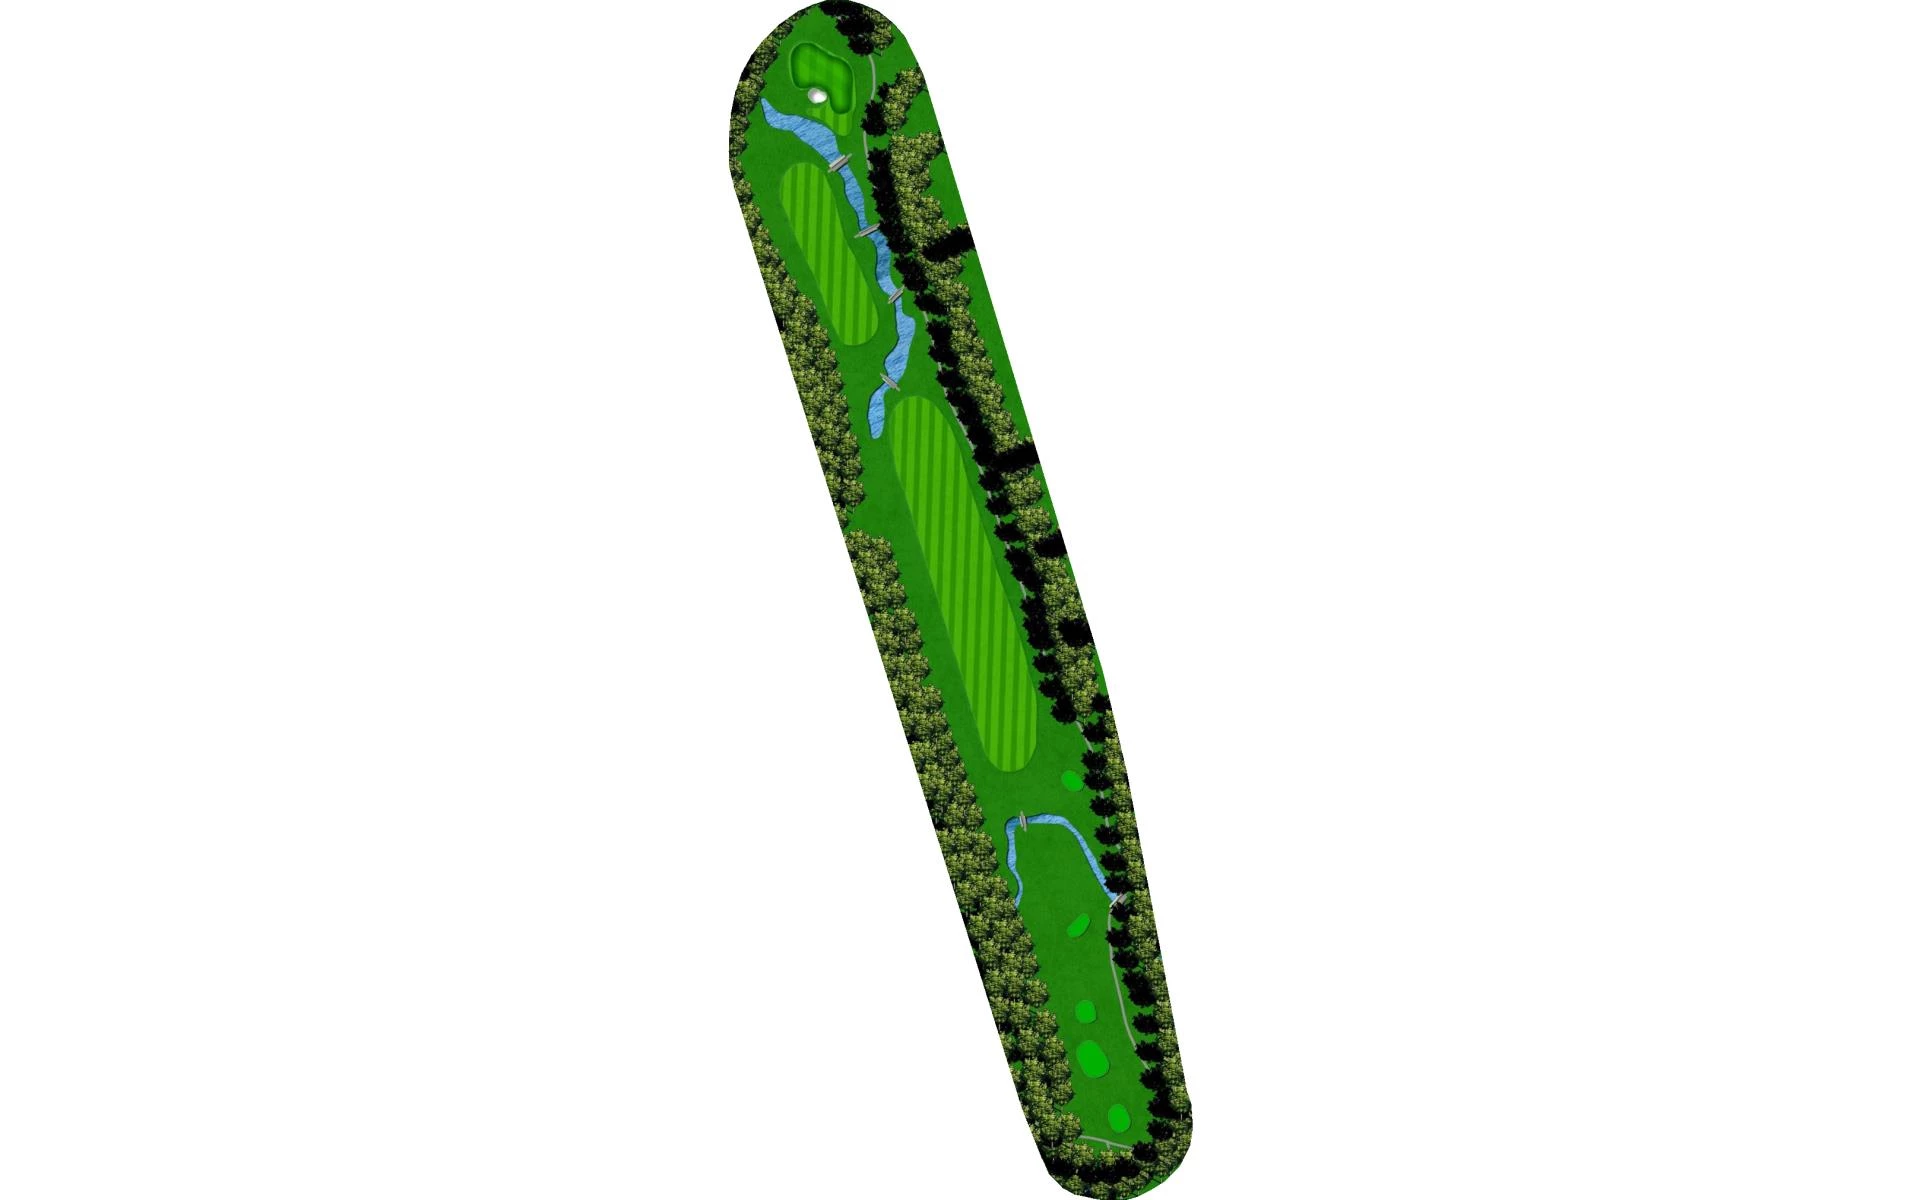
# 16 /
Par: 5
Yardage by Tee:
BLACK 550
BLUE 495
GOLD 518
WHITE 161
Pro Tips
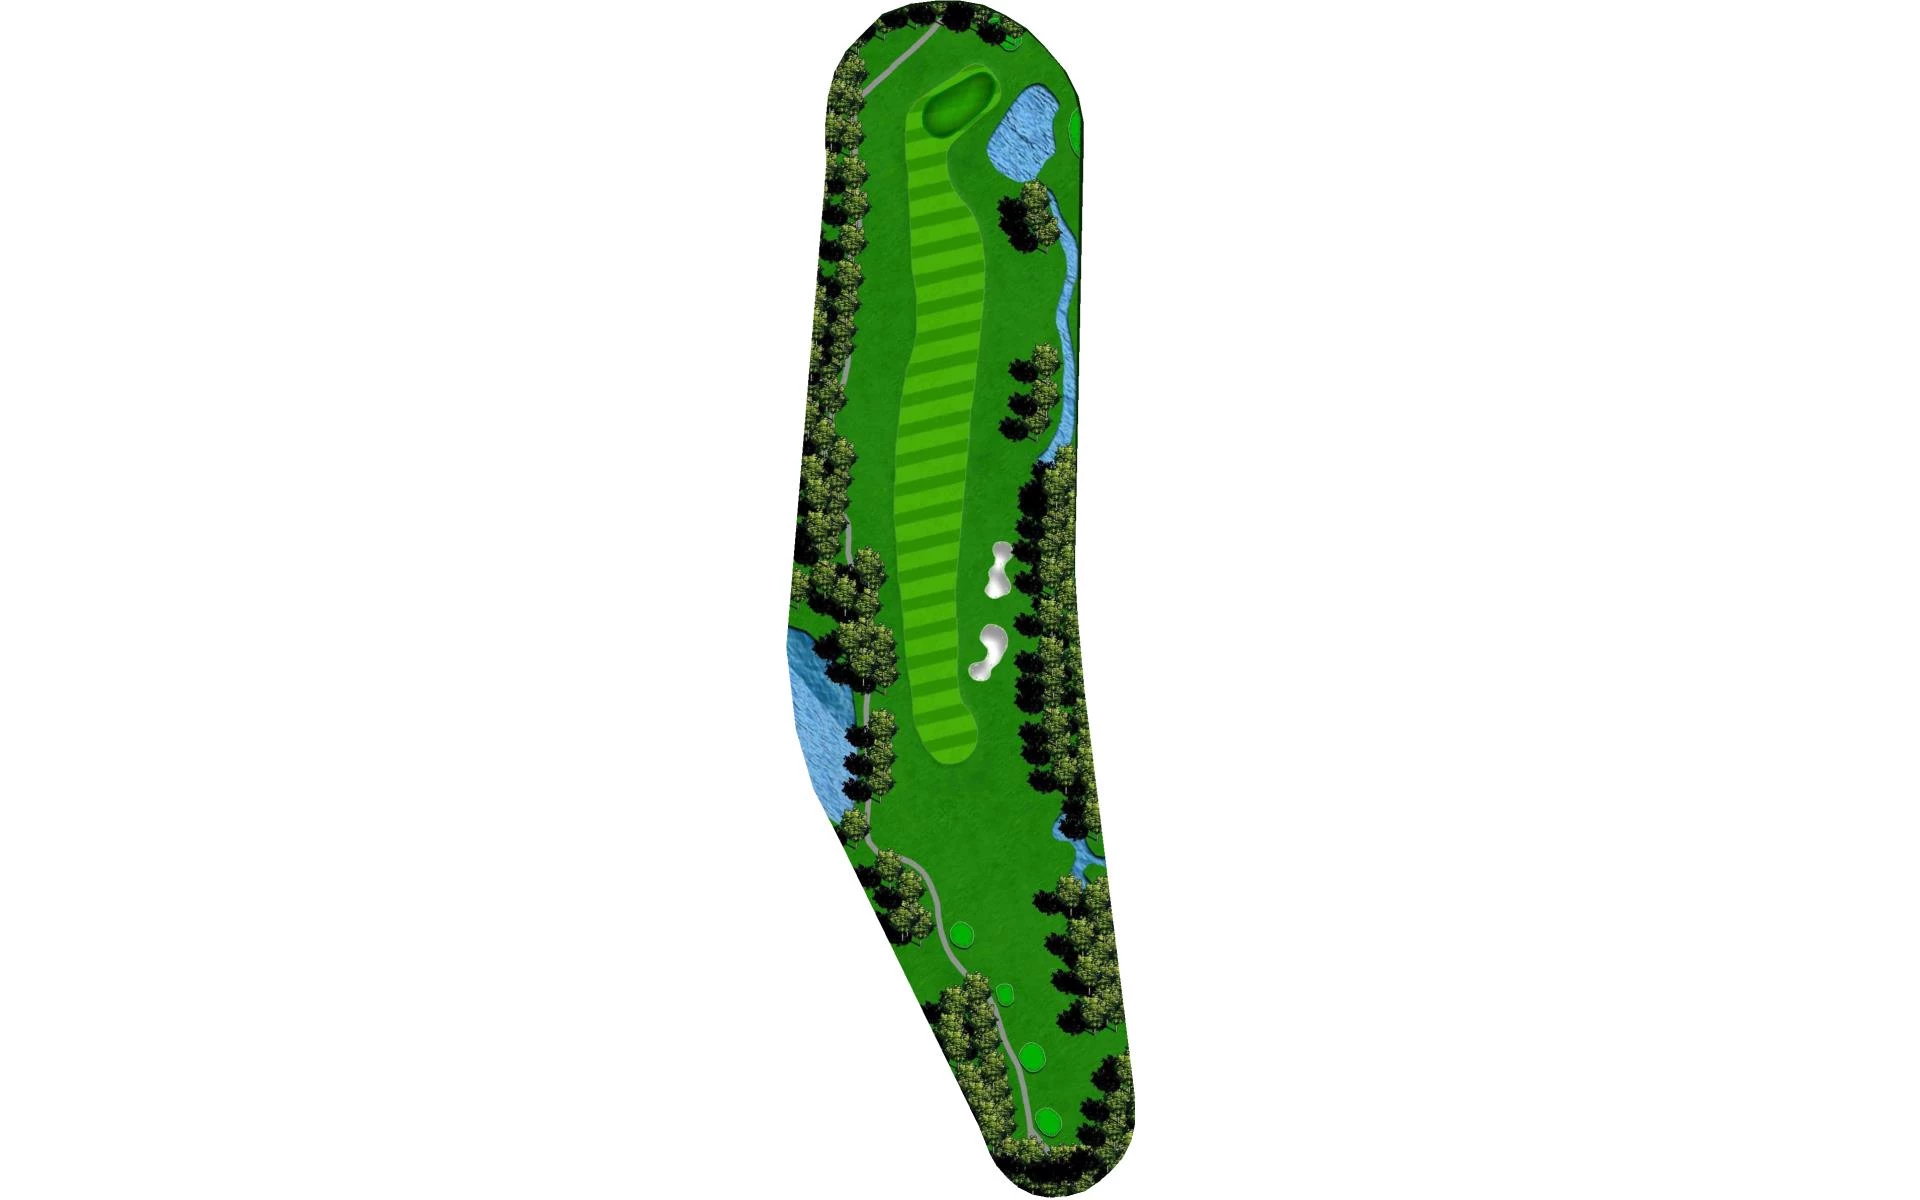
The final par 5 on the golf course is a long one that’ll require three great shots to hit the green. A creek winds back and forth from tee to green, rewarding accuracy and distance control. The green is protected by a deep front bunker and a false front.

# 17 /
Par: 3
Yardage by Tee:
BLACK 193
BLUE 166
GOLD 179
WHITE 161
Pro Tips
The green on the last par 3 is protected by bunkers short right and long left; testing a player’s distance control from the tee.
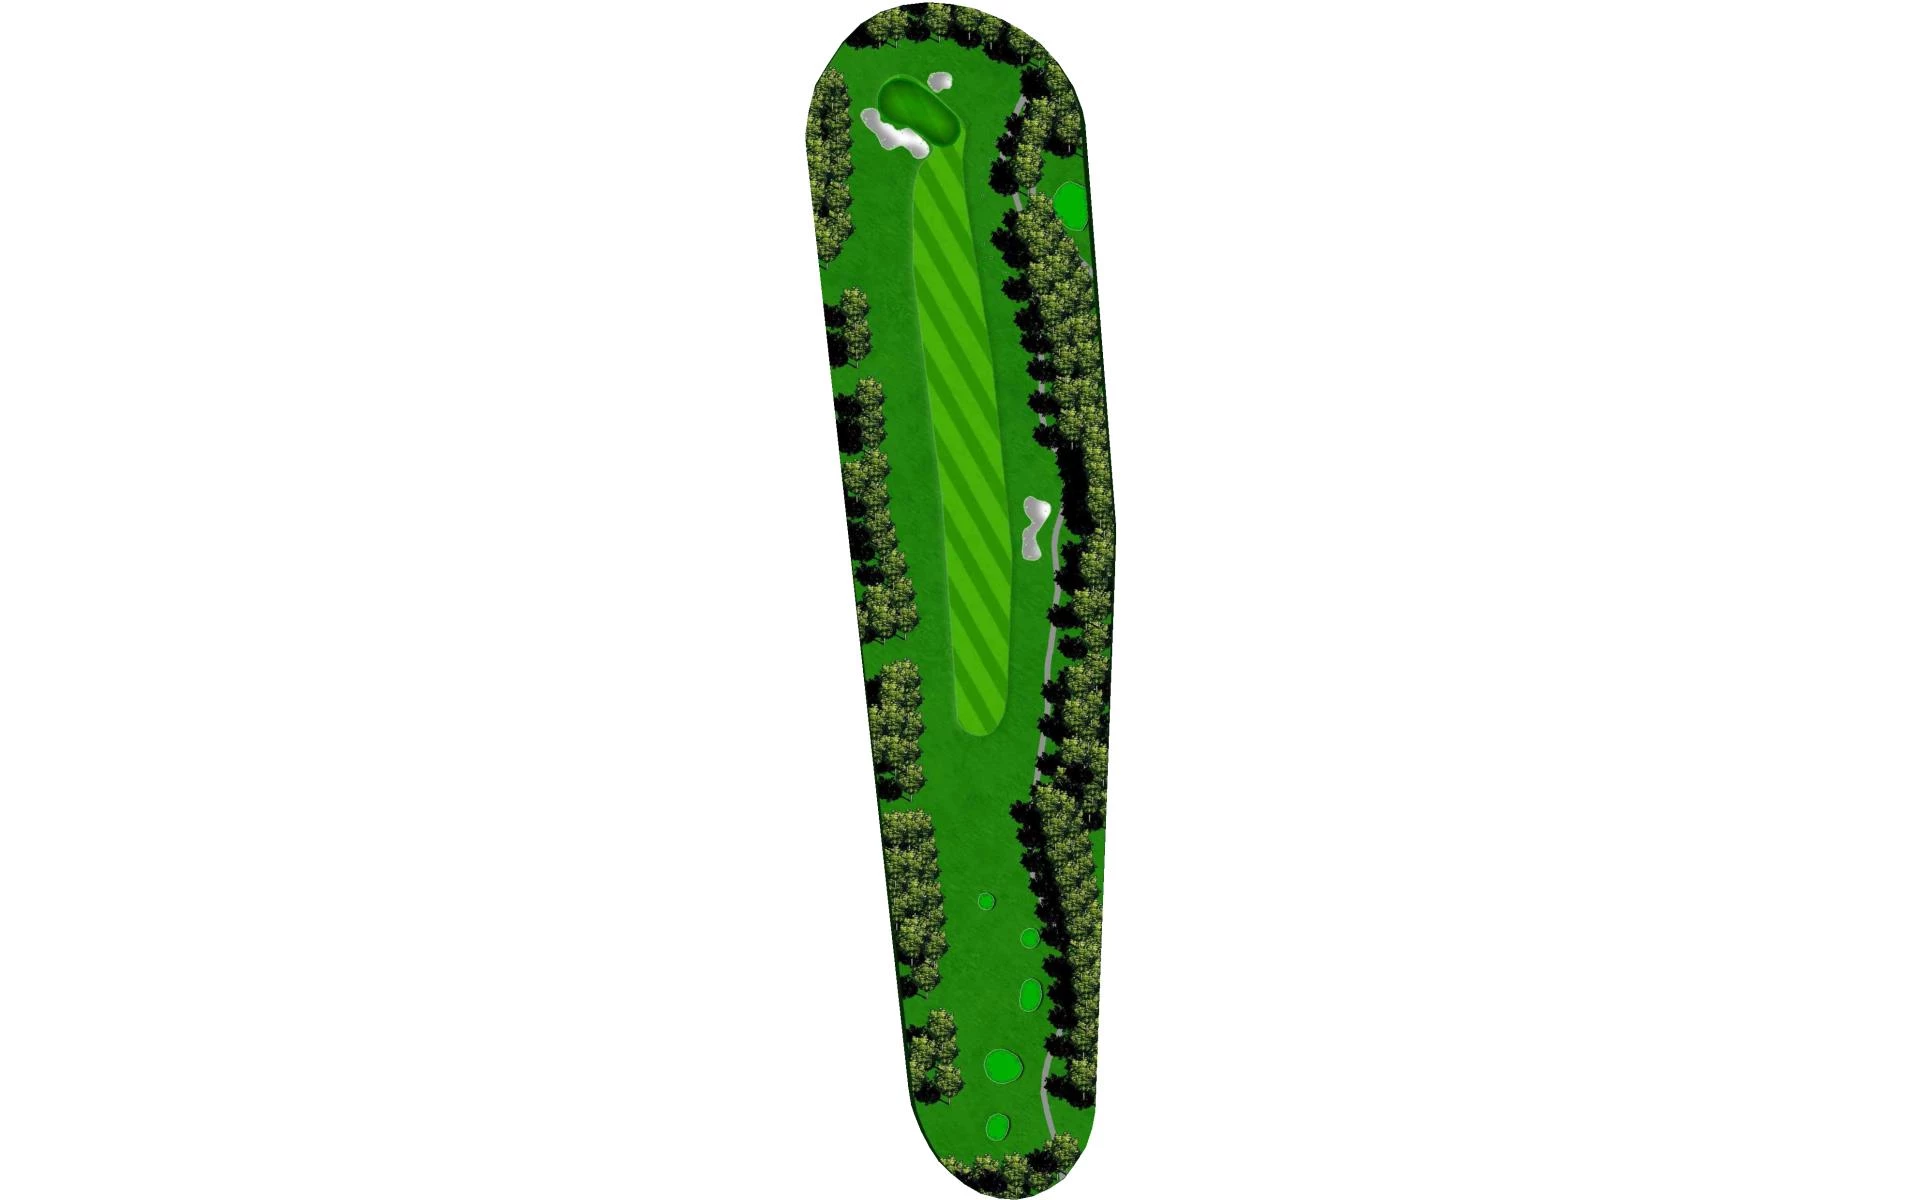
# 18 /
Par: 4
Yardage by Tee:
BLACK 440
BLUE 385
GOLD 419
WHITE 359
Pro Tips
The finishing hole starts with a generous landing area off the tee, which features a fairway bunker on the right. The approach shot is downhill into a green that slopes back-to-front and is protected by large and deep bunkers on the left and right.