Grove Course
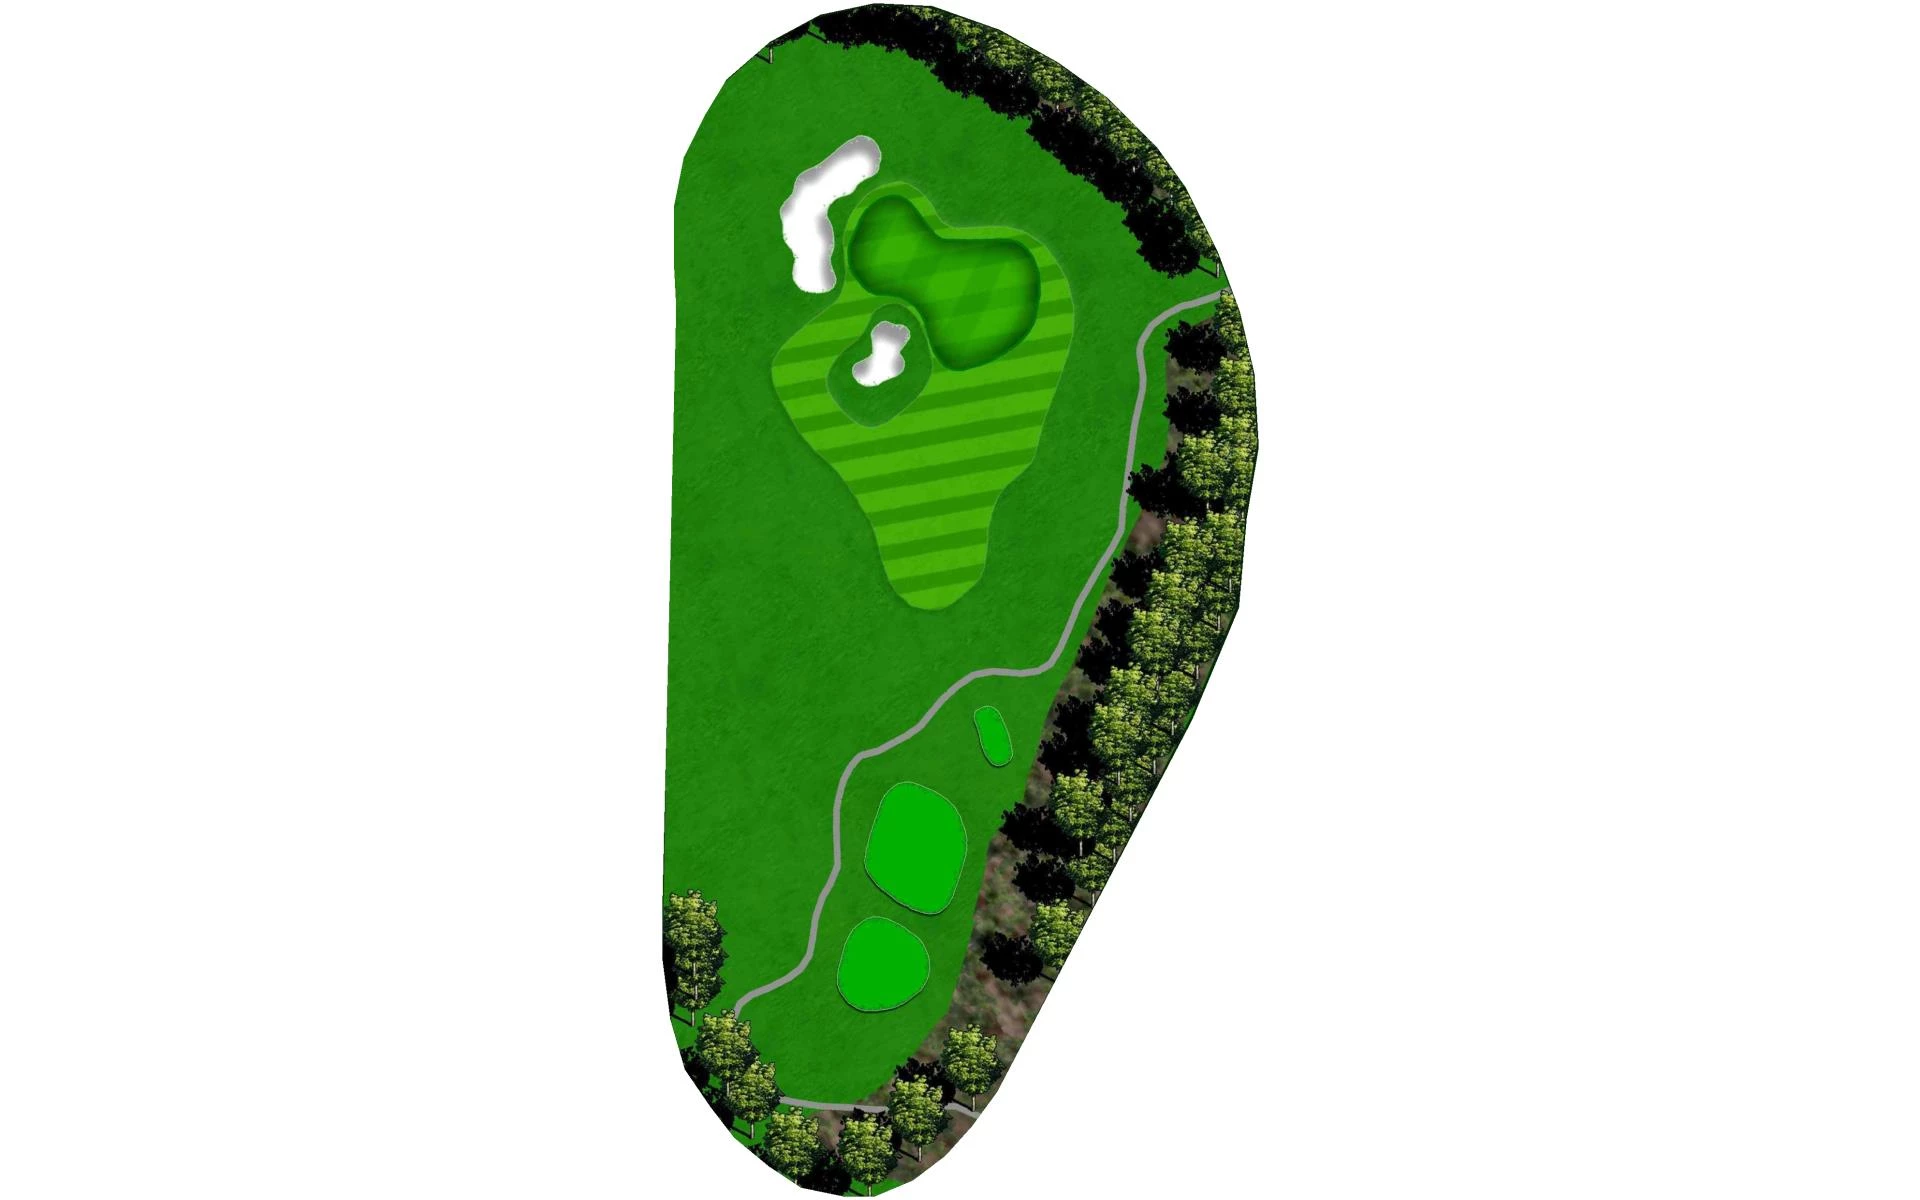
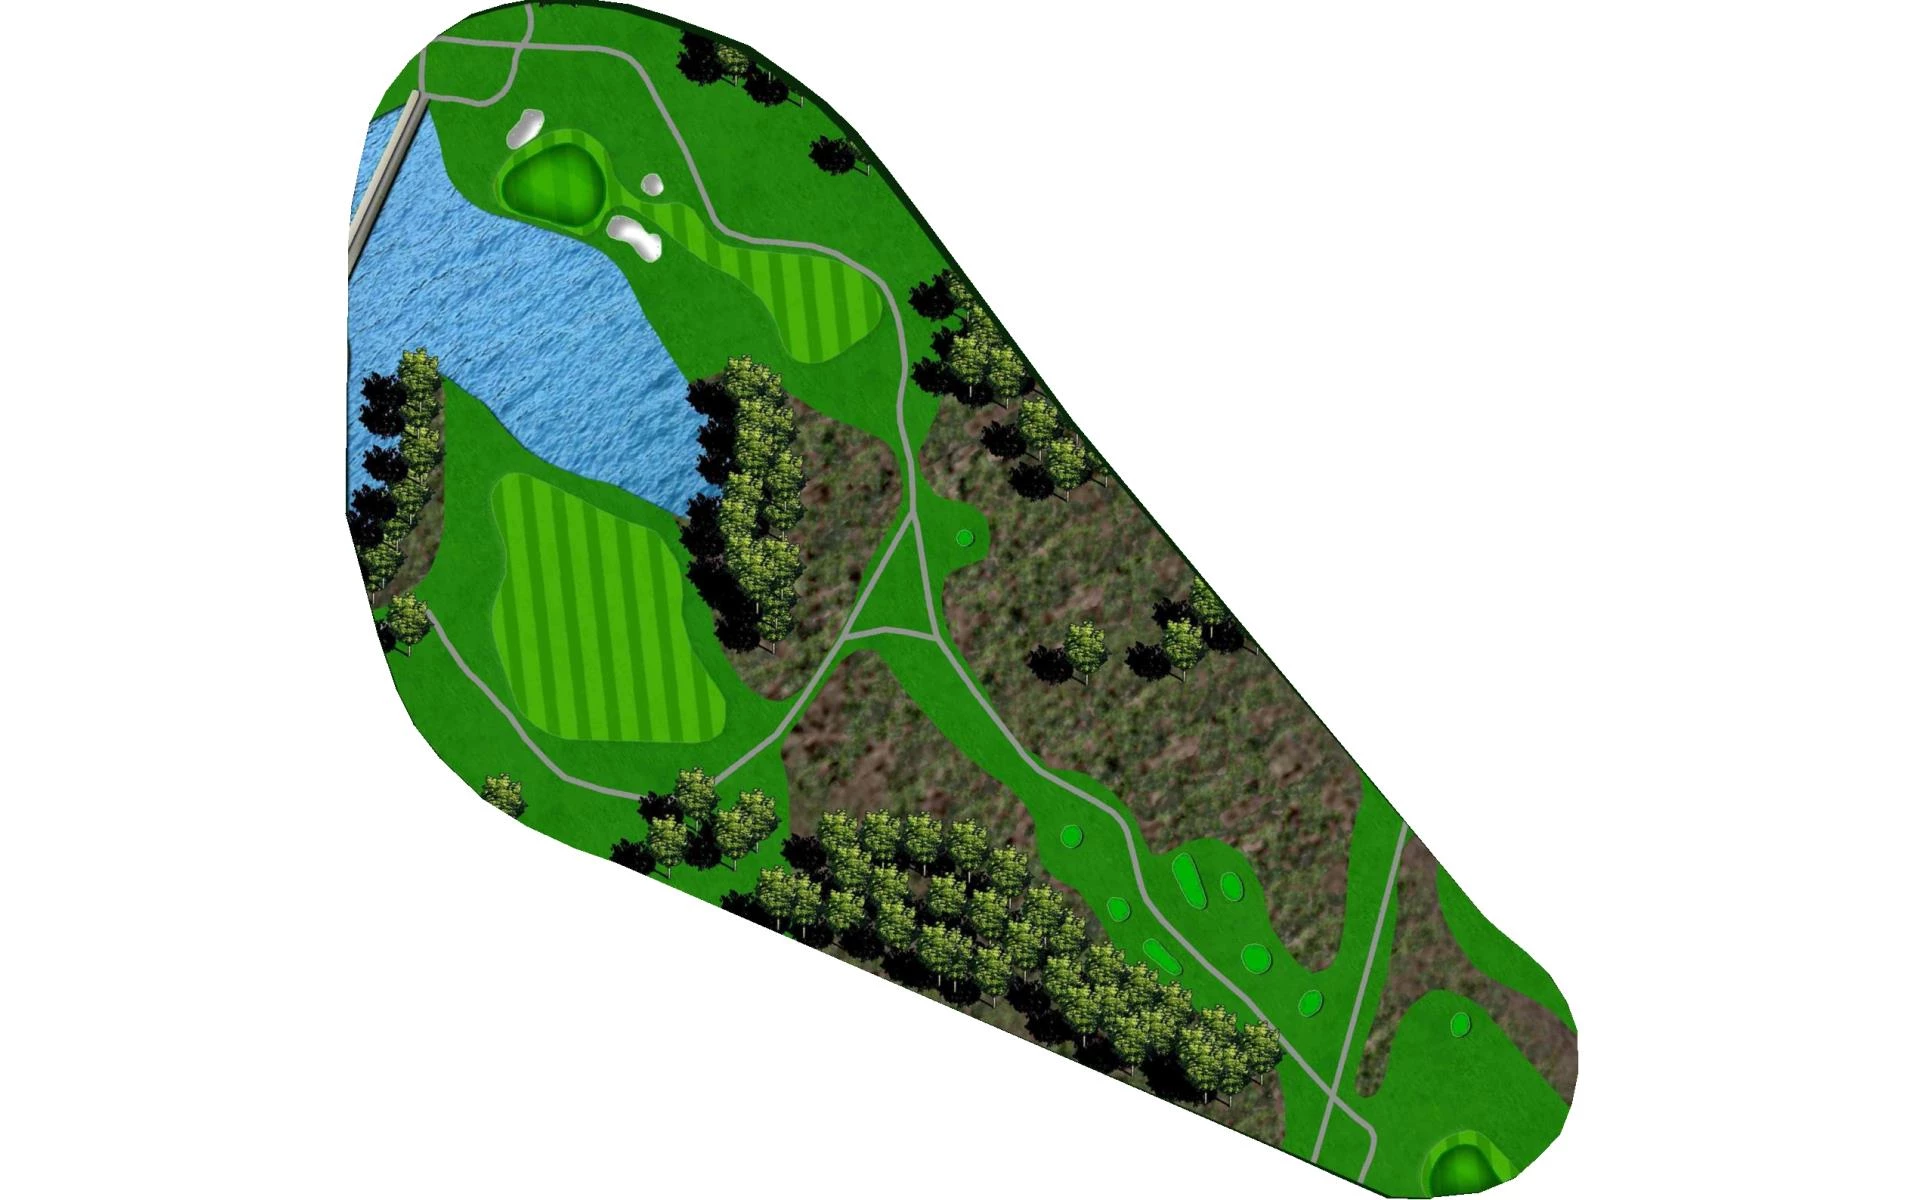
# 1 / Hole #1
Par: 5
Yardage by Tee:
GOLD 593
BLUE 556
WHITE 530
SILVER 444
BRONZE 444
Slope:
Gold 146
Pro Tips
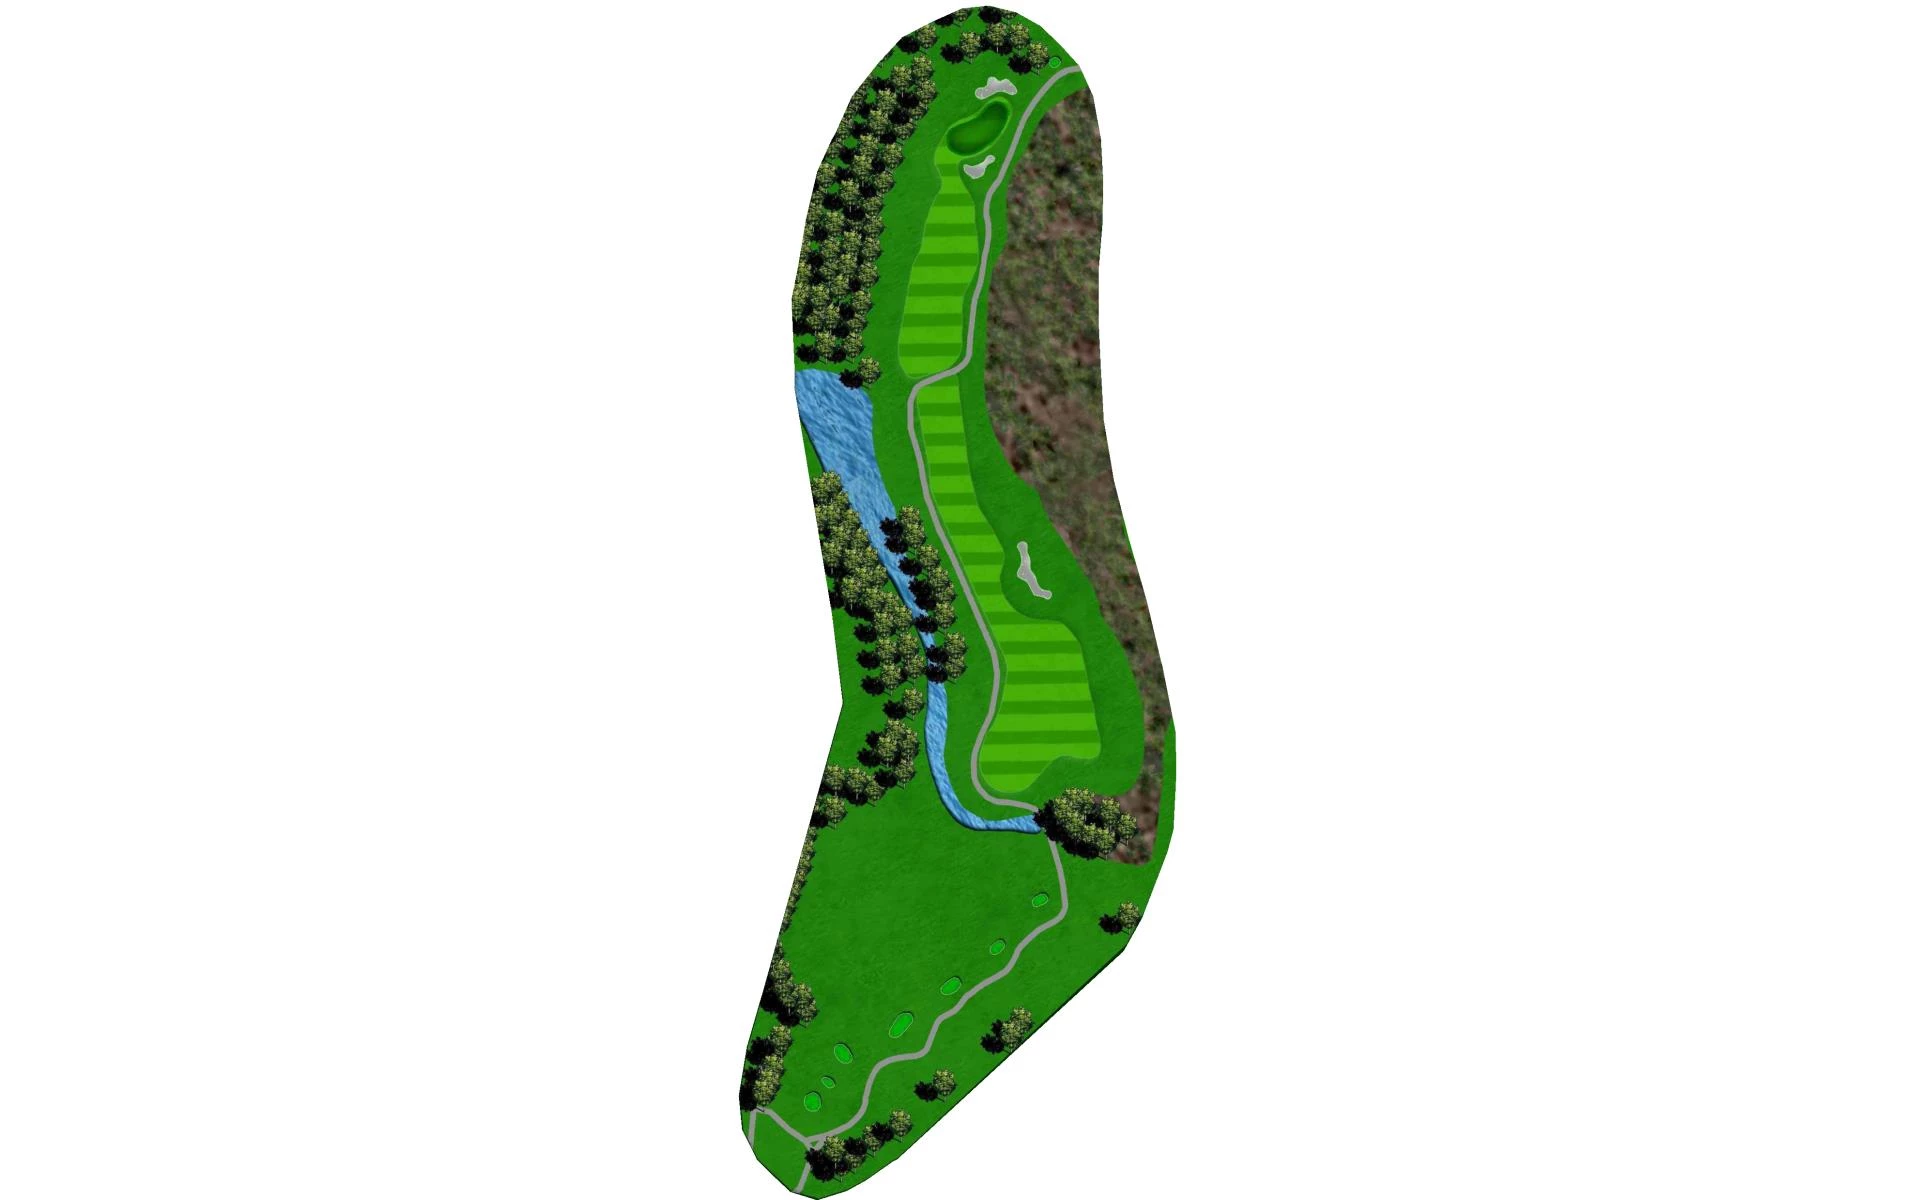
This is a great three shot double dogleg Par 5. The tee shot plays downhill and over a stream. The wide first landing area is still guarded by trees along both sides of the fairway and narrows as the hole turns left. The hole then turns to the right with a hillside along the right and penalty area left requiring a precise second shot for the final approach. The green is set at an angle with bunkers short right and long left and has a predominant slope from back right to front left of the green.
# 2 / Hole #2
Par: 3
Yardage by Tee:
GOLD 211
BLUE 199
WHITE 180
SILVER 160
BRONZE 139
Slope:
Blue 143
Pro Tips
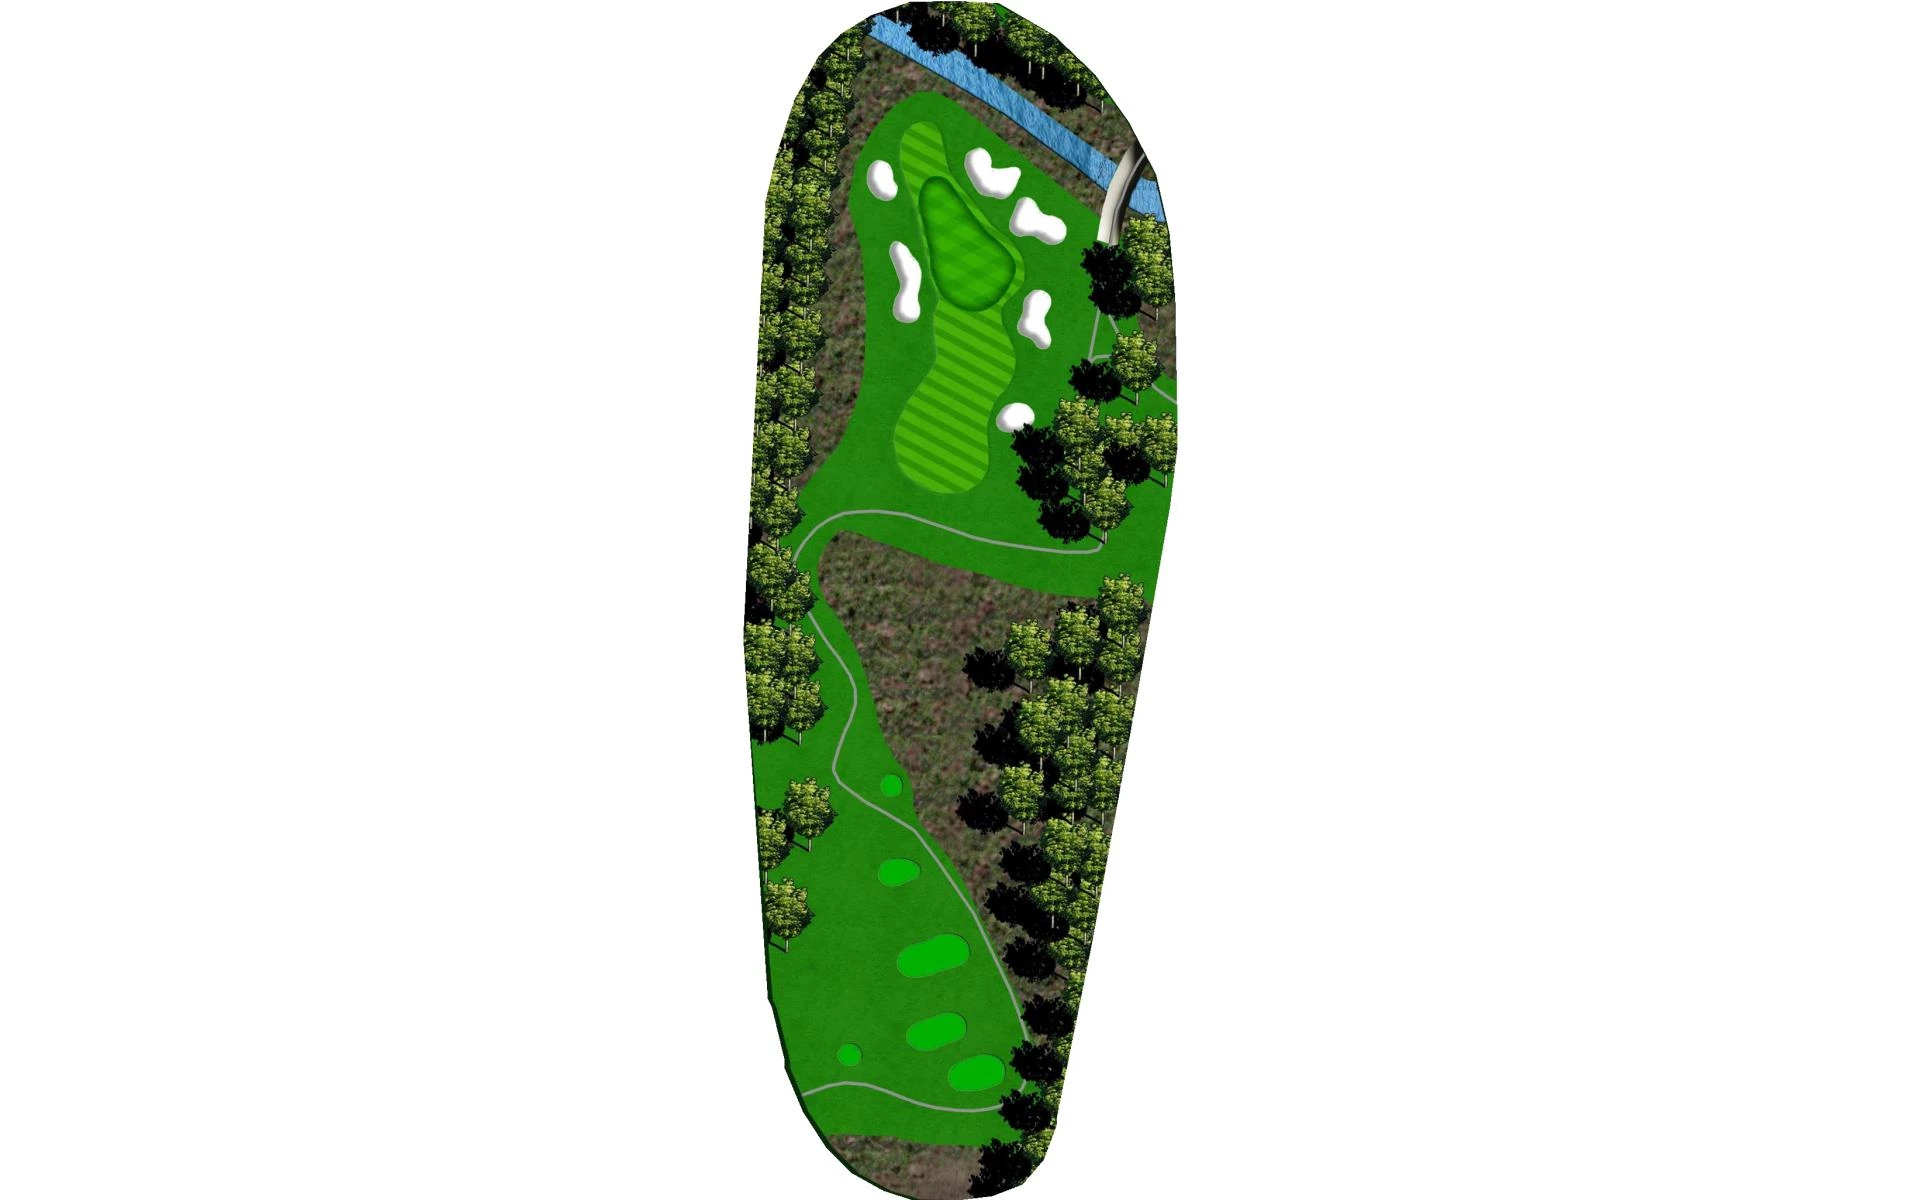
This hole also plays downhill into the valley. The tee shot is played over wetlands to a green framed by trees on both sides and several bunkers surrounding as it slopes from front to back. This is a beautiful hole with players looking down upon natural wetlands and tree canopy.
# 3 / Hole #3
Par: 4
Yardage by Tee:
GOLD 431
BLUE 402
WHITE 371
SILVER 316
BRONZE 263
Slope:
White 131
Pro Tips
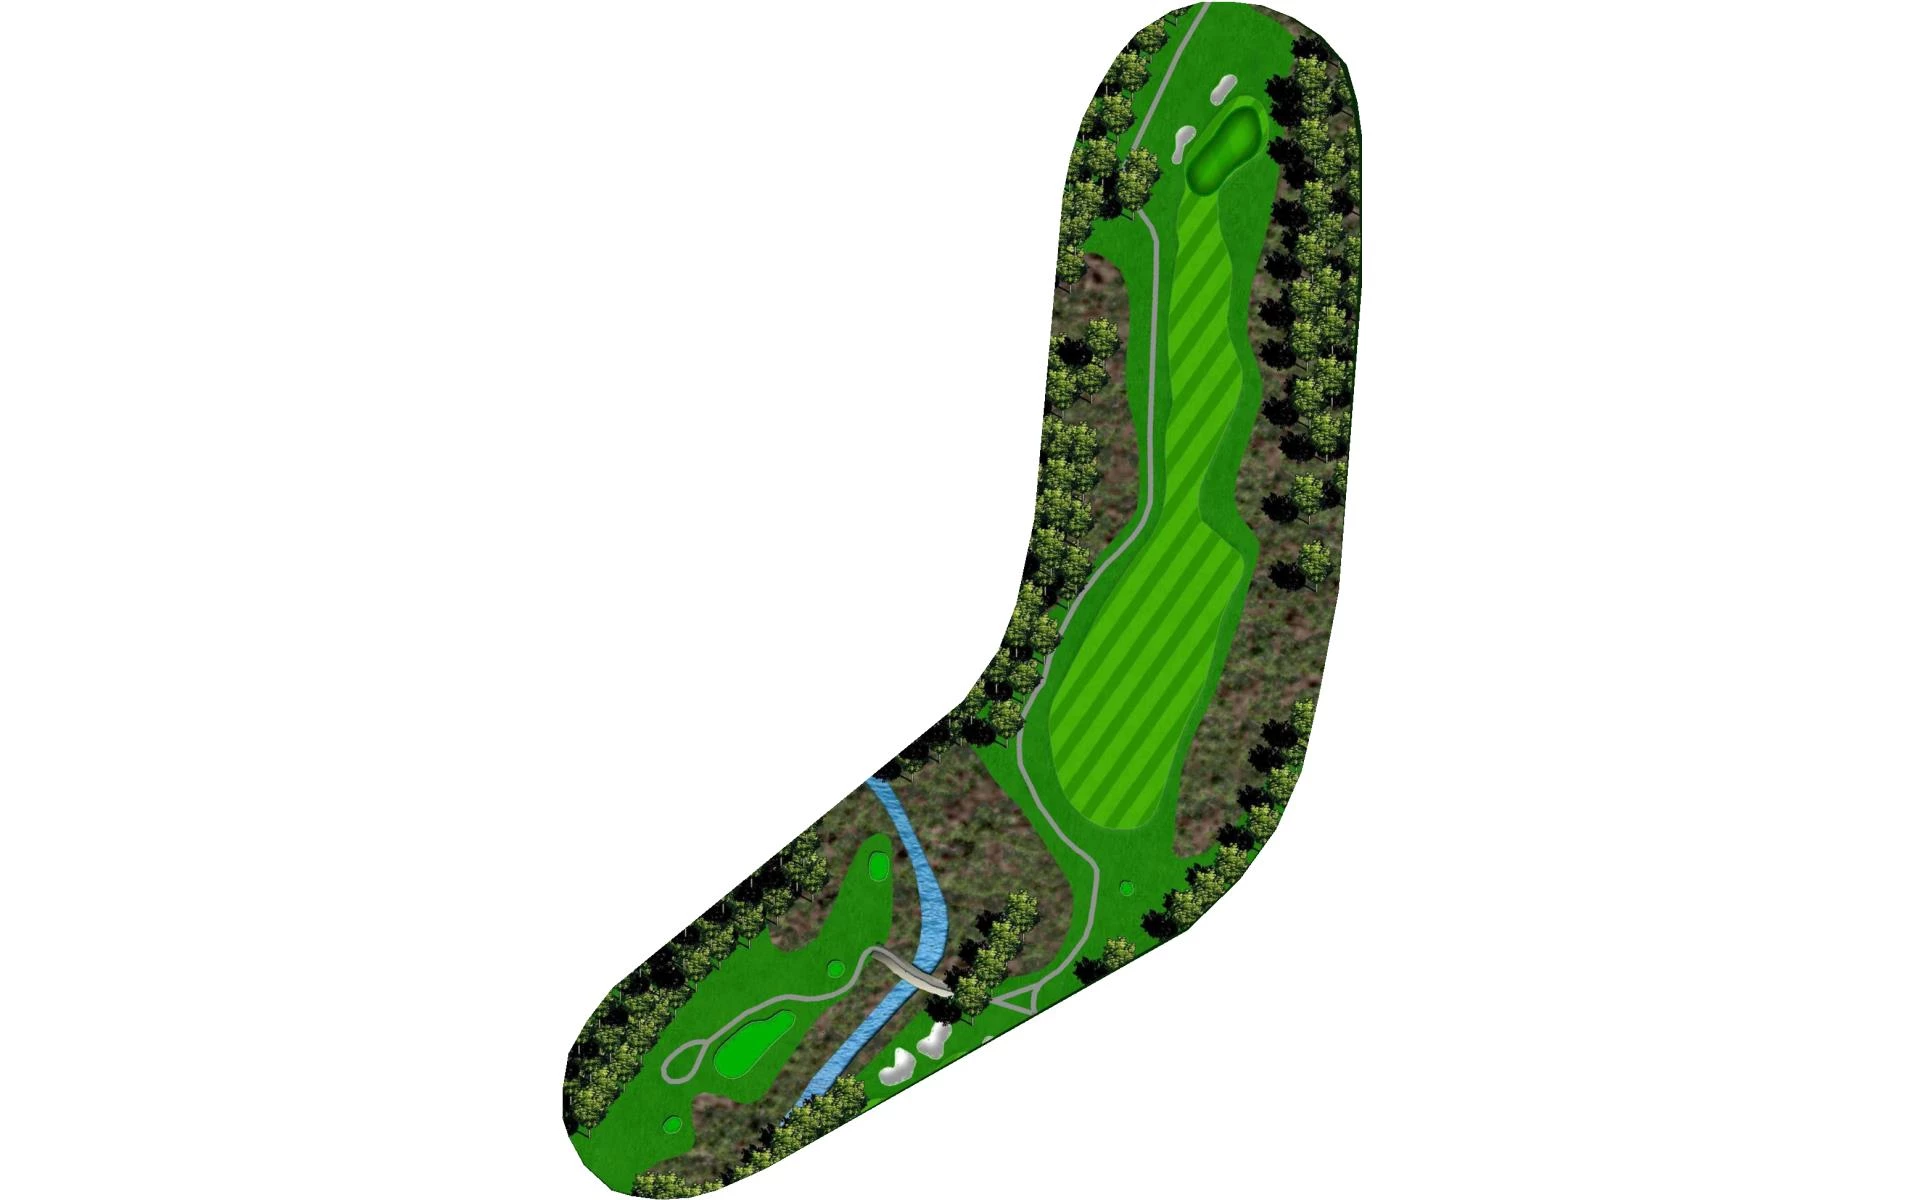
After crossing the wetland behind the previous green, these tees are elevated 25 feet above the wetland. This is done so that the tee shot does not play uphill as much. Standing on the tee, players are looking across a wetland that borders most of the left side of the hole. The preferred side of the plateau fairway is the left in order to shorten the approach shot. This severely sloped green sits elevated with bunkers left and shots falling short will find a deep grass bunker or a sloping approach fairway. This entire hole is framed by dense forest along both sides.
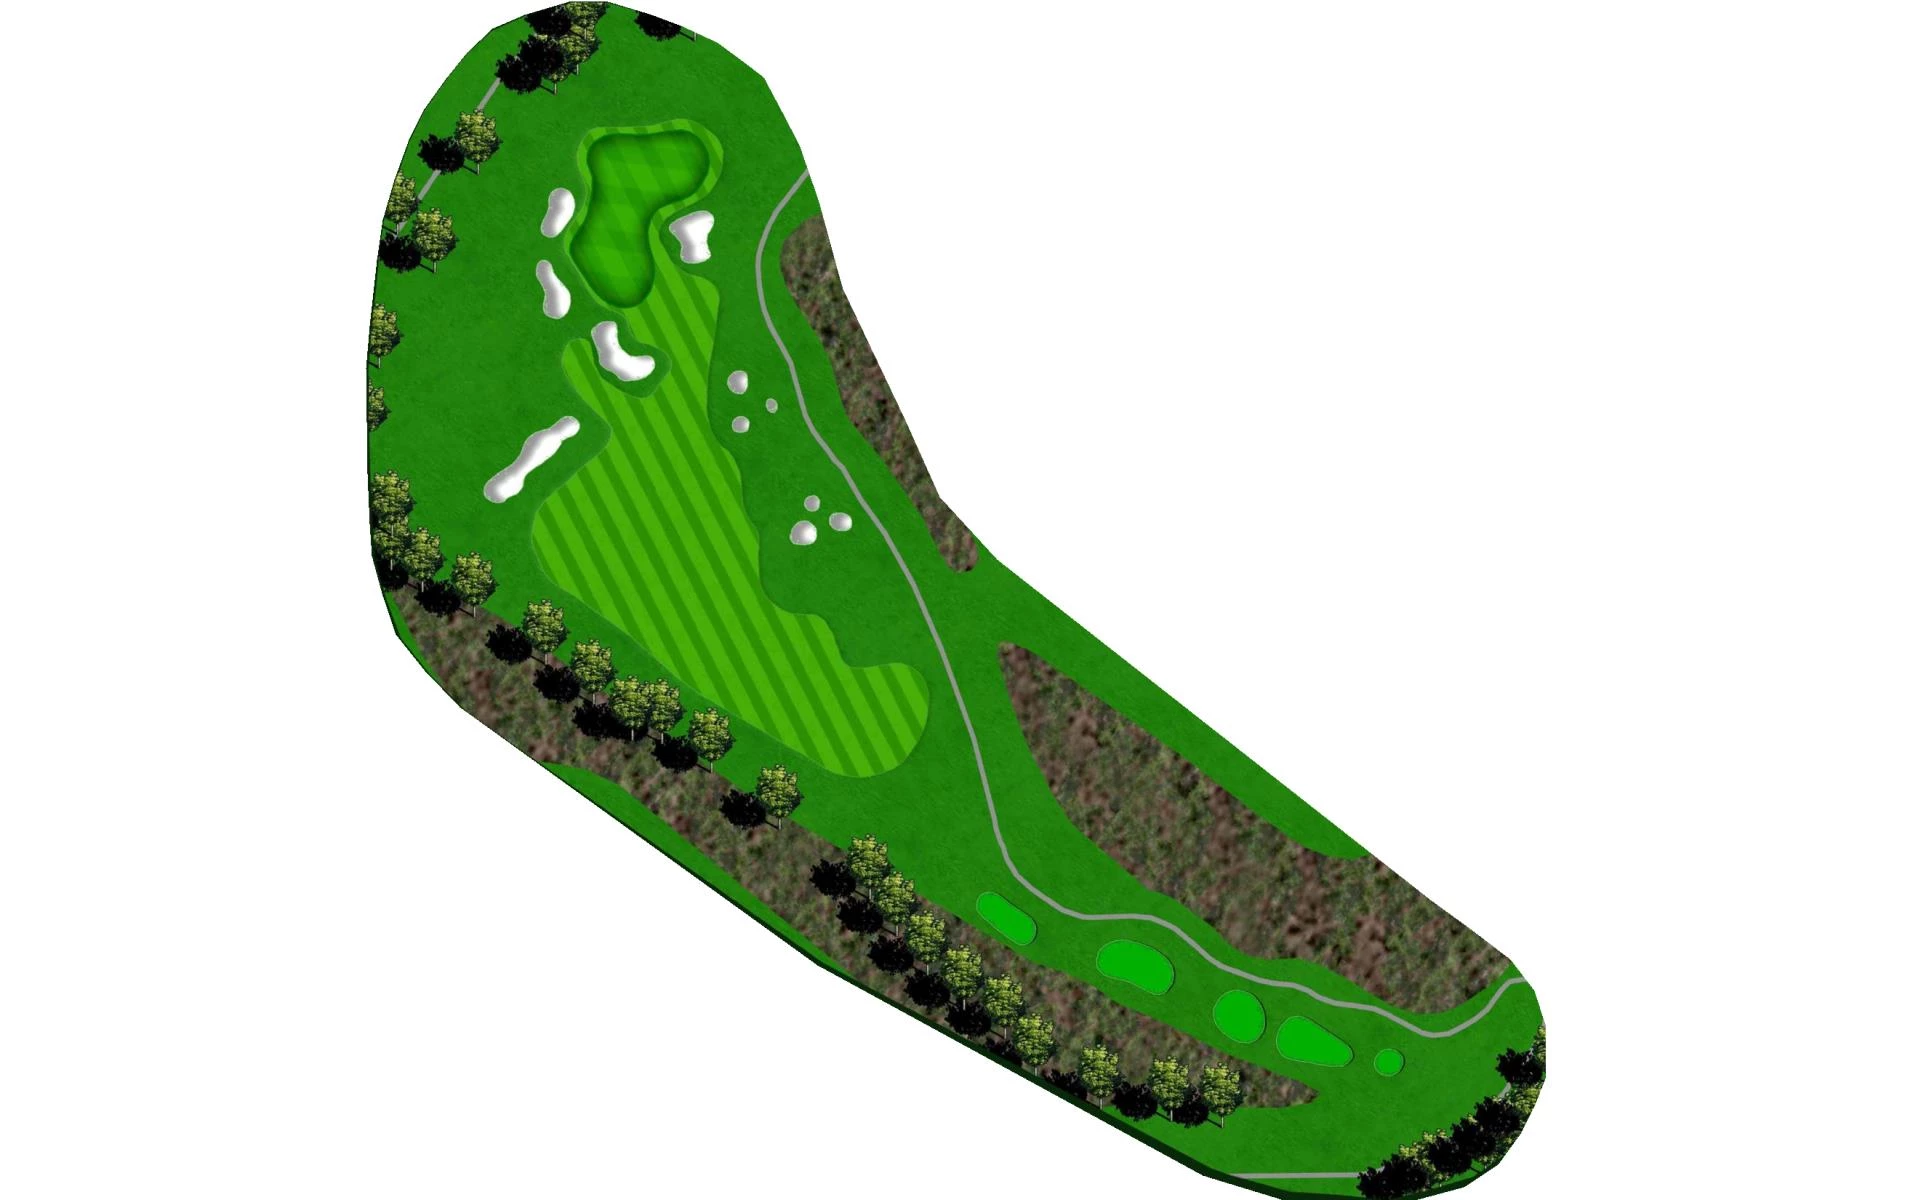
# 4 / Hole #4
Par: 4
Yardage by Tee:
GOLD 441
BLUE 402
WHITE 384
SILVER 300
BRONZE 300
Slope:
Silver 114
Pro Tips
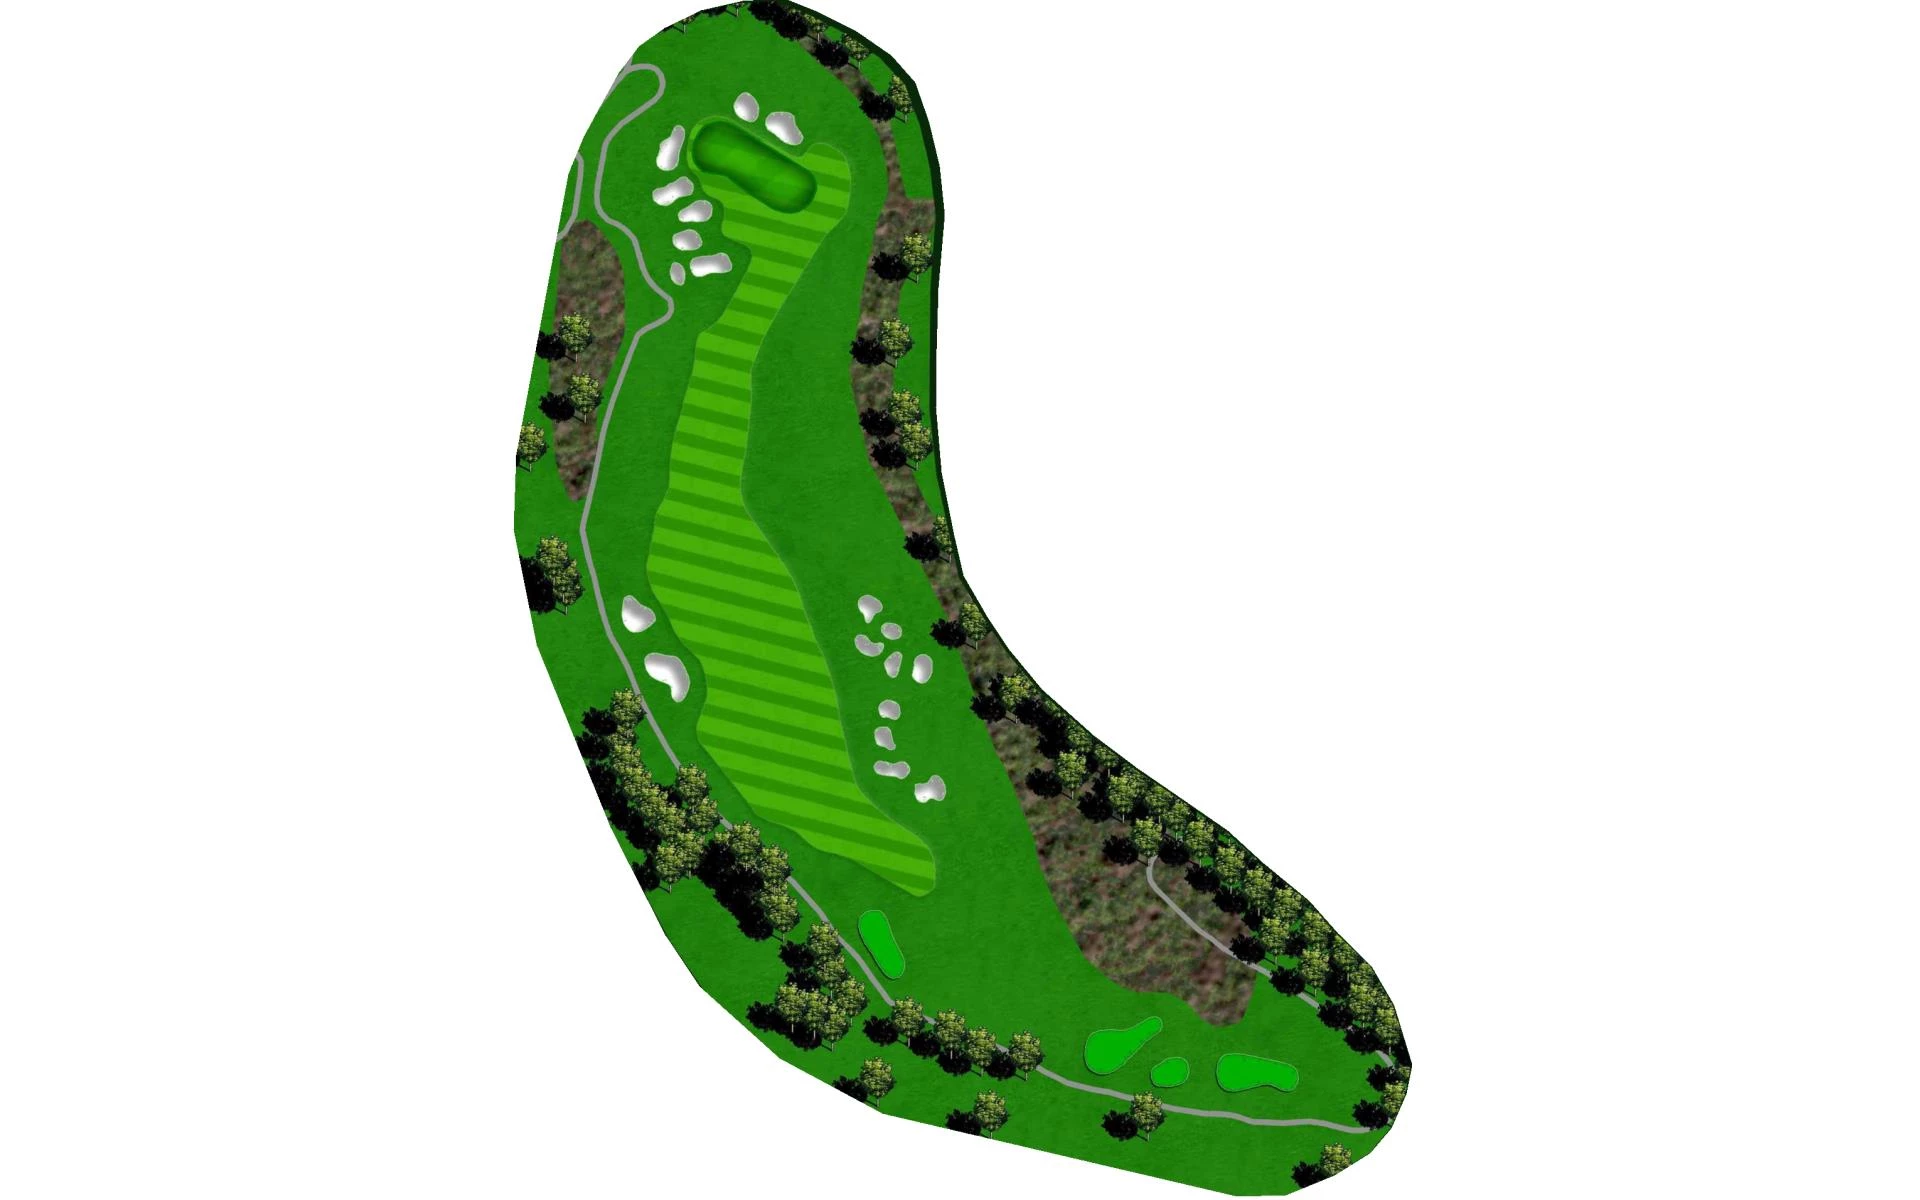
This is an excellent driving hole. The perfect tee shot carries several bunkers carved into a steep hillside to the right side of the landing area and avoids the left fairway bunkers as well. This sets up a shorter approach to the green and takes the bunkers on the right out of play. The forward tees will not be forced to carry as much of these severe hillside bunkers. This shallow and wide green is guarded left and long by bunkers and has mounds creating unique slopes for a variety of hole locations.
# 5 / Hole #5
Par: 3
Yardage by Tee:
GOLD 155
BLUE 129
WHITE 113
SILVER 102
BRONZE 102
Slope:
Bronze 112
Pro Tips
This is a fun Par 3 after navigating the previous holes. The players must negotiate a deep bunker in front of the green and avoid a large bunker to the left. The front bunker divides the green into right and left sections each having their own slopes to navigate. A shot on the wrong side results in a challenging put, but a well-placed shot provides an opportunity for birdie. This hole provides a breather before the more difficult holes heading back to the clubhouse.
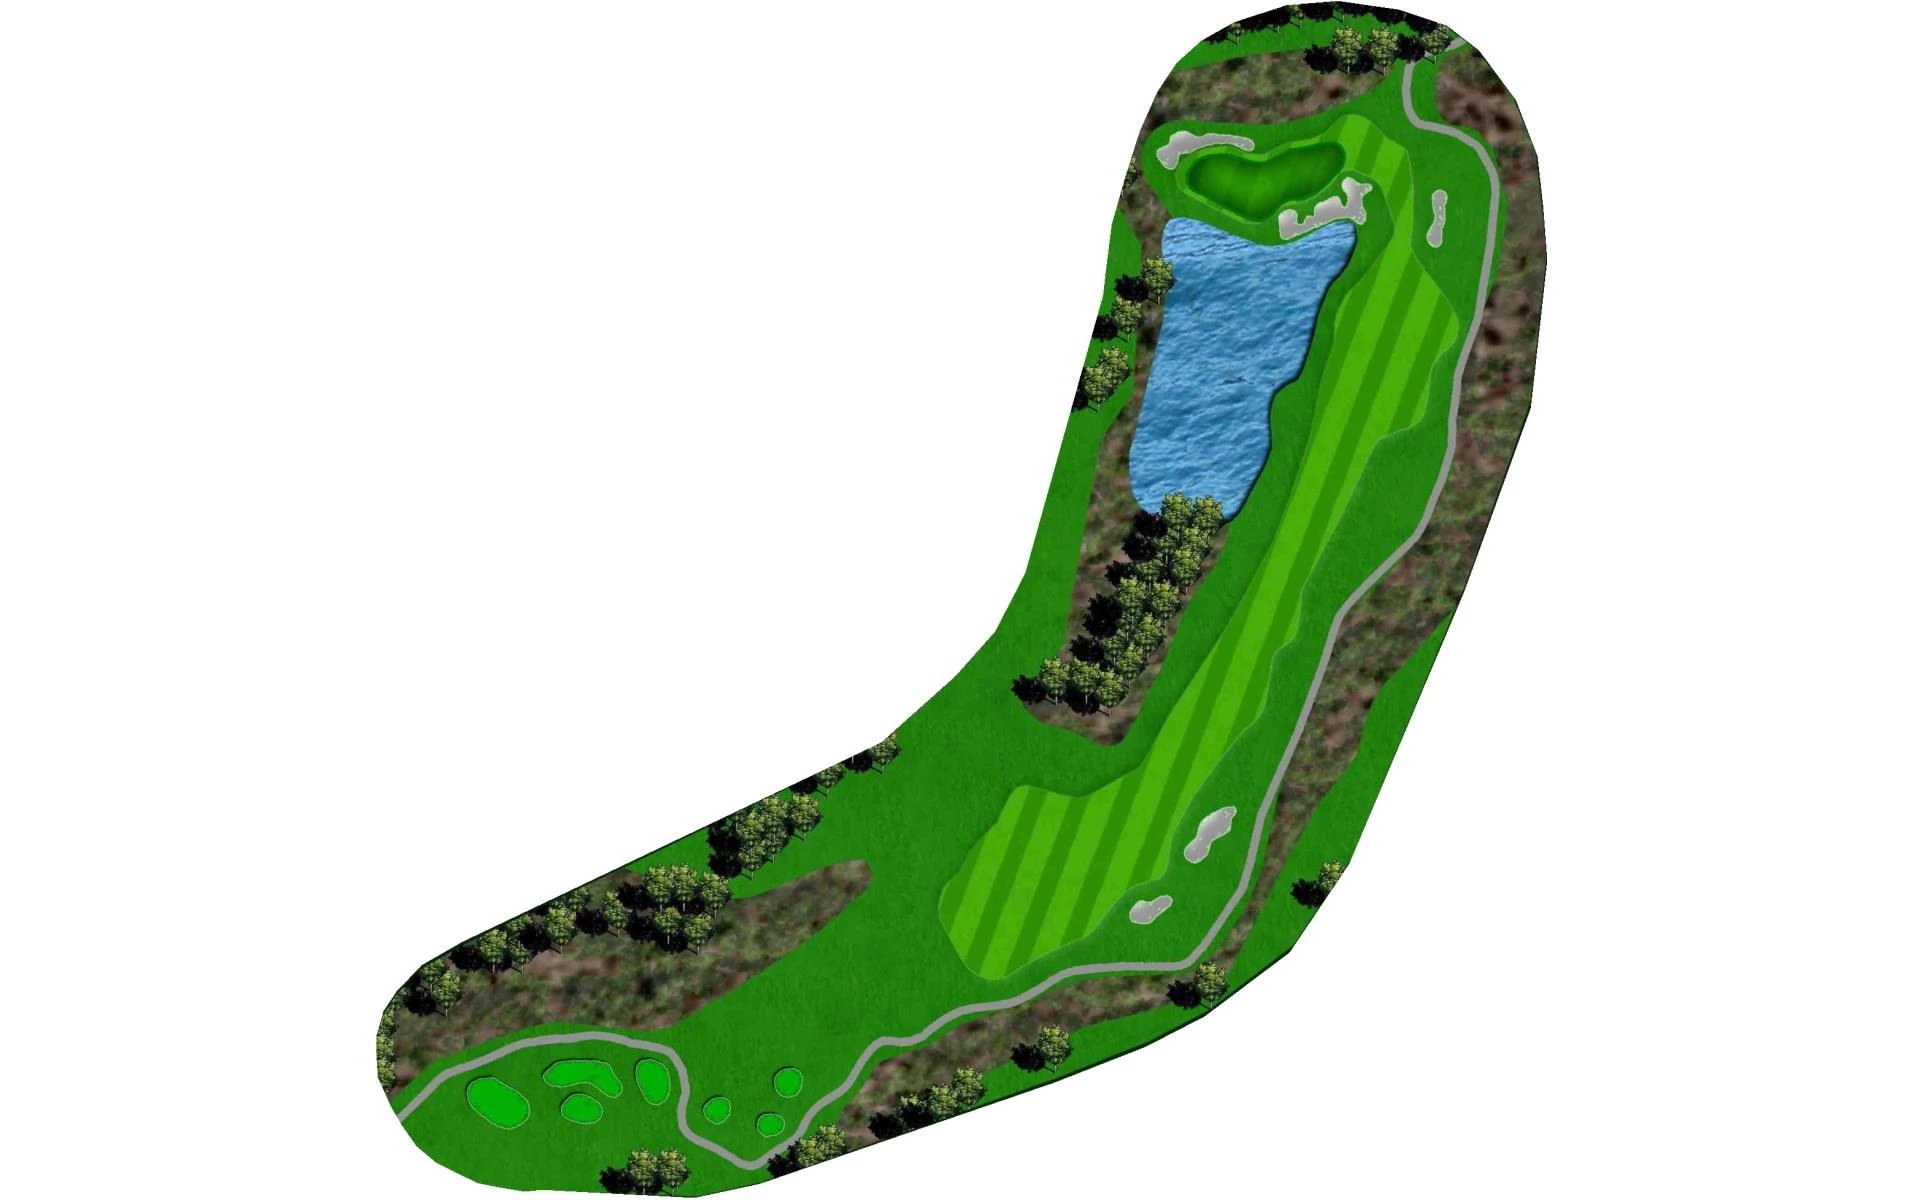
# 6 / Hole #6
Par: 5
Yardage by Tee:
GOLD 548
BLUE 508
WHITE 483
SILVER 440
BRONZE 440
Pro Tips
This is another good Par 5 with the opportunity for the better players to reach the heavily guarded green in two shots. This entire hole plays downhill. Both the first and second landing areas are flattened out of the hillside with a steep undulating fairway between them. The green is wide but shallow with a lake in front and a steep hillside behind, requiring delicate pitch shots.
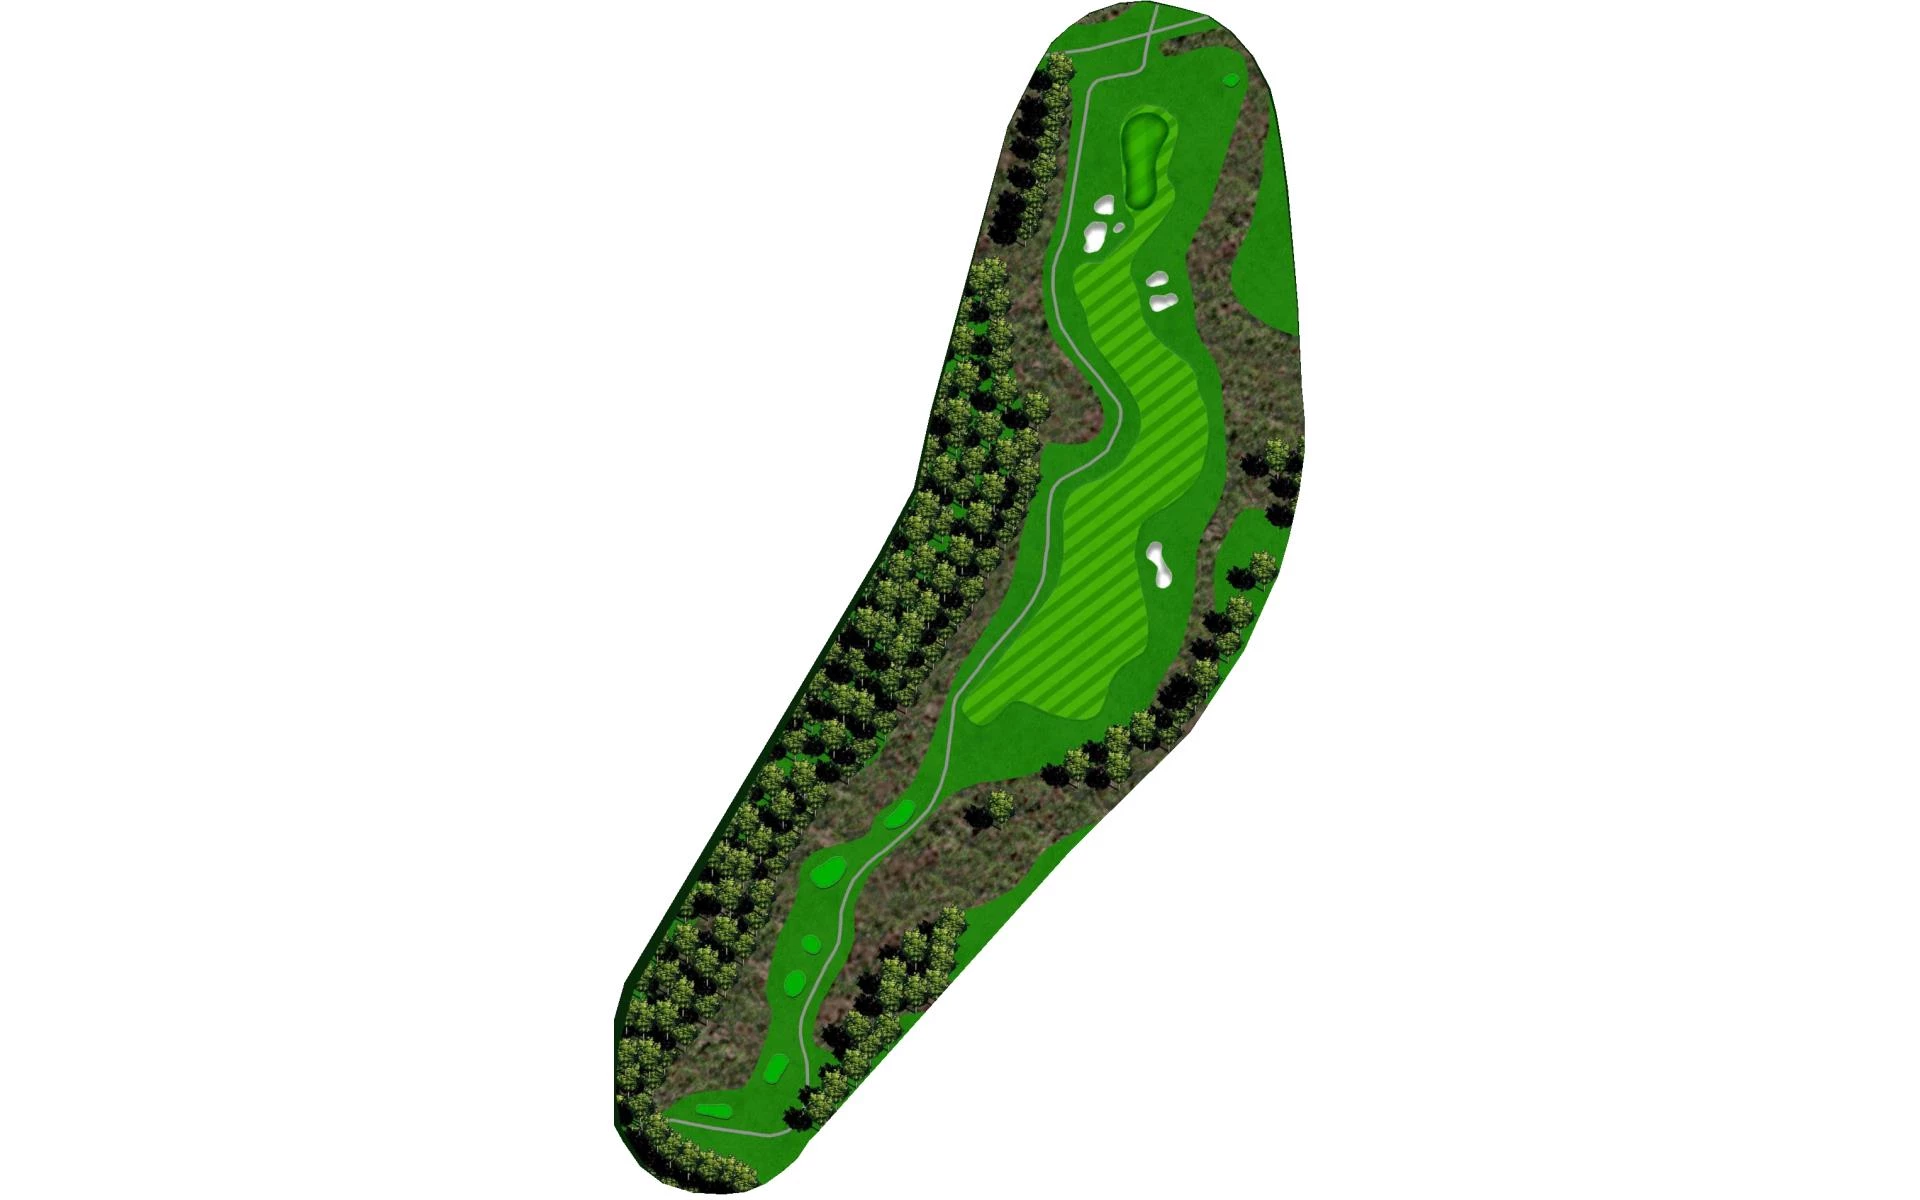
# 7 / Hole #8
Par: 4
Yardage by Tee:
GOLD 548
BLUE 508
WHITE 483
SILVER 440
BRONZE 440
Pro Tips
This long Par 4 traverses 80 feet downhill but still demands two solid shots to reach the green. All the tees look down on the landing area with wetlands on the left and a large fairway bunker to the right. The ideal tee shot challenges the bunker and hillside on the right to keep from rolling into the wetland on the left. The second shot is played over a wetland peninsula to a green cut into the existing hillside with bunkers on the left to keep balls from running down the hill into the wetland. This is one of the toughest holes on the course.
# 8 / Hole #1
Par: 5
Yardage by Tee:
GOLD 478
BLUE 448
WHITE 410
SILVER 323
BRONZE 323
Pro Tips
This is a great three shot double dogleg Par 5. The tee shot plays downhill and over a stream. The wide first landing area is still guarded by trees along both sides of the fairway and narrows as the hole turns left. The hole then turns to the right with a hillside along the right and penalty area left requiring a precise second shot for the final approach. The green is set at an angle with bunkers short right and long left and has a predominant slope from back right to front left of the green.
# 9 / Hole #9
Par: 4
Yardage by Tee:
GOLD 409
BLUE 368
WHITE 324
SILVER 284
BRONZE 161
Pro Tips
This is a great finishing hole with two separate fairways to choose from. The left fairway requires less carry over the existing wetland but sets up a more difficult second shot over a lake – all carry. The right fairway is narrower and requires a longer carry over the wetland but a shorter approach with no lake to navigate. The awaiting green slopes severely towards the water and sits below the clubhouse with bunkers to either side.