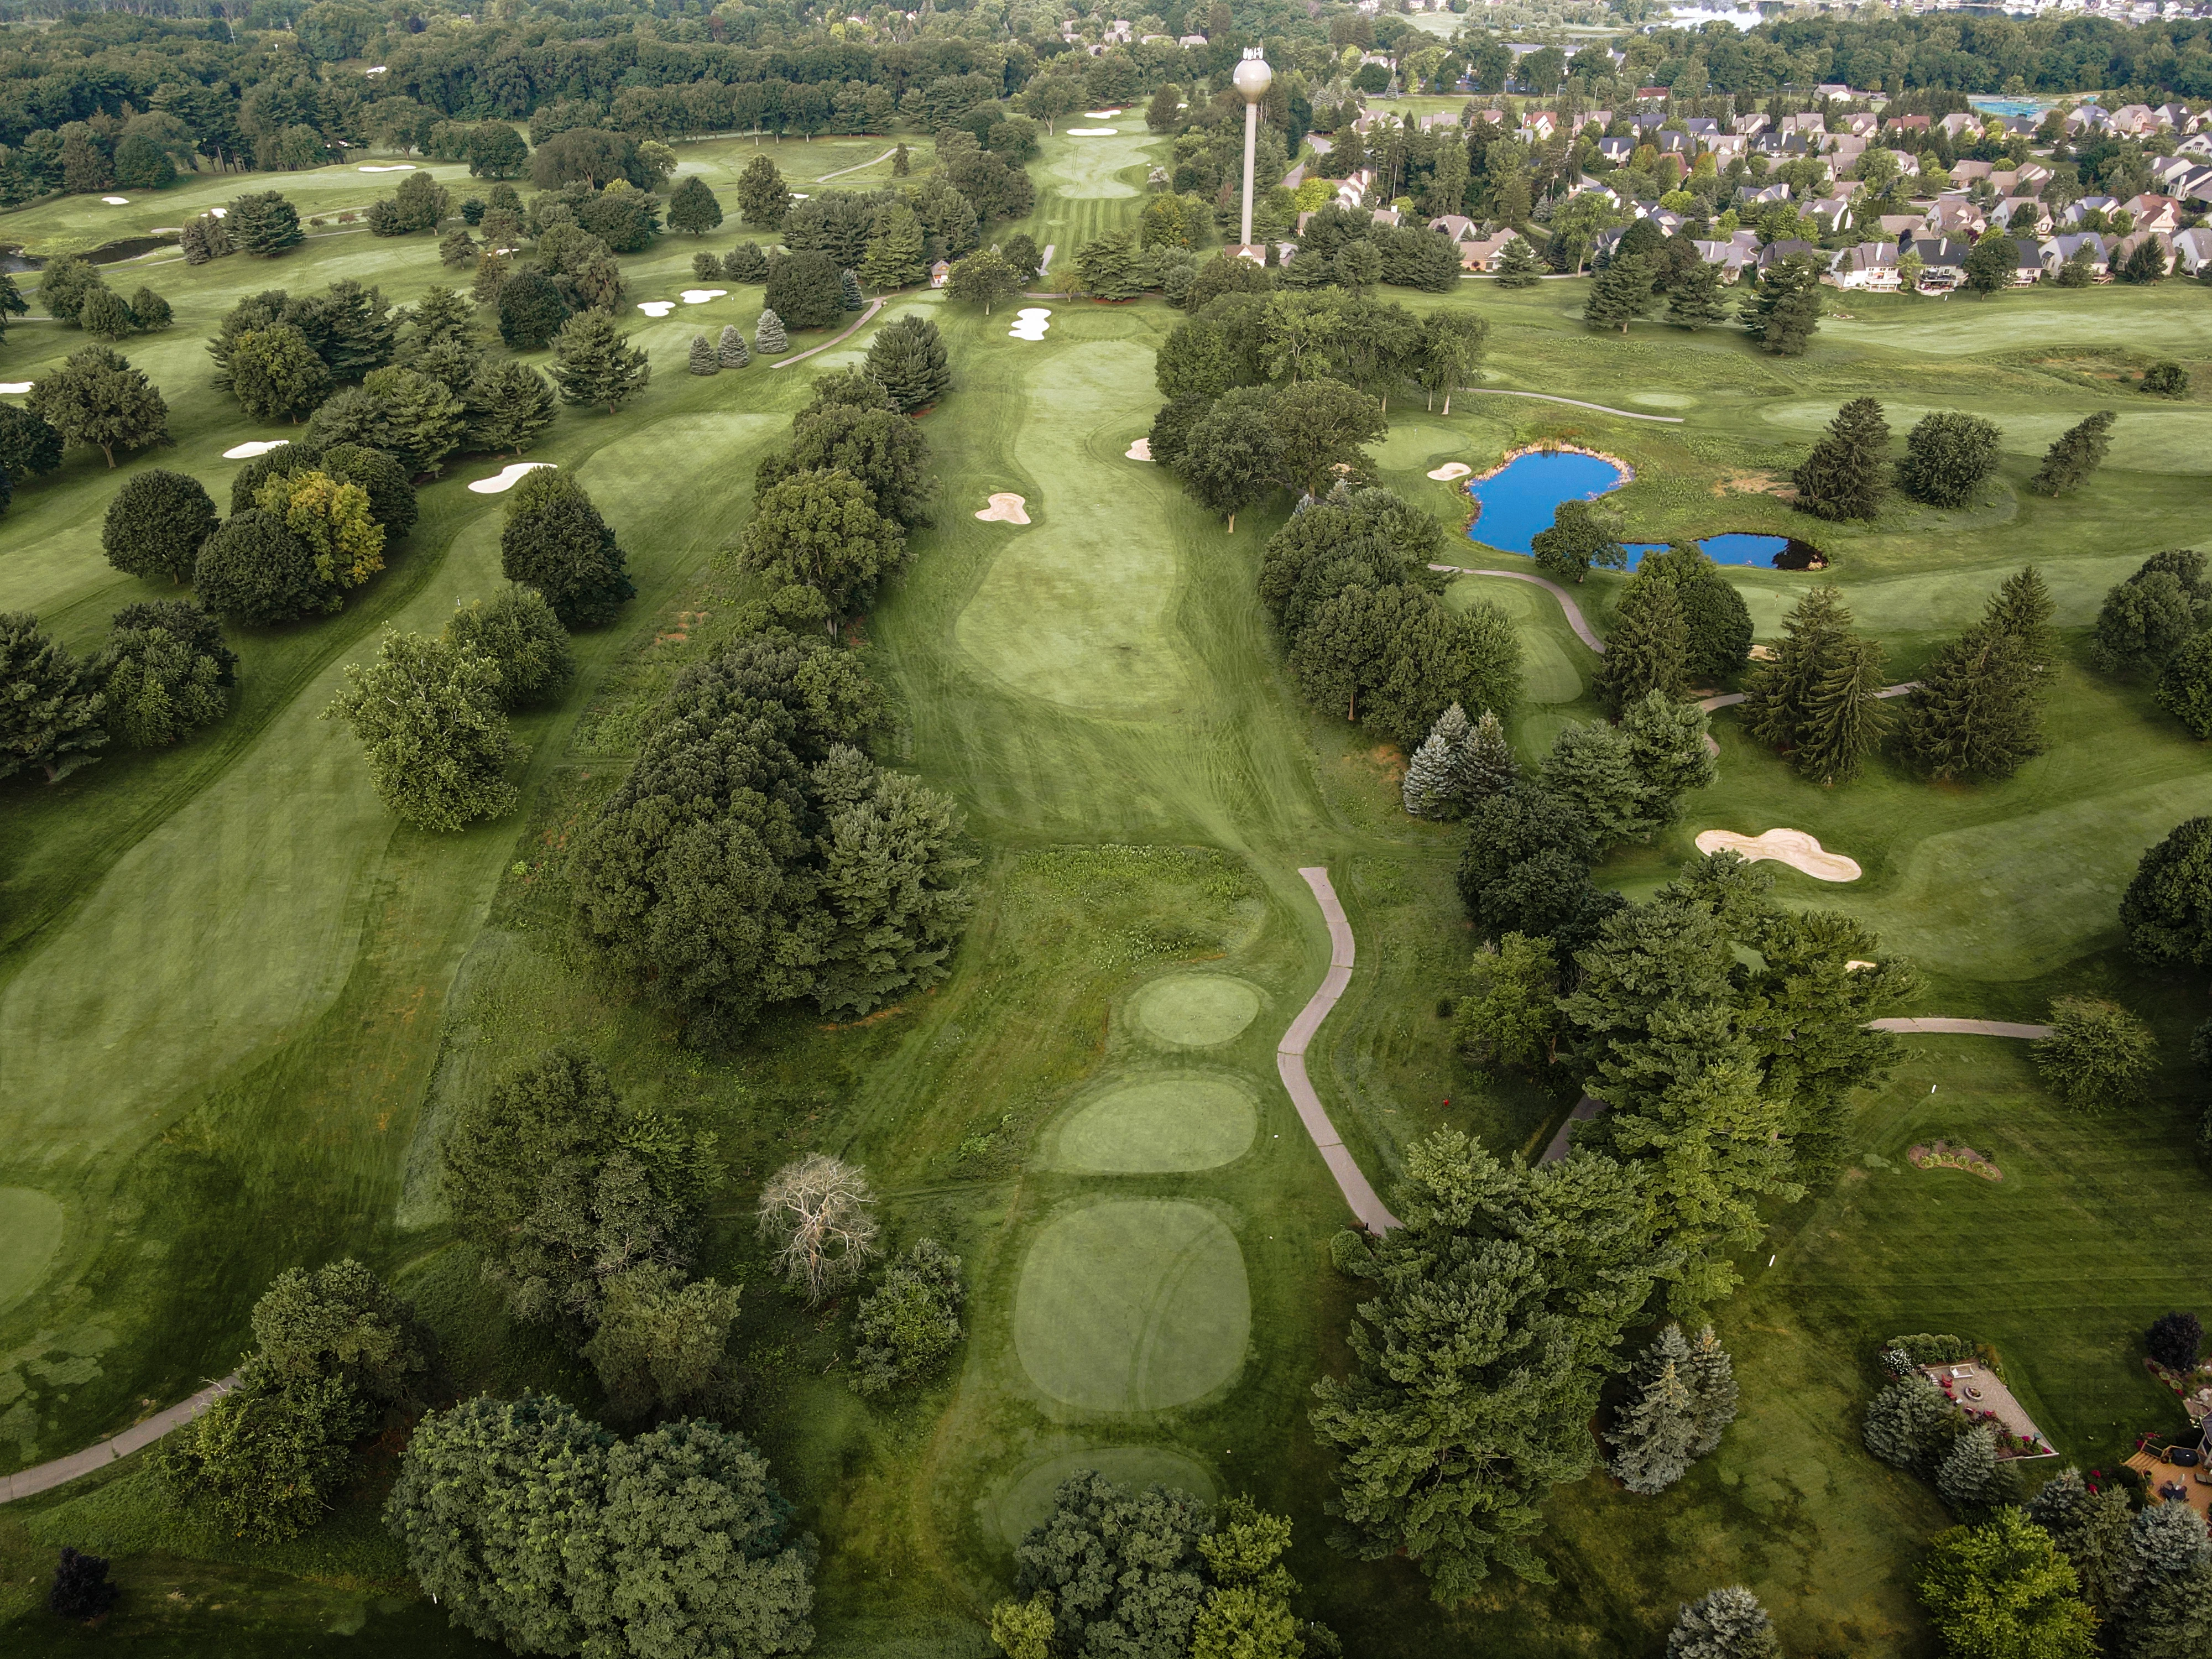
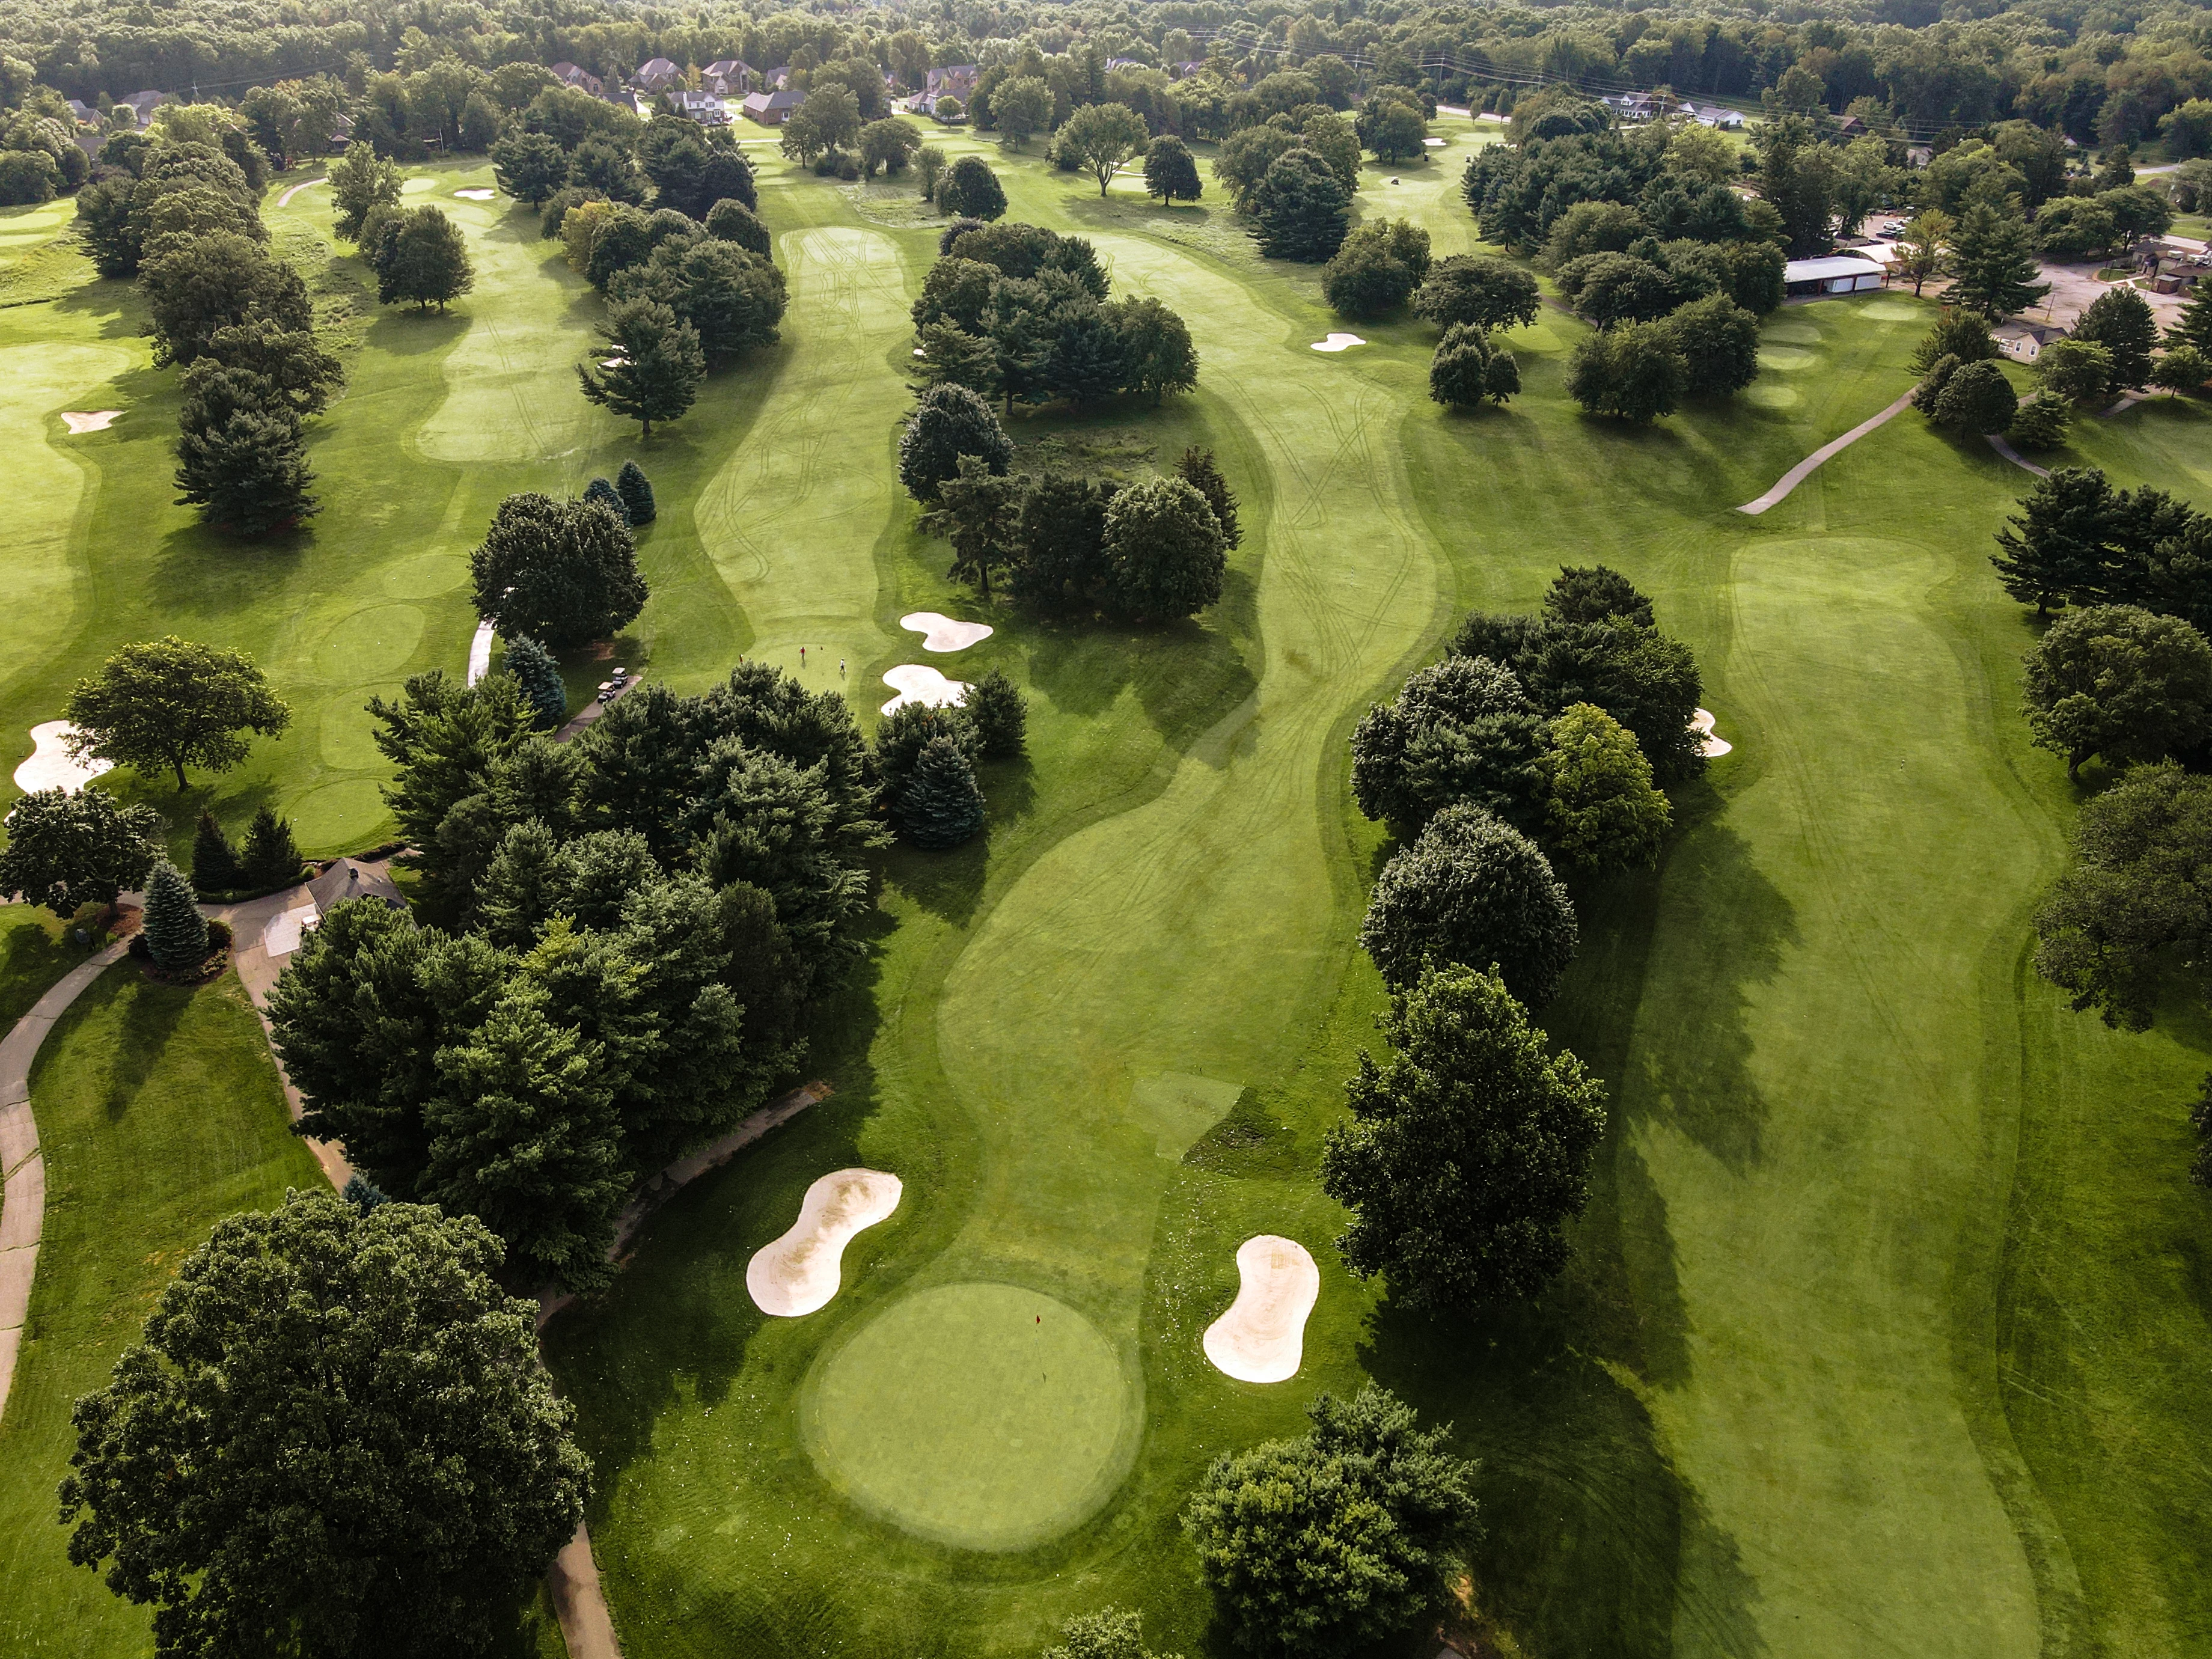
Championship Course
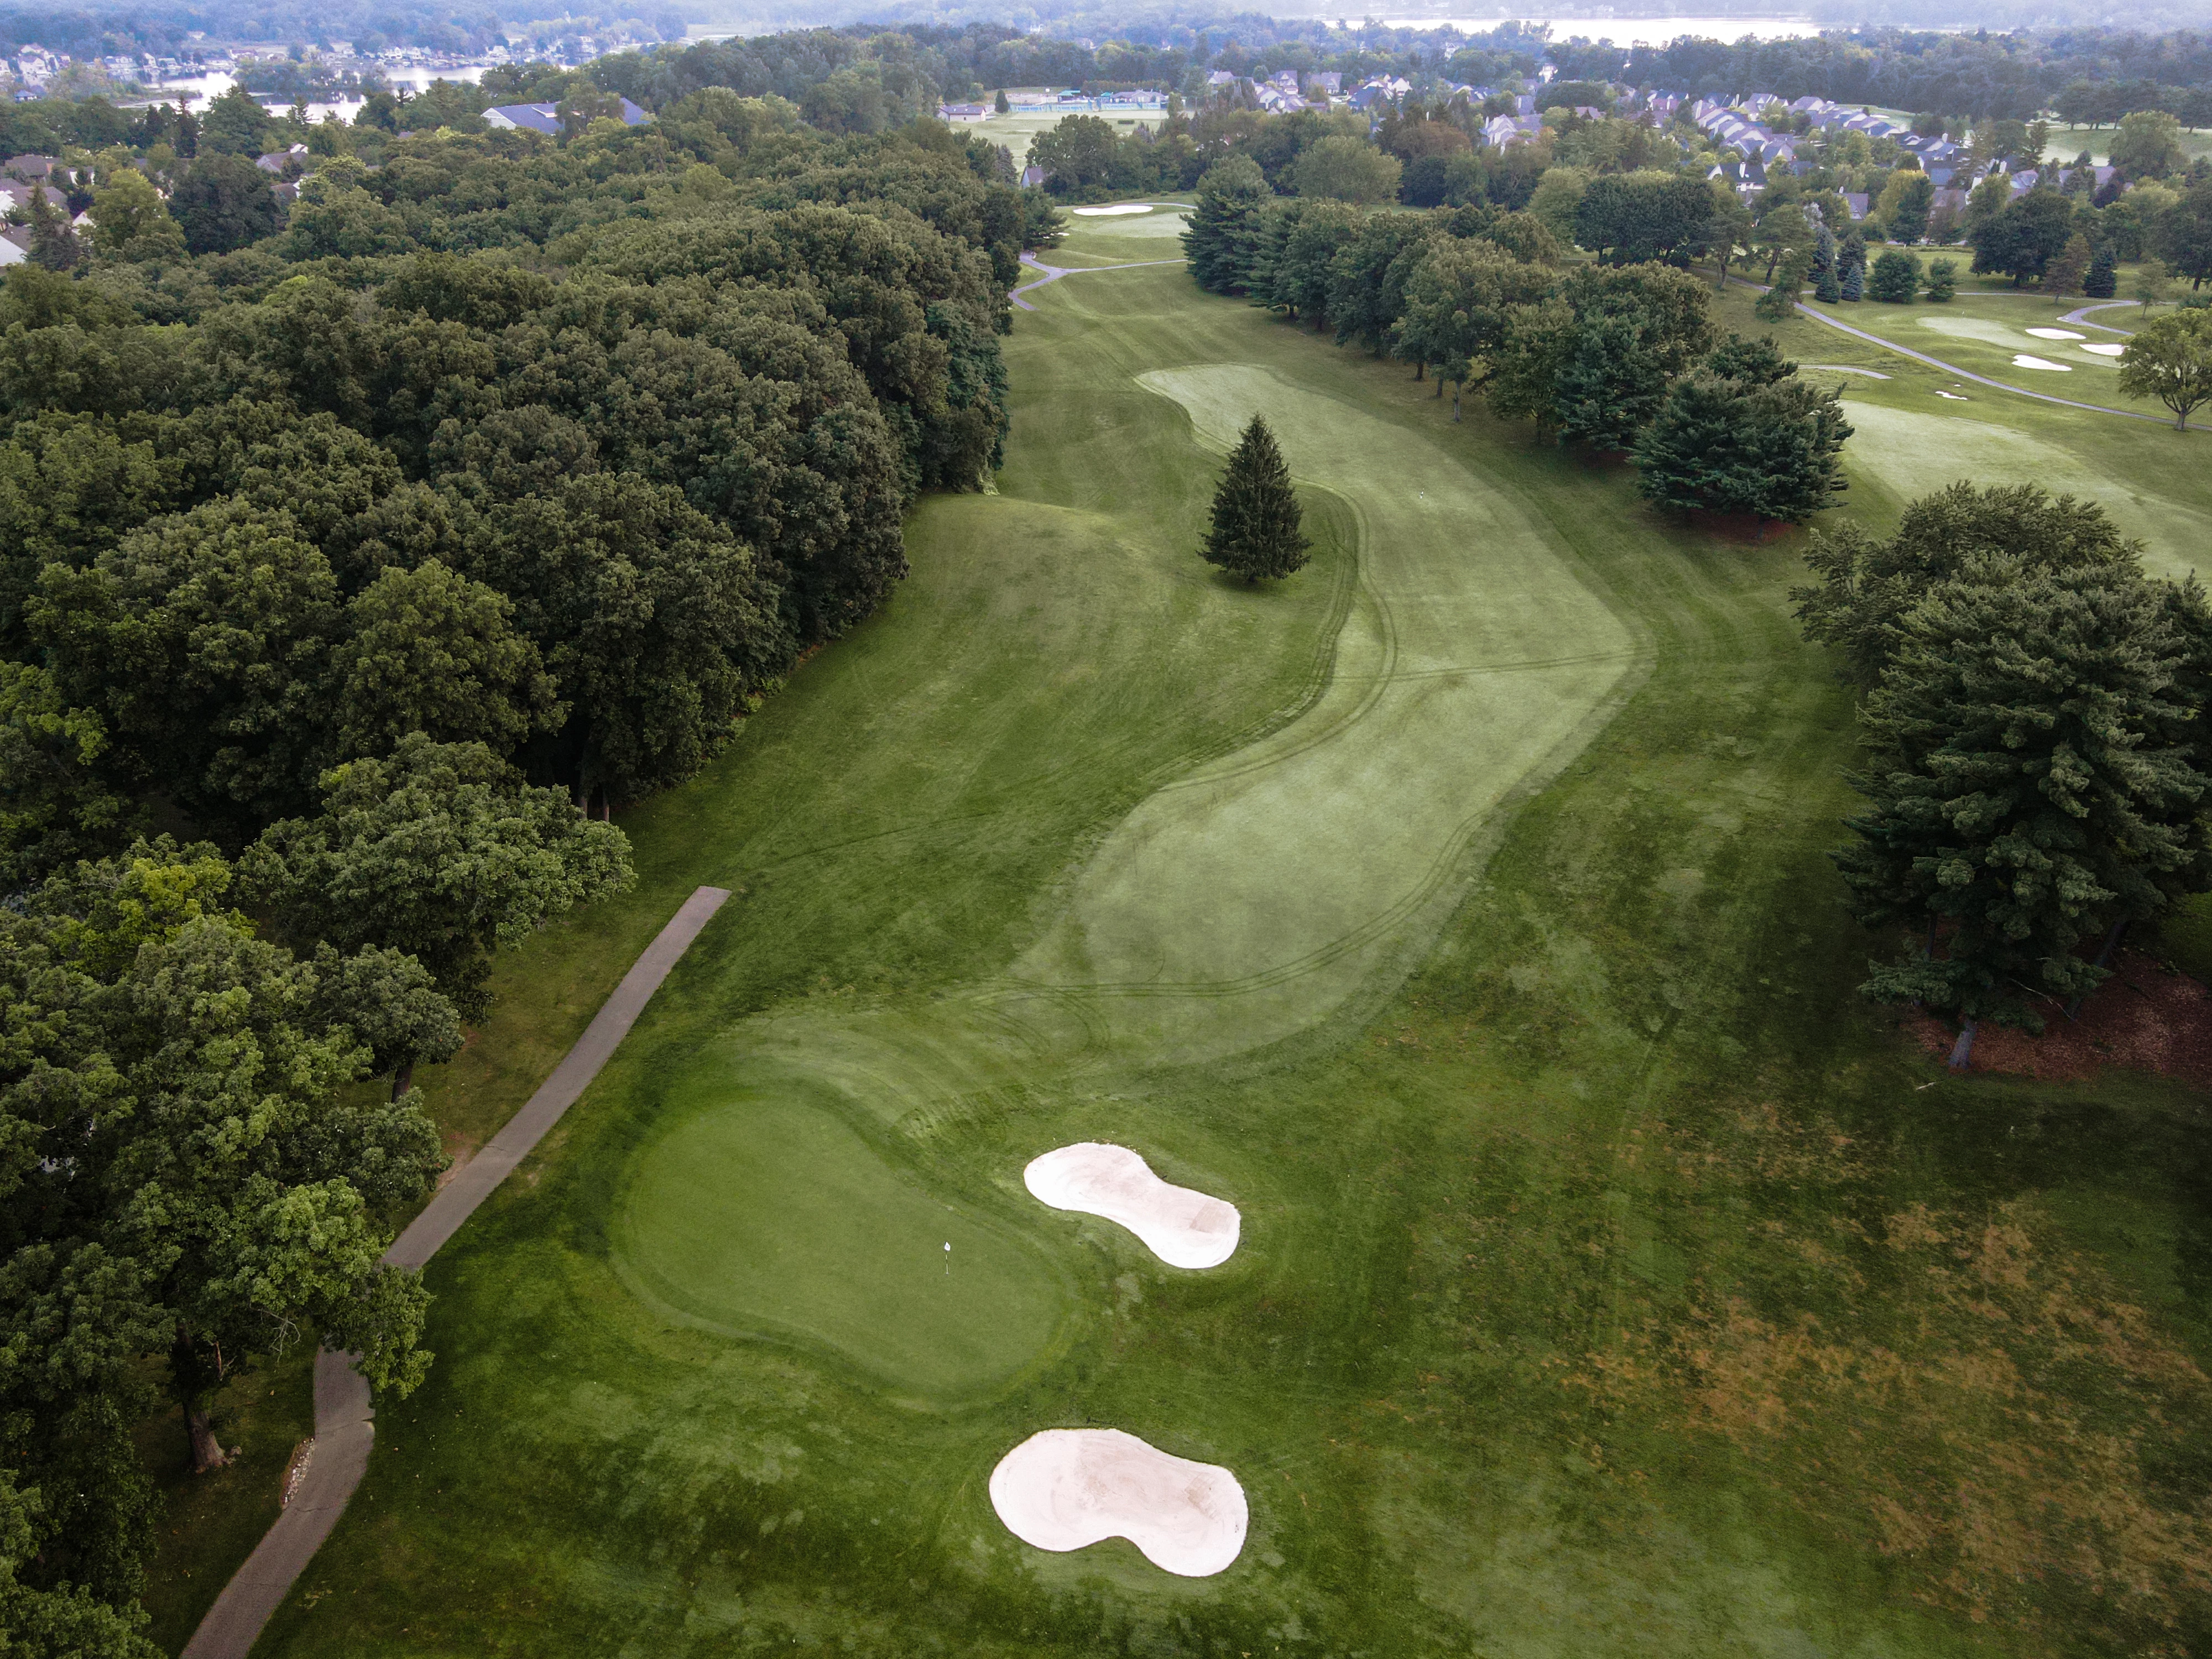
# 1 /
Par: 4
Handicaps:
Men's 5
Women's 5
The starting hole is a challenging dog leg right Par 4. Aim your drive to the left of the lone pine in the fairway to best position your se…
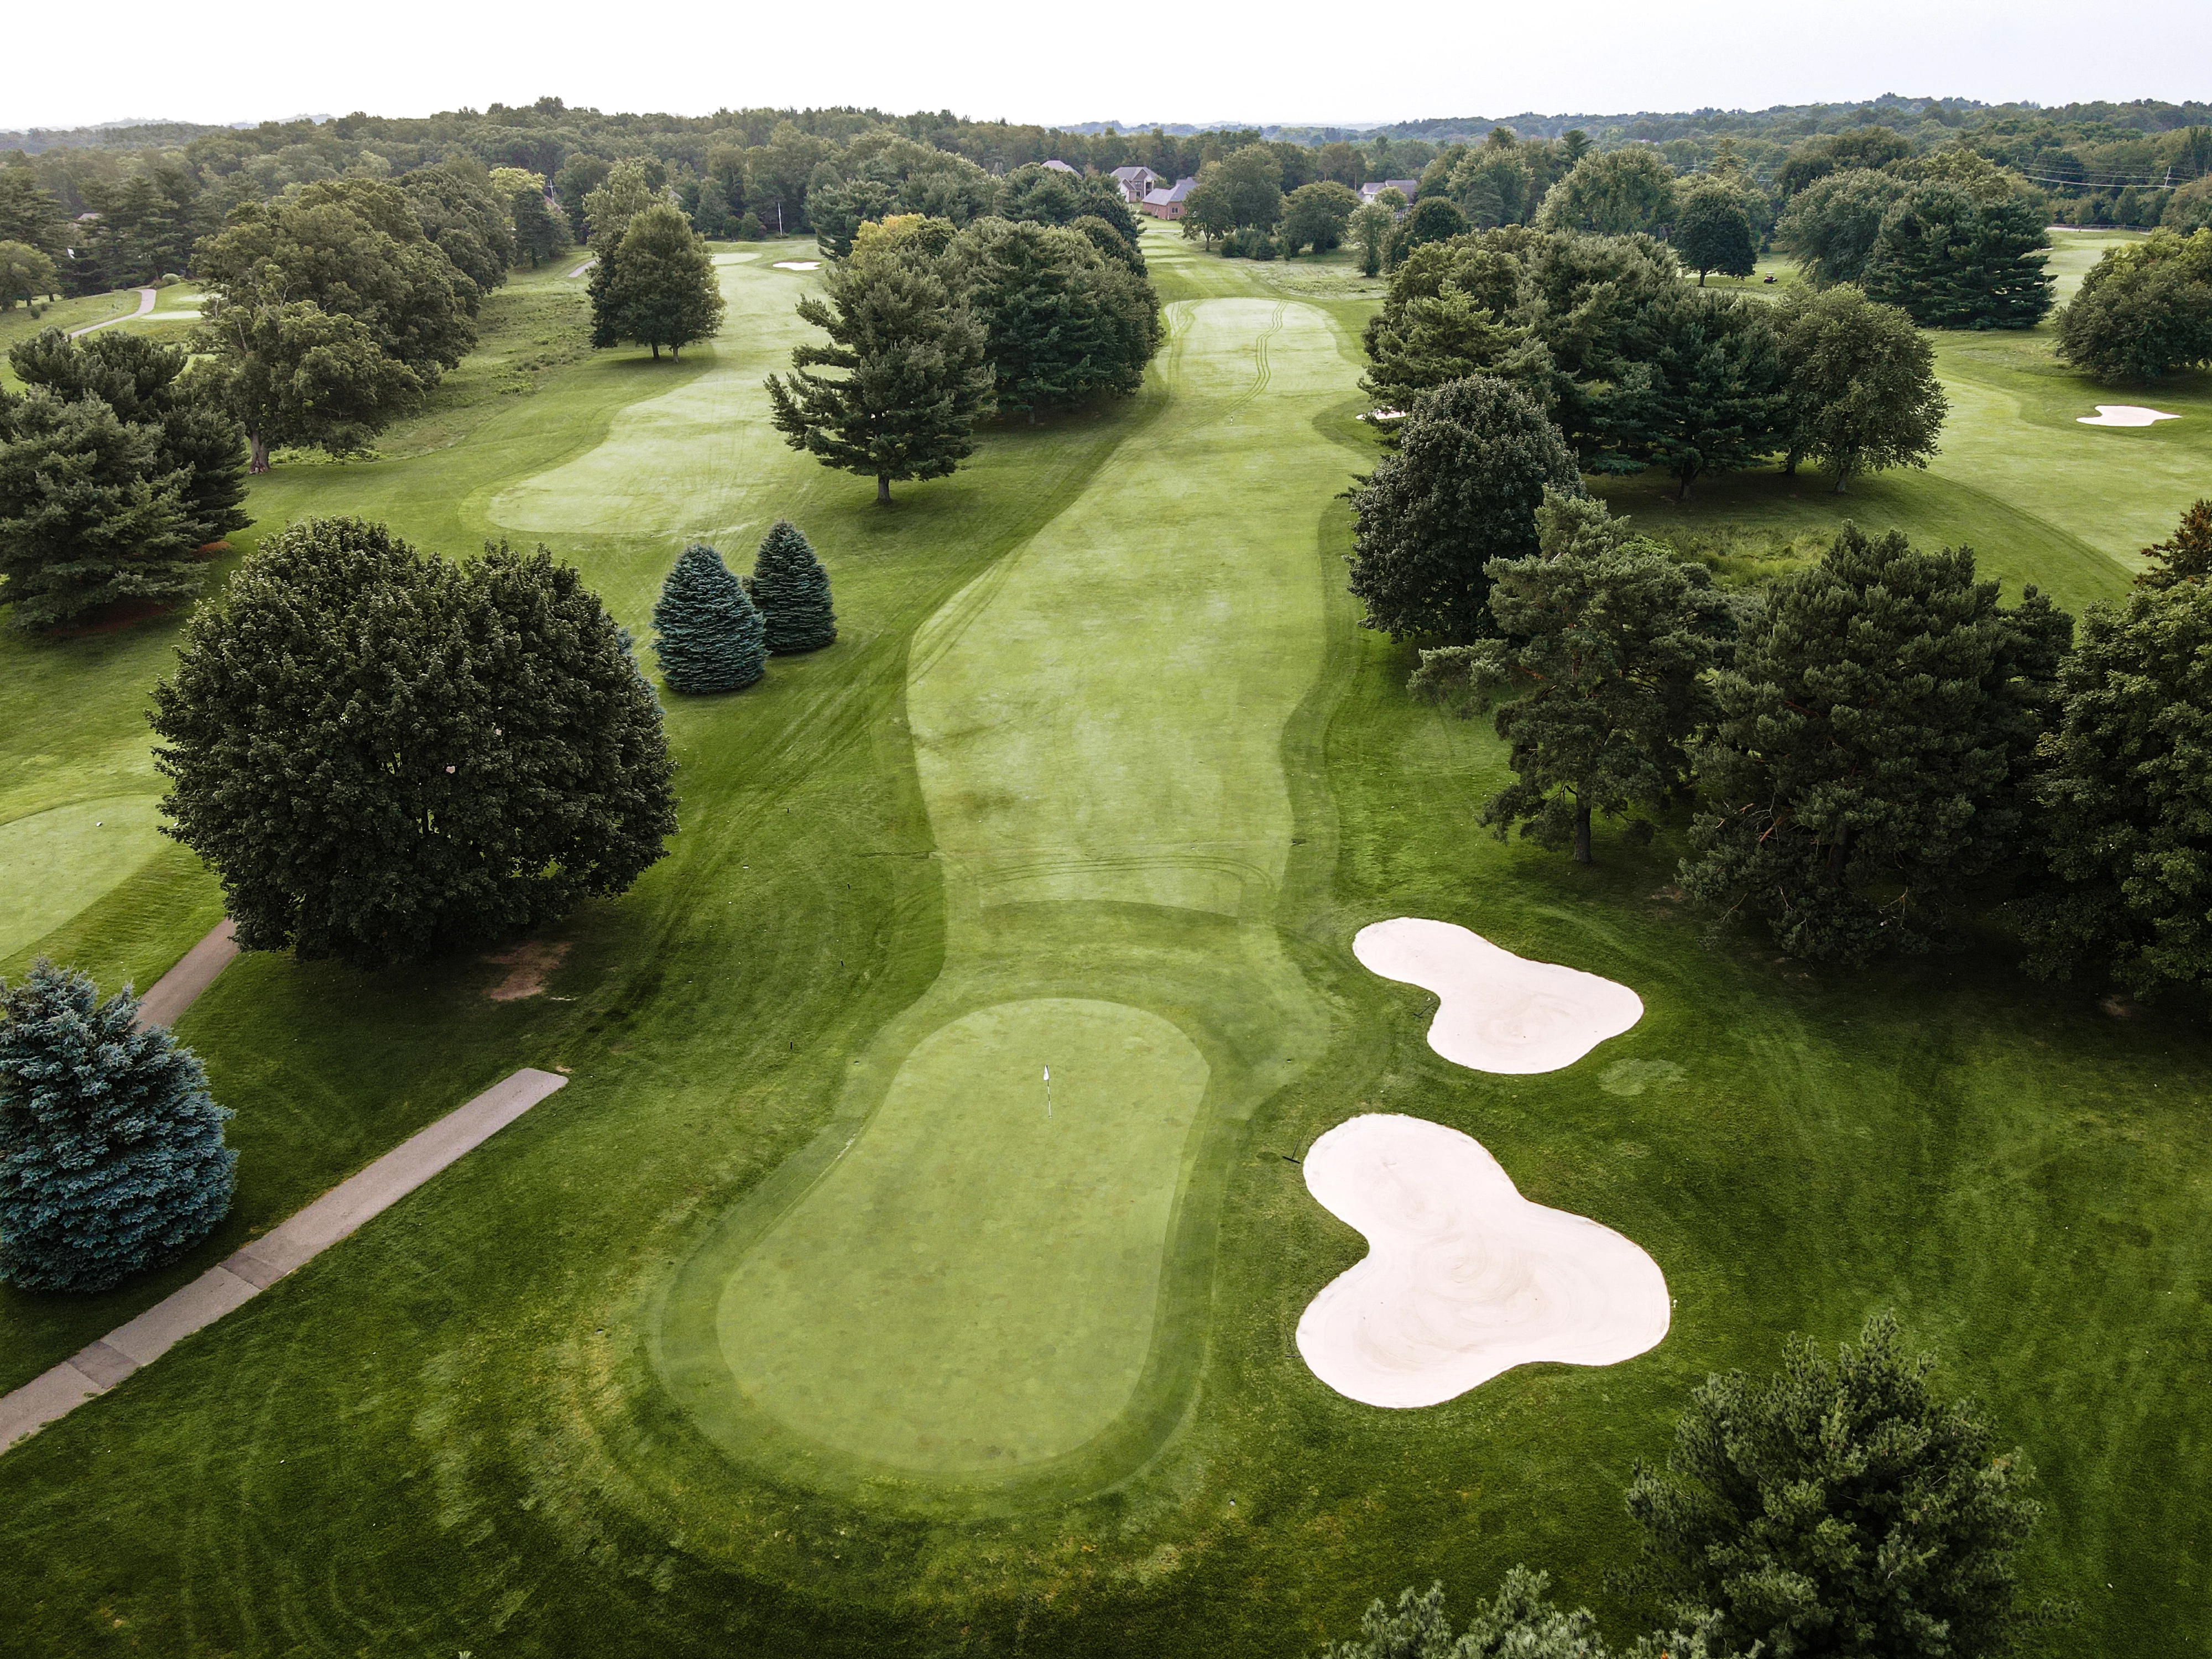
The starting hole is a challenging dog leg right Par 4. Aim your drive to the left of the lone pine in the fairway to best position your second shot. Your approach shot will be to an elevated green that is well bunkered. Sand traps protect the green front left and back left. There is a spine in the middle of the green that can lead to some challenging putts.
Yardage by Tee:
GOLD 369
BLUE 362
WHITE 329
RED 289
Slope:
Gold 136 | Blue 133 | White 126 | Red 123
Pro Tips
| Use the pine tree as an aim point off the tee. Anything past that should leave you in great position. |
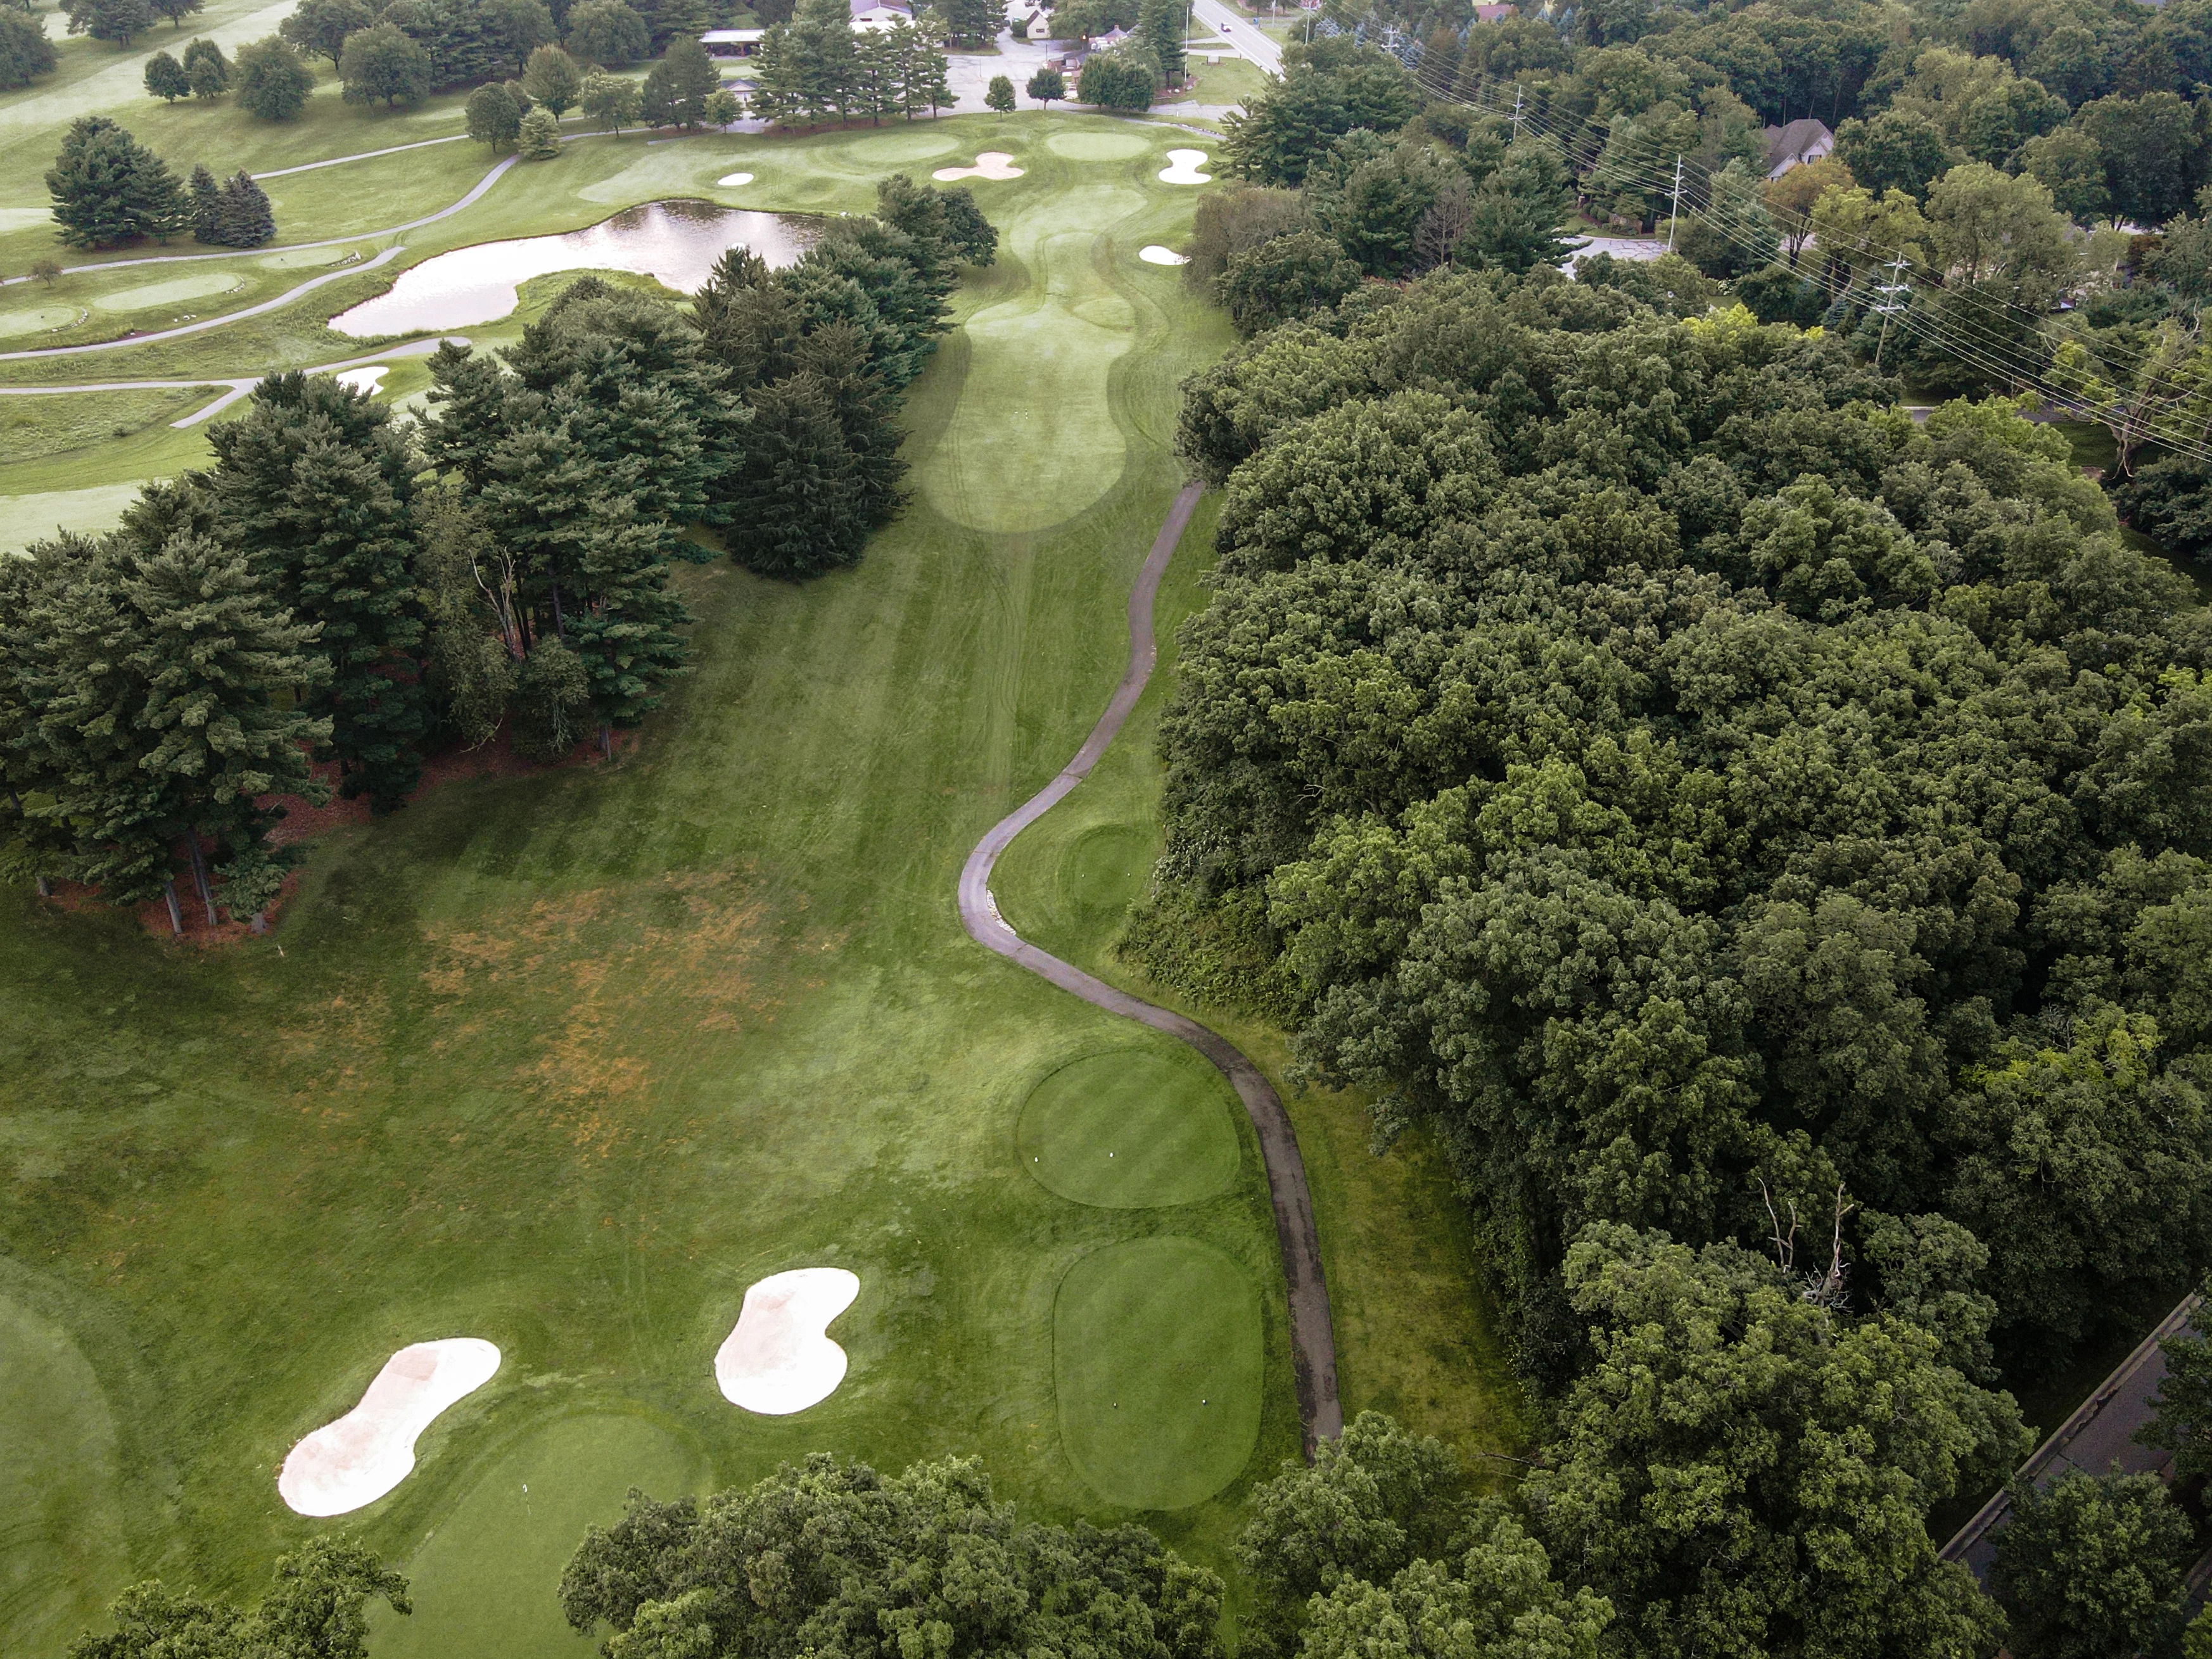
# 2 /
Par: 4
Handicaps:
Men's 9
Women's 9
A straight away rolling Par 4. There is OB on the right side of this fairway. The elevated green has bunkers on the left and right side of …
A straight away rolling Par 4. There is OB on the right side of this fairway. The elevated green has bunkers on the left and right side of the green so an accurate approach is required. Front pin positions can cause issues if the approach shot is not hit the correct distance.
Yardage by Tee:
GOLD 342
BLUE 319
WHITE 299
RED 264
Slope:
Gold 136 | Blue 133 | White 126 | Red 123
Pro Tips
| Long off the tee here is not always best. Lay-Up to the 150 Stick for a level second shot. |
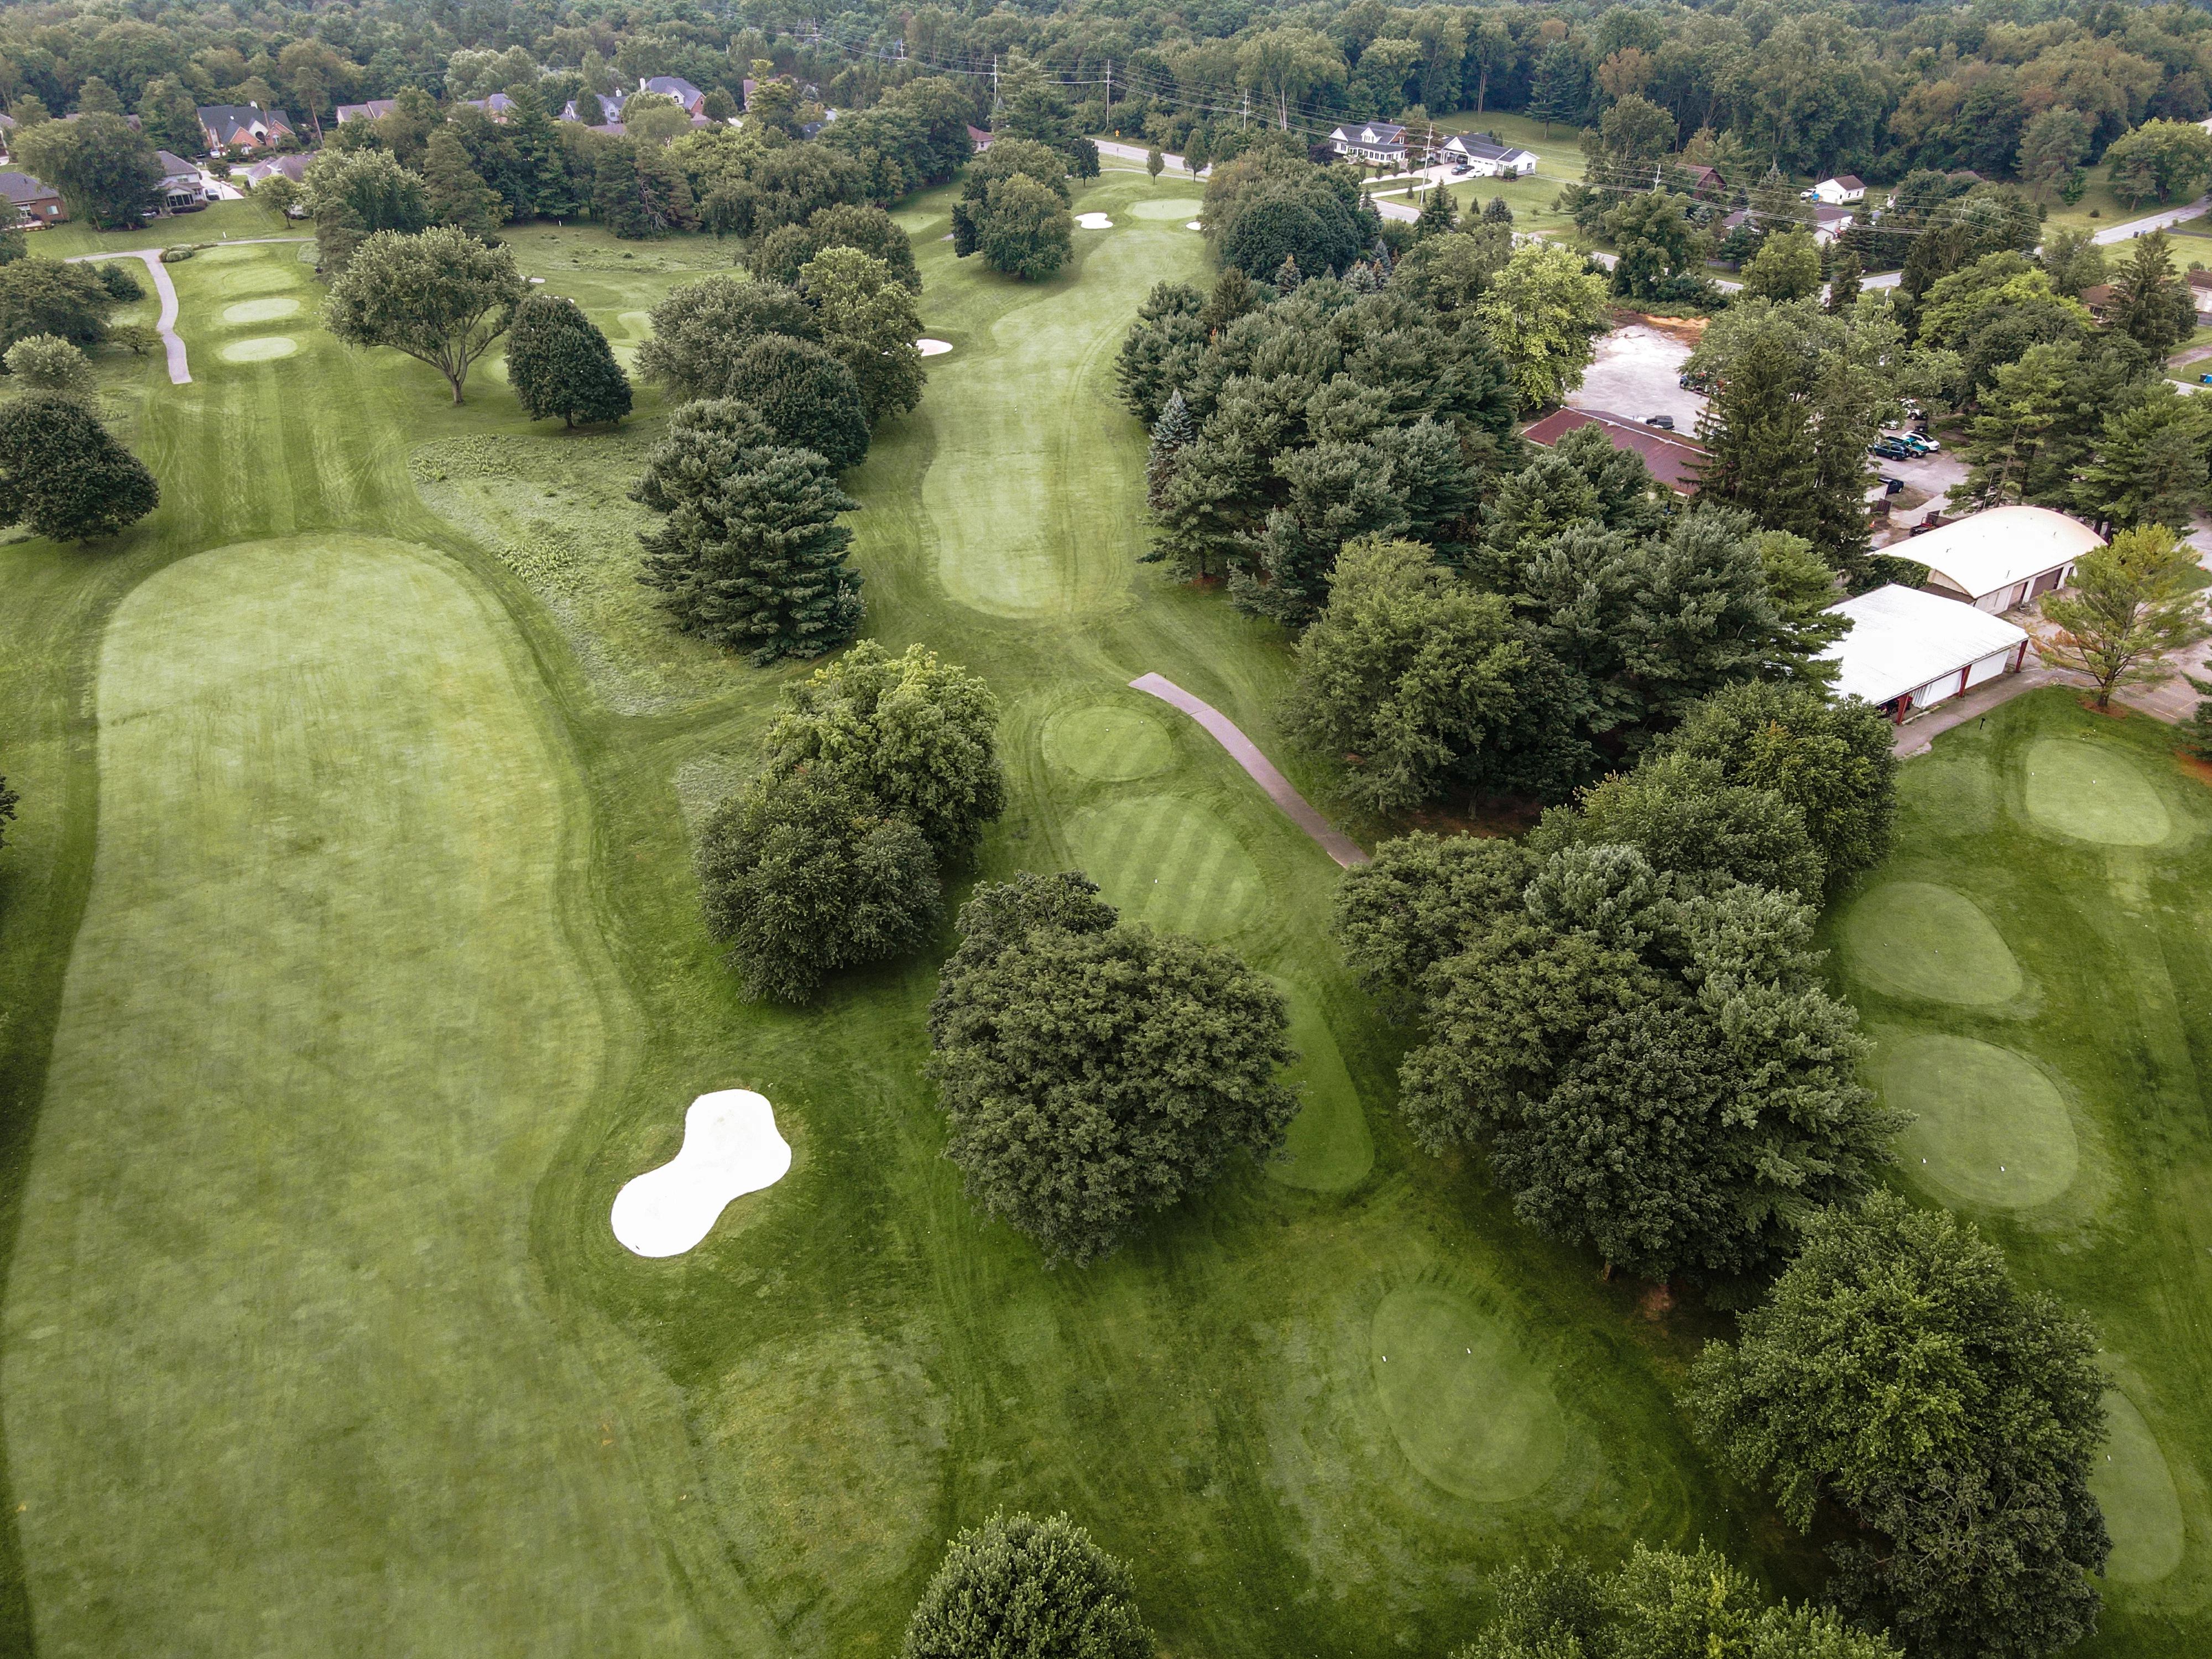
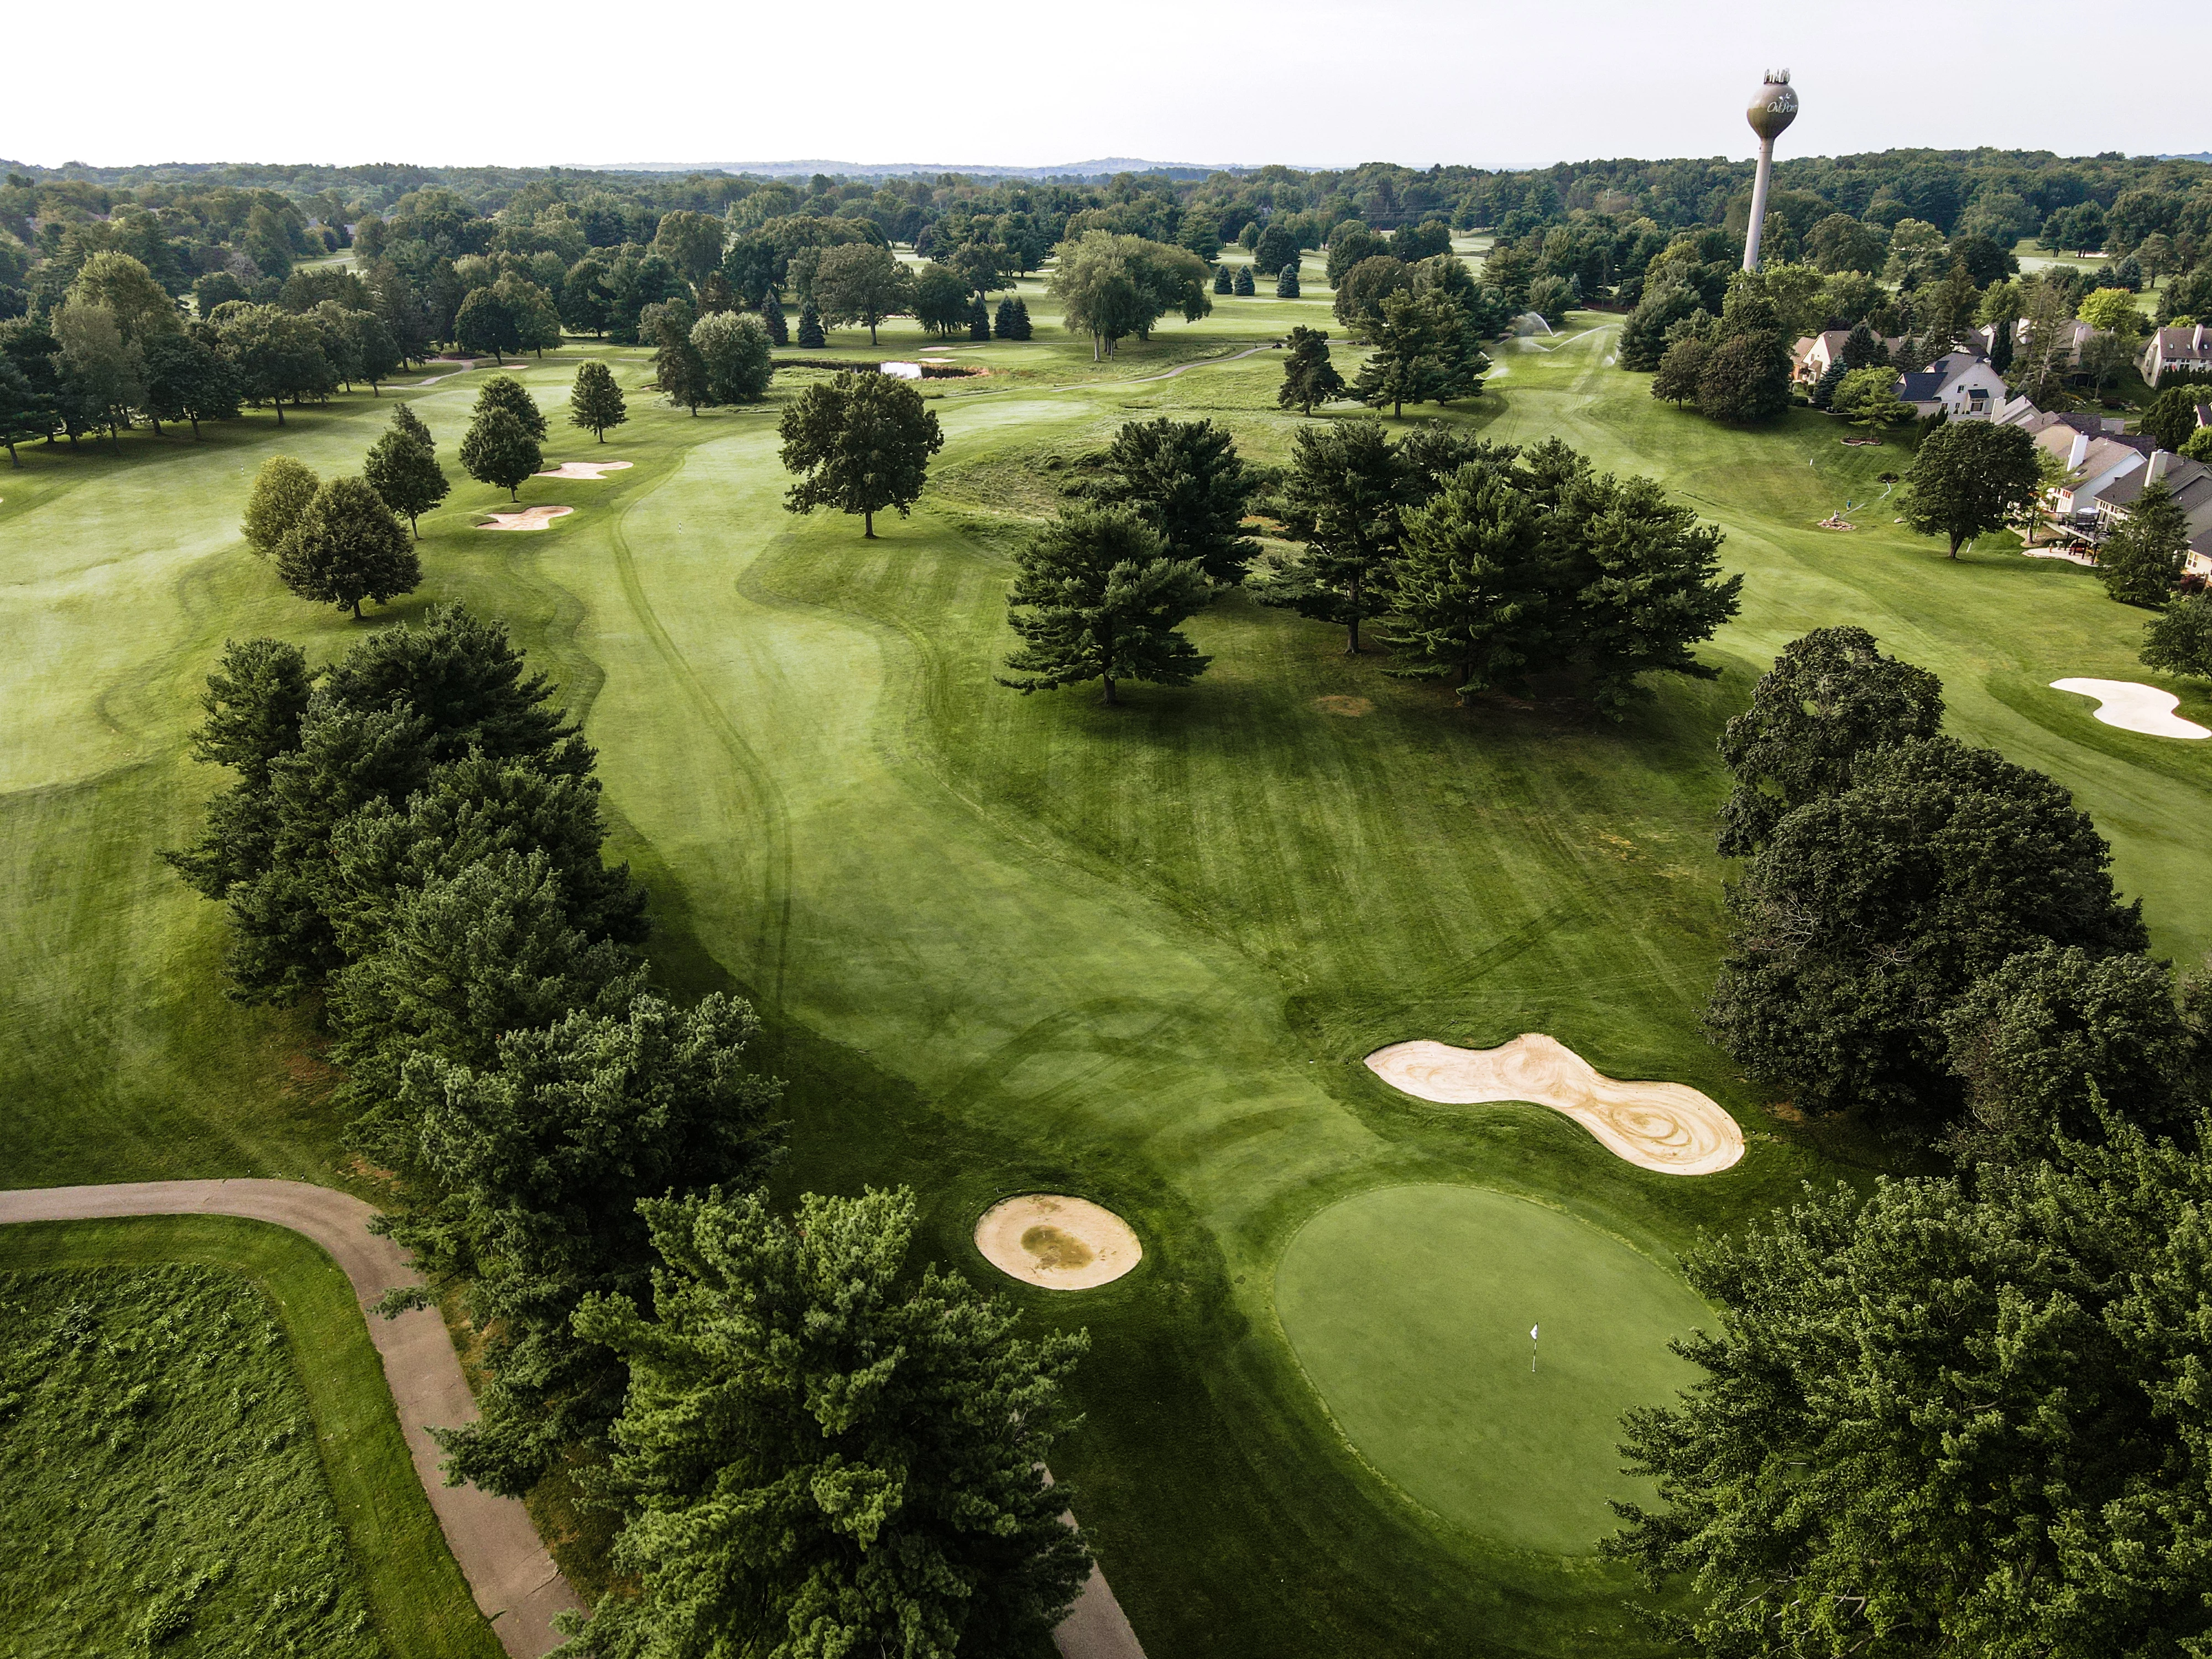
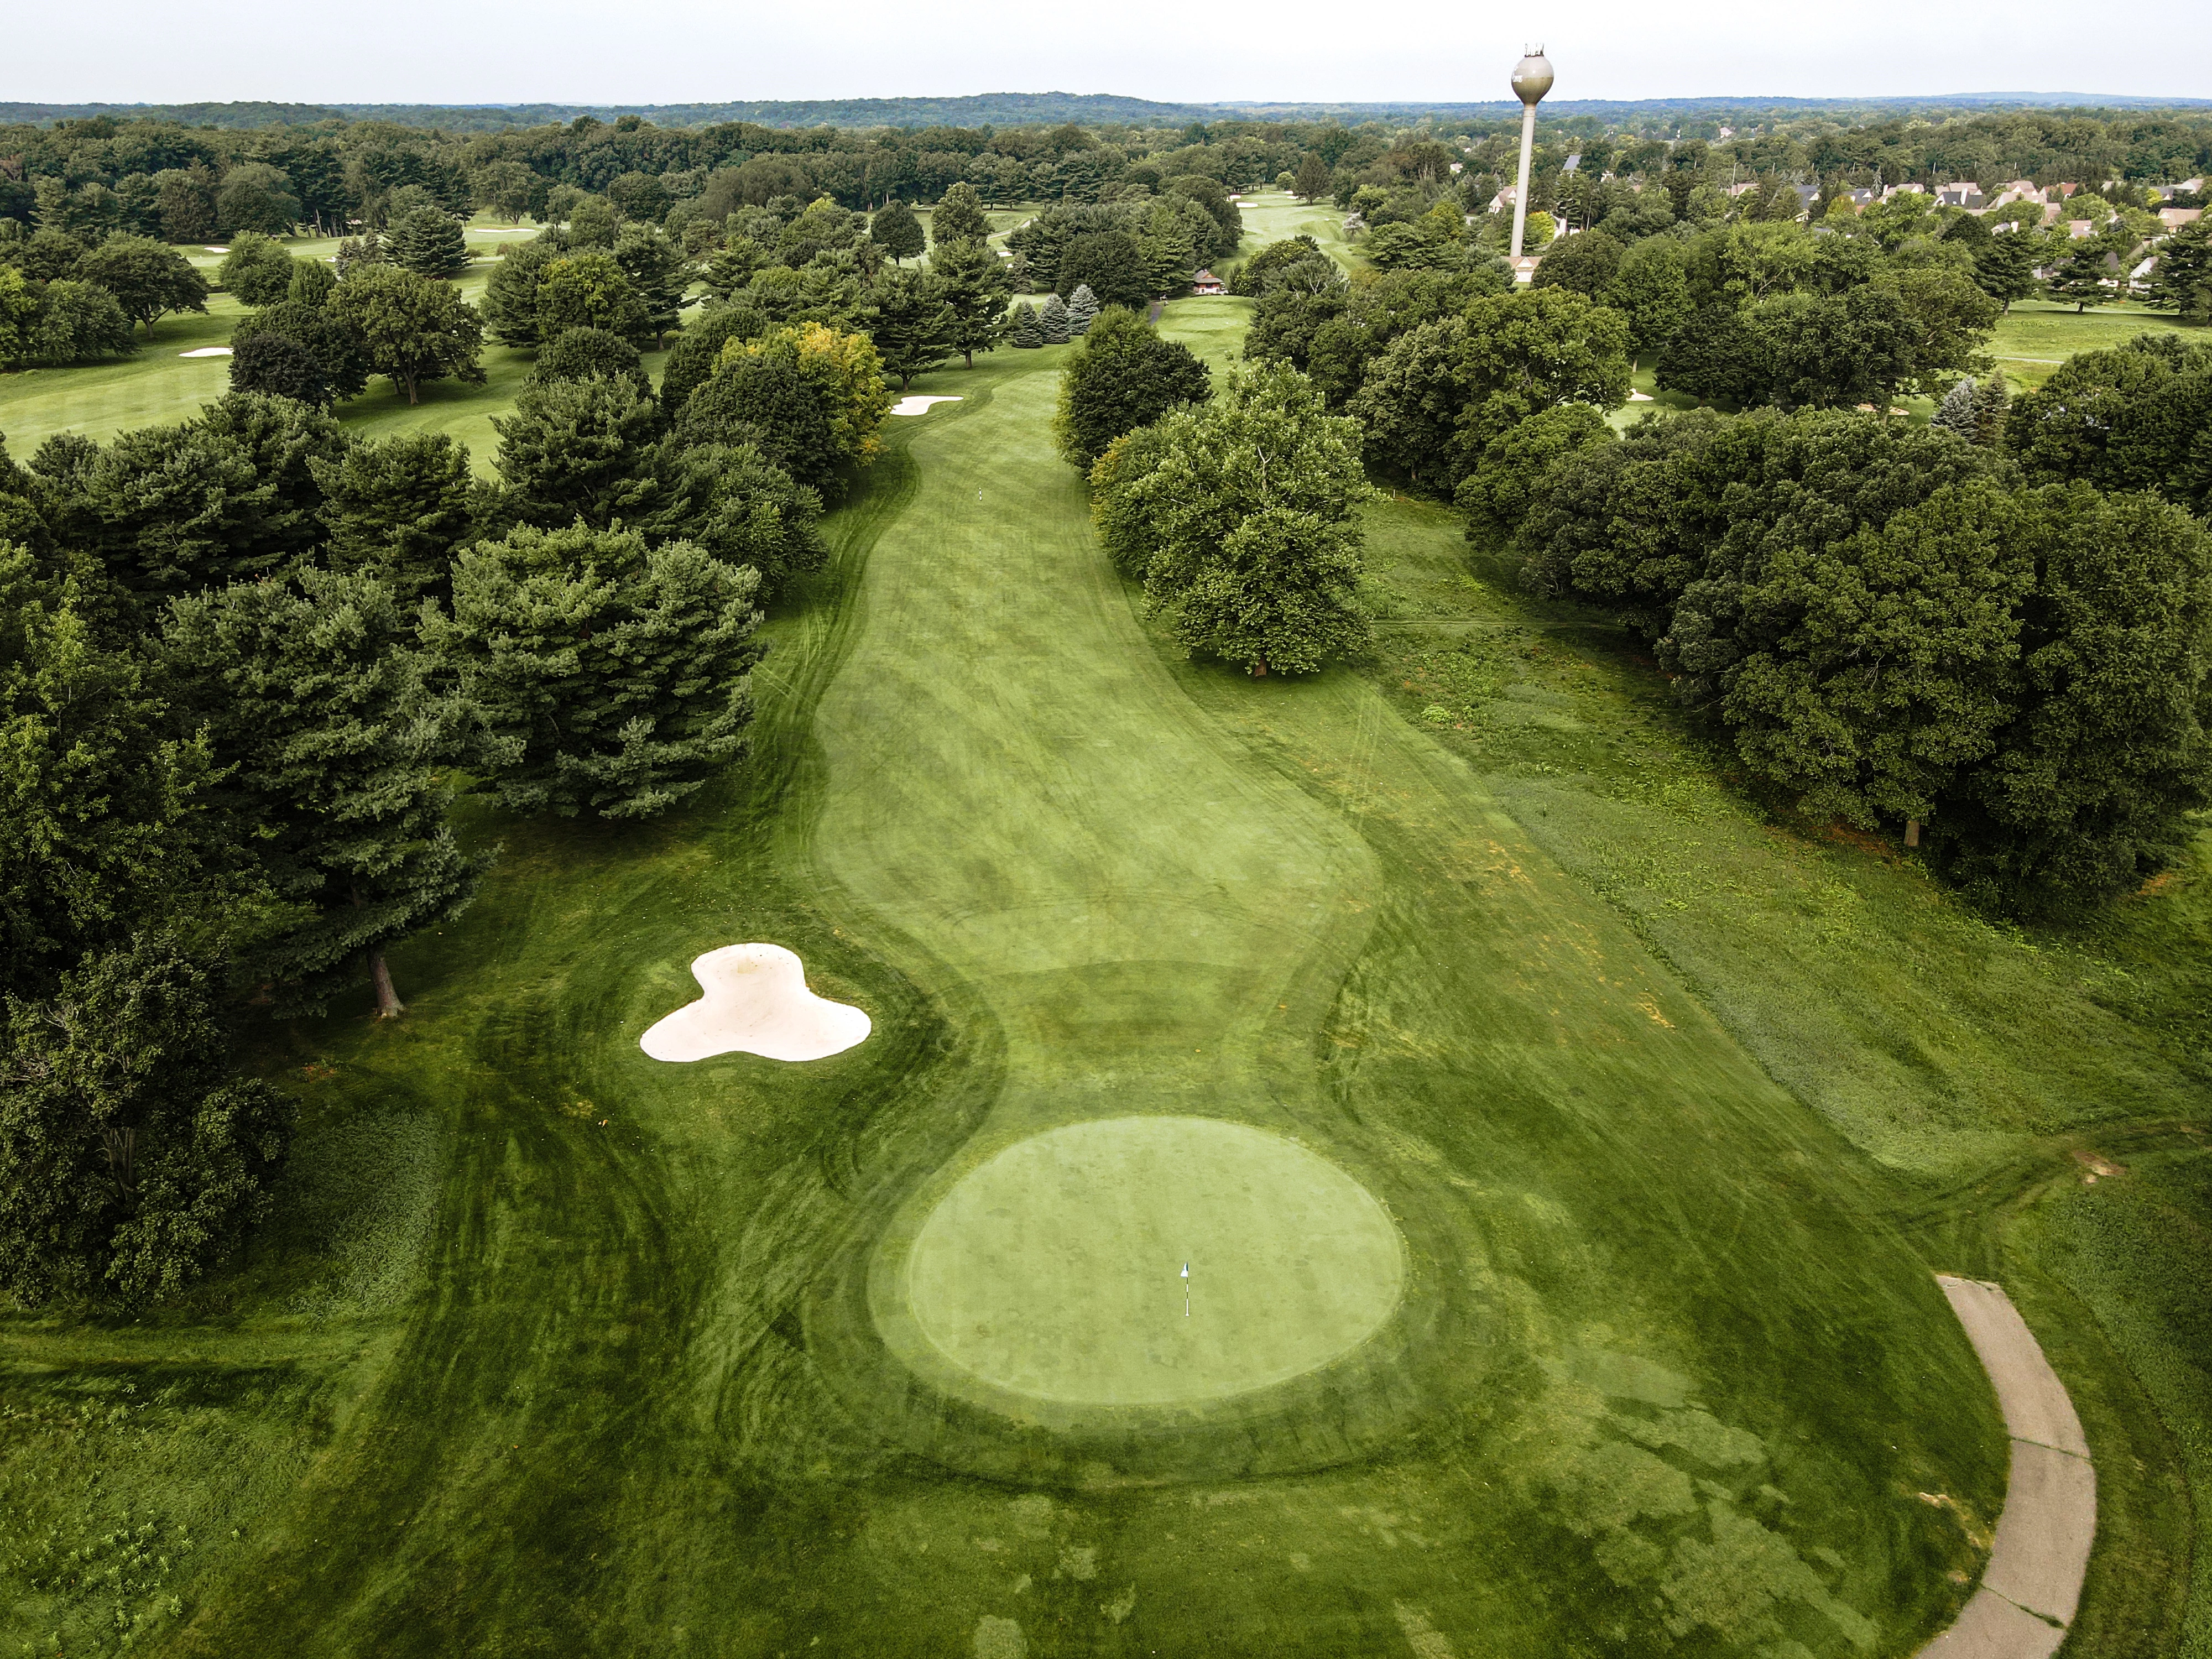
# 3 /
Par: 4
Handicaps:
Men's 17
Women's 13
This short dog leg right Par 4 requires a well-positioned drive to avoid the fairway bunker of the left side. The green is guarded by traps…
This short dog leg right Par 4 requires a well-positioned drive to avoid the fairway bunker of the left side. The green is guarded by traps on both the front left and front right of the green. The back of the green has a severe spine that can produce some putts with significant break.
Yardage by Tee:
GOLD 331
BLUE 302
WHITE 275
RED 258
Slope:
Gold 136 | Blue 133 | White 126 | Red 123
Pro Tips
| An aim point just right of the 150 stick with a long iron is preferred |
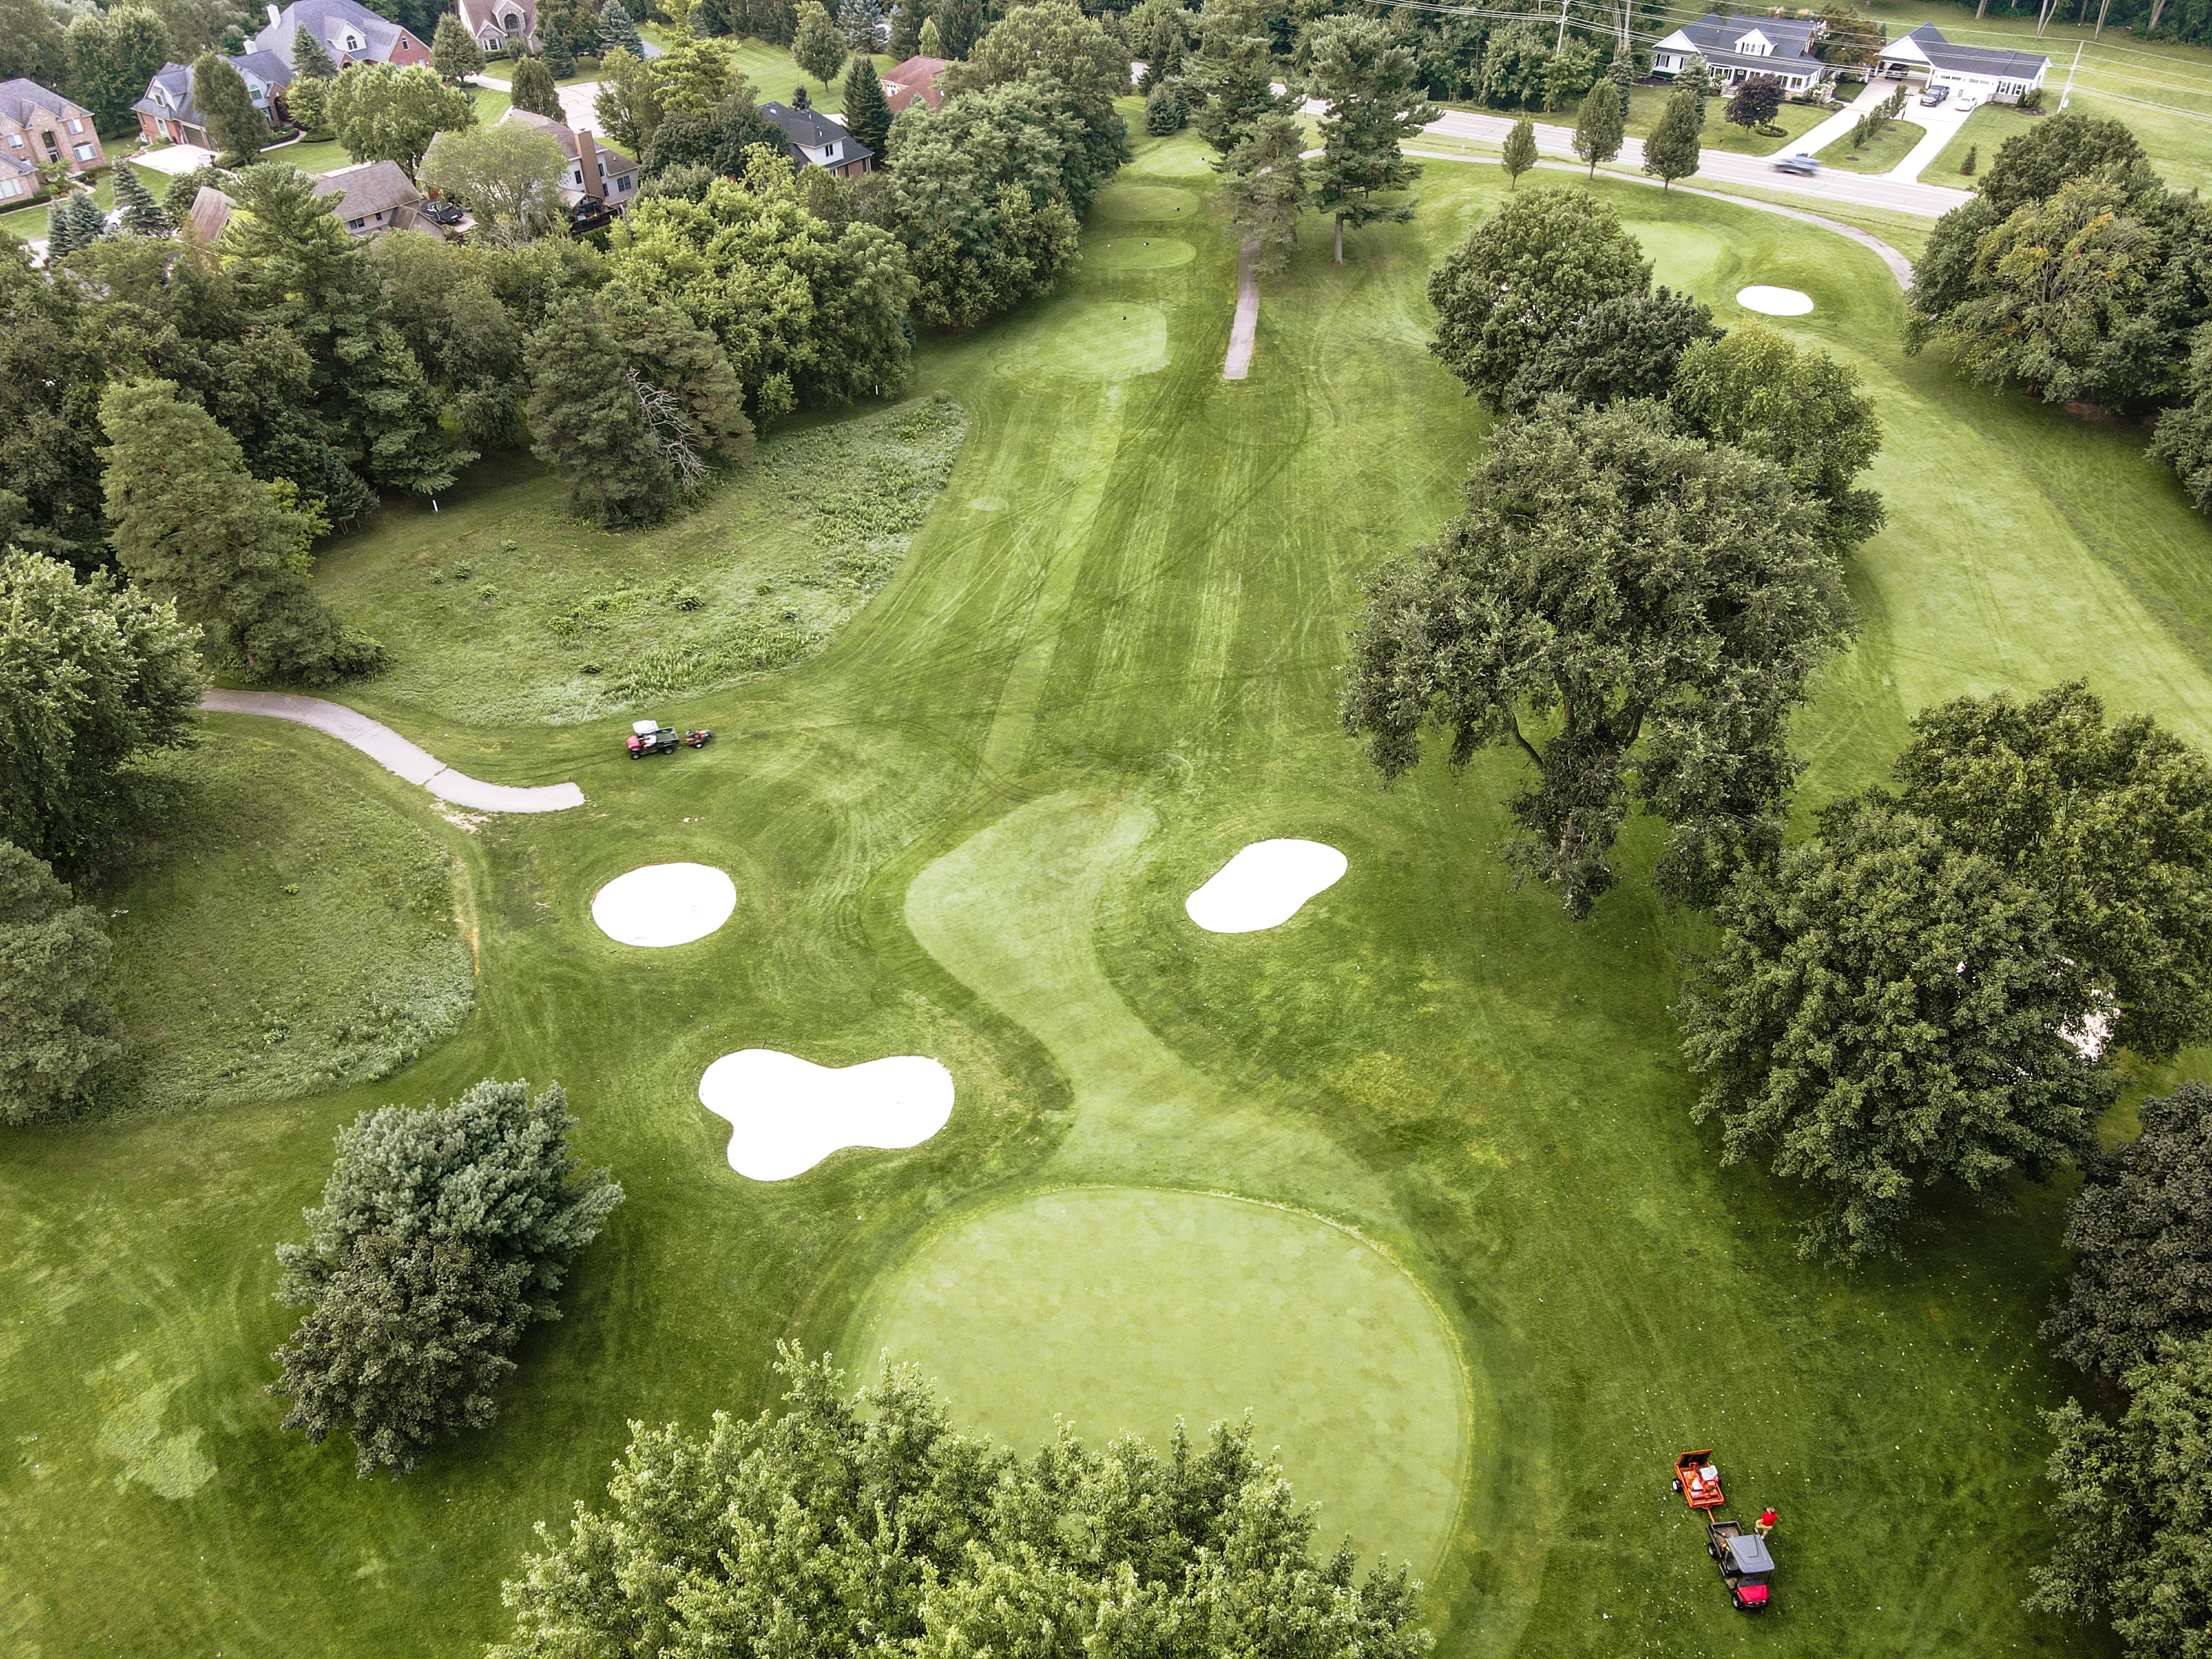
# 4 /
Par: 3
Handicaps:
Men's 15
Women's 15
Is a demanding Par 3. The elevated green is guarded on the right side with two traps and a trap on the left side of the fairway can catch wa…
Is a demanding Par 3. The elevated green is guarded on the right side with two traps and a trap on the left side of the fairway can catch wayward tee shots. The green slopes back to front so be cautious with putts to front pin positions
Yardage by Tee:
GOLD 191
BLUE 172
WHITE 157
RED 135
Slope:
Gold 136 | Blue 133 | White 126 | Red 123
Pro Tips
| Finding the center of this green is key. Par here is a good boost before heading to 5. |
# 5 /
Par: 4
Handicaps:
Men's 1
Women's 11
Is the longest Par 4 on the front nine. An accurate tee shot will avoid the trees on both sides of the fairway. A drive aimed a few yards r…
Is the longest Par 4 on the front nine. An accurate tee shot will avoid the trees on both sides of the fairway. A drive aimed a few yards right of the left side fairway trap sets you up for a good approach shot. The green is protected by sand traps on the left side and mounding on the right side. Once on the green the player will need to manage putts that can have significant break.
Yardage by Tee:
GOLD 408
BLUE 387
WHITE 366
RED 351
Slope:
Gold 136 | Blue 133 | White 126 | Red 123
Pro Tips
| Finding the short grass is key on this hole. |
# 6 /
Par: 5
Handicaps:
Men's 11
Women's 3
A rolling Par 5 that requires an accurate tee shot to avoid the OB on the left and a penalty area on the right. Long hitters could try to hi…
A rolling Par 5 that requires an accurate tee shot to avoid the OB on the left and a penalty area on the right. Long hitters could try to hit this green in two but be cautioned by the OB left of the green and traps on the front left and front right of this slopping back to front green. Front pin positions can leave some tricky down hill putts if your approach is too long.
Yardage by Tee:
GOLD 485
BLUE 479
WHITE 445
RED 402
Slope:
Gold 136 | Blue 133 | White 126 | Red 123
Pro Tips
| A three shot hole for those with a shorter tee ball offers more landing area. Accuracy will reward the long hitter. |
# 7 /
Par: 3
Handicaps:
Men's 13
Women's 17
A solid Par 3 that has an elevated two-tier green. The green is protected on both sides with sand traps.
Yardage by Tee:
GOLD 186
BLUE 171
WHITE 99
RED 77
Slope:
Gold 136 | Blue 133 | White 126 | Red 123
Pro Tips
| Finding the center of this green should give you the best chance at birdie. |
# 8 /
Par: 5
Handicaps:
Men's 1
Women's 7
A blind tee shot starts this very attractive Par 5. There is OB on the full length of the left side of this hole and sand traps are in play…
A blind tee shot starts this very attractive Par 5. There is OB on the full length of the left side of this hole and sand traps are in play for your drive on both the left and right side of this fairway. Your second shot should leave you a reasonable length shot to approach this elevated green that is guarded by sand traps both front left and front right. Make your approach shot club selection to avoid going long.
Yardage by Tee:
GOLD 525
BLUE 488
WHITE 468
RED 442
Slope:
Gold 136 | Blue 133 | White 126 | Red 123
Pro Tips
| Stay below the hole here for best results. Any long approach shots could mean trouble. |
# 9 /
Par: 4
Handicaps:
Men's 3
Women's 7
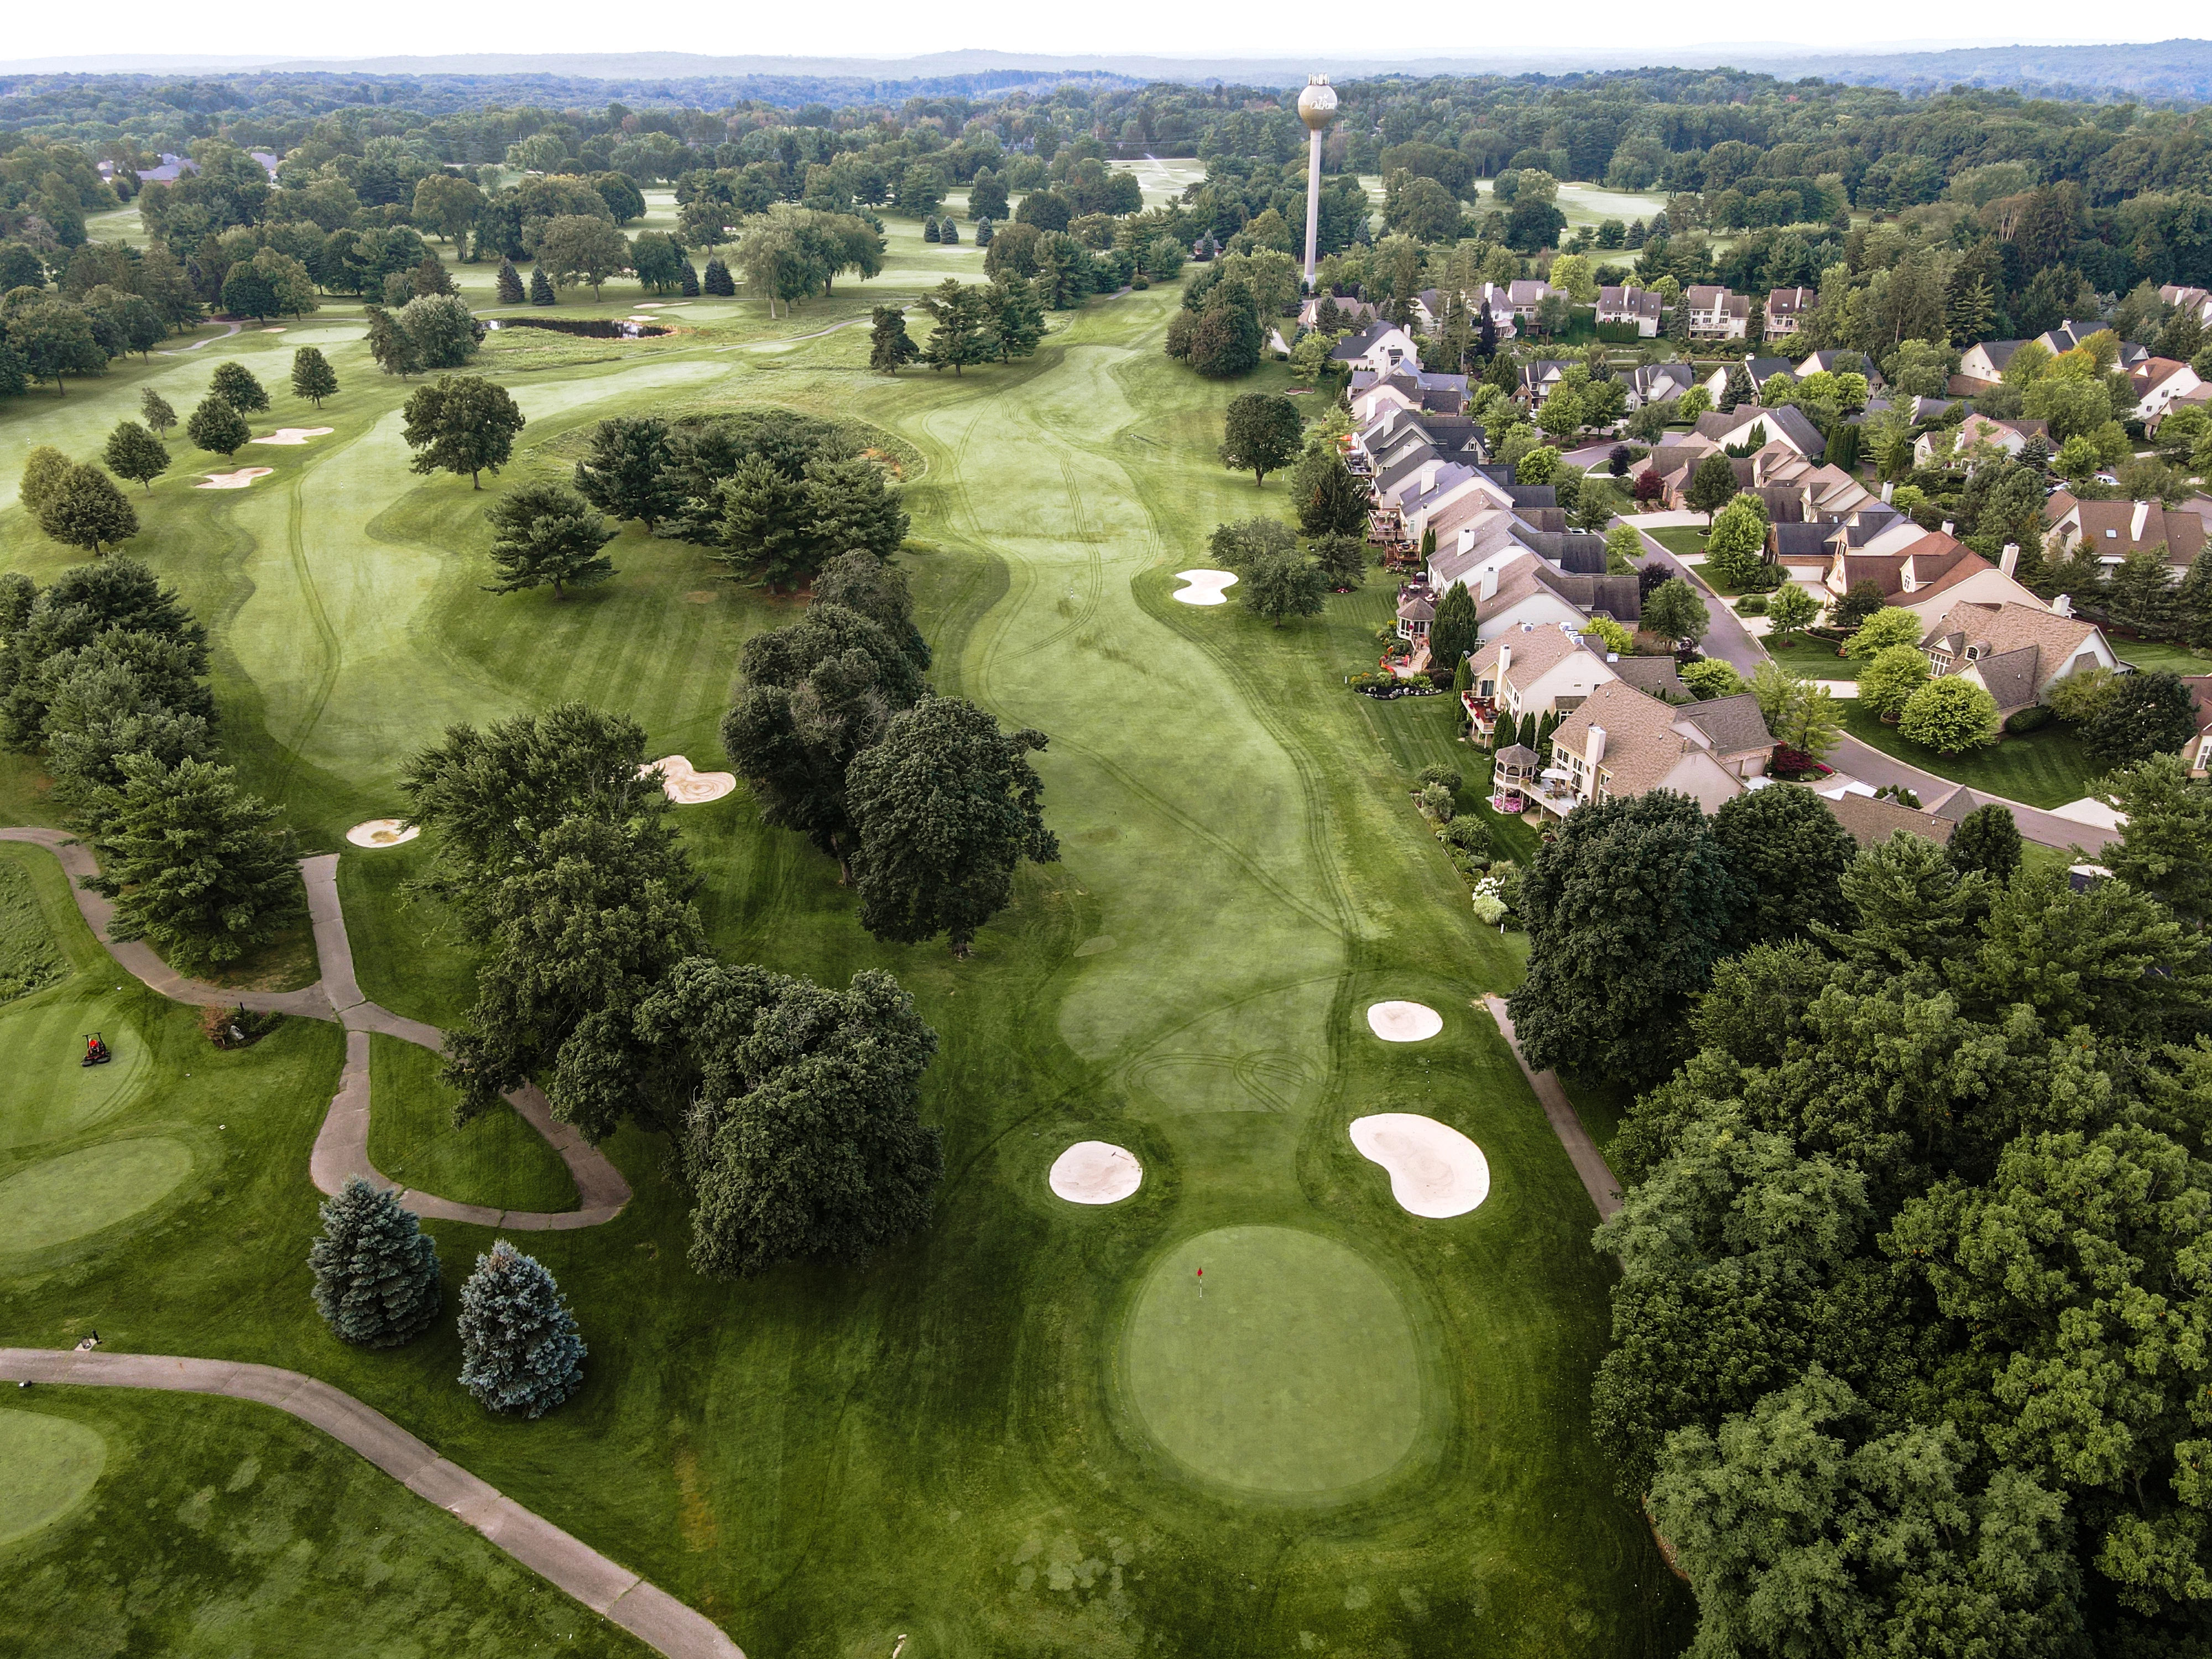
You finish the front nine with a straight away Par 4. Your tee shot will be from an elevated tee and you will need to avoid fairway traps on…
You finish the front nine with a straight away Par 4. Your tee shot will be from an elevated tee and you will need to avoid fairway traps on both the left and right side of this fairway. Your approach shot will be to a two-tier green that is protected by a sand trap on the left side of the green and mounds on the right.
Yardage by Tee:
GOLD 375
BLUE 354
WHITE 331
RED 314
Slope:
Gold 136 | Blue 133 | White 126 | Red 123
Pro Tips
| Drive for show on this beautiful par 4. The approach shot requires a little extra attention here. |
# 10 /
Par: 4
Handicaps:
Men's 14
Women's 6
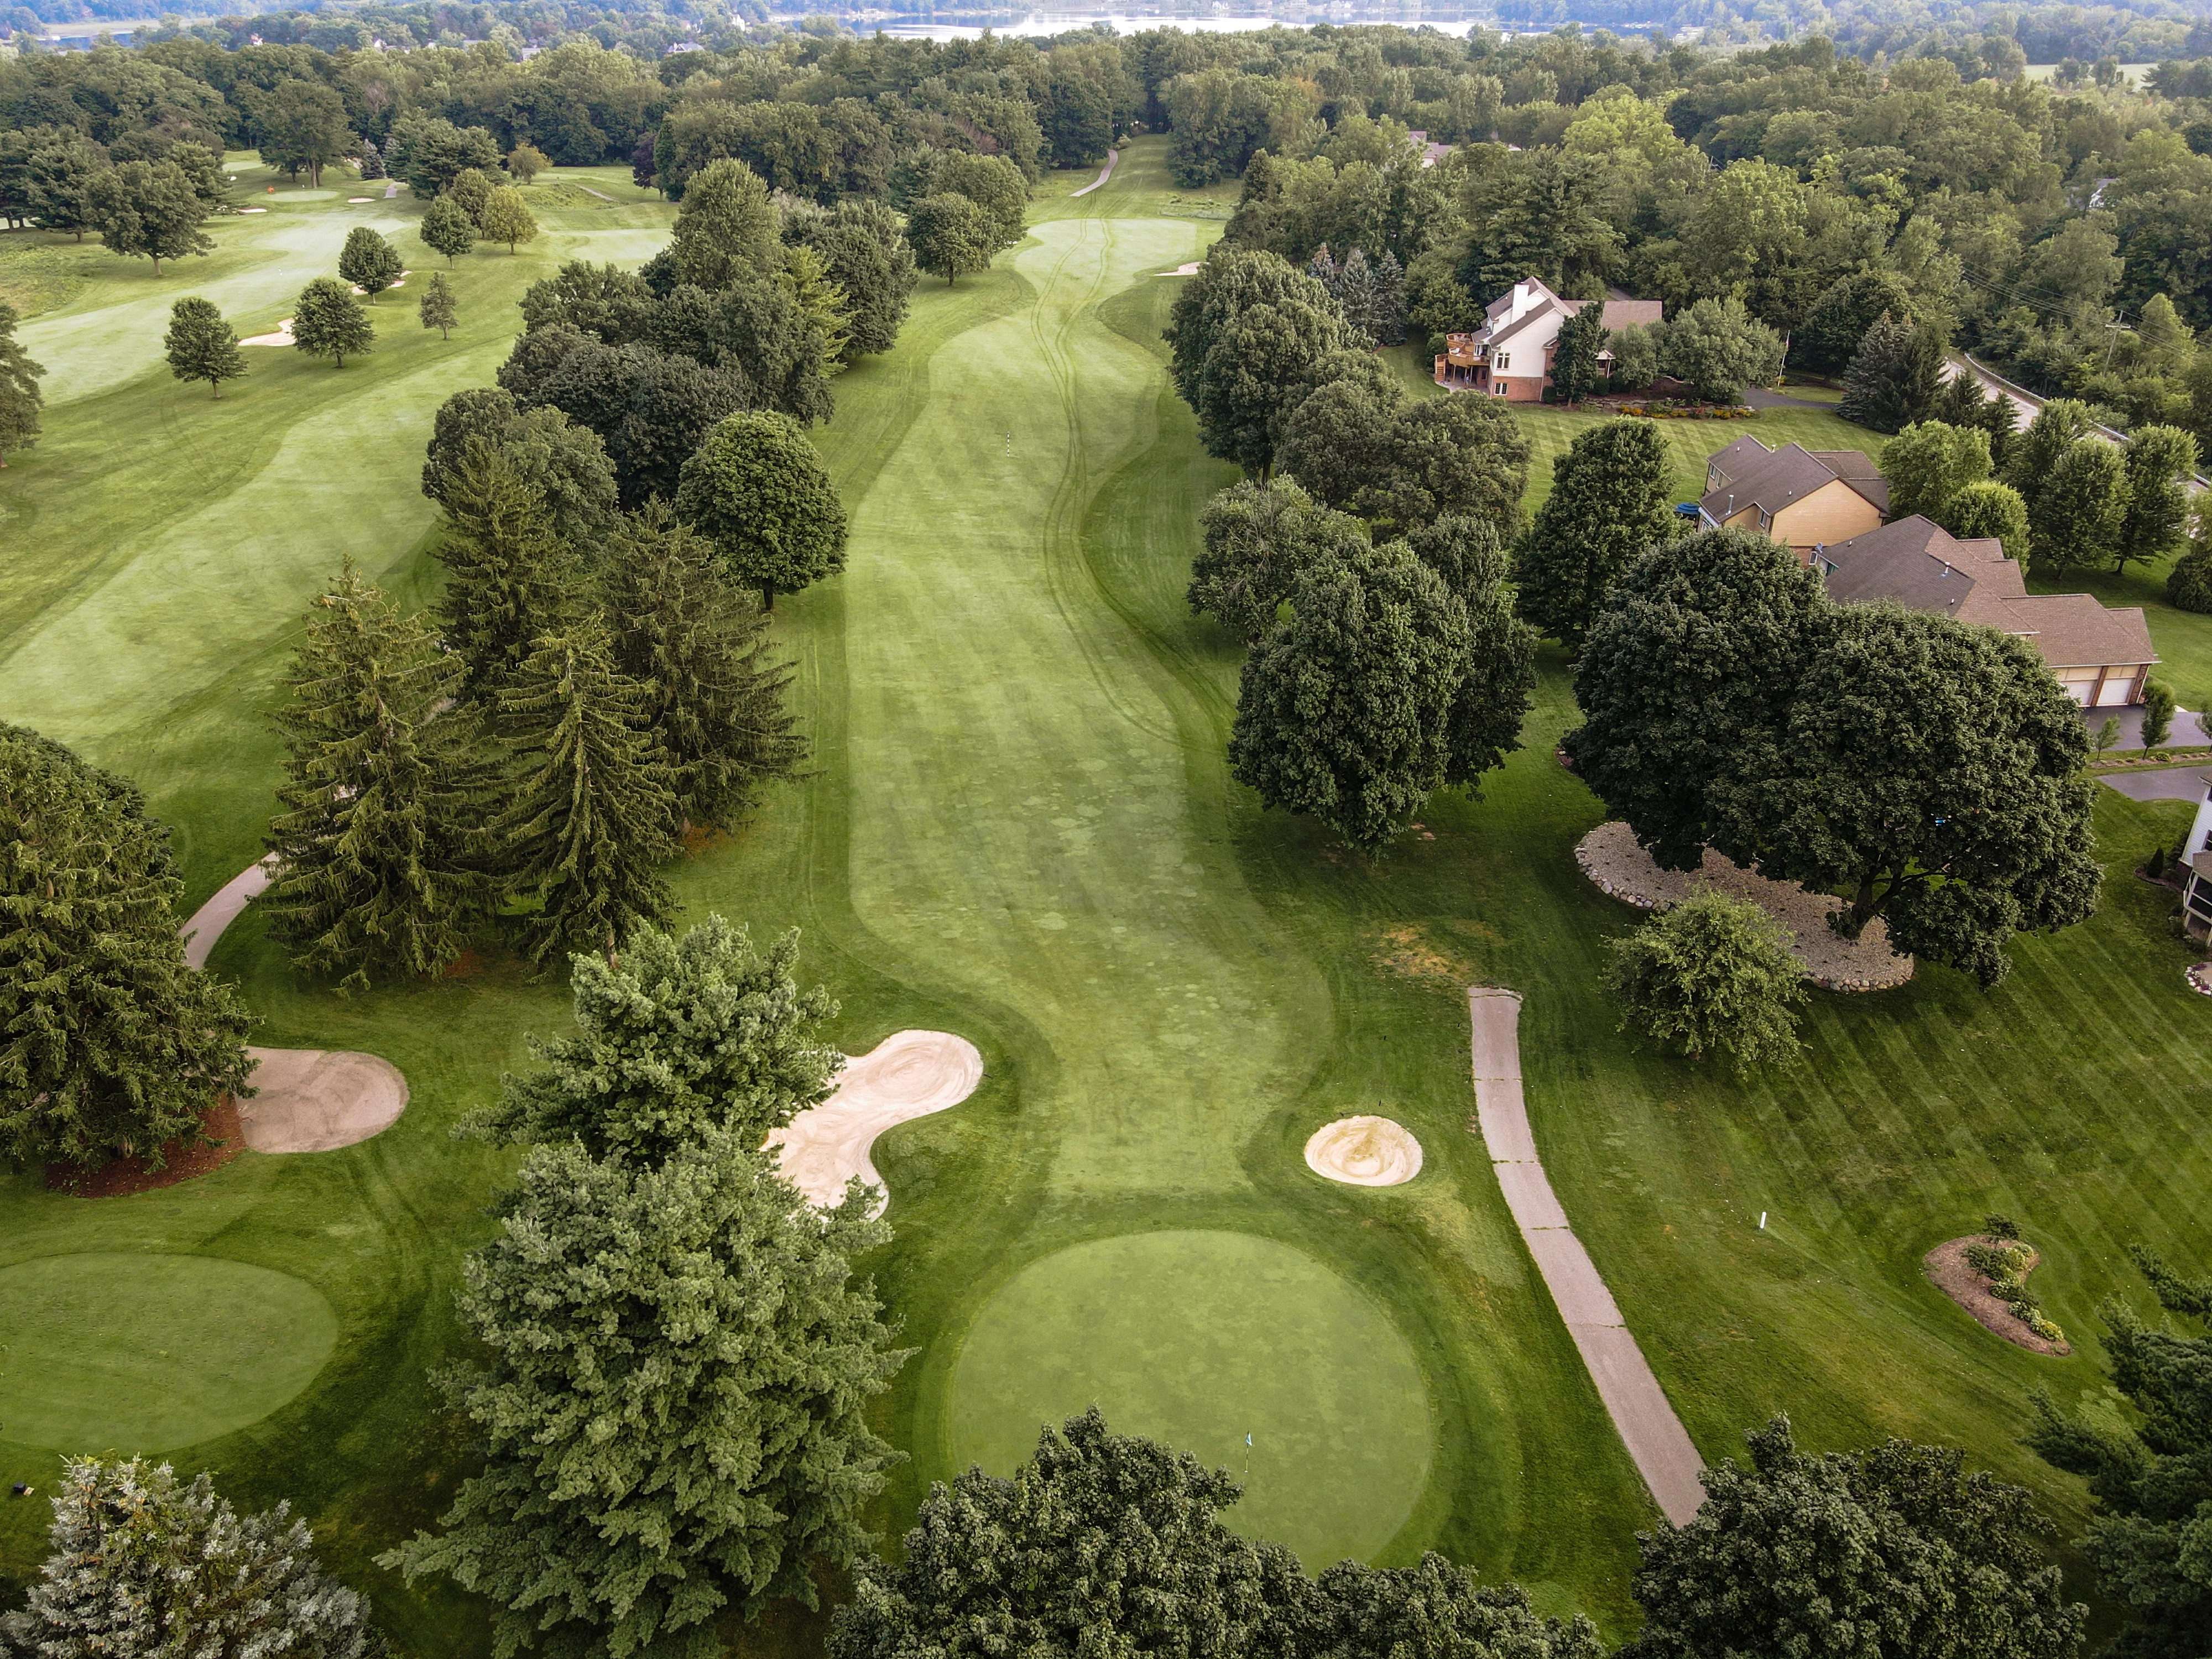
The back nine begins with a severe dog leg left Par 4. Your tee shot should be aimed down the middle of the fairway to avoid potential trou…
The back nine begins with a severe dog leg left Par 4. Your tee shot should be aimed down the middle of the fairway to avoid potential trouble on the left and right sides of the fairway. The green is protected by a trap short left and a sand trap on the right. Mounding around the green can make up and downs tricky. This green has significant slope from the front right to the back left.
Yardage by Tee:
GOLD 364
BLUE 347
WHITE 326
RED 292
Slope:
Gold 136 | Blue 133 | White 126 | Red 123
Pro Tips
| A right-center tee shot sets up the best position coming into this green. Club down into this downhill approach to avoid the back penalty area. |
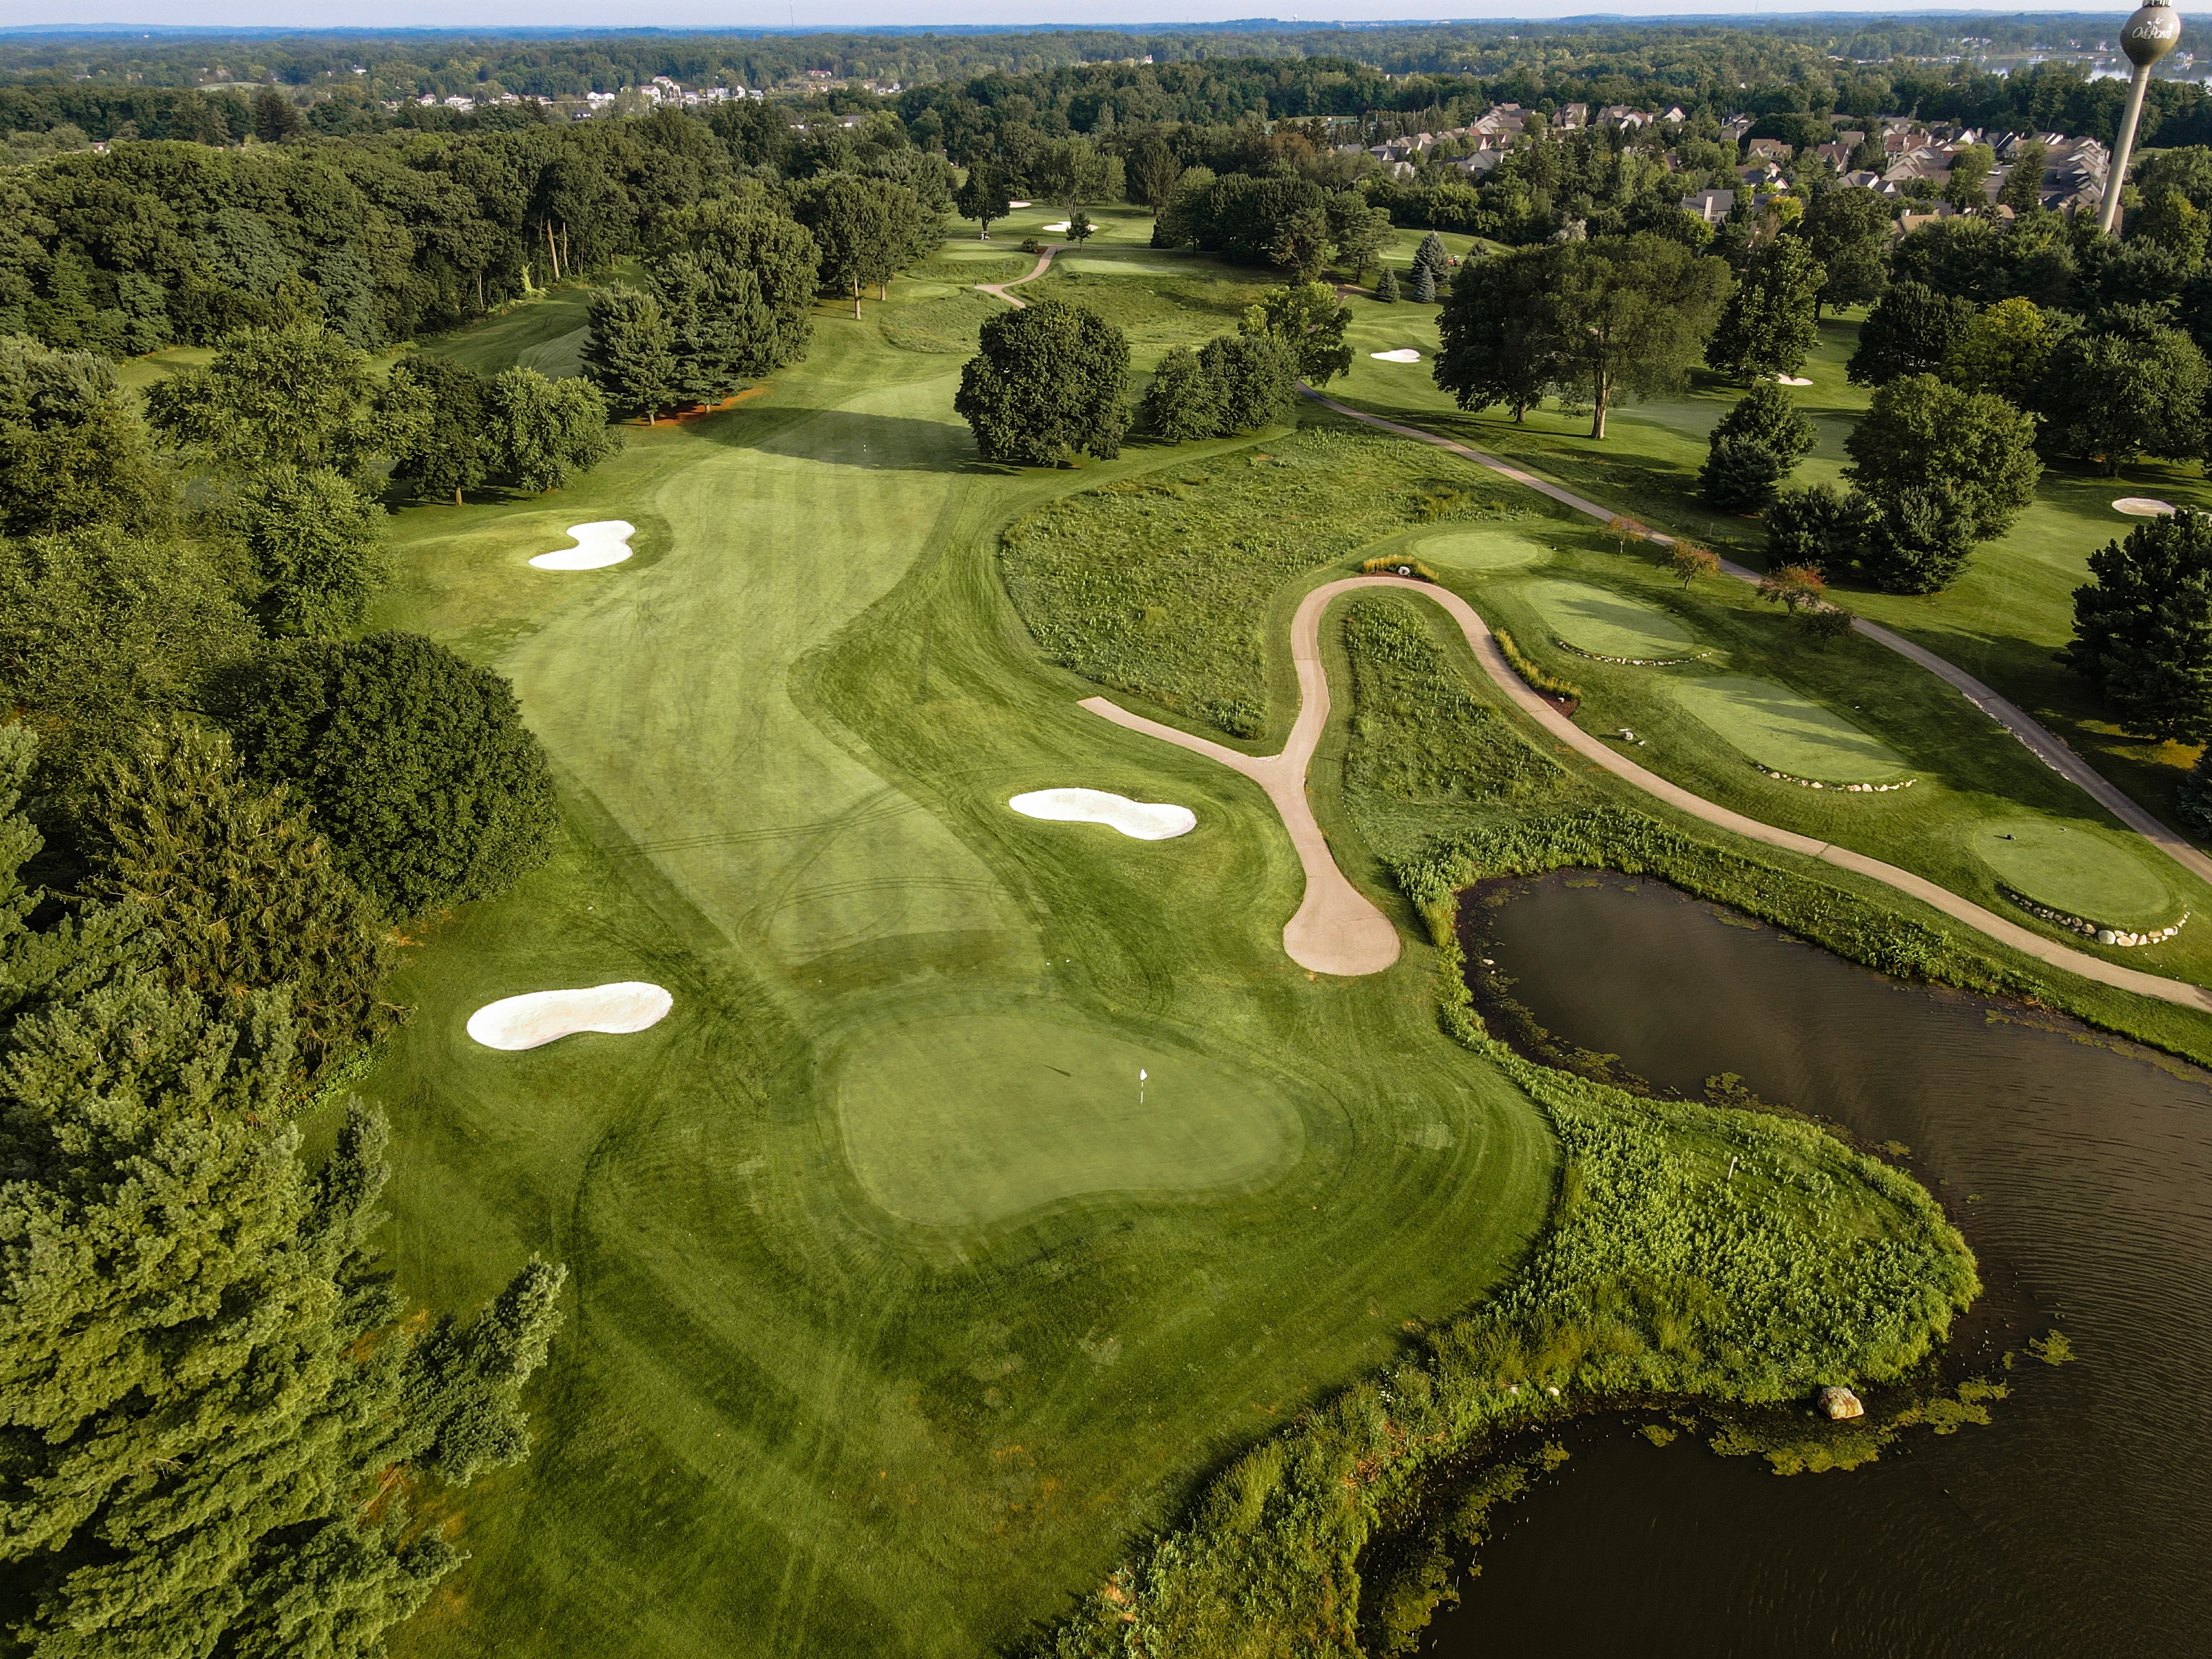
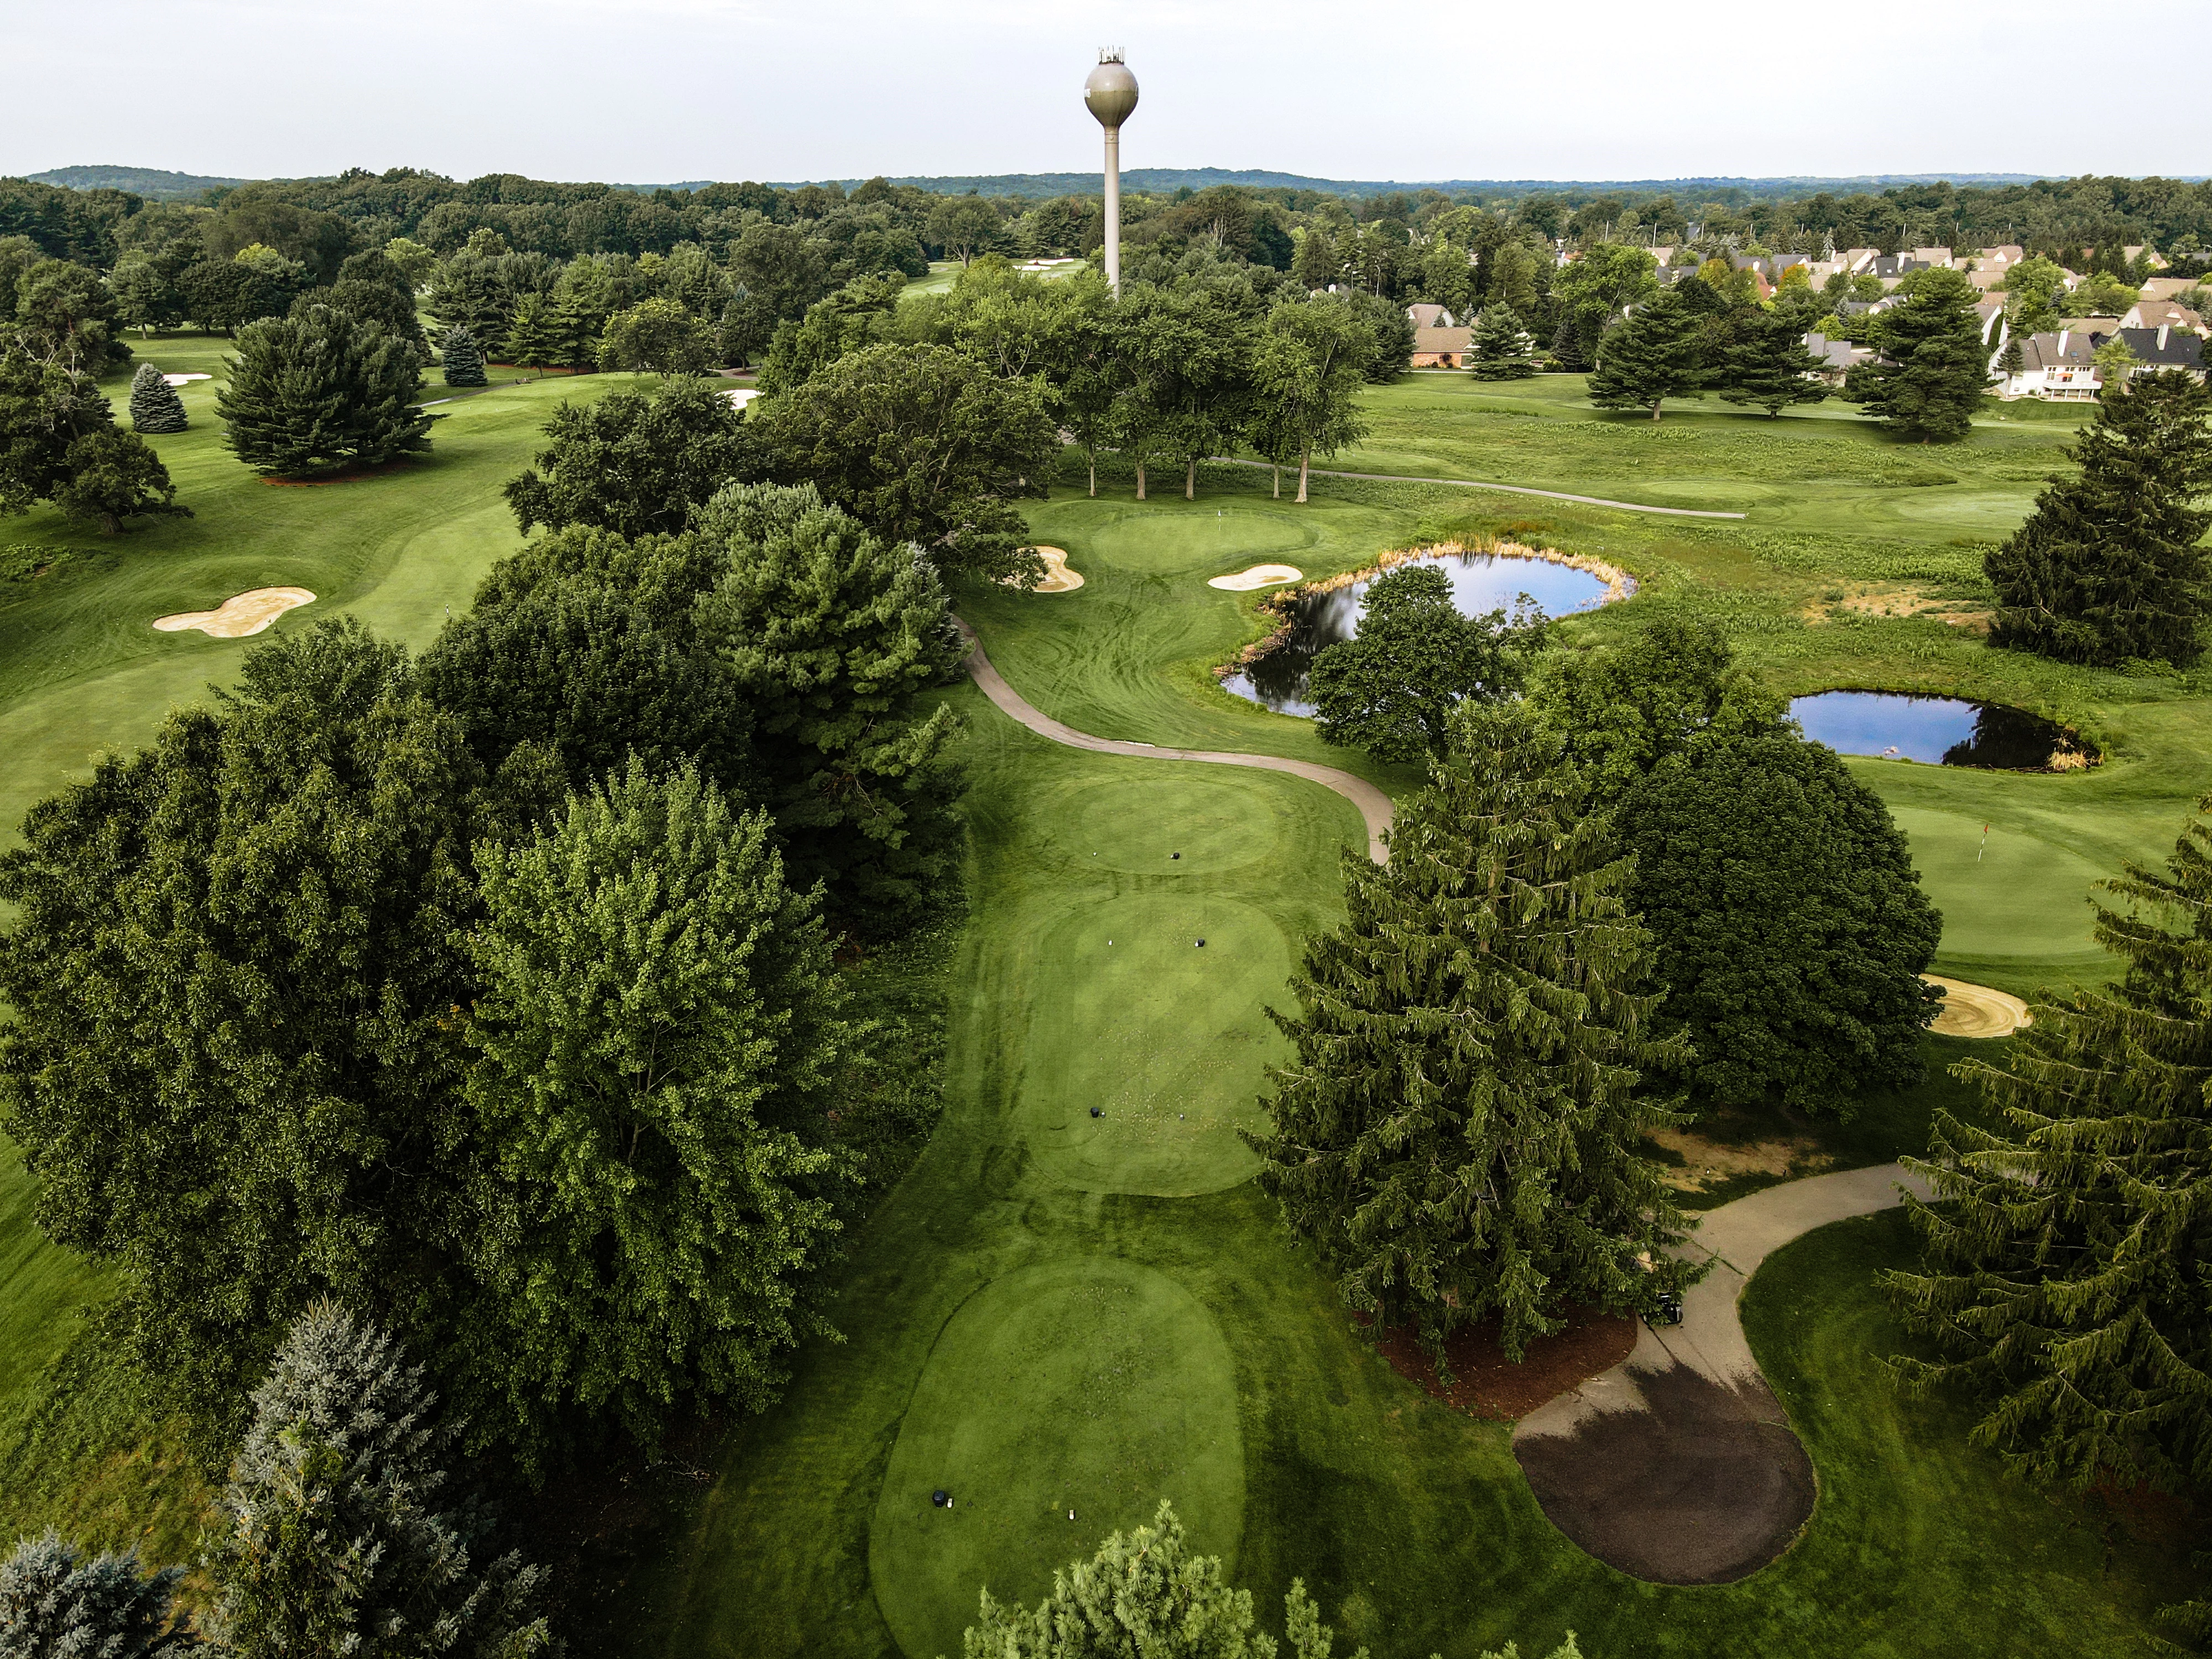
# 11 /
Par: 3
Handicaps:
Men's 16
Women's 16
This is the longest Par 3 on the course. The tee shot from this elevated tee is more demanding due to the pond that runs down the right side…
This is the longest Par 3 on the course. The tee shot from this elevated tee is more demanding due to the pond that runs down the right side of this hole. The green is protected by sand traps, grass bunkers and mounding. The green slopes from back to front.
Yardage by Tee:
GOLD 203
BLUE 178
WHITE 151
RED 125
Slope:
Gold 136 | Blue 133 | White 126 | Red 123
Pro Tips
| Wind plays a big factor in club selection here. Just getting to this green is an accomplishment in itself. Sneaking a birdie here is rare. |
# 12 /
Par: 4
Handicaps:
Men's 8
Women's 4
This rolling Par 4 requires an accurate drive to avoid the left side trees and a fairway sand trap and trees on the right. Your approach sh…
This rolling Par 4 requires an accurate drive to avoid the left side trees and a fairway sand trap and trees on the right. Your approach shot to this kidney shaped green needs to avoid the sand traps on the front left and front right of the green. Shots missed long can end up in mounding that can create challenging up and downs. Bring your best green reading skills as you putt on this green
Yardage by Tee:
GOLD 379
BLUE 349
WHITE 328
RED 302
Slope:
Gold 136 | Blue 133 | White 126 | Red 123
Pro Tips
| Long hitters can be rewarded with an extra kick down the hill for a flip wedge approach. Avoid the greenside bunkers to escape this tough green with a two putt. |
# 13 /
Par: 4
Handicaps:
Men's 4
Women's 10
A demanding dog leg left Par 4. The Tee shot needs to avoid the penalty area on the left side of the fairway and sand traps in the landing a…
A demanding dog leg left Par 4. The Tee shot needs to avoid the penalty area on the left side of the fairway and sand traps in the landing area on the right. A lengthy approach shot can bounce in to the green, but it must avoid bunkers on the front left and front right of the green. Approach shots that carry too far can leave tricky up and down shots to this very flat green.
Yardage by Tee:
GOLD 433
BLUE 404
WHITE 375
RED 325
Slope:
Gold 136 | Blue 133 | White 126 | Red 123
Pro Tips
| Use the 150 marker as an aim point from the tee. Anything left must clear the penalty area to have a chance at par. |
# 14 /
Par: 4
Handicaps:
Men's 10
Women's 14
A blind tee shot is the starting point for this dog leg right Par 4. You should aim your drive to the right of the fairway bunker that is vi…
A blind tee shot is the starting point for this dog leg right Par 4. You should aim your drive to the right of the fairway bunker that is visible on the left side of the fairway. Your lengthy approach shot needs to avoid mounding on the front left, a trap long left and a Pond on the right side of the green. This green is reasonably flat.
Yardage by Tee:
GOLD 412
BLUE 396
WHITE 386
RED 283
Slope:
Gold 136 | Blue 133 | White 126 | Red 123
Pro Tips
| A high tee ball is reccomended down the righ side of this blind shot. The treeline is reachable through the fairway so choose a club wisely. |
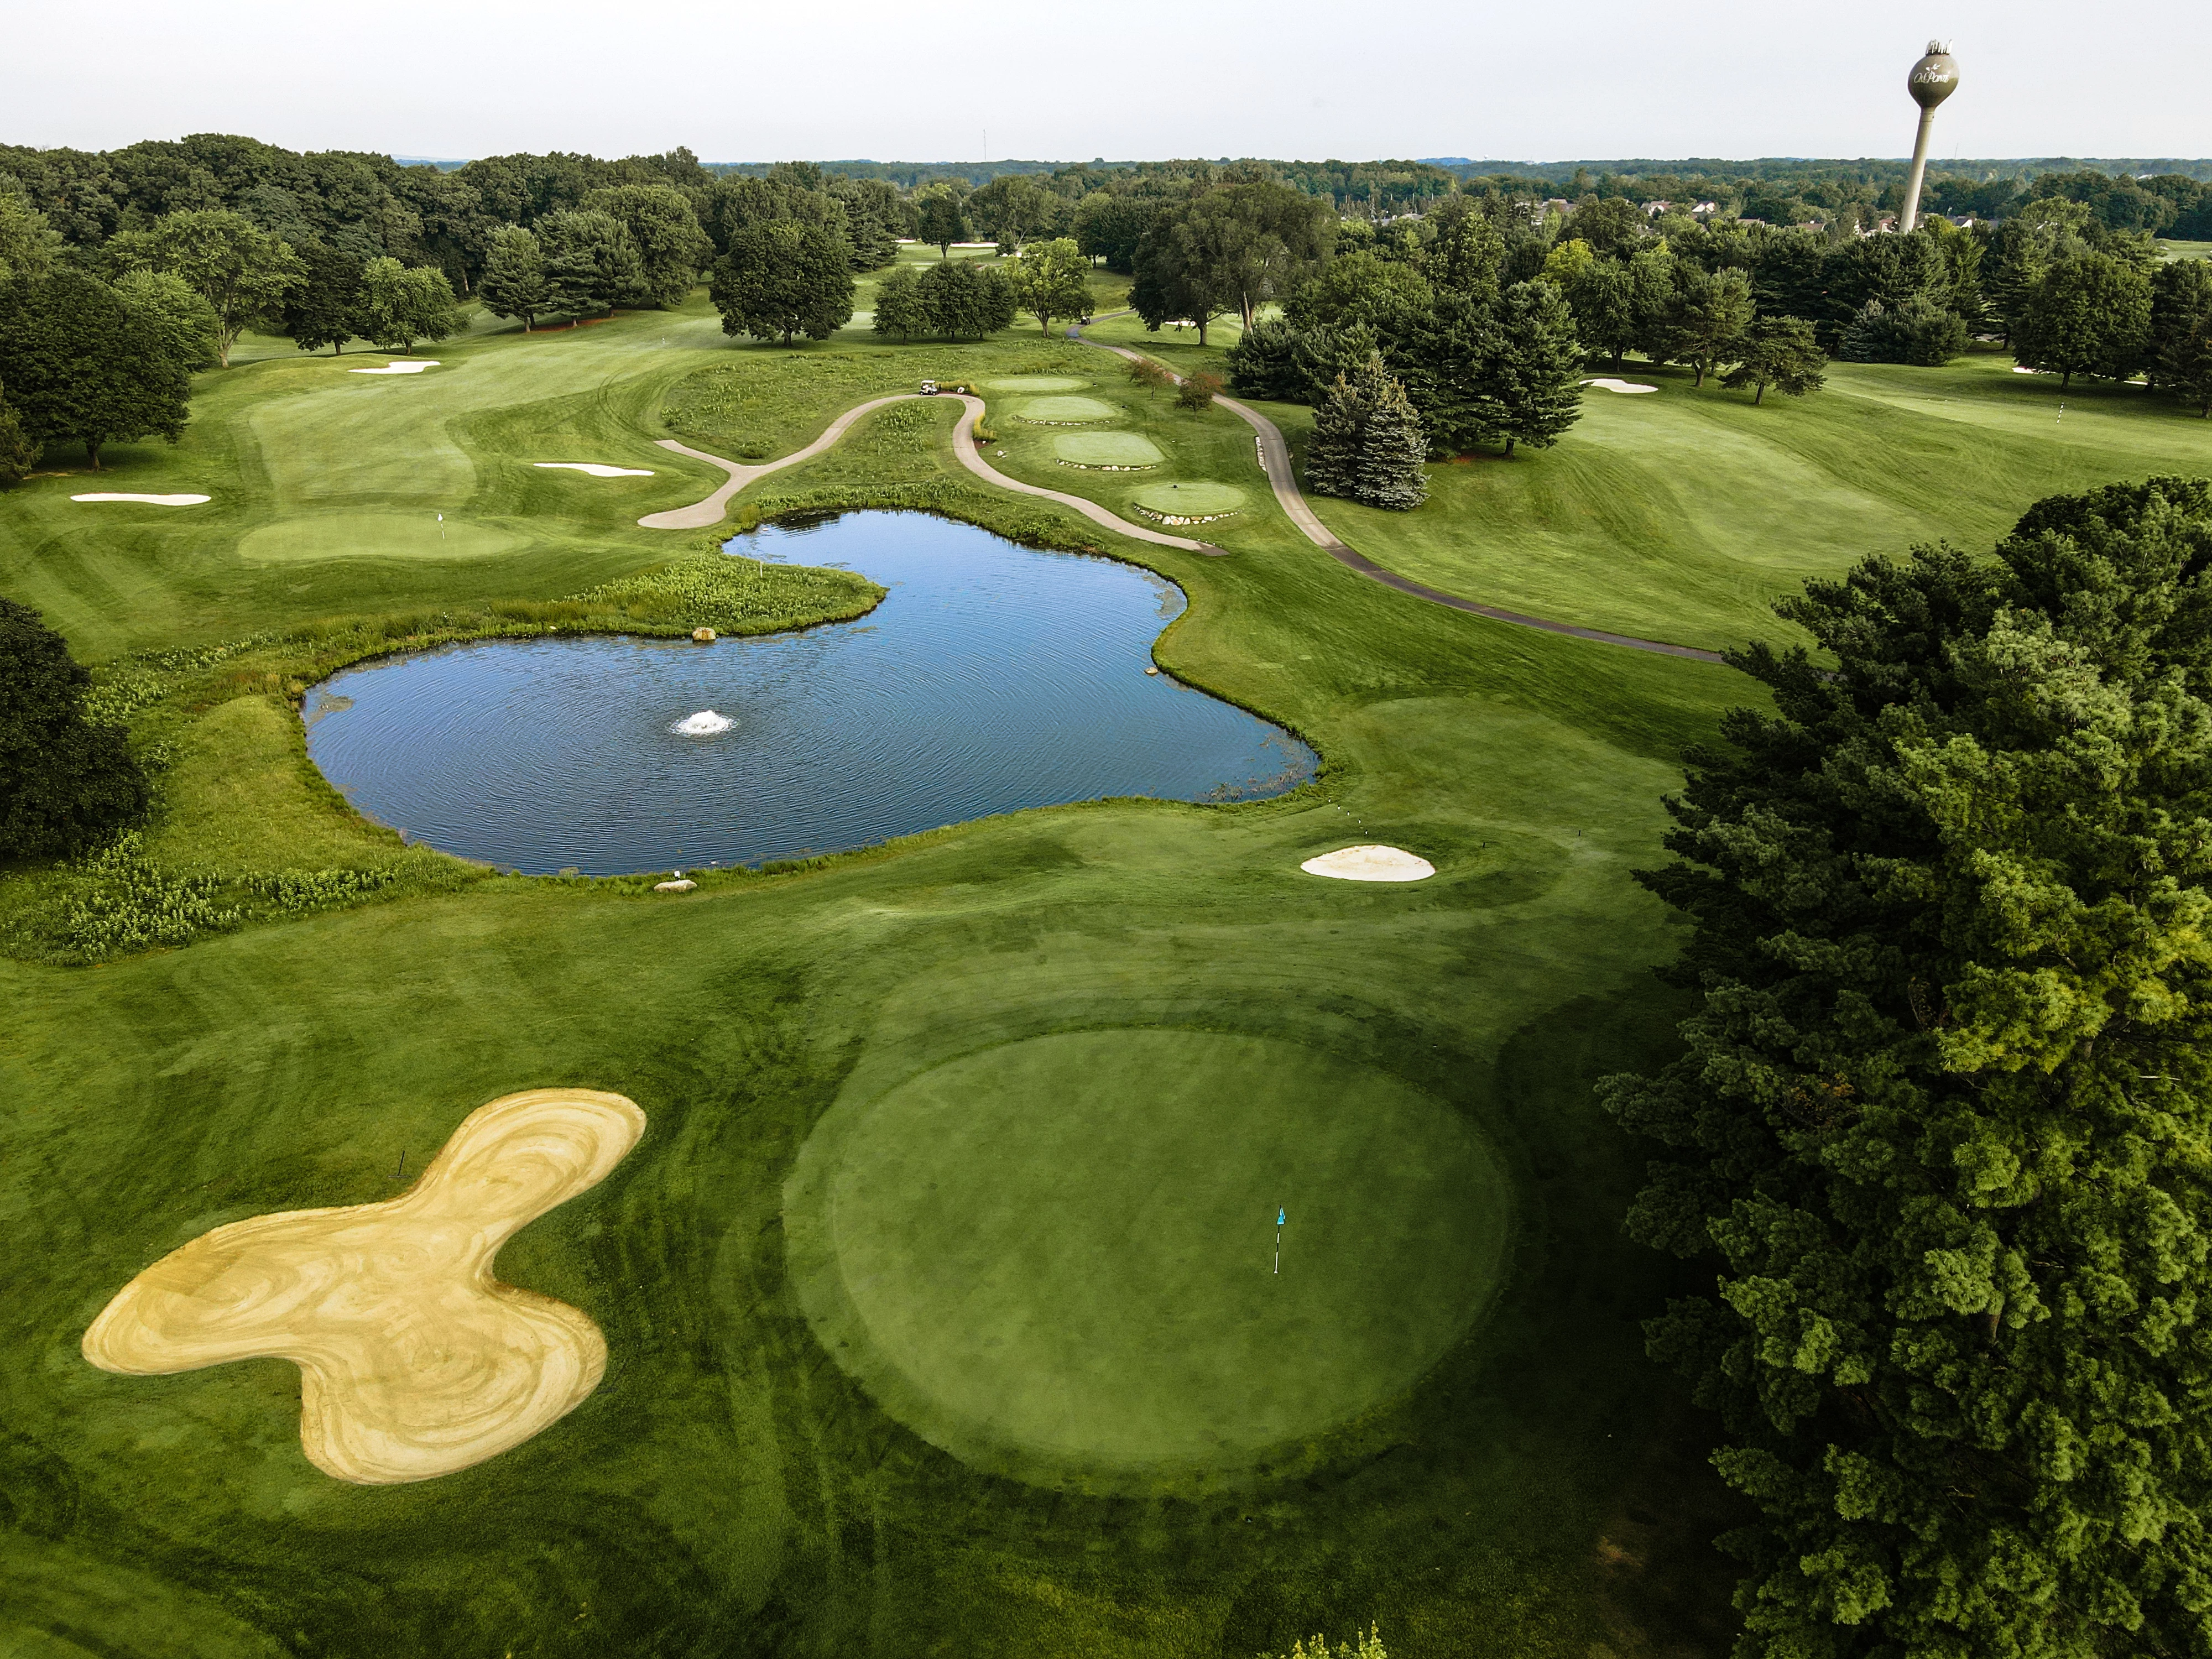
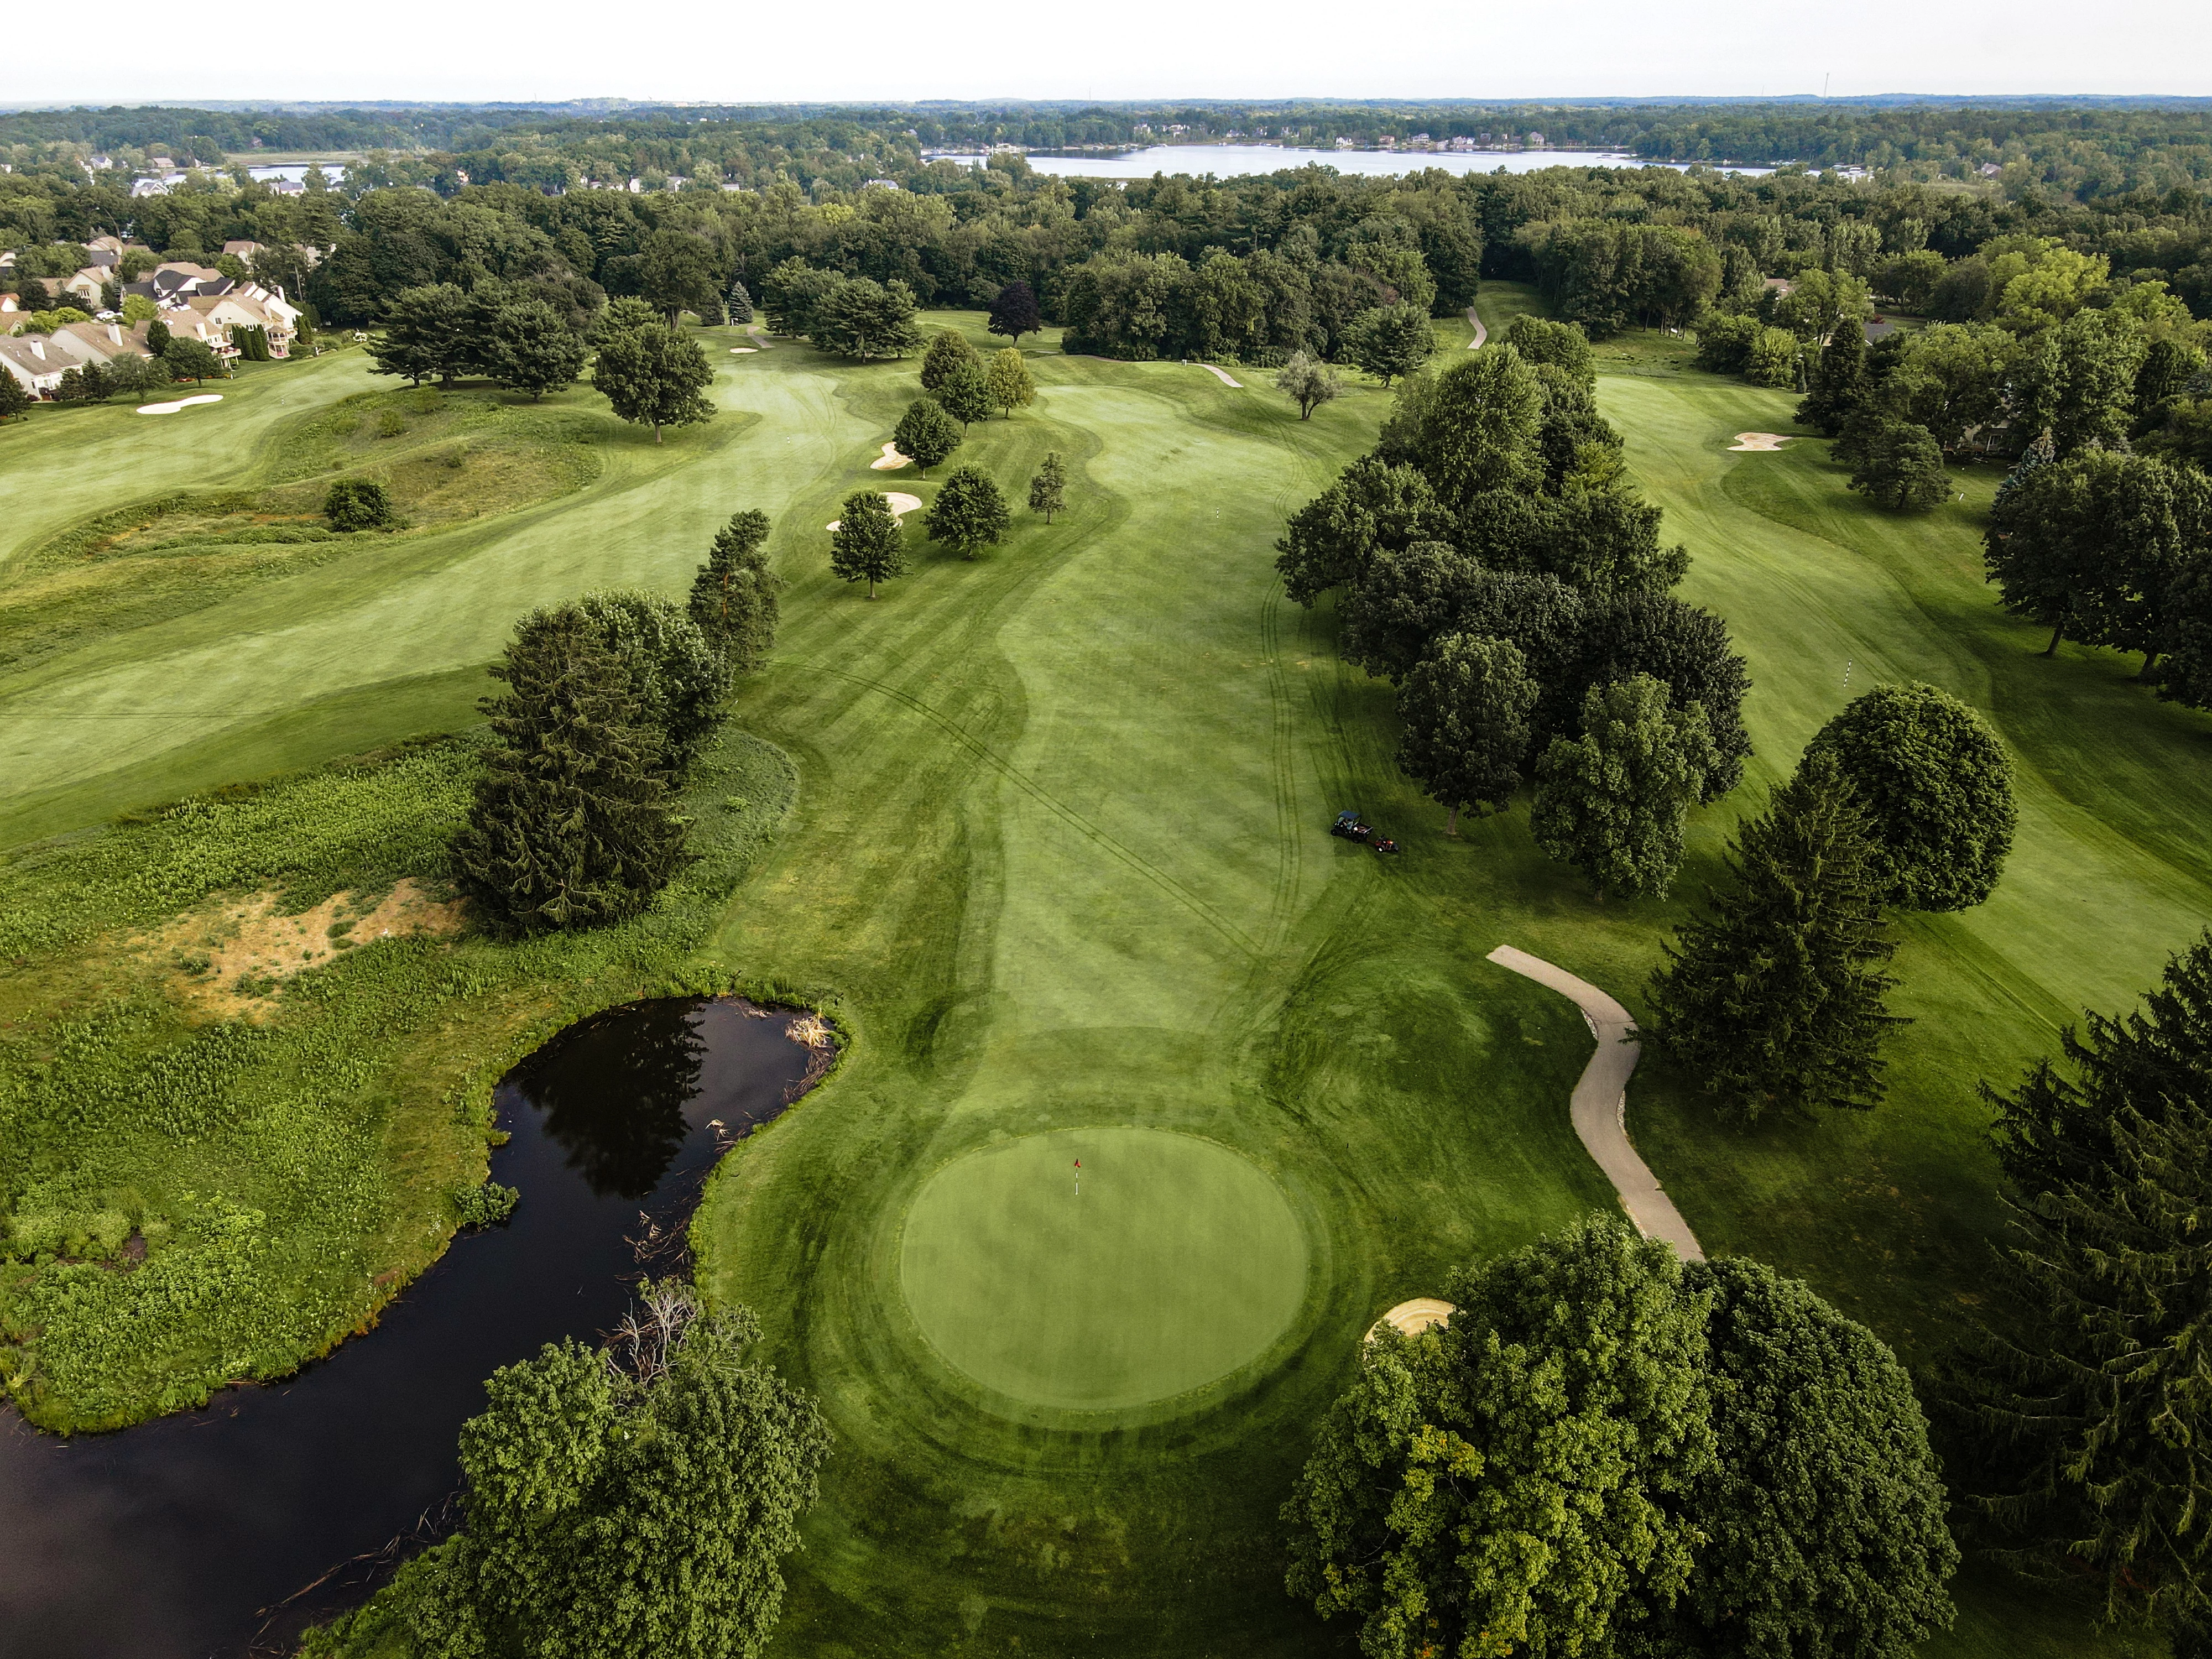
# 15 /
Par: 3
Handicaps:
Men's 18
Women's 18
This is the shortest Par 3 on the course. Don’t be fooled by the length of this hole as the green can be difficult to putt and it is protec…
This is the shortest Par 3 on the course. Don’t be fooled by the length of this hole as the green can be difficult to putt and it is protected by a sand trap front right, a trap front left and a pond guards the right side of this green. Make sure to check the prevailing wind as you make your club selection as many times this hole plays into the wind.
Yardage by Tee:
GOLD 151
BLUE 143
WHITE 113
RED 90
Slope:
Gold 136 | Blue 133 | White 126 | Red 123
Pro Tips
| Middle of the Green is best on this short hole. Avoid the pond and two greenside bunkers for a birdie opportunity. |
# 16 /
Par: 4
Handicaps:
Men's 2
Women's 8
This Par 4 is a slight dog leg to the left. Trees on the left and right side of the fairway make accuracy from the tee a must. The approach…
This Par 4 is a slight dog leg to the left. Trees on the left and right side of the fairway make accuracy from the tee a must. The approach shot to this slightly elevated green is protected by a sand trap on the front right and a drop off on the left of the green. Club selection for your approach is key as this green has a severe slope from back to front that can leave difficult downhill putts
Yardage by Tee:
GOLD 390
BLUE 366
WHITE 338
RED 318
Slope:
Gold 136 | Blue 133 | White 126 | Red 123
Pro Tips
| An accurate tee shot is a must to setup your approach into this difficult green. Stay below the hole here to avoid trouble |
# 17 /
Par: 5
Handicaps:
Men's 6
Women's 2
Is the only Par 5 on the back nine. Aim your tee shot to the right side of the fairway trap that is visible on the left side of the fairway…
Is the only Par 5 on the back nine. Aim your tee shot to the right side of the fairway trap that is visible on the left side of the fairway. Your second shot needs to feed between trees on the left and right side of the fairway. Your approach shot needs to avoid sand traps guarding the green on both the front left and front right. Again, club selection is key as this green also severely slopes from back to front and can produce very quick downhill putts.
Yardage by Tee:
GOLD 548
BLUE 524
WHITE 500
RED 480
Slope:
Gold 136 | Blue 133 | White 126 | Red 123
Pro Tips
| Left side of the fairway gives the best look at the hole for the second shot. This green is tough to hit in two, so laying up could be the best option. Stay below the hole herer for an easier putt. |
# 18 /
Par: 4
Handicaps:
Men's 12
Women's 12
You finish the Champ Course with a very playable Par 4. Tee shot needs to avoid the OB that goes the full length of the right side of the f…
You finish the Champ Course with a very playable Par 4. Tee shot needs to avoid the OB that goes the full length of the right side of the fairway and trees that line the left side. The green is protected by sand traps front left, front right and back right. Mounding around the green can also produce some challenging up and downs.
Yardage by Tee:
GOLD 355
BLUE 533
WHITE 259
RED 259
Slope:
Gold 136 | Blue 133 | White 126 | Red 123
Pro Tips
| The fairway bunker is in play if driver is selected off the tee. Accuracy is a must on the beautiful 18th hole. |